

Page 1
Operator Guide
5635/5645
5635/5645
5635/56455635/5645
your document management partner
Digital Copier
Page 2
When ordering supplies or requesting service for your
copier, you will need to provide the model and serial
number of your machine.
Please take a moment to enter your model and serial
numbers here.
MODEL NUMBER: __________________________
SERIAL NUMBER: __________________________
To order supplies, call: ( )
To request service, call: ( )
Customer Vision® -
Our commitment to your
complete satisfaction
As an Energy Star Partner, Lanier Worldwide, Inc. has
determined that this product meets the Energy Star
guidelines for energy efficiency.
© 2001 Lanier Worldwide, Inc. March
Printed in the U.S.A.
Page 3

Table of Contents
23456
7
8IGIGIG10
9IIG
Important Safeguards
Important Safeguards ...................................................................................1
Agency Certifications .......................................................................1
Making Copies
Applying Power ........................................................................................ 1-1
Main Power Switch .......................................................................1-1
Operation Key ..............................................................................1-2
Selecting the Mode of Operation................................................................. 1-3
Making Copies..........................................................................................1-4
Component Identification
Control Panel ........................................................................................... 2-1
Control Panel - continued ........................................................................... 2-2
Component Locations - Front .....................................................................2-3
Component Locations - Rear ......................................................................2-4
Status Display Indicators ...........................................................................2-5
Graphics Display....................................................................................... 2-6
Table of Contents
11
Copier Functions
Entering User Codes.................................................................................3-1
Document Feeder...................................................................................... 3-2
Precautions when using Document Feeders ......................................3-2
RADF - Feeding Stack of Originals...............................................................3-3
SADF - Feeding One Original at a Time ............................................3-3
Using Auto Start....................................................................................... 3-5
Selecting Copy Quantities .......................................................................... 3-6
Selecting Copy Darkness Modes .................................................................3-7
Using Auto Image Density Mode .................................................... 3-7
Using Manual Exposure Mode.....................................................................3-8
Using Combination Auto Image Density/Manual Mode .................................. 3-9
Selecting Original Modes ......................................................................... 3-10
Text .......................................................................................... 3-10
Text - Photo ...............................................................................3-10
Photo .................................................................................................... 3-11
Pale ........................................................................................... 3-11
Generation ................................................................................. 3-11
Selecting the Original Mode...................................................................... 3-12
Selecting Original Orientation ................................................................... 3-13
Special Originals ..................................................................................... 3-14
Batch (SADF) .............................................................................3-14
Selecting Mixed Sizes .................................................................. 3-14
Selecting Thin Mode .................................................................... 3-14
Selecting Special Original Mode ................................................................ 3-15
Selecting Custom Size Originals................................................................3-16
Selecting Copy Paper .............................................................................. 3-17
III9III
I
I
i
Page 4

1
2
3
4
Table of Contents
Using Auto Paper Select ...............................................................3-17
Using Manual Paper Select .......................................................................3-18
Enlargement and Reduction Ratios.............................................................3-19
Using Auto Reduce/Enlarge ...........................................................3-19
Using Preset Copy Ratio Keys...................................................................3-20
Zoom Keys .............................................................................................3-21
Size Magnification ...................................................................................3-22
Horizontal/Vertical Sizing..........................................................................3-23
Directional Size Magnification - Inches ...........................................3-23
Directional Size Magnification ...................................................................3-25
Directional Size Magnification - 1% Increments ...............................3-25
Erase Center and Border...........................................................................3-27
Using Border Erase ......................................................................3-27
Using Center Erase ..................................................................................3-29
Using Center/Border Erase ............................................................3-30
Margin Adjustment ..................................................................................3-32
CenteringYour Copy ................................................................................3-33
Reversing Positive/Negative Copying .........................................................3-34
5
6
77I77
II8
II9
G
I
0
Copying Methods
Series/Book Copying................................................................................. 4-1
Series Copying ............................................................................. 4-1
Copying Book Originals ............................................................................. 4-5
Bypass Copying ....................................................................................... 4-9
Using Stack Feed Bypass .............................................................. 4-9
Standard Size Paper ................................................................................4-11
Custom Size Paper ..................................................................................4-12
Thick Paper, Thin Paper, Transparencies ....................................................4-14
Combine Copying ....................................................................................4-15
1 Sided 2 Pages to Combine 1 Side...........................................................4-16
1 Sided 4 Pages to Combine 1 Side...........................................................4-17
1 Sided 8 Pages to Combine 1 Side...........................................................4-18
1 Sided 4 Pages to Combine 2 Side...........................................................4-19
1 Sided 8 Pages to Combine 2 Side...........................................................4-20
1 Sided 16 Pages to Combine 2 Side.........................................................4-21
2 Sided 2 Pages to Combine 1 Side...........................................................4-22
2 Sided 4 Pages to Combine 1 Side...........................................................4-23
2 Sided 8 Pages to Combine 1 Side...........................................................4-24
2 Sided 4 Pages to Combine 2 Side...........................................................4-25
2 Sided 8 Pages to Combine 2 Side...........................................................4-26
2 Sided 16 Pages to Combine 2 Side.........................................................4-27
Double Copying ......................................................................................4-28
Duplex Copying ......................................................................................4-29
1-Sided to 2-Sided Copying ..........................................................4-29
2-Sided to 2-Sided Copying ......................................................................4-31
Image Repeat Copying .............................................................................4-32
Interrupt Copying ....................................................................................4-34
Overhead Transparencies and Thick Paper ..................................................4-35
Cover and Page Insert Copying .................................................................4-36
Front Cover ................................................................................4-36
Front and Back Covers.............................................................................4-38
Page Insert .............................................................................................4-39
Chapters ................................................................................................4-41
Scanning Documents ...............................................................................4-42
ii
Page 5

Table of Contents
4112356GGG7
8
910
G
Cover/Slip Sheets ................................................................................... 4-43
Front Cover ................................................................................ 4-43
Front/Back Covers .................................................................................. 4-45
Designate .............................................................................................. 4-46
Chapter ................................................................................................. 4-47
Slip Sheets ............................................................................................ 4-48
Series Copying - Book to 1-Sided Copies ................................................... 4-49
Series Copying - 2-Sided to 1-Sided Copies................................................ 4-50
User Tools Settings
System Settings ....................................................................................... 5-1
Basic Steps to Accessing System Settings...................................................5-2
Exiting from User Tools .................................................................. 5-2
General Features 1 of 2 ............................................................................. 5-3
General Features 2 of 2 ............................................................................. 5-5
Paper Size Setting 1 of 3 ........................................................................... 5-6
Paper Size Setting 2 of 3 ........................................................................... 5-7
Paper Size Setting 3 of 3 ........................................................................... 5-8
Timer Setting ........................................................................................... 5-9
Interface Settings ................................................................................... 5-11
Interface Settings/Parallel Interface ...........................................................5-13
File Transfer ........................................................................................... 5-14
Key Operator Tools 1 of 2 ....................................................................... 5-16
User Code.............................................................................................. 5-18
Printing From the Counter ........................................................................ 5-26
Clearing the Counter ............................................................................... 5-28
Key Operator Tools 2 of 2 ....................................................................... 5-31
Entering Text ......................................................................................... 5-32
Available Characters .................................................................... 5-32
Keys .......................................................................................... 5-32
How to Enter Text ...................................................................... 5-32
Copy/Document Server Settings ...............................................................5-33
Basic Steps to Accessing Copy/Document Server Settings...........................5-34
Exiting from User Tools ................................................................ 5-34
General Features 1 of 4 ........................................................................... 5-35
General Features 2 of 4 ........................................................................... 5-38
General Features 3 of 4 ........................................................................... 5-39
General Features 4 of 4 ........................................................................... 5-40
Reproduction Ratio 1 of 2........................................................................5-41
Reproduction Ratio 2 of 2........................................................................5-42
Edit 1 of 2 ............................................................................................. 5-43
Edit 2 of 2 ............................................................................................. 5-44
Stamp ................................................................................................... 5-45
Background Numbering ...............................................................5-45
Preset Stamp 1 /4 to 4 /4 ............................................................ 5-45
User Stamp 1 /2-2 /2 .................................................................. 5-46
Date Stamp............................................................................................ 5-47
Page Numbering 1 /2-2 /2 ........................................................................ 5-48
Input/Output ..........................................................................................5-50
I
I
I
Special Copier Functions
Energy Saving Modes................................................................................6-1
Presetting the Next Copy Job .....................................................................6-2
Sample Copy............................................................................................6-3
I
iii
Page 6

1
2
3
Table of Contents
Storing Copy Settings In Memory .............................................................. 6-4
Storing Your Settings .................................................................... 6-4
Changing a Stored Program ....................................................................... 6-6
Cancelling a Program ................................................................................ 6-7
Recalling a Program.................................................................................. 6-8
Screen Contrast ....................................................................................... 6-9
Original Beeper ........................................................................................ 6-9
Stamp ...................................................................................................6-10
Background Numbering ................................................................6-10
Preset Stamp ..........................................................................................6-12
User Stamp ............................................................................................6-14
Program/Delete User Stamp......................................................................6-16
Date Stamp ............................................................................................6-19
Page Numbering ......................................................................................6-21
4
5
6
77I77
II8
II9
G
I
0
Using Finisher/Sorters
Using the Finisher Option .......................................................................... 7-1
Scanning Documents .................................................................... 7-1
Selecting Non-Sort Mode ............................................................... 7-1
Selecting Sort Mode ................................................................................. 7-3
Selecting Stack Mode ............................................................................... 7-4
Selecting Staple Mode .............................................................................. 7-5
Selecting Punch Mode .............................................................................. 7-6
Document Server
Document Server ..................................................................................... 8-1
Process................................................................................................... 8-2
Features and Benefits ............................................................................... 8-3
On Demand Printing ...................................................................... 8-3
File Merge Printing ................................................................................... 8-4
Facsimile Resend...................................................................................... 8-6
Operation from a Computer ....................................................................... 8-7
Scanning Originals.................................................................................... 8-8
Scanning in Document Server Mode ............................................... 8-8
Scanning in Copy Mode ...........................................................................8-12
Printing Saved Documents........................................................................8-13
Sample Printing .......................................................................................8-15
Print First Page ...........................................................................8-15
Searching Saved Documents ....................................................................8-16
To Search by File NamePress the Document Server/New Job key. .....8-16
To Search by User Name..........................................................................8-17
To Check the Details of Stored Documents.................................................8-18
Deleting Saved Documents.......................................................................8-19
Service and Supplies
Loading Paper ......................................................................................... 9-1
Loading Paper in the Paper Tray ..................................................... 9-1
Loading Paper in the Large Capacity Cassette) ............................................. 9-2
Changing Paper Tray Sizes ........................................................................ 9-3
Changing Tray Paper Size .............................................................. 9-3
Adding Toner........................................................................................... 9-6
Removing Misfeeds .................................................................................. 9-9
When a Paper Misfeed Occurs ....................................................... 9-9
Finisher..................................................................................................9-10
Adding Staples ............................................................................9-10
iv
Page 7

Table of Contents
4112356GGG7
8
910
G
Removing Jammed Staples .......................................................... 9-16
Paper Punch ........................................................................................... 9-20
Removing Chad .......................................................................... 9-20
Troubleshooting......................................................................................9-21
When the Machine Does Not Operate Properly............................................ 9-22
General ...................................................................................... 9-22
Document Server ........................................................................ 9-23
Document Server ........................................................................ 9-23
Display ...................................................................................... 9-24
When Copies are Not Clear ......................................................................9-25
Can Not Make Proper Copies....................................................................9-26
General ...................................................................................... 9-26
Adjust Image .............................................................................. 9-26
Stamp ................................................................................................... 9-27
Combine .................................................................................... 9-27
Duplex ....................................................................................... 9-27
When Memory is Full...............................................................................9-28
Document Server ........................................................................ 9-28
Cleaning ................................................................................................ 9-29
Cleaning the Machine .................................................................. 9-29
Cleaning the Exposure Glass .........................................................9-29
Cleaning the Document Feeder Belt ............................................... 9-29
Specifications
Specifications......................................................................................... 10-1
Main Machine .............................................................................10-1
Document Feeder (Option) .......................................................................10-5
1000-Sheet Finisher (Option)....................................................................10-6
2 Tray Finisher (Option)...........................................................................10-7
Punch Kit (Option) ....................................................................... 10-8
Internal tray 2 (1 bin tray)(Option).............................................................10-9
Extarnal Tray (Option) .................................................................. 10-9
Large Capacity Tray (LCT)(Option) .......................................................... 10-10
.Paper tray unit (Option) ............................................................. 10-10
Agency Certifications ............................................................................ 10-11
USA RFI ................................................................................... 10-11
Canada RFI .............................................................................. 10-11
UL ...................................................................................................... 10-12
EPA Energy Star ....................................................................... 10-12
Paper Sizes .......................................................................................... 10-13
Enlargement and Reduction Percentages .................................................. 10-14
Glossary
Copier Terms ...........................................................................................G-1
Index
Index Terms .............................................................................................. I-1
Warranty
New Machine Warranty and Limitation of Liability .........Inside Back Cover
I
I
I
I
v
Page 8

1
2
3
4
5
Table of Contents
6
77I77
II8
II9
G
0
I
vi
Page 9

Important Safeguards
Page 10
Important Safeguards
Always follow these important safeguards:
Read all of these instructions before using the unit.
1
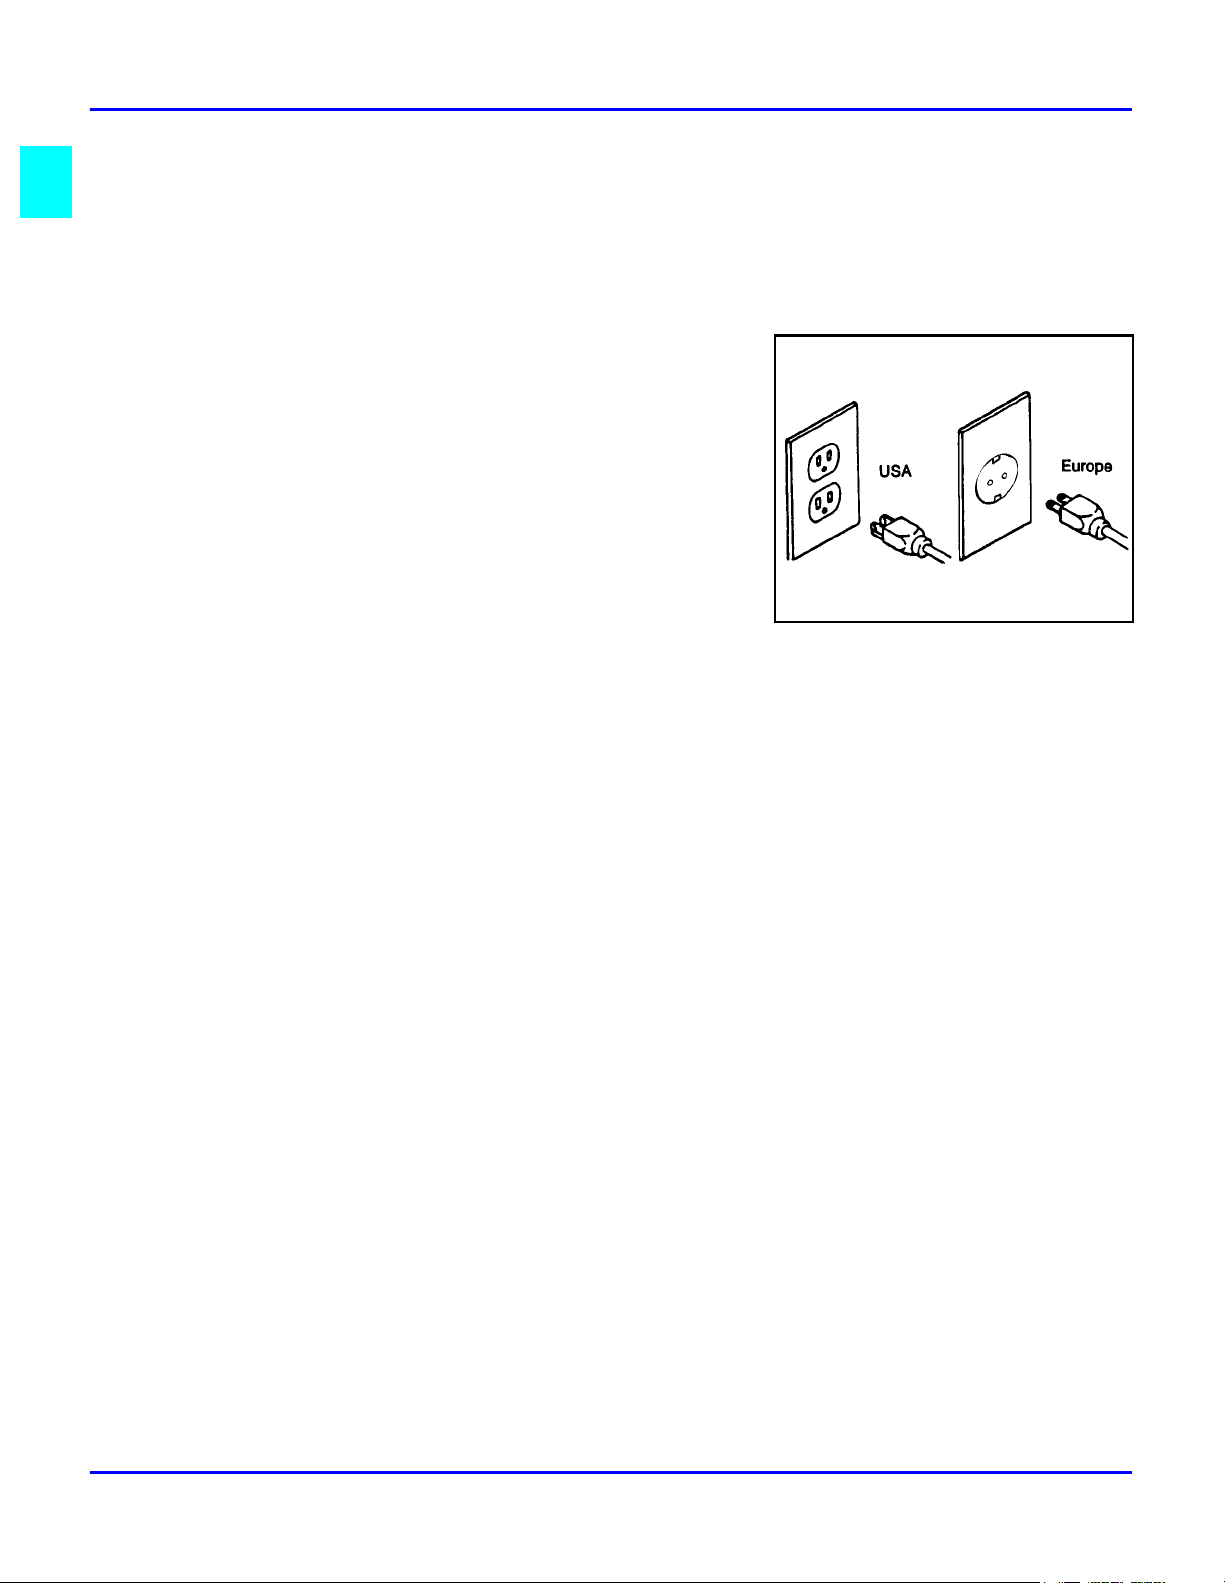
Plug the power cord into a 3-conductor
2
(grounded) outlet. Check the Specifications
chapter to make sure the outlet meets the ampere
rating of this unit.
Never ground the power cord to a gas pipe or
•
a water pipe.
Keep the power cord away from hot surfaces.
•
Avoid using an extension cord if possible.
•
If you must use an extension cord, use only a
•
3-conductor cord rated for the ampere rating
of your unit. Refer to the Specifications
Chapter for this value. Power cords rated for less can overheat and become a fire hazard.
Do not operate the unit if any part of it is damaged, or if any part has been dropped, until it
3
is checked by a authorized Lanier Service Technician.
The fusing area is hot. Exercise care in this area.
4
Do not install the unit in areas that are:
5
Damp or humid
•
Exposed to direct sunlight
•
Extremely dusty
•
Poorly ventilated
•
Close to machines generating ammonia such as diazo copy machines.
•
Subject to extreme temperature or humidity changes, for example, near an air
•
conditioner or heater
Place the unit on a firm, level surface.
6
For proper ventilation and cooling, keep the unit at least 4 inches back from the wall and
7
allow 32 inches of clearance on the left and right sides of the copier. If the optional sorter is
used, allow 48 inches on the left side of the copier.
Agency Certifications
Your unit complies with FCC rules, DOC requirements, and other agency certification
requirements. Refer to the Specifications chapter of this Operator Guide for further details.
1
Page 11

Making Copies
Chapter 1
Page 12

Chapter Overview
This chapter provides information on how to make a copy. It includes:
• “Applying Power” on page 1-1
• “Main Power Switch” on page 1-1
• “Operation Key” on page 1-2
• “Selecting the Mode of Operation” on page 1-3
For additional information on the more advanced features of the
copier, refer to: Chapter 3- Basic Copier Functions, and Chapter 4 Copying Methods.
Making Copies
Page 13
Applying Power
Two switches control the machines power. The Main Power switch controls the power to the
machine. The Operation key turns the macine on and off. It is recommended that the Main
Power switch always be left in the On position. Information in memory may be lost if the
swtich is turned off.
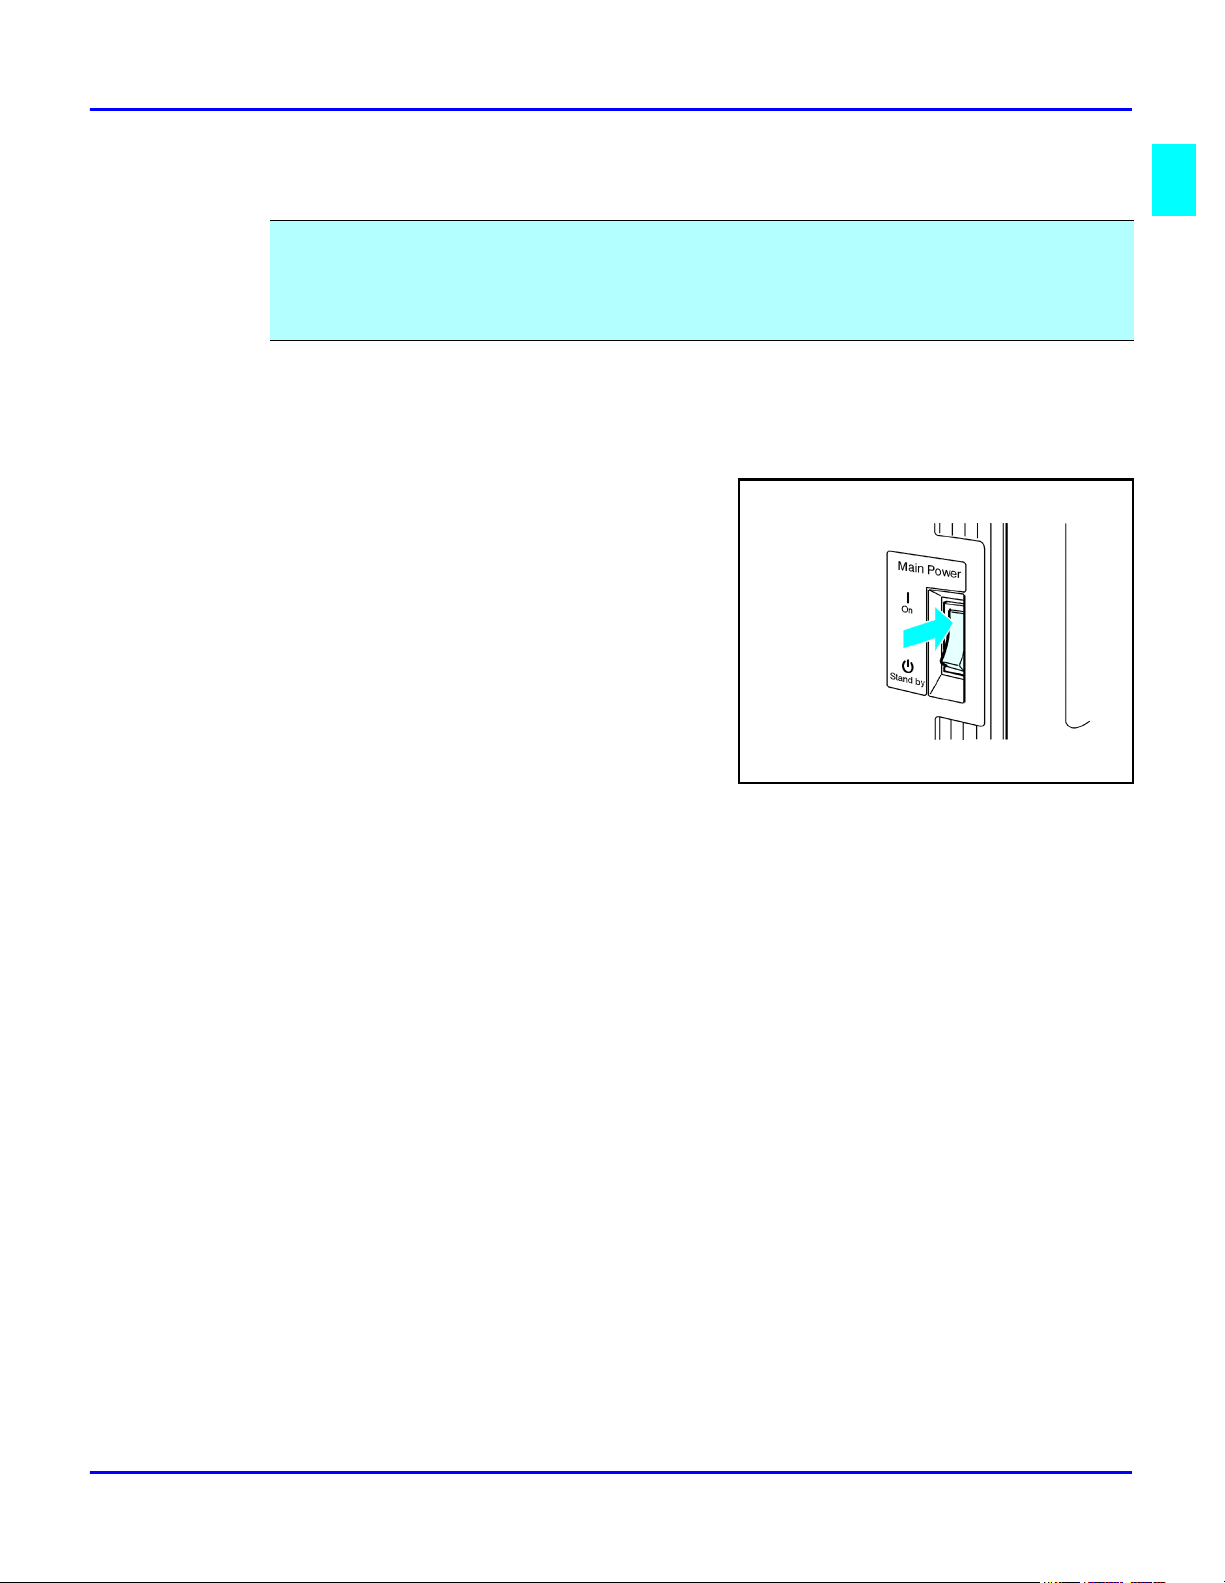
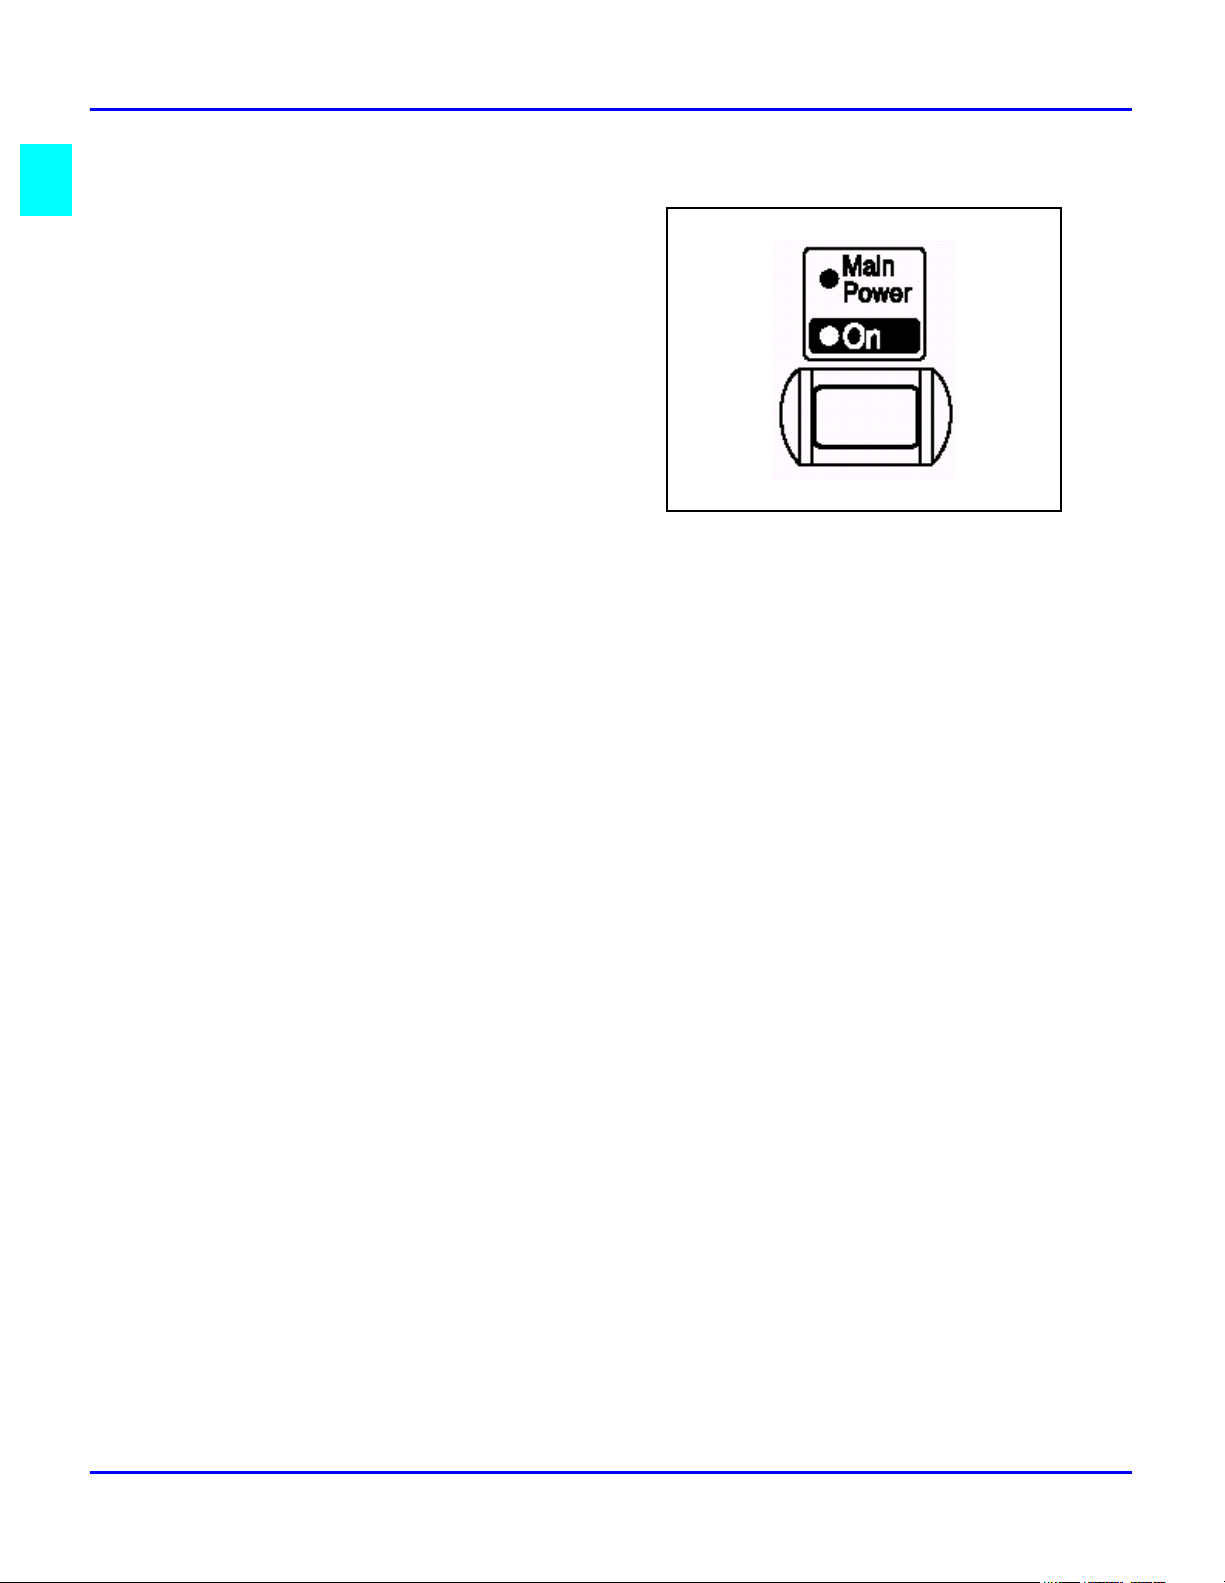
Main Power Switch
Turning On the Main Power
The Main Power switch supplies power to the
copier. To supply power to the copier, press the
Main Power switch to On.
Note: The Message Display shows,
“Now loading....” After about 15 seconds
your copier comes to its Ready condition
and three beeps sound (if beep is turned
on.) This indicates the copier is ready for
you to begin copying.
Applying Power
Turning Off the Main Power
Press the Main Power switch to the Off position. The Main Power indicator turns off.
Turning the Main Power switch off when the indicator light is flashing may cause
•
damage to the hard drive or to memory.
Pulling out the power cord before turning off the Main Power switch may cause
•
damage to the hard disk or to memory.
When the Main Power swith is turned off or the power cord unplugged, any
•
documents stored in fax memory will be lost after approximately one hour.
Making Copies 1 - 1
Page 14
Applying Power
Operation Key
The Operation key is on the far right side of
the Control Panel. It turns the copier
operation on and off while maintaining
power to the copier. If the On indicator
light is OFF and the Main Power indicator
light is ON, press the Operation key.
The On indicator light turns ON
•
and the Message Display lights
up.
To turn the copier OFF, press the
•
Operation key again. The On
indicator light turns OFF.
1 - 2 Making Copies
Page 15
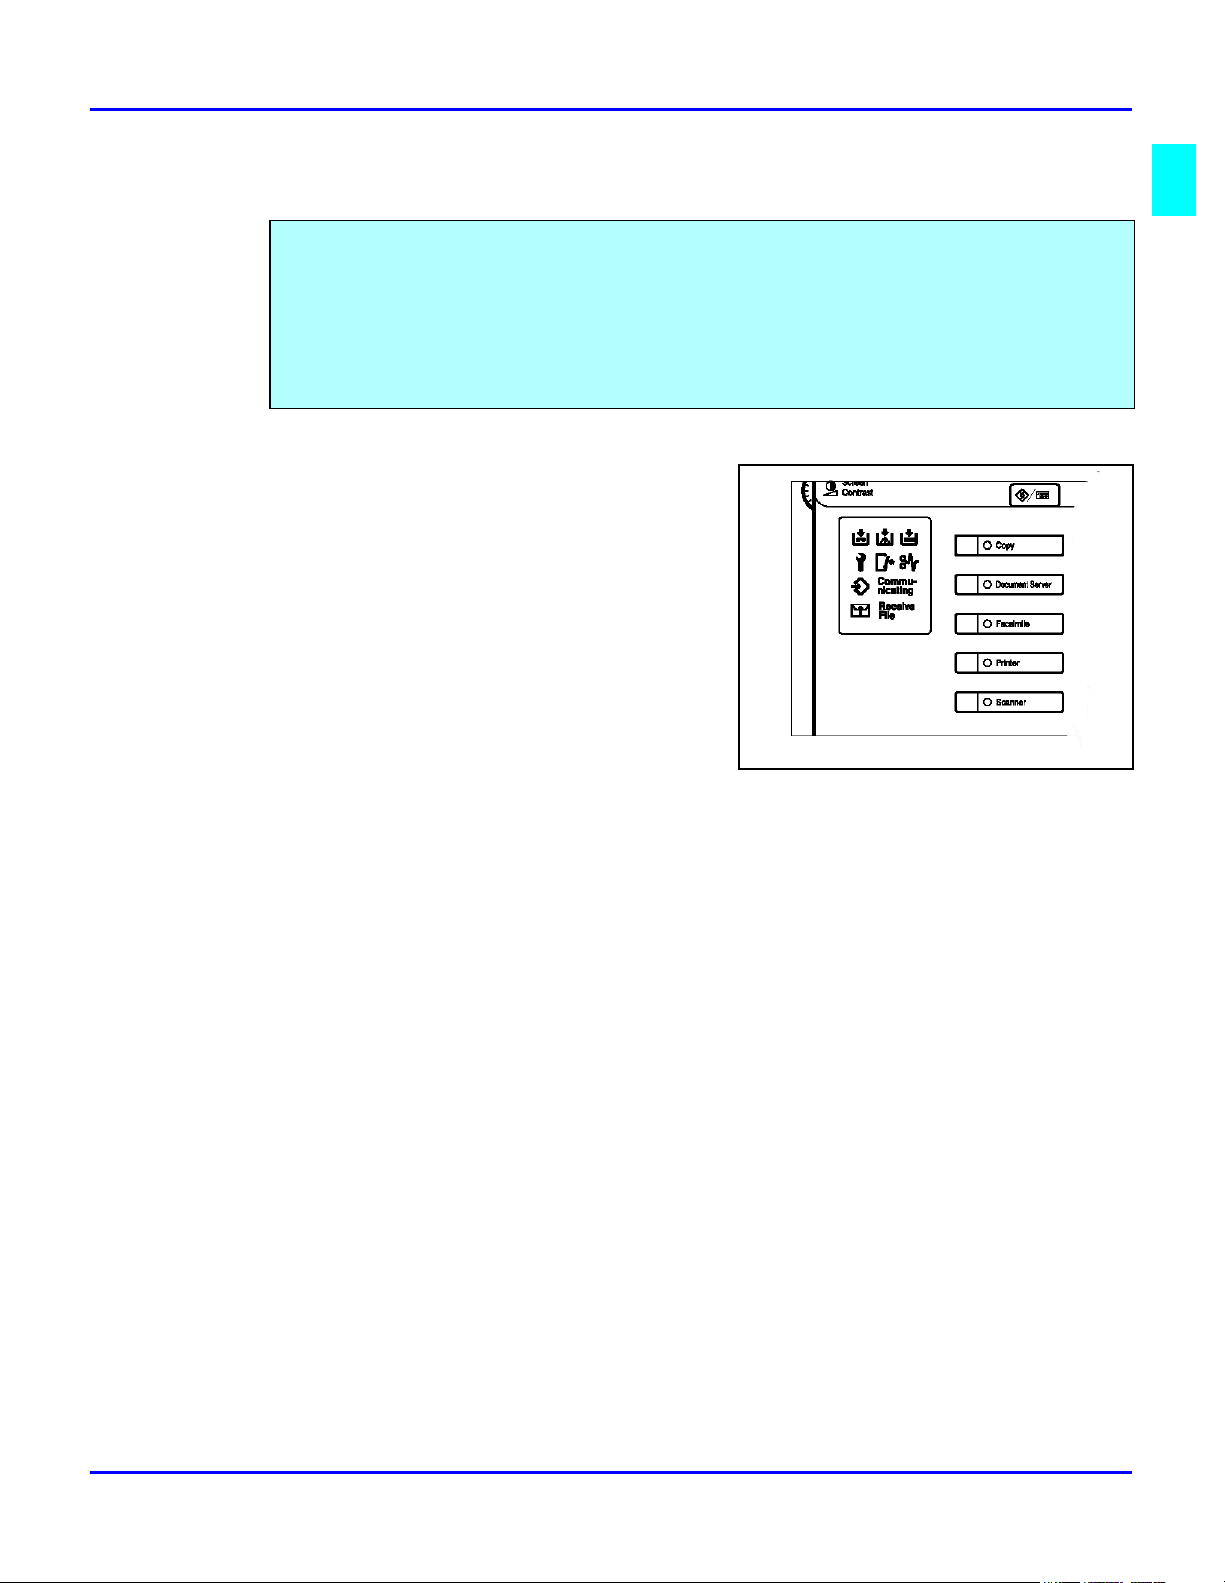
Selecting the Mode of Operation
You can use this machine as a:
Copy machine
•
Fascimile machine
•
Printer
•
Scanner
•
Press one of the Function keys to select the desired
mode of operation.
The indicator next to the key is a status indicator.
Yellow indicates the mode of opertion is
•
selected.
Green indicates the mode of operation is
•
active.
Red indicates the mode of operation has
•
been interrupted.
Selecting the Mode of Operation
Making Copies 1 - 3
Page 16
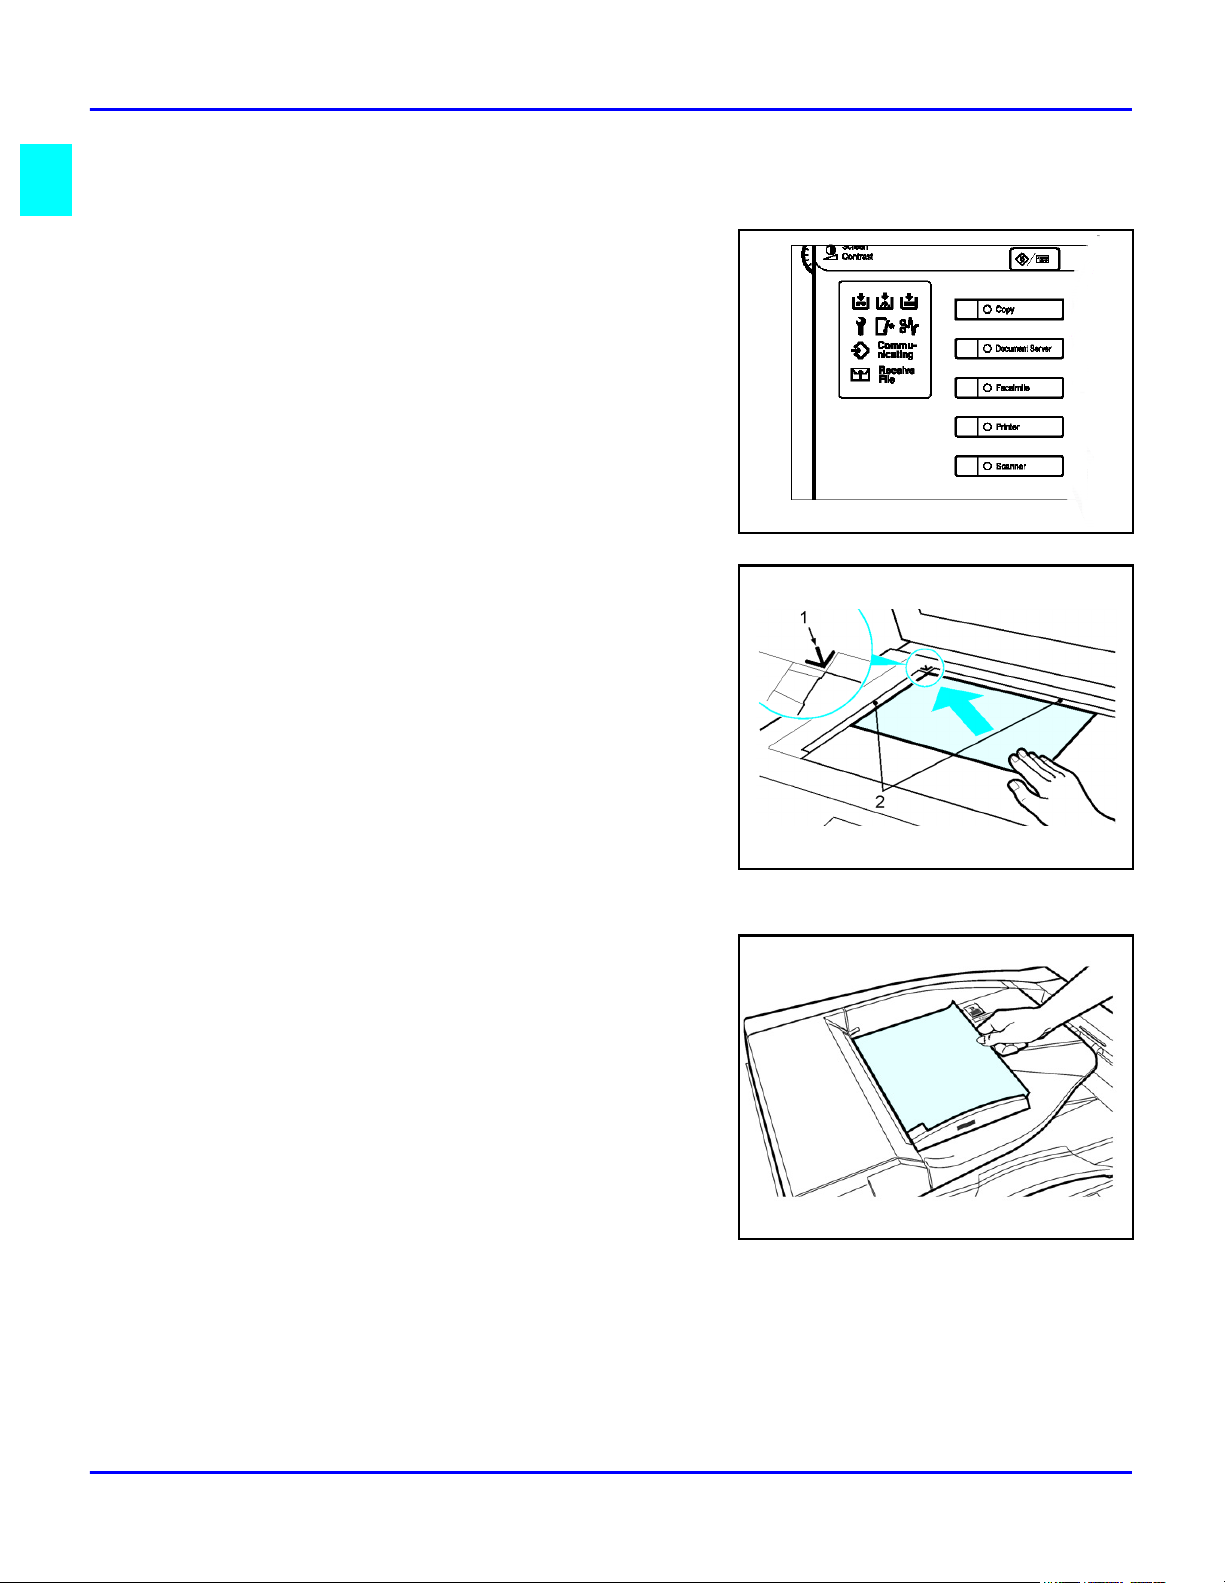
Making Copies
Making Copies
Check the Function switch to be sure the
1
machine is in the copy mode. If not, press the
Copy key. See “Selecting the Mode of
Operation” on page 1-3.
If the User Code feature is activated, the
2
message "Input user code, then press #" is
displayed. Enter your User Code. .
Place original documents
3
Face-down on the Exposure Glass. Align
•
originals to the indicator mark that
represent the size of originals you are
going to copy.
Face-up on the Automatic Document
•
Feeder.
Select copy options from the Copy Options Table below.
4
1 - 4 Making Copies
Page 17
Making Copies
Note: If you only want one copy with no options, proceed to Step 5..
Copy Options You Can Select Methods To Use For Copy Options
Copy Quantity Using the keypad, enter the number of copies you
desire. The default quantity is 1 and the maximum
is 999. See “Selecting Copy Quantities” on page 36
Copy Darkness/Lightness Automatic: Touch Auto Image Density on the
Message Display. Auto Image Density is highlighted
when activated. See “Using Auto Image Density
Mode” on page 3-7
Manual: Press either Lighter or Darker keys to
change contrast of copies. You may turn Auto
Image Density off if desired.See “Using Manual
Exposure Mode” on page 3-8
Combination: Touch Auto Image Density and press
Lighter or Darker. Use with colored background.
nSee “Using Combination Auto Image Density/
Manual Mode” on page 3-9
Original Mode The selected mode is indicated above Original
Mode on the Message Display. You can select
from: Text, Text/Photo, Photo, Pale, and
Generation Copy. Just touch Original Mode and
then touch the desired mode. See “Selecting the
Original Mode” on page 3-12
Copy Reduction or Enlargement Touch Enlarge/Reduce to gain access to Preset
Ratios and Zoom keys.
Preset Ratios: Touch the desired ratio. See “Using
Preset Copy Ratio Keys” on page 3-20
Zoom Keys: Touch the + or - keys to enlarge your
original up to 400%, or reduce your original down
to 32% of the original size. See “Zoom Keys” on
page 3-21
Copying Methods Refer to the Table of Contents or Chapter 4,
Copying Methods, for detailed information on the
many copying methods available.
Using optional Finishers Refer to “Using the Finisher Option” on page 7-1
for information on using the optional Finishers.
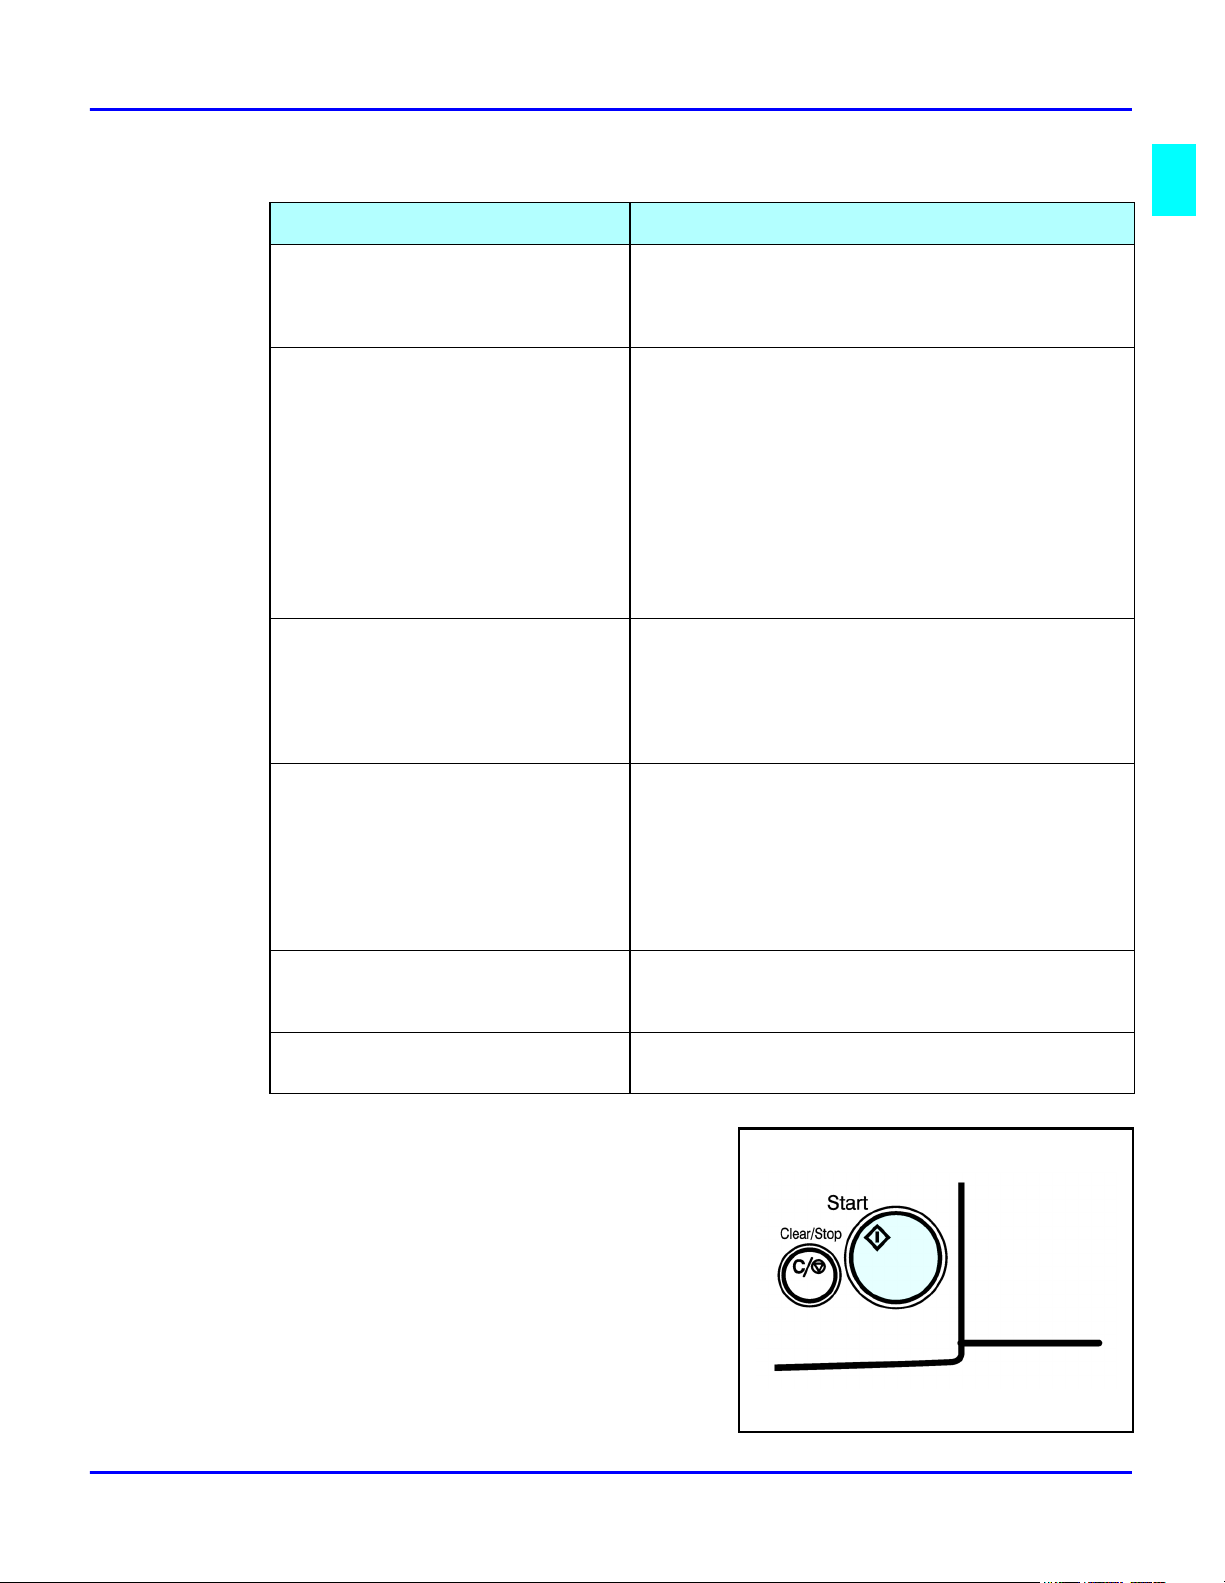
Press the Start key to begin copying.
5
Making Copies 1 - 5
Page 18

Making Copies
Notes:
1 - 6 Making Copies
Page 19

Chapter 2
Component Identification
Page 20

Chapter Overview
This chapter describes the copier’s main components. Included in this
chapter are:
• “Control Panel” on page 2-1
• “Component Locations - Front” on page 2-3
• “Component Locations - Rear” on page 2-4
• “Status Display Indicators” on page 2-5
• “Graphics Display” on page 2-6
Component Identification
Page 21
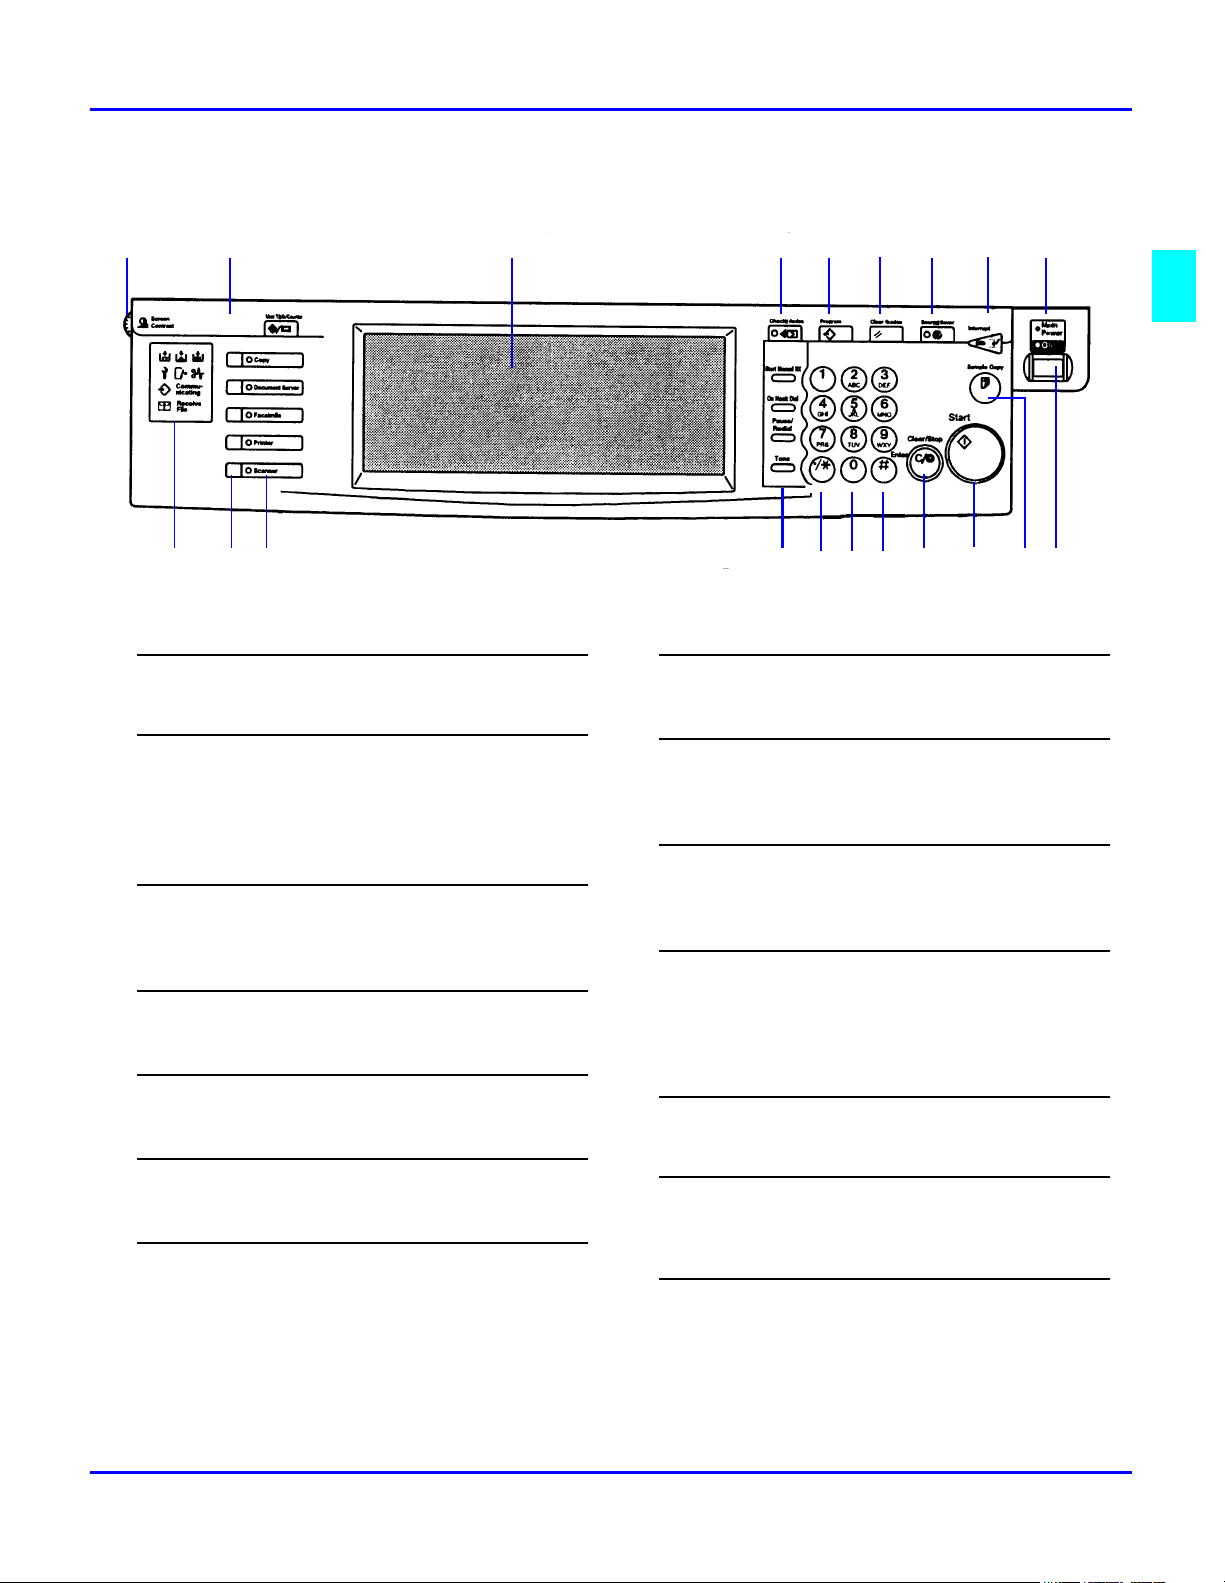
Control Panel
1
2 3 4 5 6 7 8 9
20 19 18 17 16 15 14 13 12 11 10
1
Screen Contrast knob
Adjust the brightness of the Display Panel.
2
User Tools/Counter key
User Tools: Press to change the default settings and
conditions to meet your requirements.
Counter: Press the check or print the total number of copies
made.
3
Display Panel
Displays operation status, error messages, and function
menus.
4
Check Mode key
Press to review the copy settings
8
Interrupt key
Press to interrupt a copy job to run another copy job.
9
Main Power indicator
This indicator goes on when the main power switch is turned
on, and goes off when the sitch is turned off.
10
Operation switch
Press this switch to turn the power on. To turn thepower off,
press this switch again.
11
Sample Copy key
Use this key to make a single sample copy before starting a
long copy run. Check the sample copy and making any
necessary changes to the image quality settings before you
begin making multiple copies. This saves time and supplies.
5
Program key
12
Press to store copy settings.
6
Clear Modes key
Press to clear the previous entered copy mode settings.
7
Energy Saver key
Press to switch to and from Energy Saver mode.
Component Identification 2 - 1
Start key
Press to start copying, scannig, or printing.
13
Clear/Stop key
Clear: delets one digit when entering numbers.
Stop: Interrupts the current operation.
14
# key
Used as the Enter key.
Page 22
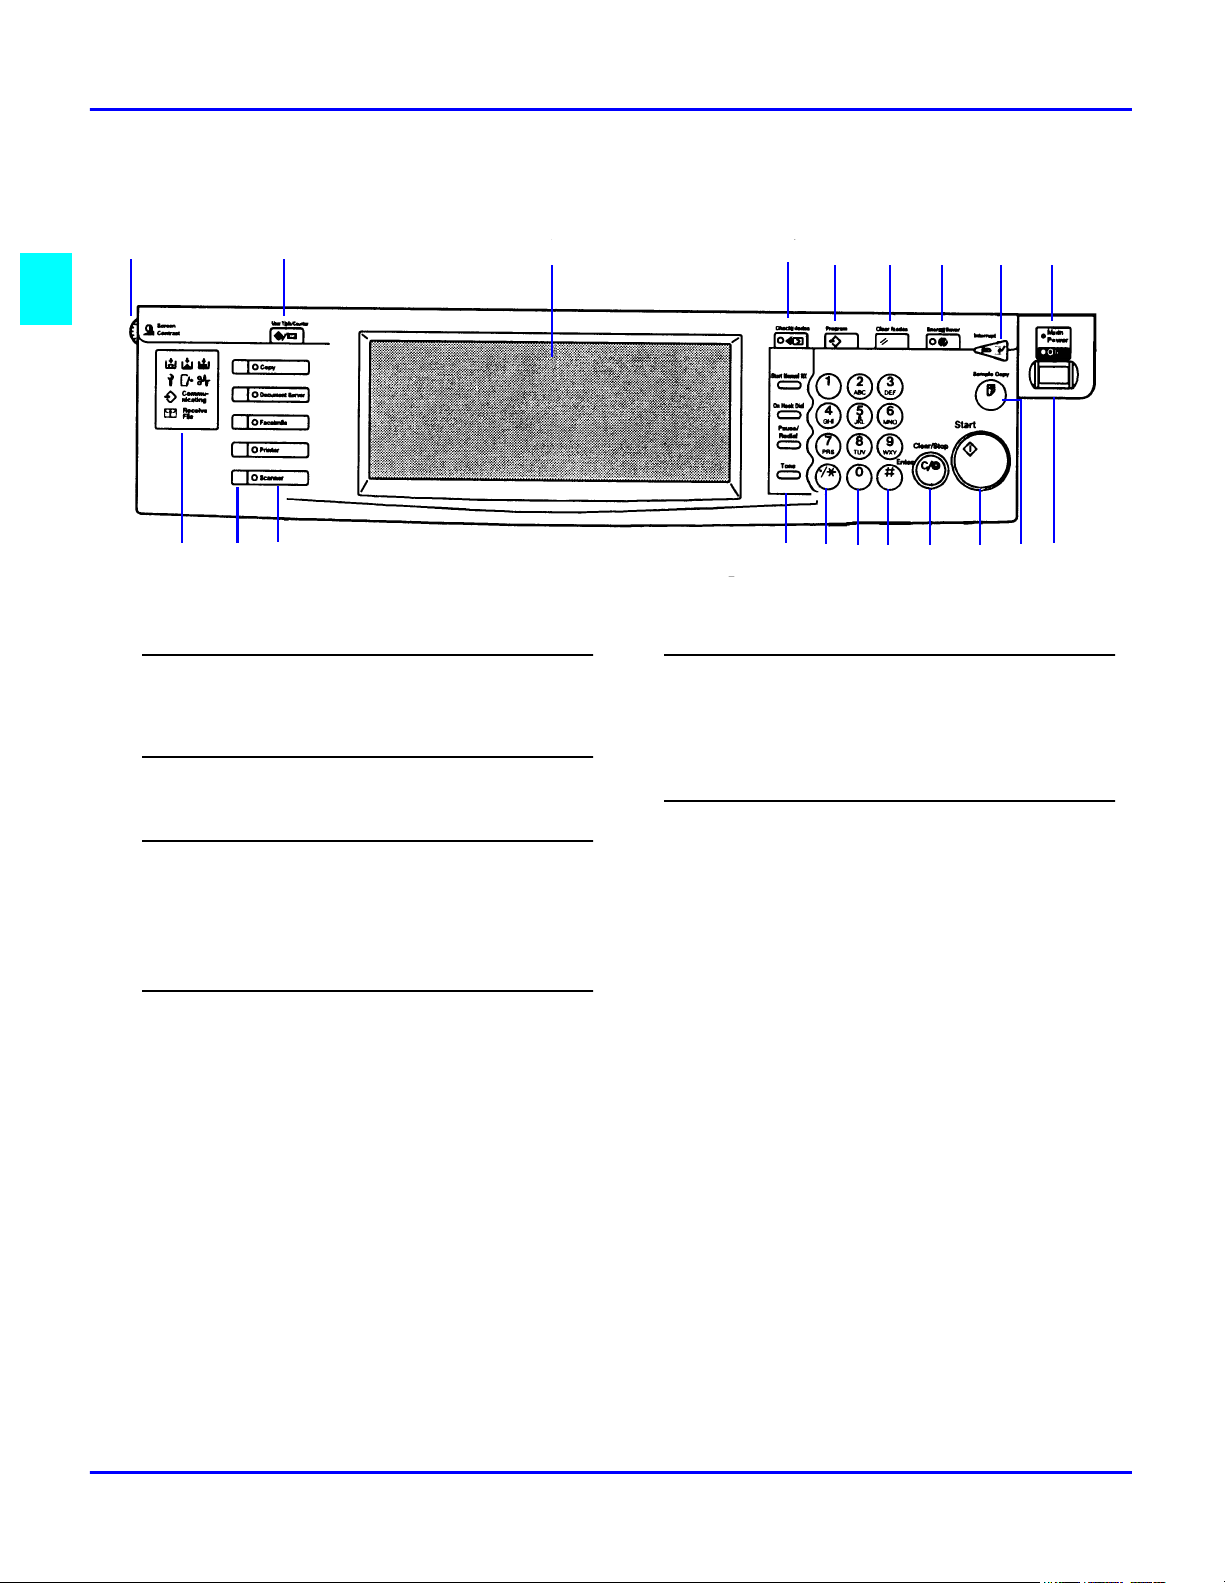
Control Panel - continued
1 2 3 4 5 6 7 8 9
20 19 18 17 15 14 13 12 11 10
15
10-digit keypad
Used to enter copy quantity and to enter numbers when
programming.
16
(.) key
Used to enter decimal points.
17
Facsimile keys
Start Manual RX
On Hook Dial
Pause/Redial
Tone
1
Touch Screen
16
19
Functon Status Indicators
Displays the status of the Functions.
Yellow: function is selected
Green: function is active
Red: function has been interrupted
20
Status Display Indicators
Indicates the status of your machine. Refer to Status Display
Indicators.
18
Function keys
Press the appropriate key to select a function.
Copy
Document Server
Facsimile
Printer
Scanner
2 - 2 Component Identification
Page 23
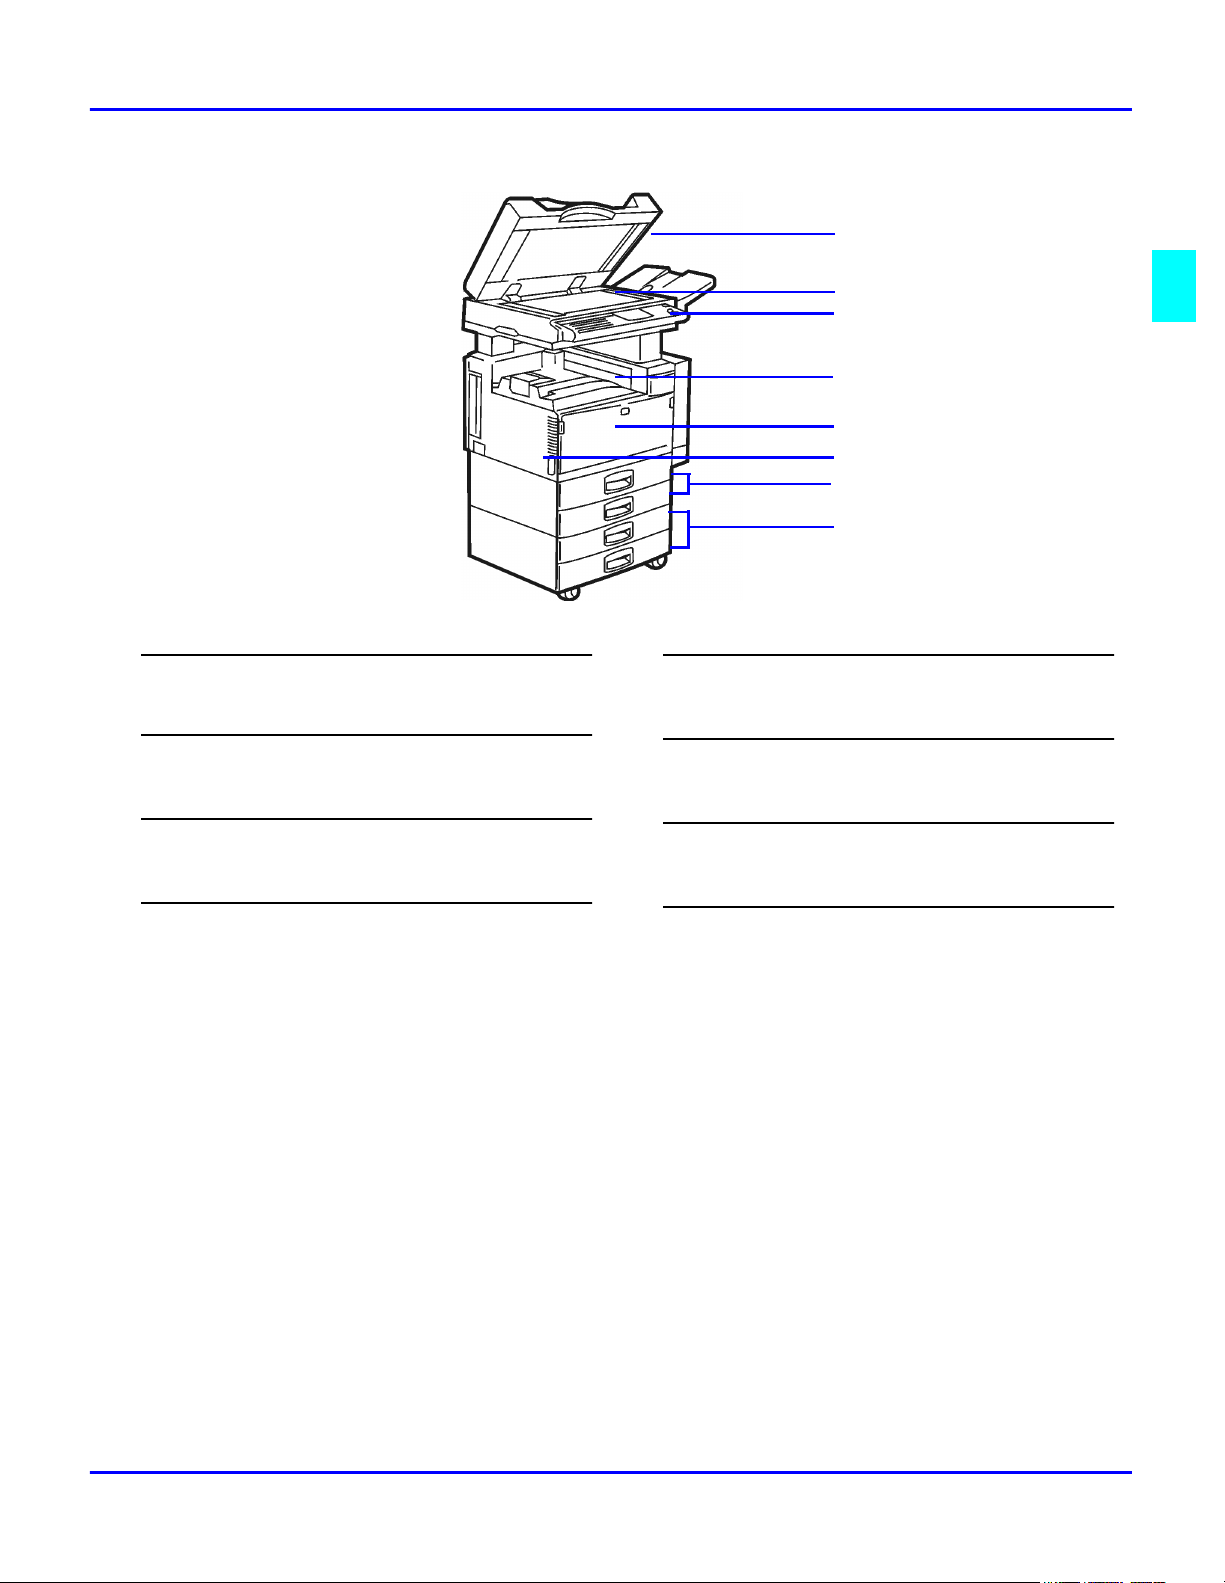
Component Locations - Front
1
2
3
4
5
6
7
8
1
Document Feed - RADF
Document feeder automatically feeds a stack of originals.
2
Exposure Glass
Place originals face down on the exposure glass.
3
Operation key
This turns power on.
4
Internal Tray
Copies are delivered to this tray.
5
Front Cover
Open to access the inside of the machine.
6
Main Power Switch
Turns on the main power to the machine.
7
Paper Drawers
Place paper in these drawers.
8
System Stand (optional)
Additional paper drawers.
Component Identification 2 - 3
Page 24
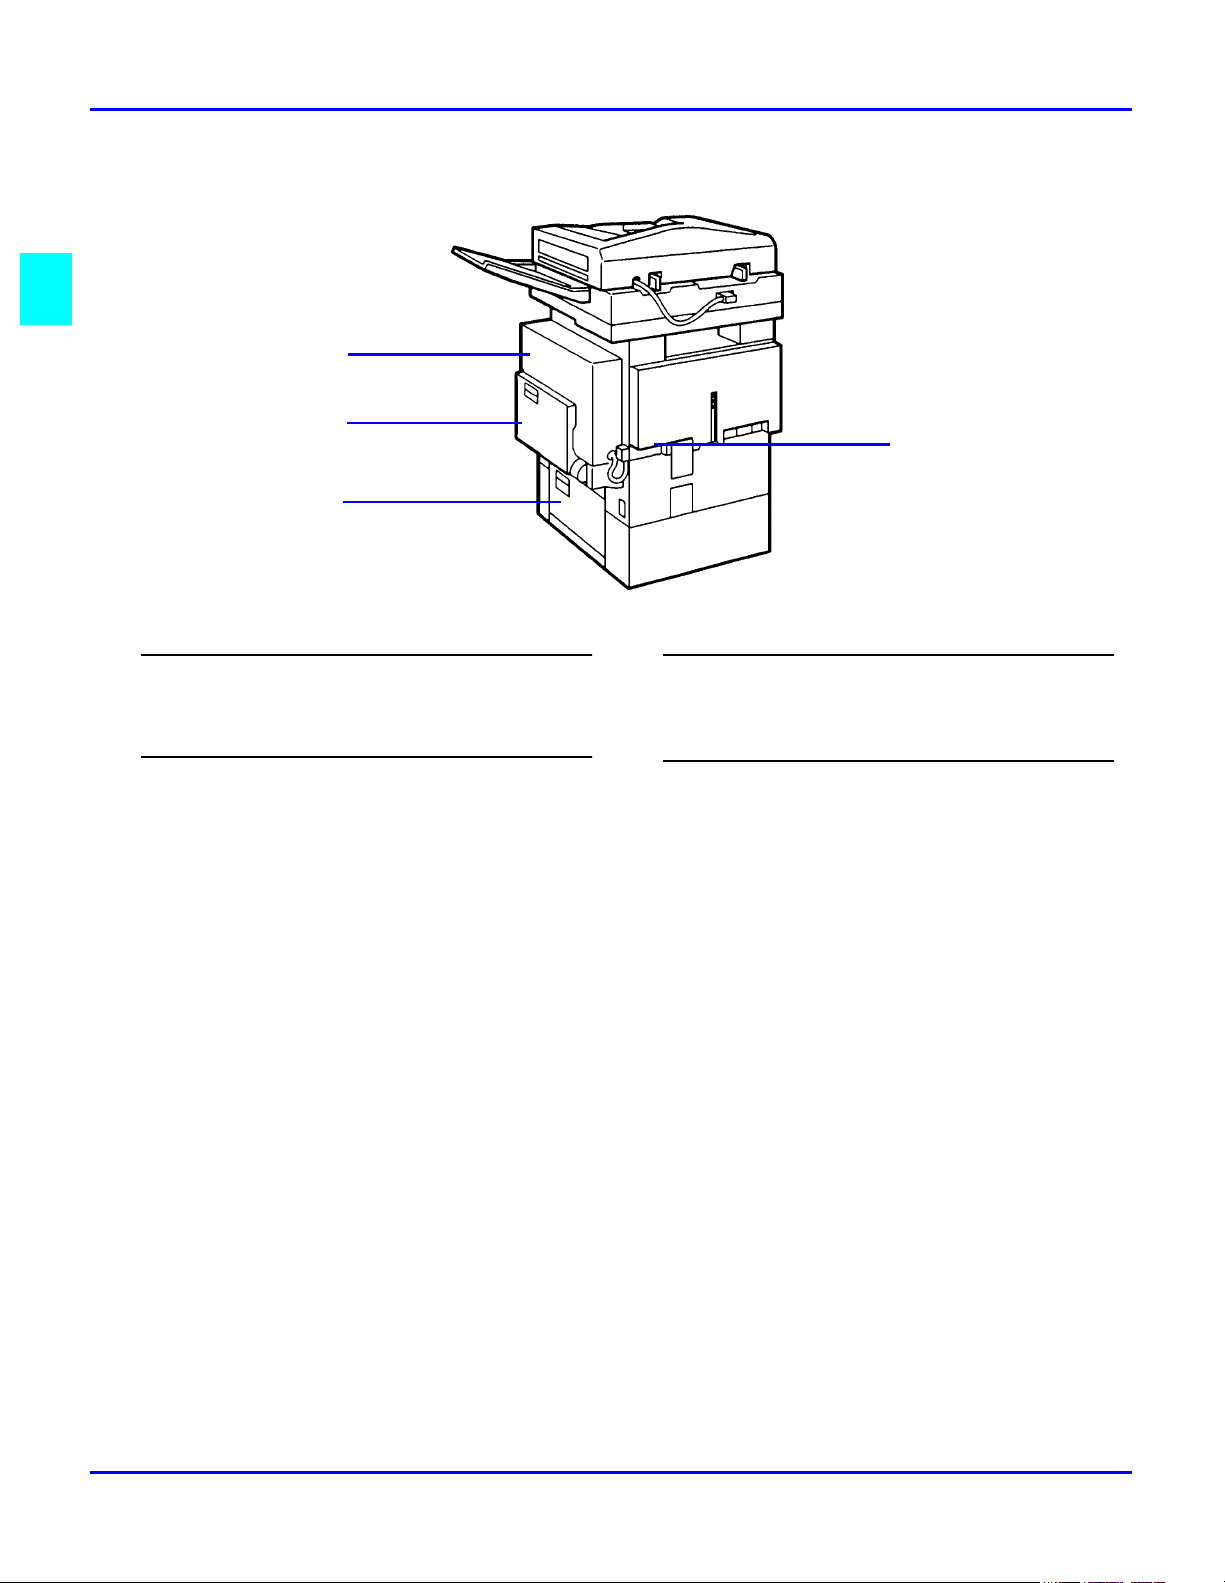
Component Locations - Rear
1
2
3
1
Duplexer
This allows you to make copies of both sides of an original.
Open to gain access to paper feed access doors.
2
Bypass Tray
Bypass copying allows you to copy onto transparencies,
letter head, or other non-standard paper.
4
3
Paper Feed Access Door
Open to gain access to the paper feed area in case of a paper
misfeed.
4
Air Vent
Do not block this vent. It aids in air circulation in the
machine.
2 - 4 Component Identification
Page 25
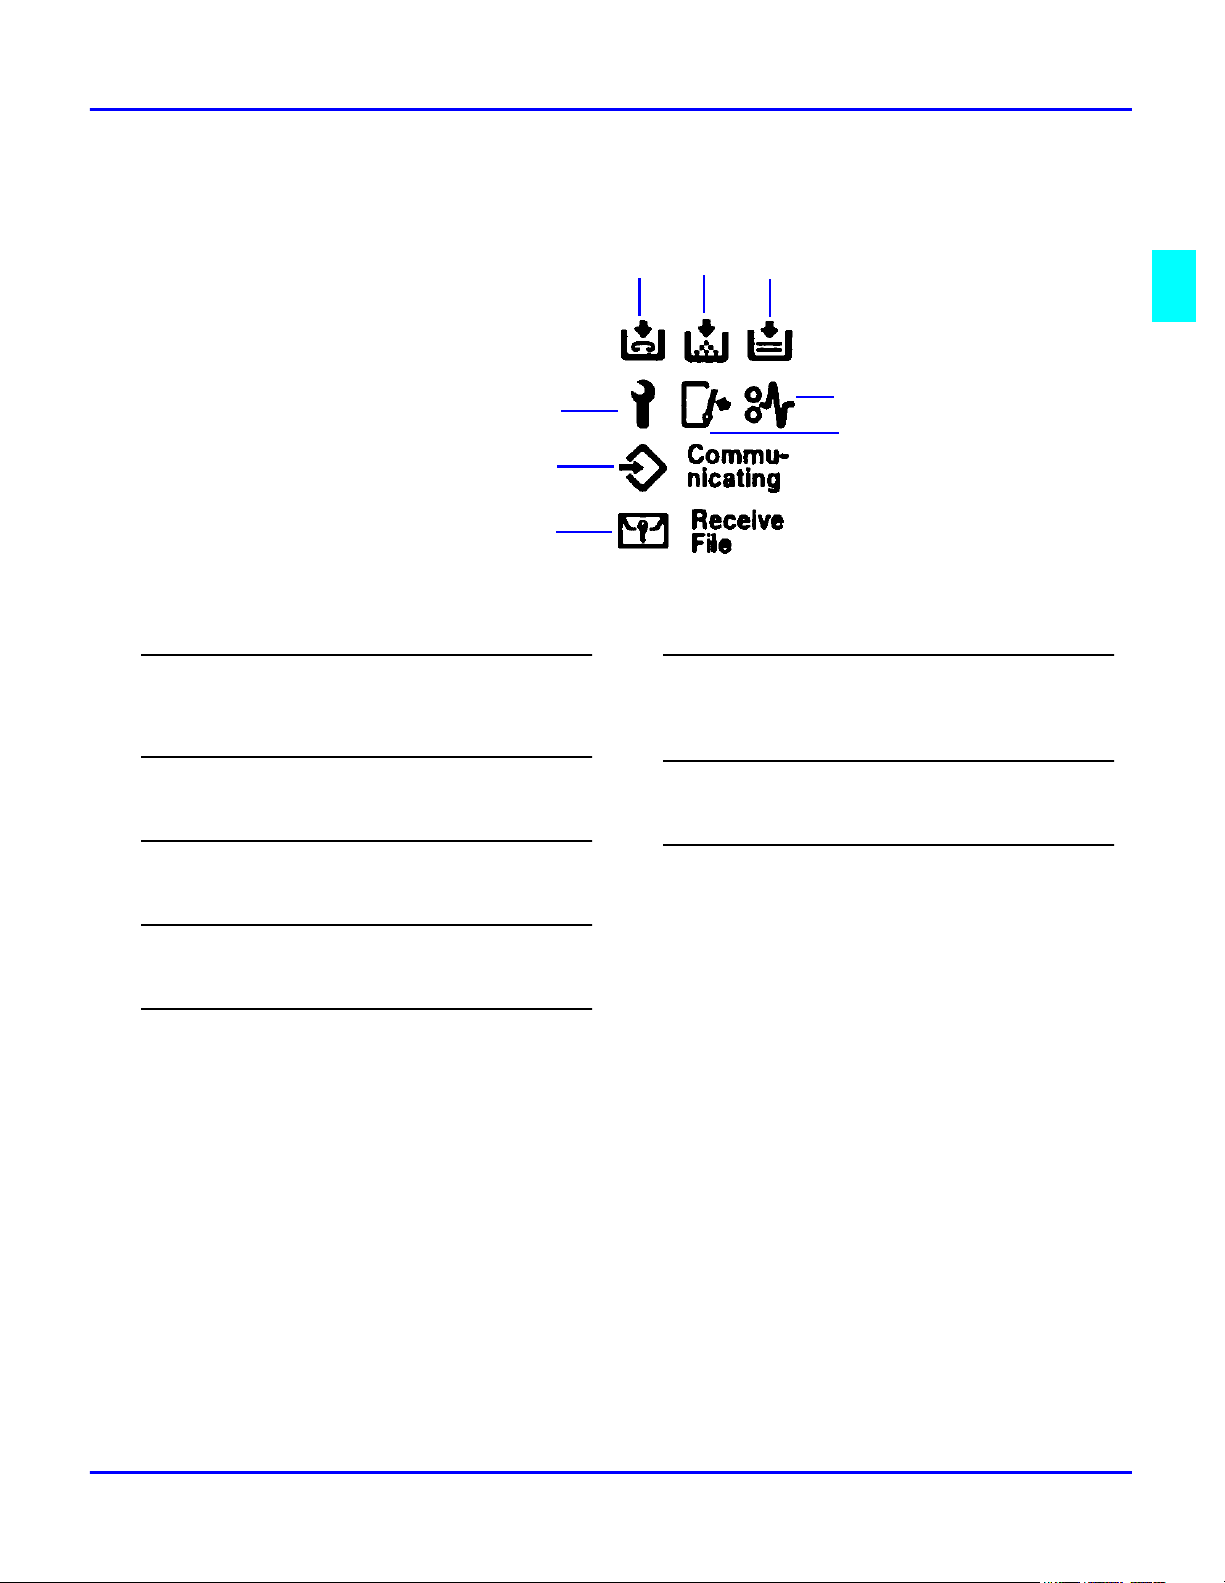
Status Display Indicators
1 2 3
1
Out of Staples
When this symbol flashes, the optional finisher is out of
staples.
2
Add Toner
When this symbol flashes, the copier is low on toner.
3
Paper Empty
When this symbol, add paper to the selected paper drawer.
4
Paper Misfeed
When this symbol flashes, a paper misfeed has occurred.
8
4
5
7
6
6
Confidential reception
When a confidential fax message is being received, this
indicator is on.
7
Data In
Program input.
8
Call for Service
When this symbol flashes, a problem exist in the machine.
Call your authorized service center
5
Door Open
When this symbol flashes, check for an open door and close
it.
Component Identification 2 - 5
Page 26

Graphics Display
1
4 5 6 7 8
2
3
1
Original Mode
Select your original type.
2
Image Density
Allows you to control the darkness of your copy, either
manually or automatically.
3
Special Original
Used for special origianls.
4
Operation Status
Provides status of the machine.
11 10
6
Program Ratios
Register up to three frequently used Reduced/Enlarge ratios.
7
Job Number
Copy job number or identification of scanned document.
8
Displays number of:
Scanned originals, copy sets, and copies
9
Sort, Stack, Staple, or Punch modes
10
Short cut keys displayed
9
11
5
Current Selected Function
Displays the current funtion.
2 - 6 Component Identification
Avaliable Functions
A clip mark is displayed on the current selected function.
Page 27

Copier Functions
Chapter 3
Page 28

Chapter Overview
This chapter describes the basic copier functions. Included in this
chapter are:
• “Entering User Codes” on page 3-1
• “Document Feeder” on page 3-2
• “Using Auto Start” on page 3-5
• “Selecting Copy Quantities” on page 3-6
• “Selecting Copy Darkness Modes” on page 3-7
• “Selecting Original Modes” on page 3-10
• “Selecting Original Orientation” on page 3-13
• “Special Originals” on page 3-14
• “Selecting Custom Size Originals” on page 3-16
• “Enlargement and Reduction Ratios” on page 3-19
• “Size Magnification” on page 3-22
• “Horizontal/Vertical Sizing” on page 3-23
• “Directional Size Magnification” on page 3-25
• “Erase Center and Border” on page 3-27
• “Margin Adjustment” on page 3-32
• “CenteringYour Copy” on page 3-33
• “Reversing Positive/Negative Copying” on page 3-34
Copier Functions
Page 29
Entering User Codes
This feature prevents unauthorized use of the copier by limiting copier access to those persons
who know an assigned User Code. The User Code feature monitors copier usage by department,
project, or persons, and tracks the number of copies made with each User Code.
The Key Operator can activate the User Code feature. When this feature is active, the Key
Operator can program up to 50 User Codes into the copier’s memory. Each code can be from
one to eight digits in length. When this feature is turned ON, the user must enter an assigned
User Code, and press the (# Enter) key before the copier can be used.
The following instructions apply only when the User Code feature is turned ON.
Enter an assigned User Code using the key
1
pad.
If you enter an invalid User Code, the
•
Message Display continues to show eight
dashes.
If you do not know which User Code to
•
use, ask your Key Operator.
Entering User Codes
Make the copy requirement selections.
2
Press the Start key to begin copying.
3
When copying is complete, clear your User
4
Code by pressing the “Clear Modes/Energy
Saver” and Clear/Stop keys at the same time.
This prevents unauthorized use of your User
Code.
Copier Functions 3 - 1
Page 30

Document Feeder
Document Feeder
The Reversing Automatic Document Feeder (RADF), feeds originals to the Exposure Glass for
copying and if Duplex Copying is selected, it turns the original over for copying the other side
of the original. Then, it exits the original onto the Document Tray.
Precautions when using Document Feeders
1. Avoid using:
You can place up to 100 originals in the Document Feeder for automatic feeding of
•
originals to the Exposure Glass for copying.
You may also select SADF which allows you to feed one original at a time into the
•
Document Feeder without having to press the Start key each time.
Badly wrinkled or folded originals.
•
Clipped or stapled originals.
•
Carbon paper.
•
Torn originals.
•
Taped originals.
•
Damp originals.
•
1. Folded or curled originals should be smoothed out before inserting into
the Document Feeder.
2. Feeding a stack of different width originals through the Document
Feeder is not recommended.
Feed them through one at a time.
•
You can, however, feed a stack of different length originals through the
•
Document Feeder.
3. If the surface of any two originals are so rough that they cannot be
moved when pinched between two fingertips, the friction between the
originals may obstruct paper separation even when the paper weight is
within specifications.
3 - 2 Copier Functions
Page 31

RADF - Feeding Stack of Originals
RADF allows you to stack feed up to 100 originals into the Document Feeder by pressing the
Start key one time. If you are feeding single sheets into the Document Feeder, switch the copy
mode to SADF and you will not have to press the Start key for each original. See SADFFeeding One Original at a Time, below.
When using the RADF, place your originals
1
face up in the Document Feeder.
Adjust the Paper Side Guides to fit the edge
2
of your originals.
Set any additional copier features desired.
3
Press the Start key.
4
Document Feeder
SADF - Feeding One Original at a Time
SADF allows you to manually feed multiple single sheets into the Document Feeder without
having to press the Start key each time to make a copy. You can also stack feed up to 100
originals just as in the RADF mode.
Touch Special Original key.
1
Touch the Batch (SADF) key.
2
Touch the OK key.
3
Copier Functions 3 - 3
Page 32

Document Feeder
Set your originals and make your copy
4
selections.
Press the Start key. The Auto Feed indicator
5
located on the rear of the RADF is ON.
When the Auto Feed indicator light turns
6
ON, you can feed the next original.The
second and subsequent originals can be fed
automatically without pressing the Start key.
Note: The SADF is on a time setting and
will return to the original RADF copy
mode after a preset time.
3 - 4 Copier Functions
Page 33

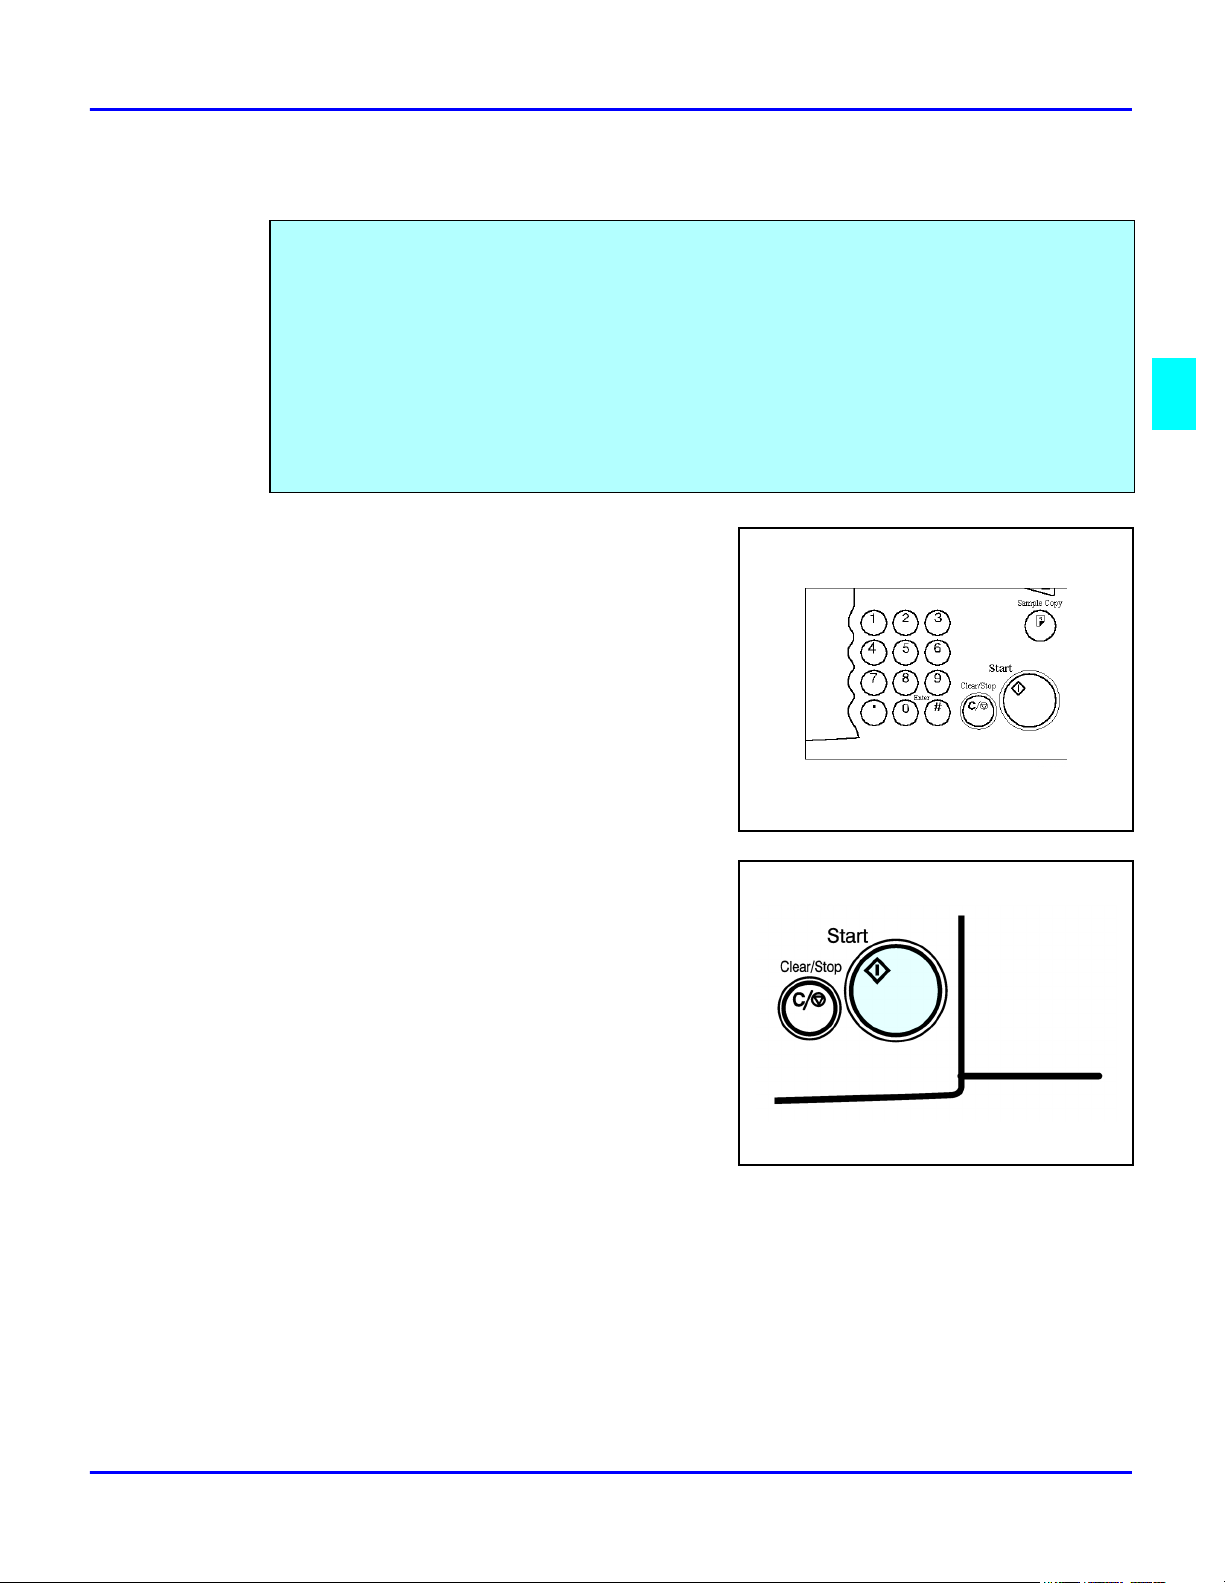
Using Auto Start
When the copier is first turned ON, it takes five and one-half minutes for it to warm-up and
come to its Ready condition. During this time, you can set up your copy job, press the Start key
and walk away. You can even do this while your copier is in the Energy Saver mode. When the
copier comes to its Ready condition, it automatically copies your job.
Place the original document in the Document
1
Feeder or on the Exposure Glass.
Make your copy requirement selections.
2
Using Auto Start
Press the Start key.The indicator light in the
3
Start key flashes alternately green and red.
The copier automatically begins copying
4
when the copier comes to its Ready
condition.
When the copier comes to its Ready
condition, the indicator light in the Start key
turns green.
Note: To cancel Auto Start, press the
Clear/Stop key.
Copier Functions 3 - 5
Page 34

Selecting Copy Quantities
Selecting Copy Quantities
The copier automatically selects a copy quantity of one copy.
If desired more than one copy, enter the number from the 10-key pad.
•
The maximum copy quantity that you can enter is 999.
•
If more than one copy of your original is required,
enter the number of copies you desire using the key
pad.
Press the Clear/Stop key to clear an entry
•
if you entered an incorrect quantity.
If no quantity is entered, one copy is
•
automatically selected by your copier.
3 - 6 Copier Functions
Page 35

Selecting Copy Darkness Modes
Select the copy darkness modes using:
Auto Image Density
•
Manual
•
Combination Auto Image Density/Manual
•
Select the Copy Darkness setting before making your copy. If you do not, the copier uses Auto
Image Density mode, as the default setting.
Selecting Copy Darkness Modes
Using Auto Image Density Mode
Auto Image Density, automatically adjust the copier for the best quality copy.
For example, the dark background on newspapers or recycled paper is not copied
•
when using Auto Image Density.
Touch the Auto Image Density key.
Auto Image Density is highlighted.
•
Copy darkness adjustment is not required
•
for most originals in the Auto Image
Density mode.
Copier Functions 3 - 7
Page 36

Selecting Copy Darkness Modes
Using Manual Exposure Mode
Manual Exposure mode allows you to manually adjust the image density darker or lighter.
Touch the Auto Image Density key.
1
The Auto Image Density indicator should be
off.
Touch the Lighter or Darker key to select
2
the lightness or darkness of the copy.
There are seven settings to choose from.
3 - 8 Copier Functions
Page 37

Selecting Copy Darkness Modes
Using Combination Auto Image Density/Manual Mode
Combination Auto Image Density/Manual mode is used when originals have colored
background and you want to adjust the copy density without affecting the background.
Touch the Auto Image Density key. Auto
1
Image Density is highlighted.
Touch the Lighter or Darker key to select
2
the lightness or darkness of the copy.
There are seven settings to choose from.
Copier Functions 3 - 9
Page 38

Selecting Original Modes
Selecting Original Modes
Identify the type of original you are copying by selecting:
Text
•
Text - Photo
•
Photo
•
Pale
•
Generation
•
The selected Original mode is shown above the Original Mode key.
Text
Select text when your original contains only text and no pictures.
Text - Photo
Select Text-Photo when your original contains photographs or picture with letters.
3 - 10 Copier Functions
Page 39

Photo
Select Photo when copying photographs and colored originals. The copier automatically adjust
to provide the best copies.
When you are using Photo, you can also use the Manual adjustments to fine tune the darkness or
lightness of the copy.
Pale
Select this mode for originals that have lighter lines written in pencil, or for faint copies. The
faint lines will be clearly copied.
Generation
If your originals are copies (generation copies), the copy image can be reproduced sharply and
clearly.
Selecting Original Modes
Copier Functions 3 - 11
Page 40

Selecting Original Modes
Selecting the Original Mode
If the desired mode is not shown above the
1
Original Mode, touch the desired Original
Mode key.
•
•
•
•
•
Select the desired Original Mode.
2
Then touch the OK key.
3
Test
Text-P hoto
Photo
Pale
Genration
3 - 12 Copier Functions
Page 41

Selecting Original Orientation
Original orientation can be set in two ways:
Standard Orientation: the original is in the same direction as the copy paper.
•
90 degree Turn: the copy image is automatically rotated 90 degrees. This works well
•
when copying on to larger paper.
Touch the Special Original key.
1
Selecting Original Orientation
Select the original orientation.
2
Standard Orientation
•
90 degree Turn
•
Touch the OK key.
3
Copier Functions 3 - 13
Page 42

Special Originals
Special Originals
With your copier, you can select from three special original types:
Batch (SADF)
Batch or (SADF) Single Automatic Document Feed, allows you to manually feed single
sheets into the Document Feeder without having to press the Start key each time to make a
copy.
Selecting Mixed Sizes
When originals of different sizes are placed on the Document Feeder at the same time,
your copier automatically checks the size of the originals and makes the appropriate copy.
Batch (SADF)
•
Mixed Sizes
•
Thin Originals
•
Selecting Thin Mode
Use this mode when placing thin originals into the Document Feeder.
3 - 14 Copier Functions
Page 43

Selecting Special Original Mode
Touch the Special Original key.
1
Touch the desired special original key.
2
Batch (SADF)
•
Mixed Sizes
•
Thin
•
Special Originals
Touch OK.
3
The selected “Special Original” key is
•
displayed just above the Special Original
key.
Set your originals in place.
4
Press the Start key.
5
Copier Functions 3 - 15
Page 44

Special Originals
Selecting Custom Size Originals
Touch the Special Original key.
1
Touch t h e Custom Size Origi. key.
2
Enter the horizontal size of the original using the keypad. Then, touch the # key.
3
Enter the vertical size of the original using the keypad. Then, touch teh keypad.
4
Touch t h e OK key.
5
Press the Start key to begin copying.
6
3 - 16 Copier Functions
Page 45

Selecting Copy Paper
Your copier provides two ways to select copy paper:
Auto Paper Select
•
Manual Paper Select
•
Using Auto Paper Select
Your copier automatically detects the paper size and copies to the proper Paper Drawer.
Touch Auto Paper Select.
1
Set up your copy requirements.
2
Press Start to copy.
3
Selecting Copy Paper
Copier Functions 3 - 17
Page 46

Selecting Copy Paper
Using Manual Paper Select
You can manually select a desired paper size for copying.
1
2
3
Touch Paper Tray 1, Paper
Tray 2, Paper Tray 3, LCC, or
the Bypass Tray key.
Proceed with your copy set up
selections.
Press the Start key to begin
copying.
3 - 18 Copier Functions
Page 47

Enlargement and Reduction Ratios
Your copier allows you to enlarge or reduce your copies using:
Auto Reduce/Enlarge
•
Preset Copy Ratios
•
Zoom Key: with 1% increments
•
Using Auto Reduce/Enlarge
Auto Reduce/Enlarge allows the copier to select the appropriate ratio based on the original size
and paper size that you select.
Touch the Auto Reduce/Enlarge key.
1
Select the copy paper tray you desire.
2
Enlargement and Reduction Ratios
Set up your copy requirements.
3
Press the Start key to begin copying.
4
Copier Functions 3 - 19
Page 48

Enlargement and Reduction Ratios
Using Preset Copy Ratio Keys
The preset Copy Ratio keys allows you to select from thirteen preset reduction and enlargement
ratios.
There are five preset Enlarge ratios to choose from: 115%, 122%, 141%, 200%, and
•
400%.
There are six preset Reduce ratios to choose from: 87%, 82%, 71%, 61%, 50%, and
•
25%.
Full size preset ratio at 100%.
•
Touch the Full Size key.
1
Touch the Reduce/Enlarge key.
2
Select Enlarge or Reduce.
3
Select a copy ratio by touching the
4
appropriate ratio.
Touch OK.
5
Set your originals and make your copy set up
6
options.
Press the Start key to begin copying.
7
3 - 20 Copier Functions
Page 49

Zoom Keys
The Zoom key allows you to select a precise copy ratio selection from 32% to 400% in one
percent increments.
You can use the + or - keys, or the keypad to change the copy ratio.
1
2
3
Touch the Full Size key.
Touch the Reduce/Enlarge key.
Enter the percent ratio by
touching the + and - keys or
entering the percent using the
keypad.
When using the +/- keys,
•
touching the key changes the
ratio in 1% increments.
Holding down the +/- keys
•
causes the ratio to change in
10% increments.
Enlargement and Reduction Ratios
After you selected your desired Copy Ratio, touch the OK key.
4
To return to a 100% ratio, touch Full Size.
5
Copier Functions 3 - 21
Page 50

Size Magnification
Size Magnification
Calculate a ratio from the lengths of the original and copy for enlarging or reducing the copy.
Measure and specify the lengths of the
1
original and copy by comparing “A” with
“a”.
Touch the Reduce/Enlarge key
2
Touch the Specified Ratio key.
3
Enter the length of the original (A) using the
4
keypad.
Touch the # key in the display.
5
Enter the length of the copy (a) with the
6
keypad.
Touch the # key in the display.
7
To change length entered, touch the Clear
•
key or press the Clear/Stop key. Then
enter a new value.
To change a length entered after touching the # key, select original or copy and enter the
•
desired length.
Touch the OK key two times.
8
3 - 22 Copier Functions
Page 51

Horizontal/Vertical Sizing
This feature allows you to stretch and squeeze an image by independently changing the
horizontal and vertical reproduction ratios.
Directional Size Magnification - Inches
When the original is on the Exposure Glass, the reproduction ratios are 25 to 400%.
•
When the original is on the Document Feeder the reproduction ratios are: Vertical 37
•
to 150%, Horizontal 25 to 400%.
When entering page size, use the (./*) key to enter the decimal.
•
Touch the Reduce/Enlarge key.
1
Horizontal/Vertical Sizing
Touch the Specified Ratio key.
2
Touch the Dirc.Size Mag. In key.
3
Enter the horizontal size of the
4
original using the keypad.
Press the # key.
5
Enter the horizontal of the copy
6
using the keypad.
Touch the # key.
7
Copier Functions 3 - 23
Page 52

Horizontal/Vertical Sizing
Repeat the same for the veritcal sizes.
8
Touch the OK key.
9
Set your originals, then press the Start key.
10
3 - 24 Copier Functions
Page 53

Directional Size Magnification
When your original is on the Exposure Glass, the reproduction ratios are 25 to 400%.
•
When your original is on the Document Feeder the reproduction ratios are: Vertical
•
37 to 150%, Horizontal 25 to 400%.
When entering page size, use the ./* key to enter the decimal.
•
Directional Size Magnification - 1% Increments
Touch the Reduce/Enlarge key.
1
Directional Size Magnification
Touch the Specified Ratio key.
2
Touch the Direct Mag% key.
3
Copier Functions 3 - 25
Page 54

Directional Size Magnification
Enter the Ratios Using + /- Keys
Touch either the + or - key.
1
Touch the Horizontal key.
2
Touch either the + or - key to
3
change the ratio in 1%
increments.
Touch the Vertical key.
4
Touch either the + or - key to change the ratio in 1% increments.
5
Touch t he OK key.
6
Enter the Ratios Using the Keypad
Touch the Horizontal key.
1
Enter the desired ratio using the
2
keypad.
Touch the Vertical key.
3
Enter the desired ratio using the
4
keypad.
Touch the OK key.
5
Touch the OK key.
6
Set your originals, then press the Start key.
7
3 - 26 Copier Functions
Page 55

Erase Center and Border
This function erases the center and/or all four sides of the original image. This is useful for
avoiding shadows on the copy image caused by the bound originals, such as books.
Border: erases the edge margin of the original image.
•
Center: erases the center margin of the original image.
•
Center/Border: erases both center and edge margins of the original image.
•
This feature is not active when you are using the Bypass Tray.
Margin width default is 0.4”, 10mm. Using the User Tools, you can change the margin from
0.1” to 2.0” in 0.1” steps (3 to 50mm in 1mm steps).
Using Border Erase
Erase Center and Border
Touch the Edit/Stamp key.
1
Touch the Erase key.
2
Copier Functions 3 - 27
Page 56

Erase Center and Border
Touch the Border key if it is not
3
already selected.
Set the border width by selecting
4
wither Same Width or Diff.
Width.
Selecting Same Width
If the Same Width key is not
1
selected, select it.
Set the erase border width using
2
the + and - keys.
Each touch of the key
•
changes the value by 0.1
inch.
Touch the OK key.
3
Selecting Different Width
Touch the Diff. Width key.
1
Set the erase border width using
2
the + and - keys.
Each touch of the key
•
changes the value by 0.1
inch.
Touch the OK key.
3
3 - 28 Copier Functions
Page 57

Using Center Erase
Touch the Edit/Stamp key.
1
Erase Center and Border
Touch the Erase key.
2
Touch the Center key.
3
Copier Functions 3 - 29
Page 58

Erase Center and Border
Set the center width using the +
4
and - keys.
•
Touch the OK key.
5
Using Center/Border Erase
Touch the Edit/Stamp key.
1
Each touch of the key
changes the value by 0.1
inch.
Touch the Erase key.
2
Touch the Center/Border key.
3
Set the erase margin.
4
3 - 30 Copier Functions
Page 59

Selecting Same Width
Touch the Center key.
1
Touch the Same Width key.
2
Touch the Border key
3
Set the erase border using the +
4
and - keys
Touch the OK key.
5
Selecting Different Width
Touch the Diff. Width key.
1
Touch the key for the part you
2
wish to change and set an erase
margin width using the + and keys.
Erase Center and Border
Touch the OK key.
3
Copier Functions 3 - 31
Page 60

Margin Adjustment
Margin Adjustment
You can shift the image on the page either left or right to make a binding margin. The default
setting is:
•
•
You can change the default setting.
Touch the Edit/Stamp key.
1
Front 0.2” left
Back 0.2” Right
Touch the Margin Adjustment
2
key.
Touch the left and right arrow
3
keys to set the left and right
margins for the front and back
side of the page.
Each touch of the arrow key
•
changes the value by 0.1
inch.
Touch the up and down arrows
4
to set the top and bottom margins for the front and back side of the page.
Each touch of the arrow key changes the value by 0.1 inch.
•
When your settings are complete, touch the OK key.
5
Touch the OK key.
6
Set your originals, then press the Start key.
7
3 - 32 Copier Functions
Page 61

CenteringYour Copy
This feature allows you to center an image on a larger sheet of paper.
Select paper size.
1
CenteringYour Copy
Touch the Edit/Stamp key.
2
Touch the Edit Image key.
3
Touch the Centering key.
4
Touch the OK key.
5
Press then Start key to begin
6
copying.
Copier Functions 3 - 33
Page 62

Reversing Positive/Negative Copying
Reversing Positive/Negative Copying
This feature reverses the balck and white images of the original.
Touch the Edit/Stamp key.
1
Touch the Edit Image key.
2
Touch the Positive/Negative
3
key.
Touch t h e OK key.
4
Touch t h e OK key.
5
Make your copy selections.
6
3 - 34 Copier Functions
Page 63

Copying Methods
Chapter 4
Page 64

Chapter Overview
This Chapter explains the various ways to make copies with the copier.
Included in this chapter are:
• “Series/Book Copying” on page 4-1
• “Bypass Copying” on page 4-9
• “Combine Copying” on page 4-15
• “Double Copying” on page 4-28
• “Duplex Copying” on page 4-29
• “Image Repeat Copying” on page 4-32
• “Interrupt Copying” on page 4-34
• “Overhead Transparencies and Thick Paper” on page 4-35
• “Cover and Page Insert Copying” on page 4-36
• “Scanning Documents” on page 4-42
• “Cover/Slip Sheets” on page 4-43
• “Series Copying - Book to 1-Sided Copies” on page 4-49
• “Series Copying - 2-Sided to 1-Sided Copies” on page 4-50
Copying Methods
Page 65

Series/Book Copying
Series copies are made by separately copying the front and back of a 2-sided original or the two
facing pages of a spread original onto two sheets of paper. A book is made by copying two or
more originals in page order.
The following types of Series and Book modes can be used:
Series Copies
• Book > 1 Sided: Copies the two facing pages of a spread original to make two 1- sided
copies.
• Book > 2 Sided: Copies a spread two-page origi-nal onto both sides of a sheet.
• Front & Back > 2 Sided: Copies each two-page spread original as it is onto both sides of
a sheet.
Booklet
• 1 Sided > Booklet: Make copies in page order for a folded booklet.
Series/Book Copying
• 2 Sided > Booklet: Copies a 2-sided original in page order for a folded booklet.
• 1 Sided > Magazine: Copies two or more originals to make copies in page order (as
when they are folded and stacked).
• 2 Sided > Magazine: Copies 2-sided originals to make copies in page order (as when
they are folded and stacked)
Series Copying
Book to 1 Sided
This allows you to make one-sided copies from two facing pages of a bound original book.
Touch the Duplex/Combine/
1
Series key.
Copying Methods 4 - 1
Page 66

Series/Book Copying
2
3
4
Touch the Series/Book key.
Make sure the Series key is
selected.
Touch the Book > 1 Sided key.
Touch the OK key.
5
Set the originals in place, then
6
press the Start key.
4 - 2 Copying Methods
Page 67

Series/Book Copying
Book to 2 Sided
Book to 2 Sided allows you to copy two facing pages of a book to both sides of a sheet.
Touch the Duplex/Combine/
1
Series key.
Touch the Series/Book key.
2
Make sure the Series key is
3
selected.
Touch the Book > 2 Sided key.
4
Touch the OK key.
5
Set the originals in place, then
6
press the Start key.
Copying Methods 4 - 3
Page 68

Series/Book Copying
Front and Back to 2 Sided
Copies each two-page spread original asit is onto both sides of a sheet.
1
2
Touch the Duplex/Combine/
Series key.
Touch the Series/Book key.
Make sure the Series key is
3
selected.
Touch the Front/Back >2 Sided
4
key.
Touch the OK key.
5
Select the paper source.
6
Set the originals in place, then press the Start key.
7
4 - 4 Copying Methods
Page 69

Copying Book Originals
1 Sided to Booklet
Make copies in page order for a folded booklet.
Touch the Duplex/Combine/
1
Series key.
Touch the Series/Book key.
2
Series/Book Copying
Touch the Book key.
3
Touch the 1 Sided > Booklet
4
key.
Touch the OK key.
5
Select the paper, set your
6
originals, and then press the
Start key.
Copying Methods 4 - 5
Page 70

Series/Book Copying
2 Sided to Booklet
Make 2 sided originals to copies in page order for a folded booklet.
1
2
Touch the Duplex/Combine/
Series key.
Touch the Series/Book key.
Touch the Book key.
3
Touch the 2 Sided > Booklet
4
key.
Touch the OK key.
5
Select the paper, set your originals, and
then press the Start key.
4 - 6 Copying Methods
Page 71

Series/Book Copying
1 Sided to Magazine
Magazine copies two or more originals to make copies in page order when they are folded and
stacked.
Touch the Duplex/Combine/
1
Series key.
Touch the Series/Book key.
2
Touch the Book key.
3
Touch the 1 Sided > Magazine
4
key.
Touch the OK key.
5
Select the paper, set your originals, and
then press the Start key.
Copying Methods 4 - 7
Page 72

Series/Book Copying
2 Sided to Magazine
Magazine copies two or more 2-sided originals to make copies in page order when they are
folded and stacked.
1
2
Touch the Duplex/Combine/
Series key.
Touch the Series/Book key.
Touch the Book key.
3
Touch the 2Sided > Magazine
4
key.
Touch the OK key.
5
Select the paper, set your originals, and
then press the Start key.
4 - 8 Copying Methods
Page 73

Bypass Copying
If you want to make a copy on a transparency for overhead projection (OHP), or have the need
to use special paper, letterhead, or paper other than that which is in the copier Paper Tray, you
may feed this paper into the Stack Feed Bypass Tray. See “Using Stack Feed Bypass” on page
4-9.
Bypass does not work in the Duplex mode.
•
Bypass copying bypasses the Paper Trays and feeds copy paper from the Stack Feed
•
Bypass Tray.
Using Stack Feed Bypass
Use the Stack Feed Bypass to feed standard paper, transparency, label stock, tracing paper,
letterhead, and other special purpose papers measuring from 8.5” x 5.5” to 11” x 17”.
The copier automatically detects standard paper sizes: 11" x 17", 8.5" x 11", 5.5" x
•
8.5".
If you are using non-standard size paper, you should enter the paper size. See
•
“Custom Size Paper” on page 4-12.
Bypass Copying
If Duplex mode is selected, touch the Duplex/Combine key and turn it OFF.
1
Place your original on the Document Feed Tray or on the Exposure Glass.
2
Open the Bypass Paper Tray.
3
The Bypass Tray indicator turns ON in
•
the display.
If the indicator does not turn ON, the
•
copy mode is set for duplex. Change the
copy mode to single side copying.
Adjust the Bypass Paper Guides to the width
4
of the copy paper.
Be sure to place the copy paper in the
•
same direction as the original.
Copying Methods 4 - 9
Page 74

Bypass Copying
Insert a single sheet or stack of paper all the
5
way into the Stack Feed Bypass Tray until a
beep is heard.
A maximum of 50 sheets can be placed in
•
the Stack Feed Bypass Tray.
If necessary, pull out the paper extension
•
bar to support longer sheets of paper.
Press the Start key to begin copying.
6
The sheet of paper in the Bypass Feed Slot feeds into the copier.
•
The copy exits to the Exit Tray or
•
Finisher.
4 - 10 Copying Methods
Page 75

Standard Size Paper
Press the # key.
1
Press the [Select Size] key.
2
Select the paper size.
3
Bypass Copying
Copying Methods 4 - 11
Page 76

Bypass Copying
Custom Size Paper
When using custom size paper, you should specify the paper size to avoid paper misfeeds..
Open the Bypass Paper Tray.
1
Adjust Paper Guides
•
Insert Paper
•
Press the # key on the keypad.
2
Touch the Custom Size key.
3
4 - 12 Copying Methods
Page 77

Touch the Vert key.
4
Enter the vertical size of the
5
paper using the keypad.
Press the # key to enter this
6
value.
Touch the Horz key.
7
Enter the horizontal size of the paper using the keypad.
8
Press the # key to enter this value.
9
To register the non-standard size entered, touch the Store key.
10
Note: Only one non-standard value can be entered.
Touch the OK key.
11
Bypass Copying
Set the originals in place, then press the Start key.
12
Copying Methods 4 - 13
Page 78

Bypass Copying
Thick Paper, Thin Paper, Transparencies
To make copies onto OHP transpar-encies or thick paper, you need to specify the paper type.
Open the bypass tray, and adjust the guides to the paper size.
1
Note: If the guides are not flush with the copy paper, a skew image or paper
misfeeds might occur.
Lightly insert the OHP transparencies or thick paper face down until the beeper sounds.
2
The indicator on the display automatically goes on.
When you set an OHP transparency, make sure that its front and back faces are properly
•
positioned.
To avoid paper misfeeds, fan the paper before setting it in the tray.
•
Press the # key.
3
Select [OHP Sheet]or [Thick
4
Paper].
Press the [OK]key.
5
Set your originals and press the
6
Start key.
Note: When copying onto
OHP transparencies, remove
copied sheets one by one.
When your copy job is finished, press the Clear Modes key to clear the settings.
7
4 - 14 Copying Methods
Page 79

Combine Copying
Combine copy, combines originals into one copy. You cannot use the Duplex or the Bypass Tray
with this feature. There are twelve types of copies that you can make in this mode:
1. 1 Sided 2 Pages to Combine 1 Side: Copies two 1-sided originals to one side of a
sheet.
2. 1 Sided 4 Pages to Combine 1 Side: Copies four 1-sided originals together to one
side of a sheet.
3. 1 Sided 8 Pages to Combine 1 Side: Copies eight 1-sided originals together to one
side of a sheet.
4. 1 Sided 4 Pages to Combine 2 Side: Copies four 1-sided original together to one
side of a sheet.
5. 1 Sided 8 Pages to Combine 2 Side: Copies eight 1-sided originals to the two-page
spread on both sides of a sheet.
6. 1 Sided 16 Pages to Combine 2 Side: Copies 16 1-sided originals together to both
sides of a sheet.
Combine Copying
7. 2 Sided 2 Pages to Combine 1 Side: Copies one 2-sided original to one side of a
sheet.
8. 2 Sided 4 Pages to Combine 1 Side: Copies two 2-sided original to one side of a
sheet.
9. 2 Sided 8 Pages to Combine 1 Side: Copies four 2-sided originals to one side of a
sheet.
10. 2 Sided 4 Pages to Combine 2 Side: Copies two 2-sided originals together to both
sides of a sheet.
11. 2 Sided 8 Pages to Combine 2 Side: Copies four 2-sided originals together to both
sides of a sheet.
12. 2 Sided 16 Pages to Combine 2 Side: Copies eight 2-sided originals together to
both sides of a sheet.
Copying Methods 4 - 15
Page 80

Combine Copying
1 Sided 2 Pages to Combine 1 Side
Copies two 1-sided originals to the two-pages spread of a sheet.
Touch the Duplex/Combine/
1
Series key.
Touch the 1-Sided key for
2
original, then touch the
Combine 1 Side key for your
copy.
Touch the 2 Originals key, then
3
touch the OK key.
Select the paper source.
4
Set the originals in place, then
5
press the Start key.
4 - 16 Copying Methods
Page 81

1 Sided 4 Pages to Combine 1 Side
Copies four 1-sided originals together to one side of a sheet.
Touch the Duplex/Combine/
1
Series key.
Touch the 1-Sided key for
2
original, then touch the
Combine 1 Side key for your
copy.
Combine Copying
Touch the 4 Originals key, then
3
touch the OK key.
Select the paper source.
4
Set the originals in place, then
5
press the Start key.
Copying Methods 4 - 17
Page 82

Combine Copying
1 Sided 8 Pages to Combine 1 Side
Copies eight 1-sided originals together to one side of a sheet.
Touch the Duplex/Combine/
1
Series key.
Touch the 1-Sided key for
2
original, then touch the
Combine 1 Side key for your
copy.
Touch the 8 Originals key, then
3
touch the OK key.
Select the paper source.
4
Set the originals in place then
5
press the Start key.
4 - 18 Copying Methods
Page 83

1 Sided 4 Pages to Combine 2 Side
Copies eight 1-sided original together to one side of a sheet.
Touch the Duplex/Combine/
1
Series key.
Touch the 1-Sided key for
2
original, then touch the
Combine 2 Side key for your
copy.
Combine Copying
Touch the 4 Originals key, then
3
touch the OK key.
Check the paper orientation.
4
Touch the OK key.
5
Select the paper source.
6
Set the originals in place, then press the Start key.
7
Copying Methods 4 - 19
Page 84

Combine Copying
1 Sided 8 Pages to Combine 2 Side
Copies eight 1-sided originals to the two-page spread on both sides of a sheet.
Touch the Duplex/Combine/
1
Series key.
Touch the 1-Sided key for
2
original, then touch the
Combine 2 Side key for your
copy.
Touch the 8 Originals key, then
3
touch the OK key.
Check the paper orientation.
4
Touch the OK key.
5
Select your paper source.
6
Set your originals and then press the Start key.
7
4 - 20 Copying Methods
Page 85

1 Sided 16 Pages to Combine 2 Side
Copies 16 1-sided originals together to both sides of a sheet.
Touch the Duplex/Combine/
1
Series key.
Touch the 1-Sided key for
2
original, then touch the
Combine 2 Side key for your
copy.
Combine Copying
Touch the 16 Originals key, then
3
touch the OK key.
Check the paper orientation.
4
Touch the OK key.
5
Select the paper source.
6
Set the originals in place, then press the Start key.
7
Copying Methods 4 - 21
Page 86

Combine Copying
2 Sided 2 Pages to Combine 1 Side
Copies one 2-sided original to one side of a sheet.
Touch the Duplex/Combine/
1
Series key.
Touch the 2-Sided key for
2
original, then touch the
Combine 1 Side key for your
copy.
Touch the 2 Pages key, then
3
touch the OK key.
Check the paper orientation.
4
Touch the OK key.
5
Select the paper source.
6
Set the originalsin place, then
7
press the Start key.
4 - 22 Copying Methods
Page 87

2 Sided 4 Pages to Combine 1 Side
Copies one 2-sided original to one side of a sheet.
Touch the Duplex/Combine/
1
Series key.
Touch the 2-Sided key for
2
original, then touch the
Combine 1 Side key for your
copy.
Combine Copying
Touch the 4 Pages key, then
3
touch the OK key.
Check the paper orientation.
4
Touch the OK key.
5
Select the paper source.
6
Set the originals in place, then press the Start key.
7
Copying Methods 4 - 23
Page 88

Combine Copying
2 Sided 8 Pages to Combine 1 Side
Copies four 2-sided originals to one side of a sheet.
Touch the Duplex/Combine/
1
Series key.
Touch the 2-Sided key for
2
original, then touch the
Combine 1 Side key for your
copy.
Touch the 8 Pages key, then
3
touch the OK key.
Check the paper orientation.
4
Touch the OK key.
5
Select the paper source.
6
Set the originals in place, then press the Start key.
7
4 - 24 Copying Methods
Page 89

2 Sided 4 Pages to Combine 2 Side
Copies two 2-sided originals together to both sides of a sheet.
Touch the Duplex/Combine/
1
Series key.
Touch the 2-Sided key for
2
original, then touch the
Combine 2 Side key for your
copy.
Combine Copying
Touch the 4 Pages key, then
3
touch the OK key.
Check the paper orientation.
4
Touch the OK key.
5
Select the paper source.
6
Set the originals in place, then press the Start key.
7
Copying Methods 4 - 25
Page 90

Combine Copying
2 Sided 8 Pages to Combine 2 Side
Copies four 2-sided originals together to both sides of a sheet.
Touch the Duplex/Combine/
1
Series key.
Touch the 2-Sided key for
2
original, then touch the
Combine 2 Side key for your
copy.
Touch the 8 Pages key, then
3
touch the OK key.
Check the paper orientation.
4
Touch the OK key.
5
Select the paper source.
6
Set the originals in place, then press the Start key.
7
4 - 26 Copying Methods
Page 91

2 Sided 16 Pages to Combine 2 Side
Copies eight 2-sided originals together to both sides of a sheet.
Touch the Duplex/Combine/
1
Series key.
Touch the 2-Sided key for
2
original, then touch the
Combine 2 Side key for your
copy.
Combine Copying
Touch the 16 Pages key, then
3
touch the OK key.
Check the paper orientation.
4
Touch the OK key.
5
Select the paper source.
6
Set the originals in place, then press the Start key.
7
Copying Methods 4 - 27
Page 92

Double Copying
Double Copying
Using Double Copy, you can make two copies of the same image on one
sheet.
You cannot use the Bypass Tray for this feature.
•
You can insert separated lines between the repeated images.
•
Touch the Edit/Stamp key.
1
Touch the Exit Image key
2
Touch the Double key.
3
Touch the OK key.
4
Select the paper.
5
Set the originals in place, then press the Start key.
6
4 - 28 Copying Methods
Page 93

Duplex Copying
There are two ways to make duplex copies with this copier:
sided originals.
1-Sided to 2-Sided Copying
Touch the Duplex/Combine/
1
Series key.
Duplex Copying
1-Sided to 2-Sided Copying: This mode makes two-sided copies from onesided originals.
2-Sided to 2-Sided Copying: This mode makes two-sided copies from two-
Touch the 1 Sided key for the
2
original.
Touch the 2 sided key for the
3
copy.
Touch the OK key.
4
Copying Methods 4 - 29
Page 94

Duplex Copying
Specify the Orientation of Bound Originals
If the binding is on the side, use Top to Top. This is the default setting.
•
If the binding is on the top of the page, use top to bottom. Your copies are automatically
•
orientated top to bottom.
Touch the Duplex/Combine/
1
Series key.
Touch the Orientation key.
2
Select an original and copy
3
orientation.
Touch the OK key.
4
4 - 30 Copying Methods
Page 95

2-Sided to 2-Sided Copying
Touch the Duplex/Combine/
1
Series key.
Touch the 2 Sided key for the
2
original.
Touch the 2 sided key for the
3
copy.
Duplex Copying
Touch the OK key.
4
Copying Methods 4 - 31
Page 96

Image Repeat Copying
Image Repeat Copying
Note:
The number of repeated images depends on the original size, copy paper size, and
•
reproduction ratio.
Original Size: 5.5” x 8.5”, Copy Paper Size: 8.5” x 11.0” (landscape to landscape, or
•
portrait to portrait).
4 repeats (71%), 16 repeats (35%)
•
Original Size: 5.5” x 8.5”, Copy Paper Size: 8.5” x 11.0” (portrait to landscape, or
•
portrait to landscape).
2 repeats (100%), and 8 repeats (50%)
Using Image Repeat, the same image can be copied repeatedly on the same
paper.
Select the size of copy paper and the reproduction ratio.
1
Touch the Edit/Stamp key.
2
Touch the Edit/Image key.
3
4 - 32 Copying Methods
Page 97

Touch the Image/Repeat key.
4
To repeat the whole original,
•
select All area.
To repeat selected areas,
•
select Select area and enter
the Horiz and Vert
dimensions.
Touch the OK key.
5
Set the originals in place, then press the Start key.
6
Image Repeat Copying
Copying Methods 4 - 33
Page 98

Interrupt Copying
Interrupt Copying
You can interrupt a copy job that is in progress to make a quick copy of another original,
without disrupting the original copy job settings or copy count. Do this by using the Interrupt
feature.
1
2
Press the Interrupt key.
When the copier stops:
Remove the remaining originals from the
•
Document Feeder.
Position the new original on the Exposure
•
Glass.
Make the copy requirement selections. See
3
“Selecting the Mode of Operation” on page 1-3.
Press the Start key.
4
When all Interrupt Copies are finished, press
5
the Interrupt key again to cancel the
Interrupt mode.
Note: The previous copy quantity, copy
ratio, copy darkness, and paper size are
automatically reset.
Put the remaining originals that you removed
6
in Step 2, back into the Document Feeder.
Press the Start key to continue the original
7
copy job.
4 - 34 Copying Methods
Page 99

Overhead Transparencies and Thick Paper
Overhead Transparencies and Thick Paper
To make copies on OHP transparencies or thick paper, you need to specify the paper type. This
function is not available in Duplex mode.
If Duplex mode is selected, touch the Duplex key to turn it OFF.
1
Place the original on the Document Feed
2
Tray or on the Exposure Glass.
Open the Bypass Paper Tray.
3
Adjust the Bypass Paper Guides to the width
4
of the transparencies.
Be sure to place the transparencies in the
5
same direction as your original.
Insert the OHP transparency or thick paper
6
face up until the beep sounds.
Press the # key on the keypad.
7
Select OHP or Thick Paper by
8
touching the appropriate key.
Touch the OK key.
9
With the originals set, press the
10
Start key.
Copying Methods 4 - 35
Page 100

Cover and Page Insert Copying
Cover and Page Insert Copying
There are four types of copying in this mode:
Front Cover: The first page of the original is copied on a specific paper
sheets for covers. You can specify it to copied on or left blank. Refer to
“Front Cover” on page 4-36.
Front and Back Covers: The first and last pages of the originals are copied
on specific paper sheets for covers. Refer to “Front and Back Covers” on
page 4-38.
Page Insert: Any specific page of the document is copied on specific paper
sheets for slip sheets. Refer to “Page Insert” on page 4-39.
Chapters: Separate one-sided originals into chapters of two-sided copies.
Refer to “Chapters” on page 4-41.
Note:
Front Cover
1
2
The cover or slip sheets should be identical in size and direction with the copy paper.
•
If Blank Cover mode is selected, the cover is not counted as a copy.
•
Touch the Cover/Slip Sheet key.
Touch the Front/ Cover key.
4 - 36 Copying Methods
 Loading...