

Page 1
Operator Guide
2001/2002
next level document solutions
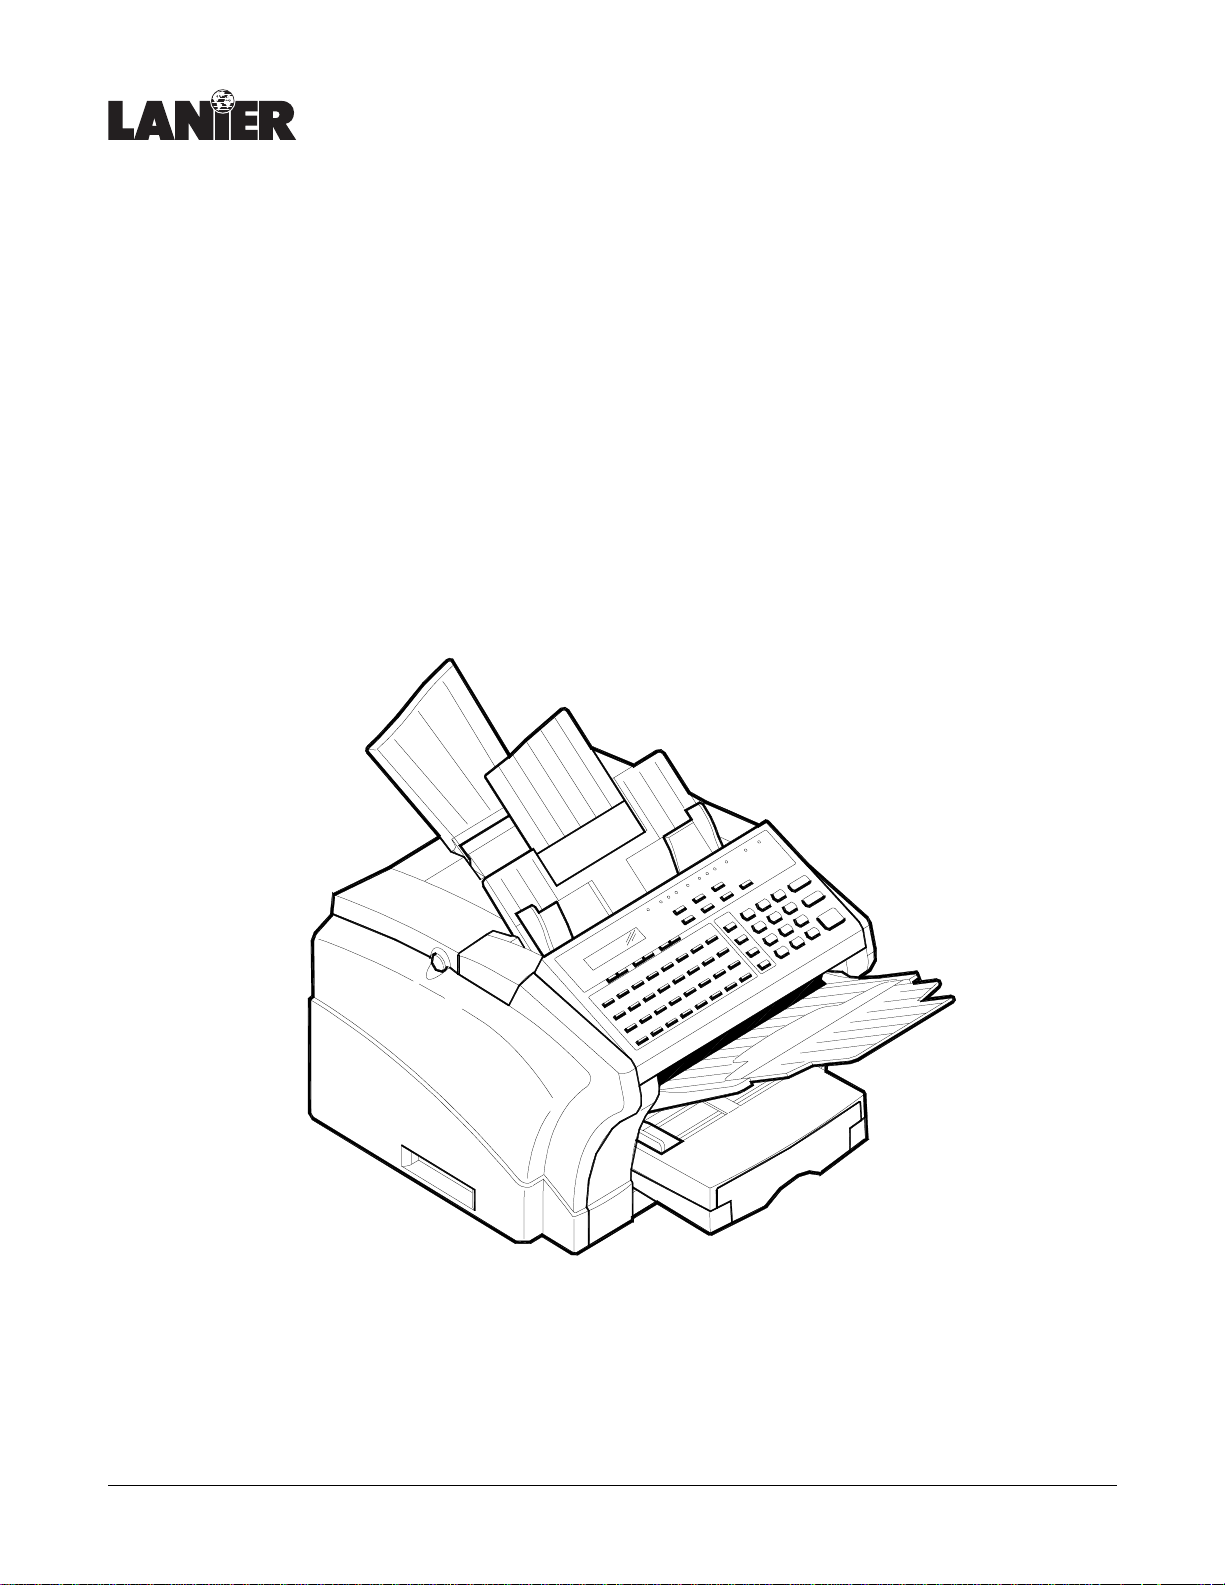
Facsimile
Page 2

When ordering supplies or requesting service,
you will need to provide the model and serial
number of your machine.
Please take a moment to enter your model and
serial numbers here.
MODEL NUMBER: __________________________
SERIAL NUMBER: __________________________
To order supplies, call: ( )
To request service, call: ( )
Customer Vision -
Our commitment to your
complete satisfaction
Trademark Acknowledgments
Lanier and Customer V ision are registered trademarks of Lanier Worldwide, Inc.
Microsoft, MS-DOS, Excel and Windows are registered trademarks of Microsoft Corp.
IBM, PC/AT and PS/2 are registered trademarks of Internat ional Business Machines Corp.
Laser fAX and Hydra Fax are registered trademarks of Wordcraft Internati onal Ltd.
As an Energy Star Partner, Lanier Worldwide,
Inc. has determined that this product meets the
Energy Star guidelines for energy efficiency.
© Lanier Worldwide, Inc. 1999 November
Printed in the U.S.A.
Page 3

Table of Contents
Chapter 1 - Introduction
Introduction to the 2001 and 2002 Units.....................................................1-1
2001/2002 Model Differences* ......................................................1-1
How to Use This Manual ................................................................1-1
Agency Certification ......................................................................1-1
Important Safeguards ................................................................................1-2
Multi-Tasking ...........................................................................................1-4
Machine Components................................................................................1-5
Control Panel Layout .....................................................................1-8
Definition of Display Symbols .......................................................1-12
Table of Contents
Chapter 2 - Basic Operations
Sending a Document .................................................................................2-1
Using Memory Transmit .................................................................2-1
Memory Overflow Transmit ............................................................2-2
Dialing Methods........................................................................................2-7
Receiving a Document...............................................................................2-8
Auto Receive ................................................................................2-8
Making Copies........................................................................................ 2-12
Chapter 3 - Advanced Facsimile
Using the Function Menu ...........................................................................3-1
Broadcast ................................................................................................3-2
Timer TX (Delay Transmission) ...................................................................3-3
Mailbox TX ..............................................................................................3-4
Print Mailbox RX.......................................................................................3-5
Polling TX ................................................................................................3-6
Polling RX ................................................................................................3-7
Continuous Polling RX ...............................................................................3-7
Relay Initiate ............................................................................................3-8
Using Combination Dial..............................................................................3-9
Using TEL DIR ........................................................................................3-10
JOURNAL Key........................................................................................ 3-11
REPORT Key .......................................................................................... 3-12
Reports .................................................................................................3-13
Transmit Message Confirmation ....................................................3-13
Manual TX Report .......................................................................3-13
SCHEDULE Key ......................................................................................3-14
PIN CODE Key ........................................................................................3-15
2 SIDED TX. Key ....................................................................................3-16
HOOK Key .............................................................................................3-17
i
Page 4

Table of Contents
Chapter 4 - Facsimile Programming
Accessing The User Program Area.............................................................. 4-1
Menu Navigation .......................................................................... 4-1
Menu Structure ............................................................................ 4-2
Initial User Data ....................................................................................... 4-5
Entering The Date & Time ............................................................. 4-5
Entering Your Telephone Number ................................................... 4-5
Entering Your User Name .............................................................. 4-6
Setting Department PW ................................................................. 4-6
Machine Operations.................................................................................. 4-7
Setting Your Fax Line Type (PSTN/PBX) .......................................... 4-7
Setting the Buzzer (Ring) Volume ................................................... 4-8
Setting the Line Monitor (Speaker) Volume ...................................... 4-8
Setting the Power Save Mode ........................................................ 4-9
Selecting Remote Monitor ............................................................4-10
Selecting Remote Program ............................................................4-10
Setting the Correct Dialing Type (Tone/Pulse) .................................4-11
Document Scan Settings..........................................................................4-12
Resolution ..................................................................................4-12
Scan Contrast .............................................................................4-13
Print Density ...............................................................................4-13
Reduction Copy ...........................................................................4-14
Rec. Paper Size ...........................................................................4-14
Auto Cassette Sel. ......................................................................4-15
Dial Registration......................................................................................4-16
One-Touch Keys ..........................................................................4-16
Speed Dial Keys ..........................................................................4-17
Group Dial Keys ..........................................................................4-18
Program Dial ...............................................................................4-19
Batch TX ....................................................................................4-22
TX Operation..........................................................................................4-23
Default TX ..................................................................................4-23
Closed Network TX .....................................................................4-24
Fax Forwarding ...........................................................................4-24
RX Operation..........................................................................................4-27
Memory RX Mode .......................................................................4-27
Two Page Print ...........................................................................4-29
Reduction RX ..............................................................................4-30
Mailbox RX .................................................................................4-30
Closed Network ..........................................................................4-30
RX Mode ....................................................................................4-32
Footer (Receive Time Print) ...........................................................4-32
Line 2 Setting .........................................................................................4-35
Line 2 Fax No. ............................................................................4-35
TX Line Priority ...........................................................................4-36
Line 2 Tone / Pulse ......................................................................4-36
Reports..................................................................................................4-37
Activity Report ............................................................................4-37
Reserv. (Reservation) Report .........................................................4-37
TX Results Report .......................................................................4-38
RX Results Report .......................................................................4-38
Broadcast Report .........................................................................4-39
Toner Low Report ........................................................................4-39
ii
Page 5

Table of Contents
Setting the Department Number and Password (PW) ............................1
Assigning a Private Mailbox ID and Password (PW) ..............................1
Editing the RX in Memory Password (PW) ...........................................1
Chapter 5 - PC Printing & Scanning
Set Printer (2002 Only) .............................................................................5-1
Symbol Set ..................................................................................5-2
Font Number ................................................................................5-3
Print Font .....................................................................................5-4
GDI Enhance ................................................................................5-5
Memory Allocations ..................................................................................5-6
Standard Memory Configuration Choices ..........................................5-6
PCL4 Emulation (2002 only).......................................................................5-7
Connecting to a Computer .............................................................5-7
Basic Operation ............................................................................5-8
Using the Manual Feed Tray to Print ................................................5-8
Printing Envelopes .........................................................................5-8
Printer Messages ......................................................................................5-9
Auto-Select Paper Tray .................................................................5-9
GDI Printer Feature .................................................................................5-10
PC Requirements ........................................................................5-10
Installing The Printer Driver ..........................................................5-11
Printing with your GDI Print Function .............................................5-14
Getting Help ...............................................................................5-14
Scanning (TWAIN Driver Option)...............................................................5-15
PC Requirements for the TWAIN Option ......................................... 5-15
Installing the TWAIN Driver ..........................................................5-15
Scanning ....................................................................................5-16
Scanner Troubleshooting ..............................................................5-17
Class 1 Fax/Modem ................................................................................5-18
Class 1 Interface .........................................................................5-18
PC Requirements ........................................................................5-18
Installing the PC-Fax Software ......................................................5-19
Using Class 1 Mode ....................................................................5-19
Receiving a Fax in Class 1 Mode ...................................................5-20
Scanning in Class 1 Mode ............................................................5-20
Chapter 6 - Maintenance & Supplies
Loading the Paper .....................................................................................6-1
Paper Tray ...................................................................................6-1
Optional PFU Paper Cassette ..........................................................6-2
Clearing Paper Jams..................................................................................6-4
Document Jams ............................................................................6-4
Paper Jams ..................................................................................6-5
Changing Toner Cartridge ..........................................................................6-9
Changing Drum Cartridge.........................................................................6-10
Maintenance ..........................................................................................6-12
Cleaning Your Fax Unit ................................................................6-12
Cleaning the Scanner ...................................................................6-12
Cleaning the White Roller .............................................................6-13
iii
Page 6

Table of Contents
Chapter 7 - Troubleshooting
Troubleshooting ....................................................................................... 7-1
Error Indication Types ................................................................... 7-1
Error Messages ............................................................................ 7-2
Troubleshooting Tips .................................................................... 7-5
Chapter 8 - Specifications
Physical Specifications.............................................................................. 8-1
Electrical Specifications............................................................................. 8-1
Operational Specifications ......................................................................... 8-2
Facsimile Specifications ............................................................................ 8-4
Optional Accessories Specifications............................................................ 8-4
Class 1 Interface (RS-232) ............................................................ 8-4
LAN Interface (Print Server)(2002 Only) .......................................... 8-5
Environmental Specifications ..................................................................... 8-7
Lithium Battery Statement......................................................................... 8-7
Appendix A - Unpacking & Installation
Unpacking............................................................................................... A-1
Main Carton Contents ................................................................... A-1
Accessories Box Contents ............................................................. A-2
Setting Up Fax Unit .................................................................................. A-3
Removing the Packing Materials ..................................................... A-3
Installing the Drum Cartridge .......................................................... A-3
Installing the Toner Cartridge ......................................................... A-4
Installing the Paper Exit Tray .......................................................... A-5
Installing the Document Exit Tray ................................................... A-5
Installing the Document Feed Tray .................................................. A-5
Attaching the Power Cord and Telephone Cords ............................... A-6
Attaching the PC Cables ............................................................... A-7
Installing the Handset ................................................................... A-7
Loading Paper .............................................................................. A-8
Turning Power ON ........................................................................ A-9
Final Checkout....................................................................................... A-10
Preparing Your Fax Unit .............................................................. A-10
Loading a Document ................................................................... A-11
Setting Up the (Optional) PFU.................................................................. A-12
Unpacking the PFU ..................................................................... A-12
Installing the PFU ....................................................................... A-13
Loading the Cassette .................................................................. A-14
Appendix B - Safety & Agency Certifications
Energy Star ............................................................................................. B-1
Laser Safety ............................................................................................ B-1
Internal Laser Radiation (For all Users) ............................................. B-1
For United States Users ................................................................ B-1
For Users In Other Countries .......................................................... B-2
FCC Safety Statement .................................................................. B-2
FCC Requirements.................................................................................... B-3
Label Identification ....................................................................... B-3
Type Of Service ........................................................................... B-3
iv
Page 7

Table of Contents
Telephone Company Procedures .....................................................B-3
If A Problem Arises .......................................................................B-4
FCC (For U.S.A. Users)..............................................................................B-5
Warning For Setting Headers and Footers .........................................B-7
User Instructions (For Canada Users)...........................................................B-8
Interference-Causing Equipment Standard (ICES-003 ISSUE 2) ............B-8
Interference-Causing Equipment Standard (ICES-003 ISSUE 2) ............B-8
IC CS-03-Telecommunication Device ...............................................B-8
Hearing Aid-Compatibility (For U.S.A / Canada Users) ........................B-9
Agency Certifications ................................................................................B-9
CE Mark ......................................................................................B-9
Ozone Release (For all Users) .....................................................................B-9
Warning Labels.......................................................................................B-10
Appendix C - Glossary
Glossary ..................................................................................................C-1
Index
Terms ....................................................................................................IX-1
New Machine Warranty............................................................... 5
v
Page 8

Table of Contents
vi
Page 9

Introduction
Chapter 1
Page 10

Chapter Overview
This chapter tells you about safety precautions and shows you the copier’s main
components. Contained in this chapter are:
Important Safeguards
•
Multi-Tasking
•
Machine Components
•
Control Panel
•
Definition of LCD Symbols
•
Introduction
Page 11

Introduction to the 2001 and 2002 Units
Introduction to the 2001 and 2002 Units
The 2001 is a fully featured Facsimile uni t. It has se veral opti ons that a llow its capa bilitie s
to be increased even more. The 2002 is a multi-funct ion device that in addition to the Fax
capability, allow you to Print, S can and Copy.
2001/2002 Model Differences*
Item 2001 2002
PFU Tray Optional Optional
TEL/FAX Mode Yes No
Page Memory 1 MB 6 MB
Dual Line Mode Optional Optional
Printing No Yes
Scanning No Yes
* Items listed above are for the standard configuration. For information on other options,
refer to the Specifications Chapter.
How to Use This Manual
This manual explains the functio ns and operation of the Lanier 2001 and 2002 units. It
also gives some troubleshooting tips as well as general precautions to be observed during
operations.
T o ensure the best performance and eff ective use of your unit, please read this manual
carefully from cover to cover. After you have read the manual, keep it near your Fax unit
for handy reference. It should be helpf ul in solving any operational questions you may
have.
This manual is written to cover the base machine with all the opti ons inst alle d. If your uni t
does not have these options installed, just skip that section. If you choose to upgr ade your
unit in the future, you will already have the necessary information. Call your Sales or
Service Representative to order options and schedule their installation.
Agency Certification
Your 2001/2002 unit complies with FCC rules, DOC requirements, and other agency
certification requirements. Refer to the Appendix section of this manual for details.
These uni ts are En ergy St ar qu alif ie d.
Introduction 1 - 1
Page 12

Important Safeguards
Important Safeguards
Always follow these important safeguards:
Read all of these instructions before using your unit.
1
Do not use this unit near water; for example, near a bath tub, sink or swimming
2
pool.
A void using th e tele phone during a n electric al stor m. There may be a remote risk of
3
electric shock from lighting.
Do not use the telephone to report a gas leak in the vicinity of this unit.
4
Use only the power cord and batteries indicated in this manual. Do not dispose of
5
batteries in a fire. They may explode. Check with local codes for possible special
disposal instruction.
Plug the power cord only into a 3-conduct or
6
(grounded) outlet rated for at least 15 amperes.
Never ground the power cord to a gas pipe or
•
a water pipe.
Keep the power cord away from hot surfaces.
•
Avoid using an extension cord if at all
•
possible. If you must use an extension cord,
use only a 3-conductor cord rated for at least
15 amperes . Cord s ra ted for le ss mig h t
overheat and become a fire hazard.
Do not operate your unit if any part of it is
•
damaged, or if any part has been dropped, until it is checked by a qualified
technician.
Do not install your unit in areas that are:
7
Damp or humid
•
Exposed to direct sunlight
•
Extremely dusty
•
Poorly ventilated
•
Subject to extre me t em perat u re or hum id ity chan ges . For ex am p l e, do n’t locate
•
your copier near an air conditioner or heater.
Install your unit with space arou nd it to provi de adequate ventilation.
8
Do not place the unit near a television or radio. If the unit is too close it may inter-
9
fere with the recept i on.
1 - 2 Introduction
Page 13

Important Safeguards
Place your unit on a firm, level surface.
10
Do not place heavy objects on the ADF (Automatic Document Feeder) or the Exit
11
Tray.
Do not disassemble your unit or try to repair it yourself, other than as instructe d in
12
this Opera tor Gu i de. Ca ll an Auth o rized Ser vice Center for all nece ssary repairs.
Incorrec t assembly can cause el ectri ca l haz ards and p ossi bl e da mage to the
machine.
Introduction 1 - 3
Page 14

Multi-Tasking
Multi-Tasking
The 2001 and 2002s can perform multipl e operations at the same time. One operation can
run in the foreground, while another runs in the background. For example, you can scan,
copy, or print documents into memory for later transmission while receiving a fax.
Operation Concurrent Operation Result
Copy Fax Reception
GDI/PCL4 Printing
(2002 only)
Memory Fax
transmission
PC-Fax Transmission
or Reception
Fax Reception Copy
GDI/PCL4 Printing
(2002 only)
Fax Transmission
Fax
Transmission
PC-Fax
Reception
Copy
GDI/PCL4 Printing
(2002 only)
Copy
The received fax is stored in memory, and
prints once copy operation is complete.
Print job is stored in memory, and prints once
copy operation is complete.
Faxing begins while copying continues.
Faxing begins while copying continues.
The Copy job will be stored in memory, then
printed out when reception (RX) is complete.
Print document during reception.
Scans document into memory for transmission.
The available memory is shared by both jobs
and their operations happen simultaneously.
The document will be printed from the PC
during Fax operation.
Copy operation starts by scanning document
into memory, and prints as fax is being
transmitted.
Parallel Port Printing
(2002 only)
Fax Transmission
PC-Fax
Transmit
1 - 4 Introduction
Copy
Parallel Port Printing
(2002 only)
Fax Transmission
Print operation occurs while PC is receiving the
fax.
TX works when PC-Fax is complete. Scans
document into memory for transmission.
Copy operation starts by scanning document
into memory first, and prints as fax is being
transmitted.
Parallel Port can be used for printing during PCFAX operation.
Scans document into memory for transmission.
Page 15

Machine Components
External Components: Front
Machine Components
1Document Exit Tray
This tray catches th e orig inal
document after i t p asses th rough the
scanner.
2 Control Panel / Scanner Cover
The controls on the panel perform the
various faxing, copying, and printing
functions. Lift th is pa nel lif ts to
remove document feed jams.
3 Docum ent Feed Tray
Load your doc um e nt face down on this
tray for faxing or copying.
4 Document Alignment Guides
Adjust these Guides to fit the width of
your original documents.
7
5Paper Tray
You can load up to 250 sheets of Lettersize, A4, or Legal-size paper into the
standard Tray.
You can add another 500 sheets with
the optional Paper Feed Unit (PFU).
6 Bypass Feed Tray
You can feed single sheets of special
types of paper. i.e. pre-printed
letterhead & envelopes (2 002).
7Paper Exit Tray
This Tray catches the p ap er afte r
printing.
3
4
2
1
5
6
Introduction 1 - 5
Page 16
Machine Components
External Components: Rear
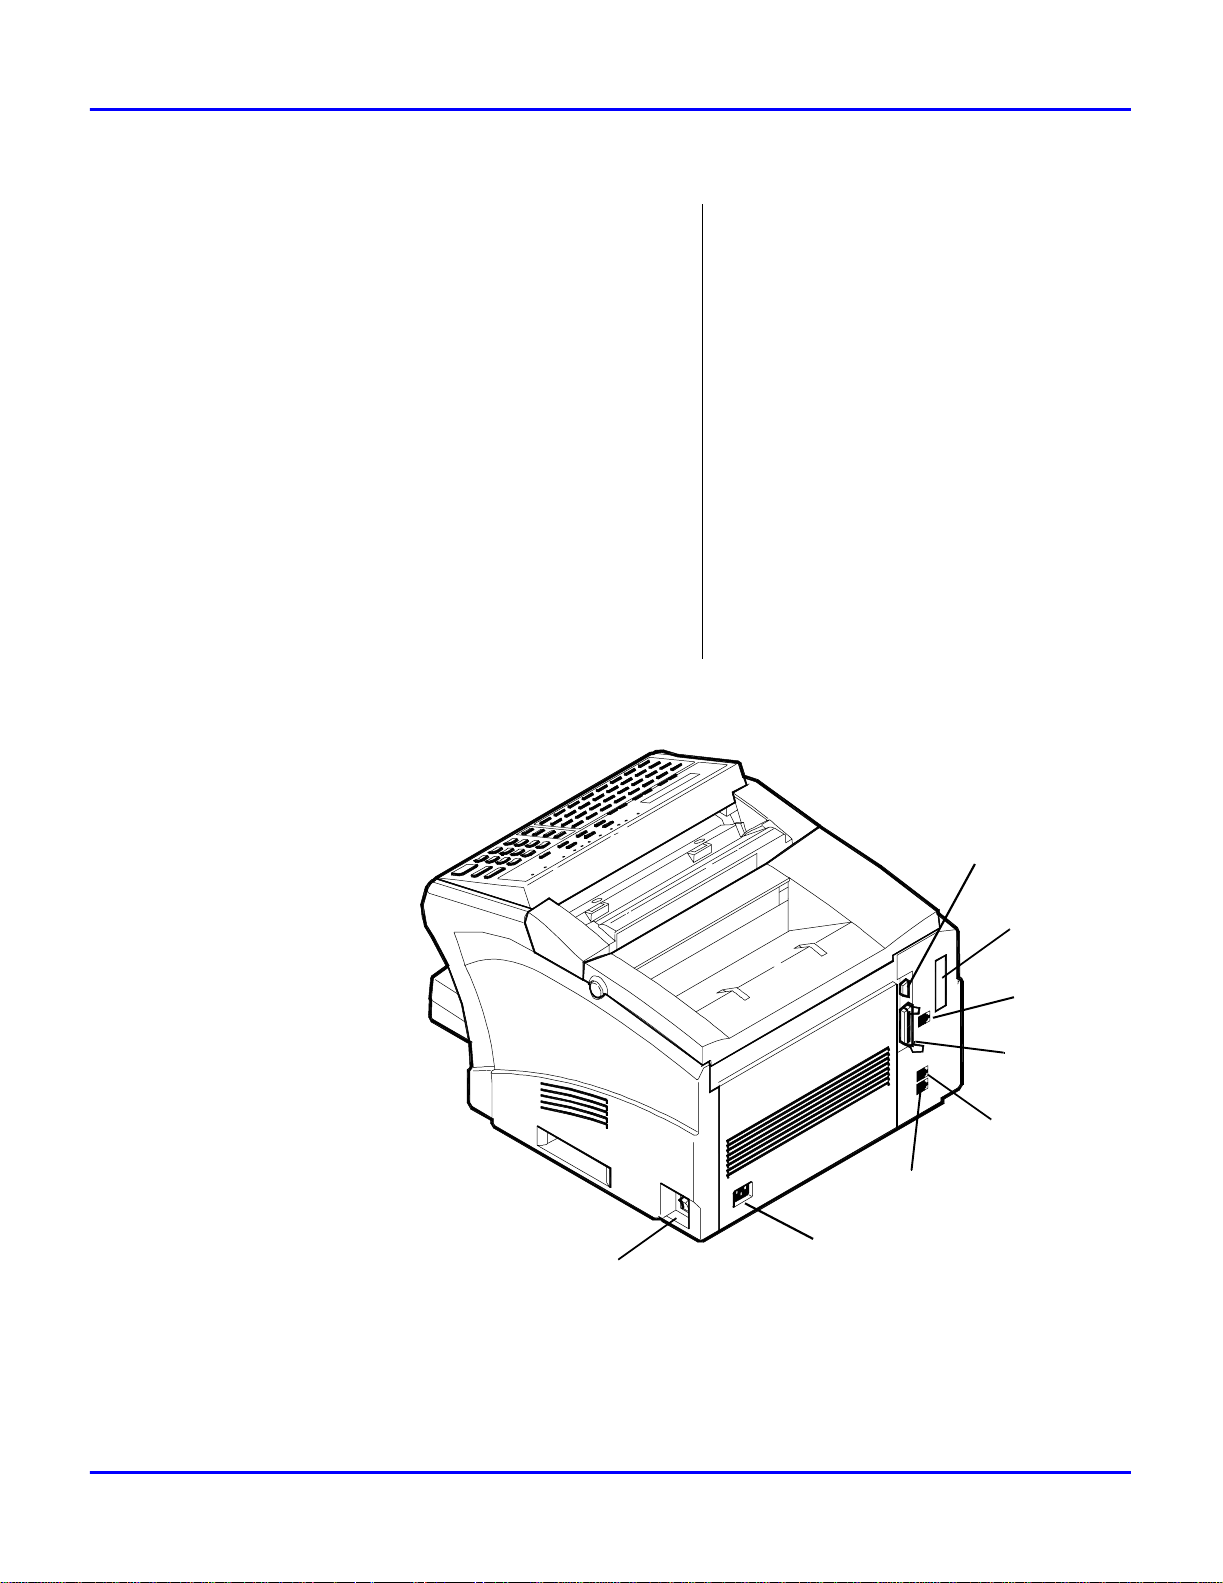
8 AC Power Connect or
The AC Power C ord plugs in he re.
9 Main ON/OFF Switch
Use to turn the yo ur unit ON and OFF.
10 Telephone Line Connector
Plug the telephone cable from this
connector into the wall socket of the
telephone line.
11 Telephone Hand Set Connector
-or- External Line
Use this conn e ctor to plug in the
telephone cord from the telephone set.
12 Parallel Connector
Provides connecti on bet ween this unit
and a host comput er for GDI printing
or PCL4 or 5e printing.
13 Serial Connector (RS232)
Provides connection between this unit
and a host computer for Class 1 PC
faxing and Twain-compliant scanning.
This interface can also be us ed fo r
printing.
14 Network Connecto r (Opti o nal NIC
Card)
Provides connection between the unit
and the Network.
15 Dual Line Connector (Optional)
Plug the telephone cable from this
connector into the wall socket for the
second line.
13
14
15
12
11
10
8
9
1 - 6 Introduction
Page 17
External Components: Internal and Optional
Machine Components
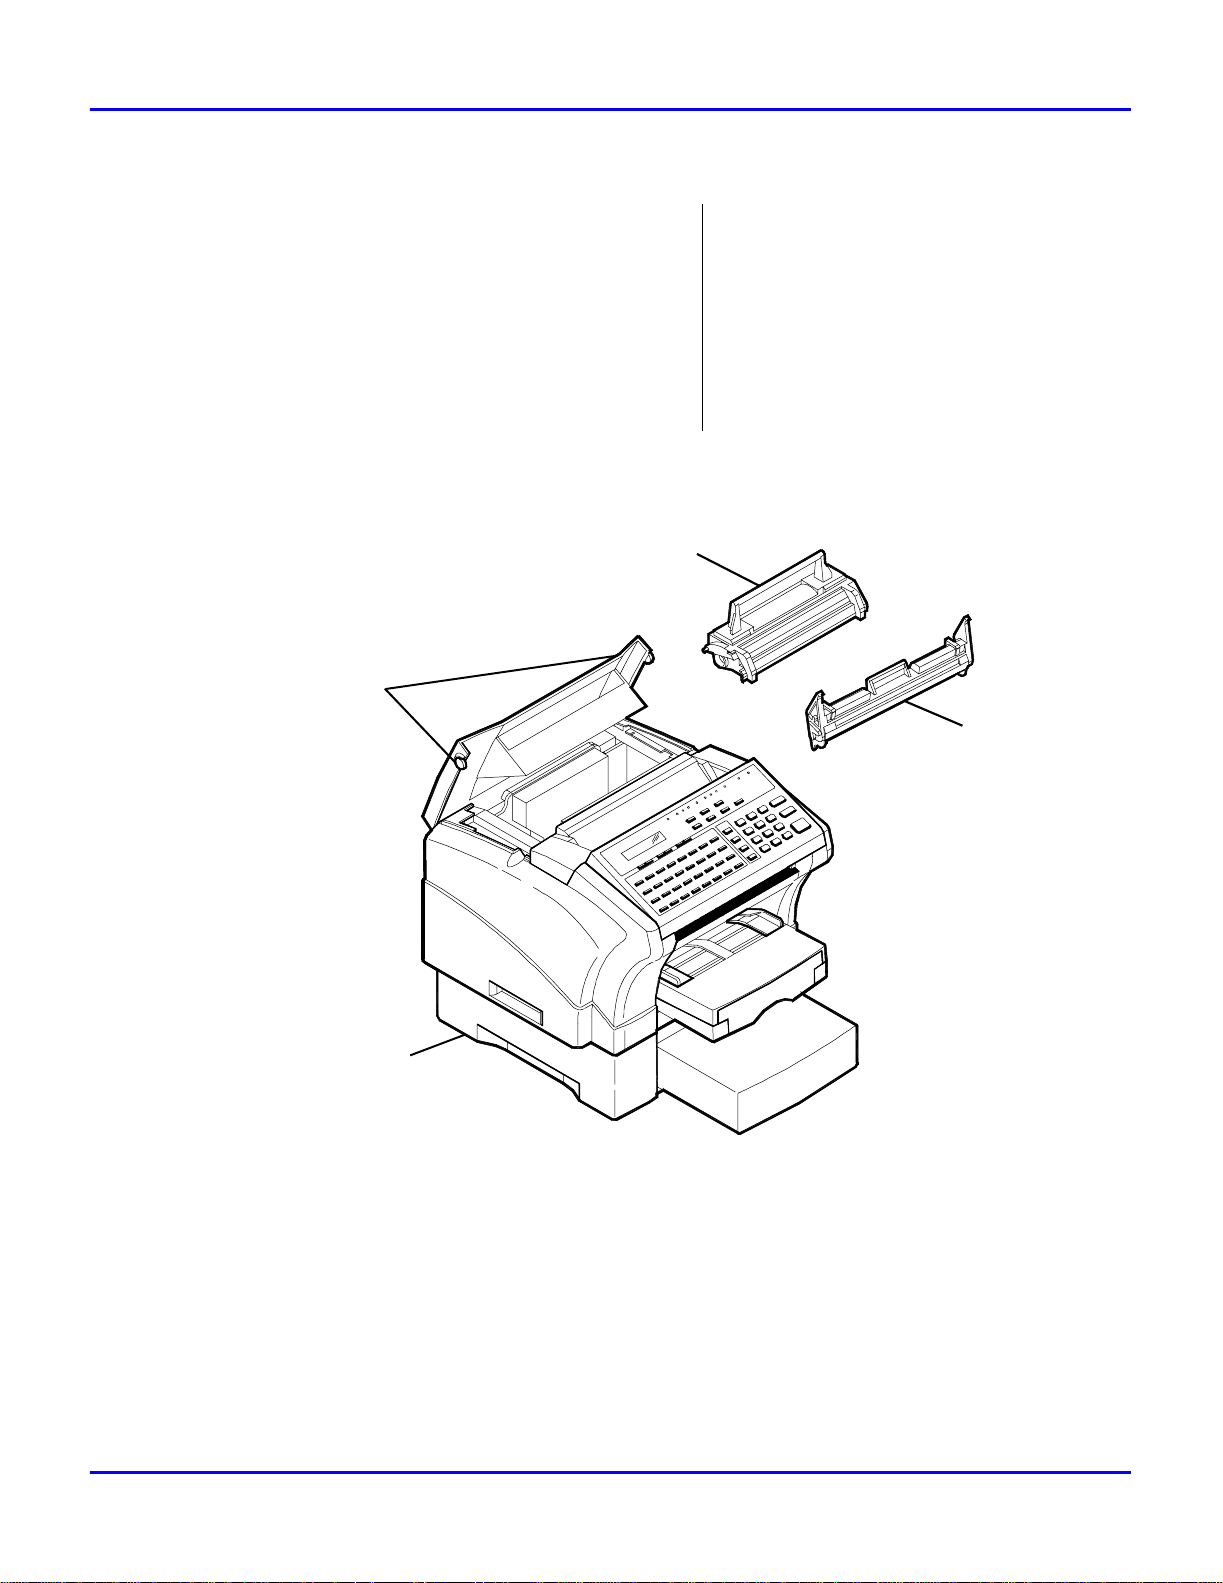
16 Top Cover / Co ver Release Buttons
Press these two buttons to open the
Top Cover to check and clear paper
jams, to change the Toner and Drum,
or to clean the interior of the unit.
17 Toner Cartridge
The T o ner Ca rtrid ge c ontai ns t he to ner
particles used in imaging.
17
16
18 Drum Cartridge
This Drum Cartridge transfers t oner to
the paper.
19 Paper Feed Unit (PF U) (Option al)
When installed, it permits your unit to
print up to 750 uninterrupted pages
without reloading pa per. (750 pages of
standard weight Letter/A4 size paper.
18
19
Introduction 1 - 7
Page 18

Machine Components
Control Panel Layout
1. Display
1
2 SIDED TX.
E
M
PIN DELETE
06
38
F
14
46 47
NO
22
54
VWTU
30
62
PROGRAM
FUNCTION
01
02
03
04
33
34
A
09
41
I
17
49
25
57
Y
35
B
10
18
50
26
58
C
11
4342
J
K
19
51
SRQ
27
59
Z
+
05
36
37
D
12
13
4544
L
20
21
52
53
28
29
60
61
-/&
STD
/2 SIDED TX.YES NO CODE
07
39
G
15
23
55
31
63
2456
FINE
EX-FINE
PHOTO
LIGHT NORM
>
TEL DIR
REDAIL
/PAUSE
HOOK
TYPE ORG.
REPORT
RESOLUTION
SCHEDULE
<
08
40
H
16
48
P
24
56
X
32
64
PHOTO
JOURNAL
SPEED DIAL
Panel Description
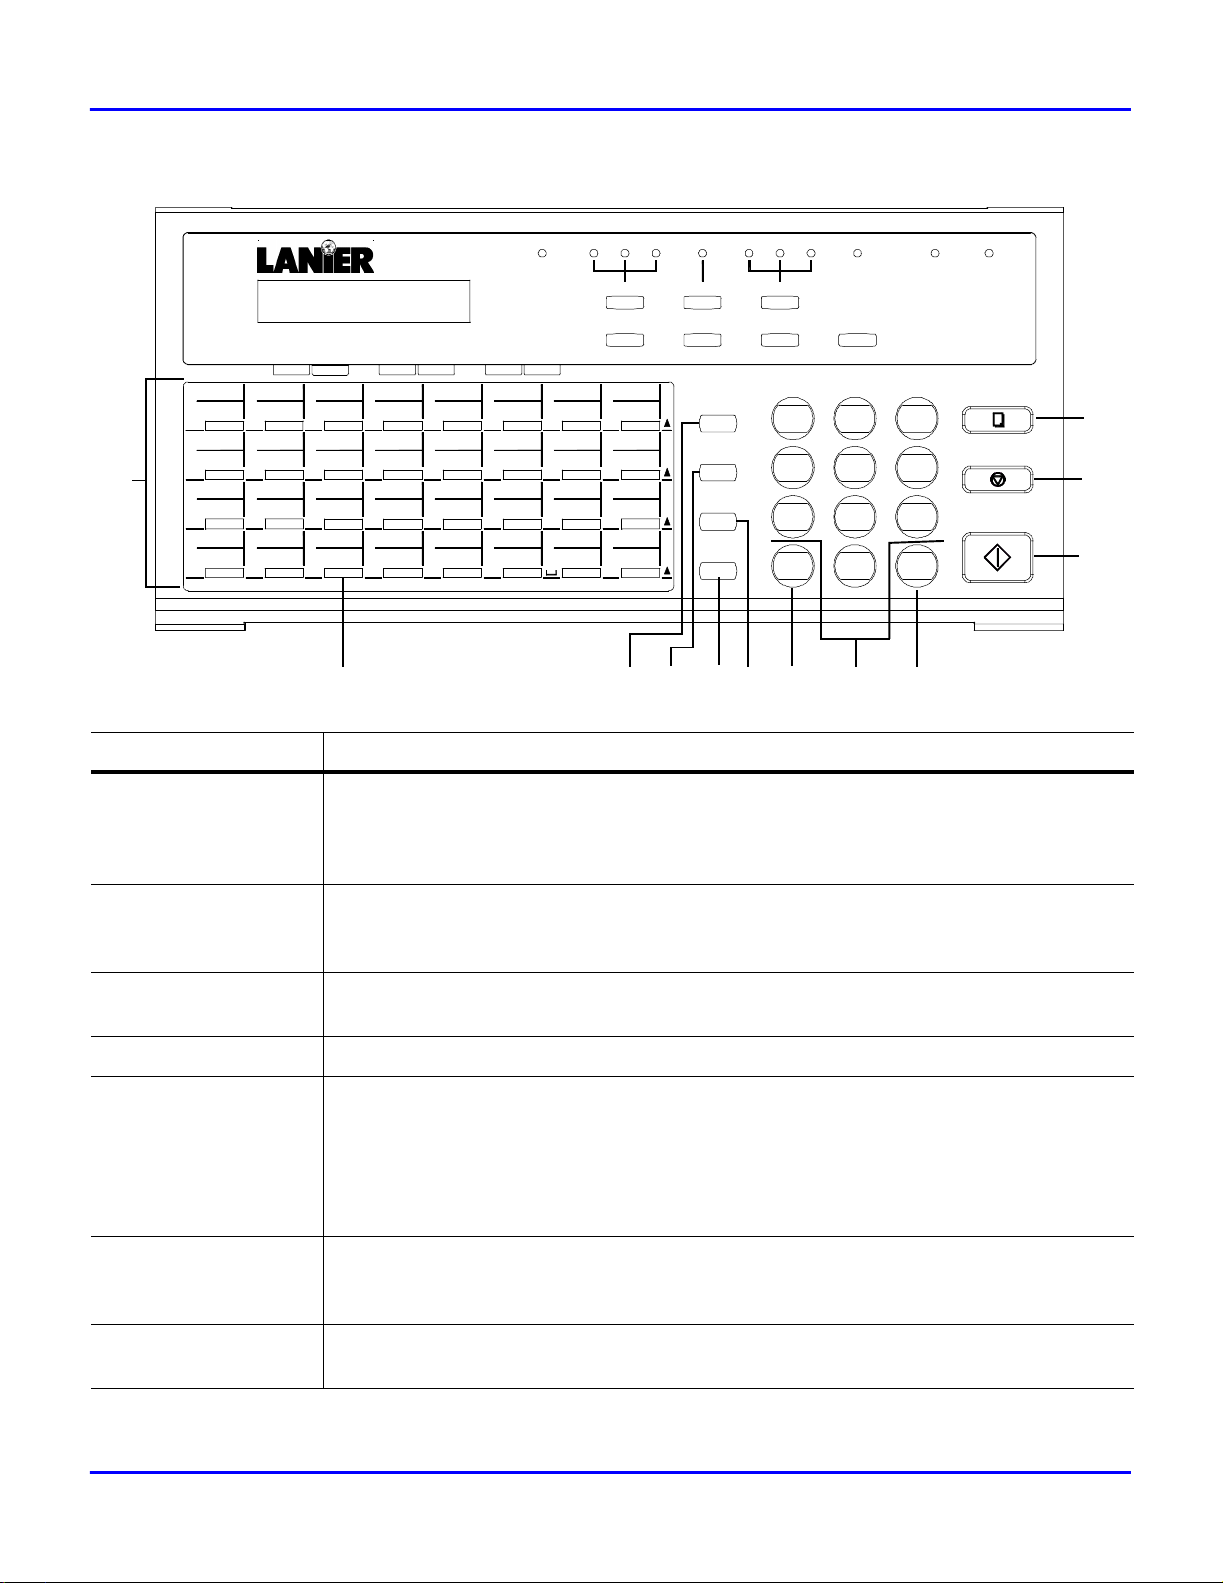
The LCD Display provides you with instructions and information about fax, copying,
printing, programming and operational functions.
3
MEM. TX. ALARM
DARK
MEM. TX.
<
ABC
TUV
OPER
2
JKL
5
0
GHI
PQRS
1
4
7
¡¯
AUTO RX.
<
DEF
MNO
WXYZ
3
6
98
COPY
STOP
START
#
2. Resolution Keys
3. Original Type Key
4. Memory TX Key/
Light
5. Auto RX Light
6. Alarm Light
Press this key to select the desired resolution for scanning:
Standard:
Fine:
Super Fine:
Photo:
Use for normal documents. This is the default.
Use for documents with fine lines or characters.
Use for very fine maps, drawings or extremely detailed originals.
Use for photographs or shaded drawings.
Press this key to select the type of original you are using:
Normal: Use this for most of the regular documents.
Light: Use for documents with very fine or light characters.
Dark: Use for documents that are dark.
Press this Key to turn Memory TX transmission ON or OFF.
When the Memory TX light is ON, it signifies that documents will be stored to
memory for transmission.
Memory TX Mode
ON:
ADF TX Mode
OFF:
This light indicates the receiving mode of the Facsimile:
The facsimile will receive documents automatically.
ON:
The facsimile will receive documents manually.
OFF:
The ALARM Light illuminates if there is a problem with the unit such as paper jam.
After the problem has been corrected or when the STOP Key is pressed, the light
turns OFF.
1 - 8 Introduction
Page 19

Machine Components
01
33
A
09
41
I
17
49
25
57
Y
Panel Description
7. Function Key
78 910 15
PROGRAM
FUNCTION
02
03
04
34
35
B
C
10
11
4342
J
K
18
19
51
50
26
58
SRQ
27
59
Z
+
05
36
37
D
12
L
20
52
53
28
60
61
-/&
11 141312
FINE
2 SIDED TX.
PIN DELETE
/2 SIDED TX.YES NO CODE
06
07
38
E
13
4544
M
21
29
39
F
G
14
15
46 47
NO
22
23
54
55
VWTU
30
31
62
63
STD
RESOLUTION
SCHEDULE
08
40
H
16
48
P
24
56
X
32
64
EX-FINE
PHOTO
PHOTO
JOURNAL
<
>
SPEED DIAL
TEL DIR
REDAIL
/PAUSE
HOOK
The FUNCTION Key allow access to the Function Menu (Broadcast, Timer TX,
Mailbox TX, Polling TX, Polling RX, Relay Broadcast, Cancel Reservation). Set
Functions by pressing the FUNCTION Key first and then selecting the desired
function using numeric keys or the FUNCTION Key.
LIGHT NORM
TYPE ORG.
REPORT
<
MEM. TX. ALARM
DARK
MEM. TX.
<
ABC
TUV
OPER
2
JKL
5
0
GHI
PQRS
1
4
7
¡¯
AUTO RX.
DEF
3
MNO
6
WXYZ
98
#
16
COPY
STOP
START
8. PROGRAM Key
9. YES Key
10. NO Key
11. Pin Code Key
12. 2-Sided TX/Delete
13. Schedule Key
14. Journal
15. Report Key
16. Arrow Keys
( )
Press the PROGRAM Key to enter the set menu and program your desired function
using either numeric keys or the arrow on the display.
The YES Key is used to accept the selections made under PROGRAM and FUNCTION
menus.
The NO Key is used to reject the selections made under the PROGRAM and
FUNCTION menus.
This key is used to input personal identification number for some telephone systems
when you dial an outside number.
This key a dual purpose key. It controls 2-sided TX scanning. When in a Program
mode, it is used to Delete an entry.
Press this key to view the transaction in memory file, such as memory transmission
or polling.
Press this key to view the transaction result the same as in an activity report. This
shows the session number, remote ID or dial number and result.
This key is used to choose your desired report, press YES to print out the report if
you need.
Used to move cursor to the right or left one position or to scroll through the menu.
Use the Key to enter ITU-T Sub-address in setting One-Touch or Speed Dial Keys.
Introduction 1 - 9
Page 20
Machine Components
2 SIDED TX.
STD
FINE
EX-FINE
PHOTO
LIGHT NORM
MEM. TX. ALARM
DARK
AUTO RX.
FUNCTION
01
02
33
34
17
A
09
41
17
49
25
57
Y
B
10
I
J
18
50
26
58
Z
Panel Description
17. One-Touch Keys
PROGRAM
03
35
C
11
4342
K
19
51
SRQ
27
59
+
RESOLUTION
SCHEDULE
PIN DELETE
/2 SIDED TX.YES NO CODE
04
05
36
37
D
12
L
20
52
53
28
60
61
-/&
06
07
38
E
13
4544
M
21
29
39
F
G
15
14
46 47
NO
22
23
54
55
VWTU
30
31
62
63
<
08
40
H
16
48
P
24
56
X
32
64
PHOTO
JOURNAL
SPEED DIAL
>
TEL DIR
REDAIL
/PAUSE
HOOK
TYPE ORG.
REPORT
<
GHI
PQRS
MEM. TX.
<
ABC
1
4
TUV
7
OPER
¡¯
DEF
2
JKL
5
0
MNO
WXYZ
3
6
98
#
COPY
STOP
START
24 252319 20 22 2118
The One-Touch Keys are used to store frequently dialled numbers. Any of the Keys
can be assigned as One-Touch Keys or Group Dial Keys. In addition, the last eight
keys can be used as Program Keys. Each Group Key can hold up to 50 One-Touch or
Speed Dial numbers.
26
27
28
18. The “+” Key
19. Speed Dial Key
20. TEL DIR Key
21. Redial/Pause Key
22. Hook Key
23. “*” Key
Used to register a combination dial in a One-Touch or Speed Dial Key, This symbol
must follow the initial number and be followed by a number stored in the One-Touch,
Speed Dial Key or entered via the Ten-Key Pad.
Use this to initiate speed dialling. Press the SPEED DIAL key and your three-digit
code to start a transmission.
Use this key to find, by name, fax numbers previously stored.
Redial: Press this key to redial the last telephone number called.
Pause: Press this key to insert a pause in the number being stored. When you press
this key, a “P” is inserted within a number causing a 2.5 second delay when dialing.
This is useful if you must dial a prefix, such as 9 to pause briefly in order to access
an outside telephone line. (A “P” after a series of numbers adds 10 seconds to the
normal time the machine waits for a remote receiver to answer a call.)
Press this key to switch the unit to the telephone line for direct (manual) dial from
the machine’s keypad. When pressed first, it also allows you to hear the dialing
when using One-Touch, Speed Dial, etc.
Press the “*” Key for tone dialing while your unit is set for pulse dialing. (This key is
only effective when the HOOK Key is used.)
1 - 10 Introduction
Page 21

Panel Description
Machine Components
24. Keypad
25. “#” Key
26. Copy Key
27. STOP Key
28. START Key
These twelve keys work for the internal telephone in the fax unit just like the keypad
on regular touch tone phones. You can use the keypad to dial a remote unit directly
or to assign codes and telephone numbers to One-Touch and Speed Dial locations.
Press the “#” Key to access internal line or PSTN line when your unit is set for use
over a PBX line.
Press the COPY Key to initiate copying documents that are loaded on the Document
Feed Tray.
Use this key to stop copying, transmitting, dialling waiting to dial or scanning. You
can also press the STOP to return from any operation mode back to the standby
status.
Press the START Key to begin transmitting, scanning, copying or manual fax
reception.
Introduction 1 - 11
Page 22
Machine Components
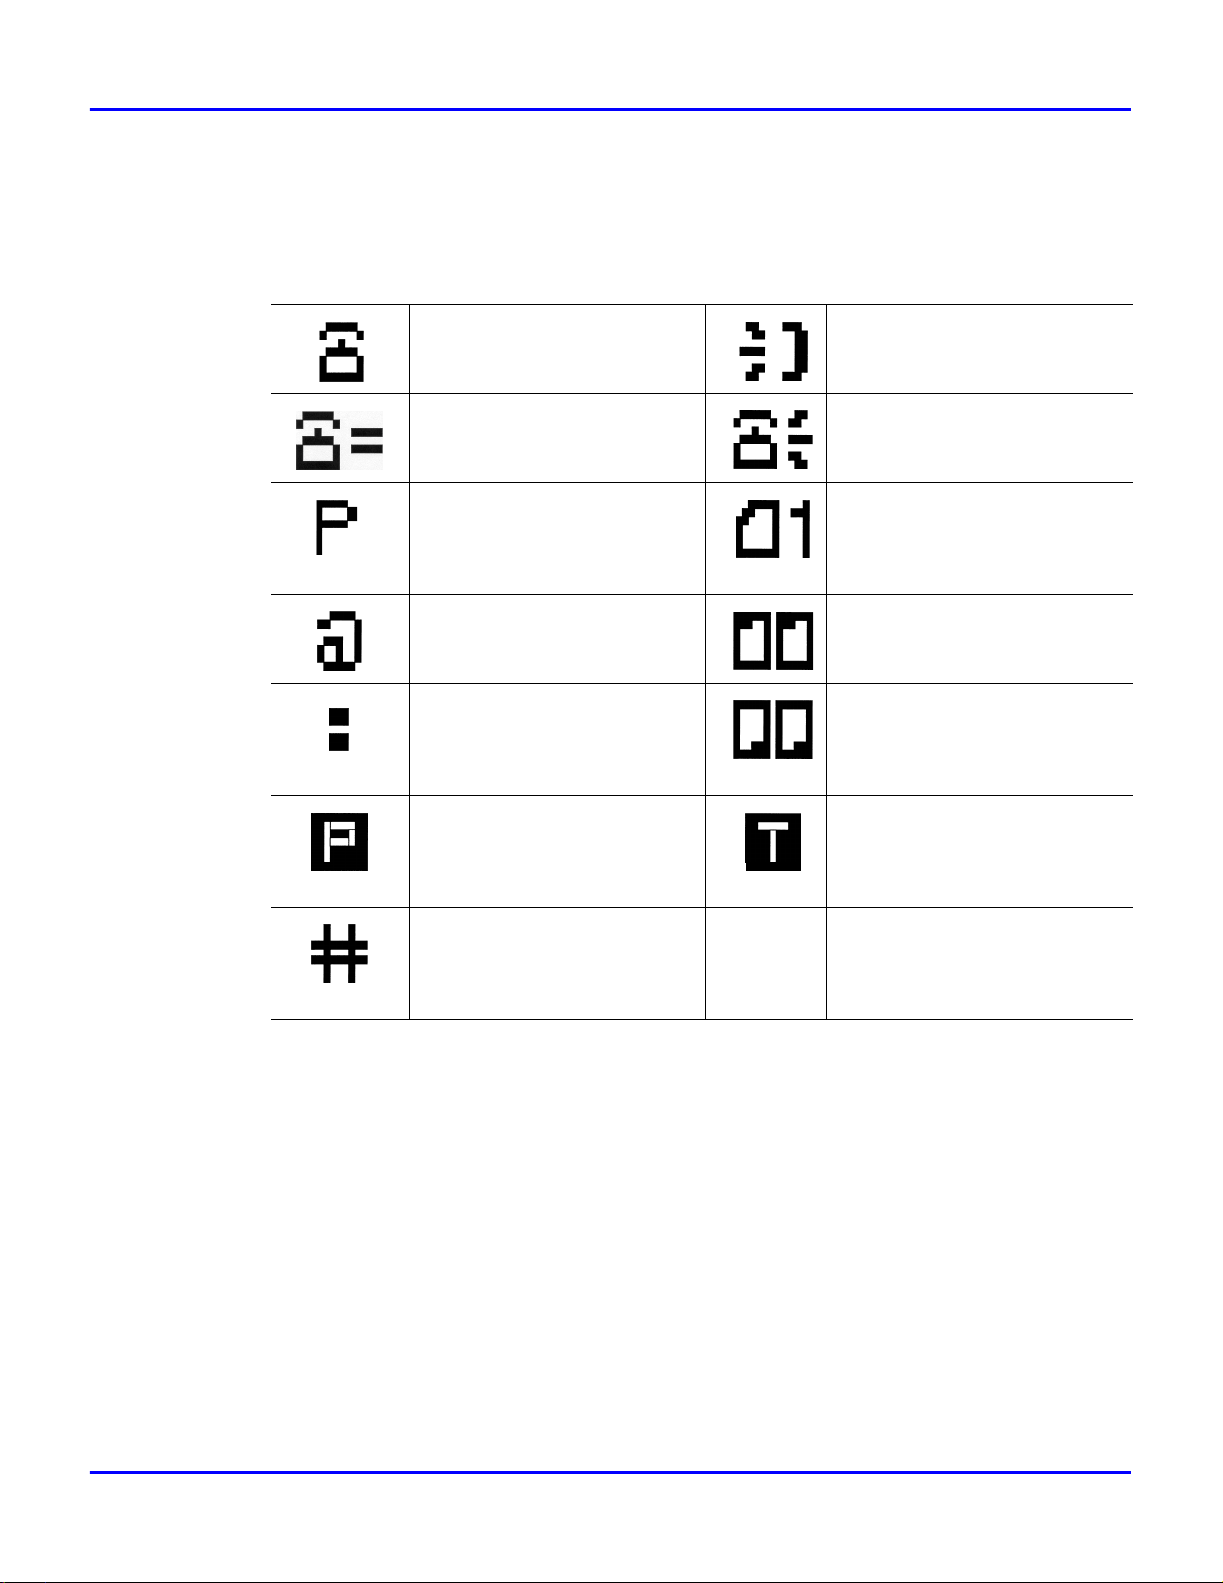
Definition of Display Symbols
The LCD Display shows the date, time of day, amount of memory available for use, fax
numbers, fax conditions and other information by means of either a message or graphic.
The follow table is a list of icons that can appear on the LCD Display.
Signifies a fax or phone
number.
Prompts you to enter a fax
number.
Indicates the pause function
is set into the destination’s
fax number.
Example 0P412641267
Indicates when the Internal
PBX function is set into the
destinations’s fax number.
Indicates when the Sub
Address is set into the
destination’s fax number.
Example: 4126412 :8108
Indicates that a polling
transmission function has
been stored in memory.
Shown while the remote fax
number is being rung.
Shown while the user’s local
fax is being rung.
Shows the number of pages.
Example: A single page.
Shown while a document is
being transmitted to the other
party.
Shown while a document is
being received from the other
party.
Indicates that a document to
be transmitted by the timer
transmission function has
been stored in memory.
Indicates when the External
PBX to PSTN function is set
into the destination’s fax
number
1 - 12 Introduction
Page 23

Basic Operations
Chapter 2
Page 24

Chapter Overview
This chapter expla ins the Basic Ope rati ons of the unit. It covers the basic fax oper ations
and how to make a copy .
The procedures in this chapt er assume that the necessary One-Touch Keys and other
remote unit information has been programmed. If your unit has not been programmed,
you will want to turn to Chapter 4 Programming and enter this data.
Basic Operations
Page 25
Sending a Document
NOV.07 12:34 100%
-SET DOC. FACE DOWN-
Note: To use some of the fax function s such as One-Touch and Speed Dial you
must first program your unit. If your unit has not yet been programmed, refer to
Chapter 4 Programming.
Using Memory Transmit
Since your fax unit provide s multi access capabilitie s, you can sc an documents into
memory for transmission, even if your unit is in the process of transmitting data from
memory, receiving data or printing a file from the PC.
Note: If the unit runs out of memory during scanning, you can use manual
transmission by pressing the HOOK key or by using the Direc t (Non-Memory)
Transmit pr ocedure.
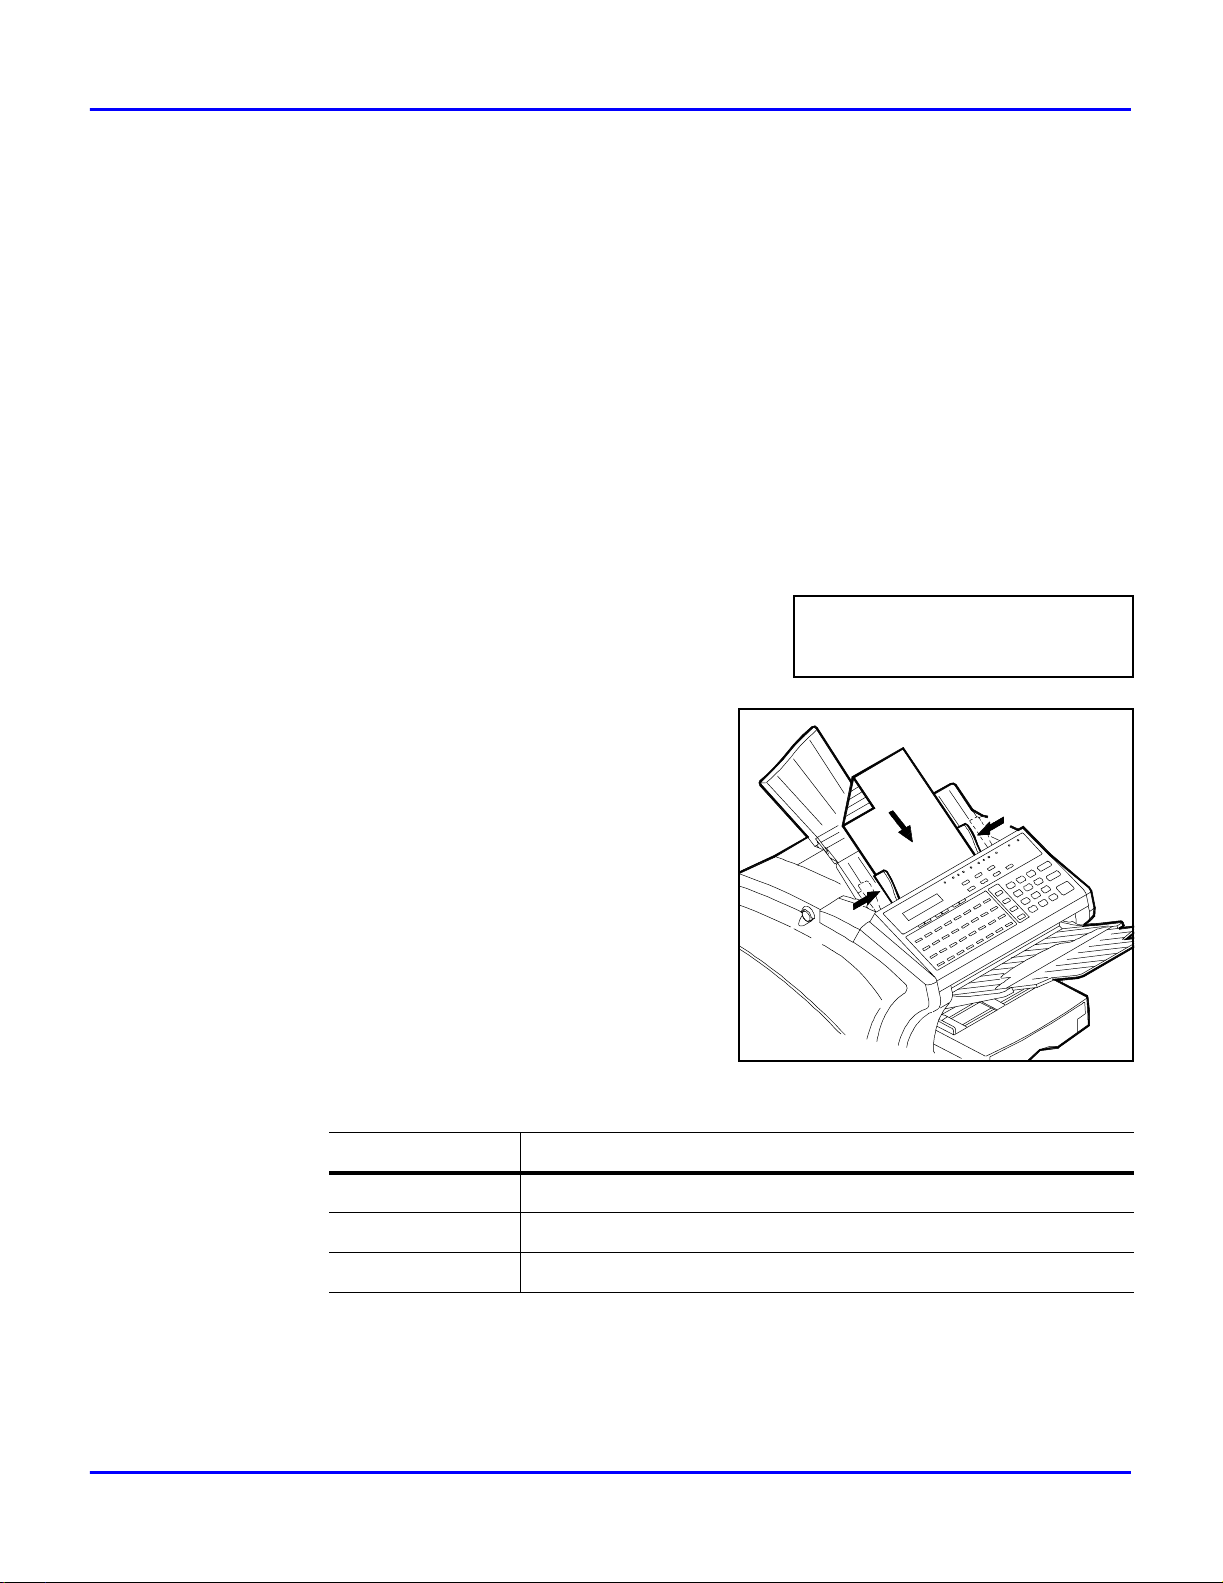
1
Place your document face down on the Document
Feed Tray.
Sending a Document
2
Adjust the Document Side Guides to the
edges of the document.
3
Use the TYPE ORG. Key to select the desired contrast:
Use this setting for this
Normal Regular documents. (Default)
Dark Documents that are dark.
Light Documents with very fine or light characters.
Basic Operations 2 - 1
Page 26
Sending a Document
T=ENTER FAX NO.
or FUNCTION
98
#
OPER
0
START
3
MNO
WXYZ
6
DEF
TUV
JKL
5
ABC
2
STOP
COPY
4
5
6
Use the RESO LU T I O N Key t o select the d esi red reso l utio n:
Use this setting for this
Standard Documents with standard size characters, such as typed
documents.
Fine Documents with smaller size characters, like newsprint.
(Copy Default)
Extra Fine Documents with very fine or light characters.
If you are sending a photograph, press the PHOTO Key for best results.
Enter the remote Fax number using the numeric
Key Pad.
The unit scans the document into memory and
•
sends it to the location you selected.
The unit automatically returns to standby mode when finished transmitting.
•
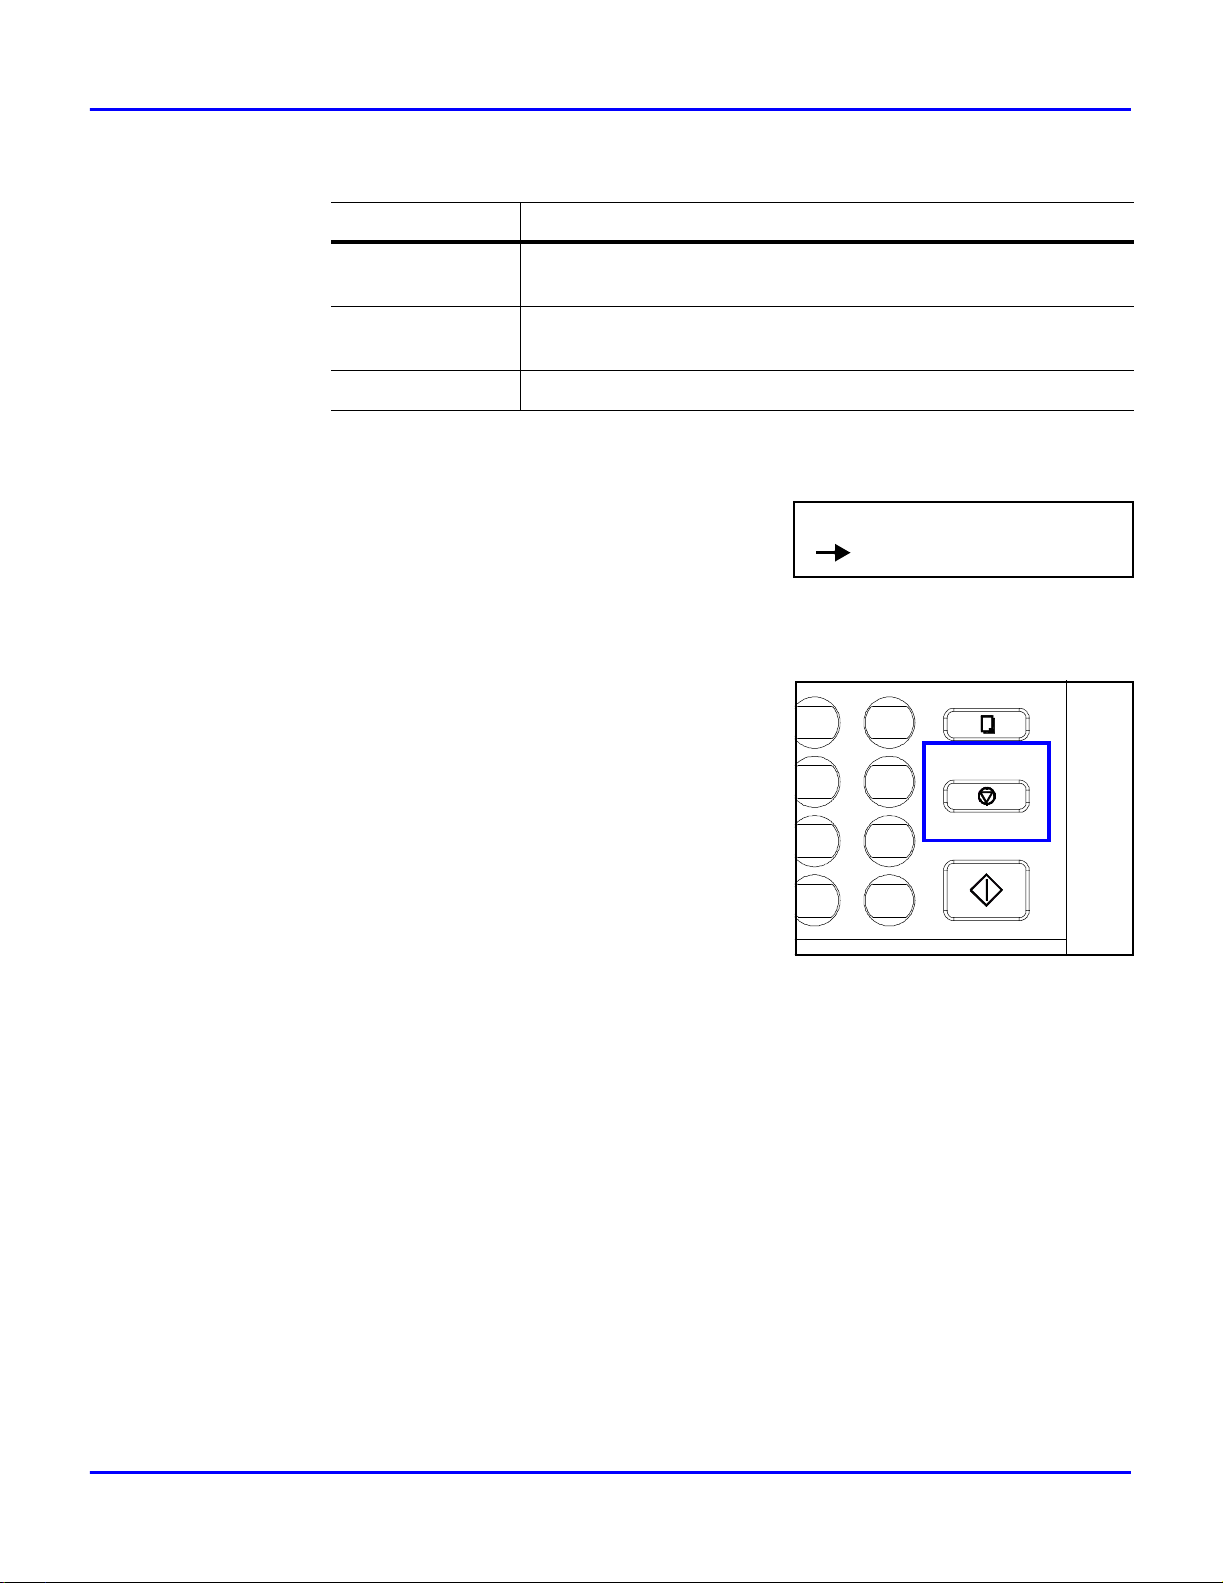
To stop a transmission, press the STOP Key.
7
Memory Overflow Transmit
Memory Overflow Transmit works the same as Memory Transmit with one special
exception. When your unit senses it will run out of memory of the next page of your
document is scanned, it will stop and ask if you wish to send what is alrea dy stored in
memory . When you answer YES, it dials the number and sends those pages. When
suff icient memory has been fr eed up, it begins scanning again. It then places a second call
automatically and sends the remainder of the pages. On a report all of this activity is
logged as one session.
2 - 2 Basic Operations
Page 27

Direct (Non-Memory) Transmit
DARK
TYPE ORG.
OTO
REPORT
<
OTO LIGHT NORM
MEM. TX.
<
AUTO RX.
MEM. TX. AL
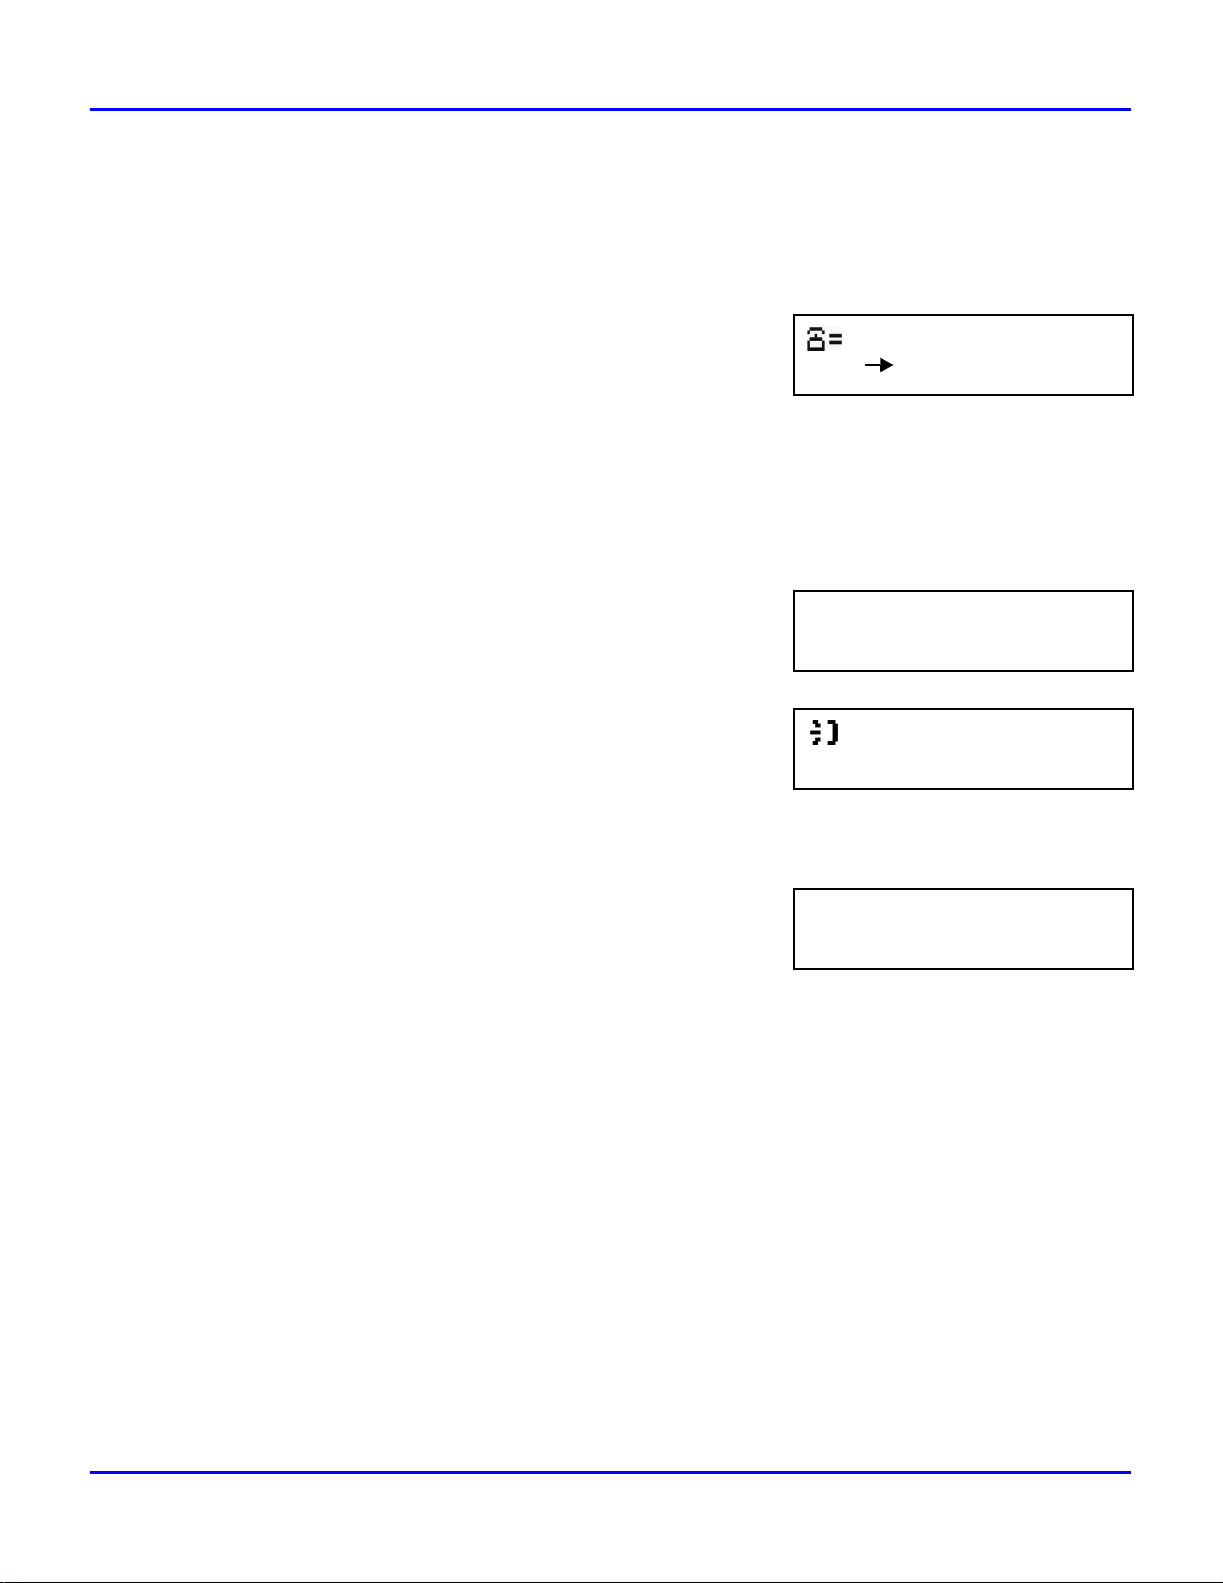
ENTER FAX NO.
or FUNCTION
TX CANCEL?
YES/CONTINUE=NO
Direct Transmis sion , from the A u tom at ic D oc ument Feeder (AD F) , bypas se s the uni t’s
memory . This can be used to transmit a fax when memory is full. If you antic ipate that
there might not be enough memory to scan a particular document into memory (for
example, lengthy documents), transmit it directly form the ADF. Be sure the LED for
Memory TX is OFF before starting transmission.
1
Place your document face down on the Document Feed Tray.
2
Adjust the Document Side Guides to the edges of the document.
3
Use the TYPE ORG. Key to select the desired contrast.
4
Use the RESO LU T I O N Key t o select the d esi red reso l utio n.
5
Press the MEM.TX Key to turn OFF th e memory
use.
Sending a Document
6
Enter the remote Fax number one of the following
methods: Speed Dial, One-Touch, Redial or
manually using the 10-Key Pad.
•
The unit scans the first page of the document
and sends it.
•
This continues until the last page has been sent.
•
The unit automatically returns to standby mode when finished transmitting.
7
To stop a transmission alr eady in progress, press
the STOP Key.
Basic Operations 2 - 3
Page 28
Sending a Document
ENTER FAX NO.
or FUNCTION
“TALKING*
(7776660000)
TX CANCEL?
YES/CONTINUE=NO
Using Handset
You can fax a document by dialing the number using the telephone handset. This function
can be used if you need to talk to the receiving party before transmission. When dialing
manually, documents will be transmitted without being stored in memory.
1
2
3
4
5
Place your document face down on the Document
Feed Tray.
Adjust the Document Side Guides to the edges of
the document.
Use the TYPE ORG. Key to select the desired contrast:
Use the RESO LU T I O N Key t o select the d esi red reso l utio n:
Lift the Handset and dial the number on the
Handset.
6
When the connection is made with the dial ed
number, press the START Key and hang up the
Handset.
•
The unit scans and sends the document.
•
The unit automatically returns to standby mode when finished truncating.
7
To stop a transmission alr eady in progress, press
the STOP Key.
2 - 4 Basic Operations
Page 29
Using the HOOK Key
7
HOOK
¡¯
TEL DIR
REDAIL
/PAUSE
GHI
PQRS
4
98
#
OPER
0
MNO
WXYZ
6
TUV
JKL
5
(7776665555)
-PUSH START KEY-
Use the HOOK dial sequenc e when it is necessary to listen to the “Handshake”. This is an
important troubleshooting aid to see if a transmission fault is phone related or not. It is
possible to dial a location using an y combination of TEN-Key, One T ouch Dial, or Speed
Dial Direct ori es .
1
Place your document face down on the Document Feed Tray.
2
Adjust the Document Side Guides to the edges of the document.
3
Use the TYPE ORG. Key to select the desired contrast:
4
Use the RESO LU T I O N Key t o select the d esi red reso l utio n:
5
Press the HOOK Key.
Sending a Document
6
Enter the remote fax number using one of the entry
methods.
7
listen until the remote fax unit answers, then press
the START Key.
8
To stop a transmission alr eady in progress, press
the STOP Key.
Basic Operations 2 - 5
Page 30

Sending a Document
Using Combination Dial
This is used when the number exceeds the 30 digit limit for a single location. The number
is split between two locations and the two are automatically linked when the first of the
two is used. It is possible to input dialing numbers continuously. You can enter another
One-Touch, Speed Dial or Ten Key followed by the combination dial numbers (phone
numbers last di gits is ‘+’ in One Touch or Speed Dial Key). The telephone number limit is
30 digits.
1
2
3
4
5
Place your document face down on the Document Feed Tray.
Adjust the Document Side Guides to the edges of the document.
Use the TYPE ORG. Key to select the desired contrast:
Use the RESO LU T I O N Key t o select the d esi red reso l utio n:
Press a One-Touch Key.
•
The One-Touch number should have a “+” at the end indicating an additional
Key has been programmed to extend the length of the number.
6
Press the second One-Touch key contai ning the additional numbers and press
START.
•
The unit scans the document into memory and sends it to the location you
selected.
•
The unit automatically returns to standby mode when finished transmitting.
7
To stop a transmission, press the STOP Key.
2 - 6 Basic Operations
Page 31

Dialing Methods
You can use the following methods to dial a remote facsimile number from your unit.
Use this setting for this
1. Key Pad Dial Dial the number of the remote facsimile using the numeric
2. One Touch Dial Press a ONE TOUCH Key. Its number will be displayed and the
3. Speed Dial Press the SPEED DIAL Key and enter a three-digit dial number
4. Group Dial Press a ONE-TOUCH Key. Any One-Touch Key can be
Dialing Methods
keypad. You can also use the Arrow Key to correct any
mistakes. (A maximum of 30 digits are allowed, including the
“PAUSE” (P).
unit scans the document and dials the number automatically.
See the Advanced Operations.
from the keypad. The Speed Dial number is shown on the
display. The unit scans the document and dials the number
automatically.
programmed for Group Dialing. The Group Name is shown on
the display. The unit scans the document and dials the
numbers automatically.
5. Program Dial Several transmission functions can be programmed in any of
the last eight One-Touch Keys. To utilize these functions, press
the corresponding One-Touch Key.
For example: if you want to set up an after-hours broadcast
which is performed regularly, you can register the necessary
functions in a Program Dial Key.
6. Using Combination
Dial
7. Using the TEL/DIR
Key
8. Using the “#” Key In most PBX applications, a prefix is necessary ahead of the
If the One-Touch or Speed Dial phone number displays a “+”
as the last character, additional numbers are necessary to
complete the dialing. The additional numbers may be stored in
a One-Touch or Speed Dial location, or may be entered using
the key pad.
The TEL/DIR function lists the One Touch and Speed Dial
locations stored in this unit. The LIST function enables you to
scroll through the list. The SEARCH functions enables you to
search a location alphabetically or numerically.
outside phone number in order to access an outside line. Once
this prefix number has been programmed into the machine,
pressing the “#” Key automatically enters it in the string.
Basic Operations 2 - 7
Page 32

Receiving a Document
NOV.07 12:34 100%
-SET DOC. FACE DOWN-
( ) 100%
-SET DOC. FACE DOWN-
(CHICAGO) 100%
-SET DOC. FACE DOWN-
*RX COMPLETE*
CHICAGO 20P
*PRINT DOC* 90%
-SET DOC. FACE DOWN-
*PRINT COMPLETE*
20P
Receiving a Document
Use automatic receiving when you want your fax to automatically receive faxes without
any interve ntion from you.
Auto Receive
1
Make sure your unit is ready to receive.
•
When your unit rings, the LCD shows this
message.
•
If the sending location is recognized, the blank
is filled in with the name or telephone number
of the location.
•
When the transmission is co mplete this message
is displayed. The number at the end of the
second line indicates the number of pages sent.
•
When the document starts to print, the
following message is displayed. The return of
the second line shows that othe r operations such
as sending a Fax or making a copy are now
available.
•
When the final page prints, the display shows
the following message. The number shows the
number of pages printed
2 - 8 Basic Operations
Page 33

Manual Receive
NOV.07 12:34 100%
-SET DOC. FACE DOWN-
*TALKING*
( ) 100%
-SET DOC. FACE DOWN-
(CHICAGO) 100%
-SET DOC. FACE DOWN-
*RX COMPLETE*
CHICAGO 20P
*PRINT DOC* 90%
-SET DOC. FACE DOWN-
*PRINT COMPLETE*
20P
In the manual receive mode, you can talk to the caller and start the receive the document
after the conversation is over.
1
When your unit rings, answer the phone.
2
If it is evident that it is a fax transmissi on, press the
START Key on your unit and then replace the
phone on the cradle.
•
An intermittent tone after picking up the
handset indicates a fax call.
•
When your unit recognizes the signal as a fax
call, the LCD shows this message.
Receiving a Document
•
If the sending location is recognized, the blank
is filled in with the name or telephone number
of the location.
•
When the transmission is co mplete this message
is displayed. The number at the end of the
second line indicates the number of pages sent.
•
When the document starts to print the following
message is displayed. The return of the second
line s h ow s t h at o th er o p era t ions such as se nd in g
a Fax or making a copy are now available.
•
When the final page prints, the display shows
the following message. The number shows the
number of pages printed.
Basic Operations 2 - 9
Page 34

Receiving a Document
<<M-RX>> 100%
-SET DOC. FACE DOWN-
( ) 100%
-SET DOC. FACE DOWN-
(CHICAGO) 100%
-SET DOC. FACE DOWN-
*RX COMPLETE*
CHICAGO 20P
<<M-RX 10P>> 80%
-SET DOC. FACE DOWN-
*PRINT COMPLETE*
20P
MEMORY RX PW=_
OK=YES (DEL=NO)
*WRONG PW*
*PRINT COMPLETE*
Memory Receive (Memory Lock)
This option saves all incoming faxes into memory. To access and print these documents,
you must enter a password.
1
Note: If you don’t have a password, contact your Key Operator to provide this.
With your unit in a ready position, the following
message appears.
•
When your unit rings, the LCD shows this
message.
•
If the sending location is recognized, the blank
is filled in with the name or telephone number
of the location.
•
When the transmission is co mplete this message
is displayed. The number at the end of the
second line indicates the number of pages sent.
•
The document ‘prints’ into memory.
•
When the final page ‘prints’, the display shows
the following message. The number shows the
number of pages printed.
2
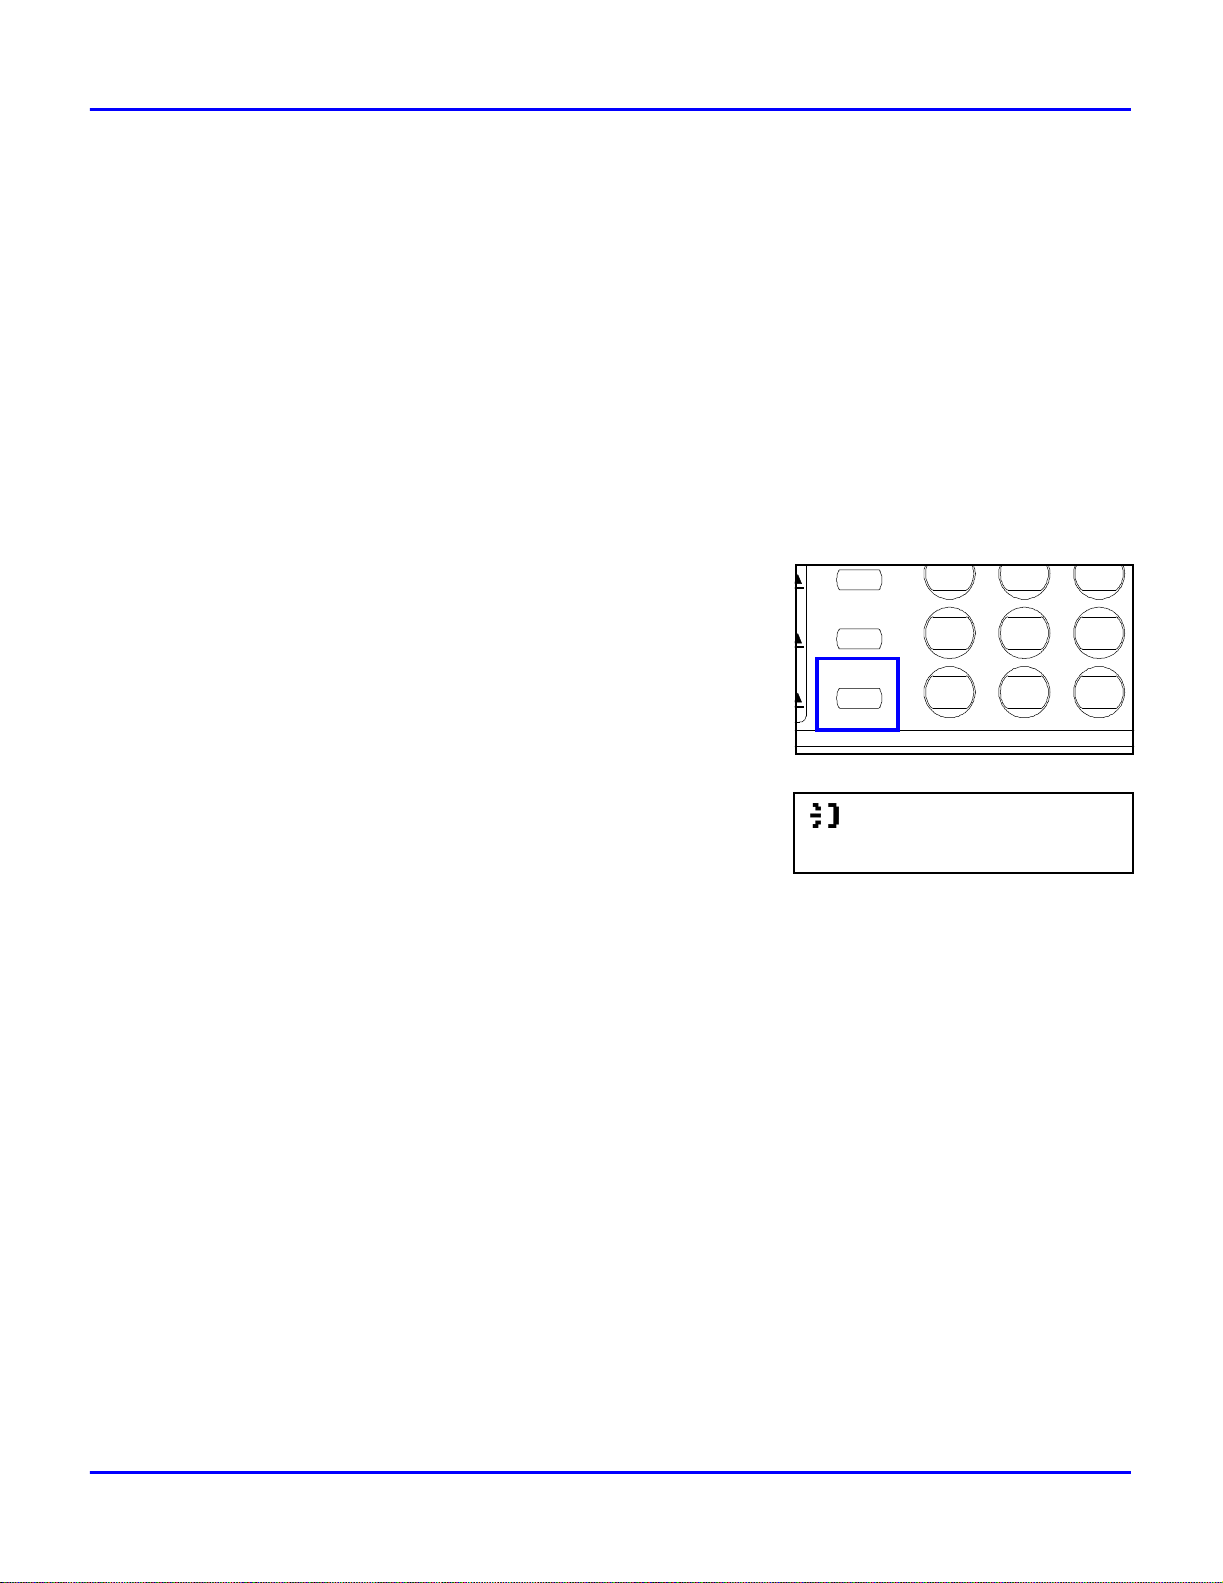
To print the document in memory, press the FUNCTION Key.
3
Scroll to the Memory RX Print memu.
4
Enter your Memory RX Password and press YES.
5
If you enter the wrong PW you are prompted and
then given an opportunity to enter the correct PW
number.
6
When the contents of your Mailbox has printed,
you are prompted that printing is complete.
2 - 10 Basic Operations
Page 35

Substitute Memory Receive
NOV.07 12:34 100%
-SET DOC. FACE DOWN-
( ) 100%
-SET DOC. FACE DOWN-
*MEMORY RX* 15P
RECORDING PAPER JAM
*PRINT DOC. 80%
-SET DOC. FACE DOWN-
*PRINT COMPLETE*
15P
If the facsimile unit shoul d encounter any of the following situations, it will switch from
direct reception mode to memory reception mode.
•
Machine runs out of paper
•
Machine runs out of toner
•
Printer Cover is open
•
Recording Paper Jam
•
Machine trouble
1
With your unit in a ready position, the following
message appears.
•
When your unit rings, the LCD shows this
message.
Receiving a Document
•
If for any of the above reasons your unit cannot
receive and print the message, an error message
is displayed.
2
Take whatever actions are required to clear the error.
•
When the erro r is rem o ved , the unit retu rn s to
normal operation and starts printing the
documents stored in memory.
•
When the final page prints, the display shows
the following message. The number shows the
number of pages printed.
Basic Operations 2 - 11
Page 36

Making Copies
T=ENTER FAX NO.
or FUNCTION
DARK
TYPE ORG.
JOURNAL
PHOTO
REPORT
>
<
PHOTO
LIGHT NORM
MEM. TX.
<
AUTO
MEM. TX.
DARK
TYPE ORG.
/2 SIDED TX.E
DELETE
2 SIDED TX.
JOURNAL
PHOTO
SCHEDULE
<
RESOLUTION
REPORT
>
<
PHOTO
FINE
STD
EX-FINE
LIGHT NORM
Making Copies
With your f acsimile unit, you can make from 1 to 99 high quality copies of an original
document. The Document Feeder can hold up to 50 originals.
Procedure
1
2
Place your document face down on the
Documen t Feed Tray.
Adjust the Document Side Guides to the
edges of the document.
3
The LCD Message Display indicates the
following:
4
Use the TYPE ORG. Key to select the
desired contrast:
•
Use NORM for regular documents.
•
Use LIGHT for documents with very fine
or light characters.
•
Use DARK for documents that are dark.
5
Use the RESOLUTION Key to select the
desired resolution:
•
Use STD (Standard) for documents with
standard size characters, such as typed
documents.
•
Use FINE for documents with smaller
size charac te rs , like new s pri nt.
•
Use EX-F INE for documents with very
fine characters.
2 - 12 Basic Operations
6
Use PHOTO for documents such as photos that have a gray scale. PHOTO may be
used in combination with Original Types and Resolution Keys.
Page 37

Making Copies
7
GHI
PQRS
4
1
98
START
3
MNO
WXYZ
6
DEF
TUV
JKL
5
ABC
2
STOP
COPY
*COPY* COPIES=01
OK=START
*COPY* COPIES=02
OK=START(SORT=YE
Press the COPY Key.
7
The LCD readout displays the foll owing:
8
Enter the number of copies you need using the
9
Numeric Keypad.
If you have entered more than “1” as your quantity, press the YES Key to sort the set, or
10
press START to STACK the sets.
This mode does this
STACK (Default) Copies the original document according to the page number
order.
Example: If you are making two copies of pages 1 through 4,
the copies are produced in this order: 1, 1, 2, 2, 3, 3, 4, 4
SORTER Copies the original document according to sort order.
Example: If you are making two copies of pages 1 through 4,
the copies are produced in this order: 1, 2, 3, 4, 1, 2, 3, 4
The unit scans the document into memory and then makes copies.
•
The unit automatically returns to standby mode.
•
Basic Operations 2 - 13
Page 38

Making Copies
Notes:
2 - 14 Basic Operations
Page 39

Advanced Facsimile
Chapter 3
Page 40

Chapter Overview
This chapter contains information about additional facsimile features availa ble on your
fax unit. A number of features are accessible through display prompts or by pressing
FUNCTION Memu key. The step-by-step explanation s detail the steps using the
function and keypad keys.
You may press STOP at any point to cancel selections and return to standby.
The advanced features in this chapt er inc lude the following:
• Broadcast
• Delay Transmission
• Mailbox Transmi ssion
• Mailbox Receive
It also covers the use of the following Control Panel Keys:
• TEL DIR Key
• JOURNAL Key
• REPORT Key
• S CHEDULE Key
• P olling Transmission
• P olling Receive
• R elay Initiate
• C ombination Dial
• PIN CODE Key
• 2 SIDED TX. Key
• HOOK Key
Advanced Facsimile
Page 41

Using the Function Menu
NOV.06 15:38 100%
-SET DOC. FACE DOWN-
FUNCTION
SEL. 1-7 OR FUNCTION
The FUNCTION Key is used to ac cess the most o ft en used fax f unction s. Liste d below a re
the menus you will encounter.
FUNCTION 1 BROADCAST
Using the Function Menu
2 TIMER TX
3 MAILBOX TX
4 PRINT MAILBOX RX
5 POLLING TX
6 POLLING RX
7 RELAY INITIATE
To access these functions, press the FUNCTION
1
Key.
To select an option, perform one of the following:.
2
Press the number of the item you want.
•
OR, Press FUNCTION a second time and use
•
the arrow keys to go the menu item you want.
OR, Press FUNCTION continually until you reach the menu item you want.
•
Advanced Facsimile 3 - 1
Page 42

Broadcast
NOV.06 15:38 100%
-SET DOC. FACE DOWN-
FUNCTION
SEL. 1-7 OR FUNCTION
1 BROADCAST
NO.001=_
OK=YES (DEL=NO)
NO.002=_
(Fin.=START)
Broadcast
The Broadcast feature allows you to send the same document to multiple locations in the
same sess ion. T he facs i m ile wi ll sc an the d oc ument into memo ry an d tran smit it
sequentially to dif ferent destinations.
The facsimile can broadcast to destinations consisting of all One-Touch Dials, 100 Speed
Dials and 16 manually dialed numbers.
If you frequently send documents to the same multiple location, you can set up a Group
Dial Key to automatically broadcast to these locations. See the Facsimil e Progra mming
Chapter for more info.
Procedure
Select the Original Type, Resolution if necessary
1
and place your document in the Document Feeder
face down.
Press the FUNCTION Key and enter 1 to select the
2
Broadcast function.
The following message appear s briefly to confirm
3
your selection.
Enter the Broadca st location number. This can be a
4
One-T ouch Key, a Speed Dial Key, a Group Dial
Key, a Combination Dial Key, a TEL/DIR, or
manually entered telephone numbers . Pre ss YES
between location.
When all the numbers have been entered, pr ess
5
START to begin your Broadcast session
3 - 2 Advanced Facsimile
Page 43

Timer TX (Delay Transmission)
NOV.06 15:38 100%
-SET DOC. FACE DOWN-
FUNCTION
SEL. 1-7 OR FUNCTION
2 TIMER TX
TIMER=_0:00
OK=YES
ENTER FAX NO.
or FUNCTION
This feature allows you to set a specif ied sta rt time withi n 24 hours to send documents at a
later time. Set the reservati on timer using military time (24 hour format). This fu nctions
can also be combined with Broadcast, Mailbox TX, Polling RX, or Relay Initiate.
Procedure
Select the Original Type and Resolution if
1
necessary and place your document in the
Documen t Feed er fa ce dow n .
Press the FUNCTION Key and press 2 to select the
2
Timer TX menu.
The following message appear s briefly to confirm
3
your selection.
Timer TX (Delay Transmission)
Enter the time you wish the T ransmission to begin.
4
Enter the destination fax number . If you press
5
FUNCTION, the available types of Delayed
Transmissions are: manually entered fax number,
Broadcast, Mailbox Polling RX or Relay Initiate.
Advanced Facsimile 3 - 3
Page 44

Mailbox TX
NOV.06 15:38 100%
-SET DOC. FACE DOWN-
FUNCTION
SEL. 1-7 OR FUNCTION
3 MAILBOX TX?
OK=YES
MAILBOX PW=_
OK=YES (DEL=NO)
ENTER FAX NO.
Mailbox TX
This operation is normally used to send conf ide ntial messages. Mailbox TX allows the
sender the ability to send a fax message to a remote machin e to be stored in memory. Only
the user with the correct password can print the document. This function works only with
a compatible fax machine that is set up for Mailbox reception. You need to enter the
correct Mailbox PW for successful transmission.
Procedure
Select the Original Type, Resolution if necessary
1
and place your document in the Document Feeder
face down.
Press the FUNCTION Key and press 3 to select the
2
Mailbox TX menu.
The following message appear s briefly to confirm
3
your selection.
Enter the Mailbox PW (0-9) and press YES.
4
Enter the desti nation fax number and press START
5
to begin transmitting.
3 - 4 Advanced Facsimile
Page 45

Print Mailbox RX
NOV.06 15:38 100%
-SET DOC. FACE DOWN-
FUNCTION
SEL. 1-7 OR FUNCTION
4 PRINT MAILBOX RX?
OK=YES
MAILBOX PW=_
OK=YES (DEL=NO)
*WRONG MAILBOX PW*
*PRINT COMPLETE*
This operation is normally used to rec eiv e confidential messages. Mailb ox TX allows the
sender the ability to send a fax m essage to your machine to be stored in memor y. Only the
user with the correct password can print the document. This function works only with a
compatible fax machine and your m achine must be set u p for Mailbox reception. You need
to enter the correct Mailbox Password to access the documents in your Mailbox.
Your fax unit can be programme d with up to 10 virtual mailboxes. Each Mailbox is
assigned a 4-digit Password. This Password is required to access the documents setting in
your Mailbox.
Procedure
Select the Original Type, Resolution if necessary
1
and place your document in the Document Feeder
face down.
Print Mailbox RX
Note: T o set up a Mai lbox and assig n a Pa ssword or to c hange your p resent one ,
contact your Key Operator for assistance.
Press the FUNCTION Key and press 4 to select the
2
Print Mailbox RX menu.
The following message appear s briefly to confirm
3
your selection.
Enter the Mailbox PW to your Mailbox and press
4
YES.
If you enter the wrong PW you are prompted and
5
then given an opportunity to enter the correct PW
number.
When the contents of your Mailbox has printed,
6
you are prompted that printing is complete.
Advanced Facsimile 3 - 5
Page 46

Polling TX
NOV.06 15:38 100%
-SET DOC. FACE DOWN-
FUNCTION
SEL. 1-7 OR FUNCTION
5 POLLING TX?
OK=YES
POLLING PW=_
OK=YES (DEL=NO)
*WRONG POLLING PW*
*SINGLE MULTI
-SELECT&PUSH”YES”-
NOV.06 15:38 100%
-SET DOC. FACE DOWN-
Polling TX
Polling TX allows you to set a document to be retrieved by a remote fax machine. Your
fax machine will automatically send the stored document in response to polling requests
from remote devices. You need to set a 4-digit security code to prevent unauthorized
polling.
Polling TX offers Single and Multi Modes.
In Single Mode, the specified file will be deleted after it has been successfully
•
transmitted.
In Multi Mode, the specifie d file has to be manually deleted during a poll ing TX
•
or by Cancel Reservation Session.
Note: You need to set a 4-digit security code to prevent unauthorized polling.
Contact your Key Operator to have this set up for you.
Procedure
Select the Original Type, Resolution if necessary
1
and place your document in the Document Feeder
face down.
Press the FUNCTION Key and press 5 to select the
2
Polling TX menu.
The following message appear s briefly to confirm
3
your selection.
Enter the 4-digit Polling PW and press YES.
4
If you enter the wrong PW you are prompted and
5
then given an opportunity to enter the correct PW
number.
Select eithe r Single or Multi and press YES to start
6
the Polling session.
Your document is scanned into memory, ready for
7
it to be polled. The “P” in the Message Display
indicated the Polling Document is in memory.
3 - 6 Advanced Facsimile
Page 47

Polling RX
FUNCTION
SEL. 1-7 OR FUNCTION
6 POLLING RX?
OK=YES
NO.001=_
OK=YES (SUB= )
NO.001=DALLAS
OK=YES (DEL=NO)
POLLING PW=_
OK=YES (DEL=NO)
NO.002=_
(Fin.=START)
CHECK DESTINATIONS?
OK=YES (Fin.=START)
Polling RX
Polling RX allows you to obtai n stored docu ments in anothe r fax by ca lling the re mote fax
and instructing it to transmi t. To receive (poll) the document, you need to enter the correct
polling PW number .
Your unit sends the Poll ing PW code to the remote unit. The remote unit allows your unit
to poll if your PW code matches the remote unit document PW.
Note: Contact the Key Operator of the remote unit for the correct Polling PW
number.
Procedure
Press the FUNCTION Key and press 6 to select the
1
Polling RX menu.
The following message appear s briefly to confirm
2
your selection.
Enter the One-Touch key of the remote fax unit or
3
enter the phone of the remote unit manually and
press YES.
The name associated with the One-Touch appears
4
to confirm this is the location you intended to poll.
Press YES to accept or NO to enter a new location.
Enter the Polling PW for the remote location.
5
If you do not have this P W, you will have to c ontac t
the Key Operator for the remote fax unit for this
information.
You are given the opportunity to enter additional
6
locations to poll. To finish, press START.
You are given the opportunity to check the
7
destinations you have selected. To initiate the
Polling session, press START.
Continuous Polling RX
Your unit can be programmed to continuously poll up to ten groups. Each group can
contain up to ten location. This allows a central unit to poll remote units on a continuous
basis. Any time a document is placed in the remote unit for Polling TX, you machine will
automatically receive it. Refer to the Program section for programming details.
Advanced Facsimile 3 - 7
Page 48

Relay Initiate
NOV.06 15:38 100%
-SET DOC. FACE DOWN-
FUNCTION
SEL. 1-7 OR FUNCTION
7 RELAY INITIATE?
OK=YES
-SEL. RELAY STATION-
OT01=DALLAS
OK=YES (DEL=NO)
RELAY GP NO.=_
OK=YES
REPORT SD NO.=88
OK=YES (DEL=NO)
Relay Initiate
Relay TX allows the operator to make one long distance call to a remote unit and the
remote unit will relay the message to one or more fax units in the local a rea. With this
function, you can save valuable time and telephone charges. This function can also
instruct the remo te fax machine to se nd an acti vity re port to one of its One-Touch or Speed
Dial locat ion.
Procedure
Note: If no One-Touch or Speed Dial Keys were set up, no reports will be
generated.
Select the Original Type, Resolution if necessary
1
and place your document in the Document Feeder
face down.
Press the FUNCTION Key and press 7 to select the
2
Relay Initiate menu.
The following messages appe ar briefly to confirm
3
your selection.
Enter the One-Touch key of the remote fax unit or
4
enter the phone of the remote unit manually and
press YES.
The name or telephone number ass ociated with the
5
One-T ouch appears to confirm this is the location
you intended to poll. Press YES to accept or NO to
enter a new location.
Using the 10-Key Pad, enter the two digit One-
6
Touch number in the remote fax machine that
represents the end locations you wish to transmit
to.
Using the 10-Key Pad, enter the two digit Speed
7
Dial number in the remote fax machine that
represents the fax unit that should r ece ive the TX
Results Report.
3 - 8 Advanced Facsimile
Press START to begin transmitting. Your document is scanned into memory and
8
sent to the Relay location.
Page 49

Using Combination Dial
NOV.06 15:38 100%
-SET DOC. FACE DOWN-
ONE TOUCH 01
YES / or
ONE TOUCH 01
1234+
12345678
(TX=START)
Because the telephone number in each One-Touch and Speed Dial location is limited to 30
digits, it mig ht be ne cessa ry to combine two or mo re One- Touch or Speed Dial locations to
call one location.
Procedure
Select the Original Type, Resolution if necessary
1
and place your document in the Document Feeder
face down.
Press any of the One-Touch or Speed Dial Keys
2
you have programmed.
The following messages appe ar briefly to confirm
3
your selection.
Using Combination Dial
If the displayed number has a “+” as the last d igit ,
4
additional numbers must be used to dial this
locaiton.
At this point, you have the option to enter the additional numbers using the
5
Ten-Key Pad, selecting another One-Touch Key or entering another Speed Dial
number.
Enter your selecti on.
6
To begin transmitting, press START.
7
Advanced Facsimile 3 - 9
Page 50

Using TEL DIR
NOV.06 15:38 100%
-SET DOC. FACE DOWN-
*LIST SEARCH
-SELECT&PUSH”YES”-
*DICK
OK=START
NOV.06 15:38 100%
-SET DOC. FACE DOWN-
LIST *SEARCH
-SELECT&PUSH”YES”-
SEARCH->>_
OK=YES
BILL (1)
SEARCH=YES (SEE= )
Using TEL DIR
The following procedure illustrates how to use LIST or SEARCH to find the specified
location stored in your One-Touch or Speed Dial Keys. Once the correct destination is
displayed, press the START Key to transmit the document.
LIST Procedure
1
2
3
Select the Original Type, Resolution if necessary
and place your document in the Document Feeder
face down.
Press the TEL DIR Key. Use the Arrow Keys to
select the LIST option and press YES.
The first alphabet ical listing appears. If this is the
desired location, press START to begin
transmitting. If i t is not the desir ed locati on, use the
Up or Down Arrow Keys to locate the correct
location and then press START.
SEARCH Procedure
Select the Original Type, Resolution if necessary
1
and place your document in the Document Feeder
face down.
Press the TEL DIR Key. Use the Arrow Keys to
2
select the SEARCH option and press YES.
Type the name of the destination and press YES.
3
You may also use the Up and Down Arrow Keys to
4
step through the available locating.
Once you have found the desired location, press
5
START to begin transmitting.
3 - 10 Advanced Facsimile
Page 51

JOURNAL Key
NOV.06 15:38 100%
-SET DOC. FACE DOWN-
08
40
DARK
TYPE ORG.
JOURNAL
PHOTO
SCHEDULE
<
RESOLUTION
REPORT
>
<
PHOTO
FINE
STD
EX-FINE
LIGHT NORM
M
ME
1 (MAR.01 14:00)TX
NY OFFICE -OK
The Journal Key allows users to press the Up or Down Arrow Keys to check the
transmission results on the LCD screen. Pressing the START Key then prints the report.
1
JOURNAL Key
Wit h your unit at a ready condition, press the
Journal Key.
Using the Up and Down Arrows, select the TX you
2
wish to check the sta tus o n.
Press the START Key to p r i n t the re port.
3
Advanced Facsimile 3 - 11
Page 52

REPORT Key
NOV.06 15:38 100%
-SET DOC. FACE DOWN-
SPEED DIAL
DEFABC
DARK
TYPE ORG.
JOURNAL
PHOTO
REPORT
>
<
PHOTOEX-FINE LIGHT NORM
MEM. TX.
<
AUMEM. TX.
TX RESULT REPORT?
OK=YES
REPORT Key
The Report Key allows users to press the Up or Down Arrow Keys to print a desired
report. Pressing the YES Key then prints the repor t.
Wit h your unit at a ready condition, press the
1
Report Key.
Using the Up and Down Arrows, select the Report
2
you wish to print. The report in the order they
appear are :
TX RESULTS REPORT?
•
RX RESULTS REPORT?
•
ACTIVITY REPORT?
•
MEMORY DATA LIST?
•
MEMORY IMA GE PRINT?
•
ONE-TOUCH LIST?
•
SPEED DIAL LIST?
•
KEY SETTING LIST?
•
MACHINE ST ATUS LIST?
•
Press the YE S K e y to pri nt the re port.
3
3 - 12 Advanced Facsimile
Page 53

Reports
Transmit Message Confirmation
Reports
Many of the available reports can be programmed to print automatically. If you wish to
have these set up, contact your Key Operator to set these up or refer to the Chapter on
Programming.
If TX Message Confirmation Report is turned ON, this unit a utomatically prints a
Confirmation Report. If it is turned OFF, you can still check transmission results by
printing the Activity Repor t or pressing the JOURNAL Key to view the Journal on the
LCD.
If the transmission is successful, the unit prints a report with the date and time, the
receiver’s number, the number of pages that were sent and other useful inf ormation.
If the document was scanned into memory, the report prints a copy o f the first page of the
transmission on the report for your refer ence.
If the transmission was not completed, the unit prints out an error report.
Manual TX Report
This function can be used to save paper and bulk in your files by printing the TX Results
on the back of the o rigin al.
When the document has finished sending, place it
1
face up in the By-Pass Feed Tray.
Press the JOURNAL Key.
2
If you are doing this immediately after sending the
3
document, press START.
If there has been other sessions sinc e your tr ansmission, use the Arrow Keys to
4
scroll through the list and locate the phone number you sent to and press START.
Advanced Facsimile 3 - 13
Page 54

SCHEDULE Key
NOV.06 15:38 100%
-SET DOC. FACE DOWN-
06
38
07
39
08
40
SPEED DIAL
TYP
/2 SIDED TX.CODE
PIN
DELETE
2 SIDED TX.
JOURNAL
PHOTO
SCHEDULE
<
RESOLUTION
R
>
PHOTO
FINE
STD
EX-FINE
LIGHT N
*NONE*
001[14:55] B-CAST
DELETE or (CONF.= )
001[14:55] B-CAST
DELETE or (CONF.= )
001=DALLAS
CHECK FINISH=YES
004[1234] POLL TX
CANCELED
SCHEDULE Key
Press this key to view the transaction in me mo ry fi le , suc h as me mo ry tr an smi s sion or
polling. You can press the YES key to cancel this schedule.
Wit h your unit at a ready condition, press the
1
Schedule Key.
If there are no messages in memory, the following
2
message appears.
Messages in memory, the following message
3
appears. Press the Up and Down Arrow Keys to
select the desired message.
Press the Right Ar row Key to Confirm the location
4
this message is being set to.
Use the Up and Down Arrows to select the
5
locations you wish to check and press YES.
If you selected Delete in Step 4, you are given the
6
opportunity to delete that tr ansmission.
3 - 14 Advanced Facsimile
Page 55

PIN CODE Key
NOV.06 15:38 100%
-SET DOC. FACE DOWN-
4544
L M
04
36
12
D
05
37
13
E
46 47
NO
06
38
14
F
07
39
G
15
48
P
08
40
16
H
/2 SIDED TX.YES NO CODE
PIN
DELETE
SCHEDULE
<
RESOLUTIO
PIN=_
OK=YES
_
(TX=START)
The PIN CODE (Personal Identificati on Number) prevents unauthorized perso nnel from
making calls. Some office telephone systems require you to enter not onl y the phone
number but also a PIN number when you dial an outside line. You can dial a PIN plus fax
number, but the PIN will not appear in the LCD or on any printout.
1
PIN CODE Key
Wit h your unit at a ready condition, press the PIN
CODE Key.
Enter your PIN Code, make sure it is correct and
2
press YES.
Select the remote loc ation using a One-Touch Key,
3
a Speed Dial Key or manually entering the number
from the 10-Key Pad.
Note: The entry of your PIN is active only for this session and must be reentered for each new session.
Advanced Facsimile 3 - 15
Page 56

2 SIDED TX. Key
NOV.06 15:38 100%
-SET DOC. FACE DOWN-
05 06 07 08
/2 SIDED TX.SNO CODE
PIN
DELETE
2 SIDED TX.
JO
P
SCHEDULE
<
RESOLUTION
P
FINE
STD
EX-FINE
2 SIDED TX. Key
If 2 Side TX LED is lit during memory TX scanning, you can scan the image of one side
of all the pages of the document, then tu rn the pages over (i n the same direct ion), and your
unit will automatically se nd a collated set to the remote location.
Wit h your unit at a ready condition, place you
1
document in the Document Feed Tray and make
any other selections such as Original Type or
Resolution.
Turn 2 Sided TX. mode on by pressing the
2
DELETE/2 SIDED TX. Key.
Enter the Fax number of the remote location using
3
One-Touch, Speed Dial or manual input using the
10-Key Pad.
Press START. Your unit scans the first sides into
4
memory.
Turn your pages over so that it enters your machine in the same direction, b ut scans
5
the second side.
Note: There is a time limit on how long your unit waits until it senses the pages
have been pla ced b ack into the AD F.
Note: Even though it is scanning the back sides in reverse order, your unit
compiles them back into the original sequence prior to sending them.
3 - 16 Advanced Facsimile
Page 57

HOOK Key
NOV.06 15:38 100%
-SET DOC. FACE DOWN-
7
X
64
32
HOOK
¡¯
24
56
P
TEL DIR
REDAIL
/PAUSE
GHI
PQRS
4
8
OPER
0
TUV
JKL
5
OFF HOOK
(DALLAS)
-PUSH START Key-
001[14:55] B-CAST
DELETE or (CONF.= )
001=DALLAS
CHECK FINISH=YES
(DALLAS)
HOOK Key
The Hook Key allows the user to transmit manually. The Hook Key also allows you to
verify that the line is properly connected by enabling you to hear signals from the speaker
built into the fax machine.
Wit h your unit at a ready condition, press the Hook
1
Key.
Enter the number of the remote unit you wish to
2
transmit to using a One-Touch Key, Speed Dial
Key or manually entering it using the 10-Key Pad.
Once the remote machine has answered, press the
3
START Key to begin the transmission.
Press the Right Ar row Key to Confirm the location
4
this message is being set to.
While the message is being sent you can hear
•
the tones and this message appears.
While the message is being sent you can hear
•
the tones and this message appears.
Advanced Facsimile 3 - 17
Page 58

HOOK Key
Notes:
3 - 18 Advanced Facsimile
Page 59

Chapter 4
Facsimile Programming
Page 60

Chapter Overview
This section gives step-by- step instructions on how to program data and how to enter
fax phone numbers. You must enter your user data, such as your telephone number,
name, and time before operating the machine. You can greatly increase the usefulness
of your unit by choosing certain sett ings to best suit your needs and by entering r emote
unit fax telephone numbers and other data.
This chapter includes the foll owing programming information:
• P rogram Menu Structure and Use
• Entering Initial User Data such as Date, Time and your Fax Number.
• Setting the Line Type, Ring and Speaker Volume
• S electing the Dialing Type (Tone or Pulse)
• S etting your default scan settings
• Program telephone numbers into One-Touch, Speed Dial, Group Dial and
Program Dial
• Programming your Transmit settings
• P rogramming your Receive settings.
• Setting the Line 2 options
• Reports
• Other options
Facsimile Programming
Page 61

Accessing The User Program Area
DIAL REGISTRATION?
YES / or 1-5
INITIAL USER DATA?
YES / or 1-4
1 DATE & TIME?
OK=YES
This section gives ste p-by-step instructions on how to program the number to be stored in
the One-Touch, Speed Dial and Group Dial Keys. In addition, it shows you how to set up
special parameters for each One-Touch Key, including Batch Time and Relay Broadcast.
Menu Navigation
Press the PROGRAM Key.
1
Use the Up or Down Arrows to step through the available menu options, or
2
continue to press the PROGRAM Key to step it to the next menu item. The main
menu it ems are:
• DIAL REGISTRATION?
• SCANNING & PRINTING?
• TX OPERATION?
• RX OPERATION?
• MACHINE OPERATION?
• REPORT?
• INITIAL USER DATA?
• SET PRINTER?
• LINE 2 SETTING?
Note: A more complete menu appears on the next page. See “Menu Structure.”
Accessing The User Program Area
When on the Initial User Data option , pr ess YES.
3
Use the Arrows to step through the availa ble menu
4
items until you find the one you wish to program.
Use the Left, Right, Up or Down Arrows to navigate through the menus .
5
Facsimile Programming 4 - 1
• 1 DATE & TIME?
• 2 USER FAX NO.?
• 3 USER NAME?
• 4 DEPARTMENT PW?
Page 62

Accessing The User Program Area
Menu Structure
Listed below are the PROGRAM Menu selections as they appear in your unit. Also
shown are the available selections and the default settings. Once ins ide each selection,
you will find additional help and guida nce.
Menu Group Sub-Menu Selections Choices Available Default
DIAL
REGISTRATION?
SCANNING &
PRINTING:
TX OPERATION? 1 DEFAULT TX
RX OPERATION? 1 MEMORY RX MODE
1 ONE-TOUCH KEY
2 SPEED DIAL
3 GROUP DIAL
4 PROGRAM DIAL
5 BATCH TX
1 RESOLUTION
2 SCAN CONTRAST
3 PRINT DENSITY
4 REDUCTION COPY
5 REC. PAPER SIZE
2 CLOSED NETWORK
3 FAX FORWARDING
4 HEADER
2 NO. of RINGS
3 TWO PAGE PRINT
4 REDUCTION RX
5 MAILBOX RX
6 CLOSED NETWORK
7 RX MODE
8 FOOTER
9 CONTINUE POLL RX
One-Touch
Speed Dial
Group Dial
Program Dial
Start Time
Standard/Fine/Super Fine
LIGHT/NORMAL/DARK
Dark to Light (6 steps)
On / Off
LETTER / LEGAL / A4
On / Off
MEM TX / ADF TX
On / Off
On / Off
On / Off
1 to 16
On / On(Sort) / Off
On / Off / Cut
Password
On / Off
Auto / Manual
On / Off
ON / Off
Not
Not
Not
Not
Off
Standard
Normal
Step 4
Off
Letter
Off
MEMORY TX
On
Off
Off
2
Off
On
Not Required
Off
Auto
Off
Off
MACHINE
OPERATIONS?
REPORT? 1 ACTIVITY REPORT
INITIAL USER DATA? 1 DATE & TIME
4 - 2 Facsimile Programming
1 PSTN/PBX
2 BUZZER VOLUME
3 LINE MONITOR
4 POWER SAVE MODE
5 REMOTE MONITOR
6 REMOTE PROGRAM
7 TONE/PULSE
2 RESERV. REPORT
3 TX RESULT REPORT
4 RX RESULT REPORT
5 BROADCAST REPORT
6 TONER LOW REPORT
2 USER FAX NO.
3 USER NAME
4 DEPARTMENT PW
PSTN / PBX
Hi / Low / Off
Hi / Low / Off
Off / Timer (On and Off)
On / Off
On / Off
Tone / Pulse (10 PPS/20)
On / Off
On / Off
On / Off
On / Off
On / Off
On / Off + Tel #
Date & Time
User Fax No.
User Name
On / Off
PSTN
Low
Low
Timer
Off
Off
Tone
On
Off
Off
Off
Off
Off
Jan 1 1990
Not Required
Not Required
Off
Page 63

Accessing The User Program Area
Menu Group Sub-Menu Selections Choices Available Default
SET PRINTER? 1 AUTO CASSETTE SEL.
2 NUMBER OF COPIES
3 SYMBOL SET
4 FONT NUMBER
5 LINE NUMBER
6 *PRINT FONT*
7 PCL4
8 GDI ENHANCE
LINE 2 SETTING 1 LINE 2 FAX NO.
2 TX LINE PRIORITY
3 LINE 2 TONE/PULSE
On / Off
1 to 99
IBM-US(24 types of fonts)
1 to 6
5 to 127
On / Off
On / Off
Line 2 Fax No.
Set Line 1 or Line 2 for TX
Priority
Tone / Pulse
Off
1
IBM-US
1
64
Not Required
Off
Off
Line 1 Priority
Tone
Facsimile Programming 4 - 3
Page 64

Accessing The User Program Area
7
¡¯
GHI
PQRS
4
1
98
#
OPER
0
START
3
MNO
WXYZ
6
DEF
TUV
JKL
5
ABC
2
STOP
COPY
SRQ
Y
57
25
Z
58
26
+
59
27
41
17
49
I
01
33
09
A
4342
18
50
J
19
51
K
02
34
B
10
03
35
11
C
VWTU
60
-/&
28
61
29
62
30
63
31
4544
20
52
L
21
53
M
04
36
12
D
05
37
13
E
46 47
22
54
NO
23
55
06
38
14
F
07
39
G
15
X
64
32
48
24
56
P
08
40
16
H
VWU
61
29
62
30
63
31
X
64
32
Entering Numbers and Letters
T o enter numb ers into a num eric fiel d, u se th e
1
10-Key Pad.
To enter letters into an alph a fiel d ,
2
use the One-Touch Keys.
To enter a Space between numbers
3
or letters, use One-Touch Key #31.
To enter a Symbol , press One-
4
T ouch Key 28 and then the number
of the symbol you need.
To enter a Europe an Sy mb ol , pres s
5
One-Touch Key 29 and then the
number of the symbol you need.
4 - 4 Facsimile Programming
Page 65

Initial User Data
1 DATE & TIME?
OK=YES
12:39 ‘90 01 15
SET TIME (OK=YES)
2 USER FAX NO.?
OK=YES
_
OK=YES (DEL=NO)
Entering The Date & Time
When you set the date a nd time, they ap pear on th e LCD when the unit is in sta ndby mode.
They also print a t the top of each page you transmit to another locat ion. The date and tim e
must be set in order to use the Delay Transmit, Broadcast, and Polling functions of your
unit. Follow these instructions for entering the current date and time.
Use the Memu Navigation procedure on page 4-1
1
to access the DATE & TIME? menu selectio n .
Press YES. Enter the Tim e and Date using the 10-
2
Keypad.
Initial User Data
After entering this information, check to make sure it is correct. If correct, press YES to
3
enter it in mem ory. If it is incorrect, pre ss NO and re- en t er the information.
Entering Your Telephone Number
To have your phone number display on the faxes you transmit:
Use the Memu Navigation procedure on page 4-1
1
to access the USER FAX NO.? menu selection.
Press YES. Enter your number.
2
After enterin g your number , check to make sure it is c orrect. I f correct, press YES to enter it
3
in memory. If the number is incorrect, press NO and re-enter the correct number
Facsimile Programming 4 - 5
Page 66

Initial User Data
3 USER NAME?
OK=YES
NAME=_
OK=YES (DEL=NO)
Entering Your User Name
T o have your user name display on the faxes you transmit:
Use the Memu Navigation procedure on page 4-1
1
to access the USE R NAM E ? me nu s elect i on.
Press YES. Enter your name.
2
After entering your name, check to make sure it is correct. If correct, press YES to
3
enter it in memory. If the name is incorrect, press NO and re-enter the correct name.
Setting Department PW
Note: This function is set by the Key Oper ator. Please direct all questions to them.
4 - 6 Facsimile Programming
Page 67

Machine Operations
MACHINE OPERATION?
YES / or 1-7
1 PSTN/PBX?
OK=YES
*PSTN PBX
-SELECT&PUSH”YES”-
This section describes the choi ces a vailable in the Machine Operations Menu. Some
choices may not be available to you depending on your country’s regulations.
Setting Your Fax Line Type (PSTN/PBX)
Select either PSTN or PBX depending on how your phone is connected. If your unit is
connected to the public switch telephone network (PSTN), you should select “PSTN.
Otherwise, you should select “PBX.”
Press the PROGRAM Key and scroll through the
1
menus until you reach the Machine O perations
menu and press YES.
Press YES since this is th e first menu to appear.
2
Machine Operations
Use the Left/Right Arrow Keys to select either
3
PSTN or PBX and press YES.
Note: With a PBX system. you generally have to dial a prefix number (e.g. “9”) to
access an outside line. If you set the lin e type to “PBX”, you can set the prefix
number in advance. Then the unit can dial the prefix numb er for you whenever
you dial. The following table shows you how to dial when using the PBX mode.
The prefix can be up to 4 digits in length.
When you are in the PBX mode, pressing # causes the the machine to dial the
programmed access number(s). If you are dialing from within a PBX and dial the
extension number within the PBX the “@” symbol is displayed.
Phone Line Telephone Number LCD Display/Dialing Access Line
PBX mode, prefix=9 123 @123 PBX
PBX mode, prefix=9 #123 9-123 PBX->PSTN
Facsimile Programming 4 - 7
Page 68

Machine Operations
MACHINE OPERATION?
YES / or 1-7
2 BUZZER VOLUME?
OK=YES
HIGH *LOW OFF
-SELECT&PUSH”YES”-
MACHINE OPERATION?
YES / or 1-7
3 LINE MONITOR?
OK=YES
HIGH *LOW OFF
-SELECT&PUSH”YES”-
Setting the Buzzer (Ring) Volume
Use this to set the ring volume to the suited level.
1
2
3
Press the PROGRAM Key and scroll through the
menus until you reach the Machine O perations
menu and press YES.
Press 2 or press the down arrow twice to reach the
Buzzer Volume Menu. Press YES.
Use the Left/Right Arrow Keys to select either
HIGH, LOW or OFF and press YES.
Choices Available Description
HIGH Buzzer Volume is set at the loudest setting available.
LOW Buzzer Volume is set at the lowest setting available.
OFF No sound will be heard.
Setting the Line Monitor (Speaker) Volume
Use this to set the speaker volume while monitoring the fax activity.
Press the PROGRAM Key and scroll through the
1
menus until you reach the Machine O perations
menu and press YES.
Press 3 or press the down arrow three times to
2
reach the Line Monitor Menu. Press YES.
Use the Left/Right Arrow Keys to select either
3
HIGH, LOW or OFF and press YES.
Choices Available Description
4 - 8 Facsimile Programming
HIGH Speaker Volume is set at the loudest setting available.
LOW Speaker Volume is set at the lowest setting available.
OFF No sound will be heard.
Page 69

Setting the Power Save Mode
MACHINE OPERATION?
YES / or 1-7
4 POWER SAVE MODE?
OK=YES
OFF *TIMER
-SELECT&PUSH”YES”-
ON TIME=_0:00
OK=YES
OFF TIME=_0:00
OK=YES
MACHINE OPERATION?
YES / or 1-7
5 REMOTE MONITOR?
OK=YES
This program allows the user to set their fax unit to a utomati cally ent er the power saving
mode at a specified ti me. You can also set the Power Save Mode to OFF. If the ON time
and the OFF time are set the same, the Power Save Mode will remain ON continuously.
Press the PROGRAM Key and scroll through the
1
menus until you reach the Machine O perations
menu and press YES.
Press 4 or press the down arrow four times to reach
2
the Power Saver Mode Menu. Press YES.
Use the Left/Right Ar row Keys to select eithe r OFF
3
or TIMER and press YES.
Note: The ON time refers to th e time t he unit will go into Po wer Sav er Mode. The
OFF time is the time it will re-enter a READY or STANDBY mode.
Machine Operations
Enter the time you wish the unit to enter Power
4
Saver Mode and press YES.
Enter the time you wish the unit to leave Power
5
Saver Mode and return to normal operation.
Selecting Remote Monitor
This function allows servic e personnel to access the unit remotely. It is possible for the
Service Representative to monitor and change machine settings. This allows them to fix
your unit over the telephone.
Press the PROGRAM Key and scroll through the
1
menus until you reach the Machine O perations
menu and press YES.
Press 5 or pres s the down arrow five times to reach
2
the Remote Monitor Menu. Press YES.
Facsimile Programming 4 - 9
Page 70

Machine Operations
ON *OFF
-SELECT&PUSH”YES”-
MACHINE OPERATION?
YES / or 1-7
6 REMOTE PROGRAM?
OK=YES
ON *OFF
-SELECT&PUSH”YES”-
MACHINE OPERATION?
YES / or 1-7
7 TONE/PULSE
OK=YES
3
Selecting Remote Program
This function allows servic e personnel to change the unit’s firmware remotely . It is
possible for the Service Representative to change the unit’s firmware if this settin g is
ON.
1
Use the Left/Right Ar row Keys to select either ON
or OFF and press YES.
Press the PROGRAM Key and scroll through the
menus until you reach the Machine O perations
menu and press YES.
Press 6 or press the down arrow six times to reach
2
the Remote Program Menu. Press YES.
Use the Left/Right Ar row Keys to select either ON
3
or OFF and press YES.
Setting the Correct Dialing Type (Tone/Pulse)
Select either T ONE or PULSE a ccording to th e type of tele phone syst em connecti on to t he
facsimile unit.
Press the PROGRAM Key and scroll through the
1
menus until you reach the Machine O perations
menu and press YES.
2
4 - 10 Facsimile Programming
Scroll through the menu options until the TONE/
PULSE options appear and press YES.
Page 71

Use the Left/Right Arrow Keys to select either
*TONE PULSE
-SELECT&PUSH”YES”-
3
TONE or PULSE and press YES.
Machine Operations
Facsimile Programming 4 - 11
Page 72

Document Scan Settings
SCANNING&PRINTING?
YES / or 1-5
1 RESOLUTION?
OK=YES
*STD FINE EX-FINE
-SELECT&PUSH”YES”
Document Scan Settings
T o optimize scanning resolution and contrast, set according to your individual needs.
Resolution
T o assure the best quality document, please set the scanning resolution and contrast
according to t he requirements of your original documents. The default resolut i on setting
is Standard and the resolut ion will return to the default setting after each transmis sion if
using a different resolution.
Four scanning resolution options are available:
Choices Available Description
STD (Standard) (Default) Normal resolution for standard size characters.
FINE Higher resolution for the small size characters.
EXTRA FINE Highest resolution for image data.
Press the PROGRAM Key and scroll through the
1
menus until you reach the SCANNING &
PRINTING Menu. Press YES to begin
programming.
Press 1 or scroll down to the Resolution menu and
2
press YES.
Using the Left and Right arrows, select the
3
resolution you wish to h ave as the defa ult and press
YES to enter this selection into memory.
4 - 12 Facsimile Programming
Page 73

Scan Contrast
SCANNING&PRINTING?
YES / or 1-5
2 SCAN CONTRAST?
OK=YES
LIGHT *NORMAL DARK
-SELECT&PUSH”YES”
SCANNING&PRINTING?
YES / or 1-5
3 PRINT DENSITY?
OK=YES
*STD FINE EX-FINE
-SELECT&PUSH”YES”
There are three contrast levels of Light, Normal, Dark that you can select depending on
your original document. For documents with very fine or light characters, choose a
lighter level.
Press the PROGRAM Key and scroll through the
1
menus until you reach the SCANNING &
PRINTING Menu. Press YES to begin
programming.
Press 2 or scroll down to the Scan Contrast menu
2
and press YES.
Using the Left and Right a rrows, se lect the contr ast
3
you wish to have as the default and press YES to
enter this selection int o memory.
Document Scan Settings
Print Density
Set the print density according to your needs. There are six printing density level s
ranging from Light to Dark.
1
2
3
Press the PROGRAM Key and scroll through the
menus until you reach the SCANNING &
PRINTING Menu. Press YES to begin
programming.
Press 3 or scroll down to the Print Density menu
and press YES.
Using the Left and Right arrows, select the density
you wish to have as the default and press YES to
enter this selection int o memory.
Facsimile Programming 4 - 13
Page 74

Document Scan Settings
SCANNING&PRINTING?
YES / or 1-5
4 REDUCTION COPY?
OK=YES
*ON OFF
-SELECT&PUSH”YES”-
Reduction Copy
This function allows you to have the document pri nted by one of the two modes
described below:
Choices Available Description
ON The facsimile machine will reduce the copy document
OFF The facsimile machine will not reduce the copy
Press the PROGRAM Key and scroll through the
1
menus until you reach the SCANNING &
PRINTING Menu. Press YES to begin
programming.
as needed to fit on the paper. The maximum reduction
proportion is 70%. If greater reduction is needed, then
the remainder of the document will be printed on the
next page.
document and will instead print the remainder of the
document on the next page.
Note: Reduction copy c apabilities are not available when t he resolution setting is
set to Half Tone.
Press 4 or scrol l down to the Re duction C opy menu
2
and press YES.
Using the Left and Right arrows, select the option
3
you wish to have as the default and press YES to
enter this selection int o memory.
4 - 14 Facsimile Programming
Page 75

Rec. Paper Size
SCANNING&PRINTING?
YES / or 1-5
5 REC. PAPER SIZE?
OK=YES
A4 *LETTER LEGAL
-SELECT&PUSH”YES”-
SET PRINTER?
YES / or 1-8
1 AUTO CASS. SEL.?
OK=YES
*NOT AVAILABLE*
This function allows you to choose the recording paper size in Tray 1 (standard Paper
Tray) and t he optional Tray 2 (PFU Paper Cassette) for the firs t printi ng aft er power ON.
After first printing the machine remembers the paper size in the Standard Tray and
Optional Paper Cassette.
Press the PROGRAM Key and scroll through the
1
menus until you reach the SCANNING &
PRINTING Menu. Press YES to begin
programming.
Press 5 or scroll down to the Rec. (Recording)
2
Paper Size menu and press YES.
Using the Le ft and R ight arrows, select the s ize y ou
3
wish to have as the default and press YES to enter
this selection into memory.
Document Scan Settings
Auto Cassette Sel.
Allows users to select the 2nd paper cassette to print out the document when the
facsimile is equipped with the 2nd paper cassette. Users can set the received FAX or
printed PC document to be printed out from either the Upper or Lower Tray.
Press the PROGRAM Key and scroll through the
1
menus until you reach the Set Printer menu and
press YES.
Press 1 or YES to enter the Auto Cassette Sel. menu.
2
Press YES to select Auto Cassette Selection.
3
Note: The Optional PFU must be installed. If it
is not installed, you will receive this message.
Facsimile Programming 4 - 15
Page 76

Dial Registration
DIAL REGISTRATION?
YES / or 1-5
1 ONE-TOUCH DIAL?
OK=YES
-SELECT REGIST. KEY-
ONE-TOUCH 01
or PRESS “YES”
OK=YES
NAME=_
OK=YES
REGISTERED! KEEP?
OK=YES (EDIT/DEL=NO)
EDIT *DELETE
-SELECT&PUSH”YES”-
Dial Registration
This section gives instructions on how to program the number to be stored in the OneT ouch, Speed Dial and Gr oup Dial Keys. In addition, it shows you how to set up special
parameters for each One-Touch Key, including batch Time and Relay Broadcast.
One-Touch Keys
You can program the most freque ntly dialed fax numbers into One-Touch Keys. This
allows you to transmit documents sim ply by pressing a One-Touch Key and the START
Key. You can program any of the One-Touch Keys as Group Dial Keys with up to 50
locations in each.
Press the PROGRAM Key and scroll through the
1
menus until you reach the DIAL REGISTRATION
Menu. Press YES to begin programming.
Press YES since this is the f irst menu to appear and
2
press YES to enter the One-Touch Program.
Press the One-Touch Key you wish to program.
3
Press YES to accept your selection.
4
Enter the Telephone number you wish to transmit
5
to and press YES.
Enter the Name you wish associated with this
6
number and press YES after checking to see it OK.
Edit/Deleting
If you wish to change any entry, a screen allows you to accept or change.
1
If you wish to change a Key that was previously
2
programmed, this message appears. Press YES to
keep this location as is, or NO if you wish to edit it.
3
4 - 16 Facsimile Programming
If you choose NO, use the arrow keys to select
either EDIT or DELETE and then proceed with the
needed changes.
Page 77

Speed Dial Keys
DIAL REGISTRATION?
YES / or 1-5
2 SPEED DIAL?
OK=YES
SPEED DIAL =_
OK=YES
OK=YES
NAME=_
OK=YES
REGISTERED! KEEP?
OK=YES (EDIT/DEL=NO)
EDIT *DELETE
-SELECT&PUSH”YES”-
The fax number and other data for a particular destina tion can be programmed using a 3digit Speed Dial Number. This feature allows you to tra nsmit a document to the
particular destination by pressing the Speed Dial Key, entering the 3-digit number and
pressing the START Key. You can program a fax number in any of the 200 Speed Dial
locations, number 001 to 200.
Entering
Press the PROGRAM Key and scroll through the
1
menus until you reach the DIAL REGISTRATION
Menu. Press YES to begin programming.
Press 2 or scroll down to the Speed Dial menu and
2
press YES.
Enter the number of the location you want to
3
program and press YES.
Dial Registration
Enter the Telephone number you wish to transmit
4
to and press YES after checking to see its OK.
Enter the Name you wish associated with this
5
number and press YES after checking to see it OK.
You are given the opportunity to program additional locations. Continue to enter additional
6
Speed Dial locations or press NO to exit.
Edit/Deleting
If you wish to change any entry, a screen allows you to accept or change.
1
If you wish to change a Key that was previously
2
programmed, this message appears. Press YES to
keep this location as is, or NO if you wish to edit it.
If you choose NO, use the arrow keys to select
3
either EDIT or DELETE and then proceed with the
needed changes.
Facsimile Programming 4 - 17
Page 78

Dial Registration
DIAL REGISTRATION?
YES / or 1-5
3 GROUP DIAL?
OK=YES
-SELECT REGIST.KEY-
GROUP DIAL 25
or PRESS “YES”
GROUP NAME=_
OK=YES
NO.001=_
REGISTERED! KEEP?
OK=YES (EDIT/DEL=NO)
EDIT *DELETE
-SELECT&PUSH”YES”-
Group Dial Keys
Instead of their regular functions, a ny of the One-Touch Keys can be used as Group Dial
Keys. Destinations already stored for One-Touch, Speed Dial and Phone Book can be
entered in a Group Dial Key. Each Group can contain up to 50 locations.
Entering
Press the PROGRAM Key and scroll through the
1
menus until you reach the DIAL REGISTRATION
Menu. Press YES to begin programming.
Press 3 or scroll down to the Group Dial menu and
2
press YES.
Press the One-Touch Key you wish to use.
3
Press YES to accept your selection.
4
Enter the Group Name and press YES to accept.
5
Enter the Key(s) you wish included in this group.
6
Remember, you ca n include any One-Touch, Speed
Dial, or Phone Book entry already in memory.
Continue to enter the loca tions you wish to include and then press YES. You are given the
7
opportunity to program additi onal locations. Continue to enter additional Speed Dial
locations or press NO to exit.
Edit/Deleting
If you wish to change any entry, a screen allows you to accept or change.
1
If you wish to change a Key that was previously
2
programmed, this message appears. Press YES to
keep this location as is, or NO if you wish to edit it.
3
4 - 18 Facsimile Programming
If you choose NO, use the arrow keys to select
either EDIT or DELETE and then proceed with the
needed changes.
Page 79

Program Dial
DIAL REGISTRATION?
YES / or 1-5
4 PROGRAM DIAL?
OK=YES
-SELECT REGIST.KEY-
FUNCTION
SEL. 1/2/3/6/7
BROADCAST
NO.001=_
Instead of their regular functions, any of the last eight One-Touch Keys (57-64) can be
used as Program Keys. Transmission functions including: Broadcast, Timer TX
(Delayed T ransmission), Mailbox, Polling RX, and Relay Initiation can be programmed
into the programmed One-Touch Keys. This allows you to “One-Touch” an operation
that normally takes multiple key strokes.
Settings entered into these program keys remain in memory for future use.
Entering
1
2
Dial Registration
Press the PROGRAM Key and scroll through the
menus until you reach the DIAL REGISTRATION
Menu. Press YES to begin programming.
Press 4 or scroll down to the Program Dial menu
and press YES.
Press the One-Touch Key you wish to use.
3
Remember, it must be one of the last eight.
Choose the function you wish to program:
4
1=Broadcast, 2=Timer TX, 3=Mailbox TX,
6=Polling RX, and 7=Relay Initiate.
Note: To continue with this process, choose the group of steps that match your needs.
For 1=Broadcast:
A screen appears to confirm Broadcast was your
5
selection.
Enter the Key(s) you wish included in this group.
6
Remember, you ca n include any One-Touch, Speed
Dial, or Phone Book entry already in memory.
Continue to enter the loca tions you wish to include and then save. You are given the
7
opportunity to program additi onal locations. Continue to enter additional Speed Dial
locations or press NO to exit.
Facsimile Programming 4 - 19
Page 80

Dial Registration
TIMER TX
TIMER=_0:00
OK=YES
ENTER FAX NO.
or FUNCTION
MAILBOX TX
MAILBOX PW=_
OK=YES
ENTER FAX NO.
MAILBOX TX
NO.001=_
For 2=Timer TX:
A screen appears to confirm Timer TX was your
5
selection.
Enter the time you wish the transmission to occur
6
and press YES.
Enter the f ax number y ou wish to send to or se lect a
7
One-T ouch ro Speed Dial location and press YES.
Once this function has been programmed, you use it by
simply pressing the One-Touch Key you have just programmed. This is documented in
Chapter 3 Advanced Facsimile.
For 3 = Mailbox TX:
A screen appears to conf irm Mailbox TX was your
5
selection.
Enter the number of the Mailbox you wish use and
6
press YES.
Enter the fax number you wish to send to or select
7
Function. If you elect to enter a phone number,
Once this function has been programmed, you use it by
simply pressing the One-Touch Key you have just programmed. This is documented in
Chapter 3 Advanced Facsimile.
For 6 = Polling RX:
A screen appears to confirm Polling RX was your
5
selection.
4 - 20 Facsimile Programming
Enter the number of the Mailbox you wish use and
6
press YES.
Page 81

Enter the Polling PW.
POLLING PW-_000
OK=YES (DEL=NO)
RELAY INITIATE
-SEL. RELAY STATION-
ONE TOUCH 01
YES / or
REGISTERED! KEEP?
OK=YES (EDIT/DEL=NO)
EDIT *DELETE
-SELECT&PUSH”YES”-
7
Once this function has been programmed, you use it by
simply pressing the One-Touch Key you have just
programmed. This is documented in Chapter 3 Advanced Facsimile.
For 7 = Relay Initiate:
A screen appears to confirm Relay Initiate was
5
your selection.
Select the One-Touc h Key under which the remote
6
unit you wish to use as a Relay Station was entered.
Press YES to accept your entry or use the arrows to
7
select another.
Dial Registration
Once this function has been programmed, you use it by
simply pressing the One-Touch Key you have just programmed. This is documented in
Chapter 3 Advanced Facsimile.
Edit/Deleting
Batch TX
You can program your single location One-Touch Key to automatically batch
documents. By assigning a batch time to a programmed One-Touch Key, you can
eliminate repeated calls to the same number throughout the day. Your unit calls the
remote un it at a preset tim e an d tran sm its all doc um en ts sto red in memory for this
particular destination in one phone call.
If you wish to change any entry, a screen allows you to accept or change.
1
If you wish to change a Key that was previously
2
programmed, this message appears. Press YES to
keep this location as is, or NO if you wish to edit it.
If you choose NO, use the arrow keys to select
3
either EDIT or DELETE and then proceed with the
needed changes.
Facsimile Programming 4 - 21
Page 82

Dial Registration
DIAL REGISTRATION?
YES / or 1-5
5 BATCH TX?
-SELECT REGIST.KEY OK=YES
ONE-TOUCH 25
TX TIME=_0:00
OK=YES
*SET ONE-TOUCH 25
23:00
-SELECT REGIST. KEY (COMPLETE=NO)
REGISTERED! KEEP?
OK=YES (EDIT/DEL=NO)
EDIT *DELETE
-SELECT&PUSH”YES”-
Entering
Press the PROGRAM Key and scroll through the
1
menus until you reach the DIAL REGISTRATION
Menu. Press YES to begin programming.
Press 5 or scroll down to the Batch TX menu and
2
press YES.
Press the One-Touch Key you wish to use.
3
Enter the time at which the batch should be
4
transmitted and press YES to accept.
This screen confirms your entry.
•
Press the START key to enter this information into
5
memory, or press NO to exit.
Edit/Deleting
If you wish to change any entry, a screen allows you to accept or change.
1
If you wish to change a Key that was previously
2
programmed, this message appears. Press YES to
keep this location as is, or NO if you wish to edit it.
If you choose NO, use the arrow keys to select
3
either EDIT or DELETE and then proceed with the
needed changes.
4 - 22 Facsimile Programming
Page 83

TX Operation
TX OPERATION?
YES / or 1-2
1 DEFAULT TX?
OK=YES
*MEM TX ADF TX
-SELECT&PUSH”YES”-
Default TX
This function is used to set the default TX mode of the fax unit. Two options are
available:
TX Operation
Choices Available Description
Memory TX When set in this mode, documents are scanned into
memory for transmission and dialing starts after the first
pages is scanned (Quick TX).
ADF TX (Direct
Transmission)
Note: In Memory Transmission Mode, you can retrieve your original document
sooner than you can in ADF TX (Direct Tra nsmission) Mode.
Press the PROGRAM Key and scroll through the
1
menus until you reach the TX Opera tion Menu .
Press YES to begin programming.
Press 1 or scroll down to the Default TX menu and
2
press YES.
Using the Left and Right arrows, select the option
3
you wish to have as the default and press YES to
enter this selection int o memory.
When set in this mode, documents are scanned for
transmission after connection has been made to the
receiving unit. (When the available memory is insufficient,
please select ADF TX for a successful transmission)
If line is not available, the message “LINE IS BUSY” will be
displayed. The facsimile will retry based on the number of
redial attempts and intervals that were preset.
Facsimile Programming 4 - 23
Page 84

TX Operation
TX OPERATION?
YES / or 1-2
2 CLOSED NETWORK?
OK=YES
ON *OFF
-SELECT&PUSH”YES”-
TX OPERATION?
YES / or 1-2
3 FAX FORWARDING?
OK=YES
FORWARD NO.=_1
OK=YES / or 01-20
FORWARD TX =ON
OK=YES
SEL. START DAY=SUN.
OK=YES / or 0-6
Closed Network TX
When closed network TX/RX mode is set ON, transmission is possible only with the
destination stations registered in One-Touch and Speed Dial.
Press the PROGRAM Key and scroll through the
1
menus until you reach the TX Opera tion Menu .
Press YES to begin programming.
Press 1 or scrol l down to the Close d Networ k menu
2
and press YES.
Using the Left and Right arrows, select the option
3
you wish to have as the default and press YES to
enter this selection int o memory.
Fax Forwarding
This allows a user to set 20 different remote telephone numbers for fax forwarding. If
you specify a telephone number, only those messages from that number will be
forwarded. If you don’t specify a remote telephone number, all the incoming message
will be forward to specified location.
Press the PROGRAM Key and scroll through the
1
menus until you reach the TX Opera tion Menu .
Press YES to begin programming.
Press 3 or scroll down to the Fax Forwarding menu
2
and press YES.
Select a location number 01 through 20 to which
3
you wish forward your messages. Press YES to
enter this selection int o memory.
Select either ON or OFF and press YES.
4
4 - 24 Facsimile Programming
Select the day you wish the forwarding to begin
5
and press YES.
Page 85

Select the day you wish the forwarding to stop and
SEL. STOP DAY=WEN.
OK=YES / or 0-6
SEL. START TIME=_0:00
OK=YES (DEL=NO)
SEL. STOP TIME=_0:00
OK=YES (DEL=NO)
PRINT AT LOCAL=OFF
OK=YES
*SPECIFIC ALL
-SELECT&PUSH”YES”-
ENTER REMOTE FAX NO.
7778885555
OK=YES (DEL=NO)
ENTER FORWARD TEL NO.
9998884444
OK=YES (DEL=NO)
FORWARD NO.=_1
OK=YES ? or 01-20
6
press YES.
Select the time you wish the forwarding to begin
7
and press YES.
Select the time you wi sh the f orwarding t o stop and
8
press YES.
Determine if you also want the message to print
9
locally. Select either ON or OFF and press YES.
Determine if you want some or all of your
10
messages forwarded. Se lect SPECIFIC or ALL a nd
press YES.
TX Operation
Enter the telephone number for the remo te unit
11
from which you will be receiving the message.
Enter the remote fax number to which you wish to
12
have the messages sent and press YES.
Select the day you wish the forwarding to begin
13
and press YES.
Select the day you wish the forwarding to begin
14
and press YES.
Facsimile Programming 4 - 25
Page 86

TX Operation
TX OPERATION?
YES / or 1-4
4 HEADER?
OK=YES
*ON OFF
OK=YES
Header
The header prints the sender machine name, fax number, date/time and page number at
the top of the sheet at the remote locat ion. This is r equir ed by the FCC in the USA and is
regulated in other way in other countries. In the USA you will have one of the following
options.
• Inside the Body: This places the header in the first 5mm of the copy top. It does
not shift the copy down. Some copy may be overwritten.
• Outside the Body: This places the header in the first 5mm of the copy top. It
then start the body below this . Depending on the remote mach ine setting s one of
three things happen: 1) because the copy is not a full page, the copy fits below
the header at 100%, 2) the copy is reduced to fit the page, or 3) the copy is split
into two pages at 100%.
Press the PROGRAM Key and scroll through the
1
menus until you reach the TX Opera tion Menu .
Press YES to begin programming.
Press 4 or scroll down to the Header menu and
2
press YES.
Select if you wish to turn the header ON or OFF
3
and press YES.
Note: This is not an option in the USA and the message will not appear.
Note: In the USA you can have the header print inside or outside the text area.
For assistance, contact your Service Representative.
4 - 26 Facsimile Programming
Page 87

RX Operation
RX OPERATION?
YES / or 1-9
1 MEM RX MODE?
OK=YES
ON *OFF
-SELECT&PUSH”YES”-
Memory RX Mode
ON = Memory Lock
In Memory RX Mode, the machine stores all received documents in memory. The
document is not printed until the machine receives a print command.
The print command can be activated by a timer or password. The print tim er co mmand
instructs the machine to start printing the document stored in memory at the specified
time. The password print command, instr uct s the machine to start printing when a
password is entered.
A password print c ommand can also be used to override the print timer command. I f the
print timer command has been set and you want to print your incoming messages before
the set time, you can enter your password to print the doc ument immediately.
RX Operation
Note: To set a password or to change you present one, contact your Key Operator
for assistanc e.
OFF
If the unit is set in the Memory RX Mode OFF status, then the received document will
be printed out directly inst ead of being stor ed in memory.
Case 1: If there is no dat a store d in the memor y and the unit is s et in OFF stat us, the n the
received d ocu me n ts print out dire ct ly.
Case 2: If there is a document stored in the memory and the unit is set in OFF status,
then the previously receiv ed documents pr inted out first.
Note: You need to enter the correct password to print out the document if a
password has been previously set.
Press the PROGRAM Key and scroll through the
1
menus until you reach the RX Operation Menu.
Press YES to begin programming.
Press 1 or scrol l down to the Menu RX Mode menu
2
and press YES.
Facsimile Programming 4 - 27
Using the Left and Right arrows, select the option
3
you wish to have as the default and press YES to
enter this selection int o memory.
Page 88

RX Operation
*ON OFF
-SELECT&PUSH”YES”-
ON TIME=_0:00
OK=YES
OFF TIME=_0:00
OK=YES
*M-RX-ON*
<T>
*M-RX-ON*
<T><PWD>
<<M-RX>> 100%
-SET DOC.FACE DOWN-
To select Memory RX ON, use the left and right
4
Arrow Keys to select ON and press YES.
Enter the time you wish to start r eceivin g messages
5
into memory .
Not e : If th e ON and OF F ti me are id enti c al,
messages will always be received into memory.
Enter the time you wish to stop receiving messages
6
into memory .
If a password was set for this feature, you have to enter it for this to work. If you
7
need a password, contact your Key Operator.
If you have your unit progra mmed for Memory RX
8
with the Timer turne d ON, your scr een shows the
following message.
If you have your unit progra mmed for Memory RX
9
with the Timer turned ON and a Password required,
your screen shows the following message.
The ready message for your unit now shows that
10
Memory RX is active.
4 - 28 Facsimile Programming
Page 89

No. of Rings
RX OPERATION?
YES / or 1-9
2 NO. of RINGS?
OK=YES
NO. of RINGS=_2
OK=YES (DEL=NO)
RX OPERATION?
YES / or 1-9
3 TWO PAGE PRINT?
OK=YES
ON ON(SORT) *OFF
-SELECT&PUSH”YES”-
The unit will answer an incoming call after the number of rings (1-16) set in this menu.
The default setting is 2 rings.
1
2
3
RX Operation
Press the PROGRAM Key and scroll through the
menus until you reach the RX Operation Menu.
Press YES to begin programming.
Press 2 or scroll down to the No. of Rings menu
and press YES.
Enter the number of rings you wish to have as the
default and press YES to enter this selection into
memory.
Two Page Print
With this function, you can set the facsimile to print two copies of a document.
Press the PROGRAM Key and scroll through the
1
menus until you reach the RX Operation Menu.
Press YES to begin programming.
Press 3 or scroll down to the Two Page Print menu
2
and press YES.
Using the Left and Right arrows, select the option
3
you wish to have as the default and press YES to
enter this selection int o memory.
Choice Available Description
ON (Stack Mode) The facsimile will print copies of the document
without sorting the document.
ON (Sort Mode) The facsimile will print two copies of the document
and sort the document.
OFF The facsimile will print only one copy of the
document.
Facsimile Programming 4 - 29
Page 90

RX Operation
RX OPERATION?
YES / or 1-9
4 REDUCTION RX?
OK=YES
*ON OFF CUT
-SELECT&PUSH”YES”-
Reduction RX
This function allows you to choose among the thre e modes described below:
Choices Available Description
ON The facsimile machine will reduce the documents as needed
to fit on the paper.
The maximum reception proportion is 70%.
OFF The facsimile machine will not reduce the document and
instead will print the remainder on a second page if the
image size exceeds the length of the paper.
CUT The facsimile machine will automatically cut off the
remainder of the document if it is less than 18 mm. If the
remainder exceeds 18mm, it will be printed on a second
page.
Press the PROGRAM Key and scroll through the
1
menus until you reach the RX Operation Menu.
Press YES to begin programming.
2
3
Mailbox RX
This function is used to set up the personal mail box to keep rec eived documents
confidential. Each mailbox is protected with a specified 4-digit password number.
Press 4 or scroll down to the Reduction RX menu
and press YES.
Using the Left and Right arrows, select the
resolution you wish to h ave as the defa ult and press
YES to enter this selection into memory.
Note: For information on this option, contact your Key Operator. Only the
administrator can set new passwords or change existing ones.
4 - 30 Facsimile Programming
Page 91

Closed Network
RX OPERATION?
YES / or 1-9
6 CLOSED NETWORK?
OK=YES
ON *OFF
-SELECT&PUSH”YES”-
RX OPERATION?
YES / or 1-9
7 RX MODE?
OK=YES
Set to ON when you want to receive documents only from specified parties. When
activated, it will only accept r eceptio ns from those numbers r egister ed in the One-Touch
or Speed Dial Keys.
Press the PROGRAM Key and scroll through the
1
menus until you reach the RX Operation Menu.
Press YES to begin programming.
Press 4 or scrol l down to the Close d Networ k menu
2
and press YES.
RX Operation
Choices Available Description
ON Closed Network RX mode is applicable to the numbers
registered in the One-Touch and Speed Dial Keys.
OFF Disable the function. You are able to receive from all parties.
RX Mode
This function is used to set the mode in which the facsimile machine receives the
document.
Using the Left and Right arrows, select the option
3
you wish to have as the default and press YES to
enter this selection int o memory.
Choices Available Description
AUTO In this mode, the facsimile machine will automatically
answer the phone call and receive the document.
MANUAL In this mode, the facsimile will not automatically receive the
document. The user must answer each call manually.
Press the PROGRAM Key and scroll through the
1
menus until you reach the RX Operation Menu.
Press YES to begin programming.
Press 6 or scrol l down to the Close d Networ k menu
2
and press YES.
Facsimile Programming 4 - 31
Page 92

RX Operation
*AUTO MANUAL
-SELECT&PUSH”YES”-
RX OPERATION?
YES / or 1-9
8 FOOTER?
OK=YES
ON *OFF
-SELECT&PUSH”YES”-
Footer (Receive Time Print)
Using the Left and Right arrows, select the option
3
you wish to have as the default and press YES to
enter this selection int o memory.
The footer is printed at the bottom of each page received showing the receiving
machine’s fax number , da te and the time of reception, the sender’s fax number, the
reception control number and page number.
Press the PROGRAM Key and scroll through the
1
menus until you reach the RX Operation Menu.
Press YES to begin programming.
Press 4 or scrol l down to the Close d Networ k menu
2
and press YES.
Using the Left and Right arrows, select the option
3
you wish to have as the default and press YES to
enter this selection int o memory.
Note: Your Service Technician can set this to
print either inside or outs ide the message area.
4 - 32 Facsimile Programming
Page 93

Continuous Poll RX
RX OPERATION?
YES / or 1-9
10 CONTI. POLLING RX?
OK=YES
POLL GROUP NO.=_1
OK=YES /or 01-10
POLL GROUP 01 =OFF
OK=YES(Fin.=START)
SEL. START DAY=SUN.
OK=YES / or 0-6
SEL. STOP DAY=SUN.
OK=YES / or 0-6
START TIME=_0:00
OK=YES (DEL=NO)
STOP TIME=_0:00
OK=YES (DEL=NO)
REDIAL TIME=1 Min.
OK=YES / or 1-8
ENTER POLLING FAX NO.
NO.001=_
OK=YES (DEL=NO)
Poll the speci fied location with pre-set timer. Up to 10 groups can be set for polling, and
each group can set 10 locations.
Press the PROGRAM Key and scroll through the
1
menus until you reach the RX Operation Menu.
Press YES to begin programming.
Press 10 or scroll down to the Continuous Polling
2
RX menu and press YES.
Enter the Poll Group number you will to assign to
3
this group and press YES.
The next scree n indic ates tha t thi s Poll Group is n ot
4
active. Press YES to continue.
RX Operation
Select a start day to begin polling. Press YES to
5
continue.
Select a stop day to finish polling. Press YES to
6
continue.
Enter a start time to begin poll ing. Press YES to
7
continue.
Enter a stop time to finish polling. Press YES to
8
continue.
Enter the number of minutes between each redail.
9
Press YES to continue.
Enter the remote fax number to be polled.
10
11
Facsimile Programming 4 - 33
Press YES to continue.
Page 94

RX Operation
POLLING PW=_000
OK=YES (DEL=NO)
NO. 002=_
(Fin.=START)
Enter the 4-digit Polling Password. This number is
12
set at the remote location and you must match it
when sending to them.
Note: Polling Passwords must be set at both
units and must match for Polling to work.
If you wish to poll more than one location, enter
13
that location. When you are done entering the data,
press START to enter the data into memory.
4 - 34 Facsimile Programming
Page 95

Line 2 Setting
LINE 2 SETTING?
YES / or 1-3
1 LINE 2 FAX NO.?
OK=YES
_
OK=YES
LINE 2 SETTING?
YES / or 1-3
The Optional Dual-Line kit allows you to connect one more telephone line to the fax
unit at the same time.
You can sele ct either telephone line for pr iority reception, and you can also select which
line is to be used for priority sending when both lines are open.
Line 2 Fax No.
Register your second fax number. It’s operation is the same as entering it for Line 1.
1
2
Line 2 Setting
Press the PROGRAM Key and scroll through the
menus until you reach the Set Printer menu and
press YES.
Press YES or 1 to select the first menu, Line 2 Fax
No. Press Yes.
Enter the telephone number of your seco nd fax
3
line. Press YES to accept this data into memory.
TX Line Priority
This allows the user to determine the priority of the second line.
Choices Available Description
LINE 1 TX PRIORITY When both lines are read, transmission is sent on
line 1. If line 1 is busy and line 2 is read,
transmission is sent on line 2.
LINE 2 TX PRIORITY When both lines are read, transmission is sent on
line 2. If line 2 is busy and line 1 is read,
transmission is sent on line 1.
LINE 1 TX PROHIBIT Even if both lines are read, transmission is sent on
line 2. Line 1 is only available for receiving.
LINE 2 TX PROHIBIT Even if both lines are read, transmission is sent on
line 1. Line 2 is only available for receiving.
Facsimile Programming 4 - 35
Note: The line 2 cannot be used for OFF HOOK TX/RX, or optional handset.
Press the PROGRAM Key and scroll through the
1
menus until you reach the Set Printer menu and
press YES.
Page 96

Line 2 Setting
2 TX LINE PRIORITY?
OK=YES
LINE 1 TX PRIORITY?
OK=YES
LINE 2 SETTING?
YES / or 1-3
3 LINE2 TONE/PULSE?
OK=YES
*TONE PULSE
- SELECT&PUSH”YES”-
Line 2 Tone / Pulse
Press 2 or sc roll down t o t he TX Line P riority m enu
2
and press YES.
Select either 1 or 2 as the line you wish to transmit
3
on. Press YES to accept this data into memory.
This allows the user to set the dialing mode of line 2. It’s operation is the same of TONE/
PULSE setting for Line 1.
Press the PROGRAM Key and scroll through the
1
menus until you reach the Set Printer menu and
press YES.
Press 3 or scroll down to the Line 2 Tone/Pulse
2
menu and press YES.
Select either Tone or Pulse. Press YES to accept
3
this data into memory.
4 - 36 Facsimile Programming
Page 97

Reports
REPORTS?
YES / or 1-6
1 ACTIVITY REPORT?
OK=YES
*ON OFF
-SELECT&PUSH”YES”-
REPORTS?
YES / or 1-6
2 RESERV. REPORT?
OK=YES
*ON OFF
-SELECT&PUSH”YES”-
Activity Report
This unit can print several dif ferent reports to aid in managing your fax tr affic and the
unit itself.
An Activity Report prints the resul ts for the past 60 communications. it is used to check
whether a communication was successf ul, the number of communications made, and
communication time.
Press the PROGRAM Key and scroll through the
1
menus until you reach the Reports menu and press
YES.
Press YES since this is th e first menu to appear.
2
Reports
Use the Left/Right Ar row Keys to select either ON
3
or OFF and press YES.
Reserv. (Reservation) Report
A Reservation Report prints a list of reservations for broadcast transmission. When the
function is turned ON, a Reservation Report is printed before a broadcast transmission or
multi-polling recep tion is made, allowing you to check the details of the reservation
request.
Press the PROGRAM Key and scroll through the
1
menus until you reach the Reports menu and press
YES.
Press 2 or scroll down to the Reserv. Report menu
2
and press YES.
Use the Left/Right Ar row Keys to select either ON
3
or OFF and press YES.
Facsimile Programming 4 - 37
Page 98

Reports
REPORTS?
YES / or 1-6
3 TX RESULTS REPORTX?
OK=YES
*ON OFF
-SELECT&PUSH”YES”-
REPORTS?
YES / or 1-6
4 RX RESULTS REPORT?
OK=YES
*ON OFF
-SELECT&PUSH”YES”-
TX Results Report
A TX Results Report prints the results of a transmission after it has been completed. This
report can be used to check whether a transmission has been successful.
Press the PROGRAM Key and scroll through the
1
menus until you reach the Reports menu and press
YES.
Press 3 or scroll down to the TX Results Report
2
menu and press YES.
Use the Left/Right Ar row Keys to select either ON
3
or OFF and press YES.
RX Results Report
A RX Results Report prints the results aft er rec eiving a Confidential or Multi-Polling
document or when errors oc cur during reception. This rep ort can be used to check whe ther
a reception by Mailbox or Multi-Polling ha s been suc cessful.
Press the PROGRAM Key and scroll through the
1
menus until you reach the Reports menu and press
YES.
Press 4 or scroll down to the RX Results Report
2
menu and press YES.
Use the Left/Right Ar row Keys to select either ON
3
or OFF and press YES.
4 - 38 Facsimile Programming
Page 99

Broadcast Report
REPORTS?
YES / or 1-6
5 BROADCAST REPORT?
OK=YES
*ON OFF
-SELECT&PUSH”YES”-
REPORTS?
YES / or 1-6
6 TONER LOW REPORT?
OK=YES
ON *OFF
-SELECT&PUSH”YES”-
A Broadcast Report prints a list of results of broadcast transmission.
Press the PROGRAM Key and scroll through the
1
menus until you reach the Reports menu and press
YES.
Press 5 or scroll down to the Broadcast Report
2
menu and press YES.
Use the Left/Right Ar row Keys to select either ON
3
or OFF and press YES.
Reports
Toner Low Report
A To ner Low Report will transmit to the service center when the toner is low .
Press the PROGRAM Key and scroll through the
1
menus until you reach the Reports menu and press
YES.
Press 6 or scroll down to the Toner Low Report
2
menu and press YES.
Use the Left/Right Ar row Keys to select either ON
3
or OFF and press YES.
Enter the Telephone number per your Lanier
4
Servi ce Representati ve.
Facsimile Programming 4 - 39
Page 100

Reports
Other Reports and Lists
This unit can print other reports and lists that are useful in managing and optimizin g
your fax traffic. See the list below. Some of these are covered in other sections of this
manual in more detail.
Report Name Description Printing
Auto Manual
One-Touch List Prints a list of destinations which have been
programmed for One-Touch Dial Keys.
Speed Dial List Prints a list of the destinations which have
been programmed for the Speed Dial Keys.
Memory Data List Prints a list of the documents to be
transmitted and those that are stored in
memory.
Memory Image Print Prints the first page of the document stored
in memory which has yet to be transmitted.
Key Setting List Prints a List of the settings for Group Dial
and Program Dial Keys.
Machine Status List Prints a list of current settings, including
Page counts.
Memory Full Report Prints out when a memory overflow occurs. O X
Power Fail Report Prints a list of documents whose data has
been lost and which were not transmitted
due to a power failure occurring while the
documents were stored in memory.
Backup RAM Error
Report
Before turning OFF, the unit prints out a list
of the PROGRAM Utilities, etc., that were
not stored in Backup RAM because of
memory error.
XO
XO
XO
XO
XO
XO
OX
OX
O = Yes X = No
Auto printing is set using the PROGRAM Utilities.
- When auto printing is set to ON, the report is printed automatically.
- When auto printing is set to OFF, the report can only be printed when started manually
from the machine’s control panel.
4 - 40 Facsimile Programming
 Loading...