

Page 1
Installation, Operation & Maintenance
Model: PBE12 & PBE24
Star Manufacturing International 10 Sunnen Drive St. Louis, MO 63143
Part Number: 2M-Z9993 Phone: (314) 781-2777, Fax: (314) 781-2714
Rev. C WWW.STAR-MFG.COM October 23, 2007
.
Page 2

SAFETY SYMBOL
Using any part other than genuine Star factory supplied parts relieves the
manufacturer of all liability.
Star reserves the right to change specifi cations and product design without
notice. Such revisions do not entitle the buyer to corresponding changes,
improvements, additions or replacements for previously purchased
equipment.
Due to periodic changes in designs, methods, procedures, policies and
regulations, the specifi cations contained in this sheet are subject to change
without notice. While Star Manufacturing exercises good faith efforts to provide
information that is accurate, we are not responsible for errors or omissions
in information provided or conclusions reached as a result of using the
specifi cations. By using the information provided, the user assumes all risks in
connection with such use.
These symbols are intended to alert the user to the presence of
important operating and maintenance instructions in the manual
accompanying the appliance.
RETAIN THIS MANUAL FOR FUTURE REFERENCE
NOTICE
MAINTENANCE AND REPAIRS
Contact your local authorized service agent for service or required maintenance. Please record the model
number, serial number, voltage and purchase date in the area below and have it ready when you call to
ensure faster service.
Model No.
Serial No.
Voltage
Purchase Date
Authorized Service Agent
Reference the listing provided with the unit
or
for an updated listing go to:
Website: www.star-mfg.com
E-mail Service@star-mfg.com
Telephone: (800) 807-9054 Local (314) 781-2777
The Star Service Help Desk
Business 8:00 am to 4:30 p.m. Central Standard Time
Hours:
Telephone: (800) 807-9054 Local (314) 781-2777
Fax: (800) 396-2677 Local (314) 781-2714
E-mail Parts@star-mfg.com
Service@star-mfg.com
Warranty@star-mfg.com
Website: www.star-mfg.com
Mailing Address: Star Manufacturing International Inc.
10 Sunnen Drive
St. Louis, MO 63143
U.S.A
2
Page 3

TABLE OF CONTENTS
CHAPTER PAGE
READ FIRST......................................................................................................4
EQUIPMENT DESCRIPTION ..........................................................................6
UNPACKING.....................................................................................................7
INSTALLATION ...............................................................................................8
INITIAL START UP..........................................................................................10
OPERATION......................................................................................................11
CLEANING & MAINTENANCE PROCEDURES..........................................13
WIRING DIAGRAM PBE12 .............................................................................14
WIRING DIAGRAM PBE24 .............................................................................15
PBE12 EXPLODED VIEW & PARTS LIST.....................................................16-17
PBE24 EXPLODED VIEW & PARTS LIST.....................................................18-19
Rev. - 2006
3
Page 4
IMPORTANT READ FIRST IMPORTANT
CAUTION: THE GRIDDLE PBE12 WEIGHS 70 LBS (32 KG). THE
PBE24 WEIGHS 130 LBS (59 KG). FOR SAFE
HANDLING, INSTALLER SHOULD OBTAIN HELP AS
NEEDED OR EMPLOY APPROPRIATE MATERIALSHANDLING EQUIPMENT (SUCH AS A FORKLIFT,
DOLLY OR PALLET JACK) TO REMOVE THE UNIT
FROM THE PACKAGING AND MOVE IT TO THE
PLACE OF INSTALLATION.
CAUTION: ANY STAND, COUNTER OR OTHER DEVICE ON
WHICH THE GRIDDLE WILL BE LOCATED MUST BE
DESIGNED TO SUPPORT THE WEIGHT OF THE
GRIDDLE.
CAUTION: SHIPPING STRAPS ARE UNDER TENSION AND CAN
SNAP BACK WHEN CUT.
DANGER: THIS APPLIANCE MUST BE GROUNDED AT THE
TERMINAL PROVIDED. FAILURE TO GROUND THE
APPLIANCE COULD RESULT IN ELECTROCUTION
AND DEATH.
WARNING: INSTALLATION OF THE UNIT MUST BE DONE BY
PERSONNEL QUALIFIED TO WORK WITH
ELECTRICITY. IMPROPER INSTALLATION CAN
CAUSE INJURY TO PERSONNEL AND/OR DAMAGE
TO EQUIPMENT. UNIT MUST BE INSTALLED IN
ACCORDANCE WITH ALL APPLICABLE CODES.
NOTICE: The data plate is located on the back of each griddle.
The griddle voltage, wattage, serial number, wire size
and clearance specifications are on the data plate.
This information should be carefully read and
understood before proceeding with the installation.
NOTICE: The installation of any components such as a vent
hood, grease extractors or fire extinguisher systems
must conform to their applicable National, State and
locally recognized installation standards.
NOTICE: During the first few hours of operation you may
notice a small amount of smoke and a faint odor from
the smoke. This is normal for a new griddle and will
disappear after the first few hours of use.
CAUTION: ALWAYS KEEP THE AREA NEAR THE APPLIANCE
FREE FROM COMBUSTIBLE MATERIALS.
CAUTION: KEEP FLOOR IN FRONT OF EQUIPMENT CLEAN
AND DRY. IF SPILLS OCCUR, CLEAN IMMEDIATELY
TO AVOID THE DANGER OF SLIPS OR FALLS.
Rev. - 2006
4
Page 5

IMPORTANT READ FIRST IMPORTANT
WARNING: KEEP WATER AND SOLUTIONS OUT OF CONTROLS.
NEVER SPRAY OR HOSE CONTROL CONSOLE,
ELECTRICAL CONNECTIONS, ETC.
CAUTION: MOST CLEANERS ARE HARMFUL TO THE SKIN, EYES,
MUCOUS MEMBRANES AND CLOTHING.
PRECAUTIONS SHOULD BE TAKEN TO WEAR RUBBER
GLOVES, GOGGLES OR FACE SHIELD AND
PROTECTIVE CLOTHING. CAREFULLY READ THE
WARNING AND FOLLOW THE DIRECTIONS ON THE
LABEL OF THE CLEANER TO BE USED.
WARNING: ALWAYS HOLD THE UPPER GRILL OPEN WHILE
CLEANING TO PREVENT INJURY IN CASE OF GRILL
CLOSING.
CAUTION:
DO NOT USE ICE OR WATER TO CLEAN THE COOKING
SURFACE WHILE THE GRIDDLE IS HOT. THE GRILL IS
MADE OF CAST IRON AND MAY CRACK FROM A
RAPID TEMPERATURE CHANGE.
Rev. - 2006 5
Page 6

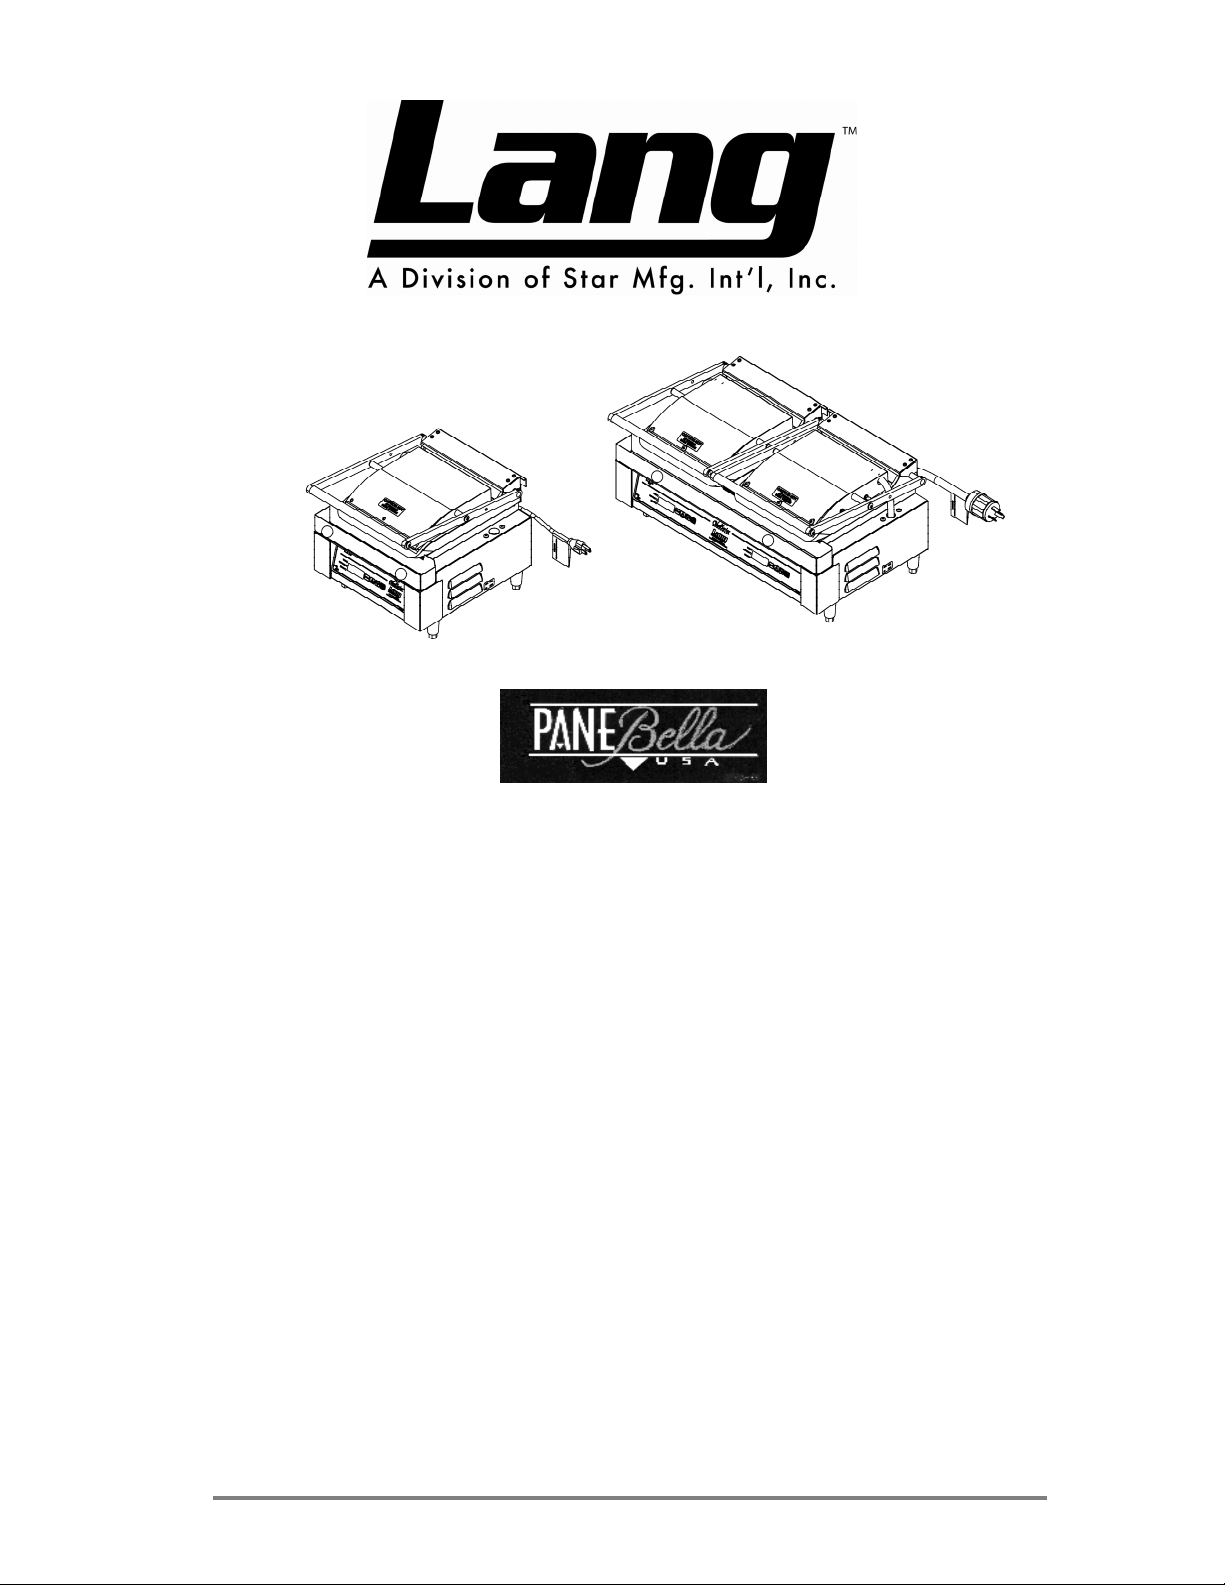
EQUIPMENT DESCRIPTION
Pane Bella, Single Grill (PBE12)
• Power: The PBE12 operates on 120, 208 or 240 volts. Each grill is supplied with
the appropriate cord and plug built in.
• Counter space required: 13.3 in wide (33.7 cm) and 14.0 in deep (35.6 cm).
• Weight: The grill weighs 70 lbs. (32 kg).
Pane Bella, Double Grill (PBE24)
• Power: The PBE24 operates on 208 or 240 volts. Each grill is supplied with the
appropriate cord and plug built in.
• Counter space required: 24 in wide (61 cm) and 14.0 in deep (35.6 cm).
• Weight: The grill weighs 130 lbs. (59 kg).
Rev. - 2006 6
Page 7

UNPACKING
Receiving the Griddle
Upon receipt, check for freight damage, both visible and concealed. Visible
damage should be noted on the freight bill at the time of delivery and signed by the
carrier's agent. Concealed loss or damage means loss or damage which does not
become apparent until the merchandise has been unpacked. If concealed loss or
damage is discovered upon unpacking, make a written request for inspection by the
carrier's agent within 15 days of delivery. All packing material should be kept for
inspection. Do not return damaged merchandise to Lang Manufacturing Company.
File your claim with the carrier.
Location
Prior to un-crating, move the griddle as near its intended location as practical. The
crating will help protect the unit from the physical damage normally associated
with moving it through hallways and doorways.
Un-crating
The griddle will arrive completely assembled inside a wood frame covered by a
cardboard box and strapped to a pallet. Remove the cardboard cover, cut the straps
and remove the wood frame. Remove griddle from the packaging and place in
intended location.
CAUTION: THE GRIDDLE PBE12 WEIGHS 70 LBS (32 KG). THE
PBE24 WEIGHS 130 LBS (59 KG). FOR SAFE
HANDLING, INSTALLER SHOULD OBTAIN HELP AS
NEEDED OR EMPLOY APPROPRIATE MATERIALSHANDLING EQUIPMENT (SUCH AS A FORKLIFT,
DOLLY OR PALLET JACK) TO REMOVE THE UNIT
FROM THE PACKAGING AND MOVE IT TO THE PLACE
OF INSTALLATION.
CAUTION: ANY STAND, COUNTER OR OTHER DEVICE ON WHICH
THE GRIDDLE WILL BE LOCATED MUST BE
DESIGNED TO SUPPORT THE WEIGHT OF THE
GRIDDLE.
CAUTION: SHIPPING STRAPS ARE UNDER TENSION AND CAN
SNAP BACK WHEN CUT.
Rev. - 2006 7
Page 8

INSTALLATION
DANGER: THIS APPLIANCE MUST BE GROUNDED AT THE
TERMINAL PROVIDED. FAILURE TO GROUND THE
APPLIANCE COULD RESULT IN ELECTROCUTION AND
DEATH.
WARNING: INSTALLATION OF THE UNIT MUST BE DONE BY
PERSONNEL QUALIFIED TO WORK WITH ELECTRICITY.
IMPROPER INSTALLATION CAN CAUSE INJURY TO
PERSONNEL AND/OR DAMAGE TO EQUIPMENT. UNIT
MUST BE INSTALLED IN ACCORDANCE WITH ALL
APPLICABLE CODES.
NOTICE: The data plate is located on the back of each griddle. The
griddle voltage, wattage, serial number, wire size and
clearance specifications are on the data plate. This
information should be carefully read and understood
before proceeding with the installation.
NOTICE: The installation of any components such as a vent hood,
grease extractors and/or fire extinguisher systems must
conform to their applicable National, State and locally
recognized installation standards.
Electrical Connection
Follow the receptacle manufacturer’s instructions when connecting the receptacle
to the power supply.
The electrical connection must be made in accordance with local codes or in the
absence of local codes with NFPA No. 70 latest edition (in Canada use: CSA STD.
C22.1).
The electrical service entrance is provided by a cord and plug located at the rear of
the appliance.
The plug provided for 208/240V is a L6-30P. The PBE12 120V comes with a
standard plug. The receptacle for a 208/240V is a L6-30R and must be supplied by
the installer. The PBE12 120V will use a standard receptacle.
Supply wire size must be large enough to carry the amperage load for the number
of appliances being installed. Wire size information can be found on the data plate.
Rev. - 2006 8
Page 9

INSTALLATION CONT’D
Ventilation and Clearances
Standard minimum clearance from combustible construction is as follows:
1 inches from sides
4 inches from back
1 inches from floor
The installation of any components such as a vent hood, grease extractors and/or fire
extinguisher systems must conform to applicable nationally recognized installation
standards.
Hood Stop (Optional)
Remove the ¼-20 thumb screws. With the half-moon crescent in the up position, align
the Hood Down Stop with the thumb screw holes in the upper casting. Select the pair of
holes that provides the best height setting.
Screw the thumb screws into the upper casting until tight.
PBE24 Only:
Repeat the above two steps for the other side
Rev. - 2006 9
Page 10

INITIAL START UP
Initial Start Up
Before starting the grill for the first time, clean the grill body and cooking surfaces
with a mild soap and water solution, then rinse with clear water and dry.
Close the upper cooking surface and set the temperature to 200°F (93°C) for two
hours to evaporate any moisture that may be in the elements and grill castings.
After two hours, set the temperature to 350°F (177°C) for 1/2 hour.
Seasoning the Cooking Surfaces
The cooking surfaces must be "seasoned" in order to eliminate product sticking.
To season, set the temperature to 275°F (135°C).
Once at temperature (the Ready light will turn on and a buzzer will sound), spray the
upper and lower cooking surfaces with a non-salted vegetable oil such as Pam®.
Allow the grill to stand at temperature until the cooking surfaces look dry, then
spray them again.
Set the temperature to 425°F (218°C) and wait until the Ready light turns on, then
repeat the procedure.
NOTICE: During the first few hours of operation you may still
notice a small amount of smoke coming off the griddle,
and a faint odor from the smoke. This is normal for a
new griddle and will disappear after the first few hours of
use.
Product Sticking Hint
The seasoning process is intended to eliminate product sticking. Given the nature
and diversity of different products grilled on the Pane Bella some sticking may
infrequently occur. The utilization of a spatula will enable the operator to gently
release or “pop” any product that may stick to upper or lower platens.
Rev. - 2006 10
Page 11

OPERATION
Control Panel
TIME
SET TEMP
READY
Display
MODE UP DOWN
Time & Set Temp Lights
Either light will illuminate to indicate which mode has been accessed (see Mode Button instructions).
Ready Light
This light will illuminate when the Actual Temp reaches the Set Temp.
Display
Time or Set Temp will be displayed, corresponding with the mode that has been selected (see Mode
Button instructions). The Actual Temp can also be displayed (see the Additional Features section).
NOTE: The Display will flash when the Actual Temp is adjusting to the Set Temp. Once the Actual
Temp reaches the Set Temp, the display will revert to steady on, the Ready Light will illuminate and
an alerting buzzer will sound.
START /
RESET
Mode Button
Use this to change from Time Mode to Set Temp Mode and back again. NOTE: The Pane Bella may
be configured to display either one or four timers (see Additional Features section).
Up & Down Buttons
Use to adjust the Time and Set Temp. Pressing and holding either button will activate the scroll
feature. Holding the buttons down longer will result in a faster scroll rate.
Start/Reset Button:
Press once to start timer count-down. Once count-down is complete, a buzzer alert will sound. Press
the Start/Reset Button again to silence the buzzer and reset the timer. NOTE: Pressing the Start/Reset
Button at any point during a count-down will reset the timer.
Additional Features
• All settings will be saved when the Pane Bella is turned off and will be automatically recalled
when the power is turned back on.
• To convert from a single timer to four timers and back again, simultaneously press and hold Mode
and Down Buttons for 5 seconds.
• The Actual Temp may be viewed at any time by simultaneously pressing the Mode and Up
Buttons.
o
• Temperatures may be displayed in
simultaneously press the Up and Down Buttons while turning the power switch on.
F (factory default) or oC. To convert from one to the other,
• PBE24 Only
position.
Rev. - 2006 11
: One or both toasters may be used by setting the rocker switch to the desired
Page 12

OPERATION CONT’D
Setting the Temperature
CAUTION: ALWAYS KEEP THE AREA NEAR THE APPLIANCE
FREE FROM COMBUSTIBLE MATERIALS.
CAUTION: KEEP THE FLOOR IN FRONT OF THE EQUIPMENT
CLEAN AND DRY. IF SPILLS OCCUR, CLEAN
IMMEDIATELY TO AVOID THE DANGER OF SLIPS OR
FALLS.
A single control panel controls each section's upper and lower cooking surfaces.
The settable temperature range is 175° to 550°F (79° to 289°C).
To set the temperature, make sure the Set Temp Light is on (press the Mode Button
to switch between Time and Set Temp), then use the Up and Down Buttons to select
the proper temperature.
Once at the set temperature, the Ready Light will turn on and a buzzer will sound.
Note: Close the upper cooking surfaces during preheat and idle times. The grill will
require far less energy to remain at temperature.
Setting the Timer
Each cooking section has a timer which can be set from 5 seconds to 60 minutes in 5
second increments.
To set the timer, make sure the Time Light is on (press the Mode Button to switch
between Time and Set Temp) then use the Up and Down Buttons to select the proper
time.
Pressing the Start/Reset Button will start the timer. Changes to the set time are not
allowed after the countdown has started. The Start/Reset Button can be pressed to
reset the timer at any time during the countdown.
A buzzer will sound when the timer has counted down to zero. Press the Start/Reset
Button to silence the buzzer and reset the timer.
Loading the Grill
Open the grill and place the product in the center of the lower cooking section.
Grasp the handle of the upper cooking surface and gently lower it onto the product.
Set the timer for the desired cooking time and press the Start/Reset Button.
When the timer sounds, press the Start/Reset Button to reset the timer, open the grill
and remove the product.
Clean the upper and lower cooking surfaces with the Pane Bella cleaning tool
between each load.
Rev. - 2006 12
Page 13

CLEANING & MAINTENANCE
Cleaning
WARNING: KEEP WATER AND SOLUTIONS OUT OF CONTROLS.
NEVER SPRAY OR HOSE CONTROL CONSOLE,
ELECTRICAL CONNECTIONS, ETC.
CAUTION: MOST CLEANERS ARE HARMFUL TO THE SKIN,
EYES, MUCOUS MEMBRANES AND CLOTHING.
PRECAUTIONS SHOULD BE TAKEN TO WEAR
RUBBER GLOVES, GOGGLES OR FACE SHIELD AND
PROTECTIVE CLOTHING. CAREFULLY READ THE
WARNING AND FOLLOW THE DIRECTIONS ON THE
LABEL OF THE CLEANER TO BE USED.
WARNING: ALWAYS HOLD THE UPPER GRILL OPEN WHILE
CLEANING TO PREVENT INJURY IN CASE OF GRILL
CLOSING.
CAUTION: DO NOT USE ICE OR WATER TO CLEAN THE
COOKING SURFACE WHILE THE GRIDDLE IS HOT.
THE GRILL IS MADE OF CAST IRON AND MAY CRACK
FROM A RAPID TEMPERATURE CHANGE.
NOTICE: Service on this or any other LANG appliance must be
performed by qualified personnel only. Consult your
LANG authorized service station directory or contact
the factory at 1-800-807-9054 or www.star-mfg.com for
the service agent nearest you.
Lang Manufacturing has designed the Pane Bella to be easy to clean and maintain.
We advise a daily cleaning schedule to keep your grill looking like new.
After the “seasoning process” use any vegetable non-stick spray sparingly
Vegetable oil sprayed on the grill surface continually throughout the day will form
a carbon build-up requiring more frequent cleaning. Any food material or sandwich
that may stick when grilling can be scraped off with a spatula or the cleaning tool
provided.
Some additional cleaning tips:
• Empty the crumb tray regularly. It is removable and located at the front edge
of the grill. Occasionally hand wash with mild soapy water. The crumb tray
may be put through a dishwasher
• Clean the upper and lower cooking surfaces with the scraping tool provided
throughout the day. Clean surfaces after each item is grilled.
• Use recommended Pane Bella grill cleaner in a diluted form for cast iron
plates. This process will clean the grill surface and not remove the seasoned
finish.
• For grills with heavy carbon build-up from continuous weeks of use without
cleaning, it may be necessary to scrape the grill thoroughly and use the
recommended grill cleaner in full strength. It may be necessary to “re-season”
after this procedure.
• Heavy carbon build-up on grill plates will negatively affect surface
temperature and grill performance.
.
Rev. - 2006 13
Page 14

21
23
30
18
29
20
37
27
25
39
24
26
12
22
2
15
10
36
40
24
41
11
6
3
17
13
32
8
35
38
28
14
1
9
19
20
34
33
4
7
This drawing contains information confidential
to Lang Manufacturing,
No reproduction or disclosure of its
contents is permitted.
SOME ITEMS ARE INCLUDED FOR
ILLUSTRATIVE PURPOSES ONLY AND IN
CERTAIN INSTANCES MAY NOT BE AVAILABLE
MODEL: PBE12
5
16
SK2222 REV. A 10/23/2007
Page 15

PARTS LIST October 23, 2007, Rev. C
PBE12 Pane Bella Electric Single, 120V-208/240V
MODEL
Number
Key
Number
1 2N-11030-40 1 ELE GRDPANI208/240V900W PBE12G
2N-11030-51 1 ELE GRD PANI 110V 900W PBE12G-120V, PBE12S, S-120V
2 2N-11030-41 1 ELEGRDPANI208/240V720W PBE12G
2N-11030-52 1 ELE GRD PANI 110V 720W PBE12G-120V, PBE12S, S-120V
3 2E-30303-27 1 SWT ROCKER ON-OFF PBE12G-120V, PBE12S, S-120V
4 2E-30500-03 1 TRM STRP 6 POLE 30A 300V PBE12G-120V, PBE12S, S-120V
5 2E-30600-12 1 RELAY 12VDC DPST 30A PNL PBE12G-120V, PBE12S
6 2E-31107-02 1 CORD SET 14/3 X 8’ 15A PBE12G-120V, S-120V
6 I9-PB-908 1 CORD ASSEMBLY PANNA BELLA PBE12G, PBE12S
7 2E-31400-26 1 XFORMR 208-240/24-12 40VA PBE12G, PBE12S
7 2E-31400-27 1 XFORMR 120V/24-12 40VA PBE12G-120V, S-120V
8 2J-40102-66 1 CONTROLLER PANNE BELLA PBE12G-120V, PBE12S, S-120V
9 2E-41100-40 1 SENSOR PANNE BELLA PBE12G-120V, PBE12S, S-120V
10 2F-50800-92 1 CASTING TOP LEFT PB PBE12GG, G-120V
2F-50800-97 1 TOP LEFT CASTING PB PBE12S, S-120V
11 2F-50800-93 1 CASTING BOTTOM PB GRIDDLE PBE12GG, G-120V
2F-50800-98 1 BOTTOM CASTING PB SMOOTH PBE12S, S-120V
12 2P-51001-31 1 SPRING FOR PANINI GRIDDLE PBE12G-120V, PBE12S, S-120V
13 2R-70701-52 2 KNOB 1/4-20 1 BLACK BALL PBE12G-120V, PBE12S, S-120V
14 2A-72500 4 Leg PBE12G-120V, PBE12S, S-120V
15 2A-73500-04 4 COLLAR SET 1/2 ID STL7/8 PBE12G-120V, PBE12S, S-120V
16 I9-PB-218-1 1 BOTTOM SINGLE PBE12G-120V, PBE12S, S-120V
17 I9-PB-513 1 CRUMB TRAY SINGLE PBE12G-120V, PBE12S, S-120V
18 I9-PB-711 1 ELEMENT PLATE PBE12G-120V, PBE12S, S-120V
19 I9-PB-713 1 SPOT ELEMENT PLATE - PBE PBE12G-120V, PBE12S, S-120V
20 I9-PB-714 4 ELEMENT PLATE SUPPORT PBE12G-120V, PBE12S, S-120V
21 I9-PB-811 1 HOOD COVER PBE12G-120V, PBE12S, S-120V
22 I9-PB-822-3 1 HOOD PIVOT COVER LEFT PBE12G-120V, PBE12S, S-120V
23 I9-PB-832-1 1 HANDLE HOOD - PB-12 PBE12G-120V, PBE12S, S-120V
24 2A-PB-833 2 HOOD LIFT BAR PBE12G-120V, PBE12S, S-120V
25 2F-PB-834-2 1 CROSS ROD SINGLE CAST - PBE12G-120V, PBE12S, S-120V
26 2F-PB-835-1 1 PIVOT ROD SINGLE CASTING PBE12G-120V, PBE12S, S-120V
27 2V-PB-838 1 L/H WIRE TUBE PBE12G-120V, PBE12S, S-120V
28 I9-PB-842 2 HOOD STOP BUSHING PBE12G-120V, PBE12S, S-120V
29 I9-PB-847 1 HOOD WIRE BRACKET PBE12G-120V, PBE12S, S-120V
30 I9-PB-849 1 HOOD STOP PBE12G-120V, PBE12S, S-120V
32 I9-PB-902 1 SCRAPER - NEW CASTING PBE12G-120V, PBE12S, S-120V
34 I9-PB-225 2 BTM CASTING INS RETAINER PBE12G-120V, PBE12S, S-120V
35 I9-PB-226 1 OVER TEMP STAT MOUNT PBE12G-120V, PBE12S, S-120V
36 I9-PB-823 1 HINGE POINT FILLER RH PBE12G-120V, PBE12S, S-120V
37 I9-PB-824 1 HINGE POINT FILLER LH PBE12G-120V, PBE12S, S-120V
38 2T-30401-31 1 STAT FXD 400 DEG OPEN PBE12G-120V, PBE12S, S-120V
40 2C-20101-95 4 SCRWTHD1/4-20X3/4PHDR PLT PBE12G-120V, PBE12S, S-120V
41 2F-PB-834-3 1 CROSS ROD SINGLE CAST PBE12G-120V, PBE12S, S-120V
NI 2H-PB-719 1 BOTTOM PLATE INSUL. DBL PBE12G-120V, PBE12S, S-120V
NI 2H-PB-812 1 HOOD INSULATION PBE12G-120V, PBE12S, S-120V
NI 2K-70801-21 1 STRN RELF BUSH HEYCO 3222 PBE12G-120V, PBE12S, S-120V
NI 2K-70801-24 1 STRN RELF BUSH HEYCO 3454 PBE12G-120V, PBE12S, S-120V
Part
Number
Per
Unit
Description
1
IMPORTANT: WHEN ORDERING, SPECIFY VOLTAGE OR TYPE GAS DESIRED PAGE
1
INCLUDE MODEL AND SERIAL NUMBER OF
Some items are included for illustrative purposes only and in certain instances may not be available.
Star Manufacturing International, Inc.
Page 16

40
27
32
36
33
39
24
26
17
34
43
2
14
35
37
45
29
12
44
31
11
28
30
23
15
41
3
9
15
42
13
38
9
16
13
10
1
40
25
22
26
4
21
7
20
20
6
This drawing contains information confidential
to Lang Manufacturing,
No reproduction or disclosure of its
contents is permitted.
SOME ITEMS ARE INCLUDED FOR
ILLUSTRATIVE PURPOSES ONLY AND IN
CERTAIN INSTANCES MAY NOT BE AVAILABLE
MODEL: PBE24
19
7
5
18
8
SK2223 REV. A 10/23/2007
Page 17

PARTS LIST October 23, 2007, Rev. C
PBE24 Pane Bella Electric Double 208/240V
MODEL
Number
Key
Number
1 2N-11030-40 2 ELE GRDPANI208/240V900W PBE24G, PB, GS, S
2 2N-11030-41 2 ELEGRDPANI208/240V720W PBE24G, PB, GS, S
3 2E-30303-28 1 SWT ROCKER ON-OFF-ON PBE24G, PB, GS, S
4 2T-30401-31 2 STAT FXD 400 DEG OPEN PBE24G, PB, GS, S
5 2E-30500-03 1 TRM STRP 6 POLE 30A 300V PBE24G, PB, GS, S
6 2E-30600-04 1 RLAY 24VAC 2FRMC DPDT PBE24G, PB, GS, S
7 2E-30600-12 2 RELAY 12VDC DPST 30A PNL PBE24G, PB, GS, S
8 2E-31400-26 1 XFORMR 208-240/24-12 40VA PBE24G, PB, GS, S
9 2J-40102-66 2 CONTROLLER PANNE BELLA PBE24G, PB, GS, S
10 2E-41100-40 2 SENSOR PANNE BELLA PBE24G, PB, GS, S
11 2F-50800-92 1 CASTING TOP LEFT PB PBE24G, PB
2F-50800-97 1 TOP LEFT CASTING PB PBE24GS, S
12 2F-50800-94 1 CASTING TOP RIGHT PB PBE24G, PB
2F-50800-99 1 TOP RIGHT CASTING PB PBE24G, PB, S
13 2F-50800-93 2 CASTING BOTTOM PB GRIDDLE PBE24G, PB, GS
2F-50800-98 2 BOTTOM CASTING PB SMOOTH PBE24S
2F-50800-98 1 BOTTOM CASTING PB SMOOTH PBE24GS
14 2P-51001-31 2 SPRING FOR PANINI GRIDDLE PBE24G, PB, GS, S
15 2R-70701-52 2 KNOB 1/4-20 1 BLACK BALL PBE24G, PB, GS, S
16 2A-72500 1 Leg PBE24G, PB, GS, S
17 2A-73500-04 4 COLLAR SET 1/2 ID STL7/8 PBE24G, PB, GS, S
18 I9-PB-218-2 1 BOTTOM - DOUBLE CASTING PBE24G, PB, GS, S
19 I9-PB-223 1 COMPONENT MOUNT - DOUBLE PBE24G, PB, GS, S
20 I9-PB-224 2 CENTER COMPONENT MOUNT PBE24G, PB, GS, S
21 I9-PB-225 4 BTM CASTING INS RETAINER PBE24G, PB, GS, S
22 I9-PB-226 2 OVER TEMP STAT MOUNT PBE24G, PB, GS, S
23 I9-PB-512-2 1 CRUMB TRAY - DOUBLE PBE24G, PB, GS, S
24 I9-PB-711 4 ELEMENT PLATE PBE24G, PB, GS, S
25 I9-PB-713 2 SPOT ELEMENT PLATE - PBE PBE24G, PB, GS, S
26 I9-PB-714 8 ELEMENT PLATE SUPPORT PBE24G, PB, GS, S
27 2V-PB-839 1 R/H WIRE TUBE PBE24G, PB, GS, S
I9-PB-811 2 HOOD COVER PBE24G, PB, GS, S
28 I9-PB-822-2 1 HOOD PIVOT COVER RIGHT PBE24G, PB, GS, S
29 I9-PB-822-3 1 HOOD PIVOT COVER LEFT PBE24G, PB, GS, S
30 I9-PB-823 2 HINGE POINT FILLER RH PBE24G, PB, GS, S
31 I9-PB-824 2 HINGE POINT FILLER LH PBE24G, PB, GS, S
32 I9-PB-832-1 2 HANDLE HOOD - PB-12 PBE24G, PB, GS, S
33 2A-PB-833 2 HOOD LIFT BAR PBE24G, PB, GS, S
34 2F-PB-834-2 2 CROSS ROD SINGLE CAST - PBE24G, PB, GS, S
35 2F-PB-835-1 2 PIVOT ROD SINGLE CASTING PBE24G, PB, GS, S
36 2V-PB-838 1 L/H WIRE TUBE PBE24G, PB, GS, S
38 I9-PB-842 2 HOOD STOP BUSHING PBE24G, PB, GS, S
39 I9-PB-847 2 HOOD WIRE BRACKET PBE24G, PB, GS, S
40 I9-PB-849 2 HOOD STOP PBE24G, PB, GS, S
41 I9-PB-902 1 SCRAPER - NEW CASTING PBE24G, PS
I9-PB-902 2 SCRAPER - NEW CASTING PBE24GPB
42 I9-PB-908 1 CORD ASSEMBLY PANNA BELLA PBE24G, GS
I9-PB-908-1 1 CORD ASSY PB W/CUSTOM PBE24GPB
43 2A-73500-04 4 COLLAR SET 1/2 ID STL7/8 PBE24G, PB, GS, S
44 2C-20101-95 4 SCRWTHD1/4-20X3/4PHDR PLT PBE24G, PB, GS, S
45 2F-PB-834-3 2 CROSS ROD SINGLE CAST PBE24G, PB, GS, S
NI 2H-PB-719 1 BOTTOM PLATE INSUL. DBL PBE24G, PB, GS, S
NI 2H-PB-812 1 HOOD INSULATION PBE24G, PB, GS, S
NI 2K-70801-21 1 STRN RELF BUSH HEYCO 3222 PBE24G, PB, GS, S
1
IMPORTANT: WHEN ORDERING, SPECIFY VOLTAGE OR TYPE GAS DESIRED PAGE
1
INCLUDE MODEL AND SERIAL NUMBER OF
Some items are included for illustrative purposes only and in certain instances may not be available.
Part
Number
Per
Unit
Description
Star Manufacturing International, Inc.
 Loading...