

Page 1

Installation/Adjustment
Model: CSE12-HS, Hood stop for podless CSE12
Star Manufacturing International 10 Sunnen Drive St. Louis, MO 63143
Part #: 2M-W369 Phone: 314-781-2777 Fax: 314-781-2714
Rev. - www.star-mfg.com January 16, 2007
Page 2

SAFETY SYMBOL
Using any part other than genuine Star factory supplied parts relieves the
manufacturer of all liability.
Star reserves the right to change specifi cations and product design without
notice. Such revisions do not entitle the buyer to corresponding changes,
improvements, additions or replacements for previously purchased
equipment.
Due to periodic changes in designs, methods, procedures, policies and
regulations, the specifi cations contained in this sheet are subject to change
without notice. While Star Manufacturing exercises good faith efforts to provide
information that is accurate, we are not responsible for errors or omissions
in information provided or conclusions reached as a result of using the
specifi cations. By using the information provided, the user assumes all risks in
connection with such use.
These symbols are intended to alert the user to the presence of
important operating and maintenance instructions in the manual
accompanying the appliance.
RETAIN THIS MANUAL FOR FUTURE REFERENCE
NOTICE
MAINTENANCE AND REPAIRS
Contact your local authorized service agent for service or required maintenance. Please record the model
number, serial number, voltage and purchase date in the area below and have it ready when you call to
ensure a faster service.
Model No.
Serial No.
Voltage
Purchase Date
Authorized Service Agent
Reference the listing provided with the unit
or
for an updated listing go to:
Website: www.star-mfg.com
E-mail Service@star-mfg.com
Telephone: (800) 807-9054 Local (314) 781-2777
The Star Service Help Desk
Business 8:00 am to 4:30 p.m. Central Standard Time
Hours:
Telephone: (800) 807-9054 Local (314) 781-2777
Fax: (800) 396-2677 Local (314) 781-2714
E-mail Parts@star-mfg.com
Service@star-mfg.com
Warranty@star-mfg.com
Website: www.star-mfg.com
Mailing Address: Star Manufacturing International Inc.
10 Sunnen Drive
St. Louis, MO 63143
U.S.A
2
Page 3
EQUIPMENT DESCRIPTION
Lang Model: CSE12-HS
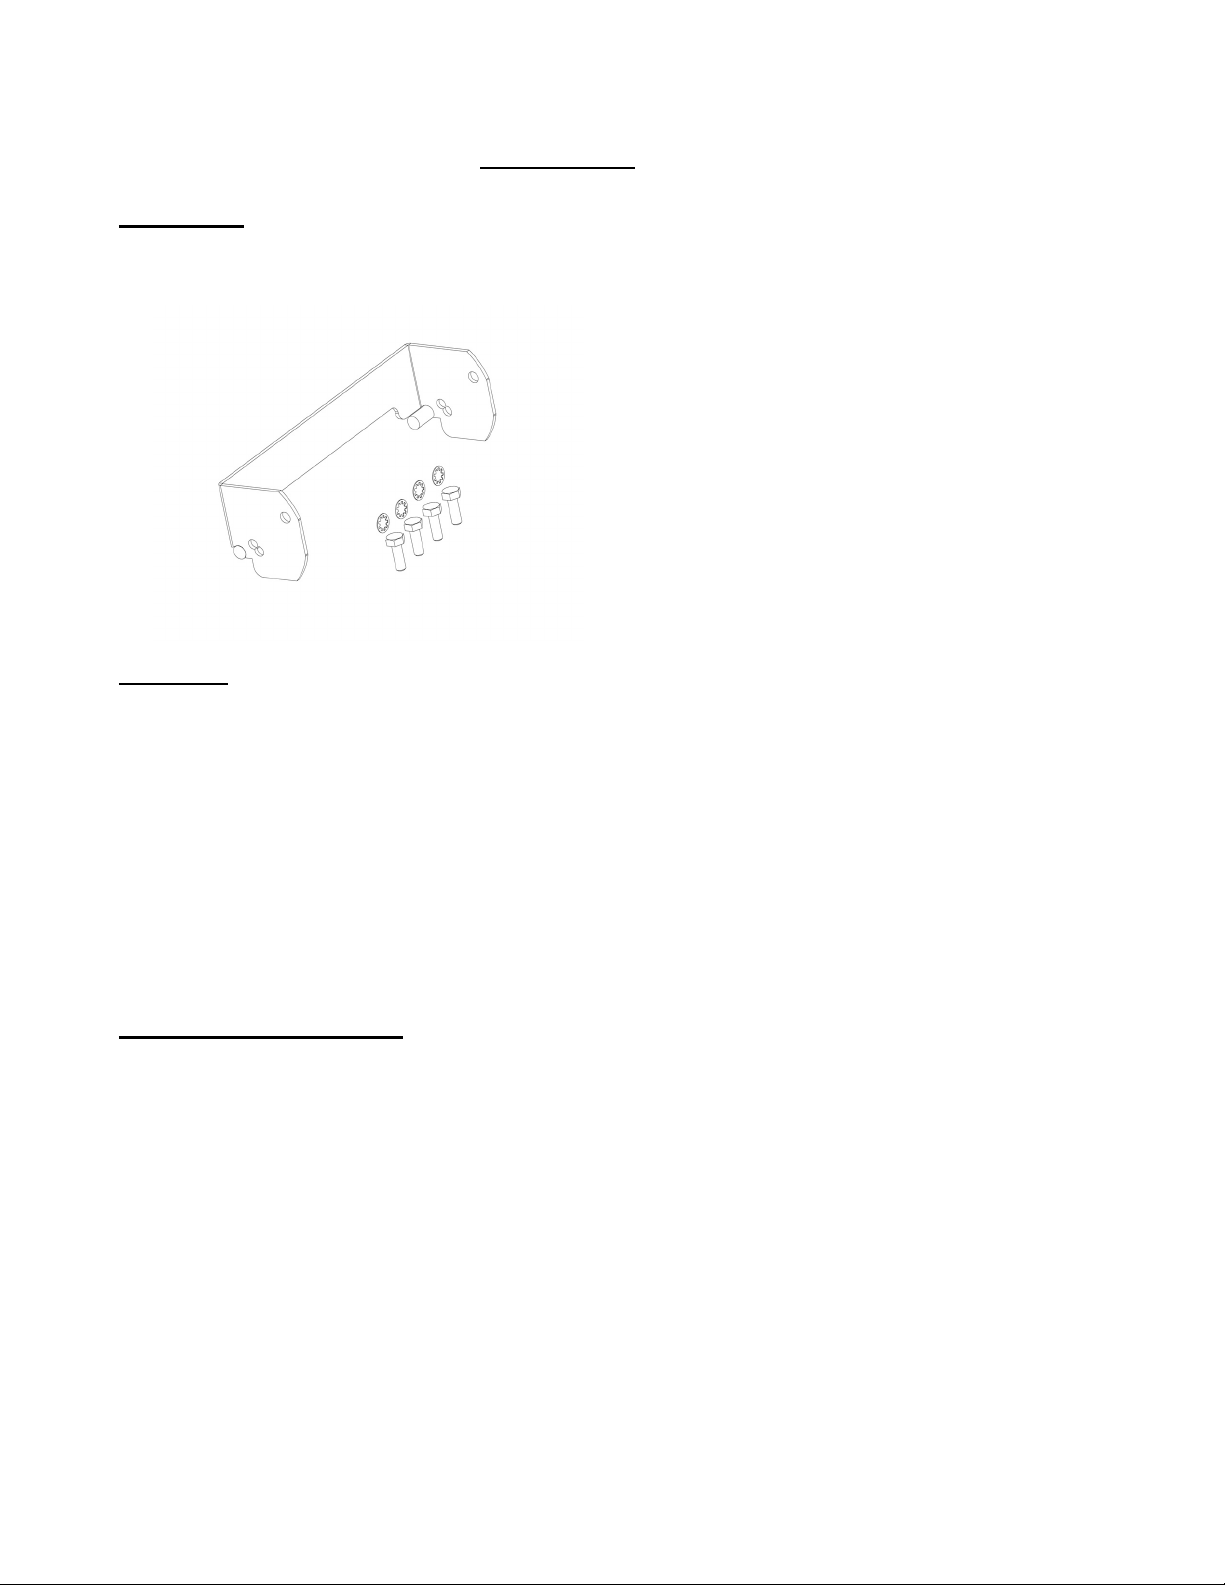
Kit part list
This kit contains the following parts; 1-Hood stop assembly, 4 ¼-20 hex head bolts,
4 star washers.
Technical
This kit is to be used to allow the user to stop the hood at two positions lower
than the maximum open position. Maximum open position is 56 degrees; the
hood stop will allow the user to stop it at either 45 or 40 degrees. This kit
includes enough parts for one hood.
UNPACKING
Receiving the equipment
Upon receipt, check for freight damage, both visible and concealed. Visible damage should be
noted on the freight bill at the time of delivery and signed by the carrier’s agent. Concealed loss
or damage means loss or damage, which does not become apparent until the merchandise has been
unpacked. If concealed loss or damage is discovered upon unpacking, make a written request for
inspection by the carrier’s agent within 15 days of delivery. All packing material should be kept for
inspection. Do not return damaged merchandise to Star Manufacturing International. File
your claim with the carrier.
Page 4

INSTALLATION
Fig 1.
1. Remove front two pan head bolts. Do not remove the back two.
2. Attach the hood stop to the stanchion using two ¼ -20 hex head bolts
and star washers provided. Install the bolts into the front two holes only,
position the hood stop as shown in Fig 2. Leave the front bolts loose.
Fig 2.
Page 5

INSTALLATION CONT.
3. Remove the back two fl at head bolts and rotate the hood stop bracket
into position so the holes line up. Install two hex head bolts and star
washers provided into the back holes and tighten all four bolts.
See Fig 3.
4. Repeat steps 1-3 for other hood stops.
Fig 3.
Page 6
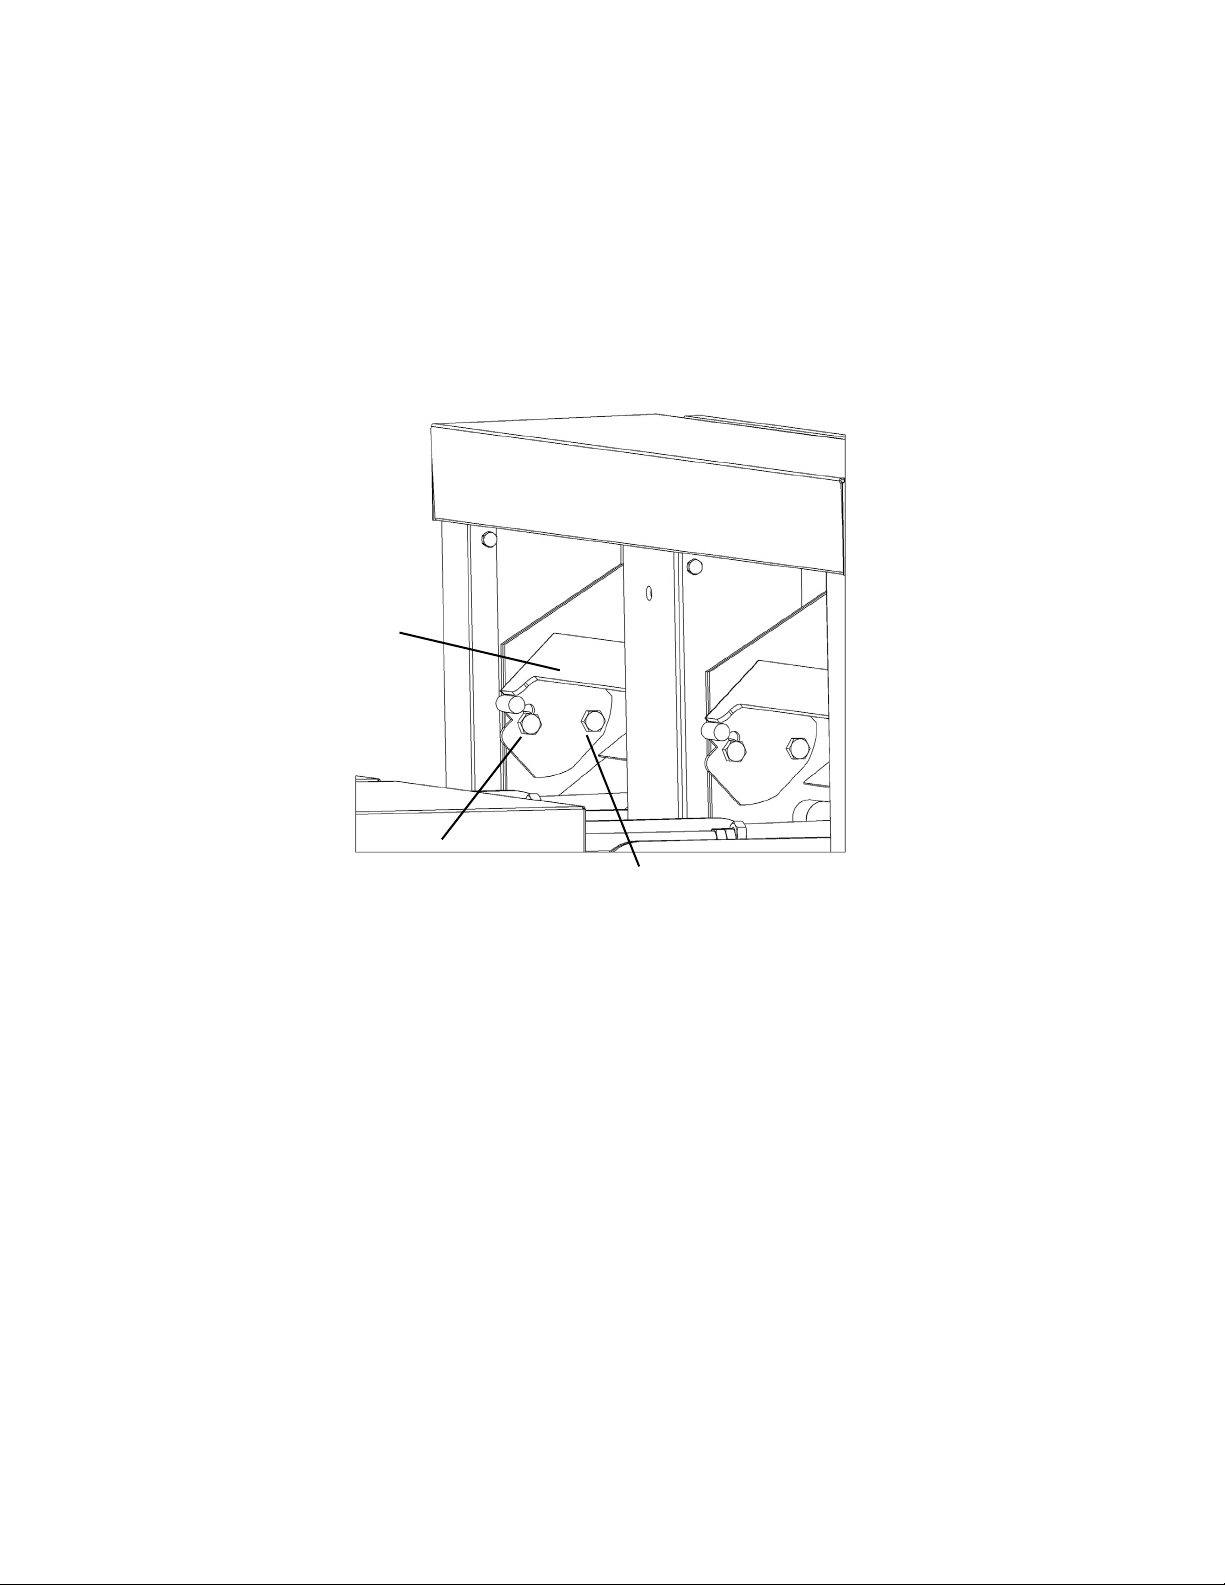
ADJUSTMENT
HOOD STOP ADJUSTMENT
Units with an Adjustable Hood Stop Installed have the capablity to adjust between a 40° to 45° degree
settings. These simple steps will assist you in accomplishing this. If you have diffi culty accomplishing this,
please call a qualifi ed service agent or Star Manufacturing Technical Service Department.
1. Remove the front bolts from the hood stop, and loosen the back bolts up, do not completely
remove the back bolts.
2. Adjust the hood stop to the desired position, the top hole is to stop the hood at 40° degrees the
bottom hole is to stop the hood at 45° degrees.
3. Re-install the front bolts and tighten up the back bolts.
Hood Stop
Front Bolt
Rear Bolt
(Fig. 1)
 Loading...