

Page 1
Installation
Operation
Maintenance
Troubleshooting
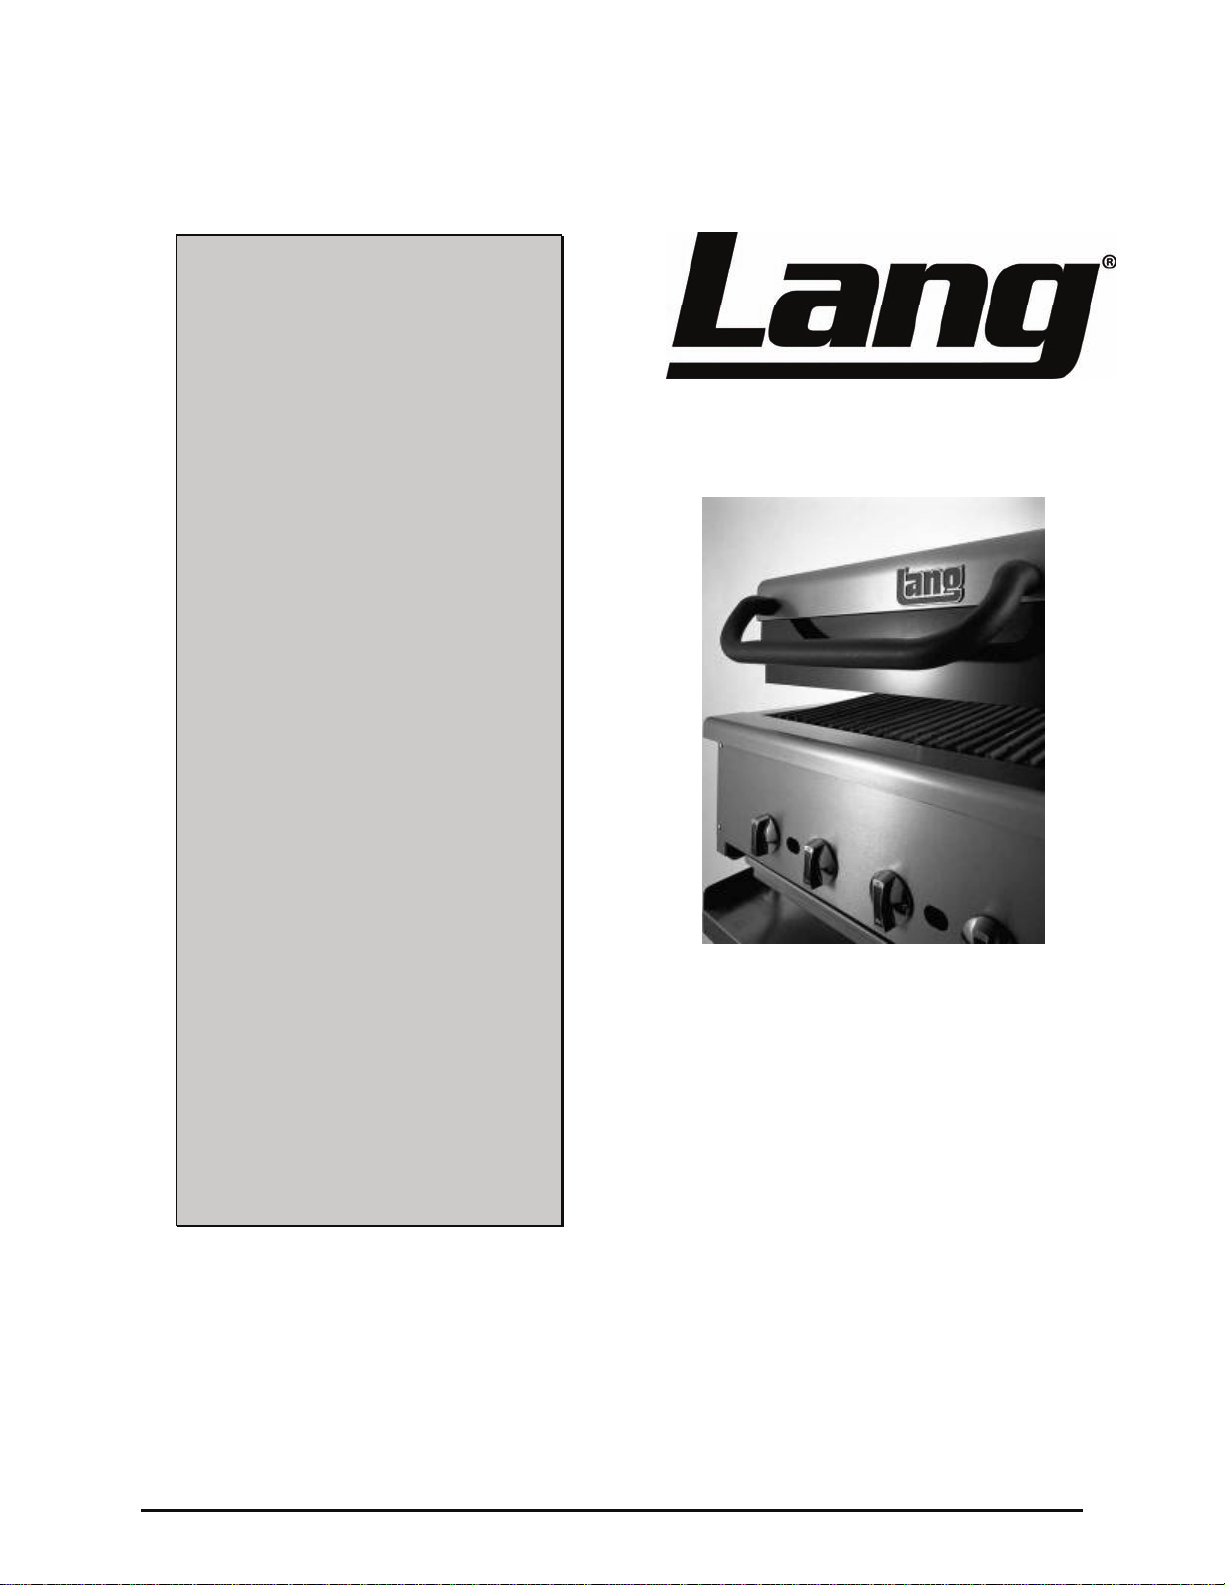
Model: CSG24
Add-on Clamshell® Hood
Star Manufacturing International
Part Number: 2M-W361
Rev. D
265 HOBSON ST
Phone: 800-438-5264 Fax: 314-781-2714
WWW.LANGWORLD.COM
SMITHVILLE, TN, 37166
JULY 10, 2018
Page 2

THIS MANUAL MUST BE RETAINED FOR FUTURE REFERENCE. READ,
UNDERSTAND AND FOLLOW THE INSTRUCTIONS AND WARNINGS CONTAINED
IN THIS MANUAL.
FOR YOUR SAFETY
DO NOT STORE OR USE GASOLINE OR OTHER FLAMMABLE VAPORS AND
LIQUIDS IN THE VICINITY OF THIS OR ANY OTHER APPLIANCE.
POST IN A PROMINENT LOCATION
INSTRUCTIONS TO BE FOLLOWED IN THE EVENT USER SMELLS GAS. THIS
INFORMATION SHALL BE OBTAINED BY CONSULTING YOUR LOCAL GAS
SUPPLIER. AS A MINIMUM, TURN OFF THE GAS AND CALL YOUR GAS
COMPANY AND YOUR AUTHORIZED SERVICE AGENT. EVACUATE ALL
PERSONNEL FROM THE AREA.
WARNING: IMPROPER INSTALLATION, ADJUSTMENT, ALTERATION, SERVICE
OR MAINTENANCE CAN CAUSE PROPERTY DAMAGE, INJURY OR DEATH.
READ THE INSTALLATION, OPERATING AND MAINTENANCE INSTRUCTIONS
THOROUGHLY BEFORE INSTALLING OR SERVICING THIS EQUIPME NT.
Model #:
Purchased From:
Serial #: Location:
Date Purchased: Date Installed:
Purchase Order #: For Service, Call:
2
Page 3

TABLE OF CONTENTS
CHAPTER PAGE
1. READ FIRST .................................................................................................................4
2. EQUIPMENT DESCRIPTION........................................................................................6
3.
UNPACKING .................................................................................................................7
4.
INSTALLATION.............................................................................................................8
5.
INITIAL START-UP .......................................................................................................10
OPERATION..................................................................................................................
6.
SEQUENCE OF OPERATION ..................................................................................... 12
7.
11
CLEANING & MAINTENANCE PROCEDURES.......................................................... 13
8.
9. TROUBLESHOOTING ..................................................................................................14
10. PARTS LISTS................................................................................................................16
11. WIRING DIAGRAMS..................................................................................................... 18
3
Page 4

IMPORTANT READ FIRST IMPORTANT
NOTICE: If the Clamshell® is to be attached to a griddle/ charbroiler in the
field – it is recommended to complete the installation of mounting adapter
before un-crating the Clamshell®.
CAUTION: UNIT IS EXTREMELY HEAVY. FOR SAFE HANDLING, INSTALLER SHOULD
OBTAIN HELP AS NEEDED, OR EMPLOY APPROPRIATE MATERIALS
HANDLING EQUIPMENT (SUCH AS A FORKLIFT, DOLLY, OR PALLET
JACK) TO REMOVE THE UNIT FROM THE SKID AND MOVE IT TO THE
PLACE OF INSTALLATION.
WARNING: INSTALLATION OF THE UNIT MUST BE DONE BY PERSONNEL QUALIFIED
TO WORK WITH ELECTRICITY AND PLUMBING. IMPROPER
INSTALLATION CAN CAUSE INJURY TO PERSONNEL AND/OR DAMAGE
TO EQUIPMENT. UNIT MUST BE INSTALLED IN ACCORDANCE WITH ALL
APPLICABLE CODES.
NOTICE: The installation of this unit must conf orm to applicable National, State and
locally recognized installation standards.
CAUTION: SHIPPING STRAPS ARE UNDER TENSION AND CAN SNAP BACK WHEN
CUT.
DANGER: DO NOT REMOVE THE MOUNTING NUTS OFF OF THE MOUNTING PLATE
STUDS WHILE THE UNIT IS IN THE LOWERED POSITION. THE
STANCHION BACK IS UNDER TENSION AND CAN CAUSE BODILY INJURY.
NOTICE: The data plate is located on the inside surface of the hood wrap. The
Clamshell® voltage, wattage, serial number, clearance and gas
specifications are on the data plate. This information should be carefully
read and understood before proceeding with the installation.
NOTICE: This unit is approved to be installed only on equipment which meets NSF
standards, and for which the adapter kit is provided.
WARNING: BEFORE LIGHTING, USE A SOAP AND WATER SOLUTION TO TEST ALL
JOINTS FOR GAS LEAKS.
NOTICE: The installation of any components such as a vent hood, grease extractors,
fire extinguisher systems, must conform to their applicable National, State
and locally recognized installation standards.
WARNING: DURING INITIAL USE, OR USE AFTER SERVICE, IF THE PILOT DOES NOT
IGNITE ON FIRST TRY THE MAIN GAS VALVE MUST BE TURNED OFF FOR
AT LEAST FIVE MINUTES.
CAUTION: ALWAYS KEEP THE AREA NEAR THE APPLIANCE FREE FROM
COMBUSTIBLE MATERIALS.
CAUTION: KEEP FLOOR IN FRONT OF EQUIPMENT CLEAN AND DRY. IF SPILLS
OCCUR, CLEAN IMMEDIATELY, TO AVOID THE DANGER OF SLIPS OR
FALLS.
NOTICE: While cooking, the Clamshell® must be monitored at all times. Do not leave
the Clamshell® unattended while cooking.
NOTICE: Fan in Clamshell® runs continuously. For the safety of the unit, the fan
must run continuously to provide cooling to the electrical components.
Component cooling is required if the base unit is running. If power to the
Clamshell® is turned off, gas to base will be turned off. If it is necessary to
remove power from the Clamshell®, the base unit must be cooled below
200°F first.
4
Page 5

IMPORTANT READ FIRST IMPORTANT
WARNING: KEEP WATER AND SOLUTIONS OUT OF CONTROLS. NEVER SPRAY OR
HOSE CONTROL CONSOLE, ELECTRICAL CONNECTIONS, ETC.
CAUTION: MOST CLEANERS ARE HARMFUL TO THE SKIN, EYES, MUCOUS
MEMBRANES AND CLOTHING. PRECAUTIONS SHOULD BE TAKEN TO
WEAR RUBBER GLOVES, GOGGLES OR FACE SHIELD AND PROTECTIVE
CLOTHING. CAREFULLY READ THE WARNING AND FOLLOW THE
DIRECTIONS ON THE LABEL OF THE CLEANER TO BE USED.
CAUTION: A COMMERCIAL LIQUID GRIDDLE CLEANER IS NOT RECOMMENDED FOR
CLEANING THE GRIDDLE OR CHARBROILER UNDER THE CLAMSHELL®
AS MOST CONTAIN POTASSIUM HYDROXIDE
WHICH IS HARMFUL TO THE CLAMSHELL® BURNER TILES.
NOTICE: Do not spray any liquids on to the tiles, or wipe the tiles with any materials.
Liquids and direct contact on the tiles can damage them.
CAUTION: DO NOT USE YOUR HAND TO CHECK GRIDDLE/CHARBROILER
TEMPERATURE.
NOTICE: Service on this, or any other, LANG appliance must be performed by
qualified personnel only. Consult your LANG authorized service agent
directory or call the factory at 1-800-438-5264, or WWW.LANGWORLD.COM
for the service agent nearest you.
DANGER: BOTH HIGH AND LOW VOLTAGES ARE PRESENT INSIDE THIS
APPLIANCE WHEN THE UNIT IS PLUGGED/WIRED INTO A LIVE
RECEPTACLE. BEFORE PERFORMING ANY WORK ON INTERNAL
COMPONENTS, DISCONNECT THE APPLIANCE FROM THE ELECTRIC
POWER SUPPLY.
CAUTION: USE OF ANY REPLACEMENT PARTS OTHER THAN THOSE SUPPLIED BY
LANG OR THEIR AUTHORIZED DISTRIBUTORS CAN CAUSE BODILY
INJURY TO THE OPERATOR AND DAMAGE TO THE EQUIPMENT AND
WILL VOID ALL WARRANTIES.
CAUTION: BE SURE ALL OPERATORS READ, UNDERSTAND AND FOLLOW THE
OPERATING INSTRUCTIONS, CAUTIONS AND SAFETY INSTRUCTIONS
CONTAINED IN THIS MANUAL.
WARNING: WHEN MULTIPLE CLAMSHELLS® ARE USED ON A GRIDDLE, ALL THE
CLAMSHELLS MUST BE CONNECTED TO THE SAME 120V SOURCE.
OR SODIUM HYDROXIDE
5
Page 6

2. EQUIPMENT DESCRIPTION
Lang Model: CSG24
ADD-ON CLAMSHELL® HOOD
2.1 Exterior Construction
• The Clamshell® dimensions are 19 1/2” (49.53cm) High in the lowered position, 38 1/3” (97.36cm)
High in the raised position, 36 3/4” (93.35cm) Deep, and width is 24” (60.96cm).
• The stainless steel hood makes for easy cleaning.
• Pivoting heat deflector redirects excess grill heat to either side of the equipment and away from
employees.
2.2 Operation
• By heating only when in the down position, you can conserve energy and save money with a cooler
backroom environment.
• Cook different products at the same time with no height adjustments needed.
2.3 Technical
• Griddle operates on either Natural Gas or Propane. This must be specified when ordering. It is
shipped with a Power Cord and Plug attached.
• Clearances required from non-combustible surfaces: Back: 0 inches, Sides: maintain side clearance
of base appliance or 3 inches which ever is greater, Bottom: 6 inches below the bottom of the
stanchions.
2.4 Griddle Gas and Voltage Specifications
The Lang Clamshell® can be connected to any 120 Volt source. In applications where multiple
clamshells are installed on the same griddle, they all need to be plugged into the same receptacle
circuit.
The gas specifications are listed on the data label located on the inside surface of the hood wrap.
WARNING: WHEN MULTIPLE CLAMSHELLS® ARE USED ON A GRIDDLE, ALL THE
CLAMSHELLS MUST BE CONNECTED TO THE SAME 120V SOURCE.
6
Page 7

3. UNPACKING
3.1 Receiving the Clamshell®
Upon receipt, check for freight damage, both visible and concealed. Visible damage should be noted
on the freight bill at the time of delivery and signed by the carrier's agent. Concealed loss or damage
means loss or damage which does not become apparent until the merchandise has been unpacked. If
concealed loss or damage is discovered upon unpacking, make a written request for inspection by the
carrier's agent within 15 days of delivery. All packi ng material should be kept for inspection. Do not
return damaged merchandise to Star Manufacturing International. File your claim with the
carrier.
3.2 Location
Prior to un-crating, move the Clamshell® as near to its intended location as practical. The crating will
help protect the unit from physical damage normally associated with moving it through hallways and
doorways.
NOTICE: If the Clamshell® is to be attached to a griddle/ charbroiler in the field –
it is recommended to complete the installation of mounting adapter
before un-crating the Clamshell®.
3.3 Un-crating the Add-on Clamshell® Hood
If Clamshell® is received already attached to a Griddle/Charbroiler skip to section 3.4.
The Clamshell® will arrive completely assembled inside a wood frame covered by a cardboard box
and bolted to a skid. Remove the cardboard cover, unbolt Clamshell® from the support
brackets. Discard the skid and brackets.
Remove Clamshell® from skid and place in intended location.
There are several parts that are not installed in the unit. Be careful not to misplace the following parts
when un-crating the unit.
Inner Component Co
Ou
In
Oute
In
Manual Shut-off Valv
Tw
Note: See Mounting Adapter kit for instructions on installing these parts.
ter Component Cov
ner Fl
ue
r Fl
ue
sulation
o 3/8 X 16 Nuts
ver
er
e
CAUTION: UNIT IS EXTREMELY HEAVY. FOR SAFE HANDLING, INSTALLER
SHOULD OBTAIN HELP AS NEEDED, OR EMPLOY APPROPRIATE
MATERIALS HANDLING EQUIPMENT (SUCH AS A FORKLIFT, DOLLY,
OR PALLET JACK) TO REMOVE THE UNIT FROM THE SKID AND MOVE
IT TO THE PLACE OF INSTALLATION.
3.4 Un-crating Griddle/Charbroiler with Clamshell® Attached
CAUTION: SHIPPING STRAPS ARE UNDER TENSION AND CAN SNAP BACK
WHEN CUT.
The griddle will arrive completely assembled inside a wood frame covered by a cardboard box and
strapped to a skid. Remove the cardboard cover, cut the straps and remove the wood
frame.
Remove griddle from skid and place in intended location. The legs and gas regulator are located in the
grease drawer.
7
Page 8

4. INSTALLATION
WARNING: INSTALLATION OF THE UNIT MUST BE DONE BY PERSONNEL
QUALIFIED TO WORK WITH ELECTRICITY AND PLUMBING.
IMPROPER INSTALLATION CAN CAUSE INJURY TO PERSONNEL
AND/OR DAMAGE TO EQUIPMENT. UNIT MUST BE INSTALLED IN
ACCORDANCE WITH ALL APPLICABLE CODES.
NOTICE: The data plate is located on the inside of the hood wrap. The
Clamshell® voltage, wattage, serial number, clearance and gas
specifications are on the data plate. This information should be
carefully read and understood before proceeding with the installation.
NOTICE: This unit is approved to be installed only on equipment which meets
NSF standards, and for which the adapter kit is provided.
WARNING: WHEN MULTIPLE CLAMSHELLS® ARE USED ON A GRIDDLE, ALL THE
CLAMSHELLS MUST BE CONNECTED TO THE SAME 120V SOURCE.
4.1 Electrical Connection
The Clamshell® is supplied with a cord and plug. The receptacle is not provided with the Clamshell®.
Follow the receptacle manufacturer’s instructions when connecting the receptacle to the power supply.
When multiple Clamshells are installed on the same griddle, you must plug them into the same
electrical circuit (receptacle) to prevent from doing damage to the units transformers.
4.2 Gas Connection
WARNING: BEFORE LIGHTING, USE A SOAP AND WATER SOLUTION TO TEST
ALL JOINTS FOR GAS LEAKS.
This Clamshell® is manufactured for use with the type of gas indicated on the nameplate.
Contact the factory if your type of gas does not match the nameplate data.
All gas connectors must be in accordance with local codes and comply with the National Fuel
Federal Gas Codes ANSI Z223.1 latest edition.
There are two gas connections involved in the installation of the Clamshell®:
The first is the gas supply to the Clamshell® itself. This connection should be made positioning
the manual shut-off valve supplied with the Clamshell® to isolate the appliance from the kitchens
main gas supply during any future service activity (See figure 1). (A service agent should be able
to shutoff and disconnect the gas supply to the Clamshell® without affecting the main gas supply
to the kitchen.) Use gas lines that have a minimum diameter of at least 1/2 an inch.
The second is the gas supply to the base appliance (the appliance to which the Clamshell® is
mounted). The Clamshell® has an external solenoid valve (the Automatic Cutoff Valve (ACV))
at the end of a flexible conduit. The ACV must be installed in line with the gas supply to the base
appliance in a location, which will ensure the ACV is not exposed to temperatures above 175°F
(See figure 1). Remove the cover to the ACV to ensure the correct flow direction through the
valve when making the connections. Replace the cover after the connections are complete. Use
gas lines that have a minimum diameter of at least 1/2 an inch.
NOTE: If this Clamshell® is received already mounted on a Lang griddle no further installation is
required. If this Clamshell® is a separate unit proceed to section 4.3 below.
NOTICE: The installation of any components such as a vent hood, grease
extractors, fire extinguisher systems, must conform to their applicable
National, State and locally recognized installation standards.
8
Page 9

4. INSTALLATION CONT’
4.3 Installation Instructions
Refer to the Installation instructions provided with the adapter kit, on how to connect this Clamshell®
to the griddle/charbroiler.
Figure 1
D
ACV
ACV
Regulator
CSG24
Manual Shut-off
Valve
CSG24
Griddle / Charbroiler
Legend:
ACV = Automatic Cut-off Valve
A = 1” Pipe
B = Reduction to 3/4” Pipe
C = Reduction to 1/2” Pipe
D = Increase to 3/4” Pipe
O = Optional second AGC Parts
9
Page 10

5. INITIAL START UP
5.1 Initial Lighting Procedure for an Clamshell®
WARNING: DURING INITIAL USE, OR USE AFTER SERVICE, IF THE PILOT DOES
NOT IGNITE ON FIRST TRY THE MAIN GAS VALVE MUST BE TURNED
OFF FOR AT LEAST FIVE MINUTES.
NOTICE: While cooking, the Clamshell® must be monitored at all times.
DO NOT
NOTICE: Fan in Clamshell® runs continuously. For the safety of the unit, the fan
must run continuously to provide cooling to the electrical components.
Component cooling is required if the base unit is running. If power to
the Clamshell® is turned off, gas to base will be turned off. If it is
necessary to remove power from the Clamshell®, the base unit must be
cooled below 200°F first.
• The Clamshell® has two positions, the lowered position for cooking and the raised position for gridd le
loading, cleaning, or griddle only use.
• No thermostats are provided for temperature control. The Clamshell® is a radiant cooking device,
which operates only in the lowered position.
leave the Clamshell® unattended while cooking.
• Ignition is automatic and occurs as the Clamshell® is lowered.
• Raising the Clamshell® turns the gas burner off.
5.2 Initial Lighting Procedure for the Griddle/Charbroiler
See Operator manual for the griddle/charbroiler.
10
Page 11

6. OPERATION
6.1 Clamshell® Operation
CAUTION: ALWAYS KEEP THE AREA NEAR THE APPLIANCE FREE FROM
COMBUSTIBLE MATERIALS.
CAUTION: KEEP FLOOR IN FRONT OF EQUIPMENT CLEAN AND DRY. IF SPILLS
OCCUR, CLEAN IMMEDIATELY, TO AVOID THE DANGER OF SLIPS OR
FALLS.
NOTICE: While cooking, the Clamshell® must be monitored at all times. Do not
leave the Clamshell® unattended while cooking.
• The Clamshell® has two positions, the lowered position for cooking and the raised position fo
gri
ddle loading, cleaning, or griddle only use.
• No thermostats are provided for temperature control. The Clamshell® is a radiant cooking device,
which operates only in the lowered position.
• Ignition is automatic and occurs as the Clamshell® is lowered.
r
• Raising the Clamshell® turns the gas burn
• Place
• Lo
6.2 Opera
See Operator’s Manual for the base unit.
food on griddle/charbroiler and immediately lower the Clamshell®. The tiles will
ish-orange in approximately 30-45 seconds. The radiant heat from the Clamshell® will cook
redd
from the top while the griddle/charbroiler cooks the product from the bottom
ad product under the Clamshell® following the normal loading procedures for th
g
riddle/charbroiler to which it is attached
tion When Attached to a Griddle/Charbroiler
er off.
glow
.
e
.
11
Page 12

7. SEQUENCE OF OPERATION
7.1 Power On
• When the Clamshell® is plugged in, 115 Volts is applied to the blower motor. The Clamshell® is
designed to have a constantly running blower motor.
• The air switch then senses the blower motor, closes, and applies the 115 Volts to a 24 VAC transformer.
• The transformer then supplies 24 VAC to the tilt switch, and to the automatic cutoff valve.
• The 24 VAC to the automatic cutoff valve opens the gas valve to the griddle/charbroiler, thus allowing the
base unit to operate.
• When the Clamshell® is lowered, the tilt switch allows 24 VAC to go to the spark module.
• The spark module then supplies 24 VAC to open the Clamshell® gas valve, and high voltage to the spark
igniter.
• When the burner ignites, the sense probe senses the flame is ignited and the spark module turns off the high
voltage to the spark igniter.
• When the Clamshell® is raised the tilt switch opens the 24 VAC to the spark module, which removes the
24 VAC to the gas valve, turning off the Clamshell®.
12
Page 13

8. MAINTENANCE & CLEANING
WARNING: KEEP WATER AND SOLUTIONS OUT OF CONTROLS. NEVER SPRAY OR
HOSE CONTROL CONSOLE, ELECTRICAL CONNECTIONS, ETC.
CAUTION: MOST CLEANERS ARE HARMFUL TO THE SKIN, EYES, MUCOUS
MEMBRANES AND CLOTHING. PRECAUTIONS SHOULD BE TAKEN TO
WEAR RUBBER GLOVES, GOGGLES OR FACE SHIELD AND PROTECTIVE
CLOTHING. CAREFULLY READ THE WARNING AND FOLLOW THE
DIRECTIONS ON THE LABEL OF THE CLEANER TO BE USED.
CAUTION: A COMMERCIAL LIQUID GRIDDLE CLEANER IS NOT RECOMMENDED FOR
CLEANING THE GRIDDLE OR CHARBROILER UNDER THE CLAMSHELL®
AS MOST CONTAIN POTASSIUM HYDROXIDE
WHICH IS HARMFUL TO THE CLAMSHELL® BURNER TILES.
NOTICE: Do not spray any liquids on to the tiles, or wipe the tiles with any materials.
Liquids and direct contact on the tiles can damage them.
OR SODIUM HYDROXIDE
8.1 Weekly Cleaning
• The Clamshell® tiles are self cleaning, which is accomplished by leaving the Clamshell® on with no
product being cooked, thus allowing the heat of the broiler to burn debris from th
• To clea
• Tu
n the Clamshell®, start with a
rn off the griddle/charbroiler thermostats and wait until the griddle/charbroiler is cool
e tiles.
clean griddle plate.
.
CAUTION: DO NOT USE YOUR HAND TO CHECK GRIDDLE/CHARBROILER
TEMPERATURE.
• Lower the Clamshell® and let it run for 45 minutes, then raise the Clamshell® and ensure the blower moto
ntinues to blow cooling air through the burner tiles (Do not unplug or turn off Clamshell® po
co
• On
tiles with
ce the Clamshell® has cooled, wipe ash from around the burner tiles. Take care not to touch th
the cleaning
rag.
wer).
e burner
NOTICE: Do not spray any liquids on to the tiles, or wipe the tiles with any materials.
Liquids and direct contact on the tiles can damage them.
8.2 Burner Air Shutter Adjustment
• The air shutters are pre-set at the factory, and should not need adjustment. However, if adjustment
required, contact your local authorized service station for in
being
8.3
Disconnecting Power from Blower Motor
If power is to be removed from the blower motor, the following must be completed:
s are
structions.
r
The gas to the base unit and the gas to the Clamshell® must be turn
The base unit must be cooled below 200°F.
13
ed off.
Page 14

8. MAINTENANCE & CLEANING CONTINUED
CAUTION: DO NOT REMOVE THE REAR DRIP SHIELD. THE DRIP SHIELD SHOULD
ONLY BE REMOVED DURING SPECIFIC REPAIRS BY A TRAINED SERVICE
PROFESSIONAL.
Do not remove the drip shields. The drip shields should only be removed during
specific repairs by a trained service professional. Check the screws on your unit
during your periodic inspection.
• If you cannot turn a screw to the left or counter-clockwise, then do not do anything further
with that screw.
• If you can turn a screw to the left or counter-clockwise, then use the Lang kit,
part number PS-60101-W8, provided to you at no charge to rework the screw.
14
Page 15

9. TROUBLESHOOTING
9.1 Symptoms
What follows is a chart of Symptoms and Possible Causes to aid in diagnosing faults with the Clamshell®.
Refer to the Symptoms column to locate the type of failure then to the Possible Cause for the items to be
checked.
To test for a possible cause, refer to the TEST section and lo cate the Possible Cause then refer to test to
identify test procedures.
SYMPTON POSSIBLE CAUSE
Igniter not sparking
Spark but no ignition
Clamshell® turns off after extended use
Taking too long to light
Hazy blue flame on tile face
Not hot enough
Clamshell® not turning off
Blower runs continuously
• Failed spark modu
• Failed
• Failed air switch
• Failed motor blow
• Failed
• Failed spark electrode
• Failed spark controlle
• Fai
• Clamshell® gas valve turned off
• Pl
• Incorrectly adjusted sense ele
• Incorrectly adjusted spark elec
• Pl
• Plugged burner tiles
• Incorrectly adjusted air sh
• Leak i
• Incorrectly adjusted gas regulator
• Incorrectly adjusted gas regulato
• Pl
• Plugged burner tiles
• Failed tilt switch
• Failed gas solenoid valv
• Normal operation
tilt switch
transfor
led gas solenoid valv
ugged orifice
ugged enrichment orifi
n air path to burner face
ugged main burner orifi
le
er
mer
r
e
ctrode
trode
ce
utter
ce
e
r
15
Page 16

9. TROUBLESHOOTING CONT’D
9.2 TESTS
NOTICE: Service on this, or any other, LANG appliance must be performed by
qualified personnel only. Consult your LANG authorized service agent
directory or call the factory at 1-800-807-9054, or WWW.STAR-MFG.COM
For the service agent nearest you.
WARNING: BOTH HIGH AND LOW VOLTAG ES ARE PRESENT INSIDE THIS
APPLIANCE WHEN THE UNIT IS PLUGGED/WIRED INTO A LIVE
RECEPTACLE. BEFORE REPLACING ANY PARTS, DISCONNECT THE
UNIT FROM THE ELECTRIC POWER SUPPLY AND CLOSE THE MAIN GAS
VALVE. ALLOW FIVE MINUTES FOR UNBURNED GAS TO VENT.
If an item on the list is followed by an asterisk (*), the work should be done by a factory
authorized service representative.
Possible Cause TEST
Failed tilt switch
Failed gas valve
Failed spark module
Failed air switch
Failed combustion blower
Improper gas pressure
Failed transformer
• Unplug switch and test for continuity while raising/lowering
the hood
• Remove the wires and check for continuity across the valve
coil
• Check for 24 VAC on TH*
• Observe spark
• Unplug switch and test for continuity while blower motor is
running*
• Check for proper voltage to unit/blower*
• Check for continuity across the motor’s windings
• Ensure gas pressure is adjusted properly*
• Check for proper voltage*
CAUTION: USE OF ANY REPLACEMENT PARTS OTHER THAN THOSE SUPPLIED BY
LANG OR THEIR AUTHORIZED DISTRIBUTORS CAN CAUSE BODILY
INJURY TO THE OPERATOR AND DAMAGE TO THE EQUIPMENT AND
WILL VOID ALL WARRANTIES.
16
Page 17

1
2
3
4
5
6
7
8
9
10
11
15 14 13
16
19
20
24
25
26
27
28
21
17
22
23
12
29
30
31
32
33
34
Model: CSG24 GAS 24” CLAMSHELL
SK2476, Rev. B 07/09/2018
Page 18

PARTS LIST
JULY 09, 2018, Rev. A
Gas Clamshell Hood Parts List
R
Fig No Part No Qty Description Application
1 K9-60101-851 1 HOOD WRAP ASSY, w/DIE CAST LOGOS
2 2M-60301-W2 1 LANG CLAMSHELL LOGO
3 K9-70603-24 1 AGC HOOD HANDLE ASSY COMPLETE
4 K9-60301-43-1 1 SATIN CHRM-LANG DIE CAST
5 2K-70801-19 1 BUSHING HEYCO 5/8#2077
6
7 2P-51002-11 2 HOOD SPRING
8 2P-51002-05 2 SPRING GAS HOOD
9
2P-70201-06
2
BRNZ BR FLN BUSHING
10 K9-50312-40 2 SPRING PISTON / WASHER
11 2C-20104-37 2 SCRW 3/8-16X12 H/H CAP 2 THD
12 2V-80502-03
1
SOLENOID VALVE 24VAC 1/2PIPE
2 CSG24B
CSG24
13 K9-30307-01 1 SWT MERC TLT W/250°C 18GA
14 2J-80300-10 1 SPRK IGN CNTRL
2V-80501-03 1 GAS REG 1/2X1/2CLSIISET10 LP
15
2V-80501-10 1 GAS REG 1/8X1/2 CLS I NAT
Y9-80403-04
2A-80400-26 ORIFICE HOOD .1360 #29
16
Y9-80403-05
2A-80400-27 ORIFICE HOOD .0860 #44
90 DEG FITING W/#29 DRL
1
90 DEG FITING W/#44DRL
1
NAT
LP
17 2E-103-232 1 HARNESS, AGC HOOD #1
19 2J-80302-06 1 IGNITOR/SENSOR CHANNEL
20 K9-103-3 1 SPARK COVER
21 K9-51100-59 1 BURNER TILE ASSY, GLUED
- - 2H-60106-67 1 INSULATION BURNER TILE KIT (INCLUDED w/K9-51100-59)
22 2U-103-193 1 LEFT SKIRT
23 2V-103-194 1 RIGHT SKIRT
24 2V-103-197 1 FRONT SKIRT w/HINGE
25 K9-60102-1964 1 FRONT SKIRT INNER WALL w/SCREWS
26 2C-20103-02 3 SCRW SM PLT 10 X .5 PHLSL
27 K9-103-A88 1 FLAPPER ASSY
28 2B-50201-08 1 WIRE GUARD ADD-ON-BROILER
29 2K-70101-51 1 BRAS TBE ELBOW 1/4CC X 1/4CC
30 K9-103-4 1 TOP SEAL PLATE
31 K9-103-89 1 TOP PLATE SEAL
32 2C-20201-03 1 WSHR FLT AN960-716
33 K9-103-71 1 TUBE #5
2A-80401-04
34
2A-80401-05 PILOT BURNER ORIFICE, .010DRL LP
PILOT BURNER ORIFICE, .021DRL NAT
1
NI 2H-103-124 1 COMPONENT COVER INSULATION
1
IMPORTANT: WHEN ORDERING, SPECIFY VOLTAGE OR TYPE GAS DESIRED PAGE
INCLUDE MODEL AND SERIAL NUMBER OF
Some items are included for illustrative purposes only and in certain instances may not be available.
1
Page 19

1
2
11
10
6
5
7
12
13
14
15
17
16
8
3
4
9
18
19
21
22
23
20
27
Model: CSG24 GAS 24” CLAMSHELL, FRAME ASSY
24
25
26
SK2477, Rev. A, 3/23/2015
Page 20

PARTS LIST August 04, 2015, Rev. -
Gas Clamshell Frame Parts List
Fig No Part No Qty Description Application
K9-103-702-W2
1
K9-103-702-1 LEFT OUTER STANCHION CSG24B
LEFT OUTER STANCHION - ASSY CSG24
1
R
2 K9-103-701 1 BLOWER DUCT - SPOT
3 2U-30200-44 1 MOTOR & BLOWER ASSY FOR AGC
4 OB-60102-194 1 OBS AGC BLOWER HOUSE ASSY
K9-103-301
5
K9-103-301-2 CSG24B
K9-103-303
6
K9-103-303-2 CSG24B
1 STANCHION COVER LH
1 INNER DRIP EDGE
CSG24
CSG24
7 K9-103-304 1 BAFFLE CLIP RH
8 K9-103-305-1 1 BAFFLE CLIP LH
K9-103-300
9
K9-103-300-2 STANCHION COVER RH CSG24B
STANCHION COVER RH CSG24
1
10 K9-103-323 1 HOODWRAP DRIP CATCHER
11 K9-103-164 1 REAR ACCESS COVER
12 2C-20104-08 2 SCRW HXHD CAP PLT 1/4-20
13 2C-20202-05 2 WSHR PLT 1/4 LOCK SPLIT
14 2C-20201-05 2 WSHR LFT 1/4 USS PLTD
15 2P-70201-07 4 BRNZ BR FLN 5/8IDX3/4ODX1
16 K9-60102-1911 2 HOOD PIVOT SHAFT ASSY
K9-103-115-W3
17
K9-103-115-3 RH OUTER STANCHION CSG24B
RIGHT OUTER STANCHION CSG24
1
18 2C-20109-04 16 SCREW THD MS SS 10-32X
19 K9-103-102 1 FIXED BOTTOM
20 2E-30501-02 1 TRM STRP 3 POLE W/PUSH ON TRM
21 2E-31200-01 1 BOX CONNECTOR 3/8
2E-30600-11
22
2E-30600-04 RLAY 24VAC 2FRMC DPDT FLNG MNT
RELAY 120V SPDT FLANGE MNT used w/Envirozone Griddles
1
23 2E-31400-07 1 XFRMR, 120-208-240/24V,40V
24 K9-103-101 1 COMPONENT TRAY
25 2E-70505-07 1 CONDUIT CNNCTR 3/8 90° FLEX
26 2E-31107-06 1 CORD SET 14/3 X 6’ 15A
27 2V-80502-03 1
SOLENOID VALVE 24VAC
NI 2E-30308-01 1 SWITCH AIR 10WC 1/4
NI K9-103-95 1 AIR SWITCH HOSE
NI 2E-40704-04 1 CAP - BLOWER START FOR
1
IMPORTANT: WHEN ORDERING, SPECIFY VOLTAGE OR TYPE GAS DESIRED PAGE
1
INCLUDE MODEL AND SERIAL NUMBER OF
Some items are included for illustrative purposes only and in certain instances may not be available.
Page 21

MODELS:
ADD ON GAS CLAMSHELL
THIS DRAWING CONTAINS INFORMATION CONFIDENTIAL TO STAR MFG. INT'L. INC.
NO REPRODUCTION OR DISCLOSURE OF ITS CONTENTS IS PERMITTED.
2M-61113-24 Rev F
6-8-2011
TO 2ND OR 3RD
CLAMSHELL TB1
WHEN PRESENT
GRN
BLK
WHT
AIR
SWITCH
1 TAN
2 TAN
4 TAN
3 TAN
GRIDDLE SWITCH
(GRIDDLES ONLY - WIRES NOT SHOWN)
TO 2ND OR 3RD
CLAMSHELL
WHEN PRESENT
TO 2ND OR 3RD
CLAMSHELL
WHEN PRESENT
35 GRN
INSULATED SPADE
CONNECTORS
FOR USE WITH
OPTIONAL EXTERNAL
TIMER RELAY.
STOWED WHEN
NOT IN USE
33 GRN
32 RED
31 WHT
34 GRN
29 YEL
30 GRN
AUTOMATIC
CUTOFF VALVE
(ACV)
16 BLU
15 BRN
17 BRN
CAPACITOR
6 WHT
25 GRN
1 C GRN
1 B WHT
1 A BLK
POWER
CORD
6 WHT
5 BLK
8 BLK
7 GRN
TB1
3
2
1
10 BLK
9 WHT
CNO
11 YEL
EBM
BLOWER
12 YEL
20 YEL
24
115
XFMR
CARRIAGE HOOD
19 BLU
18 BLK
20 YEL
21 TAN
22 TAN
23 RED
24 GRN
26 GRN
27 ORG
28 TAN
IGNITOR
SENSOR
TILT SWITCH
SOLENOID
VALVE
HVT
SPARK MODULE
GROUND
GROUND
SENSOR
VALVE
TH
F
WHEN 2 OR 3 HOODS ARE PRESENT, ONLY ONE POWER
CORD IS USED FOR ALL HOODS.
1
1
REV. DATE/ECO DESCRIPTION OF CHANGE
F
6/8/2011
ECO 10748
REDRAWN IN SOLDWORKS.
ADDED POWER JUMPER FOR 2ND & 3RD HOOD
Page 22

SJD
SLLEHSMALC 42GSC HTIW ELDDIRG SAG "84 PMETUCCA D/W
OT SERIW 2 NAT ,1 NAT DEGNAHC
22W-22116-M2
ETON DEDDA & DEHSAD
.2 ETON DEDDASJD
.ON TRAP
DROC REWOP
NRG
THW
KLB
7002/11/21
6269 OCE
5046 OCE
0102/32/6
THW 2
KLB 1
RENRUB
LEY 02
ULB 71
RENRUB
ULB 42
RENRUB
KLB
ULB
HCTIWS REWOP
LEY 4
THW 8
KLB 7
LEY 21
ULB 11
EVLAV
LEY 91LEY 62LEY 33
ULB 81ULB 52ULB 23
EVLAV
EVLAV
.ON LEDOM
.VEROCE/ETADEGNAHC FO NOITPIRCSEDRD
ELTIT
SNOISIVER
0102/2/7
ETAD:
510. ± xxx. :DETON SSELNU :ECNARELOT
SELGNA 1
LAIRETAM
HSINIF
:ravoS naD
RD.KC
R
L'TNI .GFM RATS OT LAITNEDIFNOC NOITAMROFNI SNIATNOC GNIWARD SIHT
DETTIMREP SI STNETNOC STI FO ERUSOLCSID RO NOITCUDORPER ON .CNI
.CNI LANOITANRETNI GNIRUTCAFUNAM RATS
ASU ,34136 .OM ,SIUOL .TS
EVIRD NENNUS 01 #
KLB
THW
A
B
V021
REMROFSNART
V42
LEY
LEY
EVLAV
TOLIP
RENRUB
TOLIP
RENRUB
TOLIP
EMAS EHT OTNI DEGGULP EB TSUM SDROC DOOH.2
RENRUB
TOLIP
KRAPS
KRAPS
KRAPS
ELUDOM
NLG
ELUDOM
NLG
ELUDOM
NLG
ULB 5
THW 51THW 22THW 92
KLB 41KLB 12
1LN
ULB 6
HCTIWS
EMALF
LEY 31
ULB 01
NRG 9NRG 61NRG 32NRG 03
HCTIWS
EMALF
HCTIWS
EMALF
LEY 72
2
DROC REWOP
NRG
B
ROTACIDNI
PMAL
KLB
TATSOMREHT
TATSOMREHT
TATSOMREHT
THW
KLB
LEY 02
4 NAT
1 NAT
3 NAT
LEY 21
A
1 NAT
2 NAT
A
1 NAT
2
DROC REWOP
NRG
THW
B
KLB
2 NAT
NEHW D'QER YLNO ERA SERIW DEHSAD .1
HCTIWS
EMALF
LEY 43
KLB 82
ELUDOM
RENRUB
TOLIP
KRAPS
NLG
ULB 13
RENRUB
EVLAV
TATSOMREHT
LEY 21
.DESU ERA SDOOH )2(
.
ELCATPECER
ELDDIRG
XOB EGAIRRAC
:SETON
B
A
LEY 92
LEY 92
KLB 5
ULB 61
KLB 5
ULB 61
REMROFSNART
KLB 81
NRB 71
REMROFSNART
KLB 81
NRB 71
FFOTUC OTUA
EVLAV
NRG 03
321
HCTIWS RIA
CON
KLB 01
V021
V42
ULB 91
NRB 51
ROTICAPAC
FFOTUC OTUA
EVLAV
LEY 02
HCTIWS RIA
CON
KLB 01
V021
V42
ULB 91
NRB 51
ROTICAPAC
KLB 8
THW 13
THW 9
LEY 21
NEHW WOTS
DESU TON
REWOLB
NRG 53
EDAPS DETALUSNI
NRG 03
321
KLB 8
THW 13
THW 9
LEY 21
NEHW WOTS
DESU TON
REWOLB
NRG 53
EDAPS DETALUSNI
SROTCENNOC
ELUDOM KRAPS
NAT 12
HCTIWS TLIT
NRG 43
THW 6
NRG 7
DER 23
NRG 33
REMIT LANOITPO
HTIW ESU ROF
SROTCENNOC
YALER
ELUDOM KRAPS
NAT 12
HCTIWS TLIT
NRG 43
THW 6
NRG 7
DER 23
NRG 33
REMIT LANOITPO
HTIW ESU ROF
YALER
TVH
DNUORG
DNUORG
ROSNES
EVLAV
HT
NAT 22
NRG 52
ROSNES
ROTINGI
HT
NAT 22
NRG 52
ROSNES
ROTINGI
NRG 62
NAT 82
GRO 72
1 XOB EGAIRRAC & DOOH LLEHSMALC)LANOITPO( 2 XOB EGAIRRAC & DOOH LLEHSMALC
DER 32
NRG 42
RENRUB
EVLAV
TVH
DNUORG
DNUORG
ROSNES
EVLAV
NRG 62
NAT 82
GRO 72
DER 32
NRG 42
RENRUB
EVLAV
DOOH LLEHSMALC
Page 23

Page 24

STAR INTERNATIONAL HOLDINGS INC. COMPANY
Star - Holman - Lang - Wells - Bloomeld - Toastmaster
265 HOBSON ST,
(800) 807-9054 (314) 781-2777
Parts & Service (800) 807-9054
SMITHVILLE, TN 37166 U.S.A.
www.star-mfg.com
 Loading...