

Landmann 0825 Assembly Instruction Manual
0825
0825 / 10-08 / #113-2009bt
Address / Cím / Naslov / Adresa / Adresă /
Адрес
t
Assembly Instruction
H
Összeszerelési és üzemeltetési útmutató
Inštalácia a návod na obsluhu
Uputa za ugradnju
Instalare si Instrucţiuni de operare
Инсталиране и Инструкция
Technische Änderungen vorbehalten. Für Druckfehler wird nicht gehaftet. u Technical details are subject to change. We do not take any responsibility for misprints. u Sous
réserve de modications techniques. Nous ne nous porterons pas responsables des erreurs d’impression.
u
Con riserva di modiche tecniche. Non ci si assume la responsabilità
di eventuali errori di stampa.
u
A műszaki változtatások jogát fenntartjuk. Az esetleges nyomtatási hibákért nem vállalunk felelősséget. u Zmiany techniczne zastrzeżone.
Nie odpowiadamy za błędy w druku.
u
Vi förbehåller oss rätten till tekniska förändringar. Feltryck ligger utanför vårt ansvar.
u
Tekniske endringer kan forekomme. Vi
tar forbehold om trykkfeil.
u
Der tages forbehold for tekniske ændringer samt tr ykfejl. u Pidätämme itsellämme oikeuden teknisiin muutoksiin ja painovirheisiin.
k
t
U
N
l
q
H
Germany Landmann-Peiga® GmbH & Co. Handels-KG
Am Binnenfeld 3-5, D-27711 Osterholz-Scharmbeck, Deutschland
Tel. **49 - 47 91 - 30 8 - 59 oder 78, Fax **49 - 47 91 - 30 8 - 36
Mo-Do 8:00 bis 16:45 Uhr, Fr 8:00 bis 15:30 Uhr
e-mail: ohz@landmann-peiga.de, internet: www.landmann.com
United Kingdom Landmann® Ltd.
Unit 1, Ryelands Business Centre, Ryelands Lane, Elmley Lovett, Worcs, WR9 0PT, United Kingdom
Barbecue Helpline **44 - 12 99 - 25 17 47,
Sales Oce fax: **44 - 12 99 - 25 32 13
Monday to Thursday 9am to 5pm, Friday, 9am to 4pm.
e-mail: enquiries@landmann.co.uk, internet: www.landmann.co.uk
France Veuillez vous adresser au bureau allemand.
Italiy La preghiamo di rivolgersi all’ucio tedesco.
Hungary Landmann-Peiga® Hungária Kft.
Almáskert u. 4., H-2220 Vecsés
Tel. **36 - 29 - 55 50 70, Fax **36 - 29 - 35 49 32
Hétfő-Csütörtök 8:00 - 15:30, Péntek 8:00 - 14:00
e-mail: infohun@landmann-peiga. de, www.landmann.hu
Poland Landmann® Polska Sp.z.o.o.
ul. Kuziennicza 13b, 59-400 Jawor, Polska
Tel. **48 - 76 - 8 70 24 61, Fax **48 - 76 - 8 70 23 88
Poniedziałek - czwartek od 8:00 do 16:45, piątek od 8:00 do 15:30
e-mail: landmann@landmann.pl, internet: www.landmann.pl
Sweden Landmann® Skandinavia AB
Storgatan 70, S-568 32 Skillingaryd, Sverige
Tel. **46 - 3 70 - 69 35 80, Fax **46 - 3 70 - 4 95 80
Måndag-Fredag, 08.00 - 16.00
e-mail: landmann@landmann.se, internet: www.landmann.se
Norway Landmann® Norge AS
Sandstuveien 60 A, N-1184 Oslo, Norway
Tel. **47 - 23 - 16 50 10, Fax **47 - 23 - 16 50 11
Mandag-Fredag 08:00 - 16:00
e-mail: landmann@landmann.no, internet: www.landmann.no
Denmark Landmann® Danmark A/S
Hvidsværmervej 147, C/O BasicCon Scandinavia A/S, DK-2610 Rødovre, Danmark
Tel. **45 - 59 44 74 14, Fax **45 - 59 44 74 41
Mandag-Torsdag: 8.00 - 16.00, Fredag 8.00 - 15.00
e-mail: info@basiccon.com, internet: www.landmann.dk
Finland Landmann® Finland OY
Laulakuja 4, PL. 1, SF-00421 Helsinki, Finland
Tel. **358 - 9 - 47 70 93 - 0, Fax **358 - 9 - 47 70 93 50
Maanantai-Perjantai 8:30 - 16:30
e-mail: landmann@landmann., internet: www.landmann.
p
C

A
B
C
D
E
F
G
H
2
H1
I
J
K
L
M
N
P
O
Q
Contents / Tartalmát / Vsebina / Sadržaj /
Continut / Съдържание
t
Warranty
We grant a warranty for the barbecue grill for the duration of
two years, starting with the date of purchase, please provide
proof of purchase. The warranty includes manufacturing
deciencies and defective parts; it extends to the replacement
of these parts. Costs for postage, assembly, replacement of
worn parts (charcoal grill) and other costs are not covered by
this guarantee. The warranty lapses in case of mishandling
and if any kind of unauthorized use.
H
Jótállás
A vásárlás idõpontjától számítva a grillkészülékre 2 év
garanciát adunk. A jótállás az esetleges gyártási hibákra
és hibás alkatrészekre vonatkozik, és az érintett elemek
kicserélésére korlátozódik. A szállítás, szerelés és az
elhasználódott alkatrészek (szénrostély) és egyebek cseréje
nem képezik a szavatosság részét. Helytelen kezelés, valamint
a készüléken eszközölt bárminemû önkényes változtatás
esetén megszûnik a jótállás.
Záruka
Nepreberáme záruku za grilovanie na obdobie dvoch rokov od
dátumu nákupu. Záruka sa vzťahuje na chyby v spracovaní a
chybných dielov, to sa vzťahuje aj na v ýmenu týchto dielov.
Náklady na dopravu, montáž, výmena opotrebovaných dielov
(drevené uhlie gril) a iné nie sú súčasťou záruky. Ktorého
platnosť končí v prípade zlého zaobchádzania a svojvoľné
zmeny všetkého druhu boli vykonané na grile.
Jamstvo
Mi preuzima jamstvo za roštilj za razdoblje od dvije godine
od datuma kupnje. Jamstvo pokriva nedostataka u izradi
i neispravnih dijelova, ona se proteže na zamjenu tih
dijelova. Troškova za transport, instalaciju, zamjenu dijelova
nošen (ugljen roštilj) i ostali nisu dio jamstvo. To izdisati in
mishandling i ako je proizvoljna promjena bilo koje vrste su
provedena na roštilj.
De garanţie
Ne asumam garanţie pentru gratar, pentru o perioadă de
doi ani de la data achiziţionării. Garanţia acoperă defecte de
executie sau piese defecte, aceasta se extinde la înlocuirea
acestor părţi. Costurile pentru transportul de marfă, instalare,
înlocuirea pieselor uzate (cărbune gratar) şi alte nu fac
parte din garanţie. Aceasta expiră în mishandling şi dacă
modicările arbitrare de orice fel au fost efectuate pe gratar.
Гаранция
Ние поема гаранция за грил за период от две години,
считано от датата на закупуване. Гаранцията покрива
дефекти в изработката и дефектни части, тя се простира
до замяната на тези части. Разходите за транспорт,
инсталация, подмяна на износени части (скара на дървени
въглища) и други не са част от гаранцията. Той изтича в
злоупотреба и ако произволни промени от всякакъв вид,
са били извършени на скара.
Warranty / Jótállás / Záruka / Jamstvo /
De garanţie / Гаранция
t
Assembly and operating instructions „Stew oven“ ..........................................................................3
H
Összeszerelési és üzemeltetési útmutató „Üstkazán“ .......................................................................7
Navodilo za montažo in uporabo ""Peč s kotličkom" .....................................................................11
Upute za montažu i uporabu "Kotao za kuhanje" ..........................................................................15
Instrucţiuni de montaj şi de exploatare "Cazan pentru tocană" .....................................................19
Инструкцияза монтаж и експлоатация "Кюмбе с котле" ..........................................................23
3
LANDMANN
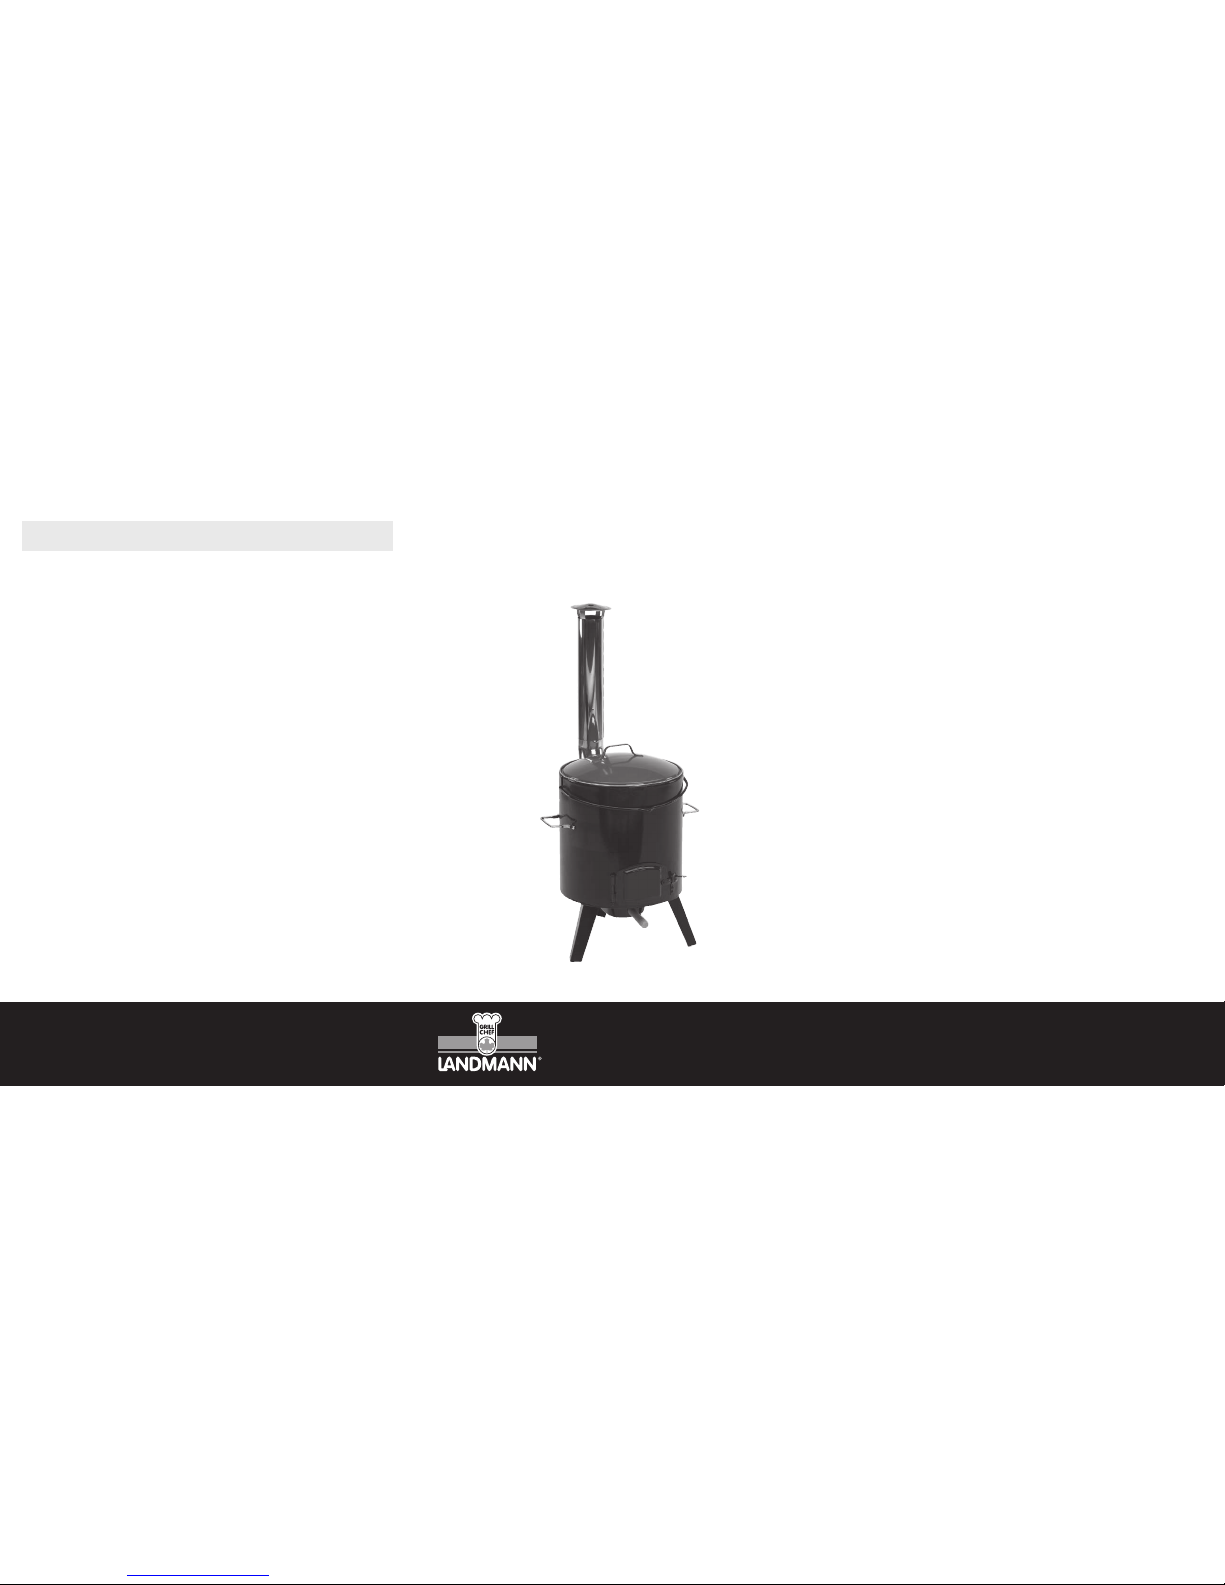
Assembly and operating instructions
"Stew oven"
t
General safety instructions
Introduction
Before operating the high-quality LANDMANN
stew oven please read these assembly and operating
instructions carefully.
You will quickly determine that:
Set up and handling are easy.
Proper use
The stew oven should only be used for preparing food.
All of these operating instructions must be complied
with.
Only for private use
Safe operation of the stew oven
Before using for the rst time the stew oven must
heat up for approximately 30 minutes.
WARNING - burn injuries!
➱ The stew oven must be placed on a stable and rm substrate during operation, otherwise it can tip
over.
➱ ATTENTION! This stew oven becomes extremely hot and should not be moved during operation!
➱ When burning fuel, wear grill gloves or use grill tongs.
➱ Allow the stew oven to cool down completely before cleaning.
➱ CAUTION! Do not use spirit or gasoline to ignite or re-ignite!
➱ CAUTION! Only use lighting starters in accordance with the European standard for lighting starters (EN
1860-3)!
➱ Never use water to extinguish charcoal, or briquettes.
WARNING - suocation!
➱ Do not use in enclosed areas!
DANGER for children and pets!
➱ Never leave the hot stew oven unattended.
➱ ATTENTION! Keep children and pets away from the replace!

4
LANDMANN
General instructions for successful
assembly
Please read the assembly instructions carefully all
the way through, and follow the safety instructions.
Allow yourself sucient time for assembly. Establish
a level work surface beforehand of approximately two
to three square meters. Remove the device from the
packaging! Organize the parts and the required tools
so that they are close at hand.
Please note: Firmly tighten all screw connections
only after concluding assembly. If you tighten screw
connections before assembly is concluded undesired
tension can occur.
Part list
A. Cover 1
B. Ladle 1
C. Pot 1
D. Charcoal grate 1
E. Boiler handle 2
F. Boiler 1
G. Holder for lock bracket 1
H. (1) Lock bracket 1
(2) Boiler door 1
I. Bolt 1
J. Splint 1
K. Hinge 1
L. Wooden handle 1
M. Ash collection box 1
N. Stand 3
O. Connecting tube 1
P. Chimney 1
Q. Roof 1
Assembly preparations
Please use the list and drawing below to verify that
you have all of the parts. Organize the parts and the
tools required for assembly so that they are close at
hand.
5
LANDMANN
Assembly
CAUTION!
For your safety the heads of the screws should
always point outward, otherwise injuries can
occur.
Only rmly tighten all screw connections after
assembly is concluded, otherwise undesired
material tension can occur.
1. Turn the boiler (F) upside down and screw the
stand (N) via the M5x8 screws and MD nuts to
the tightly to the boiler. Place the boiler right
side up after assembly.
2. Mount the boiler handles (E) on the sides of the
boiler (F) via the MD screws and MD nuts.
3. Fasten the hinge (K) onto the boiler (F) via the
M4x8 screws and M5 nuts.
4. Mount the lock bracket (H
1) on the boiler door
(H
2) via the M4x8 screw and M4 nut.
5. Fasten the holder for the lock bracket (G) to the
boiler (F) via the M4x8 screws and M4 nuts.
6. Insert the boiler door (H
2) in the hinge (K) and
x the boiler door (H
2) in place with the nut (I).
Secure the bolt (I) by introducing the splint (J)
through the hole on the end of the bolt.
7. Fix the connecting tube (O) on the rear part of
the boiler (F) via M5x8 screws and M5 nuts.
Connection elements
(pre-assembled connecting elements are included
in the itemisation!)
8. Place the chimney (P) on the connecting tube
(O) and place the roof (Q) on the end of the
chimney (P).
9. Fasten the wooden handle (L) onto the ash
collection box (M) via a wood screw Ø3.5x20.
Slide the ash collection box (M) into the
provided holder on the oor of the boiler.
10. Place the charcoal grate (D) and the pot (C) in
the boiler (F).
WARNING!
The boiler must be placed on a stable and rm
substrate during operation, otherwise it can
tip over.
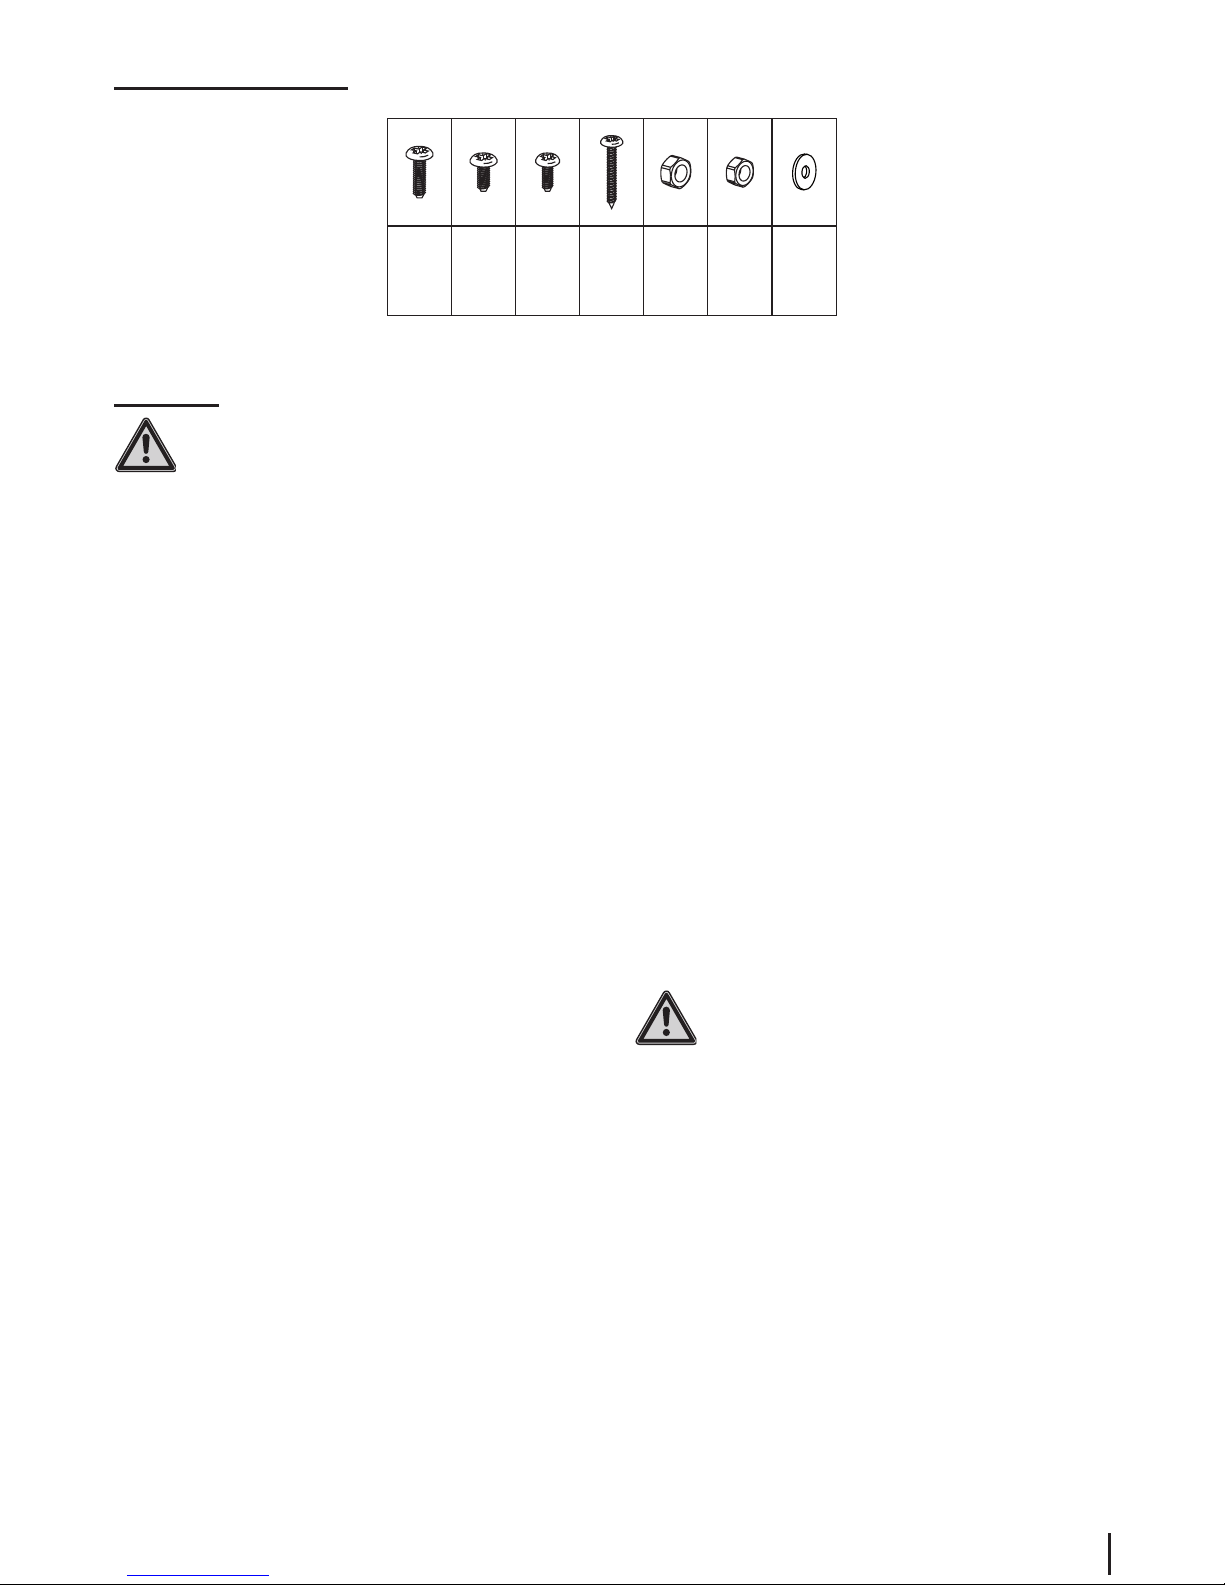
M5x8
10x
M4x85xØ3,5x20
1x
M5x12
4x
M5
14x
M4
5x
Ø6
6x
6
LANDMANN
Instructions for safe operation of the
replace
The boiler must be in a stable position on a rm
substrate during operation.
Do not use in enclosed areas, or in areas covered
by a roof.
Only use safe lighting materials (such as
LANDMANN solid re starter).
The fuel container has a holding capacity of
approximately 5 kg.
Prior to using for the rst time, the stew oven must be
heated for approximately 30 minutes.
Igniting the fuel
WARNING - burn injuries!
If igniting with gasoline or spirit,
uncontrolled heat development can occur
due to deagration. Only use safe combustion
materials, such as solid re starter.
The stew oven must be in a stable position on a
rm substrate during operation.
1. Use quality products from LANDMANN,
such as LANDMANN charcoal,
LANDMANN briquettes, and
LANDMANNsolid re starter.
2. Layer a portion of the charcoal or briquettes on
the charcoal grate (D).
3. Light one or two of the solid re starters with
a match. Place these on the layer of charcoal or
briquettes.
4. Allow the solid re starter to burn for 2 to 4
minutes. Then slowly ll the boiler with charcoal
or briquettes.
5. Only start to cook the food when the fuel is
coated with a layer of ash! This indicates that
the charcoal or briquettes have reached a state
that is ideal for grilling. Distribute the charcoal
or briquettes uniformly in the boiler (F) with a
suitable metal tool..
6. Insert the pot and start cooking.
Cleaning / care
Naturally, occasional cleaning is necessary to maintain
the attractive appearance of the product. Do not use
abrasive agents. Never use water to extinguish stew
oven.
1. A wash cloth and water with an o-the-shelf
dish washing agent suce for cleaning.
2. If there are stubborn stains on the enamelled
parts, use an o-the-shelf cleaning agent for
enamel (oven cleaner). Follow the instructions
provided by the manufacturer of the cleaning
agent you are using.
3. Clean the pot with dish washing detergent or
rust-free cleaning pads.
Environmental instructions & disposal
measures
Ensure cleanliness when handling the stew oven and
when disposing of residual materials. Only dispose of
residual waste in containers made of metal or nonammable materials that have been designed for this
purpose.
Local regulations apply for disposal.
7
LANDMANN
Összeszerelési és üzemeltetési útmutató
"Üstkazán"
H
Általános biztonsági tanácsok
Előszó
Mielőtt üzembe helyezné ezt a kiváló minőségű
LANDMANN üstkazánt, gyelmesen
tanulmányozza át ezt az összeszerelési üzemeltetési
útmutatót.
Hamarosan megállapíthatja:
A készülék összeállítása és kezelése egyaránt rendkívül
könnyű és egyszerű feladat.
Rendeltetésszerű használat
Az üstkazánt kizárólag ételek elkészítésére szabad
felhasználni. Eközben maradéktalanul be kell tartani
a jelen útmutató minden előírását.
Csak magánhasználatra
A tűzhely biztonságos üzeme
Mielőtt először használná, fűtse fel az üstkazánt
kb. 30 percig (faszénnel vagy brikettel).
FIGYELEM égési sérülés!
➱ Működés közben az üstkazánnak stabil és szilárd alapon kell állnia, mert különben felborulhat.
➱ FIGYELEM! Ez az üstkazán a használat során rendkívül felforrósodik, és ezért működés közben nem
szabad odébb helyezni!
➱ Tüzelés közben viseljen grillező kesztyűt vagy használjon egy fogót.
➱ A tisztítás előtt hagyja teljesen lehűlni az üstkazánt.
➱ VIGYÁZAT! A gyújtáshoz, illetve újra gyújtáshoz ne használjon spirituszt, vagy benzint!
➱ VIGYÁZAT! Kizárólag a gyújtási segédeszközökről szóló Európai Szabványnak (EN 1860-3) megfelelő
gyújtási segédeszközöket használjunk!
➱ Soha ne használjon vizet a faszén ill. a brikett oltásához.
FIGYELEM, fulladásveszély!
➱ Ne használja zárt helyiségben!
A gyermekek és háziállatok számára VESZÉLYES.
➱ Soha ne hagyja felügyelet nélkül a forró üstkazánt.
➱ FIGYELEM! A gyermekeket és háziállatokat tartsa távol!

8
LANDMANN
Az eredményes szereléshez szükséges
általános tudnivalók
Gondosan olvassa el a tájékoztatót, és tartsa be a
biztonsági előírásokat. Hagyjon elegendő időt az
összeszereléshez. Előtte gondoskodjon két-három
négyzetméter sík területről. Vegye ki a készüléket a
csomagolásból! Tegye a tartozékokat és a szükséges
szerszámokat karnyújtásnyi távolságra.
Ügyeljen a következőre: A csavarokat csak a teljes
összeszerelés után húzza meg erősen. Ellenkező
esetben nem kívánt feszülés keletkezhet.
Alkatrészjegyzék
A: Fedél 1
B: Merítő kanál 1
C: Üst 1
D: Szénrostély 1
E: Kemence fogantyú 2
F: Kemence 1
G: A zárókeret tartója 1
H: (1) zárókeret 1
(2) kemence ajtó 1
I: Csapszeg 1
J: Sasszeg 1
K: Csuklópánt 1
L: Fa fogantyú 1
M: Hamuzó doboz 1
N: Állvány 3
O: Összekötő cső 1
P: Kémény 1
Q: Tető 1
Az összeszerelés előkészítése
A jegyzék és rajz alapján ellenőrizze, hogy minden
alkatrészt megkapott-e. Tegye a tartozékokat és az
összeszereléshez szükséges szerszámokat távolságra.
 Loading...