

Page 1
TECHNICAL MANUAL
820 LX / 910 LX / 1300 LX
Page 2

LANCER reserves the right to modify, constantly its documentation for its improvement.
The values of adjustments indicated in the displays of this manual are given as an indication
and do not have to be taken for reference.
Page 3

PRECAUTIONS TO BE TAKEN BEFORE USE
• Users must be trained before using the washer-dryer.
• The staff that use or repair this washer-dryer must have followed a complete
training referring its use and maintenance. This training must include the
selection and understanding of the washing cycle, the loading and unloading of
the baskets and the handling of the washing products.
• The staff in contact with the detergent products and its emanations, which
could be used in this washer-dryer, must have knowledge of the safety data
sheet of the used products as well as the detailed instructions about the
dangers and the detection of toxic product leaks.
• The training of the users and technicians must be done regularly and always
before the first use of the washer-dryer. A written register of these trainings
must be kept in order to prove the presence and the understanding of the
interested parties.
NT_820_910_1300_LX_ANG_V1 04_2007.doc
1
Page 4

Page 5

SUMMARY
SUMMARY
CHAPTER 1 INTRODUCTION..................................5
1. INTRODUCTION TO THE TECHNICAL MANUAL 6
2. INTRODUCTION TO THE ACCESS CODES 7
3. DESCRIPTION OF KEYPAD 8
CHAPTER 2 ACCES TO TECHNICIAN MENU ................9
1. ACCES TO TECHNICIAN MENU 10
2. THE MACHINE TEST 11
3. CALIBRATION OF TEMPERATURE PROBES 13
4. MAINTENANCE HOURS RESET 15
5. CHANGING CARD 16
5.1 MEMORY READING OF THE ELECTRONIC BOARD TO BE CHANGED 16
5.2 MEMORY WRITING 18
6. RETURN TO THE INITIAL DISPLAY 20
CHAPTER3 ACCES TO SUPERVISOR MENU...............21
1. ACCES TO SUPERVISOR MENU 22
2. MACHINE CONFIGURATION 23
3. THE COMMON TIMES 28
4. THE CHOICE OF MACHINE NAME 34
5. UPDATE CYCLES 35
6. UPDATE HOURS 36
NT_820_910_1300_LX_ANG_V1 04_2007.doc
3
Page 6

SUMMARY
7. UPDATE MAINTENANCE HOURS 37
8. PRINT PROGRAM / COMMON SETTING PARAMETERS 39
9. PRINT CONFIGURATION PARAMETERS 40
10. CHANGING CARD 41
11. RETURN TO THE INITIAL STATE 41
CHAPTER 4 FAULT ALARMS................................43
1. WARNINGS 44
1.1 - LACK OF SALT * : 44
1.2 - LACK OF PRODUCTS 44
1.3 HOT CHAMBER 44
1.4 FULL BASIN 45
1.5 MAINTENANCE REMINDER 45
1.6 PREVENTATIVE MAINTENANCE REQUIRED 45
2. FAULT ALARMS 46
2.1 FAULT N°1 PROBE FAULT. 46
2.2 FAULT N°2 EMPTYING FAULT. 46
2.3 FAULT N°3 HEATING EXCESS. 47
2.4 FAULT N°4 HEATING FAULT. 47
2.5 FAULT N°5 NO WATER. 48
2.6 FAULT N°6 DOOR FAULT 48
2.7 FAULT N°7 LEVEL FAULT. 49
2.8 FAULT N°8 PRESSURESTAT FAULT. 49
NT_820_910_1300_LX_ANG_V1 04_2007.doc
4
Page 7
CHAPTER 1 INTRODUCTION
CHAPTER 1 INTRODUCTION
You have in your possession a LANCER washer-dryer.
Its good working and your entire satisfaction depend on the attention you pay
when reading this guide.
You will find here some advices about the use, the loading and the maintenance.
Follow them, as they have been written in your interest.
Before using your washer-dryer, you should become fully acquainted with it and
learn how to use it properly so it will give you many years’ service.
NT_820_910_1300_LX_ANG_V1 04_2007.doc
5
Page 8

CHAPTER 1 INTRODUCTION
1.INTRODUCTION TO THE TECHNICAL MANUAL
This manual is intended to facilitate the operations of programming, testing,
maintenance and repairing, of your washer-dryer.
It is only addressed to people in possession of an access code of technician or
supervisor.
Before executing any operation, do read carefully these advices and
recommendations, they have been written in your interest.
Do respect the using precautions; the washer-disinfector must be only used for
the washing operations described in this manual.
This manual is made up of 4 chapters.
You have started chapter 1 , which introduces the specifications of the
washer-dryer from the point of view of the people authorised to the access
technicians and supervisors levels.
Chapter 2 will familiarize you with the operations which can be made by an
owner of a technician code.
Chapter 3 is a description of the configuration machine and of the different
parameters of the programs, only changeable by the owner of a supervisor
code.
You will find in chapter 4 the solutions to the different incidents which you
could find when using your washer-dryer.
All through this manual, we have placed brief comments and icons to help you
locate the important information.
When you see this icon, it means :
: ATTENTION ! ! PAY SPECIAL ATTENTION ! !
NT_820_910_1300_LX_ANG_V1 04_2007.doc
6
Page 9
CHAPTER 1 INTRODUCTION
2.INTRODUCTION TO THE ACCESS CODES
The codes give access to the developed menu which enables you to define the
adjustments of the washer-dryer.
There is a hierarchy inside these codes which enables the reduction of the rights
of access to the adjustment data, according to the different users (user’s level,
technician level, supervisor level).
The assigning of the access levels to the different users is a responsibility of the
client.
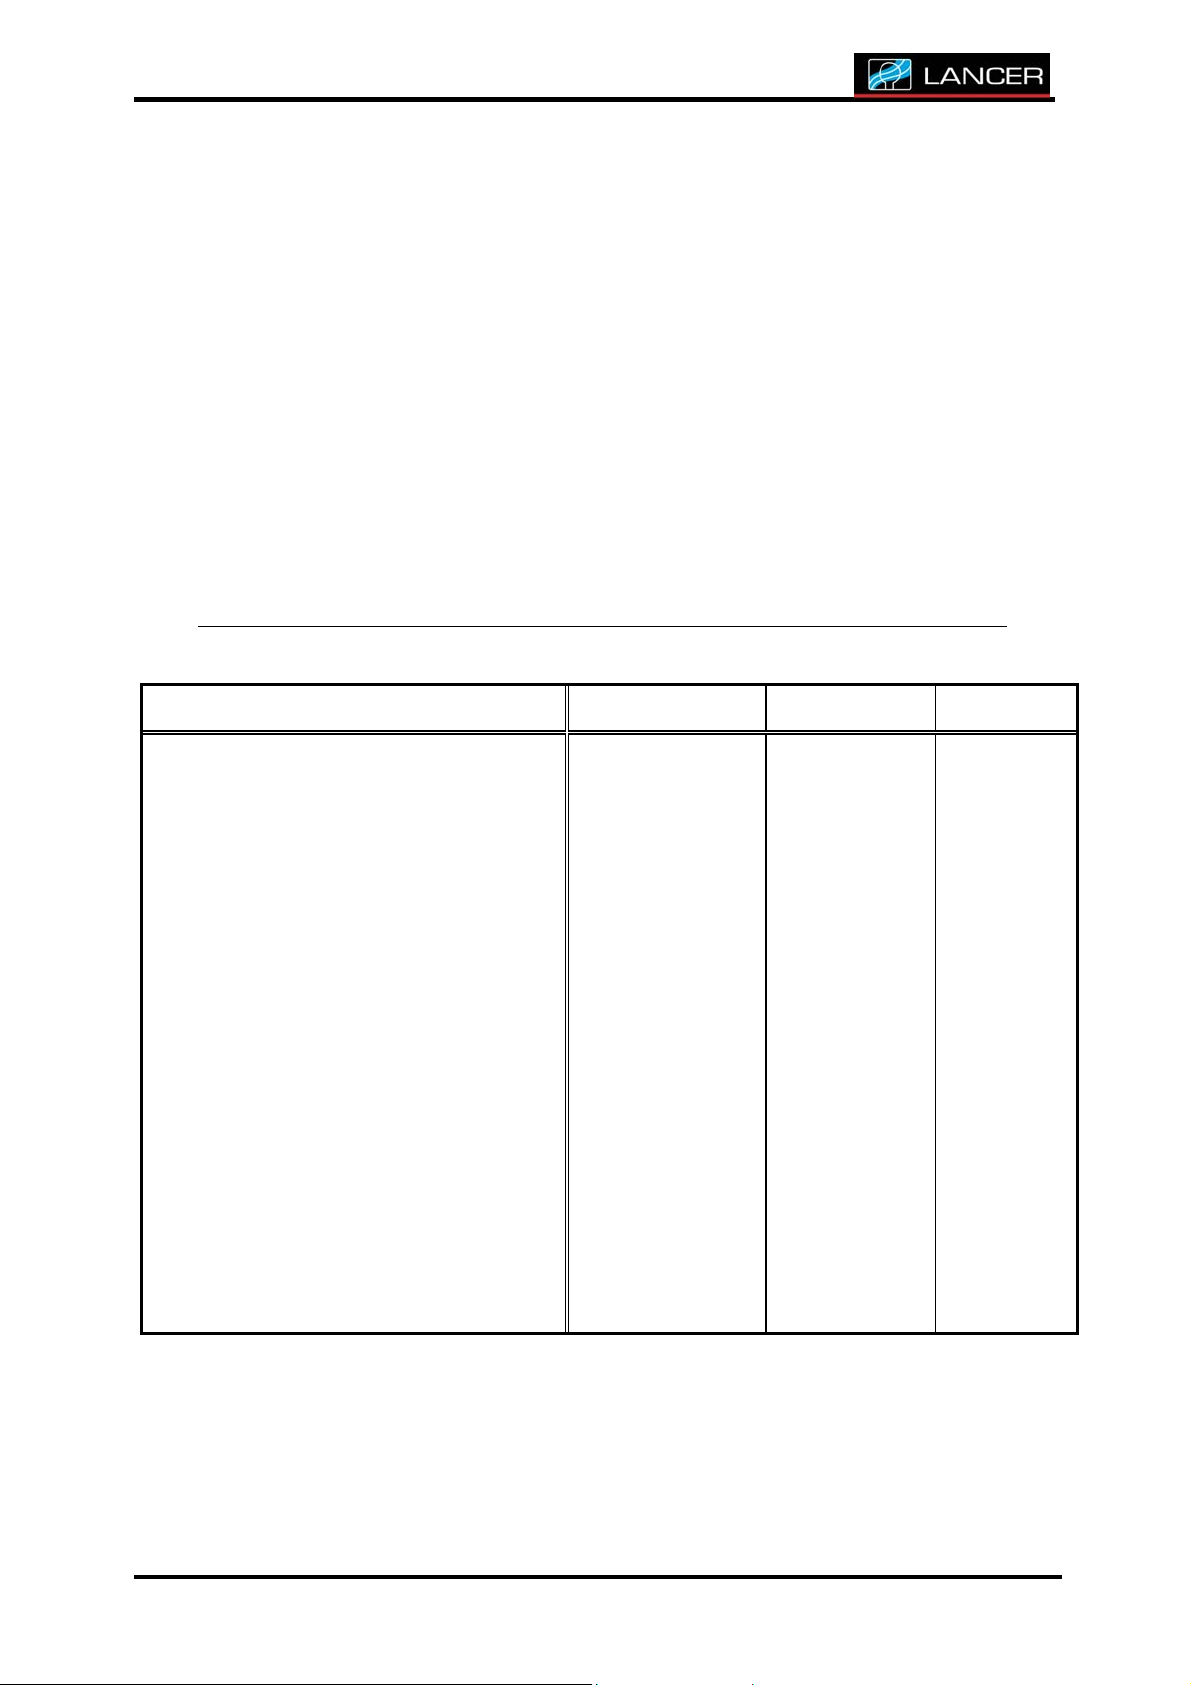
SUMMARY BOARD OF AVAILABLE FUNCTIONS ACCORDING THE ACCESS LEVEL
FUNCTIONS
Configurations
Common times
Machine name
Update cycles
Update hours
Update maintenance hours
Programme parameter printing
Configuration parameter printing
Changing card
Test Machine
Probe calibration
To zero maintenance hours
Printer parameters.
Faulty cycles
Name of programme
Dosing pump test
Reading programme
Programme parameters
Launching cycle
SUPERVISOR TECHNICIAN USER
X
X
X X
X
X
X
X
X
X X
X
X
X
X
X
X
X
X
X
X
NT_820_910_1300_LX_ANG_V1 04_2007.doc
7
Page 10
CHAPTER 1 INTRODUCTION
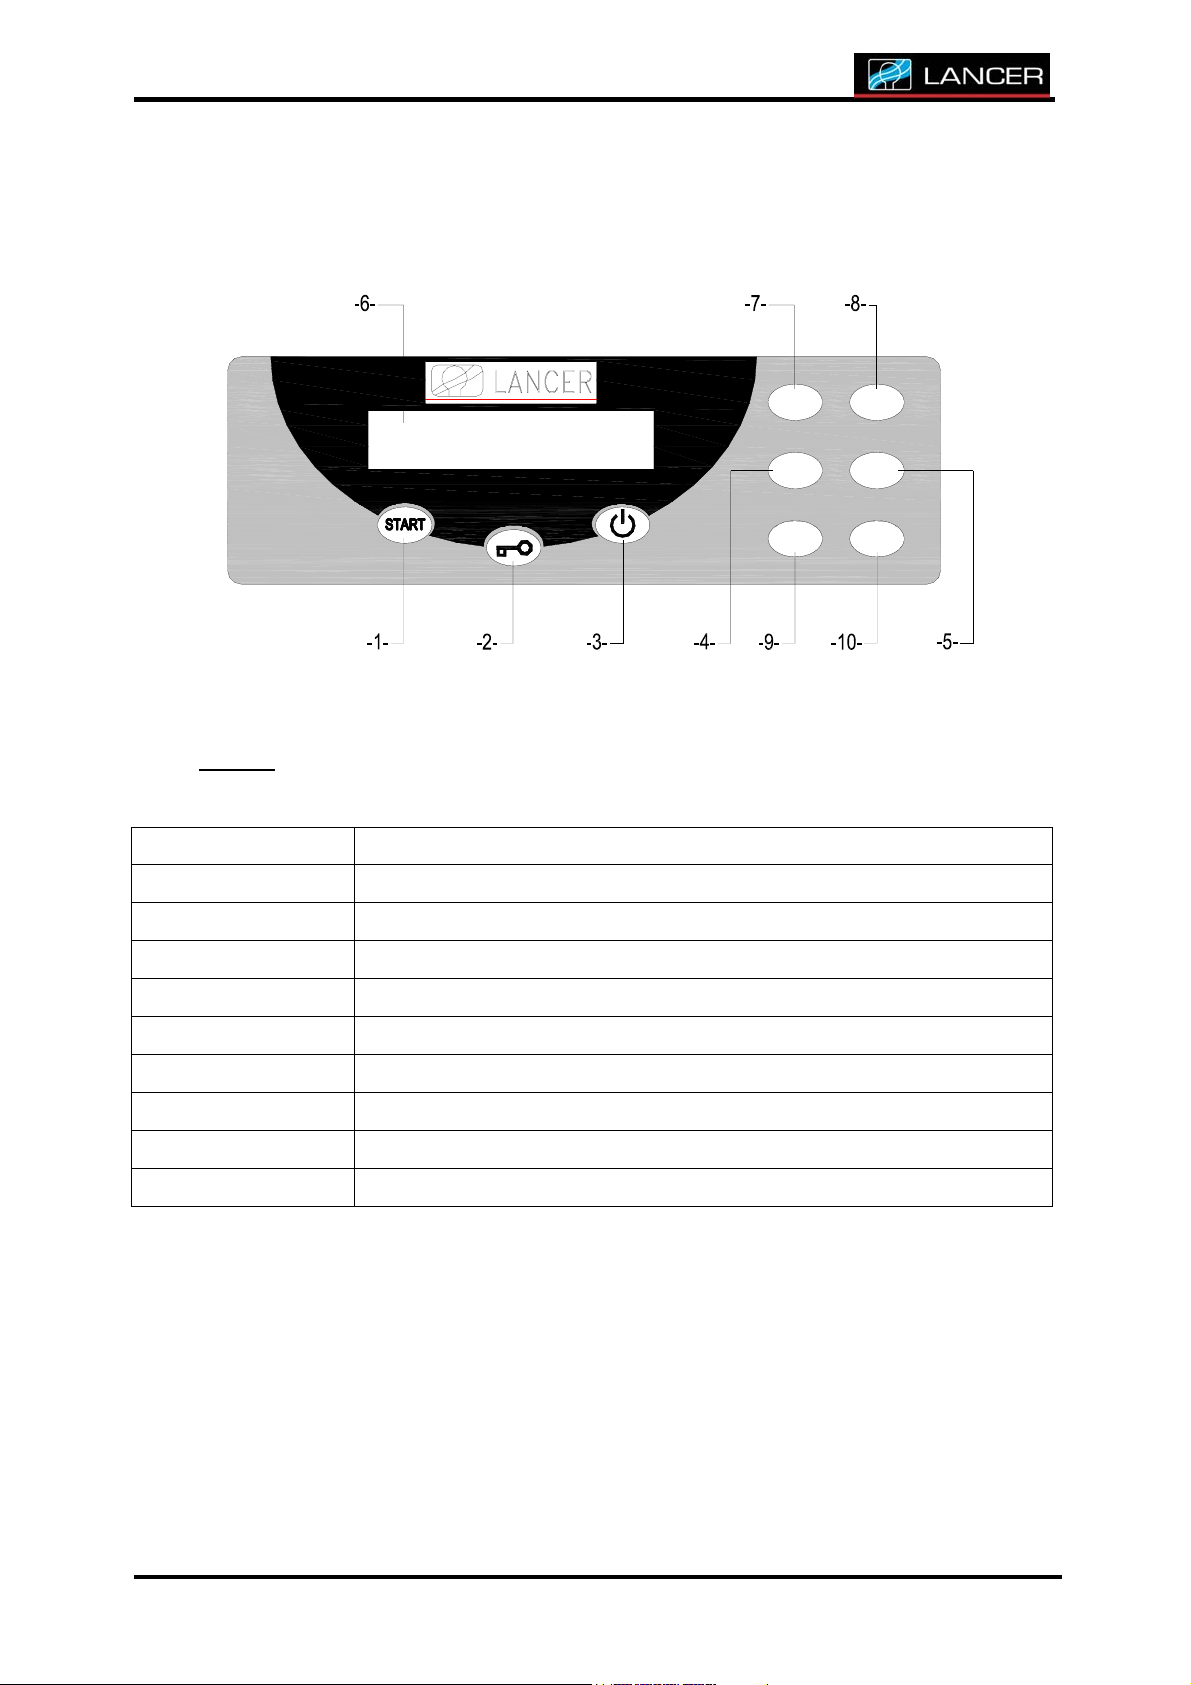
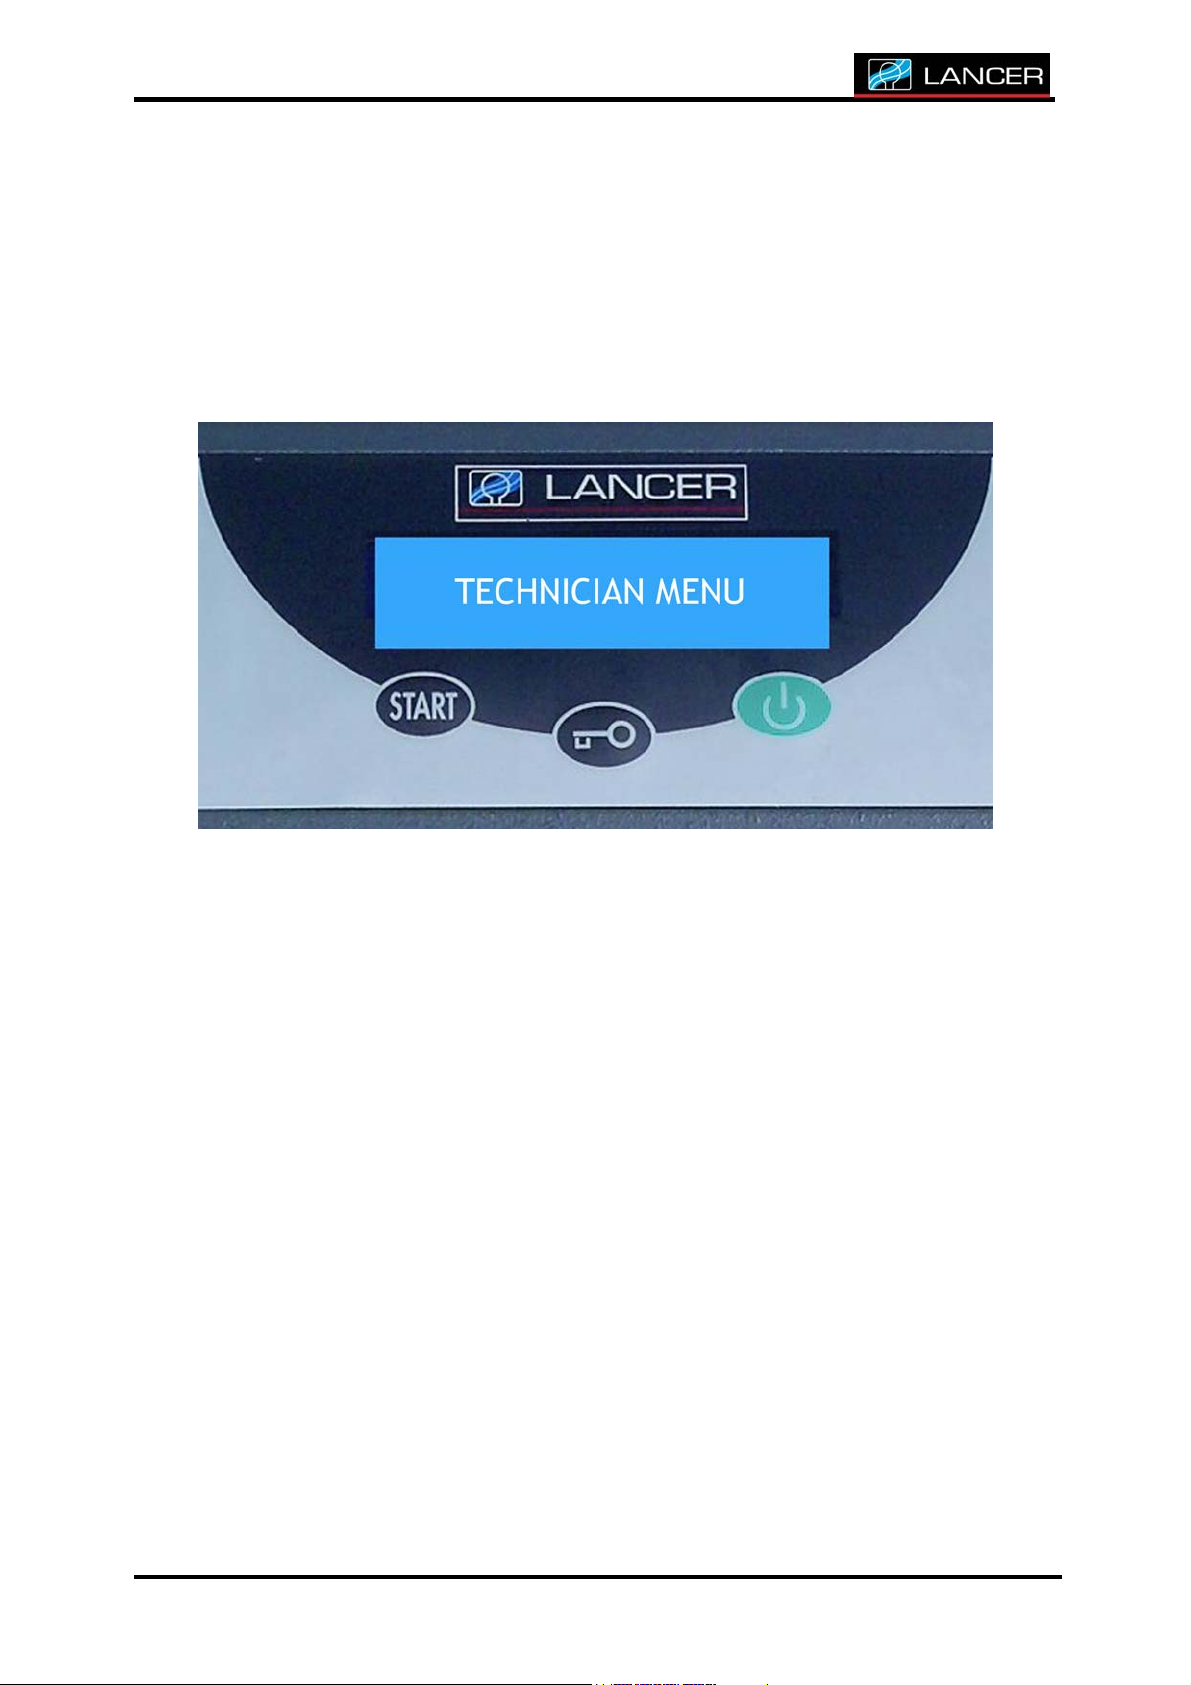
3. DESCRIPTION OF KEYPAD
Legend :
1 START" BUTTON
2 ENTER BUTTON (FOR PROGRAMMING) / DOOR UNLOCK
3 WASHER POWER ON/OFF BUTTON
4 BUTTON 3 / "-" FUNCTION BUTTON
111111111111
1111
33333333333333
3
3
//////////////
/
/
-
-
---------------
-
-
5555555555555
555
2222
2222222222
2
2
4444444444444444
//////////////
/
/
++++++++++++++
+
+
6666
6666666666
6
6
5 BUTTON 4 / "+" FUNCTION BUTTON
6 LIQUID CRYSTAL DISPLAY UNIT
7 BUTTON 1
8 BUTTON 2
9 BUTTON 5
10 BUTTON 6
NT_820_910_1300_LX_ANG_V1 04_2007.doc
8
Page 11
CHAPTER 1 INTRODUCTION
CHAPTER 2 ACCES TO TECHNICIAN MENU
This chapter provides information to check that your washer operates properly.
Using the LEVEL 2 / TECHNICIAN Access code, you can operate the output relays,
verify input status, and perform calibration of temperature probes, reset
maintenance hours counter as well as the recording of the various parameters of
the washer before an electronic board swapping
NT_820_910_1300_LX_ANG_V1 04_2007.doc
9
Page 12
CHAPTER 2 ACCES TO TECHNICIAN MENU
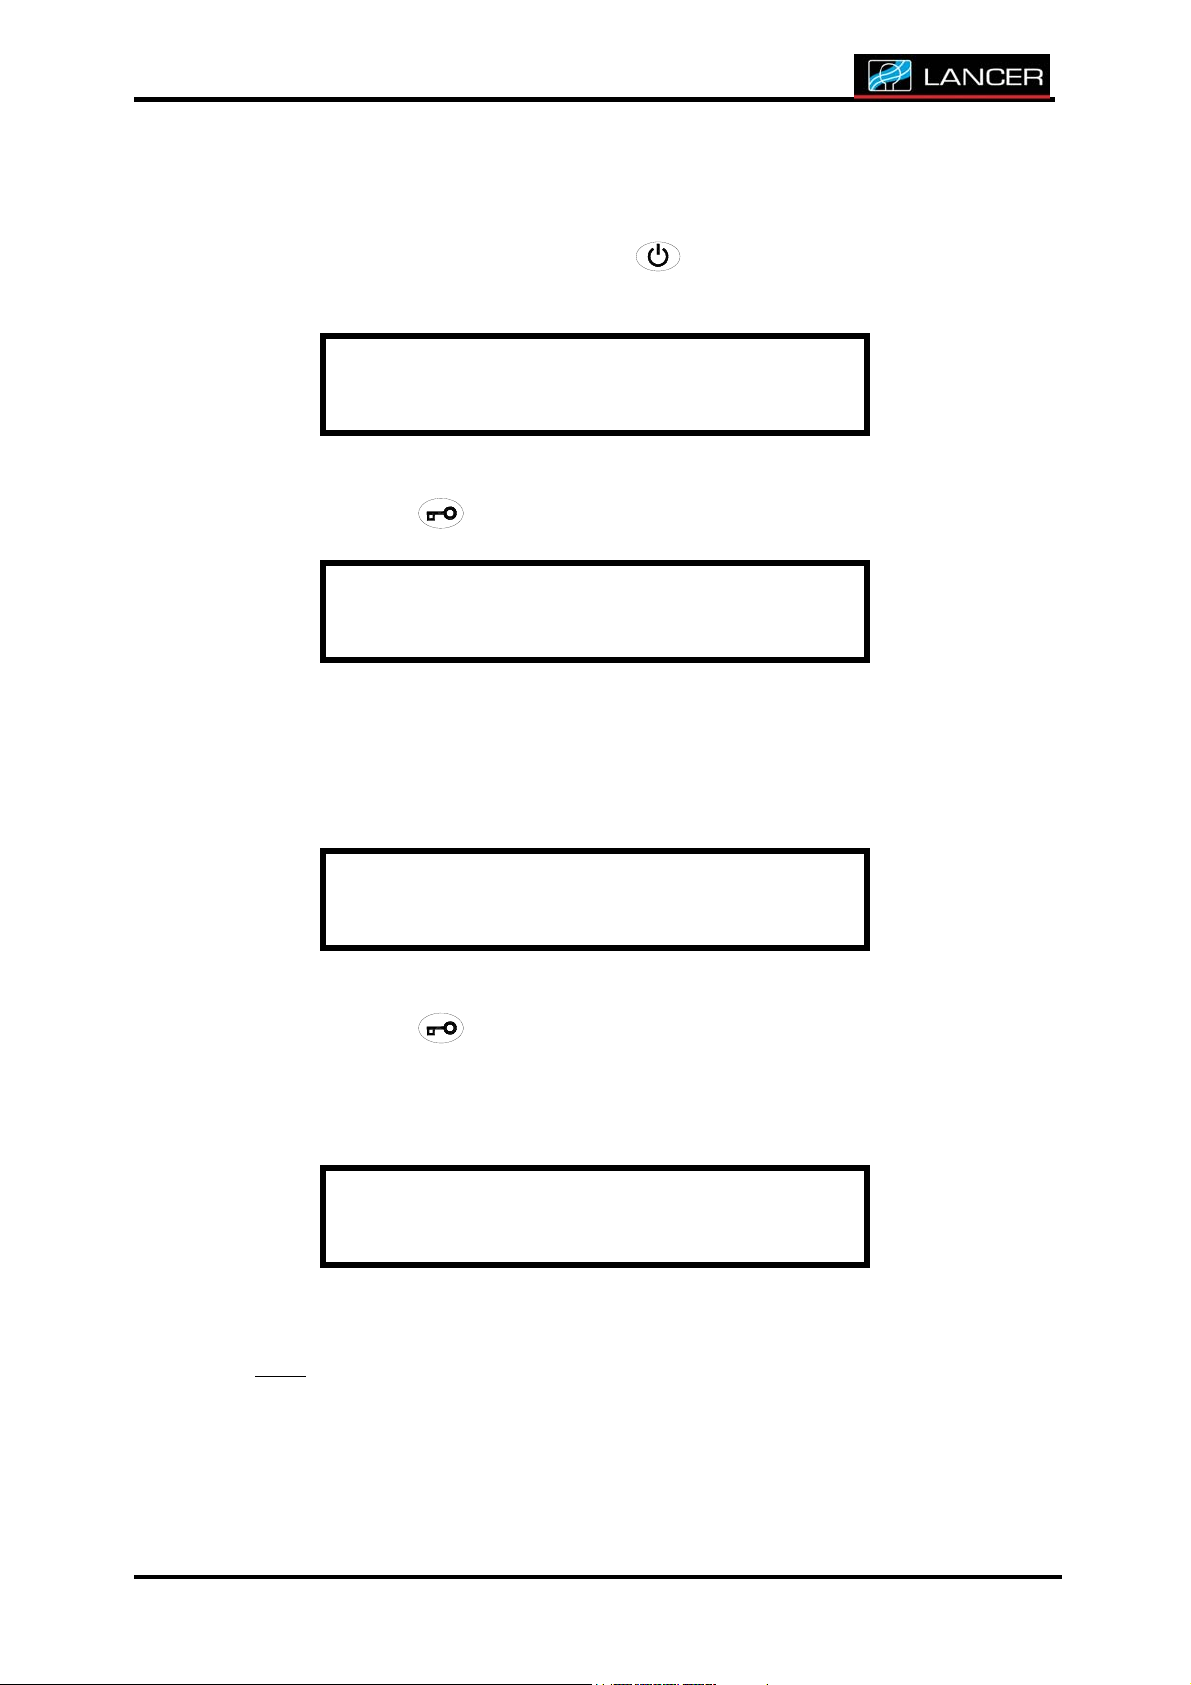
1.ACCES TO TECHNICIAN MENU
Switch on the machine by pressing .
The display indicates the number of the last cycle performed.
P r o g r a m n ° 0 1
L A N C E R x x x x L X
Press and hold button for 3 seconds to validate.
A C C E S S C O D E
----
Enter the access code - TECHNICIAN -.
If an incorrect code is entered, the following error message is displayed.
A C C E S S C O D E
I N C O R R E C T C O D E
Press and hold
button for 3 seconds to validate.
You must enter the correct access code.
Otherwise you access to technician menu.
T E C H N I C I A N M E N U
T e s t m a c h i n e
Note :
If the access code is not entered within 30 seconds, the display unit
returns to its initial state.
NT_820_910_1300_LX_ANG_V1 04_2007.doc
10
Page 13
CHAPTER 2 ACCES TO TECHNICIAN MENU
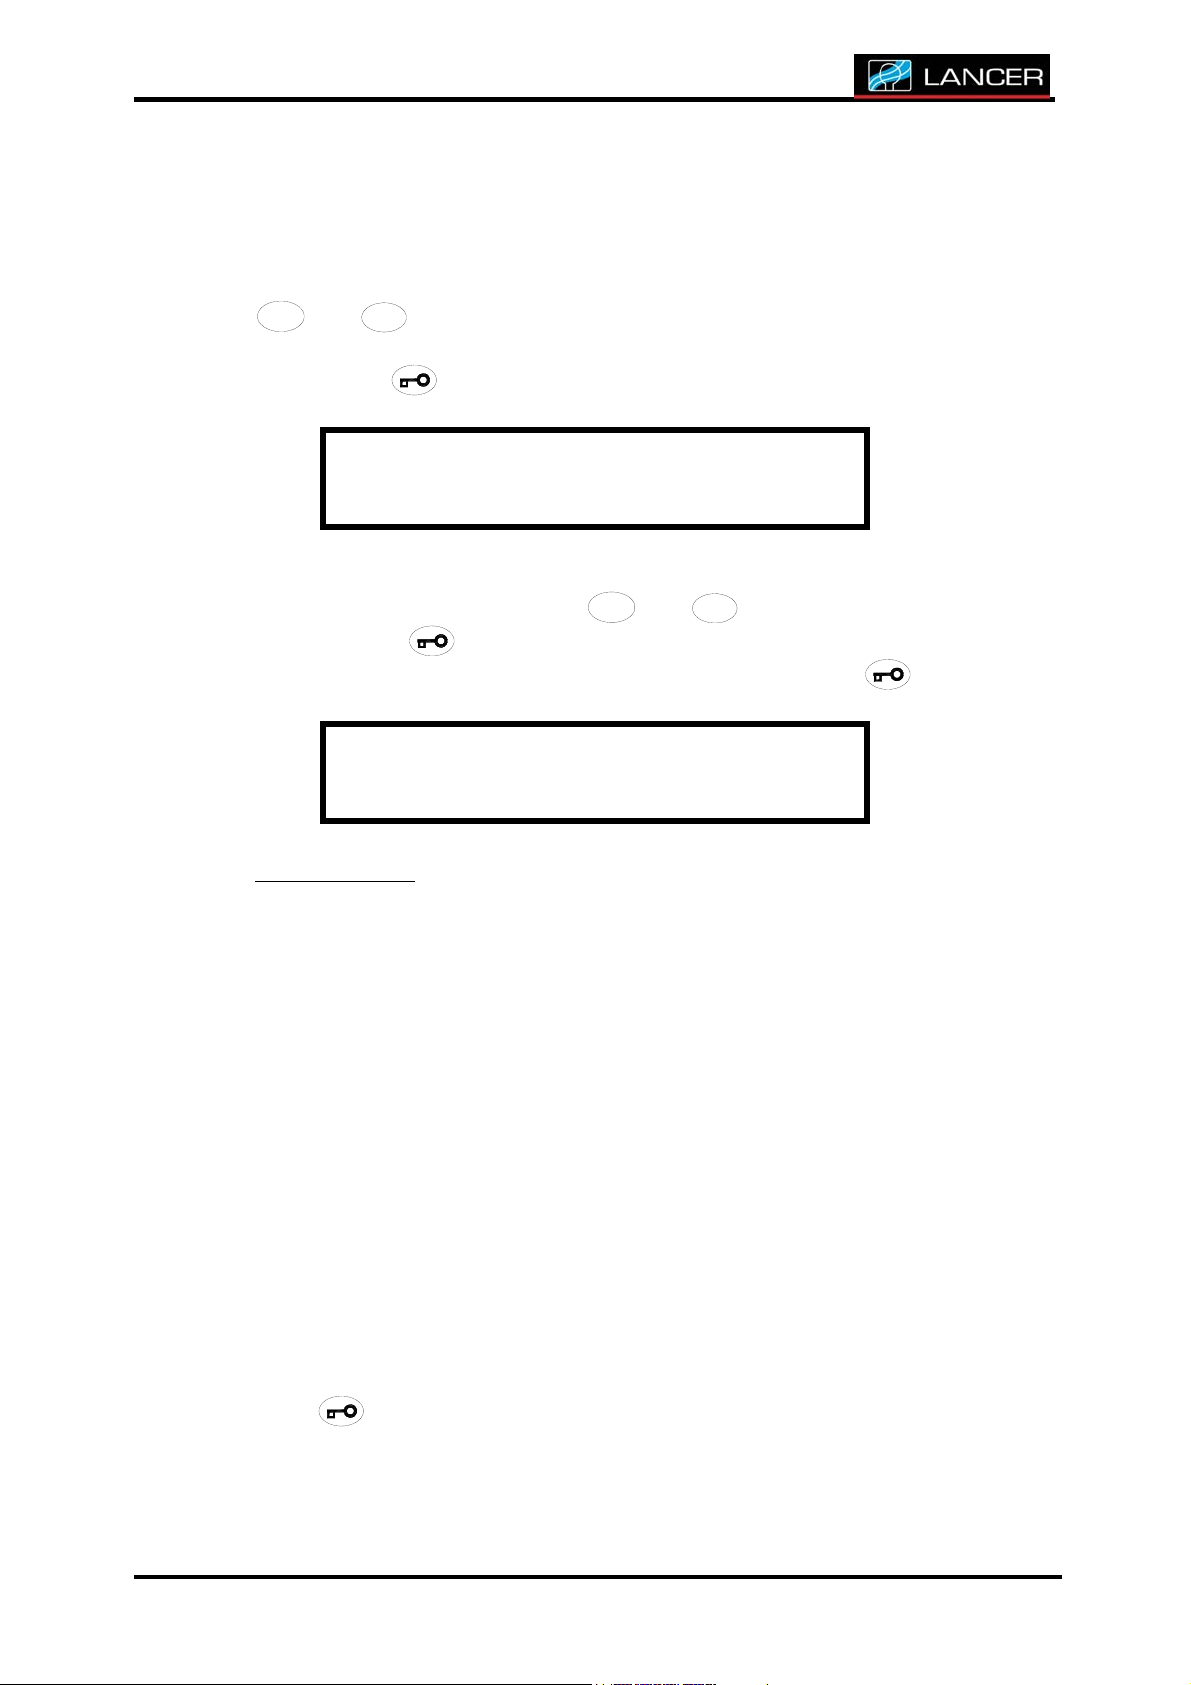
2.THE MACHINE TEST
After accessing to technician menu, you must select TEST MACHINE with
44444444444444
4
4
//////////////
/
/
++++++++++++++
+
+
electronic card
Accept with button.
Choose the relay number to be checked.
Choose the relay number with
Each press on button activates or inactivates the relay.
To leave the relay test, select relay 0 and validate with button.
33333333333333
3
3
and
buttons to test the relay state and the inputs of the
//////////////
/
/
-
-------------
-
-
T E C H N I C I A N M E N U
T e s t m a c h i n e
44444444444444
4
4
33333333333333
3
3
and
//////////////
/
/
++++++++++++++
+
+
buttons.
//////////////
/
/
-
-------------
-
-
T e s t m a c h i n e
R e l a y N ° 0 1 : O F F
Particular case :
The "ON" position of relay 14 is limited to 5 seconds to avoid damaging
the heating element if heating without water.
It is necessary to have a quantity of water in the bottom of the basin to
check the functioning of the heaters.
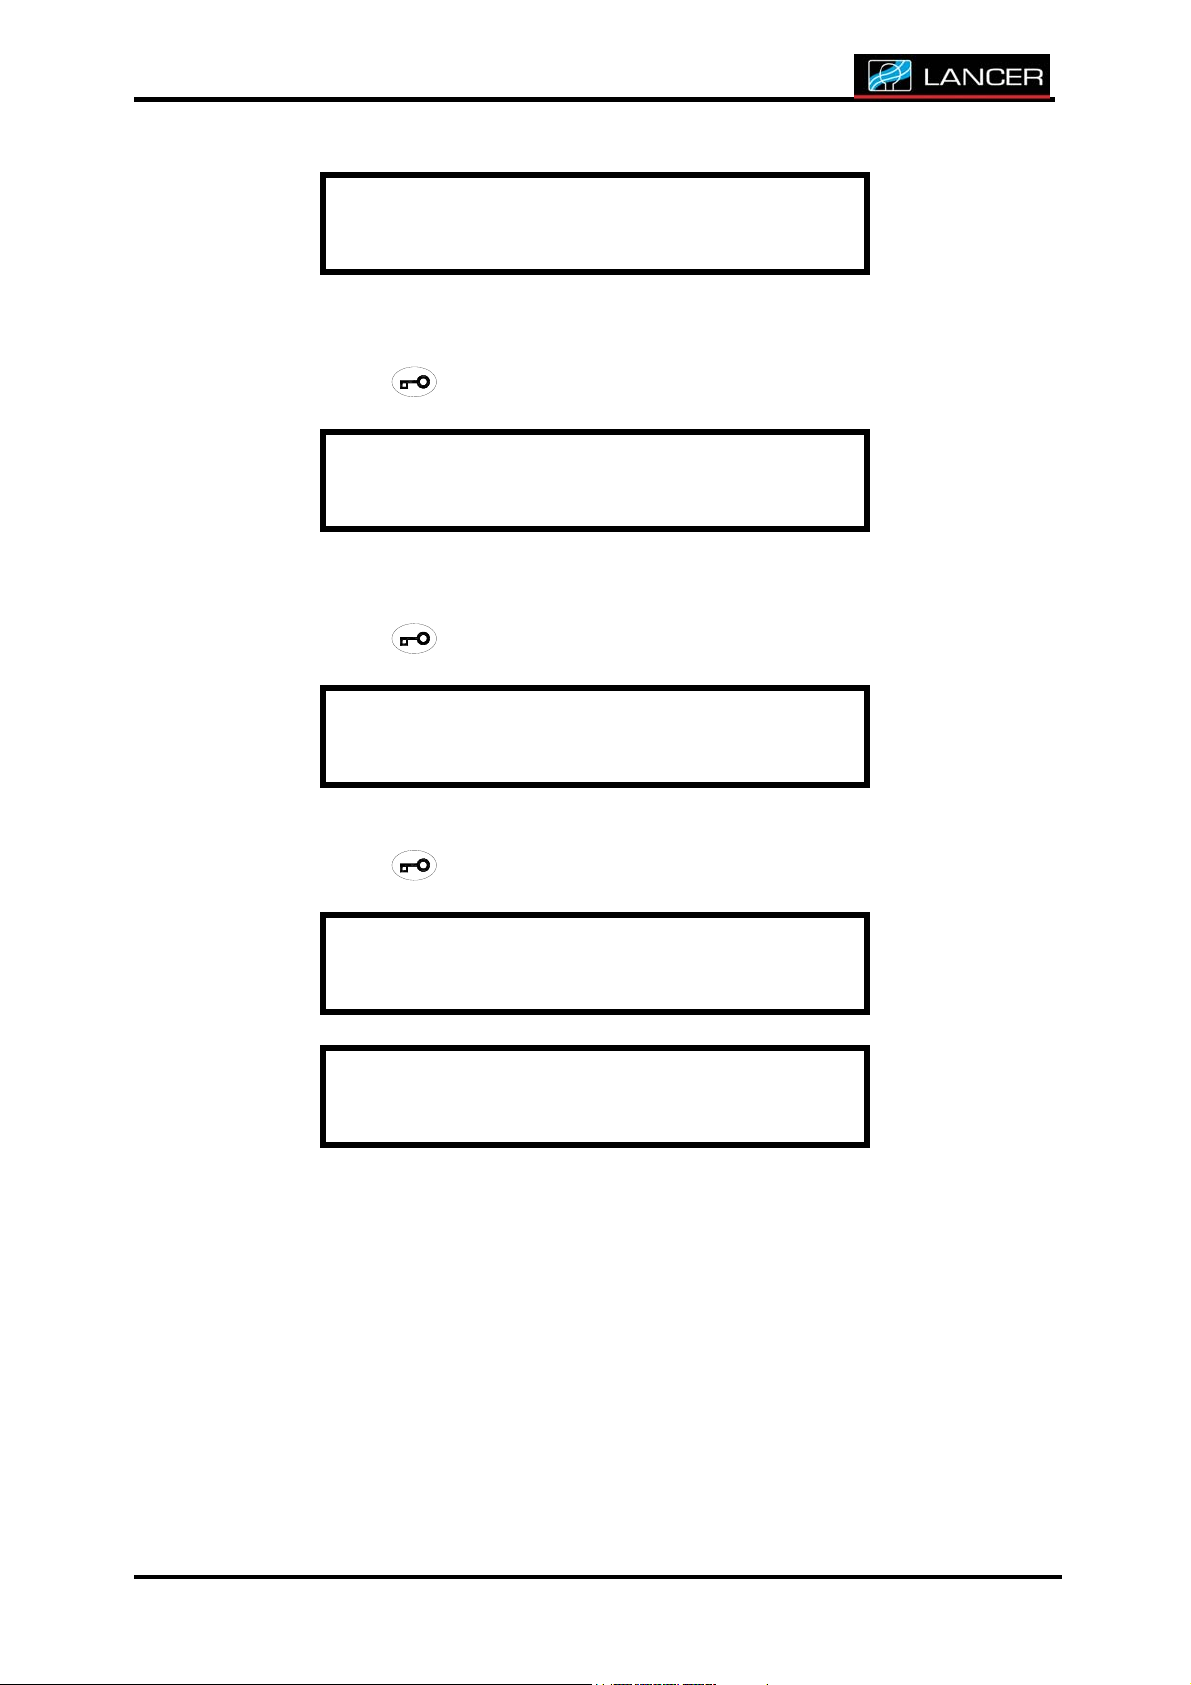
The following display enables to control the state of inputs.
Conformity of the inputs :
INPUT 1 and 2 : CHAMBER FULL
INPUT 3 : CHEMICAL TANKS FULL
INPUT 4 : DOOR LOCKING
INPUT 5, 6 and 7 : N/A
A value of "1" indicates that the switch is closed and the input is
connected to ground (On). A value of "0" indicates that the switch is
open and that the input is not connected to ground (Off).
Press button to get out.
NT_820_910_1300_LX_ANG_V1 04_2007.doc
11
Page 14
CHAPTER 2 ACCES TO TECHNICIAN MENU
I n p u t s : 7 6 5 4 3 2 1
S t a t e : 0000110
The following display gives the total functioning time of the machine and
the number of cycles performed.
Accept with button.
N b r c y c l e s : x x
T i m e m a c . : x h
The following display allows to know time remaining before carrying out
maintenance actions on washer.
Accept with button.
M a i n t enance
i n x x h o u r s
The following display shows the memory version.
Accept with button.
L 6 X X X X X V : x . x x
x x - x x - x x x x x x : x x
E n d o f m e n u
The display returns to technician menu.
NT_820_910_1300_LX_ANG_V1 04_2007.doc
12
Page 15
CHAPTER 2 ACCES TO TECHNICIAN MENU
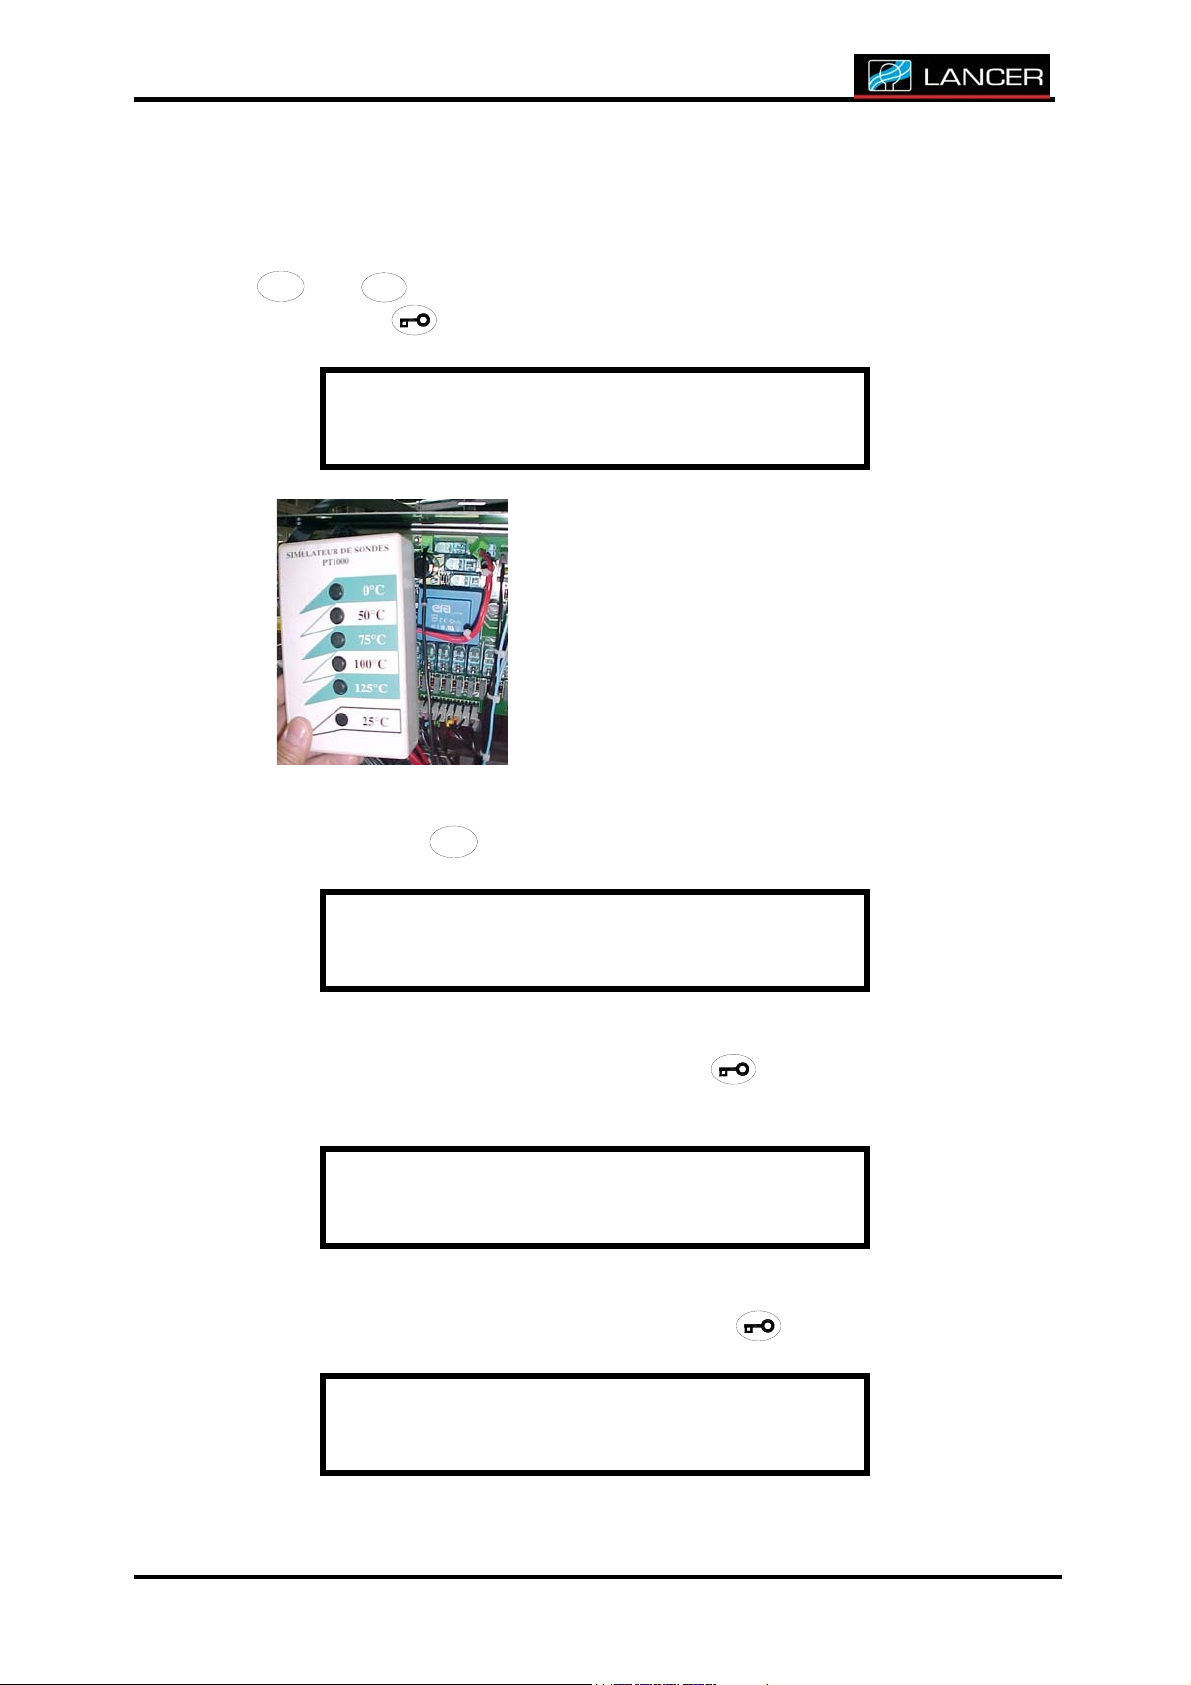
3.CALIBRATION OF TEMPERATURE PROBES
After accessing to technician menu, you must select CALIBR. PROBE with
44444444444444
4
4
//////////////
/
/
++++++++++++++
+
+
Accept with button.
33333333333333
3
3
and
buttons to calibrate the probes.
//////////////
/
/
-
-------------
-
-
T E C H N I C I A N M E N U
C a l i b r . p r o b e
Connect probe simulator box on plug K49 of
the electronic board.
Calibrate electronic board probe outlet
(slope of the probe) using probe simulator
box.
Display indicates temperature of the probe.
6666
6666666666
6
Press on button
6
to calibrate the probe.
Wa t e r p r o b : 3 4 . 9 °
Press on button 0°C of the simulator.
Keep pressed button 0°C and accept with button.
C a l i b r a t e s l o p e
S i m P T 1000 -> 00°
Press on button 100°C of the simulator.
Keep pressed button 100°C and accept with button.
C a l i b r a t e s l o p e
S i m P T 1 0 0 0 - > 1 0 0 °
NT_820_910_1300_LX_ANG_V1 04_2007.doc
13
Page 16
CHAPTER 2 ACCES TO TECHNICIAN MENU
The slope of the probe is set.
Disconnect the probe simulator from the electronic board then connect
temperature probe on plug K49 of the electronic board.
The following display enables calibration of the temperature probe of
the chamber.
Calibration of the probe must be done inside a full water chamber, then
deep the probe of the calibrated standard inside the sump and verify
both values (washer probe and calibrated standard probe).
Probe is blinking. Validate with
Adjust the value of the offset with
the calibrated standard.
Accept with button.
If the display reads 120°C, the probe is not connected or is faulty.
44444444444444
4
4
and
//////////////
/
/
++++++++++++++
+
+
44444444444444
4
4
//////////////
/
/
++++++++++++++
+
+
33333333333333
3
3
//////////////
/
/
-
-------------
-
-
and
buttons.
33333333333333
3
3
buttons in regard to
//////////////
/
/
-
-------------
-
-
Wa t e r p r o b : 3 4 . 9 °
Of f s e t : + 0.1
Temperature of the electronic board inside the cabinet.
This value is given as an indicative value and does not have to be
modified.
Accept with button.
Ma i n box : 42. 7°C
Do not modify the value of the offset. Set in factory.
Accept with button.
Ma i n box : 42. 7°C
Of f s e t : + 0.1
F i n du menu
The display returns to technician menu.
NT_820_910_1300_LX_ANG_V1 04_2007.doc
14
Page 17

CHAPTER 2 ACCES TO TECHNICIAN MENU
4.MAINTENANCE HOURS RESET
After having reached to the small technician, you must, to allow a new
calculation of the hours before completing work of maintenance
After accessing to technician menu, you must, to allow a new calculation
of the hours before completing work of maintenance, select Reset
44444444444444
4
Maint. HRS with
Accept with
4
//////////////
/
/
++++++++++++++
+
+
button.
T E C H N I C I A N M E N U
R e s e t M A I N T . H R S
Choose yes or no with
Accept with button.
and
44444444444444
4
4
//////////////
/
/
++++++++++++++
+
+
33333333333333
3
3
and
buttons.
//////////////
/
/
-
-------------
-
-
33333333333333
3
3
//////////////
/
/
-
-------------
-
-
buttons
R e s e t M A I N T . H R S
C o n f i r m a t i o n : Y e s
E n d o f m e n u
The display returns to technician menu.
NT_820_910_1300_LX_ANG_V1 04_2007.doc
15
Page 18

CHAPTER 2 ACCES TO TECHNICIAN MENU
5.CHANGING CARD
After accessing to technician menu, it is possible, before changing
electronic board of the washer, choose Changing card using buttons
44444444444444
4
4
and
//////////////
/
/
++++++++++++++
+
+
keyboard must be still existing).
Accept with button.
Using buttons
“writing memory”.
33333333333333
3
3
, (communication between electronic board, display and
//////////////
/
/
-
-------------
-
-
T E C H N I C I A N M E N U
C h a n g i n g c a r d
44444444444444
4
4
and
//////////////
/
/
++++++++++++++
+
+
33333333333333
3
3
., you have to select: “reading memory” or
//////////////
/
/
-
-------------
-
-
5.1 MEMORY READING OF THE ELECTRONIC BOARD TO BE CHANGED
“Memory reading ” makes it possible to keep in memory washer
configurations, programming tables, counters for cycles, hours or
maintenance…
All these parameters are stored inside memory 24c256.
NT_820_910_1300_LX_ANG_V1 04_2007.doc
16
Page 19

CHAPTER 2 ACCES TO TECHNICIAN MENU
C h a n g i n g c a r d
R e a d i n g m e m o r y
Accept with button.
C h a n g i n g c a r d
C o n f i r m a t i o n : Y e s
Accept with button.
C h a n g i n g c a r d
[ . . . . . . . . . . ] 9 9 %
Once 100% is reached, all the datas are now stored in the memory.
E n d o f m e n u
The display returns to technician menu.
NT_820_910_1300_LX_ANG_V1 04_2007.doc
17
Page 20

CHAPTER 2 ACCES TO TECHNICIAN MENU
5.2 MEMORY WRITING
“Memory writing ”.makes it possible to transfer on the memory from the
washer all the parameters which were safeguarded in reading mode, thus
avoiding having with all to reprogram.
C h a n g i n g c a r d
W r i t i n g m e m o r y
Accept with button.
C h a n g i n g c a r d
C o n f i r m a t i o n : Y e s
NT_820_910_1300_LX_ANG_V1 04_2007.doc
18
Page 21

CHAPTER 2 ACCES TO TECHNICIAN MENU
C h a n g i n g c a r d
[ . . . . . . . . . . ] 9 9 %
Once 100% is reached, all the datas are now written in the memory.
E n d o f m e n u
The display returns to technician menu.
NT_820_910_1300_LX_ANG_V1 04_2007.doc
19
Page 22

CHAPTER 2 ACCES TO TECHNICIAN MENU
6. RETURN TO THE INITIAL DISPLAY
44444444444444
4
Select END REGLAGE ? with
technician menu.
Accept with button.
E n d o f r e g l a g e ?
4
and
//////////////
/
/
++++++++++++++
+
+
33333333333333
3
3
buttons to leave the
//////////////
/
/
-
-------------
-
-
NT_820_910_1300_LX_ANG_V1 04_2007.doc
20
Page 23

CHAPTER3 ACCES TO SUPERVISOR MENU
CHAPTER3 ACCES TO SUPERVISOR MENU
Using the SUPERVISOR Access code enables adaptation of the configuration and
programming parameters of your washer-dryer to meet the requirements of the
facility in which it will be used.
The operation of your machine can be adversely
affected by the settings in this section. Do not
randomly modify parameters!
NT_820_910_1300_LX_ANG_V1 04_2007.doc
21
Page 24

CHAPTER3 ACCES TO SUPERVISOR MENU
1.ACCES TO SUPERVISOR MENU
Switch on the machine by pressing .
The display indicates the number of the last cycle performed.
P r o g r a m n ° 0 1
L A N C E R x x x x L X
Press and hold button for 3 seconds to validate.
A C C E S S C O D E
----
Enter the access code - SUPERVISOR -.
If an incorrect code is entered, the following error message is displayed.
A C C E S S C O D E
I N C O R R E C T C O D E
Press and hold
button for 3 seconds to validate.
You must enter the correct access code.
Otherwise you access to supervisor menu.
S U P E R V I S O R M E N U
C o n f i g u r a t i o n s
Note :
If the access code is not entered within 30 seconds, the display unit
returns to its initial state.
NT_820_910_1300_LX_ANG_V1 04_2007.doc
22
Page 25

CHAPTER3 ACCES TO SUPERVISOR MENU
2.MACHINE CONFIGURATION
After accessing the supervisor menu, you must select CONFIG. MACHINE
44444444444444
4
with
4
and
//////////////
/
/
++++++++++++++
+
+
Accept with button.
S U P E R V I S O R M E N U R
C o n f i g u r a t i o n s
Select the language : French, English, German…
Select the language with
button.
33333333333333
3
3
buttons to configure the machine.
//////////////
/
/
-
-------------
-
-
44444444444444
4
4
and
//////////////
/
/
++++++++++++++
+
+
33333333333333
3
3
buttons. Accept with
//////////////
/
/
-
-------------
-
-
C h o o s e t e x t
F rancai s
Choose the type of water of your washer according to its equipment:
- LX WITHOUT REGE for standard washers
- LX REGE 1 for washers equipped with softener option
- LX REGE 1+2 for washers equipped with softener option (no purified
water available)
- SP1 (not applicable)
Select with
4
and
//////////////
/
/
++++++++++++++
+
+
33333333333333
3
3
buttons. Accept with button.
//////////////
/
/
-
-------------
-
-
44444444444444
4
C h o i x d e s e a u x
L X W I T H O U T R E G E
Select the machine model : 820 LX, 820 SP1, 820 MD, 910 LX, 1300 LX,
1400 LX.
Select the model with
4
and
//////////////
/
/
++++++++++++++
+
+
33333333333333
3
3
buttons. Accept with button.
//////////////
/
/
-
-------------
-
-
44444444444444
4
T y p e o f m a c h i n e
L A N C E R 9 1 0 L X
If the washer is equipped with softener option (regeneration), select YES
44444444444444
4
with
4
//////////////
/
/
++++++++++++++
+
+
Accept with
NT_820_910_1300_LX_ANG_V1 04_2007.doc
or
33333333333333
3
3
buttons.
//////////////
/
/
-
-------------
-
-
button.
23
Page 26

CHAPTER3 ACCES TO SUPERVISOR MENU
R E G ENERAT I ON
YES
This washer is equipped with a drying device as a standard, you must
select YES with
Accept with
4
//////////////
/
/
++++++++++++++
+
+
button.
or
33333333333333
3
3
buttons.
//////////////
/
/
-
-------------
-
-
44444444444444
4
D RYING
YES
This washer is equipped with a door lock device (during the washing
cycle) as a standard (except 820 LX), you must select YES with
33333333333333
3
3
buttons.
//////////////
/
/
-
-------------
-
-
Accept with button.
44444444444444
4
4
or
//////////////
/
/
++++++++++++++
+
+
D O O R L O C K E D
YES
If the washer is equipped with an additional dosing pump option, select
YES with
4
//////////////
/
/
++++++++++++++
+
+
or
33333333333333
3
3
buttons.
//////////////
/
/
-
-------------
-
-
44444444444444
4
Accept with button.
P R ODUCT 2
YES
Not applicable on 910 LX / 1300LX washers, select NO with
4
//////////////
/
/
++++++++++++++
+
+
or
33333333333333
3
3
//////////////
/
/
-
-------------
-
-
44444444444444
4
buttons.
Accept with button.
E M P T Y I N G 2
YES
This washer is equipped with a door lock device (during the washing
cycle) as a standard (except 820 LX),, you must select YES with
33333333333333
3
3
buttons.
//////////////
/
/
-
-------------
-
-
Accept with button.
NT_820_910_1300_LX_ANG_V1 04_2007.doc
24
44444444444444
4
4
or
//////////////
/
/
++++++++++++++
+
+
Page 27

CHAPTER3 ACCES TO SUPERVISOR MENU
M O T O R L O C K E D
YES
Not applicable on laboratory range washers, select NO with
buttons.
Accept with button.
L U BRICANT
YES
44444444444444
4
Select YES with
4
//////////////
/
/
++++++++++++++
+
+
Accept with button.
or
33333333333333
3
3
//////////////
/
/
-
-------------
-
-
buttons.
44444444444444
4
4
//////////////
/
/
++++++++++++++
+
+
or
33333333333333
3
3
//////////////
/
/
-
-------------
-
-
H O T W A T . NETWORK
YES
If the washer is equipped with effluent neutralization option, select YES
with
4
//////////////
/
/
++++++++++++++
+
+
or
33333333333333
3
3
buttons.
//////////////
/
/
-
-------------
-
-
44444444444444
4
Accept with button.
N E U T R A L I Z A T I O N
YES
The HYSTERESIS is the temperature difference between switching
heating on and off during regulation.
Choose with
4
or
//////////////
/
/
++++++++++++++
+
+
33333333333333
3
3
, hysteresis temperature between 1 and
//////////////
/
/
-
-------------
-
-
44444444444444
4
10°C.
Accept with button.
H Y STERISIS
3°C
NT_820_910_1300_LX_ANG_V1 04_2007.doc
25
Page 28

CHAPTER3 ACCES TO SUPERVISOR MENU
Choose if the fast advance is allowed.
44444444444444
4
Select Active/Non active with
4
Accept with button.
F a s t A v a n c e
Acti ve
If MEMORY OF PROG. is active, the washer will keep in memory the N° of
the last cycle carried out. Otherwise when you switch on the machine,
the number displayed will be 1.
44444444444444
4
Select Active/Not active with
4
Accept with button.
M e m o r y o f p r o g .
//////////////
/
/
//////////////
/
/
++++++++++++++
+
+
++++++++++++++
+
+
and
and
33333333333333
3
3
buttons.
//////////////
/
/
-
-------------
-
-
33333333333333
3
3
buttons.
//////////////
/
/
-
-------------
-
-
Acti ve
If TEST MODE is ON, it is possible to display relay status during the
washing cycle:
555555555555
- button
- button
Select ON/OFF with
5555
will give status for relays 1 to 8
6666
6666666666
6
6
will give status for relays 9 to 16
44444444444444
4
4
and
//////////////
/
/
++++++++++++++
+
+
33333333333333
3
3
buttons.
//////////////
/
/
-
-------------
-
-
Accept with button.
T e st Mode
Off
If you wish to have a sound effect when pressing buttons on the
keyboard, select ON or OFF with
4
and
//////////////
/
/
++++++++++++++
+
+
33333333333333
3
3
buttons.
//////////////
/
/
-
-------------
-
-
44444444444444
4
Accept with button.
D i s p l a y B i p
Off
The salt alarm is determinate by a counter whose limit is fixed by the
duration of the salt intake and by this setting.
The time of each salt intake is accumulated in memory. When it reaches
the preset value, the automaton asks for the salt intake.
The counter is adjustable from 3 to 20 minutes with
buttons, it goes back to zero as soon as the alarm is cancelled.
NT_820_910_1300_LX_ANG_V1 04_2007.doc
26
44444444444444
4
4
and
//////////////
/
/
++++++++++++++
+
+
33333333333333
3
3
//////////////
/
/
-
-------------
-
-
Page 29

CHAPTER3 ACCES TO SUPERVISOR MENU
A d j ust sal t
6mn
Select the PROGRAM NUMBER with
Accept with button.
P r o g r . n u m b e r
66
Choose the display type : Type of machine, Machine name or Name of
program.
44444444444444
4
Select the type display with
4
//////////////
/
/
++++++++++++++
+
+
Accept with button.
44444444444444
4
4
and
//////////////
/
/
++++++++++++++
+
+
and
33333333333333
3
3
buttons.
//////////////
/
/
-
-------------
-
-
33333333333333
3
3
buttons.
//////////////
/
/
-
-------------
-
-
C h o o s e d i s p l a y
T y p e o f m a c h i n e
Note :
MACHINE NAME and NAME OF PROGRAM are respectively configurable
44444444444444
4
The selection of the characters is obtained with the buttons
33333333333333
3
3
.
//////////////
/
/
-
-------------
-
-
A pressure on the key
makes it possible to validate the selected
4
//////////////
/
/
++++++++++++++
+
+
and
character then to pass to following space.
If the chosen name has less of 8 characters fill-in empty blanks by
pressing button.
S eri al nbr
X XXXXXXX
e n d o f m e n u
The display unit returns to its initial state.
NT_820_910_1300_LX_ANG_V1 04_2007.doc
27
Page 30

CHAPTER3 ACCES TO SUPERVISOR MENU
3.THE COMMON TIMES
In this section you can set the Common Times necessary for proper
operation of the machine and define the set point times of the alarms N°
02 and 05.
After accessing to supervisor menu, you must select COMMON TIMES
44444444444444
4
with
4
and
//////////////
/
/
++++++++++++++
+
+
Accept with
S U P E R V I S O R M E N U
C o m m o m t i m e s / T °
33333333333333
3
3
buttons to set the commons times.
//////////////
/
/
-
-------------
-
-
button.
Choose period for emptying : 0 to 6 mn 59 s
During the cycle, if the machine is not entirely emptied at the end of
this period, the alarm "EMPTYING FAULT" will be displayed.
Select the minutes with
Select the seconds with
4
//////////////
/
/
++++++++++++++
+
+
44444444444444
4
4
and
//////////////
/
/
++++++++++++++
+
+
and
33333333333333
3
3
buttons. Accept with button.
//////////////
/
/
-
-------------
-
-
33333333333333
3
3
buttons. Accept with button.
//////////////
/
/
-
-------------
-
-
44444444444444
4
Accept with button.
E m p t y i n g s t a r t
00m30s
Choose period of 1st regeneration : 0 to 6mn 59s MAXI.
Select the minutes with
4
and
//////////////
/
/
++++++++++++++
+
+
33333333333333
3
3
buttons. Accept with
//////////////
/
/
-
-------------
-
-
44444444444444
4
button.
Select the seconds with
4
and
//////////////
/
/
++++++++++++++
+
+
33333333333333
3
3
buttons. Accept with
//////////////
/
/
-
-------------
-
-
44444444444444
4
button.
Accept with button.
R e g e n e r a t i o n 1
00m18s
NT_820_910_1300_LX_ANG_V1 04_2007.doc
28
Page 31

CHAPTER3 ACCES TO SUPERVISOR MENU
When there is no demi. water available, water inlet for last rinses can be
softened by the washer by programming this function (REGENERATION 2).
During setting of the program (code 3124), it will be possible to select
the filling valve, hot or cold which will feed the softener.
Choose period of 2nd regeneration between 0 and 5mn 59s.
44444444444444
4
Select the minutes with
Select the seconds with
4
and
//////////////
/
/
++++++++++++++
+
+
44444444444444
4
4
and
//////////////
/
/
++++++++++++++
+
+
Accept with button.
R e g e n e r a t i o n 2
00m00s
Choose period for pump priming : 0 to 6 mn 59 s
Before the pump starts, water flows into the basin, to avoid damaging of
the seal.
44444444444444
4
Select the minutes with
Select the seconds with
4
and
//////////////
/
/
++++++++++++++
+
+
44444444444444
4
4
and
//////////////
/
/
++++++++++++++
+
+
Accept with button.
33333333333333
3
3
buttons. Accept with button.
//////////////
/
/
-
-------------
-
-
33333333333333
3
3
buttons. Accept with button.
//////////////
/
/
-
-------------
-
-
33333333333333
3
3
buttons. Accept with button.
//////////////
/
/
-
-------------
-
-
33333333333333
3
3
buttons. Accept with button.
//////////////
/
/
-
-------------
-
-
P u m p p r i m i n g
00m18s
Choose period for filling : 0 to 10 mn 59 s
During the cycle, if the machine has not reached its water level, before
elapsing of this period, the alarm "
44444444444444
4
Select the minutes with
Select the seconds with
4
//////////////
/
/
++++++++++++++
+
+
44444444444444
4
4
//////////////
/
/
++++++++++++++
+
+
FILLING FAULT" will be displayed.
33333333333333
3
3
and
and
buttons. Accept with button.
//////////////
/
/
-
-------------
-
-
33333333333333
3
3
buttons. Accept with button.
//////////////
/
/
-
-------------
-
-
Note : Filling of the washer will be 2 min. minimum instead of
programmed time is between 00min00s and 2min00s.
F i l l i n g
04m00s
NT_820_910_1300_LX_ANG_V1 04_2007.doc
29
Page 32

CHAPTER3 ACCES TO SUPERVISOR MENU
Choose period for emptying : 0 to 6 mn 59 s
During the cycle, if the machine is not entirely emptied at the end of
this period, the alarm "EMPTYING FAULT" will be displayed.
44444444444444
4
Select the minutes with
Select the seconds with
4
and
//////////////
/
/
++++++++++++++
+
+
44444444444444
4
4
and
//////////////
/
/
++++++++++++++
+
+
E mptyi ng
01m15s
Not applicable on 910 LX / 1300LX washers, this setting must be zero.
44444444444444
4
Select the minutes with
Select the seconds with
4
and
//////////////
/
/
++++++++++++++
+
+
44444444444444
4
4
and
//////////////
/
/
++++++++++++++
+
+
E m p t y i n g 2
33333333333333
3
3
buttons. Accept with button.
//////////////
/
/
-
-------------
-
-
33333333333333
3
3
buttons. Accept with button.
//////////////
/
/
-
-------------
-
-
33333333333333
3
3
buttons. Accept with button.
//////////////
/
/
-
-------------
-
-
33333333333333
3
3
buttons. Accept with button.
//////////////
/
/
-
-------------
-
-
00m00s
Choose duration of recycling : 0 to 6 mn 59 s
This regulation corresponds to the time during which the water will be in
running water rinse, when the pressurestat will be pushed.
Select the minutes with
Select the seconds with
4
//////////////
/
/
++++++++++++++
+
+
44444444444444
4
4
and
//////////////
/
/
++++++++++++++
+
+
and
33333333333333
3
3
buttons. Accept with button.
//////////////
/
/
-
-------------
-
-
33333333333333
3
3
buttons. Accept with button.
//////////////
/
/
-
-------------
-
-
44444444444444
4
R e c y c l i n g
00m30s
In order to adjust the pH of basic discharged liquids, recirculation period
is increased with an acid intake before draining (function called
“Neutralization”). The adjustment of the acid quantity is carried out
through the working time of the acid dosing pump.
This working time has to be determined by the customer according to
the detergent concentration to be neutralized in the chamber and the
acid concentration.
Choose duration for acid intake: 0 to 6mn59s.
44444444444444
4
Select the minutes with
Select the seconds with
4
//////////////
/
/
++++++++++++++
+
+
44444444444444
4
4
and
//////////////
/
/
++++++++++++++
+
+
and
33333333333333
3
3
buttons. Accept with button.
//////////////
/
/
-
-------------
-
-
33333333333333
3
3
buttons. Accept with button.
//////////////
/
/
-
-------------
-
-
NT_820_910_1300_LX_ANG_V1 04_2007.doc
30
Page 33

CHAPTER3 ACCES TO SUPERVISOR MENU
R e c y . N e u t r . A c i d e
00m30s
In order to adjust the pH of acid discharged liquids, recirculation period
is increased with an detergent intake before draining (function called
“Neutralization”). The adjustment of the detergent quantity is carried
out through the working time of the detergent dosing pump.
This working time has to be determined by the customer according to
the acid concentration to be neutralized in the chamber and the basic
concentration.
Choose duration for detergent intake: 0 to 6mn59s.
44444444444444
4
Select the minutes with
Select the seconds with
4
and
//////////////
/
/
++++++++++++++
+
+
44444444444444
4
4
and
//////////////
/
/
++++++++++++++
+
+
33333333333333
3
3
buttons. Accept with button.
//////////////
/
/
-
-------------
-
-
33333333333333
3
3
buttons. Accept with button.
//////////////
/
/
-
-------------
-
-
R e c y . N e u t r . B a s i c
00m10s
Choose the pause period : 0 to 6 mn 59 s
At the end of hot demi. water rinse, we define the condenser functioning
time (option).
Select the minutes with
Select the seconds with
4
//////////////
/
/
++++++++++++++
+
+
44444444444444
4
4
and
//////////////
/
/
++++++++++++++
+
+
and
33333333333333
3
3
buttons. Accept with button.
//////////////
/
/
-
-------------
-
-
33333333333333
3
3
buttons. Accept with button.
//////////////
/
/
-
-------------
-
-
44444444444444
4
Pause
00m00s
Choose door unlocking period: 0 to 2 mn 59 s
Select the minutes with
Select the seconds with
4
//////////////
/
/
++++++++++++++
+
+
44444444444444
4
4
and
//////////////
/
/
++++++++++++++
+
+
and
33333333333333
3
3
buttons. Accept with button.
//////////////
/
/
-
-------------
-
-
33333333333333
3
3
buttons. Accept with button.
//////////////
/
/
-
-------------
-
-
44444444444444
4
U n l o c k i n g d o o r
00m12s
NT_820_910_1300_LX_ANG_V1 04_2007.doc
31
Page 34

CHAPTER3 ACCES TO SUPERVISOR MENU
Choose period for door lock control: 0 to 2 mn 59 s.
This parameter allows a door lock control. At beginning of cycle, if door
is not correctly closed, alarm “OPENED DOOR” is displayed.
44444444444444
4
Select the minutes with
Select the seconds with
4
and
//////////////
/
/
++++++++++++++
+
+
44444444444444
4
4
and
//////////////
/
/
++++++++++++++
+
+
T . u n l o c k d o o r
00m10s
Choose water temperature for detergent intake with
buttons: 0 to 2 mn 59 s
If temperature is
- set to zero
- higher than programmed temperature for current phase,
detergent intake is done at the beginning of the phase.
Accept with button.
33333333333333
3
3
buttons. Accept with button.
//////////////
/
/
-
-------------
-
-
33333333333333
3
3
buttons. Accept with button.
//////////////
/
/
-
-------------
-
-
44444444444444
4
4
and
//////////////
/
/
++++++++++++++
+
+
33333333333333
3
3
//////////////
/
/
-
-------------
-
-
D e t e r g e n t i n t a k e
T e m p e r a t u r e = 4 0 °
Choose water temperature for acid intake with
4
//////////////
/
/
++++++++++++++
+
+
and
33333333333333
3
3
buttons: 0
//////////////
/
/
-
-------------
-
-
44444444444444
4
to 2 mn 59 s
If temperature is
- set to zero
- higher than programmed temperature for current phase,
acid intake is done at the beginning of the phase.
Accept with button.
A c i d i n t a k e
T e m p e r a t u r e = 3 0 °
Not applicable on laboratory range washers, must be set to zero with
44444444444444
4
4
//////////////
/
/
++++++++++++++
+
+
and
33333333333333
3
3
buttons.
//////////////
/
/
-
-------------
-
-
Accept with button.
NT_820_910_1300_LX_ANG_V1 04_2007.doc
32
Page 35

CHAPTER3 ACCES TO SUPERVISOR MENU
L u b r i c a n t i n t a k e
T e m p e r a t u r e = 3 5 °
If the washer is equipped with an additional dosing pump option, choose
water temperature for additive 2 intake with
2 mn 59 s
If temperature is
- set to zero
- higher than programmed temperature for current phase,
additive 2 intake is done at the beginning of the phase.
Accept with button.
P r o d u c t i n t a k e 2
T e m p e r a t u r e = 3 5 °
44444444444444
4
4
//////////////
/
/
++++++++++++++
+
+
and
33333333333333
3
3
buttons: 0 to
//////////////
/
/
-
-------------
-
-
If the machine is equipped with a condenser, choose with
keys, the condenser temperature between 0 and 60°C.
Accept with button.
C o ndenso r
T e m p e r a t u r e = 5 0 °
E n d o f m e n u
The display unit returns to its initial state.
44444444444444
4
4
//////////////
/
/
++++++++++++++
+
+
or
33333333333333
3
3
//////////////
/
/
-
-------------
-
-
NT_820_910_1300_LX_ANG_V1 04_2007.doc
33
Page 36

CHAPTER3 ACCES TO SUPERVISOR MENU
4.THE CHOICE OF MACHINE NAME
If you choose "CHOOSE DISPLAY = MACHINE NAME" in "machine
configuration " menu of supervisor level (see page 23), the machine can
be identified by a designation particular. A maximum of 16 characters is
available.
After accessing to supervisor menu, you must choose MACHINE NAME
44444444444444
4
with
4
and
//////////////
/
/
++++++++++++++
+
+
Accept with button.
S U P E R V I S O R M E N U
N o m m a c h i n e
33333333333333
3
3
buttons to define the name of the machine.
//////////////
/
/
-
-------------
-
-
The characters selection is got with
4
//////////////
/
/
++++++++++++++
+
+
and
33333333333333
3
3
buttons.
//////////////
/
/
-
-------------
-
-
44444444444444
4
Press button to accept the chosen character and to pass on next
space.
If the chosen name has less of 16 characters fill-in empty blanks by
pressing button.
m a c h i ne name
█
The program name is recorded in memory after the 16th character is
entered by pressing the button.
E n d o f m e n u
The display unit returns to its initial state.
NT_820_910_1300_LX_ANG_V1 04_2007.doc
34
Page 37

CHAPTER3 ACCES TO SUPERVISOR MENU
5.UPDATE CYCLES
This function is to modify the counter of the number of cycles carried
out.
After accessing to supervisor menu, you must choose UPDATE CYCLE
44444444444444
4
with
4
and
//////////////
/
/
++++++++++++++
+
+
Accept with
S U P E R V I S O R M E N U
U p d a t e s c y c l e s
Select YES/NO with
Accept with button.
33333333333333
3
3
buttons to modify the cycle number.
//////////////
/
/
-
-------------
-
-
button.
44444444444444
4
4
and
//////////////
/
/
++++++++++++++
+
+
33333333333333
3
3
//////////////
/
/
buttons.
-
-------------
-
-
U p d a t e s c y c l e s
C o n f i r m a t i o n : Y e s
44444444444444
4
If YES, select the cycle number with
4
and
//////////////
/
/
++++++++++++++
+
+
Accept with button.
U p d a t e s c y c l e s
8
E n d o f m e n u
The display unit returns to its initial state.
33333333333333
3
3
buttons.
//////////////
/
/
-
-------------
-
-
The meter value must be noted before an update.
NT_820_910_1300_LX_ANG_V1 04_2007.doc
35
Page 38

CHAPTER3 ACCES TO SUPERVISOR MENU
6.UPDATE HOURS
This function is to modify the counter of the machine usage time.
After accessing to supervisor menu, you must choose UPDATE HOURS
44444444444444
4
with
4
and
//////////////
/
/
++++++++++++++
+
+
Accept with
S U P E R V I S O R M E N U
U p d a t e s h o u r s
Choose YES/NO with
Accept with button.
33333333333333
3
3
buttons to modify the hour.
//////////////
/
/
-
-------------
-
-
button.
44444444444444
4
4
and
//////////////
/
/
++++++++++++++
+
+
33333333333333
3
3
buttons.
//////////////
/
/
-
-------------
-
-
U p d a t e s h o u r s
C o n f i r m a t i o n : Y e s
If YES, choose the hours number with
Accept with button.
U p d a t e s h o u r s
5
E n d o f m e n u
The display returns to its initial state.
44444444444444
4
4
and
//////////////
/
/
++++++++++++++
+
+
33333333333333
3
3
buttons.
//////////////
/
/
-
-------------
-
-
The meter value must be noted before an update.
NT_820_910_1300_LX_ANG_V1 04_2007.doc
36
Page 39

CHAPTER3 ACCES TO SUPERVISOR MENU
7.UPDATE MAINTENANCE HOURS
This function is to modify the counter of hours before carrying out
maintenance.
After accessing to supervisor menu, you must choose Update MAINT. hrs
44444444444444
4
with
4
and
//////////////
/
/
++++++++++++++
+
+
Accept with
S U P E R V I S O R M E N U
U p d a t e M a i n t . h r s
Choose YES/NO with
Accept with button.
33333333333333
3
3
buttons to modify the hours.
//////////////
/
/
-
-------------
-
-
button.
44444444444444
4
4
and
//////////////
/
/
++++++++++++++
+
+
33333333333333
3
3
buttons.
//////////////
/
/
-
-------------
-
-
U p d a t e M a i n t . h r s
C o n f i r m a t i o n : y e s
Choose frequency of maintenance with
4
and
//////////////
/
/
++++++++++++++
+
+
33333333333333
3
3
buttons.
//////////////
/
/
-
-------------
-
-
44444444444444
4
Accept with button.
The calculation of this frequency is displayed at each starting-up.
M a i n t enance
e v e r y : x x x h
Choose with
4
and
//////////////
/
/
++++++++++++++
+
+
33333333333333
3
3
buttons, the interval of time remaining
//////////////
/
/
-
-------------
-
-
44444444444444
4
before next maintenance so that this time is announced to each
launching of cycle
Accept with button.
M a i n t enance
i n t e r v a l . : x x x h
NT_820_910_1300_LX_ANG_V1 04_2007.doc
37
Page 40

CHAPTER3 ACCES TO SUPERVISOR MENU
This display allows to reset to zero maintenance hours or enter a time
after changing electronic board using
Accept with button.
U p d a t e M a i n t . h r s
xxxx
E n d o f m e n u
The display returns to its initial state.
44444444444444
4
4
and
//////////////
/
/
++++++++++++++
+
+
33333333333333
3
3
buttons.
//////////////
/
/
-
-------------
-
-
NT_820_910_1300_LX_ANG_V1 04_2007.doc
38
Page 41

CHAPTER3 ACCES TO SUPERVISOR MENU
8.PRINT PROGRAM / COMMON SETTING PARAMETERS
This function allows printing of wash program parameters and common
settings (only for washer equipped with printer option).
TO BE DONE AFTER ANY MODIFICATION OF PROGRAM!
S U P E R V I S O R M E N U
P r i n t p a r a m . p r g
Accept with
button.
P r ogram n°
22
Choose program to be printed.
Accept with
button.
P ri nti ng
I n progress...
Printing of the parameters.
E n d o f m e n u
The display returns to its initial state.
NT_820_910_1300_LX_ANG_V1 04_2007.doc
39
Page 42

CHAPTER3 ACCES TO SUPERVISOR MENU
9.PRINT CONFIGURATION PARAMETERS
This function allows printing of the configuration parameters (only for
washer equipped with printer option).
TO BE DONE AFTER ANY MODIFICATION OF
CONFIGURATION!
S U P E R V I S O R M E N U
P r i n t p a r a m . c f g
Accept with
button.
P ri nti ng
I n progress...
Printing of the parameters.
E n d o f m e n u
The display returns to its initial state.
NT_820_910_1300_LX_ANG_V1 04_2007.doc
40
Page 43

CHAPTER3 ACCES TO SUPERVISOR MENU
10. CHANGING CARD
See page 16
S U P E R V I S O R M E N U
C h a n g i n g c a r d
11.RETURN TO THE INITIAL STATE
You must choose END REGLAGE ? with
supervisor menu.
Accept with
button.
44444444444444
4
4
and
//////////////
/
/
++++++++++++++
+
+
33333333333333
3
3
buttons to quit the
//////////////
/
/
-
-------------
-
-
E n d o f r e g l a g e ?
NT_820_910_1300_LX_ANG_V1 04_2007.doc
41
Page 44

Page 45

CHAPTER 4 FAULT ALARMS
CHAPTER 4 FAULT ALARMS
This chapter explains all fault alarms that can occur on the washer-dryer.
NT_820_910_1300_LX_ANG_V1 04_2007.doc
43
Page 46

CHAPTER 4 FAULT ALARMS
1. WARNINGS
1.1 - LACK OF SALT * :
* only for washers with regeneration
(not applicable on 820 LX)
WARNING
L A C K O F S A L T
Lack of salt definition: The following message is displayed at the start
of the cycle when you press the key.
Corrective Action :Fill the salt pot located inside the washer.
1.2 - LACK OF PRODUCTS
WARNING
L A C K O F C H E M I C .
Lack of product definition : The following message is displayed at the
start of the cycle when you press the
Corrective Action :Check level of additive tanks, replace additive low
level tank.
1.3 HOT CHAMBER
W A R N I N G !
H O T C H A M B E R
INCIDENT: the following message is displayed if the temperature inside
the washing chamber is above the safety temperature set point for door
opening.
ACTION: At the end of the cycle, let the washer chamber and contents
cool before opening the chamber door.
key.
NT_820_910_1300_LX_ANG_V1 04_2007.doc
44
Page 47

CHAPTER 4 FAULT ALARMS
1.4 FULL BASIN
W A R N I N G !
F U L L B A S I N :
INCIDENT: If the wash chamber contains water at the beginning of the
cycle, either from the interruption of the previous cycle or due to an
abnormal addition of water to the chamber.
ACTION: The washer is automatically emptied and the cycle then
proceeds normally.
1.5 MAINTENANCE REMINDER
M a i n t e n a n c e
I n X X X H o u r s
INCIDENT: After turning on the machine, the reminder of the upcoming
preventative maintenance is shown on the display.
ACTION: Press the
key to acknowledge the reminder. Schedule a
preventative maintenance service call.
1.6 PREVENTATIVE MAINTENANCE REQUIRED
T i m e f o r P r e v e n T i v e M a i n t e n a n c e
INCIDENT: After starting the wash cycle, the preventative maintenance
message is shown on the display.
ACTION: Press the
maintenance should be performed on the machine.
NT_820_910_1300_LX_ANG_V1 04_2007.doc
key to acknowledge the reminder. Preventative
45
Page 48

CHAPTER 4 FAULT ALARMS
2.FAULT ALARMS
These alarms stop the operation of the washer. To clear the alarm mode, the
washer must be switched off by pressing button.
2.1 FAULT N°1 PROBE FAULT.
F A U LT N°01
P R O B E D E F E C T
Probe Fault Definition :
The probe used to check the temperature of the water in the chamber
is disconnected or defective.
Corrective Action :
CONTACT A MAINTENANCE TECHNICIAN to check the electrical
connection and the condition of the probe.
2.2 FAULT N°2 EMPTYING FAULT.
F A U LT n°02
E M P T Y I N G F A U L T
Emptying Fault Definition :
The washer has not been fully emptied at the end of the normal
emptying time defined in the Common Times menu.
Corrective Action :
Check that there is no restriction on the emptying line, that the
emptying pump (or the valve) and its pipes are not blocked and that the
chamber filters are not clogged.
This message may be displayed at the end of PREWASH 1, PREWASH 2,
WASH, RUNNING WATER RINSE 1, ACID RINSE, RUNNING WATER RINSE 2, COLD DEMI.
WATER RINSE and HOT DEMI. WATER RINSE.
NT_820_910_1300_LX_ANG_V1 04_2007.doc
46
Page 49

CHAPTER 4 FAULT ALARMS
2.3 FAULT N°3 HEATING EXCESS.
F A U LT n°03
H E A T I N G E X C E S S
Heating Excess Definition :
Is displayed if the basin temperature exceeds the programmed
temperature by 20°C.
Corrective Action :
Verify that the incoming water temperature does not exceed the
programmed setpoint temperature.
CONTACT A MAINTENANCE TECHNICIAN.
2.4 FAULT N°4 HEATING FAULT.
F A U LT n°04
H E A T I N G F A U L T
Heating Fault Definition :
This message is displayed during one of the heating phases if the water
temperature has not increased after 8 minutes of heating duration.
Corrective Action :
CONTACT A MAINTENANCE TECHNICIAN TO CHECK :
- the electrical connections,
- the condition of heating elements,
- the safety thermal cut-out with manual reset.
This message may be displayed during the heating phase of
PREWASH 2, WASH, and HOT DEMI. WATER RINSE.
PREWASH 1,
NT_820_910_1300_LX_ANG_V1 04_2007.doc
47
Page 50

CHAPTER 4 FAULT ALARMS
2.5 FAULT N°5 NO WATER.
F A U LT n°05
N O WATER
No Water Definition :
The washer did not reach the required water level by the end of the
normal filling time defined in the Common Times menu.
Corrective Action :
Check that the water inlet valves are open, that the water inlet pipes
are in good condition and that the water inlet filters are clean.
This message may be displayed during filling for PREWASH 1, PREWASH 2,
PREWASH 3, WASH , RUNNING WATER RINSE 1, ACID RINSE , RUNNING WATER RINSE 2,
COLD DEMI. WATER RINSES and HOT DEMI. WATER RINSE.
2.6 FAULT N°6 DOOR FAULT
F A U LT N°06
O P E N E D D O O R
Door Fault Definition :
It displays when the door is opened during the cycle. The cycle is
stopped.
Corrective Action :
Shut the door and start the cycle again.
NT_820_910_1300_LX_ANG_V1 04_2007.doc
48
Page 51

CHAPTER 4 FAULT ALARMS
2.7 FAULT N°7 LEVEL FAULT.
F A U L T N ° : 0 7
F I X TO LEVEL
Fix to Level Definition :
After achieving the proper water level during the Filling Time, the
water level has dropped causing the pressurestat to open times to
indicate fluctuation of the water level in the machine.
Corrective Action :
Check if you have a leak or if the emptying tube is out of location.
2.8 FAULT N°8 PRESSURESTAT FAULT.
F A U L T N ° : 0 8
P R E S S O S T A T F A U L T
Pressostat Fault Definition :
The pressurestat has a N.O. + N.C. contact. This alarm indicates that
the contacts are both closed or both open at the same time which is not
correct.
Corrective Action :
Check the state of the pressurestat
NT_820_910_1300_LX_ANG_V1 04_2007.doc
49
Page 52

CHAPTER 4 FAULT ALARMS
NT_820_910_1300_LX_ANG_V1 04_2007.doc
50
 Loading...