

Page 1

Operating manual
PUK D3
Page 2

OPERATING MANUAL (translation)
"PUK D3" with welding microscope "SM5"
Dear Customer,
This operating manual is intended to familiarise you with the commissioning process and operation of your PUK D3 as well
as the associated SM5 welding microscope. Please read the operating instructions carefully and follow the advice given
here diligently. Disruptions and operational faults will thus be avoided. Your personal safety, constant availability and long
service life can be assured by this.
THE COMMISSIONING OF THE DEVICE MUST ONLY BE UNDERTAKEN BY TRAINED SPECIALISTS AND ONLY
WITHIN THE SCOPE OF APPROPRIATE USE. THE MANUFACTURER ACCEPTS NO LIABILITY FOR DAMAGES
CAUSED THROUGH INAPPROPRIATE USE AND IMPROPER OPERATION. THE “GENERAL SAFETY
REQUIREMENTS” AND "PERSONAL BODY PROTECTION" CHAPTERS MUST BE READ BEFORE COMMISSIONING.
Please keep these operating instructions safe.
The equipment produced by “Lampert Werktechnik GmbH” fulfils the conformity requirements of the CE mark and is
constructed in accordance with the VDE guidelines.
The eye protection systems used on the "SM5" welding microscope are tested and certified by DIN-CERTCO (DIN
department for eye protection).
Only use original spare parts for maintenance and overhaul work. Our customer service department will naturally be happy
to help you.
THE DEVICE MUST ONLY BE OPENED OR MODIFIED BY AUTHORISED CUSTOMER SERVICE PERSONNEL,
OTHERWISE ALL GUARANTEES AND WARRANTIES ARE VOID.
LAMPERT WERKTECHNIK GMBH
November 2017
Page 3

© Lampert Werktechnik GmbH 2
017 2
TABLE OF CONTENTS
1 WARNING AND INFORMATION SIGNS Pg. 2
2 FIELD OF APPLICATION Pg. 3
3 SAFETY REQUIREMENTS
3.1 General safety requirements Pg. 3
3.2 Personal body protection and hazards
3.3 Hazards of shielding gas cylinders Pg. 4
3.4 Risk of allergic reactions Pg. 4
4 SETUP AND INSTALLATION
4.1 Set-up of the device Pg. 4
4.2 Description of the rear of the device Pg. 5
4.3 Connection of eye protection and
LED illumination of the microscope SM5 Pg. 5
4.4 Connect shielding gas supply Pg. 5
4.5 Inserting the electrodes into the handpiece Pg. 6
4.6 Connect power supply Pg. 6
4.7 Configuration of the welding microscope Pg. 6
5 COMMISSIONING
5.1 Description of the front-side controls Pg. 7
5.2 Description of menu items Pg. 8
5.3 Switching on the device Pg. 9
5.4 Adjusting for the correct gas flow Pg. 9
5.5 Control level “settings” Pg. 9
6 SELECTION OF THE WELDING PARAMETERS
AND USER LEVELS Pg. 10
6.1 Selection of the welding parameters Pg. 10
6.2 Expert menu Pg. 12
6.3 Help Function Pg. 12
6.4 Programming Pg. 12
6.5 Loading saved programs Pg. 13
6.6 Fixation welding Pg. 13
6.7 Retention welding function Pg. 13
7 WELDING INSTRUCTIONS
7.1 Introduction to welding Pg. 13
7.2 Welding with the smoothing mode Pg. 14
7.3 Retention welding Pg. 14
7.4 Welding with the foot switch Pg. 14
7.4.1 Fixation welding Pg. 14
7.4.2 Retention welding with foot switch Pg. 15
7.5 Basics and tips Pg. 15
7.6 Sharpening the electrodes Pg. 15
8 CARE OF THE SYSTEM COMPONENTS
8.1 Care of the welding equipment Pg. 16
8.2 Care of the microscope Pg. 16
9 TECHNICAL DATA Pg. 17
9.1 Technical data welding device Pg. 17
9.2 Technical data microscope Pg. 17
9.3 Optical data microscope Pg. 17
9.4 Technical data LCD shutter Pg. 17
9.5 Type plate Pg. 18
9.6 Warning notices Pg. 19
10 TROUBLESHOOTING Pg. 19
10.1 Welding device Pg. 19
10.2 Microscope Pg. 20
11 SPARE PARTS LIST Pg. 21
12 DISPOSAL INFORMATION Pg. 21
13 EC-DECLARATION OF CONFORMITY Pg. 21
Wa
rning!
“Warning” identifies a potentially dangerous situation. If this is not avoided, the consequences can be death or
severe injuries.
Caution!
"Caution!" identifies a potentially hazardous situation. If this is not avoided, the consequences can be slight or
minor injuries as well as property damage.
Note!
“Note” identifies the product at risk from the hazard and possible damage to the equipment.
Important!
"Important!" designates user tips and other especially useful information. This is not a signal word for hazardous or
dangerous situations.
1. WARNING AND INFORMATION SIGNS
Page 4

© Lampert Werktechnik GmbH 2
017 3
2. APPROPRIATE USE (FIELD OF APPLICATION)
• Outdoor operation is impermissible. Use this device
only in dry rooms!
• PUK D3: the application of spot welds to all customary
dental alloys as well as titanium for the manufacture of
new articles and for repairs on dental work.
WELDS INSIDE AND ON THE HUMAN BODY ARE PROHIBITED.
GENERALLY NO LIABILITY IS ACCEPTED FOR THE DURABILITY OF THE WELDING. WE RECOMMEND
THAT THE WELDING BE CHECKED IN EVERY CASE.
SM5: Observation and microscopic viewing of objects
through the ocular of the microscope and illumination of
the working area.
The SM5 unit may only be used for welding if it has been
properly connected to a PUK fine-welding device.
3. SAFETY INSTRUCTIONS
3.1 GENERAL SAFETY REQUIREMENTS
PERSONS WHO WEAR ACTIVE IMPLANTS (HEART PACEMAKERS) MUST MAINTAIN A SAFETY
DISTANCE OF 20 CM BETWEEN THE WELDING CURRENT CABLE / SOURCE OF THE WELDING
CURRENT AND THE IMPLANT
The opening of the device is only permitted when
undertaken by an electrician. Before opening
remove the mains cable and ensure that the
device is de-energised. Discharge any components in the
device that could hold electrical charge.
In case of doubt or uncertainty, always consult with a
specialist. Our customer support department is naturally
always available to assist you with their professional
trained personnel, appropriate tooling and equipment.
Always use the original cables and ensure that workpiece
clamps are properly attached.
Both the mains and welding currents can be a source of
danger.
The device must be isolated from the mains power when
undertaking any repair or maintenance work on the power
source. The power socket is to be clearly blocked when
undertaking any work on the system beyond minor
manipulations where it is necessary to leave the
workplace, even for brief periods.
The highest and thus the most dangerous voltage in the
welding circuit is the no-load voltage. The highest
permissible no-load voltages are recorded in the national
and international regulations in accordance with the type
of welding current, construction of the current source and
the extent of the electrical hazard to the workplace.
If it can be assumed that risk-free operation is no longer
possible, the unit must be put out of operation and
secured against being unintentionally restarted.
It can be assumed that risk-free operation is no longer
possible, if
• the equipment shows visible signs of damage,
• malfunctions occur,
• or the equipment is no longer working.
The PUK must, as standard, be operated with a mains
voltage of 115 V~.
Yellow-green wire = protective earth terminal (PE). The
other wires L1 and N are to be connected to the phase
and neutral conductors of the power plug.
The welding device is factory-adjusted to 115 V!
This means that as a result of the tolerance range of
+/- 10 %, the system can also be operated at 110 V~.
Devices configured to voltages other than 115 V will be
designated as such by means of a label.
THE DEVICE MUST ONLY BE OPENED BY
AUTHORISED SERVICE PERSONNEL!
IF THE DEVICE HAS BEEN CONFIGURED FOR A
CUSTOM VOLTAGE, THE TECHNICAL DATA ON THE
DEVICE SPECIFICATION PLATE APPLY! MAINS
PLUGS MUST CORRESPOND TO THE MAINS
VOLTAGE AND POWER CONSUMPTION OF THE
WELDING EQUIPMENT (see technical data!)
THE FUSING FOR THE MAINS SUPPLY MUST BE
MATCHED TO THE POWER CONSUMPTION OF THE
WELDING EQUIPMENT!
ONLY USE THE SUPPLIED MAINS CABLE!
THE PUK D3 IS A PIECE OF ELECTRICAL EQUIPMENT. NATIONAL REGULATIONS ON TESTING
INTERVALS AND THE SCOPE OF REQUIRED RECURRING SAFETY-RELATED TESTS MUST BE
OBSERVED.
Page 5

© Lampert Werktechnik GmbH 2
017 4
3.2 HAZARDS AND PERSONAL BODY PROTECTION
Please also observe the relevant regulations of the respective country.
RISK OF INJURY FROM RADIATION OR HEAT:
Protective gloves must be worn when welding.
Uncovered areas of the skin must be protected from
the UV radiation generated during welding in order to
avoid skin damage.
Wear suitable dry protective clothing with no synthetic
fibers.
The workpiece and the electrode tip can become very
hot during welding – risk of burns.
Welding can cause sparks and spatters – risk of burns.
EYE PROTECTION WHEN WELDING:
Never look into the arc without eye protection; always
use a welding mask with certified protective glass.
In addition to light and thermal radiation, which can
cause dazzling and burning, the electric arc also emits
UV radiation. With insufficient protection this invisible
ultraviolet radiation causes very painful conjunctivitis,
which can first be noticed hours later, and can also
cause permanent eye damage.
The Lampert eye protection systems with its integrated
LCD protective welding screen offers reliable protection
against these risks and provides permanent protection
from UV / IR rays in both light and dark state. The
protective class of the filter is defined such that
dazzling by the arc is effectively prevented.
Persons who are nearby to the electric arc and
assistants must also be informed of the dangers and
equipped with the appropriate protection; if necessary
set up protective partition walls.
EYE PROTECTION WHEN OPERATING THE LED
ILLUMINATION:
Never look into the LED lamp or its reflections without
eye protection; use protective shield or safety glasses
with suitable protective glass.
SMOKES AND GASES:
When welding, especially in small spaces, ensure that
there is an adequate fresh air supply or use an external
extractor fan, as smoke and hazardous gases occur.
EXPLOSION HAZARD – DANGER WHEN
WELDING ON CONTAINERS:
It is not permitted to carry out welding on containers
that have been used for storing gases, propellants,
mineral oils or similar, even if they have been empty for
a long time, as there is a risk of explosions caused by
residues.
Particular regulations apply to fire and explosion
endangered spaces.
OTHER DANGERS:
The electrode tip installed in the handpiece means a
risk of injury (stabbing and scratching of e.g. hand, face
and eyes).
3.
3 HAZARDS OF SHIELDING GAS CYLINDERS
Observe all applicable safety measures when
ha
ndling gas cylinders as well as the safety
regulations for handling gases. Gas tanks must
especially be secured against falling over / falling down
and heat (max. 50°C); it is particularly important to
ensure they are not subjected to sunlight for extended
periods and that they are protected from severe frost.
3.4 RISK OF ALLERGIC REACTIONS:
Please note that the device's raw materials that
could come into contact with the operator's skin
may cause allergic reactions in susceptible people.
4.
SETUP AND INSTALLATION
4.1 SET-UP OF THE DEVICE
The system is to be set up so that cooling air is able to
reach all of the surfaces of the housing without
hindrance. The device may not be covered! The device
is to be placed on a non-combustible surface! The
device should be set up on a base that is solid, level,
and insulated - ideally on a suitable workbench. Fasten
the two hand supports for the microscope with 2 Allen
screws using the supplied Allen key by inserting the
screws into the designated holes from underneath the
microscope baseplate and into the hand supports.
Page 6

© Lampert Werktechnik GmbH 2
017 5
4.2 DESCRIPTION OF THE REAR OF THE DEVICE
(Fig. 2)
(1) FUSEBOX ("Fuse")
(2) MASTER MAINS SWITCH as well as
AC POWER SOCKET
(for connecting the mains cable)
(3) CONNECTION SOCKET FOR EYE PROTECTION SYSTEM
AND LED MICROSCOPE ILLUMINATION
(4) CONNECTION SOCKET FOR FOOT SWITCH
(5) TYPE PLATE
(6) SERIAL NUMBER
(7) PROTECTIVE GAS CONNECTION ("Argon Gas")
For 6.0 mm diameter pressure hose (max. 4,0 bar / 58 psi)
(8) APPROVED MAINS VOLTAGE FOR THIS DEVICE
4.3 CONNECT EYE PROTECTION AND LED ILLUMINATION OF THE WELDING MICROSCOPE TO THE PUK:
The circular connector for the eye protection system and
the LED illumination should be inserted into the
connecting socket (3) on the rear of the PUK welding
device (marked in red and yellow colour) and is to be
tightened in place with the coupling nut (hand tight)..
WARNING!
ONLY SUITABLE ORIGINAL EYE PROTECTION SYSTEMS FROM LAMPERT MAY BE CONNECTED TO THE
WELDING SYSTEM! OTHER EYE PROTECTION SYSTEMS ARE NOT APPROVED AND CAN LEAD TO
PERMANENT HEALTH DAMAGE OR DAMAGE TO THE WELDING DEVICE.
ALWAYS OBSERVE THE OPERATING INSTRUCTIONS FOR THE CONNECTED EYE PROTECTION SYSTEM
4.4 CONNECT SHIELDING GAS SUPPLY:
Fasten the suitable flow regulator with the corresponding
tool to the shielding gas tank. ATTENTION: In doing so,
always observe the enclosed special operating
instructions provided. (Where possible, use argon with
min. 99.9 % purity, e.g. "Argon 4.6"). The pressure hose is
to be fastened by hand with the help of the quick coupling
adapter to the flow regulator as well as the shielding gas
connector (7) on the rear of the device.
CHECK REGULARLY THAT ALL OF THE HOSE CONNECTIONS AND GAS HOSES ARE IN OPTIMAL
C
ONDITION, ARE PROPERLY FASTENED AND ARE AIRTIGHT!
1
3
5
4
2
8
7
6
Page 7

© Lampert Werktechnik GmbH 2
017 6
4.5 INSERTING THE ELECTRODES INTO THE WELDING HANDPIECE:
PLEASE ALWAYS CHECK THAT THE MACHINE IS SWITCHED OFF, PRIOR TO EXCHANGING THE
ELECTRODES. THIS PREVENTS UNCONTROLLED TRIGGERING OF THE WELDING PROCESS.
(Fig. 3)
(Fig. 4)
(Fig. 5)
Lightly rotate the nozzle (10) back and forth and in doing
so, pull it off of the handpiece (13). It is only pushed-on, not
screwed in place.
Release the threaded electrode connection (12), insert a
well sharpened tungsten electrode (11) and tighten up
(hand-tight – do not use a tool to tighten).
The correct length for the electrode can easily be checked
and corrected if necessary by means of the milled marks
on the handpiece clamping arm (Fig. 4).
Now replace the nozzle.
The electrode must protrude approx. 4 - 6mm out of the
nozzle (Fig. 5).
ONLY USE THORIUM OXIDE FREE ORIGINAL ELECTRODES
Subsequently insert the connector of the handpiece as
straight as possible into the socket (23) on the front of
the PUK and fasten in place by tightening the coupling
nut hand-tight in a clockwise direction. Insert the
connecting cable used into the socket (24) on the front
side of the housing.
4.6
CONNECT POWER SUPPLY:
Insert the power cable with the mains connector into the
corresponding socket (2) on the rear of the housing and
insert the mains plug into a suitable socket with the correct
mains voltage.
CAUTION!
AS SOON AS THE MASTER MAINS SWITCH ON YOUR
PUK IS SWITCHED ON, THE VOLTAGE IS APPLIED TO
THE CONNECTED CROCODILE CLIPS OR CABLES. IT
IS TO BE ENSURED THAT THESE PARTS ARE NOT
ALLOWED TO COME INTO CONTACT WITH
ELECTRICALLY CONDUCTIVE OR EARTHED PARTS,
SUCH AS THE HOUSING, ETC. IN DOING SO, THERE
IS NO RISK FOR THE OPERATOR, WITH THE
EXCEPTION OF POSSIBLE CIRCUMSTANCES
ARISING FROM OPERATING ERROR.
4.7 CONFIGURATION THE WELDING MICROSCOPE:
ESSENTIAL PRIOR TO THE INITIAL WELDING OPERATION: PRECISE CONFIGURATION OF THE
MICROSCOPE OPTICS
FIRST STEPS
Align the handpiece holder so that you are able to
comfortably introduce a workpiece with your hands to the
tip of the handpiece mounted in the supporting arm. It
should be possible to comfortably place both hands and
palms on the baseplate hand supports. You also have the
option of changing the angle of inclination for the
microscope. In order to do so, release the locking screw
(14) on the stand, angle the
microscope to the desired position
and re-fasten the screw. A metal
pin extends from the stand to
support the microscope on your
working surface.
Page 8
© Lampert Werktechnik GmbH 2
017 7
ADJUSTING THE INTEROCULAR DISTANCE
Look through the two oculars (17) and move the ocular
tubes (15) inwards or outwards by holding the prism
housing (18) still and moving them in or out. The
interocular distance is correct if the range of vision as
viewed through the two oculars is complete and is united
into a single image. The interocular distance should be
individually set for each user.
FOCUSING
Mount the welding handpiece
with clamped electrode into
the supporting arm. Rotate the
focusing knob (20) to a
medium focus range. Adjust
the mounting height of the
microscope head: Hold the
microscope head (19) with one
hand, without touching one of the lenses, and use the
other hand to release the screw on the head bracket. The
head can now be moved. Look through the oculars and
move the microscope head up or down until the object
appears focused. The correct distance between the
handpiece holder and the microscope head amounts to
approx. 6 cm on the stand rod. Now re-tighten the
adjusting screw on the head bracket once more.
Subsequently use the focusing knob (20) to focus the
image.
DIOPTRE ADJUSTMENT
The sleeve for adjusting the dioptre (16) is fitted to the lefthand ocular (17). In the normal position, the lower part of
the tube is aligned to the marking on the ocular tube. In
the event of differing vision in both eyes: Open the right
eye only, look into the right-hand ocular (15) and adjust
the focus using the focusing knob (20). Now look through
the left-hand ocular with your left eye and adjust the focus
by turning the dioptre control (16) on the left tube (17) until
the image appears focused.
5.
COMMISSIONING
5.1 DESCRIPTION OF THE FRONT-SIDE CONTROLS
(Fig. 1)
(21) TOUCHSCREEN-DISPLAY with slide function
(22) CONNECTION SOCKET FOR HANDPIECE (-)
(23) SOCKET (-)
For connecting the blue contact terminal for fixation welding
(24) SOCKET (+)
For connecting contact elements such as contact terminals and
clamps.
(25) ROTARY CONTROLLER
Select the welding power/time or switch to the next user level
• Pressing the rotary controller for short time (< 1
second) switches from the power (POWER) parameter
to the pulse duration (TIME) parameter.
(It jumps back to power automatically after 1 second)
• Turning the controller to the left or the right changes
the selected parameter.
• Pressing the controller for longer time (> 1 second)
switches to the next user level, see chapter 5.2.
21
25
23
24 22
Page 9

© Lampert Werktechnik GmbH 2
017 8
TOUCHSCREEN
(27) Select the material or welding program
(depending on the user level) by sliding to the left
or right within the selected user level. Press and
hold for 2 seconds to call the memory menu.
(28) Foot switch activated
(29) Smoothing mode activated
(30) Recommended setting range
(31) Output scale as a percentage (POWER in %)
(32) Preselect welding situation and pulse shape
(depending on user level)
(33) Red range: In this range the settings no longer
make sense and there is a possible risk of
damaging the workpiece.
(34) Pulse duration scale in milliseconds (TIME in ms)
5.2 EXPLANATION / OVERVIEW OF MENUS
(F
ig. Schematic diagram of user levels)
ONCE IT IS SWITCHED ON, THE PUK D3 STARTS UP IN ITS START LEVEL (MAIN MENU).THE FOLLOWING USER
LEVELS CAN BE NAVIGATED AFTER PRESSING LONGER (> 1 SEC.) THE ROTARY CONTROLLER (25):
a) Start level (main menu):
Pre
selection of the material to be welded and
preselection of the welding situation with display of the
recommended settings range for welding power and
pulse duration
b) Expert level (if activated in the settings)
Arbitrary preselection of the various welding curves
c) User programs and stored custom settings (if activated
in the settings)
d) Fixation welding (if activated in the settings)
e) Retention welding (if activated in the settings)
f) Settings (Language, gas valve, lighting …)
At the start level and in "Custom Programs", sliding in the
header bar on the display scrolls between the different
preset materials or stored programs depending on the
selected user level.
Beginners using the PUK system are advised to remain
within the start level.
PRESSING THE SELECTED MATERIAL (27) IN THE TOP OF THE DISPLAY FOR 2 SEC. CAUSES THE
PROGRAMMING MENU TO BE LAUNCHED:
28
27
31
32
33
29
Page 10

© Lampert Werktechnik GmbH 2
017 9
g) Selection of the memory location and saving the
settings (if activated in the settings). Storing custom
welding parameters (20 memory slots)
h) Input and saving of the desired program (if activated in
the settings)
5.3 SWITCHING ON THE DEVICE
First, carefully open the gas tank valve. Then switch the
master mains switch (2) on the rear of the housing to the
“I” position – the display shows the safety prompt
regarding eye protection and the operating manual.
Confirm your compliance with the safety instructions by
pressing the rotary controller or by touching the
touchscreen.
5.4 ADJUSTING FOR THE CORRECT GAS FLOW
The PUK D3 only works with shielding gas
connected and sufficient gas flow. If no shielding
gas is connected or the gas flow is insufficient, then a
corresponding error message is shown in the display and
the device fails to weld in the TIG-mode (starting and
expert level, and in the stored custom settings).
PLEASE CONSIDER THAT GOOD WELDING RESULTS CAN ONLY BE ACHIEVED WITH A CORRECTLY
ADJUSTED GAS FLOW.
In order to configure the correct gas flow, activate the
"Gas valve" in the "Settings" menu (see chapter 5.5). This
opens the gas valve in the welding device. Now set the
flow regulator to the correct flow rate of approx. 2 - 3
litres/min. In doing so, also observe the instructions
provided with the flow regulator. Once the gas volume is
correctly adjusted, close again the "Gas valve" function by
pressing the corresponding button.
5.5 OPERATING LEVEL "SETTINGS"
The "Settings" user level can be used to modify basic settings and launch various test functions.
• Gas valve:
Pressing the corresponding button
causes the gas valve to be
opened. This function is important
in order to set the correct gas flow on the flow regulator
(see chap. 5.4). Pressing the button again causes the
gas valve to be closed. In addition, any other operation of
the device will automatically quit that function.
• Filter-Test:
Pressing this button causes a
sh
ading of the eye protection filter.
This enables correct function of the
eye protection filter to be checked.
Pressing the button again quits the test.
• LED light:
Pressing the button enables the
brightness of the LED lamp on the
welding microscope to be adjusted in 3 steps or to be
switched off.
• Program memory:
You can activate or deactivate the
saving and calling functions for
programs that you created
yourself here. If this menu is activated, it appears as an
additional user level. The user levels can be toggled by
pressing the rotary controller for 1 second.
• Expert Menü:
The expert menu can be activated
here. If this menu is active, it
appears as an additional user level. The user levels can
be toggled by pressing the rotary controller for 1 sec.
• Fixation:
Pressing this button activates or
deactivates the operating menu
for fixation welding. If this menu is
activated, it appears as an additional user level. The user
levels can be toggled by pressing the rotary controller for
1 sec.
Page 11

© Lampert Werktechnik GmbH 2
017 10
• Welding sequence:
You can press the button to
preselect a "standard" or "short"
basic welding sequence. If you
select "short", a shortened gas pre-flow time results in a
shorter time gap for triggering in a series of welding
points.
• Language
Pressing the button with the
country codes enables the
system language for the welding
device to be changed. The system can be toggled
between English (EN), German (DE), Spanish (ES),
French (FR) and Italian (IT).
• Welding signal tone:
Pressing the button activates or
deactivates the acoustic signal that
notifies the triggering of the weld.
• Retention welding:
Pressing this button activates or
deactivates the operating menu for
welding retentions. When
activated, the corresponding menu appears as an
additional user level. The user levels can be toggled by
pressing the power regulator.
6.
SELECTION OF THE WELDING PARAMETERS AND
USER LEVELS
6.1 SELECTION OF THE WELDING PARAMETERS
Pressing for a short time (< 1 second) the rotary controller (25) or touching the POWER or TIME scales on the display
switches between the power (POWER) and pulse duration (TIME) parameters. It jumps back to power (POWER)
automatically after 1 second. Rotating the rotary controller or sliding the power (POWER) or pulse duration (TIME) scales
changes the relevant value.
BASIC INFORMATION ABOUT THE EFFECTS OF WELDING POWER AND WELDING TIME:
POWER:
With the parameter “welding power” the strength of
welding energy is set.
The size and intensity of the welding points are controlled
in this way, i.e. the higher the power the larger the welding
point.
With very thin materials too high a power level can also
quickly result in damage, i.e. it makes sense to experiment
with samples for beginners with the PUK system to find
the optimum power level, starting at a power of 20 % or
with very fine welding, even lower. Power settings
between 35 and 50 % are considered medium welding
po
wers.
Most dental alloys can be welded with higher power levels,
just as with stainless steel. Power levels above 70 % are
only practical in the most unusual circumstances. There is
a danger of inhomogeneous welds and only experienced
users should move outside this range.
WELDING TIME OR PULSE DURATION:
The welding time setting determines for how many
milliseconds the welding power is applied, i.e. a longer
pulse duration results in a longer and deeper application of
the energy to the workpiece and thus simultaneously a
greater development of heat.
With very thin materials or wires it is recommended to use
a shorter welding time, primarily when welding near to
acrylic or ceramic parts or other heat-sensitive materials.
Welding times of no more than 4 msec are recommended
here.
With some cobalt chromium alloys, with silver alloys or
other highly conductive metals a longer welding time can
be advantageous in order to avoid hot cracks, starting at
10 msec.
Page 12

© Lampert Werktechnik GmbH 2
017 11
IMPORTANT FOR SUCCESSFUL OPERATION WITH THE PUK:
Welding power and pulse duration must be considered in
close context with each other in all cases! The total
energy applied to the workpiece is comprised of these
two parameter settings together - prior to welding this
must be considered carefully following an in-depth
analysis of the welding task, the materials and the
workpiece geometry.
SELECTION OF THE WELDING PARAMETERS ON THE PUK D3:
The welding parameters are set in two stages:
1) In the upper area of the display, select the metal to be welded by sliding over
the metal names.
2) Pressing one of the 5 buttons on the lower edge of the display selects the
given welding situation.
This selection causes numerous settings to be made in the background. The important information for the user is then
shown on the display:
• A welding time is preselected and the recommended
setting range for the selected welding situation is
marked under the scale by means of a blue bar.
Settings outside of the recommended blue setting range
are always possible, however, they are not
recommended for the selected welding situation.
• The power is also preselected and the recommended
setting range for the power is marked with a blue bar.
Settings outside of the recommended blue setting range
are always possible, however, they are not
recommended for the selected welding situation.
RED RANGE:
If you move above the predefined values for welding time and welding power, the colour of the cursor and the
parameter value displayed changes from white to red from a certain setting. In these ranges, there is a risk of
damaging the material being welded, i.e. we expressly advise you against working in these extreme conditions.
DESCRIPTION OF THE WELDING SITUATION WITH ASSOCIATED SYMBOL ON TOUCHSCREEN:
• In the start level, the meaning of the following symbols
i
s always the same for each of the preconfigured
materials.
• In The start level shows in addition to the welding
power and pulse duration for each stored material also
the recommended working range in the respective
scales of the touchscreen, highlighted in colour.
Universal setting for material thicknesses
from 0.3 mm. This is well suited for most
applications (≥ 0.3 mm).
Setting for thin or delicate parts
less than 0.3 mm thick. This setting offers
very low development of heat, especially in
combination with short welding times.
Welding in sharp angles and tight joint
situations. Here it is important to use short
welding times.
Melting of welding wire. Use identical alloy
wire with a diameter of 0.3 to 0.4 mm. Ideal
is a diameter of 0.35 mm.
Very low-energy melting for welding
(orthodontic) wires or very thin material.
PUSHING/TOUCHING THE RESPECTIVE BUTTON FOR 2 SEC. BRINGS UP AN INFO WINDOW ON THE
DI
SPLAY; SEE ALSO CHAPTER 6.3 "HELP FUNCTION".
Page 13
© Lampert Werktechnik GmbH 2
017 12
6.2 EXPERT MENU
>>>THE EXPERT MENU CAN BE ACTIVATED FROM THE "SETTINGS" USER LEVEL
After activation,
the expert mode
appears as a
separate user
level, which can
be accessed by
pressing the
rotary controller
for 1 sec. The various welding characteristic curves are
stored in the expert mode, which have been developed
and defined in the start level for the preconfigured metals
and welding geometries. However, here they are shown
without content-related assignment.
This mode is designed for experienced welders who want
to experiment with the various stored energy characteristic
curves (pulse modulations). In this user level it is possible
to choose between the various energy curves and store
these together with individual settings for the output and
time.
WHEN SWITCHING FROM THE MAIN MENU TO THE EXPERT MENU, THE RELEVANT SETTINGS ARE
CARRIED OVER FROM THE MAIN MENU. THIS MEANS THAT THE WELDING CURVES STORED IN THE
MAIN MENU CAN STILL BE VIEWED.
6.3 HELP FUNCTION
The buttons on the bottom
of the display are provided
with accessible info
screens in all user levels.
Touching / pressing the
button for 2 sec. causes the info screen to appear for the
respective button, which contains explanatory information
for the button's function. Touching the display button again
causes the active user screen to be shown once more.
6.4 PROGRAMMING
SAVING CUSTOM PROGRAMS
Pressing the metal
name for a longer
time (2 seconds) calls
the programming
menu. In the first step,
scroll/slide to the
left/right to select the
program slot into which you want to store your custom
settings.
Then save your data
by pressing the "Next"
button. Saved data
cannot be deleted. It
can only be
overwritten.
The following screen
provides the option of
assigning a program
name to the stored
settings. The program
name can comprise
upper and lower case
letters and special characters. You can use the arrow
buttons on the display to select the active cursor position
and you can use the rotary controller (25) to select the
desired characters.
Once the name has been entered, confirm your entry by
pressing the "Save" button. After saving, you will be
returned to the "Custom Programs" user level
automatically, and the previously saved data is active.
6.5 LOADING SAVED PROGRAMS AND THE USER LEVEL "CUSTOM PROGRAMS"
All custom stored
programs are
summarised in the
"Custom Programs"
user level. In the upper display area on this user level,
se
lect the relevant custom program by sliding to the left
or to the right.
Page 14
© Lampert Werktechnik GmbH 2
017 13
6.6 FIXATION WELDING
>>> THE FIXATION WELDING MENU CAN BE ACTIVATED FROM THE "SETTINGS" USER LEVEL.
After activation (see
also point 5.5 /
Settings), the fixation
mode appears as a
separate user level,
which can be
accessed by
pressing the rotary controller several times for 1 sec.
This mode is used for the fixation of two work piece
parts. See also Chapter 7.3.1.
For using the fixation mode the tack welding set is
required (optional accessory).
PLEASE NOTE: TACK WELDING IS PARTICULARLY WELL SUITED FOR METALS WITH LOW ELECTRICAL
CONDUCTIVITY, FOR EXAMPLE: TITANIUM AND STEEL.
6.6 RETENTION WELDING
>>> THE RETENTION WELDING MENU CAN BE ACTIVATED FROM THE "SETTINGS" USER LEVEL.
After activation (see
also point 5.5 /
Settings), the retention
welding mode appears
as a separate user
level, which can be accessed by pressing the rotary
controller for one second.
This mode is used for the welding of CoCr or NiCr-alloy
retention pins using the relevant pin welding adapter (ø
1.2, 1.3, 1.5 or 2 mm). See also Chapter 7.3 and 7.4.2.
7.
WELDING INSTRUCTIONS
NOTE!
PRIOR TO WELDING, ALWAYS CHECK THE
FUNCTION OF THE EYE PROTECTION FILTER AS
DESCRIBED IN CHAPTER 5.5 "FILTER TEST". IF THE
EYE PROTECTION FILTER (SHUTTER) FAILS TO
SWITCH OVER FROM LIGHT TO DARK, THEN IT MUST
BE IMMEDIATELY EXCHANGED BY SPECIALIST
PERSONNEL.
7.1 WELDING INSTRUCTIONS
• First connect a metallic blank section of the workpiece
with the contact clamp.
• Lightly touch the area to be welded with the tip of the
electrode until welding begins. In doing so, it is
important to remain in the position where initial contact
is made until welding begins, i.e. neither to follow the
electrode with the workpiece if it retracts slightly in the
handpiece, nor to pull back.
The welding process starts automatically as soon as t
he electrode touches the workpiece:
• Shielding gas flows around the welding area.
• A signal tone (if activated in the settings) notifies of the
arc.
• The welding protection filter is darkened
• The arc is triggered with a slight delay and the
electrode partly withdraws into the handpiece.
• The welding protection filter is lightened and the
electrode returns to the initial position.
• The shielding gas supply stops or the welding process
is started again by touching the workpiece.
WORK ONLY WITH EXTREMELY LIGHT CONTACT AND WITHOUT ANY PRESSURE TO THE TIP OF THE
ELECTRODE!
The PUK D3 is equipped with a function to prevent the electrode becoming welded to the workpiece by incorrectly pressing
too hard. If a welding point has already been set and is pressed too hard to the workpiece when it comes into contact again,
the welding point is not triggered; instead, the eye protection system will be darkened periodically to indicate that the
electrode is pressing too hard against the workpiece. The electrode's contact to the workpiece must be stopped for a short
time and the welding process must be started again.
THE WELDING PROCESS CAN BE HALTED AT ANY TIME BY MEANS OF LIFTING THE ELECTRODE AWAY
FROM THE WORKPIECE.
Page 15

© Lampert Werktechnik GmbH 2
017 14
7.2 WELDING WITH THE SMOOTHING MODE
You can press
the "TIME" scale
on the display
for 2 seconds to
activate or
deactivate
smoothing
mode. The
smoothing mode can only be activated on the start level,
in the expert menu and on the "Custom Programs" level.
Smoothing mode enables a faster welding sequence, e.g.
to smooth surfaces or to weld with an increased heat
transfer (e.g. to reduce the conductivity of silver). If the
user switches to a different user level, smoothing mode
must be reactivated if required.
7.3 RETENTION WELDING INSTRUCTIONS
This mode is used for the welding of CoCr or NiCr-alloy retention pins using the relevant pin welding adapter (Ø 1.2, 1.3, 1.5
or 2 mm).
Please switch off the machine prior to
exchanging the electrodes or the adapter. This
prevents uncontrolled triggering of the welding
process. Remove the electrodes, replace the
clamping nut and chuck with the pin welding adapter.
Work without the clamping nut and nozzle. Then select
the diameter of the adapter being used, by pressing the
respective button on the display of the PUK D3.
Then connect the workpiece to an area of bare metal,
using a contact clamp. Insert a pin of the appropriate
diameter into the pin welding adapter. No shielding gas
flows during the whole process..
The welding process itself proceeds automatically:
• The 1
st
light touch of the workpiece pulls back
t
he pin welding adapter, and a continuous tone
sounds for approx. 3 seconds.
• The 2
nd
light touch triggers the welding process
(during the continuous tone).
A good welded connection is indicated by a clearly
audible welding noise. If the process passes off without
making a noise, then the connection is presumably of
insufficient strength. Blasting or roughening polished
welding points before welding may have a positive effect
on welding behaviour for pin welding.
FOR INFORMATION ON RETENTION WELDING USING THE FOOT SWITCH, SEE ALSO CHAPTER 7.4.2.
7.4 WELDING WITH FOOT SWITCH
With the PUK D3 switched off, connect the foot switch to
the socket (4) marked with the blue foot switch symbol on
the rear of the device. Switch the device on, confirm the
safety prompt by pressing the rotary controller or touching
the screen and wait for the self-test to conclude. The
device is now ready for operation.
THE FOOT SWITCH CAN BE ACTIVATED BY PRESSING AND HOLDING IT (APPROX. 2 SEC.). AN INFO
MESSAGE AND A WHITE SYMBOL APPEAR IN THE DISPLAY.
Connect a metallic blank
se
ction of the workpiece
with the contact clamp.
Now lightly touch the
workpiece with the
electrode. The eye protection system starts to turn
periodically from its light to its dark setting. If the foot
switch is operated in this mode, the welding process will
begin automatically as described in chapter 7.1.
PRESSING AND HOLDING THE FOOT SWITCH (APPROX. 2 SEC.) (WITHOUT TOUCHING A WORKPIECE) CAUSES
IT TO BE DEACTIVATED AND THE WHITE SYMBOL ON THE DISPLAY DISAPPEARS.
7.4.1 FIXATION WELDING
THE BLUE CONNECTION CABLE MAY ONLY BE CONNECTED AFTER THE MODE HAS BEEN ACTIVATED.
AFTER WELDING IS COMPLETE, IT IS VITAL THAT THIS CABLE IS REMOVED AGAIN, BEFORE SWITCHING
TO ANOTHER MODE, IN ORDER TO AVOID FAULTY WELDS!
Page 16

© Lampert Werktechnik GmbH 2
017 15
Connect both of the workpieces which are to be fixed at
an area of bare metal with a contact clamp, one to the
blue one and the other to the black. When the two parts
are touching, the welding process can be triggered, using
the foot switch. The handpiece is not used during
this process. The required welding power is determined
by the strength of the connection desired as well as the
workpiece geometry. The welding time setting is of
secondary importance in this mode, and can only be
varied to a very limited extent.
AFTER WELDING HAS BEEN SUCCESSFULLY COMPLETED, AND BEFORE SWITCHING TO ANOTHER
USER LEVEL, PLEASE REMOVE THE BLUE CONNECTION CABLE!
NOTE: DURING FIXATION WELDING, THE FOOT SWITCH IS ALWAYS ACTIVE, AND CANNOT BE
DEACTIVATED!
7.4.2 RETENTION WELDING WITH THE FOOT SWITCH
Please switch off the machine prior to
exchanging the electrodes or the adapter.
This prevents uncontrolled triggering of the
welding process.
Remove the electrodes, replace the clamping nut and
chuck with the pin welding adapter. Work without the
clamping nut and nozzle. Then select the diameter of the
adapter being used, by pressing the respective button on
the display of the PUK D3. Then connect the workpiece
to an area of bare metal, using a connection terminal.
Insert a pin of the appropriate diameter into the pin
welding adapter.
• The 1
st
light touch of the workpiece pulls back
t
he pin welding adapter.
• With the 2
nd
light touch, the eye protection
system (shutter) in the microscope can be
clearly seen flickering.
Pressing the foot switch at this stage triggers
the welding process.
A good welded connection is indicated by a clearly
audible welding noise. If the process passes off without
making a noise, then the connection is presumably of
insufficient strength. Blasting or roughening polished
welding points before welding may have a positive effect
on welding behaviour for pin welding. No shielding gas
flows during the whole process.
PRESSING AND HOLDING THE FOOT SWITCH (APPROX. 2 SEC.) (WITHOUT TOUCHING A WORKPIECE) CAUSES
IT TO BE DEACTIVATED AND THE BLUE DOT ON THE DISPLAY DISAPPEARS
7.5 BASICS AND TIPS
IMPORTANT!
• Always work with a well sharpened electrode (see point
7
.6 for information about sharpening the electrodes).
• Ensure extremely good contact between the workpiece
and the contact clamp, i.e. make contact between the
workpiece and the connection cable terminal at a point
which is metallically blank.
• Never weld "free hand", i.e. use the hand rests of the
microscope SM5. Shaking hands can cause the
configured parameters to be falsified.
• Apply only light force to the electrode tip.
• Weld with the correct gas flow of approx. 2 litres per
minute and check this regularly.
• With a little experience you will notice that the angle
with which you touch the workpiece with tip of the
electrode affects the "direction of flow" of the welding
point.
• The electrode can easily be clamped in somewhat
longer for welding recessed areas.
• The electrode can easily be clamped in somewhat
longer for welding recessed areas.
7.6 GRINDING THE ELECTRODES
Please switch off the machine prior to exchanging
the electrodes. This prevents uncontrolled
triggering of the welding process.
If possible, the electrodes should be sharpened with a
diamond disk with fine or medium grain.
The recommended angle of grinding is approx. 15°.
See also the video “Electrodes” on
www.youtube.com/LampertWelding.
Page 17

© Lampert Werktechnik GmbH 2
017 16
8.
CARE OF THE SYSTEM COMPONENTS
8.1 CARE OF WELDING DEVICE AND WELDING MICROSCOPE
Your PUK as well as the welding microscope require a
minimum of maintenance under normal working
conditions. However, it is essential that a few points are
observed in order to guarantee the functionality and to
keep the spot welding device fully operational for years to
come.
• Check the mains plug and cable as well as all welding
and connection cables regularly for damage.
• Check that the moving parts of the handpiece move
easily.
• If necessary, clean the electrode threaded assembly on
the handpiece, in order to ensure optimal contact with
the electrodes.
• Clean the device occasionally with a suitable cloth.
• Use the supplied dust cover to cover up the microscope
after use.
IF WORK OR REPAIRS THAT ARE NOT DESCRIBED IN THESE OPERATING INSTRUCTIONS ARE
NECESSARY THEN CONTACT YOUR DEALER.
WARNING!
IF FUSES REQUIRE EXCHANGING, THEN THEY MUST BE REPLACED WITH FUSES OF THE SAME TYPES AND
VALUES. THE GUARANTEE IS VOID IN THE EVENT OF EXCESSIVLY HIGH FUSING!
THE DEVICE MAY ONLY BE OPENED BY A QUALIFIED ELECTRICIAN!
8.2 CARE OF THE OPTICAL COMPONENTS
Do not attempt to disassemble optical components.
Please contact the local technical customer service
department for repairs which are not covered by this
manual.
Remove dust from the lens surface with a special brush
prior to cleaning. You can obtain suitable accessories in
any photography store.
Cleaning the oculars: Do not remove the oculars (17) from
the ocular tubes (15).
Clean the outer surfaces. In doing so, breathe on them.
Subsequently dry the lens with suitable cloth or paper for
the purpose. Dry the lens with circular movements from
the centre to the outside. Do not wipe over a dried l
ens as
they can easily be scratched.
Cleaning and exchanging the protective glass of the eye
protection filter:
Never dismantle the eye protection filter (shutter)!
Only clean the surface. Use a cotton cloth with glass
cleaner.
If the protective glass requires exchanging, slide it
forwards out of the bracket and insert a new protective
glass in the same manner.
Page 18
© Lampert Werktechnik GmbH 2
017 17
9. TECHN
ICAL DATA
9.1 TECHNICAL DATA WELDING DEVICE
Device suitable for welding in dry rooms
Mains voltage
Mains fusing
Power consumption
Closed-circuit voltage
No-load voltage
Duty cycle X
Max. charging time
Shielding gas
Maximum gas pressure
Protection class
Insulation class
Protection type
Weight
~115 V / 50 - 60 Hz +/-10 %
T 6.3 A
400 VA
30 – 43 V
43 V
80 %
0.8 sec.
min. ARGON 99,996 %
4 bar / 58 psi
I
B
IP 21S
7.8 kg
9.2. TECHNICAL DATA MICROSCOPE
Optical eye protection and illumination unit for exclusive
use with PUK fine welding devices.
Use only in dry rooms.
9.3 OPTICAL DATA MICROSCOPE
Lens
Ocular
Working distance
Magnification factor
Field of view
1.0
10 x
140 mm
10 x
20 mm
9.4 TECHNICAL DATA LCD SHUTTER M11 (BL)
Light shade
Dark shade
Switching time
UV protection
IR protection
DIN 3
DIN 11
< 50 msec.
> UV 11
> IR 11
MARKING ON THE LCD SHUTTER: 3/11 LWT 1/1/1/3/379
Protection shade number in open state
Protection shade numbers in closed state
Manufacturer identification code
Optical quality
Light scattering
Homogeneity
Angular dependence
Number of the standard
3
11
LWT
1
1
1
3
379
Notified body for CE testing of the LCD Shutter: DIN CERTCO, Alboinstrasse 56, 12103 Berlin
Operating temperature
Lamp "LED unit"
Protection class
Insulation class
Protection type
Weight
+5 °C bis +40 °C
3 W / 800 mA
III
B
IP 20
3.5 Kg
Page 19
© Lampert Werktechnik GmbH 2
017 18
9.5 TYPE PLATE
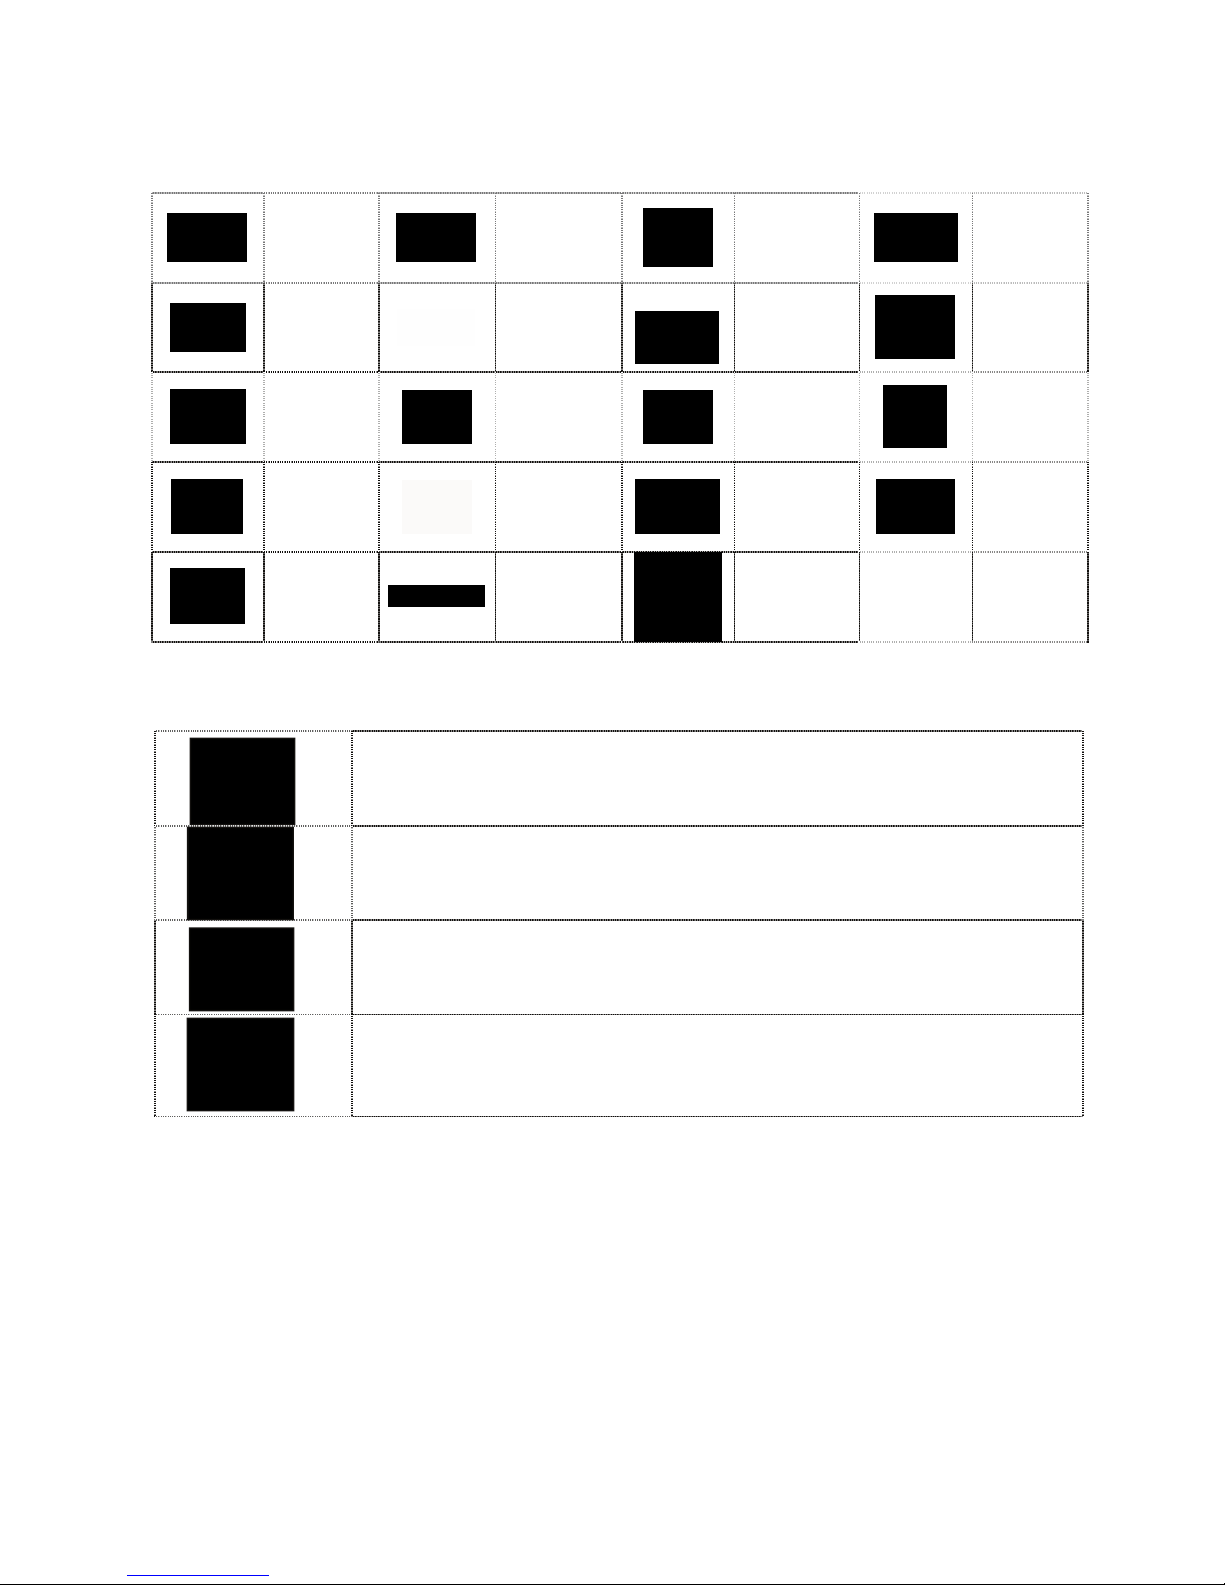
Explanation of pictographs::
Current
Voltage
Protection
type
Hertz
Alternating
current
(AC)
Direct current
1 ~ 50-60Hz
Mains input
1 phase / AC /
50 – 60 Hz
Read
operating
manual
No-load
voltage
Mains voltage
Voltage at
nominal load
Tungsten
inert gas
welding
Earthing
Nominal
welding
current
Power
consumption
under max.
load
Power
consumption
under
nominal load
Cyclic
duration
factor
Single-phase
transformer
Keep away
from water
9.6 WARNING NOTICES:
Breathing welding fumes and gases can be hazardous to your health.
Welding sparks, hot workpiece, and hot equipment can cause fires and burns.
Arc rays from the welding process can burn eyes and skin.
Electro-magnetic fields can affect pacemakers.
Page 20
© Lampert Werktechnik GmbH 2
017 19
10.
TROUBLESHOOTING
10.1 WELDING DEVICE
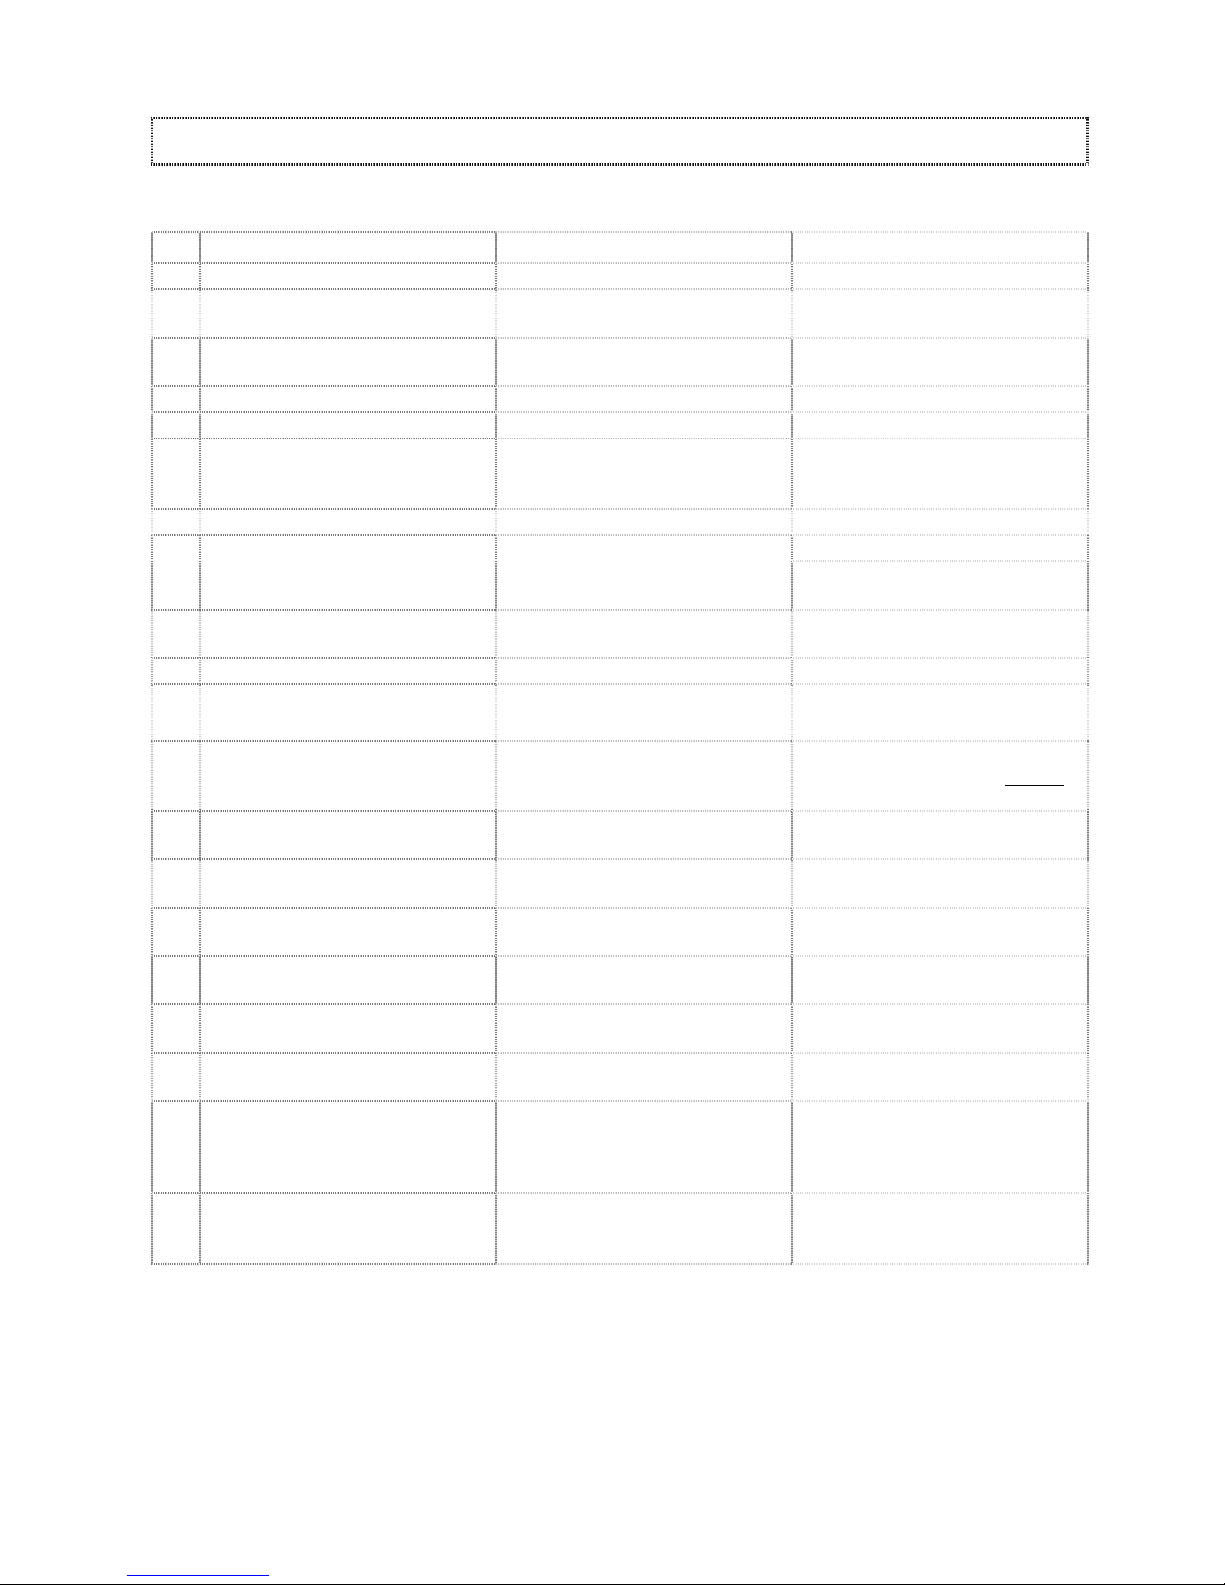
FAULT CAUSE REMEDY
1 No welding current
Mains master switch on,
display remains off
Mains cable interrupted Check mains cable and mains voltage
Device fuse blown Replace device fuse with identical
fuse (same type and value)
2 No welding current
Mains master switch on Welding cable connections interrupted Check plugged connections
Poor or zero contact to the workpiece Establish connection to the workpiece,
fasten contact clamps directly to the
workpiece
3 No welding current
Mains master switch on
Fault due to leakage current Switch device off and back on again
If fault reoccurs,
arrange for servicing of device
4 Mains fuse blows or automatic
circuit breaker trips
Mains insufficiently fused or incorrect
automatic circuit breaker
Fuse mains properly
Mains protection trips during idling Arrange for servicing of device
5 Poor welding characteristics
Incorrect shielding gas Use inert shielding gas (Argon 4.6)
6 Poor ignition characteristics
Electrode clamped loosely in
handpiece
Tighten the clamping nut in the
handpiece (chap.11, no.38) by hand,
however, tighten firmly.
7 Oxidation and rusting
Excessive gas pressure Reduce flow rate - approx. 2 l/min is
recommended
8 Severe oxidation of the welding
points
Incorrect shielding gas Use inert shielding gas (Argon 4.6)
9 Tungsten inclusions in base
material
Excessive pressure of the electrodes
on the workpiece
Touch workpiece with extremely light
pressure.
10 Tungsten electrode welds to
workpiece
Excessive pressure of the electrodes
on the workpiece
Touch workpiece with extremely light
pressure.
11 Tungsten electrode melts off
immediately
Electrode sharpened too steeply Use the recommended angle of
grinding (approx. 15°)
12 Static discharge over the surface of
the device
Special local conditions Use special foot mat for the
workspace
13 Welding power is not released; the
welding process starts, but a weld
spot is not produced.
The internal protective circuit has
triggered. -> avoid “electrostatic
discharges” against the handpiece or
housing.
Switch device off and on again.
14 Device begins to weld immediately
when touching the workpiece (no
gas pre-flow)
Fault Immediately shut down the device,
arrange for servicing.
Page 21
© Lampert Werktechnik GmbH 2
017 20
10.2 MICROSCOPE
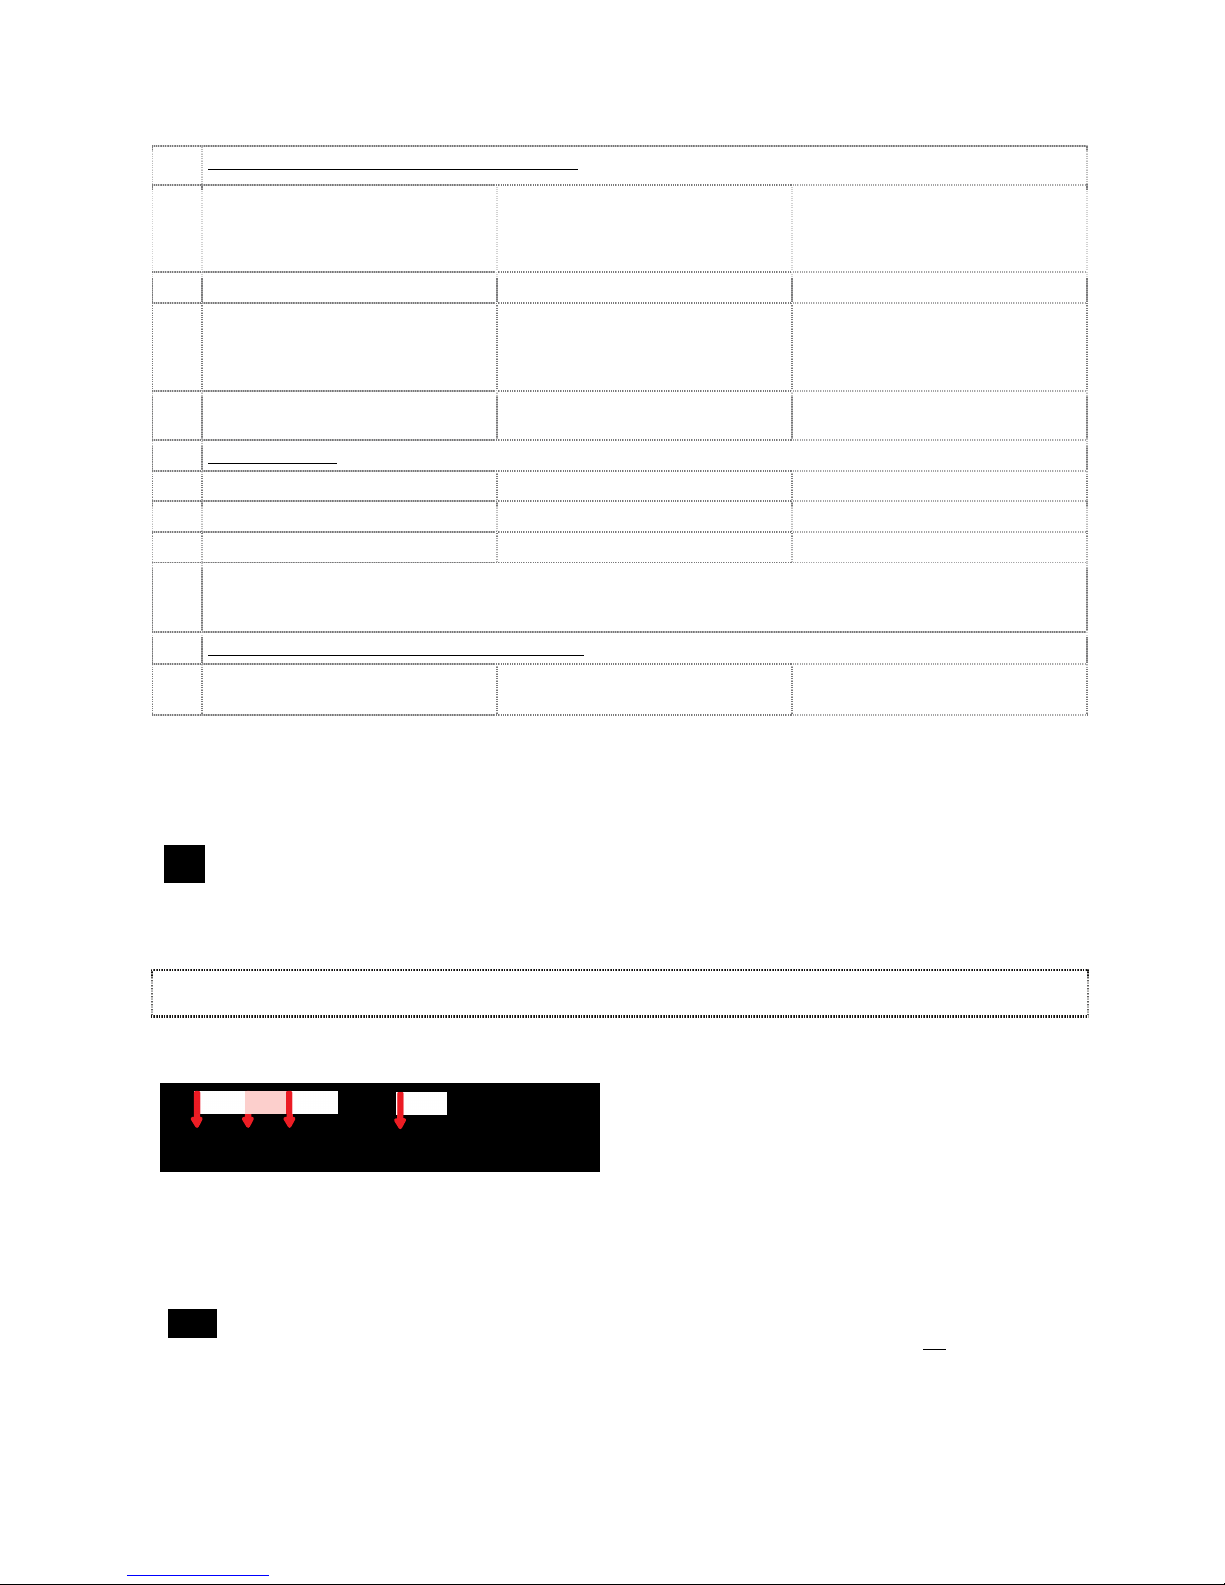
PROBLEMS WITH ELECTRICAL COMPONENTS
A The LED illumination fails to
operate
Cable not connected. Connect the plug to the connecting
socket (3) marked with the red and
yellow eye protection and illumination
symbol on the PUK.
LED faulty Contact authorized customer service
B Eye protection system (shutter)
fails to operate
Cable connected incorrectly Connect the plug to the connecting
socket (3) marked with the red and
yellow eye protection and illumination
symbol on the PUK.
Eye protection filter faulty Arrange to have eye protection unit
replaced by qualified personnel
IMAGE QUALITY
D Poor
resolution
Oculars dirty. Clean oculars.
E Marks or soiling in field of vision
Oculars dirty. Clean oculars.
Protective glass dirty Clean or exchange protective glass
* Note: Marks in the field of vision can also be caused by soiling in the interior of the oculars. For this reason, it is
recommended to have the lenses cleaned by an authorised customer service engineer
PROBLEMS WITH MECHANICAL COMPONENTS
F Focus is not retained
The sight slides down Readjust the tension of the focusing
knob
REPAIR
If the PUK D3 or the stereo microscope should require a
repair or adjustment by qualified personnel, we always
recommend to first contact your dealer or an authorized
customer service.
WARNING: THE DEVICE MAY ONLY BE OPENED BY A QUALIFIED ENGINEER!
11.
SPARE PARTS LIST
, SEE ALSO www.lampert.info
Handpiece
(37) Nozzle (Ø 3 mm)
(38) Clamping nut
(39) Chuck Ø 0.5/0.6 – 0.8 mm
(40) Handpiece complete
Gas hose:
6 x 4 mm, sold by the metre
100 150K
100 152
100 15x
100 100 04
100 153
PLEASE NOTE!
Nozzle (37), clamping nut (38), electrodes and clamping tongs (39) are wearing parts and are not covered by the
guarantee.
40
38 39 37
Page 22
© Lampert Werktechnik GmbH 2
017 21
12.
DISPOSAL
INFORMATION:
Render discarded devices unusable by
removing the mains cable.
Only for EU countries: In accordance with EU
directive 2012/19/EU regarding the disposal of
used electrical and electronic equipment, discarded
electrical devices must be separated and collected and
sent for recovery in an environmentally friendly manner.
13. EC-
DECLARATION OF CONFORMITY
Please find enclosed to this shipment the separate document – Declaration of Conformity.
Text and illustrations represent the technical status at the time of printing. Subject to change.
Rev.1.0
Page 23

© Lampert Werktechnik GmbH 2
017 22
W
ORKSHOP NEWS
You are interested in the possibilities of use of our fine-welding devices? Or you are searching for one or another tip on
working with your PUK? Then just sign up for our newsletter on www.lampert.info!
VISIT OUR SHOWROOM!
Our video library is showing many applications from everyday goldsmith activities, our photo gallery various examples of
use. Get inspired on www.lampert.info!
Page 24

Born in Germany.
Lampert Werktechnik GmbH
• Ettlebener Straße 27 • D-97440 Werneck • Tel. +49.9722.9459-0 • [email protected] • www.lampert.info
Rev. 1.0
 Loading...