

LaMotte DO 6 PLUS Instructions Manual
99 Washington Street
Melrose, MA 02176
Phone 781-665-1400
Toll Free 1-800-517-8431
Visit us at www.TestEquipmentDepot.com
Code 5-0107-01
1

PREFACE
This manual serves to explain the use of the DO 6 PLUS hand held
meter.
This manual functions in two ways: f rst as a step by step guide to
operating the meter; second, as a handy reference guide.
This manual is written to cover as many anticipated applications of the
DO 6 PLUS meter as possible. If there are questions about the use of this
meter contact the LaMotte Tech Service Department.
LaMotte Company will not accept any responsibility for damage or
malfunction to the meter caused by improper use of the instrument.
The information presented in this manual is subject to change without
notice as improvements are made, and does not represent a commitment
on the part of LaMotte Company.
WARNING! This set contains chemicals that
may be harmful if misused. Read cautions on
individual containers carefully. Not to be used by
children except under adult supervision.
2

TABLE OF CONTENTS
1. INTRODUCTION 5
2. GETTING STARTED 6
2.1 Description of Keypad Functions 6
2.2 Description of LCD Annunciators 7
2.3 Inserting & removing the Rubber Boot/Stand 7
2.4 Inserting New Batteries 8
2.5 Battery Replacement 8
2.6 Connecting the Probe 9
2.7 Electrode Information 10
2.8 Switching the Meter On 11
2.9 Changing Mode 11
3. CALIBRATION 12
3.1 General Information 12
3.2 Temperature Calibration 13
3.3 % Saturation Calibration 14
3.3.1 100% Calibration 14
3.3.2 0% Calibration 15
3.4 mg/L or ppm Calibration 16
4. MEASUREMENT 17
4.1 Temperature Compensation 17
4.2 Taking Measurements 18
4.3 Pressure & Salinity Compensated Measurements 18
4.4 Holding a Reading 19
5. SETUP 19
5.1 Conf guration Menu (COF.1) 23
5.2 Automatic Temperature Compensation (A.ATC) 23
5.3 Selection of mg/L or ppm (b.DO) 24
5.4 Calibration Data (CAL.2) 24
5.5 Electrode Data (ELE.3) 25
5.6 Automatic Shut Off (AtO.4) 26
5.7 Reset to Factory Default (rSt.5) 26
5.8 % Saturation Offset Adjustment (OFS.6) 27
5.9 Pressure & Salinity Adjustment 29
6. PROBE MAINTENANCE 30
6.1 Cap and Electrolyte Replacement 31
6.2 Electrolyte Solution 32
7. TROUBLESHOOTING 32
8. ERROR MESSAGES 33
9. FACTORY DEFAULT SETTINGS 34
10. SPECIFICATIONS 35
3

11. REPLACEMENT PARTS AND ACCESSORIES 36
12. DISSOLVED OXYGEN THEORY 37
Measurement Units 37
What Is Being Measured? 37
Air Calibration 38
Applications 38
13. WARRANTY 39
14. REPAIRS 40
4

1. INTRODUCTION
The DO 6 PLUS microprocessor-based handheld meter is economical
and easy to use. It has a large custom LCD (Liquid Crystal Display) for
clear and easy reading.
The DO 6 PLUS offers measurement of dissolved oxygen (DO) as
percentage saturation or concentration. Temperature measurement is
available in degrees Celsius. The meter ensures accurate measurement
of the dissolved oxygen values through the temperature, barometric
pressure and salinity compensation features.
Meter kits include a dissolved oxygen probe, ref ll solution, a rubber
boot/stand, 4 alkaline “AAA” batteries and instruction manual. For
additional information, see Section 11 — Replacement Parts and
Accessories.
Read this manual thoroughly before operating the meter.
5
2. GETTING STARTED
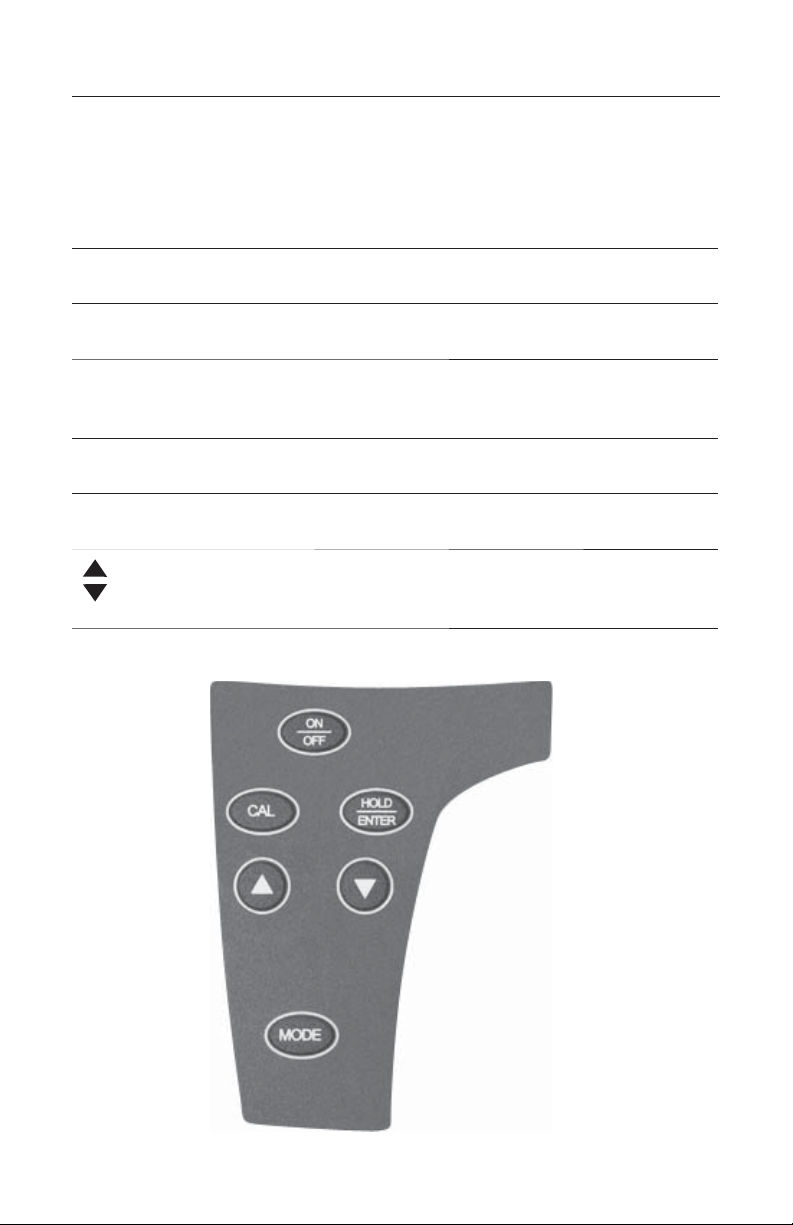
2.1 Description of Keypad Functions
The meter has 6 keys on a splash-proof keypad. Some buttons have
multiple functions depending on the mode of operation.
ON/OFF
CAL
MODE
HOLD
ENTER
Powers meter on and off. Meter starts up in the
measurement mode that was last used.
Enters into calibration mode. Pressing while in calibration
mode will abort calibration without conf rming value.
Selects desired measurement mode. When pressed
simultaneously with ON/OFF, it will go to the SETUP
mode.
Freezes measured reading. Press again to resume live
reading.
Conf rms calibration value in calibration mode and
conf rm selections in SETUP mode.
Increments/decrements values during calibration mode or
scroll through SETUP menus. Set offset adjustments and
conf guration settings.
6
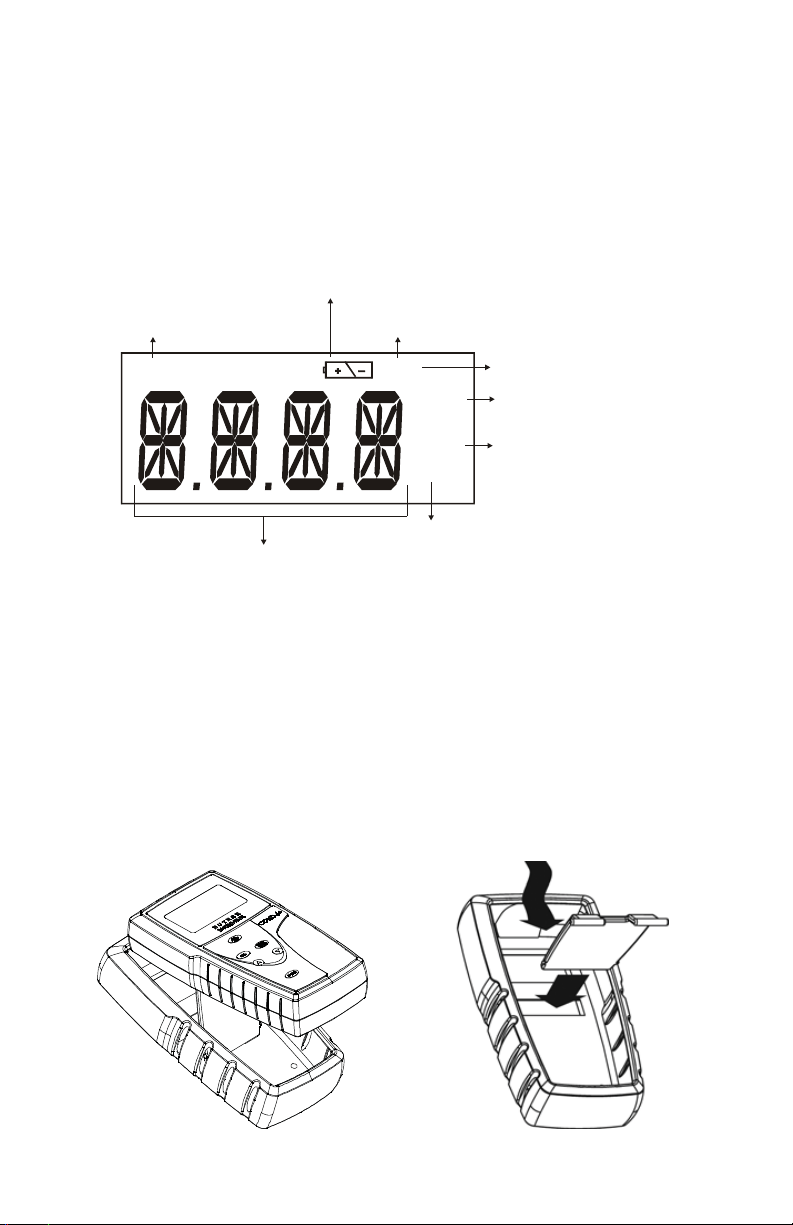
2.2 Description of LCD Annunciators
The meter has a large custom LCD that consists of 4-digit segments plus
annunciators for percentage saturation (%), concentration (mg/L or ppm)
and Temperature in degrees Celsius (T).
Other annunciators include “A” (when the ATC function is activated),
“CAL” (when meter is in calibration mode) and low battery condition.
Calibration Mode
Annunciator
CAL
Low Battery annunciator
Temperature Mode
TA
mg/l
ppm
A T C annunciator
milligram per litre
(Concentration Mode)
parts per million
%
Percentage
14-segment Liquid Crystal Display
(Percentage Saturation
Mode)
2.3 Inserting & Removing the Rubber Boot/Stand
1. To remove the meter from the rubber boot, push out the bottom
edge of the meter until it is completely out of the boot. Ensure
that the probe cables are not connected. See Figure 1.
2. To insert the meter into the rubber boot, slide in the top of the
meter before pushing the bottom edge of the meter down to set it
into position. Lift up the stand at the back of the meter for bench
top applications. See Figure 2.
Figure 1 Figure 2
7
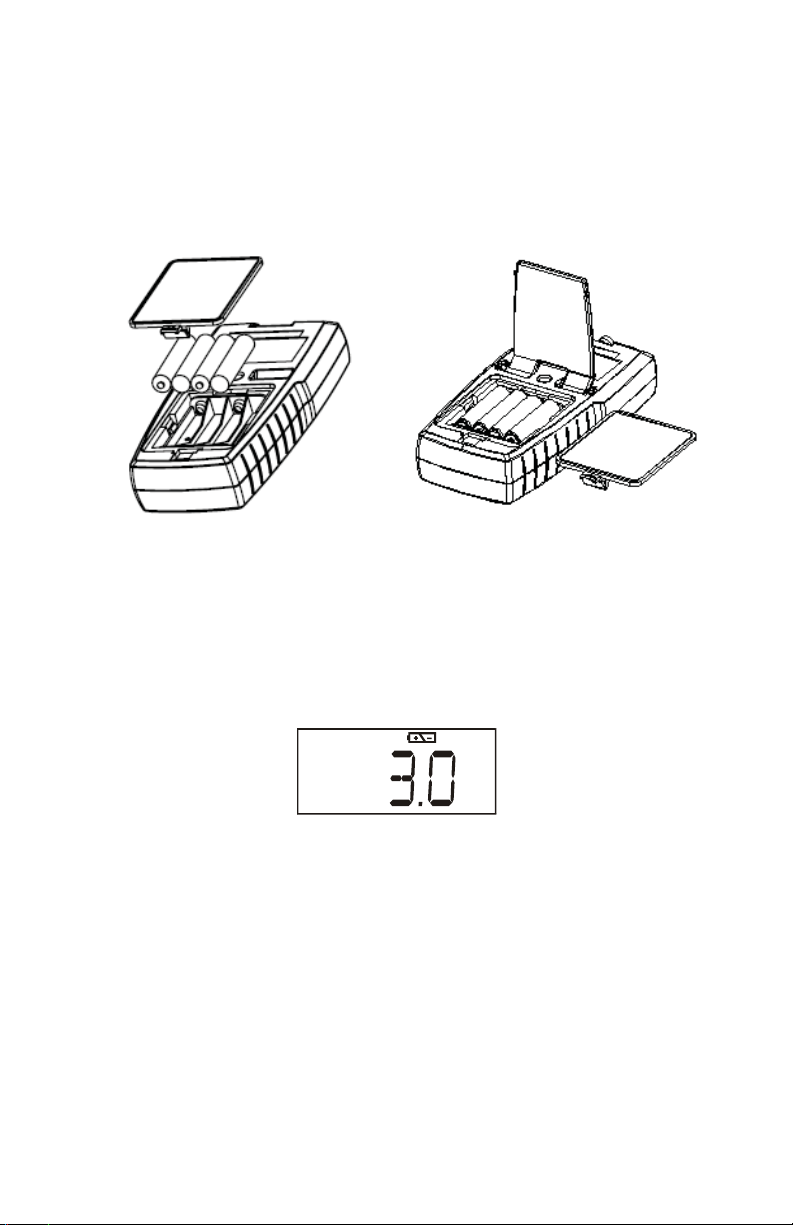
2.4 Inserting New Batteries
The battery compartment is found at the back of the instrument. To open
the battery compartment, push the cover in the direction of the arrow and
lift up. Note the polarity of batteries before inserting them into position.
After the batteries have been replaced, reposition the cover and press
down until it locks.
2.5 Battery Replacement
A low battery annunciator on the LCD alerts when the battery power is
running low. Caution: Power off the meter before replacing the batteries.
%
Low Battery Condition
8
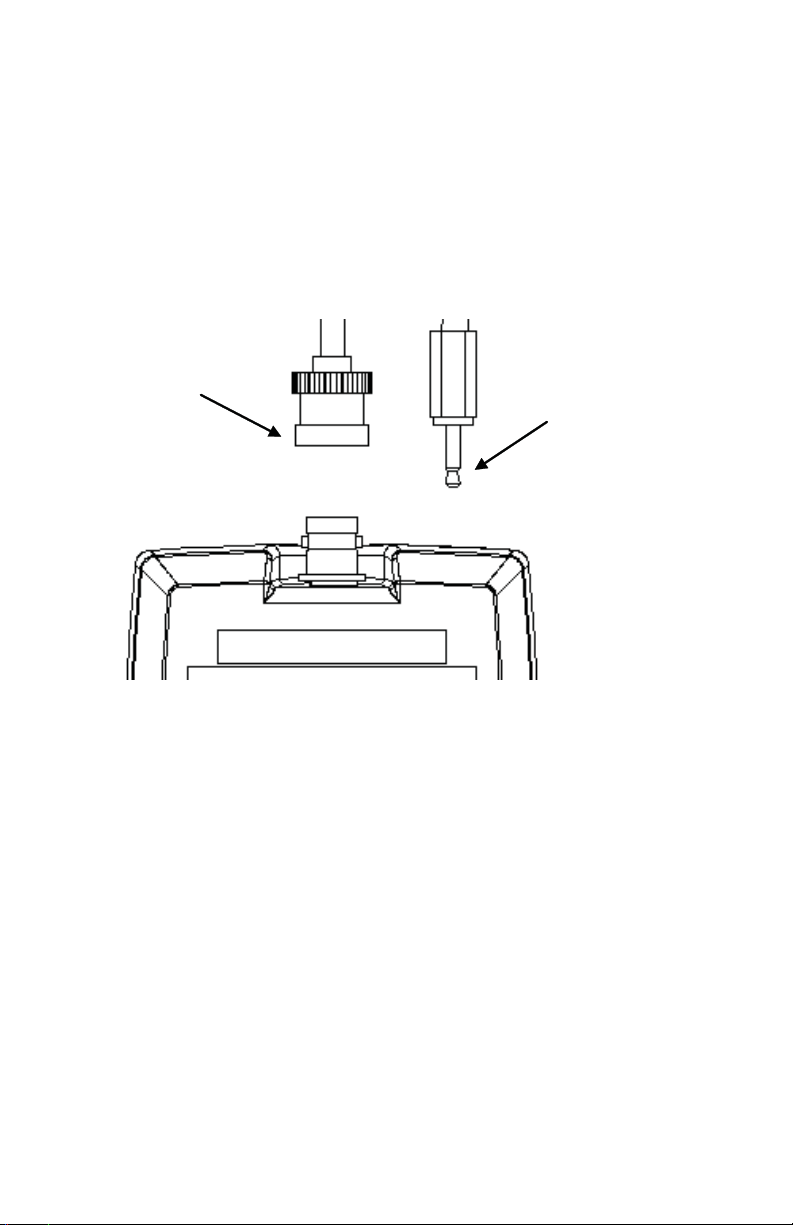
2.6 Connecting the Probe
1. To connect the probe, align the connector slots with the posts of
the meter socket and rotate the connector clockwise until it locks.
2. To remove the probe, rotate the connector in an anti-clockwise
direction until it unlocks, and slide the connector off the socket.
3. Insert the mini phono jack of the temperature sensor into the
socket on the meter as shown below.
BNC connector
for DO probe
2.5 mm mini phono
jack for
temperature sensor
9

2.7 Electrode Information
The DO 6 PLUS includes a galvanic DO electrode
which does not require warm-up. It generates
a millivolt signal proportional to the amount of
oxygen in the solution.
The probe has a dual cable; a BNC connector
for DO measurement and a phono jack plug
for temperature. The sensor utilizes a cathode,
anode, and electrolyte that are separated from
the sample by an oxygen permeable membrane.
The membrane is pre-assembled and f xed to a
detachable cap. The pre-assembled cap design
allows simple replacement and fast conditioning.
12 mm
The probe is lightweight and includes a built-in
temperature sensor. The epoxy body of the probe
is 12mm in diameter while the detachable Noryl
cap is 16mm in diameter. The compact sensing
Detachable
Pre-membraned Cap
(Probe Sensing Area)
area reduces air entrapment resulting in quick,
accurate, and stable readings.
The pre-assembled cap must be completely
submersed in the solution to obtain an accurate
reading. Provide simple stirring for best results—
16 mm
ideally achieve a minimum water f ow rate of 2 inch/second on the
membrane. The probe is not recommended for use in samples outside of
the range of 0 to 50 °C.
Shaking the probe will aid in removing bubbles, if needed, before taking
a reading. When calibrating in air, shake to remove water from the
membrane.
The membrane is thin and can not be repaired if it is damaged. Use care
to protect from scratches, abrasions, or contact with solids. For best
results keep the membrane clean by rinsing it after daily use. See Section
6 – Probe Maintenance.
10
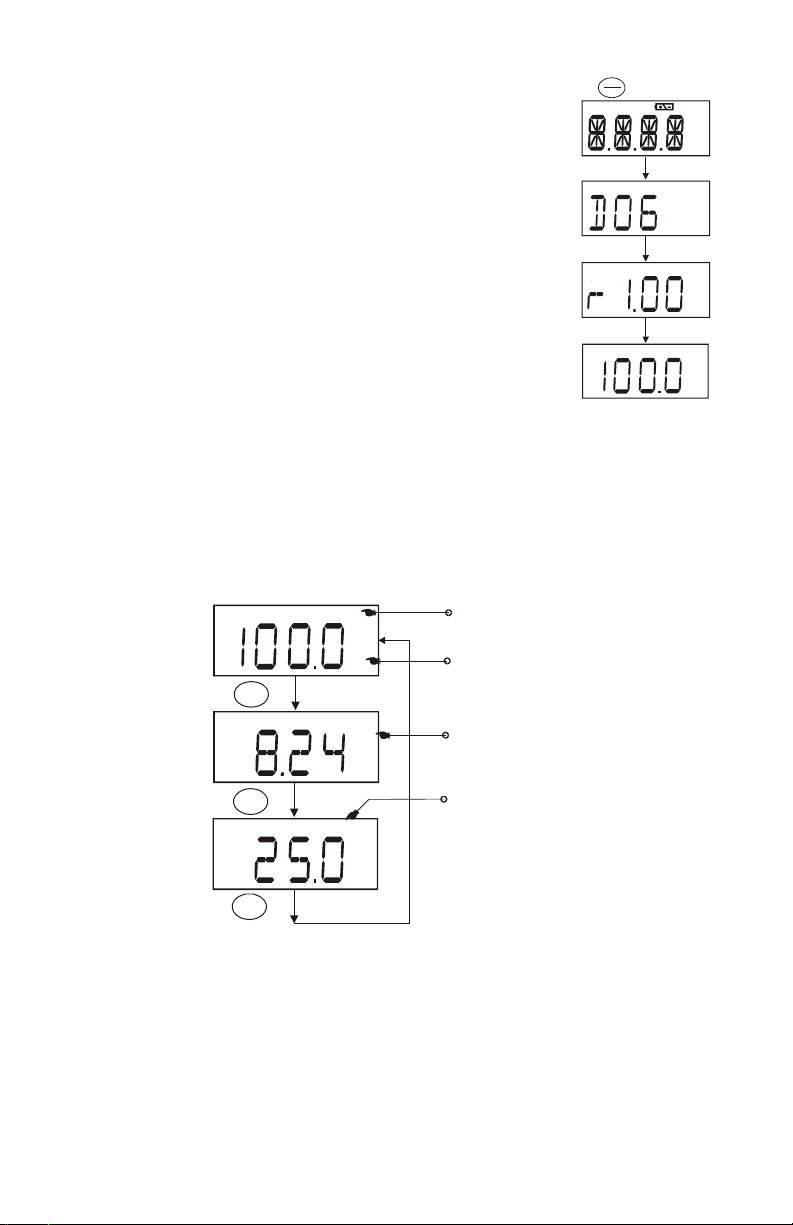
2.8 Switching the Meter On
Press ON/OFF to power up the meter. The meter will
cycle through various setup parameters.
ON
OFF
CAL 13 CAL 24
TAvg
mg/l
NTU
ppm
%pH
1. All LCD segments will brief y illuminate.
2. The model name [DO 6] will display next along
mg/l
ppm
%
with mg/l, ppm, and % annunciators.
3. Next, the meter revision number [r #.##] is
shown brief y before beginning measurement.
4. The meter will be in the measurement mode
A
that was in use when it was powered off—%,
mg/l, ppm, or T.
%
2.9 Changing the Mode
Press MODE to switch between percentage saturation (%), concentration
(mg/L)(ppm), and temperature (T) measurement.
MODE
A
A
%
mg/l
Automatic Temperature
Compensation
Percentage Saturatio n
Concentration Mode
MODE
MODE
TA
Temperature Mode
11
3. CALIBRATION
3.1 General Information
The DO 6 PLUS has three measurement modes; DO as % saturation, DO
as mg/L (or ppm) concentration, and temperature.
Dissolved oxygen levels vary with temperature, barometric pressure, and
salinity, so the calibration must be performed with consideration of these
factors. It is necessary to set the proper temperature, barometric
pressure and salinity values prior to performing any DO calibration
or measurement.
See Section 3.2 — Temperature Calibration
See Section 5.2 — Automatic Temperature Compensation
See Section 5.9 — Pressure & Salinity Adjustment
The DO 6 PLUS will accept two % saturation calibration points; 100%
using saturated air or air-saturated water, and 0% using a zero oxygen
solution. When the 100% calibration is performed, the corresponding
concentration is adjusted simultaneously. Therefore, it is not necessary
to calibrate the concentration mode. If calibrating for 0% oxygen, note
that the meter will take several minutes to reach 0% saturation value and
constant stirring is not required.
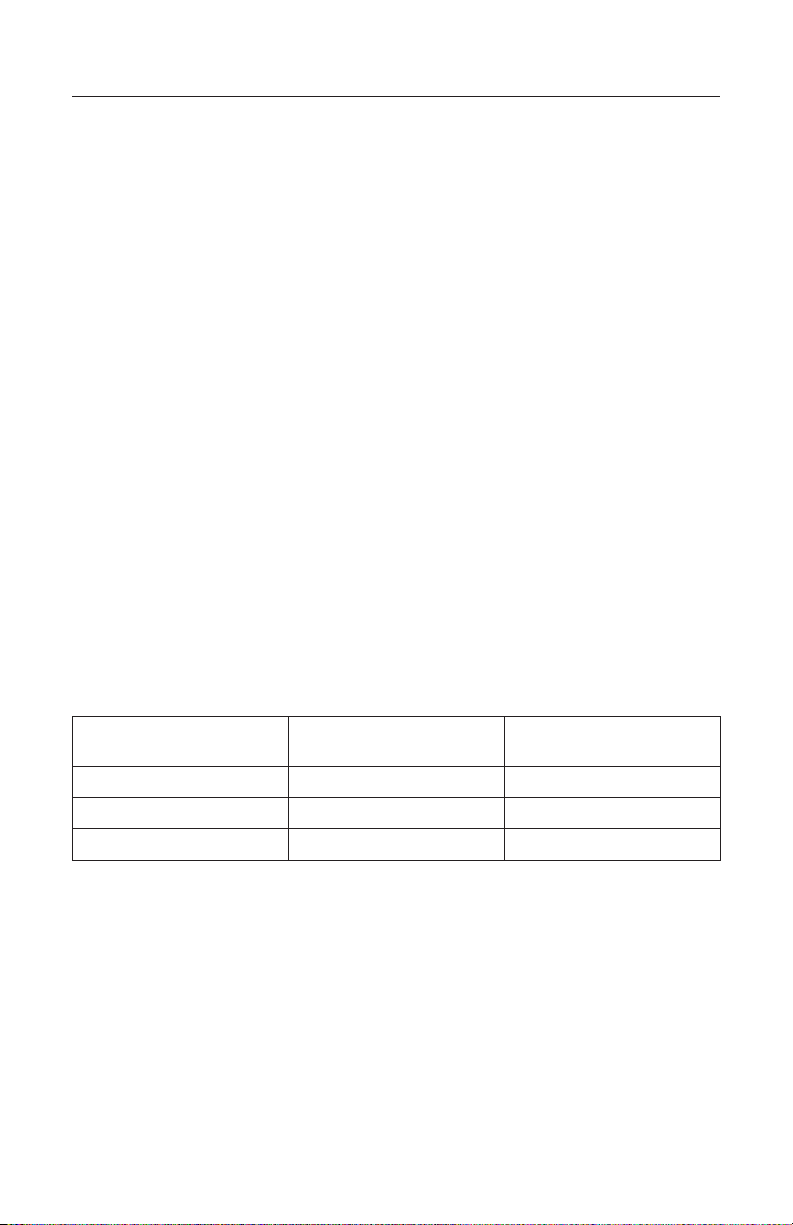
The following table lists calibration values in % saturation calibration
mode with two different barometric pressures. Note that the saturation
value (92.1%) has decreased due to the lower barometric pressure
entered.
% Saturation (per
factory default value)
Calibration Value
(760mmHg)
Calibration Value
(700mmHg)
less than 10% 0% 0%
10.1% to 49.9% Err.1 (error 1) Err.1 (error 1)
50% to 200% 100% 92.1%
If calibration is attempted from 10.1% to 49.9%, the “Err.1” message will
be shown. The calibration will be rejected and the display will return to
the measurement mode.
The DO 6 PLUS will accept one calibration point in concentration mode.
The minimum value is 2 mg/L (ppm), and the calibration window is
±40% of the factory default value.
Temperature and % saturation calibration should take place before
attempting to perform mg/L (ppm) concentration calibration.
Calibration of the concentration mode will only replace the previous
concentration calibration and does not affect the % saturation calibration.
12
 Loading...