

Page 1

B=C@
Page 2

DETAILS:
Bucket 1 pc Mop plate 1 pc
Handle 1 set Mop head 2 pcs
Flat mop 1 pc
Spinning
basket
Water
Shield
Bucket
MOP HEAD
A
B
C
D
E
Handle grip
Stainless steel shaft
Lock
Plastics nut
Mop plate
EN PHOTOS INSTRUCTION
Page 3
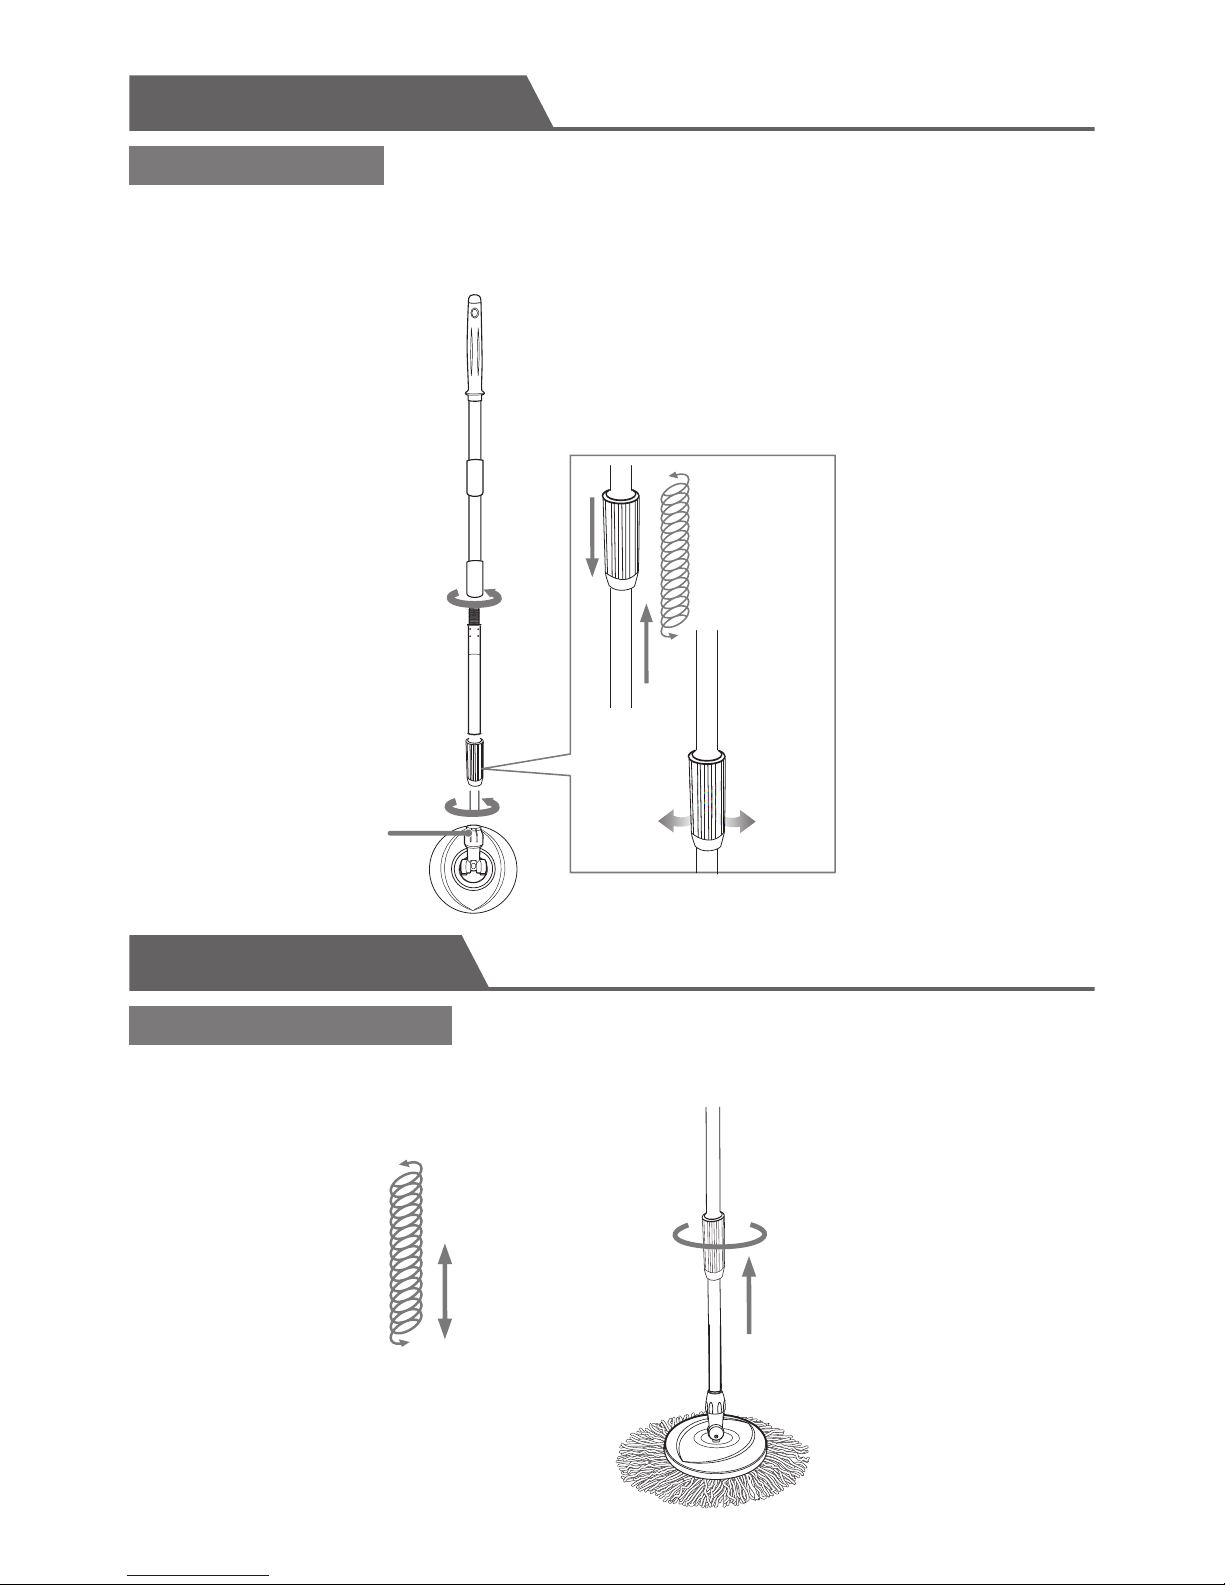
POLE ASSEMBLING
Before using, kindly conrm the parts and assemble thight when assembling.
Please note the direction of the connection as shown
Bottom
Hand press
Telescopic handle
POLE ASSEMBLING
MOP HEAD ASSEMBLING
OPEN LOCK
STEPS TO NOTE
Page 4
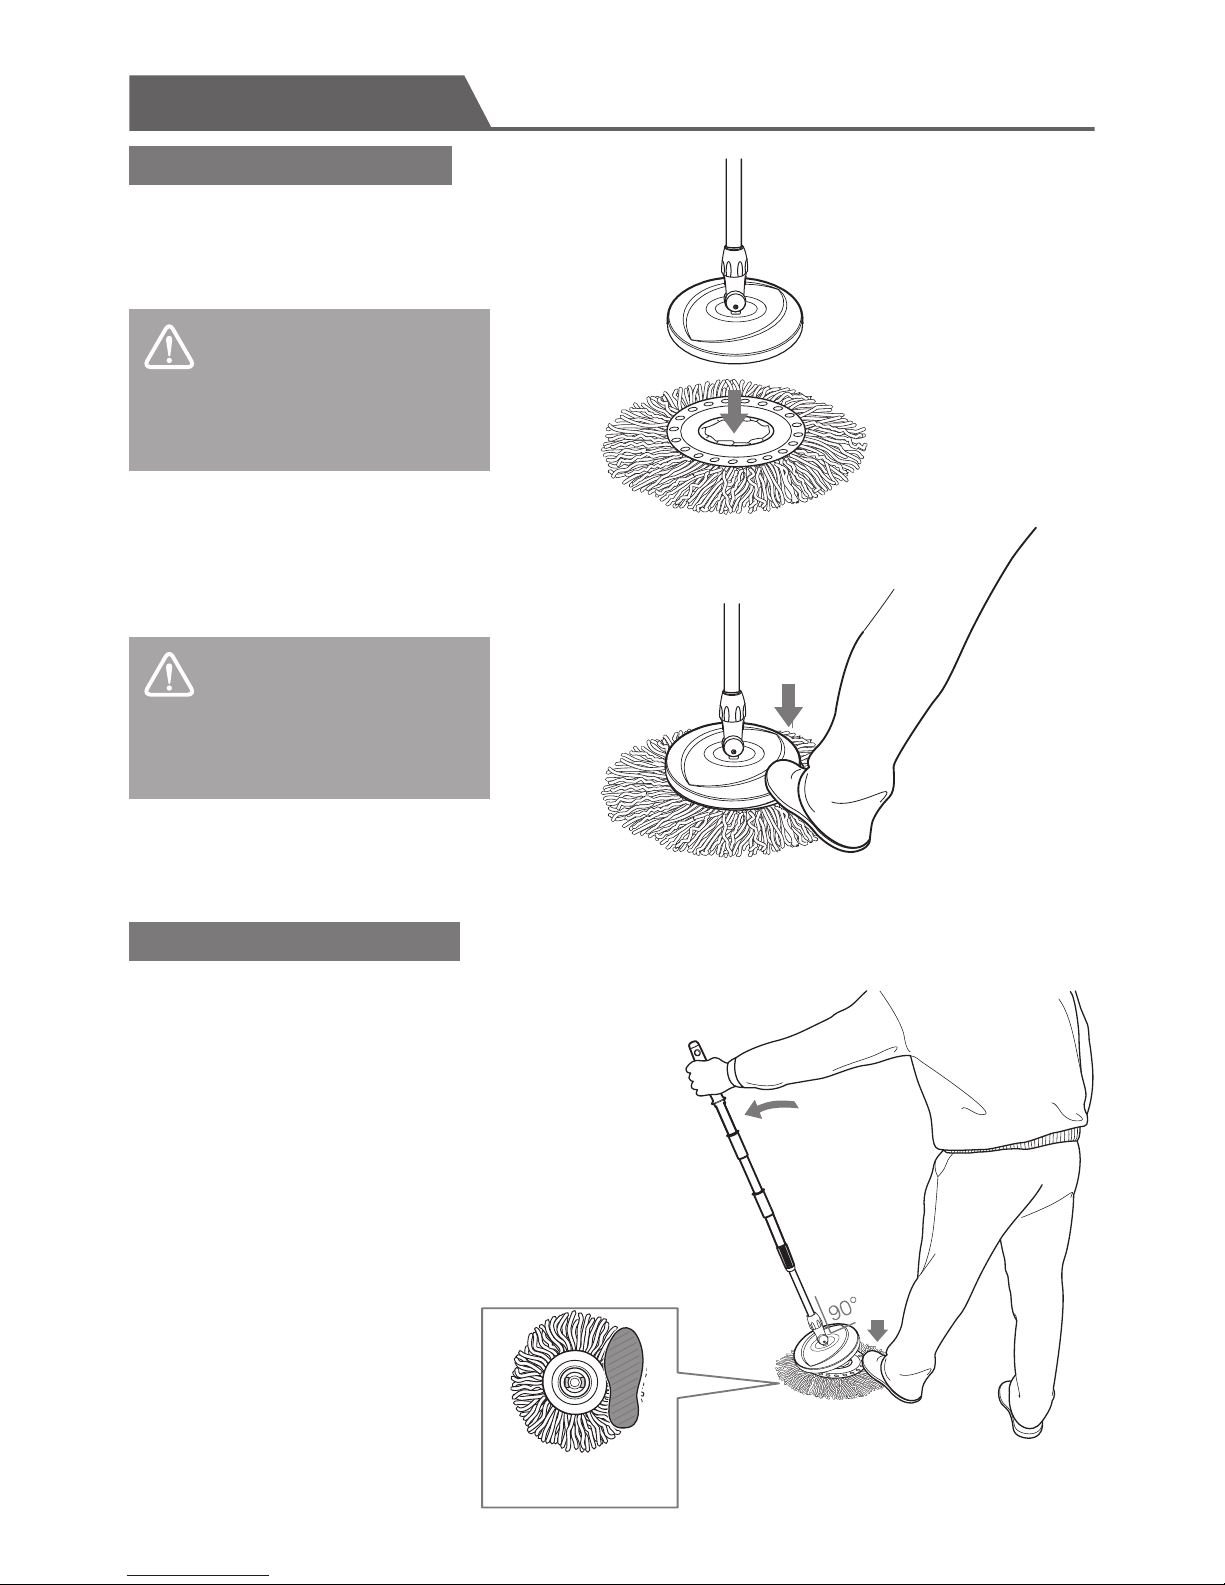
Put the plastic plate directly
on the plastic disk of mop head.
To remove the mop head, put your
foot on the side of the rell and push
the handle to the opposite direction.
When faced, please put your
foot on the plate to step tightly.
WARNING:
WARNING:
Please pay attention on the
oor to avoid from sliping.
Please stop stepping when
you hear the „KA“ sound.
Foot direction
MOP HEAD ASSEMBLING
CHANGE THE MOP REFILL
STEPS TO NOTE
Page 5

BUCKET ASSEMBLY
SPARE PARTS FOR BUCKET AS BELOW:
ASSEMBLY AS FLOW STEPS:
1. Fill the water to the bucket, not exceed the max water level.
2. Put the mop plate on the axis of spinning basket and push
down until hear Click sound.
3. Pull up the mop stick with the spinning basket then put it
down to the bottom of bucket.
4. Push the handle swivel to wash the mop head.
WARNING:
DON’T PUT TOO MUCH WATER,
OTHERSIE YOU WILL FEEL SO
HARD TO PUSH THE HANDLE.
Water shiled
Water level
Spinning basket Bucket
Plastic block
THE WAY TO WASH THE MOP HEAD
Page 6
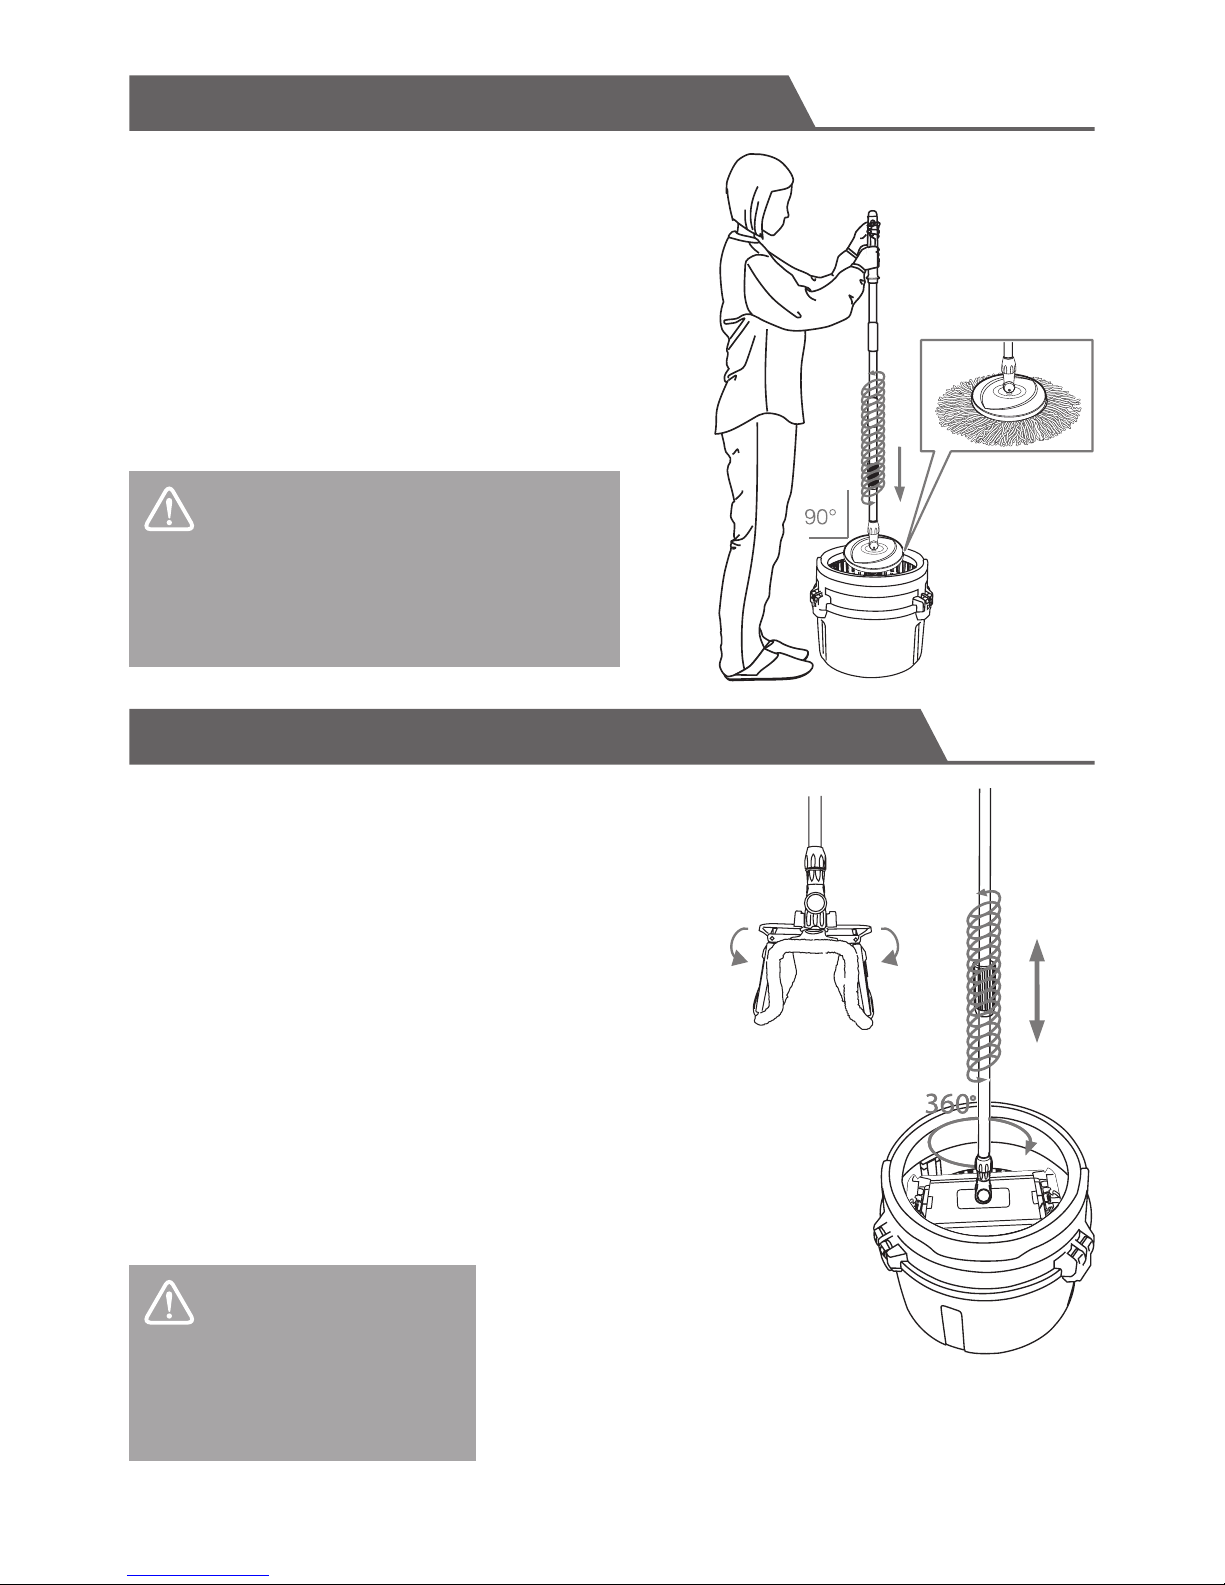
THE WAY TO WASH THE MOP HEAD
1. Put the mop plate on the axis of spinning basket
and push down until hear Click sound.
2. Pull up the mop sticker with the spinning basket
to the upper position of the bucket.
3. Put stright the mop stick then push the handle
swivel for drying.
4. When nish drying, while the mop is still spinning,
slightly inlcine the mop head and remove it fast
from the basket.
1. Put the at rell on the at mop pad before
assembling on the mop stick.
2. Put the at mop pad on the axis of spinning
basket and push down under hear Click sound.
3. Put stright the mop stick, put it down to the
bottom position for wash and pull it up to the
upper position for dry.
4. When nish drying, while the mop is still spinning,
slightly inlcine the mop head and remove it fast
from the basket.
5. Incline the mop stick, the at mop pad will be
opened automatically.
6. When you put the stick strightly, the at mop pad
will be folded back for washing.
WARNING:
WARNING:
BEFORE SPINNING, PLEASE MAKE SURE
PUT ALL REFINGES INSIDE OF THE BUCKET
TO AVOID FROM DIRTY YOUR PANTS.
DON’T FOLD THE FLAT MOP
PAD FORCED BY YOUR
HANDS.
THE SAME WAY USED WITH THE FLAT MOP
 Loading...