

Lakeside Foodservice E917 Installation Manual
INSTRUCTIONS
For Models
E917, E927, E937
TM
EXPRESS HEAT
MOBILE HEATED
self-leveling
DISPENSER
Adjust-A-Fit®
OPERATION
CAUTION: The Express Heat Plate Warmer/Dispenser is
designed for back-of-the-house operation to produce very hot
plates. It is not designed for heating/dispensing in public
areas. Avoid touching the top cabinet surface during
operation. Care must also be taken when handling hot plates.
The Express Heat features a blower to heat plates faster and more
evenly. The unit’s blower turns on when the cabinet’s power
cord is plugged into a live electrical outlet. The blower cannot be
turned o (and will not go ‘o’) while the unit is plugged in.
To turn the heating element on and heat dishes, depress the
On/O button located on the top of the cabinet between the
dispensers. The indicator light will illuminate when the heating
element is powered up in the ‘on’ position (see reverse side).
Round stainless steel dish covers are provided to retain heat and
allow the unit to heat plates more eciently. Place the covers over
the dispensers while plates are heating after the heating element
is turned on.
DIAMETER ADJUSTMENT
a. With the top cap in place, position a dish on center of the the
dish carriage.
b. Pull up on one of the three guides so that the peg on the
base of the guide lifts out of the small hole on the base of
the dispenser.
c. Adjust the guide in toward the dish so that it nearly touches
the dish, and allow it to drop so that the peg goes into a hole
on the base.
d. Repeat step c. for the other two dish guides. Guides should be
close, but not touching the dish.
DISPENSING HEIGHT ADJUSTMENT
Dish diameter and weight determine how many springs should
support your dishes. To insure smooth operation, use an equal
number of springs on both sides of the dispenser. Always
unhook lower end of springs only. Leave unused springs hang by
top hook for future use. Use the following chart as a guide to deter-
mine approximately how many springs to use.
Dish Size Springs Required
5¾” to 6½” Diameter 3 to 7
6¾” to 7¼” Diameter 7 to 9
7½” to 8” Diameter 9 to 11
8¼” to 9” Diameter 10 to 13
9¼” to 10” Diameter 12 to 16
10¼ to 12¼ Diameter 16 to 22
(Continued)
HEIGHT ADJUSTMENT (continued)
a. Place six to ten dishes into the unit directly on
top cap.
b. If the dishes are above the top of the dish
guides, one or more of the springs must be
unhooked. Remove the dishes, lift the dispenser
mechanism (with springs) out of the cabinet
high enough for access to the bottom of
the springs, or lift the dispenser out and place
on oor.
c. Unhook one or more springs from the bottom.
Leave the spring hang for future use. Replace
the six dishes. Repeat this operation if the
dishes are still too high. Place dispenser back
into cabinet.
d. If the dish height is too low, remove all the
dishes. Lift the dispenser out of the cabinet
high enough for access to the bottom of the
springs. Hook one or more loose springs into
position. Extra springs are attached unhooked
for this purpose. Replace the dishes. Repeat this
operation if the dish height is still too low.
e. Repeat the above operations with more and
with less dishes.
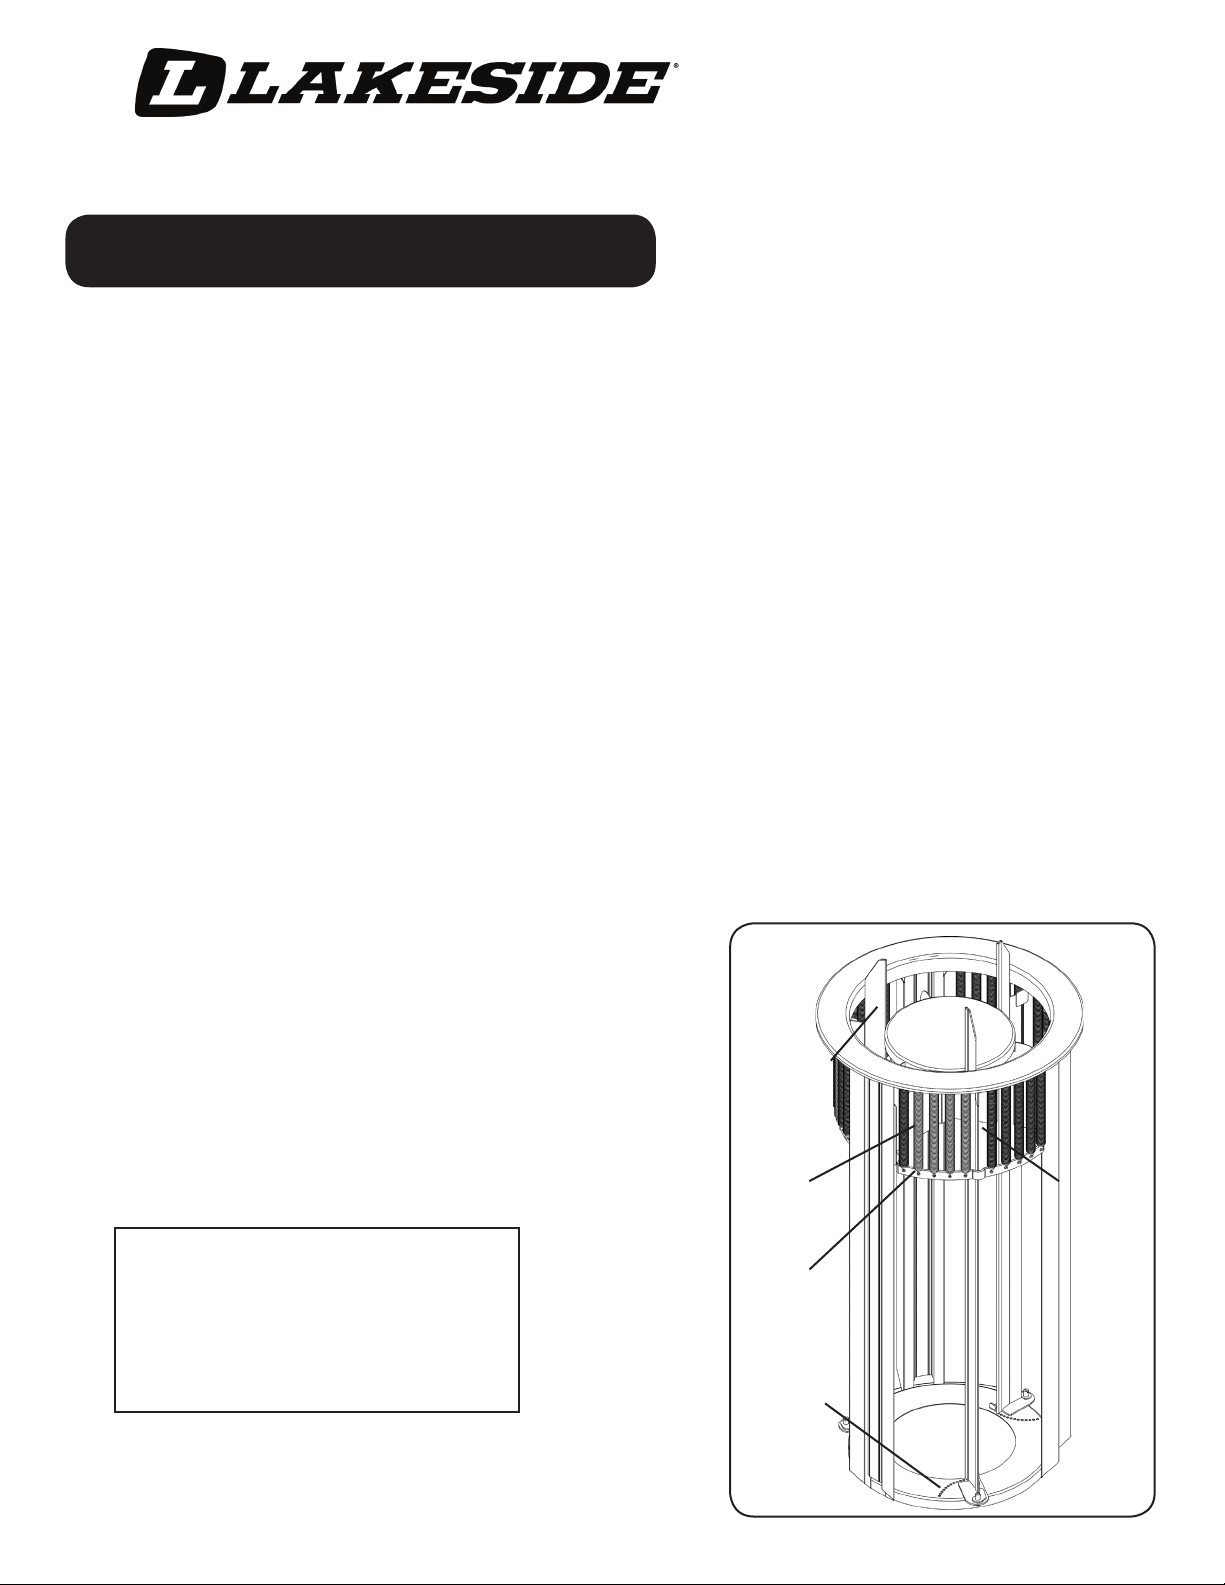
Top Cap
Dish Guide
Springs Carriage
Assembly
Lower
Spring
Ring
Peg
Holes
ADDITIONAL INFORMATION ON REVERSE SIDE.
EXPRESS HEAT
MOBILE HEATED
self-leveling
DISPENSER
Adjust-A-Fit®
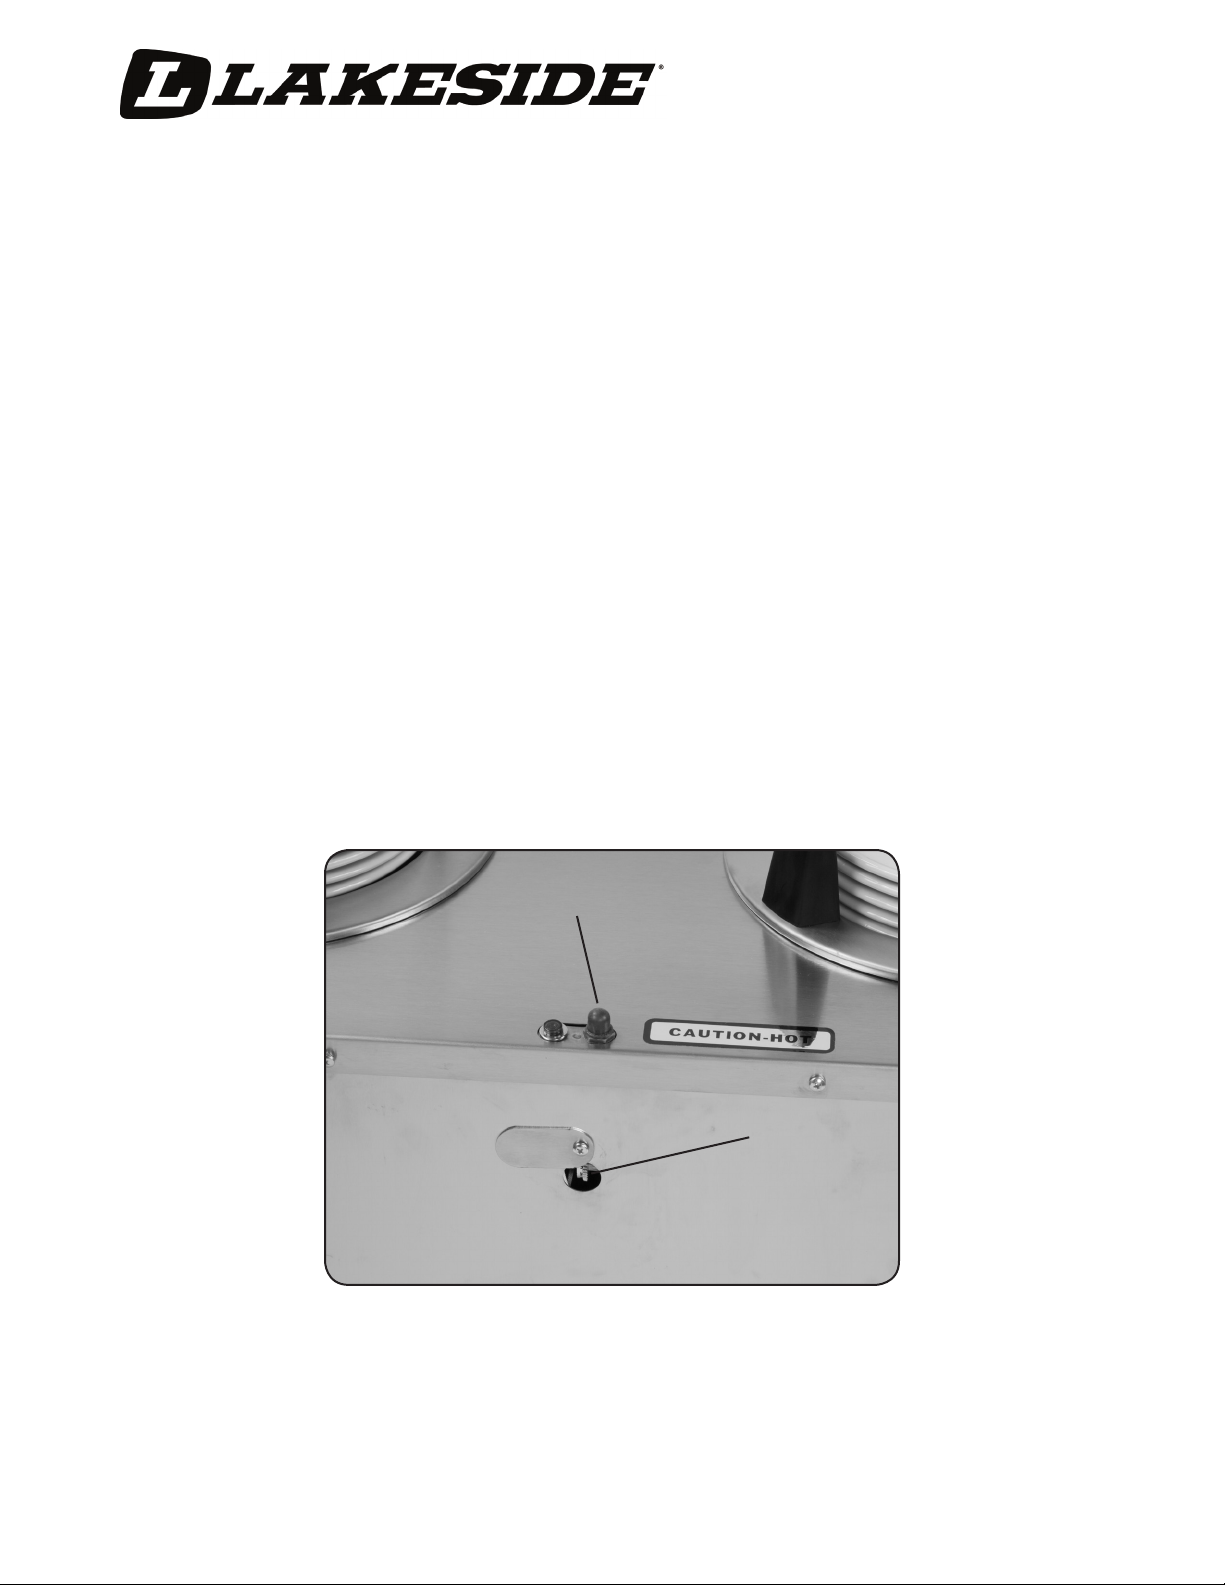
THERMOSTAT ADJUSTMENT
The thermostat is located under the small cover plate on the side of the cabinet, and is preset at the highest setting for quick
heating. To obtain adjust the thermostat:
a. Locate the thermostat adjustment wheel by sliding the cover plate to one side (see below).
b. Dial the wheel to a lower number to decrease the temperature.
c. Run the cabinet heater with a full load of dishes to determine the cabinet’s set temperature. The cabinet may take up to
two hours to heat plates to maximum desired temperature.
CLEANING OF UNIT
a. Unplug unit from electrical source and allow it to cool to room temperature.
b. Lift self-leveling mechanisms from cabinet and clean as desired.
c. Remove any debris from the interior of cabinet by sweeping it to the clean-out hole on the floor of the cabinet.
d. Wash inside and outside of cabinet with a damp cloth. Avoid getting the blower/heater mechanism wet.
Dry thorougly.
e. Reinsert self-leveling mechanisms into cabinet.
f. Run the unit empty for fifteen minutes to facilitate drying and evaporate any chemical residue before reloading
with dishes.
TM
On/Off Switch
Thermostat
Dial
For more information, call Lakeside Customer Service at 800.558.8565
Email: info@eLakeside.com www.eLakeside.Foodservicecom
 Loading...