

Lakeland 24442 User Manual
INSTRUCTION
BOOKLET
Easy Fill Iron

LAKELAND EASY FILL IRON
Thank you for choosing the Lakeland Easy Fill Iron.
Please take a little time to read this booklet before you use your machine and keep it in a safe place
for future reference.
The Lakeland Easy Fill Iron has a wider water tank cover on the base making it quick to fill and easy
to empty. Simple controls allow you to iron with or without steam, and the steam shot and water
spray buttons help you combat stubborn creases.
An award winning family-owned business, here at Lakeland we still have the same values of
excellent quality, value for money and exceptional customer care as we did when we first set up
the company in the 1960s. Our products are carefully selected and rigorously tested to meet our
high standards, so you can be assured that any product you purchase will be easy-to-use and
highly durable.
CONTENTS
Product features 4
Safety cautions 4
Instructions for use 8
Troubleshooting 13
Care and cleaning 14
Recycling your electricals 14
Electrical connections 15
2 3
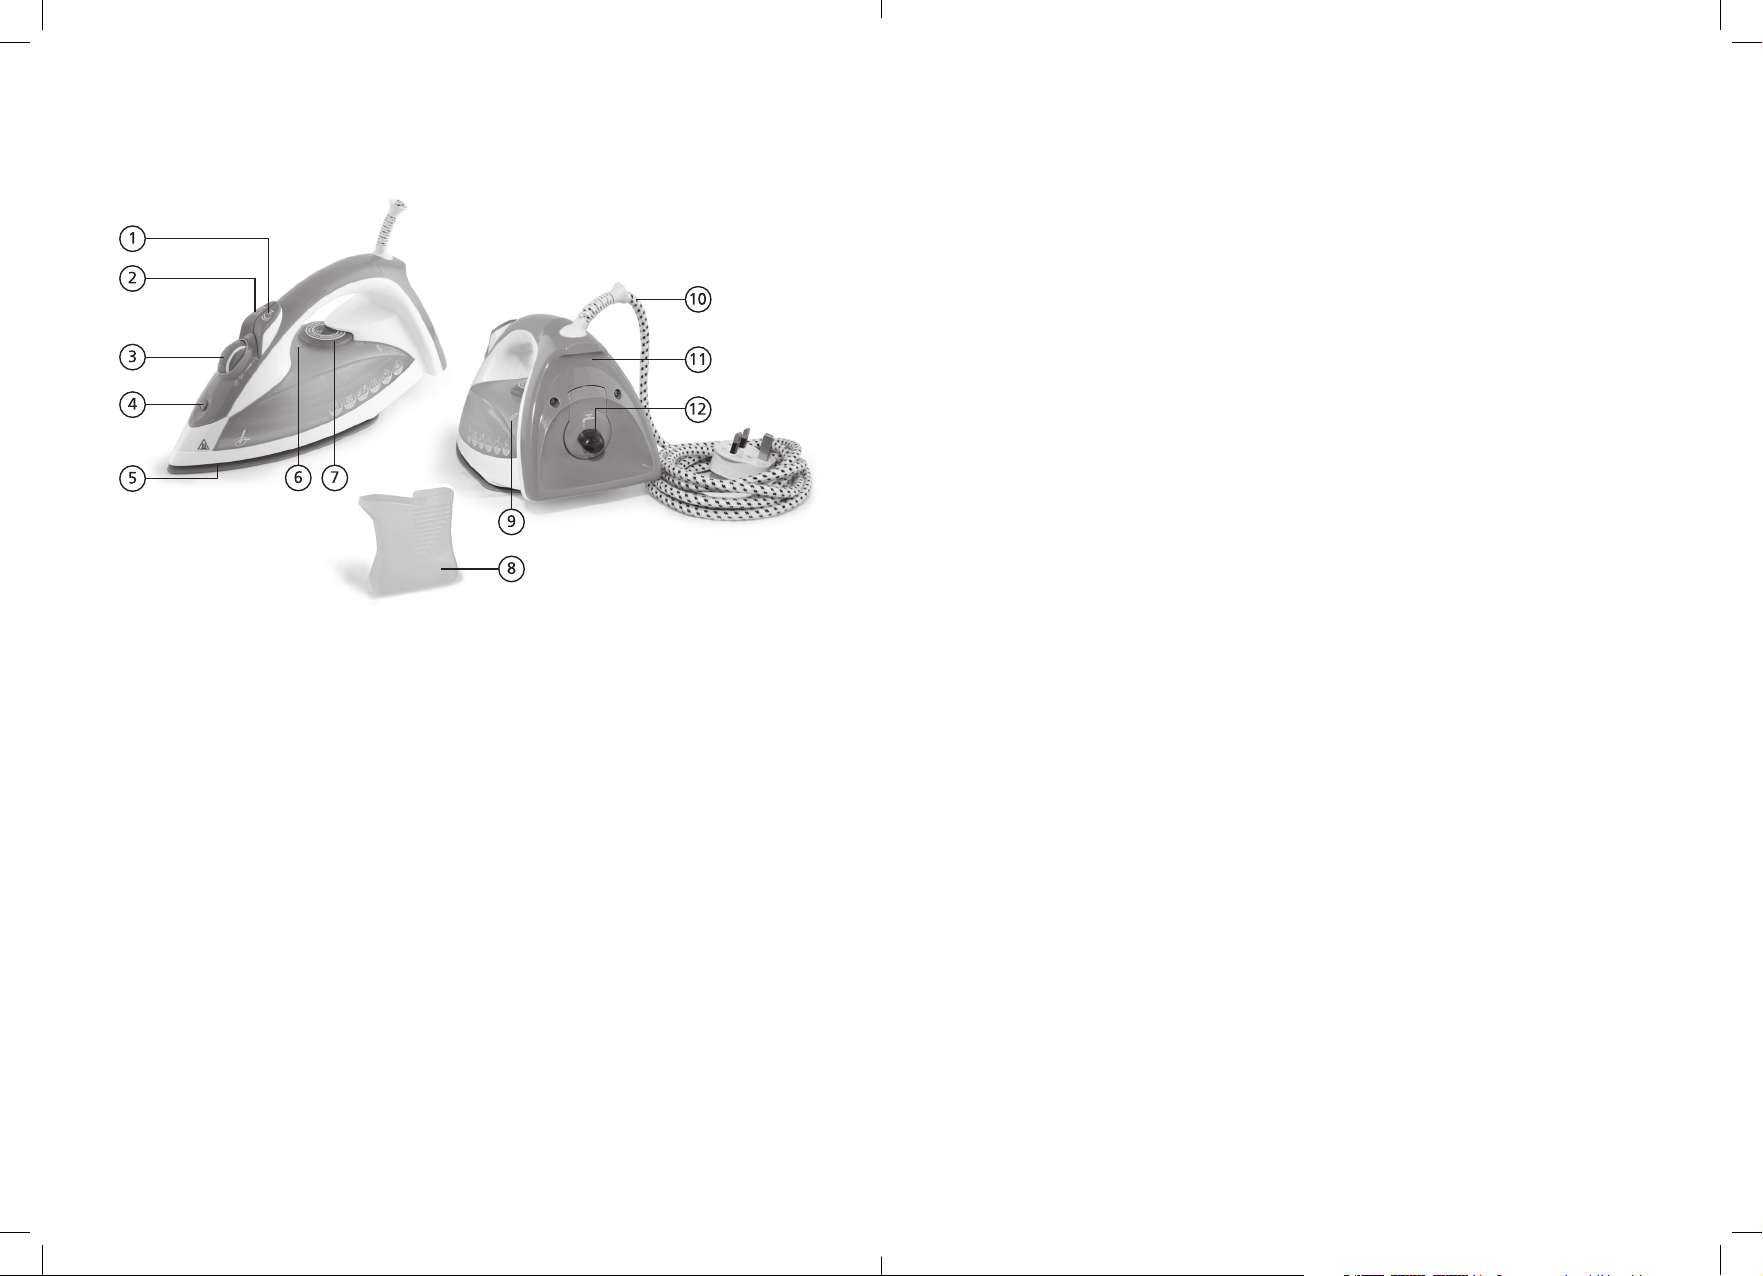
PRODUCT FEATURES
1. Steam Shot Button
2. Spray Button
3. Steam Control Dial
4. Spray Nozzle
5. Ceramic Soleplate
6. Temperature Dial Pointer
7. Temperature Dial and Pilot Light
8. Water Jug
9. Maximum Water Level
10. Cord
11. Base
12. Water Tank Cover
SAFETY CAUTIONS
Carefully read all the instructions before using the appliance and keep in a safe place for future
reference. Always follow these safety cautions when using the appliance to avoid personal injury or
damage to the appliance. This appliance should be used only as described in this instruction book.
• Make sure your electricity supply matches the voltage shown on the appliance.
• Ensure all packaging materials and any other promotional labels or stickers are removed from
the appliance before first use.
• Always inspect the appliance before use for noticeable signs of damage. Do not use the iron
if it is damaged or has been dropped. In the event of damage, or if the appliance develops a
fault, contact the Lakeland customer care team on 015394 88100.
• Do not use any accessories or attachments with this product other than those recommended
by Lakeland.
• Children should always be supervised to ensure they do not play with this product.
• This iron is for domestic household use only. It is not suitable for use outdoors, or in
bathrooms.
• This iron must only be used for its intended purpose. Never iron clothes on people.
• Never leave the iron unattended during use. Close supervision is necessary when ironing near
children. Please ensure children do not play with the iron and its cord and always store it out
of their reach.
• This appliance is not intended for use by persons (including children) with reduced physical,
sensory or mental capabilities, or lack of experience and knowledge, unless they have been
given supervision or instruction by a person responsible for their safety.
• Always turn the iron to its minimum heat setting before plugging in or unplugging. Grasp by
the plug, never the cord.
• Unplug the iron before filling or emptying the water tank, before cleaning and maintenance,
and immediately after use.
• The iron must be used on a dry, level, heat resistant surface. Do not allow the power cord to
touch hot surfaces or the soleplate. Allow the iron to cool completely before storing it in an
upright position.
• This appliance generates high temperature steam. To avoid the risk of severe burns, never
touch the soleplate during use. Always hold the iron by its handle and warn others, especially
children, of the possible dangers of burns from steam, hot water or the soleplate.
• Do not leave the lead hanging over the edge of an ironing board or worktop, where it may be
pulled by children, or tripped over.
• Empty the water tank after use.
• An earthed extension cable may be used with care. The electrical rating of the cable should
be at least as great as the appliance. Do not allow the cable to hang over the edge of the
worktop or touch any hot surface.
• Do not add perfume, vinegar or other chemical liquids into the water tank.
• Do not wrap the power cord around the iron for storage until it has cooled down completely.
• This appliance complies with the basic requirements of Directives 04/108/EC (Electromagnetic
Compatibility) and 06/95/EC (Safety of Domestic Electrical Appliances)
• WARNING; A cut off plug inserted into a 13amp socket is a serious safety (shock) hazard.
Ensure the cut off plug is disposed of safely.
• Do not connect this appliance to an external timer or remote control system.
• This appliance should be used for the ironing of clothes as described within the instructions
for use that accompany it.
4 5

• CAUTION; The plastic bags used to wrap this appliance or the packaging may be
dangerous. To avoid risk of suffocation, keep these bags out of reach of babies and children.
These bags are not toys.
BEFORE USING YOUR IRON FOR THE FIRST TIME
Please check that the iron voltage rating corresponds to your mains voltage. Remove any stickers
or protective covers from the soleplate. When the iron is first used, you may notice some vapour
being released for a short while. This is perfectly normal.
• Do not use this appliance if the lead is damaged. Never attempt to repair the iron or replace
the cover yourself as this may lead to severe injury or electric shock. If the lead is damaged
it must be replaced with a special lead: please contact the Lakeland customer care team on
015394 88100.
• Always ensure that your hands are dry before removing the plug from the mains socket. Never
pull the plug out of the mains socket by its lead.
• Unplug from the mains when not in use and before cleaning. Allow to cool before cleaning the
appliance. To disconnect, turn the socket to “off “and remove the plug from the mains socket.
• To protect against fire, electric shock or personal injury, do not immerse the iron, power cord,
or plug in water or any liquids.
• This iron must always be plugged into an earthed socket.
• To avoid injury or possible fire, do not cover the appliance when in use.
• Do not touch the surfaces marked with symbol during or just after ironing. They are hot!
1. Unwind the power cord.
2. Fill the iron as described below in ‘Filling the water tank’.
3. Plug the power cord into the socket and switch on. The pilot light will be lit for a second to
show the iron is on.
4. Turn the temperature dial clockwise to ‘MAX’ position.
5. The pilot light will come on again to show the iron is heating up, it will turn off when the
required temperature is reached.
6. Turn the steam control dial to Steam will come through the vents on the soleplate.
7. Iron a tea towel or a piece of cloth and when the water tank is empty the iron is ready for use.
FILLING THE WATER TANK
For best results always make sure there is enough water in the tank when ironing. Use demineralized water or distilled water. Do not use chemically de-scaled water or any other liquids.
1. Unplug the iron.
2. Slide the steam control dial to DRY position.
3. Open the water tank cover as shown below.
4. Hold the iron with the base uppermost. Use the water jug to fill the iron pouring until the
MAX level is reached. Never fill the water tank level beyond this point.
5. Close the water cover firmly.
Pull the handle
upwards to open
the water tank
cover
Do not exceed
the MAX level
when the iron
is upright
CAUTION: HOT SURFACE!
6 7
INSTRUCTIONS FOR USE
DRY AND STEAM IRONING
To ensure a good output of steam, always keep the water tank at least a quarter full. Steam ironing
is only possible at higher ironing temperatures, (•• or ••• dots or the MAX setting).
1. Fill the iron as described in ‘Filling the Water Tank.’
2. Set the steam control dial to
3. Connect the power cord to the socket and switch on. The pilot light will be lit for a second to
show the iron is on.
4. To begin ironing, stand the iron upright and turn the temperature dial to your required
temperature.
5. The pilot light will show the iron is heating up and will go off when the required temperature
is reached.
6. The iron is ready for use.
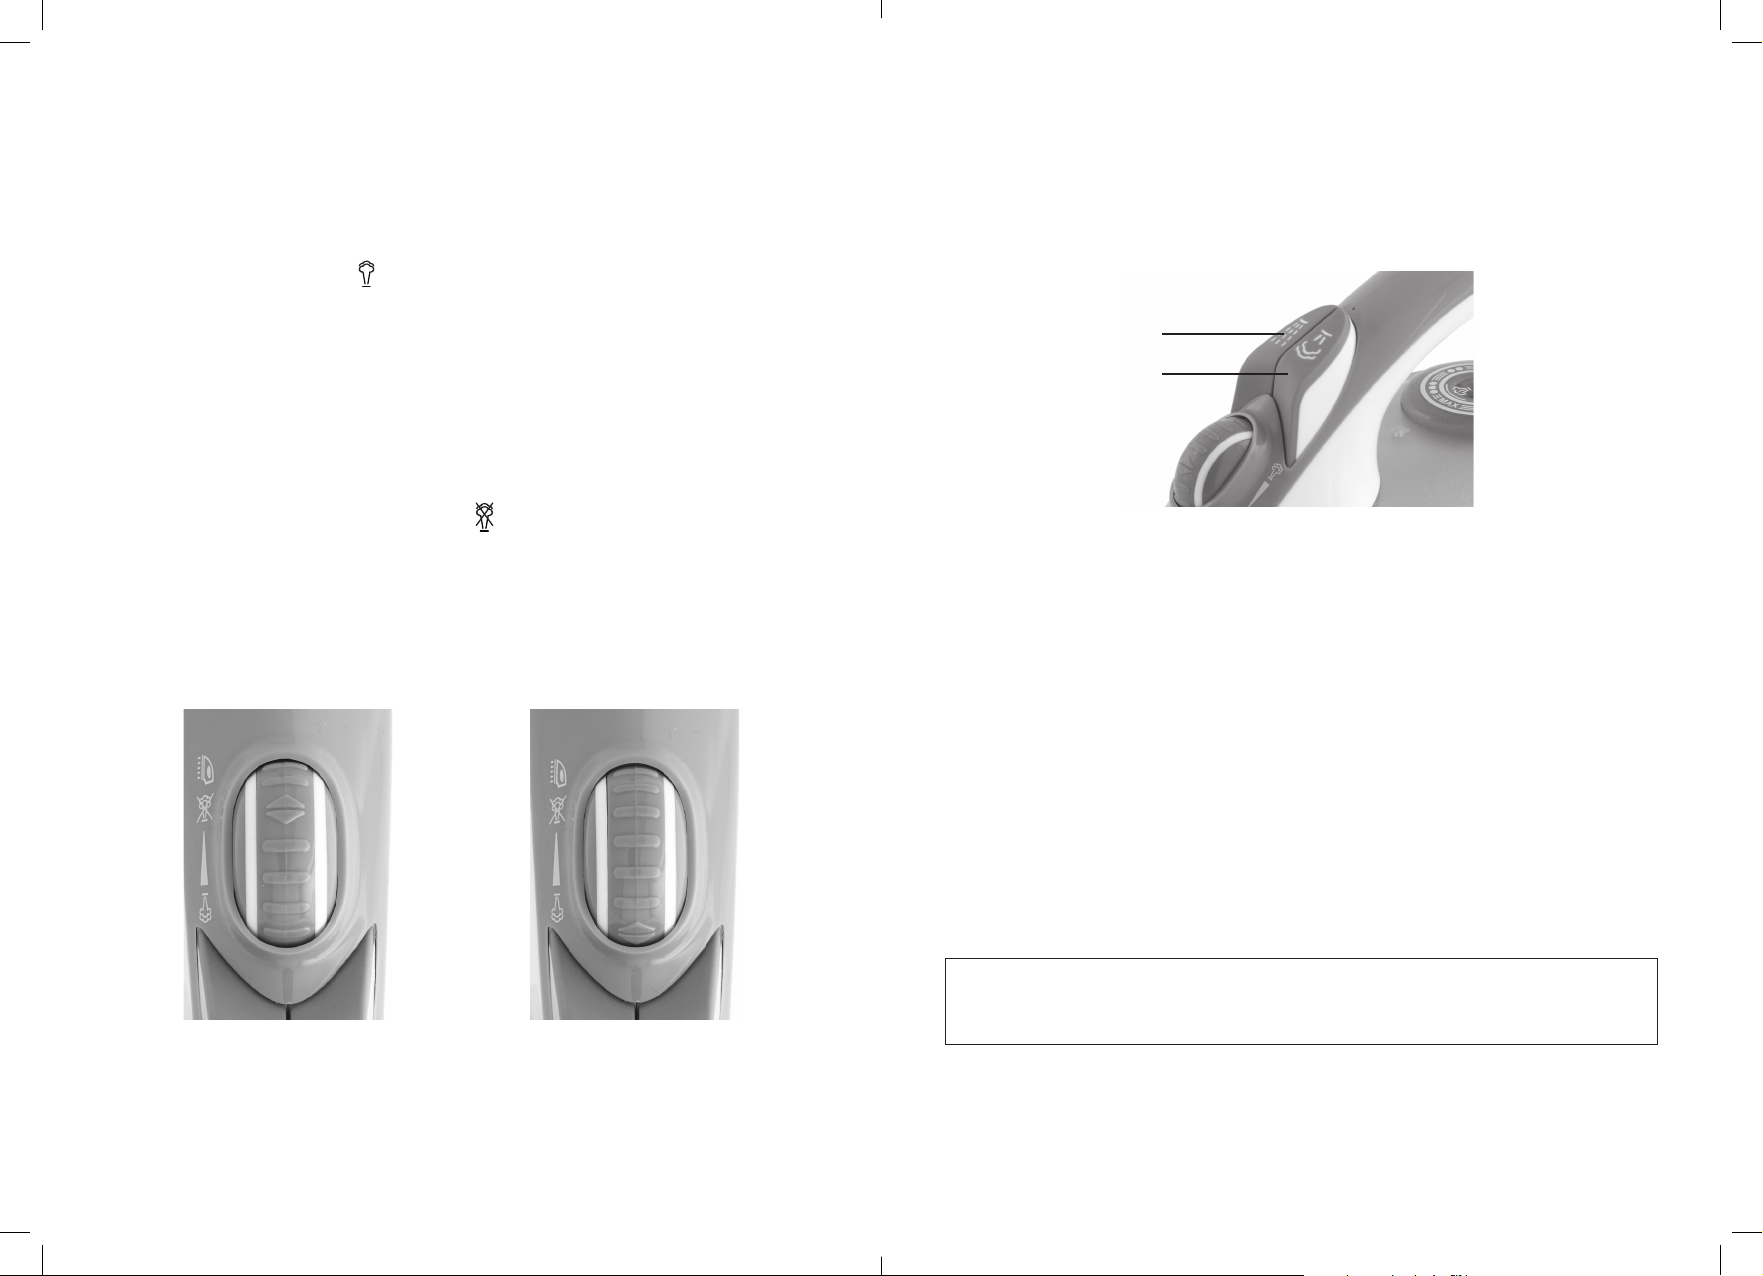
7. The steam control dial allows you to choose the ideal steam output for each garment. Rotate
backward for more steam, rotate forward for less steam, rotate fully forward for no steam.
8. To iron without steam, slide the steam dial to DRY. Then select the desired temperature as
normal.
9. To switch off, turn the temperature dial to ‘MIN’.
10. Unplug the iron.
11. After every use follow the instructions in ‘Draining the water’.
SPRAYING
Aim the spray nozzle at the area and press the button a couple of times to dampen the fabric
with a fine mist of water. Delicate or synthetic fabrics, which must be ironed at low temperatures
without steam, may be sprayed. Use the spray button for stubborn creases; check there is enough
water in the tank before spraying. You may need to press the spray button a few times to start
the function.
Spray button
Steam Shot button
STEAM SHOT
The steam shot gives an extra burst of steam to help you smooth out stubborn creases and
wrinkles. It’s particularly helpful on denim and linen, and it can be used whether you are ironing
with or without steam.
1. Turn the temperature dial to ‘••• (3-dot) or MAX’ position, this button can only be used at
higher temperature settings.
2. Pilot light will go off when the required temperature is reached.
3. Lift the iron slightly above the fabric and press the steam shot button down firmly.
4. Release the button as you iron, so that an intense surge of steam penetrates deep into the
fibres. For optimum steam output, wait at least 4 seconds before pressing the steam shot
button again. It may be necessary to press the button a few times to start this function.
5. For a stronger burst of steam, slide the steam selector to DRY.
VERTICAL STEAM SHOT
Vertical steam is especially useful for taking the creases out of curtains or suits and garments
on hangers. Follow the instructions in ‘Steam Shot’ but hold the iron upright between 15 to 30
centimetres away from the fabric to avoid scorching.
CAUTION: Please ensure that children are well away when you press the steam shot button. Keep
your fingers at a safe distance from the tip of the soleplate to avoid burning. Never iron clothes on
the body, and never direct the steam towards people. You do not get a continuous flow of steam
on this setting.
Move dial forward for less steam
and fully forward for no steam
8 9
Move dial backwards for more steam
AUTO SHUT-OFF
• The iron will automatically switch off when the iron is unattended and still connected to a
mains supply outlet.
• The iron will switch off automatically after around 30 seconds if it is left immobile in a
horizontal ironing position. The iron will switch off automatically after around 8 minutes if it
is left on its base in a vertical position.
• The pilot light will blink, indicating the iron is in Auto-Off mode.
• The iron will automatically switch on when it is moved again.
• The iron will take about 60 seconds to reach its previous temperature.
DRAINING THE WATER
• Turn the temperature dial to MIN.
• Switch off at the socket and unplug the iron.
• Slide the steam control dial to DRY position.
• Holding the iron with the base uppermost, open the water tank cover by pulling the handle,
tip the iron over a sink and shake it to empty the water tank.
• Close the cover and stand the iron upright and leave it to cool.
• Always store the iron empty, cooled and standing upright in a safe, dry place.
SELF-CLEANING YOUR IRON
Your iron will give better results and last for longer if you carry out these steps once or twice a
month to remove any limescale or impurities.
ANTI-CALC SYSTEM
To combat limescale build-up and prolong the working life of your iron, tap water is filtered via
a built in anti-calc cartridge. This will not completely prevent the clogging caused by mineral
deposits. To ensure the longevity of your iron, never use vinegar, starch or chemically descaled
water. The harder your water, the more frequently the iron should be self-cleaned. (See ‘Self
Cleaning your Iron’)
1. Fill the water tank half full.
2. Set the steam control dial to DRY.
3. Stand the iron upright and set the temperature dial to MAX.
4. Plug into the socket and switch on the power. The pilot light will be lit for a second to show
iron is on.
5. Wait for one more cycle for the pilot light to glow then go off.
6. Turn the temperature dial to ‘MIN’, unplug the iron.
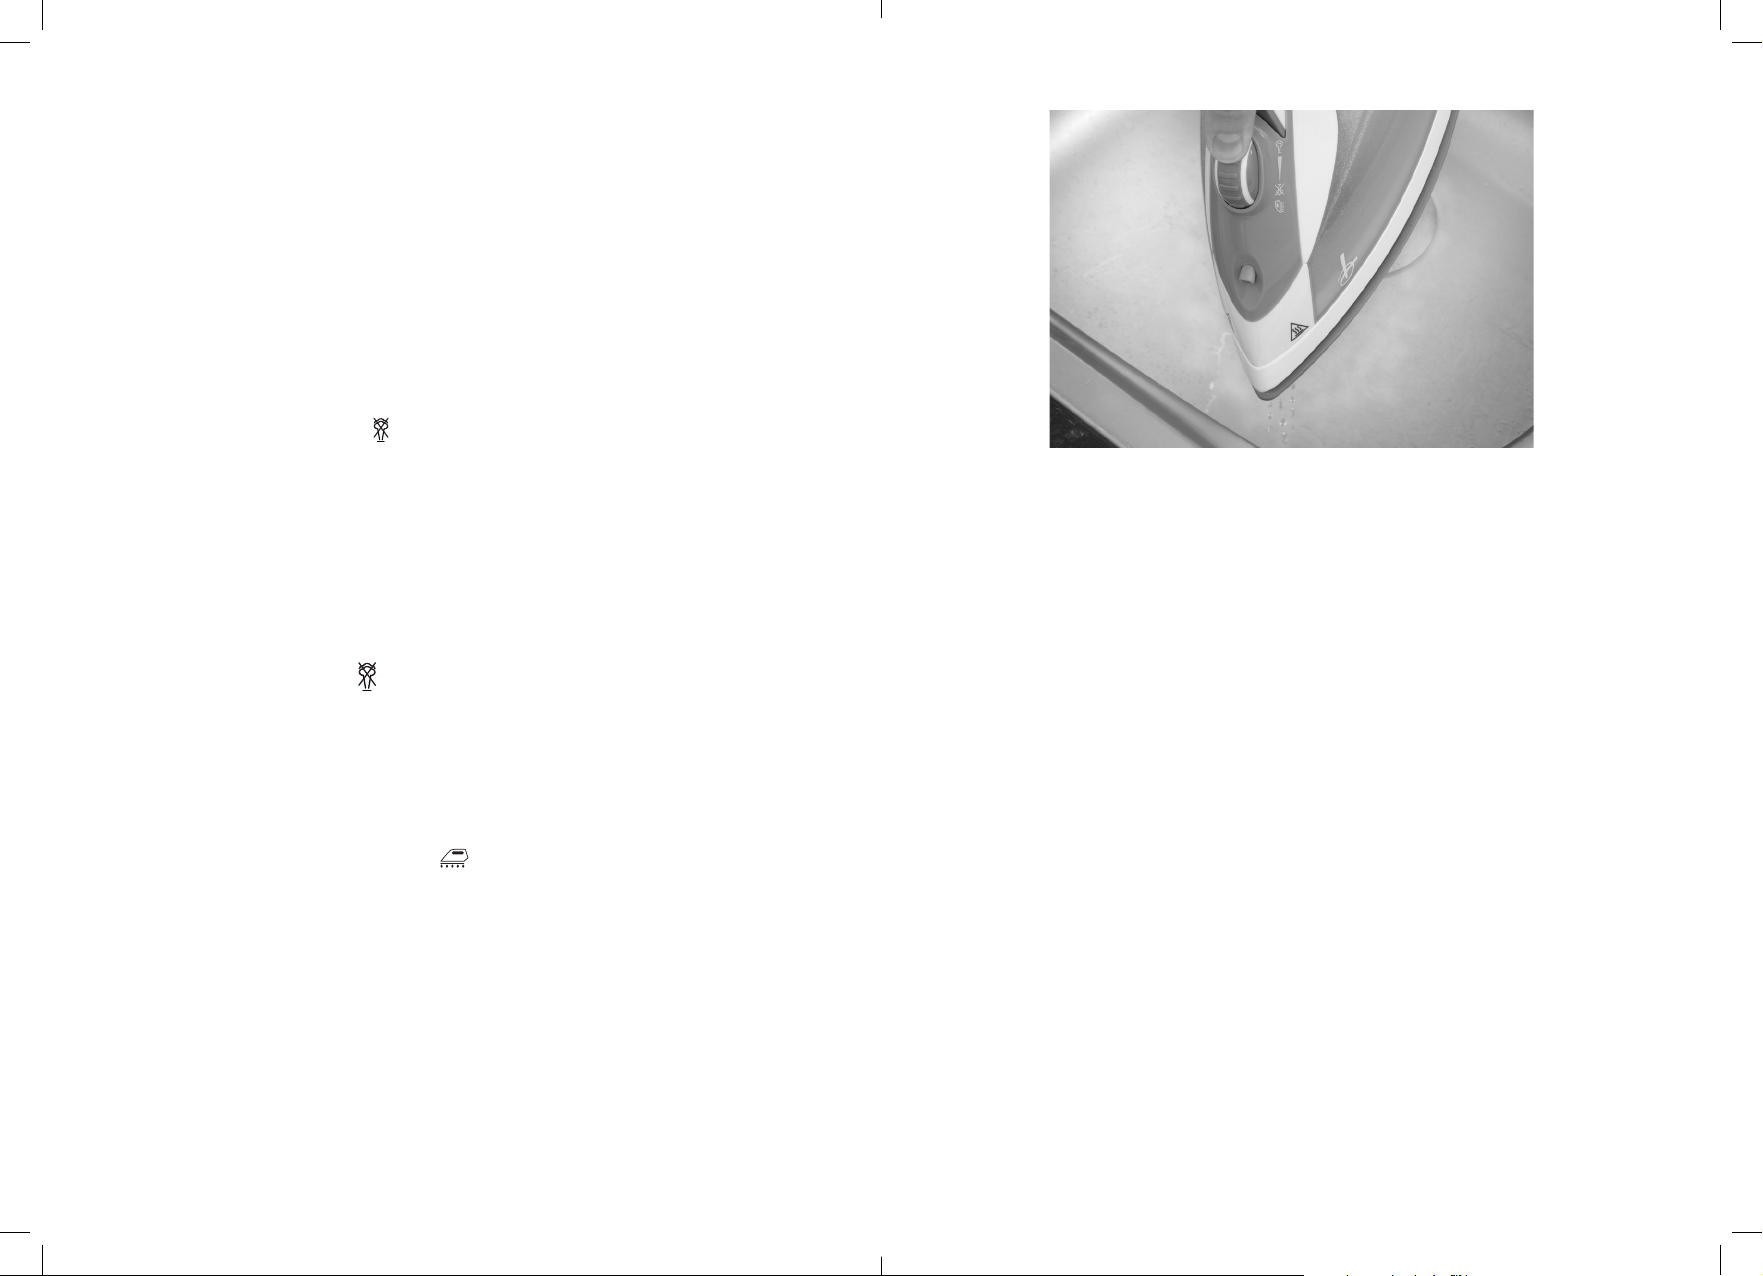
7. Hold the iron horizontally over a sink.
8. Push and hold the steam control dial to (Descaling) position.
9. Steam and boiling water will escape from the steam holes on the soleplate. Move the iron
backwards and forwards to help flush out impurities and limescale and until the water tank is
empty. A little water will remain in the water tank, this will not affect the iron’s performance.
You can repeat this process for further cleaning.
PLEASE NOTE: the Steam Control dial must not be held in the descaling position during ironing.
10 11
DRIP-STOP SYSTEM
With ordinary steam irons, water may drip from the soleplate if the temperature selected is too low,
creating unsightly water marks on the fabric. This iron has been designed to stop automatically if
the temperature is too low for steam. You may hear the drip-stop system ‘clicking’ as the iron heats
up or cools down. This perfectly normal and shows that the system is working correctly.
 Loading...