

Lakeland 22250 User Manual
USER MANUAL
STEAM IRON
Model: 22250
Helpline No: 015394 88100
Lakeland
Alexandra Buildings, Windermere, Cumbria LA23 1BQ
Tel: 015394 88100 Web: www.lakeland.co.uk
The Lakeland Guarantee....
is probably the simplest guarantee in the world!
If you are not satisfied at any time, you receive your money back!
This is our promise.
Iron Manual_Steam 11_10:Layout 1 17/11/10 14:41 Page 1
INTRODU CTION
Thank you for choosing the Lakeland Steam Iron. To get the best from your new iron, please take a few moments
to read these instructions, and keep them in a safe place for future reference.
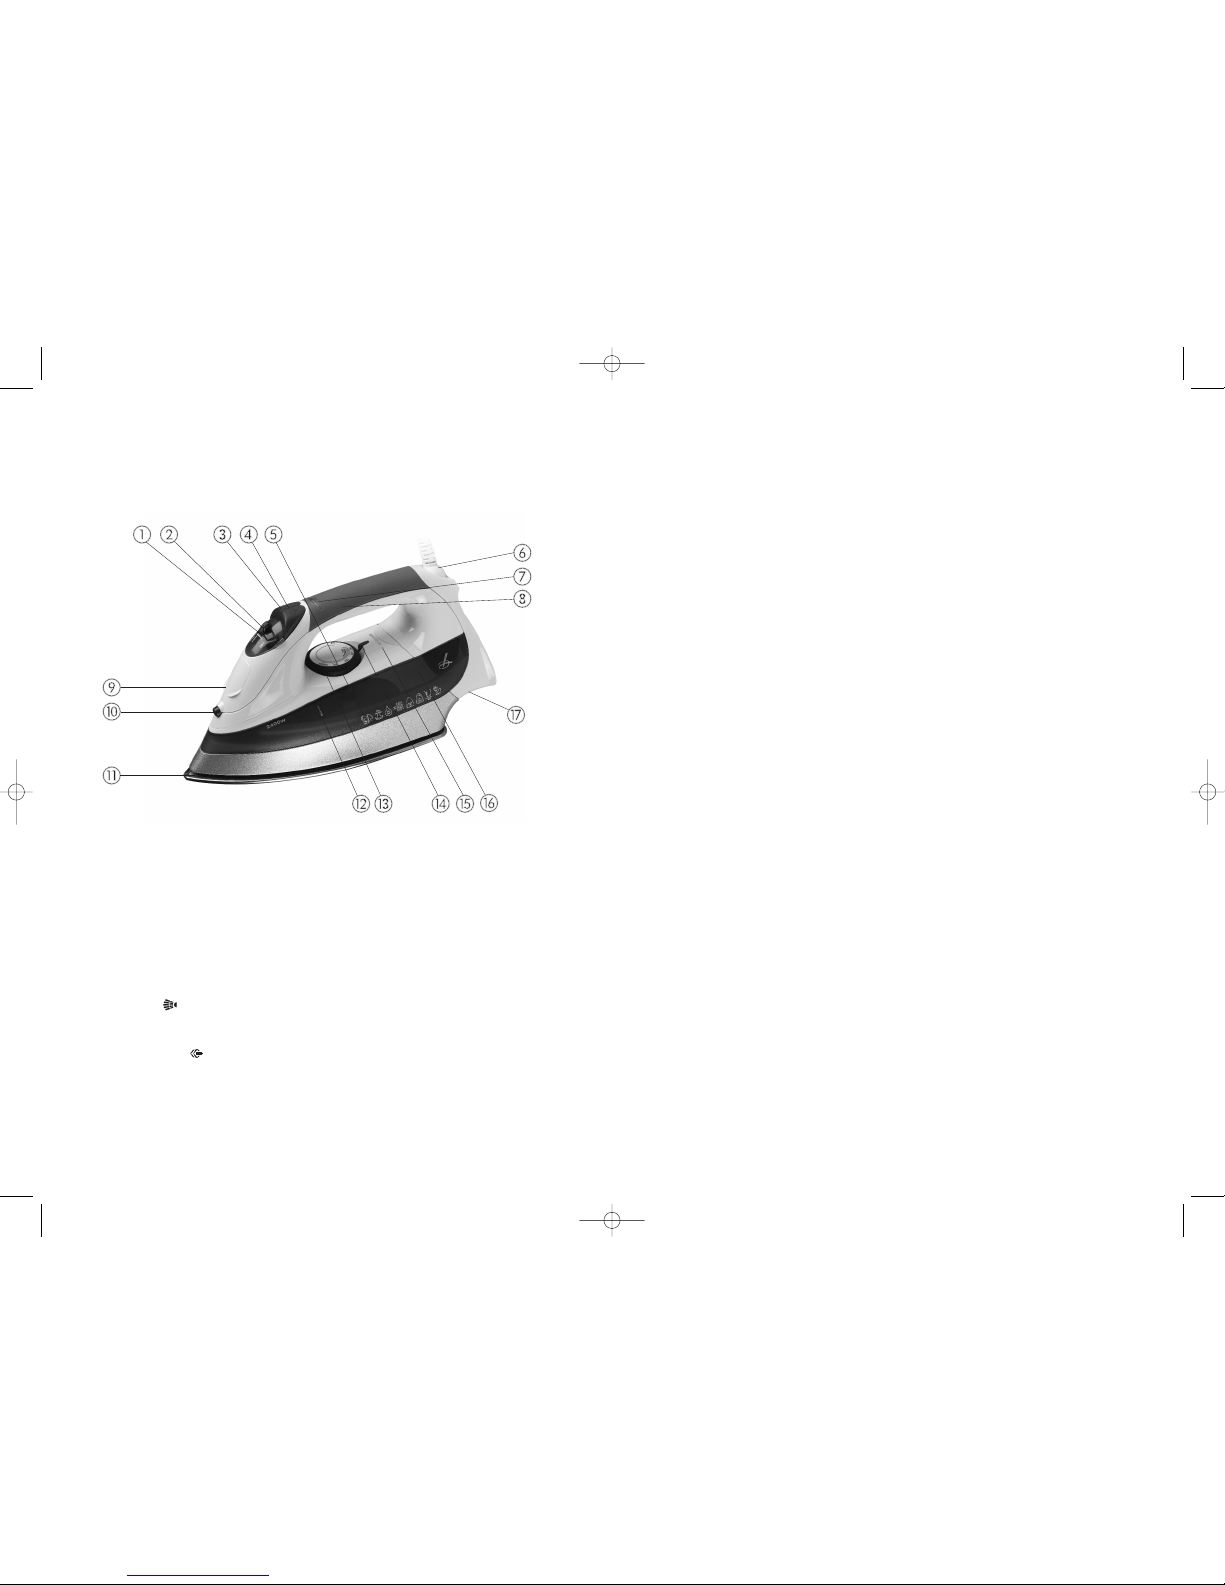
FEATURES
1. Variable steam
The steam selector allows you to choose the ideal steam output for each garment. Alternatively, select the
dry setting DRY to iron without steam.
2. Self-cleaning
The iron has a self-cleaning system to help prevent limescale build-up. Select the CLEAN setting on the
steam selector.
3. Spray button
Treats stubborn creases by misting a fine spray of water onto the garment.
4. Steam shot button
Delivers a burst of steam onto the fabric, to help smooth out difficult wrinkles.
5. Vertical steam
Especially useful for taking the crumples out of curtains, delicate fabrics or garments on hangers, such as
suits. Hold the iron upright and press the steam shot button to produce a vertical surge of steam.
6. Extra-long 3m cord
For effortless reach and ease of movement when ironing, the cord is extra-long with a swivel socket. A
flexible cover prevents fraying.
7. Power indicator light
8. Soft-grip handle
9. Water spout
The extra-wide opening makes for easier filling, without bubbling over.
10. Spray nozzle
11. Stainless steel soleplate
The soleplate is designed to deliver extra steam to the tip of the iron, for precision pressing around buttons,
collars, cuffs and pockets. The groove which runs right around the soleplate allows you to iron beneath
buttons.
12. Maximum water level
Do not exceed the MAX F ILL level when the iron is upright.
13. Temperature dial
Turn the dial to select the ideal heat for each garment, from MIN (synthetic) to MAX (linen). The dial also
indicates if steam is required.
14. Heat indicator light
This light comes on when the iron is heating up, and turns off when the selected temperature is reached.
15. Built-in anti-calc system
Filters tap water to reduce limescale build-up inside the iron.
16. Large water tank
Gives a constant flow of steam, with less need to stop and refill.
17. Cord storage
The cord can be neatly wrapped around the iron and clipped into position, for tidy storage. Never allow the
cord to come into contact with the soleplate, and always wait until the iron has cooled completely before
storing the cord away. Take care not to wrap the cord too tightly.
Power consumption: 2400W
Operating voltage: 23 0V~50Hz
Iron Manual_Steam 11_10:Layout 1 17/11/10 14:41 Page 3
 Loading...