


G30x-L GPS Data Logger Receiver
Embedded Solutions
Laipac Technology, Inc.
55 West Beaver Creek Rd. Unit 1 Richmond Hill Ontario L4B 1K5 Canada
Tel: (905) 762-1228 Fax: (905) 763-1737
http://www.laipac.com

1
Laipac Technology, Inc.
Contents
1. Introduction ................................................................................................3
1.1 Specification
......................................................................................4
2. Installation ..................................................................................................5
2.1 Connecting G30 ( For G30R/G30R-L, PS/2 type ) ......................... 5
2.2 Connecting G30 ( For G30U/G30U-L, USB type ) ........................ 6
3 Using Data Logger Demo Program
........................................................... 8
3.1 Getting Connected ............................................................................ 9
3.2 Uploading Data .................................................................................10
3.3 Data Review.......................................................................................11
4 Troubleshooting
..........................................................................................14

2
Laipac Technology, Inc.
1. Introduction
The G30-L Compact GPS receiver ( data logger ) is about the half size of a
computer mouse. Based on the SiRF star II TM chip set manufactured by
SiRF
Technology, Inc., G30-L supports all features, and maintains the technical
specifications of the SiRF star II TM architecture.
G30-L receiver is a fully self-contained receiver for the Global Positioning System
with data logger capabilities. Inside the container, the TF30 module provides
complete GPS signal processing from antenna input to serial data output. The module
connects seamlessly to low cost active antenna. Moreover, G30-L is also a mini
data logger (up to 15hrs for PVT data, 1Hz update rate) by using SiRF GSP2e
integrated ARM7TDMI
TM
microprocessor and on-board flash memory.
Two versions of G30x are available. G30R comes with a 9-pin serial
connector, and G30U comes with a USB connector. Also both modules can come
with (G30R-L, G30U-L) or without (G30R, G30U) data logger function.
These receivers are well suited to system integrators or users who use popular PC
compatible system, notebook PC, PDA and “
off-the-shelf
” GPS solution.
G30 can be used as an ordinary real-time GPS locator, and in the mean time to
log the GPS data to its on-board flash memory. The type of data to be logged as well
as the data format can be specified by the user in the logging setup. The log rate is
also user definable. When any of these are activated, the character string is written to
the log file along with the GPS data. A companion software package provides above
functions and replays these markers.
G30 can satisfy a wide variety of application for vehicle navigation, tracking or
leisure purpose. In automotive applications, the SiRF architecture supports advanced
tracking capabilities through fast recovery times combined with reliable operation in
“urban” and areas of dense foliage.

3
Laipac Technology, Inc.
1.1 Specification
G30 Compact GPS Receiver Specifications
General G30R /G30R-L G30U /G30U-L
GPS Receiver 12 Channel “All-in-view” tracking 12 Channel “All-in-view” tracking
Cable Connections
Terminated DB-9 serial connector
and cigarette lighter plug, 12 ft.
cable.
Terminated USB serial connector,
12 ft. cable.
Mounting Magnetic mount. Magnetic mount.
Perf or m ance
Position Accuracy 25 meters CEP without SA 25 meters CEP without SA
Velocity Accuracy
0.1 meters/second, without SA 0.1 meters/second, without SA
Max Speed
515 meters/sec.(1000 Knots)
max.
515 meters/sec.(1000 Knots)
max.
Acceleration 4 g., max. 4 g., max.
Jerk 20 meters /sec.3 max. 20 meters /sec.3 max.
Max Altitude
18,000 meters (60,000 Feet)
max.
18,000 meters (60,000 Feet)
max.
Time to First Fix
45 sec (Cold Start)
38 sec (Warm Start)
8 sec (Hot start)
0.1 sec (Reacquisition)
45 sec (Cold Start)
38 sec (Warm Start)
8 sec (Hot start)
0.1 sec (Reacquisition)
Update Rate 1/sec 1/sec
Receiver Sensitivity -175dBW -175dBW
Map Datum WGS-84 WGS-84
Data Logger
16M bit (up to 15hrs for PVT data,
1Hz update rate) (G30R-L only)
16M bit (up to 15hrs for PVT
data, 1Hz update rate) (G30U-L
only)
Interfaces
Input Voltage +5V DC +5V DC
Power Cons.(Avg.) 0.3 watt 0.3 watt
Serial Comm.
Hardware/ software baud rates:
4800 baud (default)
Hardware/ software baud rates:
4800 baud (default)
Protocol Messages NMEA 0183 v2.2
SiRF Binary
NMEA 0183 v2.2
SiRF Binary
Physical
Compact, integrated GPS
receiver and antenna
Compact, integrated GPS
receiver and antenna
Dimensions 66 x 50 x 25.5 66 x 50 x 25.5
Weight 85g 85g
Operating Temp -10°C to +70°C -10°C to +70°C
Storage Temp -40°C to +85°C -40°C to +85°C
Specifications are subjected to change without notice

4
Laipac Technology, Inc.
2. Installation
2.1 Connecting G30 (For G30R/G30R-L, PS/2 type )
Step1. Plug RS-232 to COM port of your Notebook PC or Handheld PC.
Step2. Plug PS2 connector in the PS2 mouse outlet of your Laptop PC or Handheld
PC.
Place your PC in a safe and plane surface inside the vehicle.
Step3. Place your G30 on the outside roof of your vehicle with magnetic base.
Step4. Choose the correct COM port for running the map or navigation software.
Step5. Run the SiRF DEMO program. Please refer to “SiRF Demo user manual”.
Notice:
(1) Make sure the power is off before the start.
(2) For safety reason, please do not install G30 while driving.
(3) To receive NMEA0183 navigational data, use the Hyper Terminal program
of Windows 98/ME/2000. Please setup the COM port connected with G30R /
G30R-L to:
Baud rate : 4800
Data bit : 8

5
Laipac Technology, Inc.
Parity : None
Stop bit : 1
Flow control : Non e.
(4) The format of NMEA messages is illustrated on Software Data section.
(5) To prevent from the poor contact, the 4-pin mini din connector was designed as
good fitting. It is strongly recommended that users don’t plug & unplug this
connector frequently.
2.2 Connecting G30 (For G30U/G30U-L, USB type)
Step
1. Run the program "USBDRV.exe" to unzip it. You will find the "serwpl.inf" file in
the \PL-2303 directory.
Step2. Connect G30U/G30U
-L to the USB port of your computer. The devices will
be detected automatically. Please follow the installation procedure until the
system asks you to locate the driver file. Please point
out the directory \PL-2303
in Step1.
Step3. To check where the "COM" port is for the USB device, please open "Control
Panel", click on "System", choose "Devices Manager", and then check the Port
(COM&LPT) . It should have a "USB to Serial Port " there. Look at
which COM port is.
Step4. User's application can access the G30U via the "COM" port found in
Step 3. The

6
Laipac Technology, Inc.
COM port is for the setup of
SiRF demo
program(SIRFDEMO.exe) and
some
mapping software which supports GPS function. For instance, if it shows COM3,
you have to switch to the COM port when you start SiRF demo program. Please
notice the action, it is very important. If you don't setup the right Com port, no
matter
SiRF demo program or other mapping software, it will be unable to
communicate with your computer.
Step5. Place your G30 on the outside roof of your vehicle with magnetic base.
Notice:
(1) Uninstall:
Run the program "DRemover98_2k.exe" to uninstall the dirvers.
(2) To receive NMEA0183 navigational data, please use the Hyper Terminal program of
Windows 98/ME/2000. Please setup the virtual COM port connected with G30U /
G30U-L to:
Baud r ate : 4800
Data bit : 8
Parity : None
Stop bit : 1
Flow control : Non e.
(3) The formats of NMEA messages are illustrated on Software Data section.
(4) To prevent from the poor contact, the USB connector was designed as good fitting. It
is strongly hot plug and play this connector frequently.

7
Laipac Technology, Inc.
3 Using Data Logger Demo Program
GPS Data Logger
demo program is a Win98/Win2000 based application software to demo
and test functions of G10/G30.
This demo
software will, according to the configuration,
start recording upon power on and stop recording on running out of storage. Users
may use the demo program to:
˙Upload recorded data
˙Change Recording Interval
˙Change Recording Mode
˙Programmable Device ID
˙Clear recorded data
˙Upgrade Firmware

8
Laipac Technology, Inc.
3.1 Gett ing Conn ected
First, connect G30-L to the USB/RS232 slot of your PC. Launch demo program
and use “select comport” button (first speed button) to select the correct COM port
connected. When COM port is correct selected, then press “connect” speed button to
connect G30-L. Once connected, all the other disabled buttons will become
enabled. (see Fig. 1) The connected device “G30-L” is shown in the message area.
The connecting result is shown in the status area. Sometimes users may need to retry
if the connection failed.
Fig 1 Device connected

9
Laipac Technology, Inc.
3.2 Uploading Dat a
Use “data sync” speed button to upload record. Users need to specify a file to save
the uploaded data. A blue bar will display to indicate the upload progressing. Use
“erase” speed button to clear logged data. After uploading the recorded data, users
need to “erase” the storage of the device to enable the device to record new data
again.
Fig 2 Uploading recorded data
10
Laipac Technology, Inc.
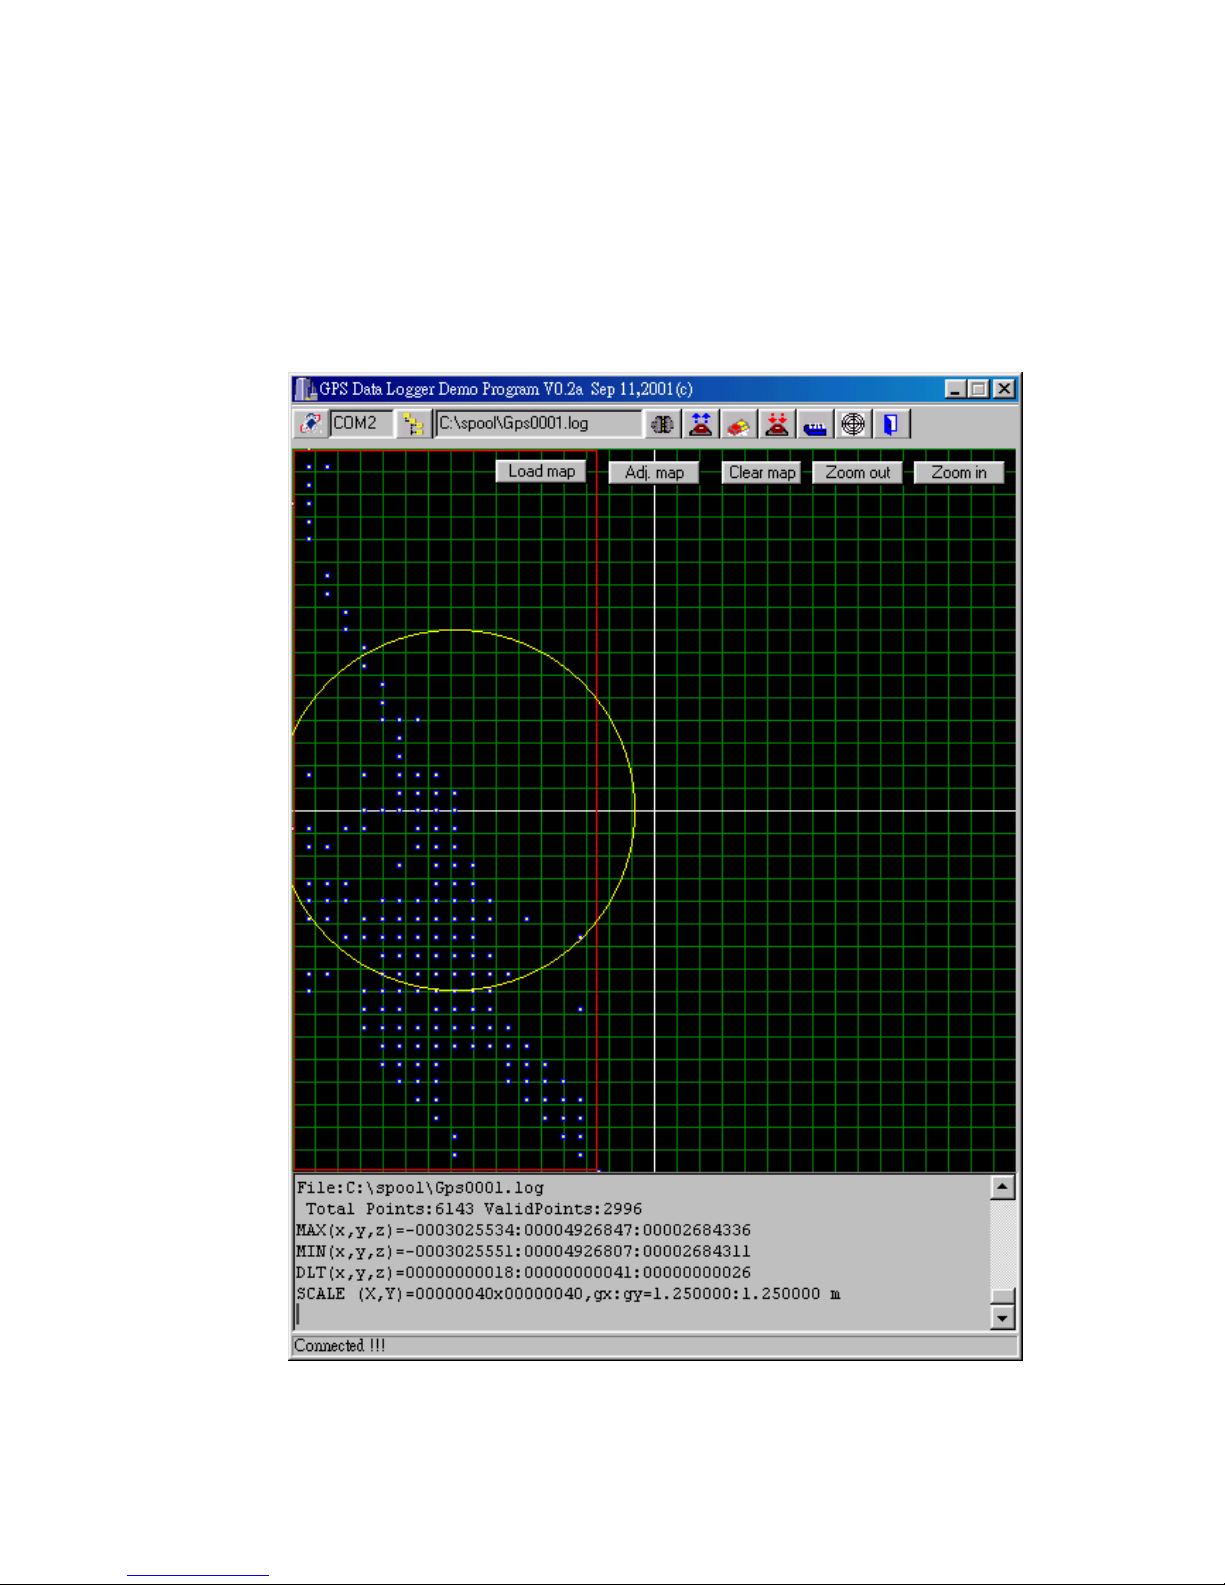
3.3 Data Review
Use “analysis”speed button to read back and display recorded data. (see Fig 4)
Some summary data is shown in the message area.
The diameter of the yellow circle is 20 meters.
The diameter of the green circle is 100 meters
Fig 4 Record data

11
Laipac Technology, Inc.
Use “Load map” button to load a map file (in BMP format) as a back map. (see Fig 5)
The loaded map file will automatically fit into the current display range.
Fig 5 Background map loaded

12
Laipac Technology, Inc.
Users can use “Adj. Map” button to set the correct map range in WGS84 (see fig 6)
Use “Clear map”
button to remove the background map. Use
“Zoom In” “Zoom
Out” buttons to change view range.
Fig 6 Adjust the map range
4 Troubleshooting
Problem Reason Solution
T est fail
(No serial port
output )
1.Poor connection
2.SiRF Demo set on wrong
configuration.
1.Check the RS-232 and PS/2 connector or
USB connector to make sure they are well
connected.
2. Check
SiRF demo set on correct COM
port and baud rate.
Open COM port
fail
The serial COM port has been
used for other application
program
1.Close all the other application programs and
return to the SiRF Demo.
2.If the problem still happen. Restart the
computer and run the SiRF Demo again.
Noposition
output but timer is
counting
1.Weak or no GPS signal can
be received by G30
2.At outdoor space but GPS
signal is block by building.
1.Go outdoor place without high building to
block the signal.
 Loading...