

Page 1
1. Before Proceeding
We recommend calling a professional if you are
uncertain about installing this product! This product
should be installed in accordance with all local and
state plumbing and building code requirements.
2. Shut Off Water Supplies
Locate the water supply inlets and shut off both the
hot and cold water supply valves. If you are
replacing an existing faucet, remove the old faucet.
Clean the sink surface thoroughly in preparation for
the new faucet.
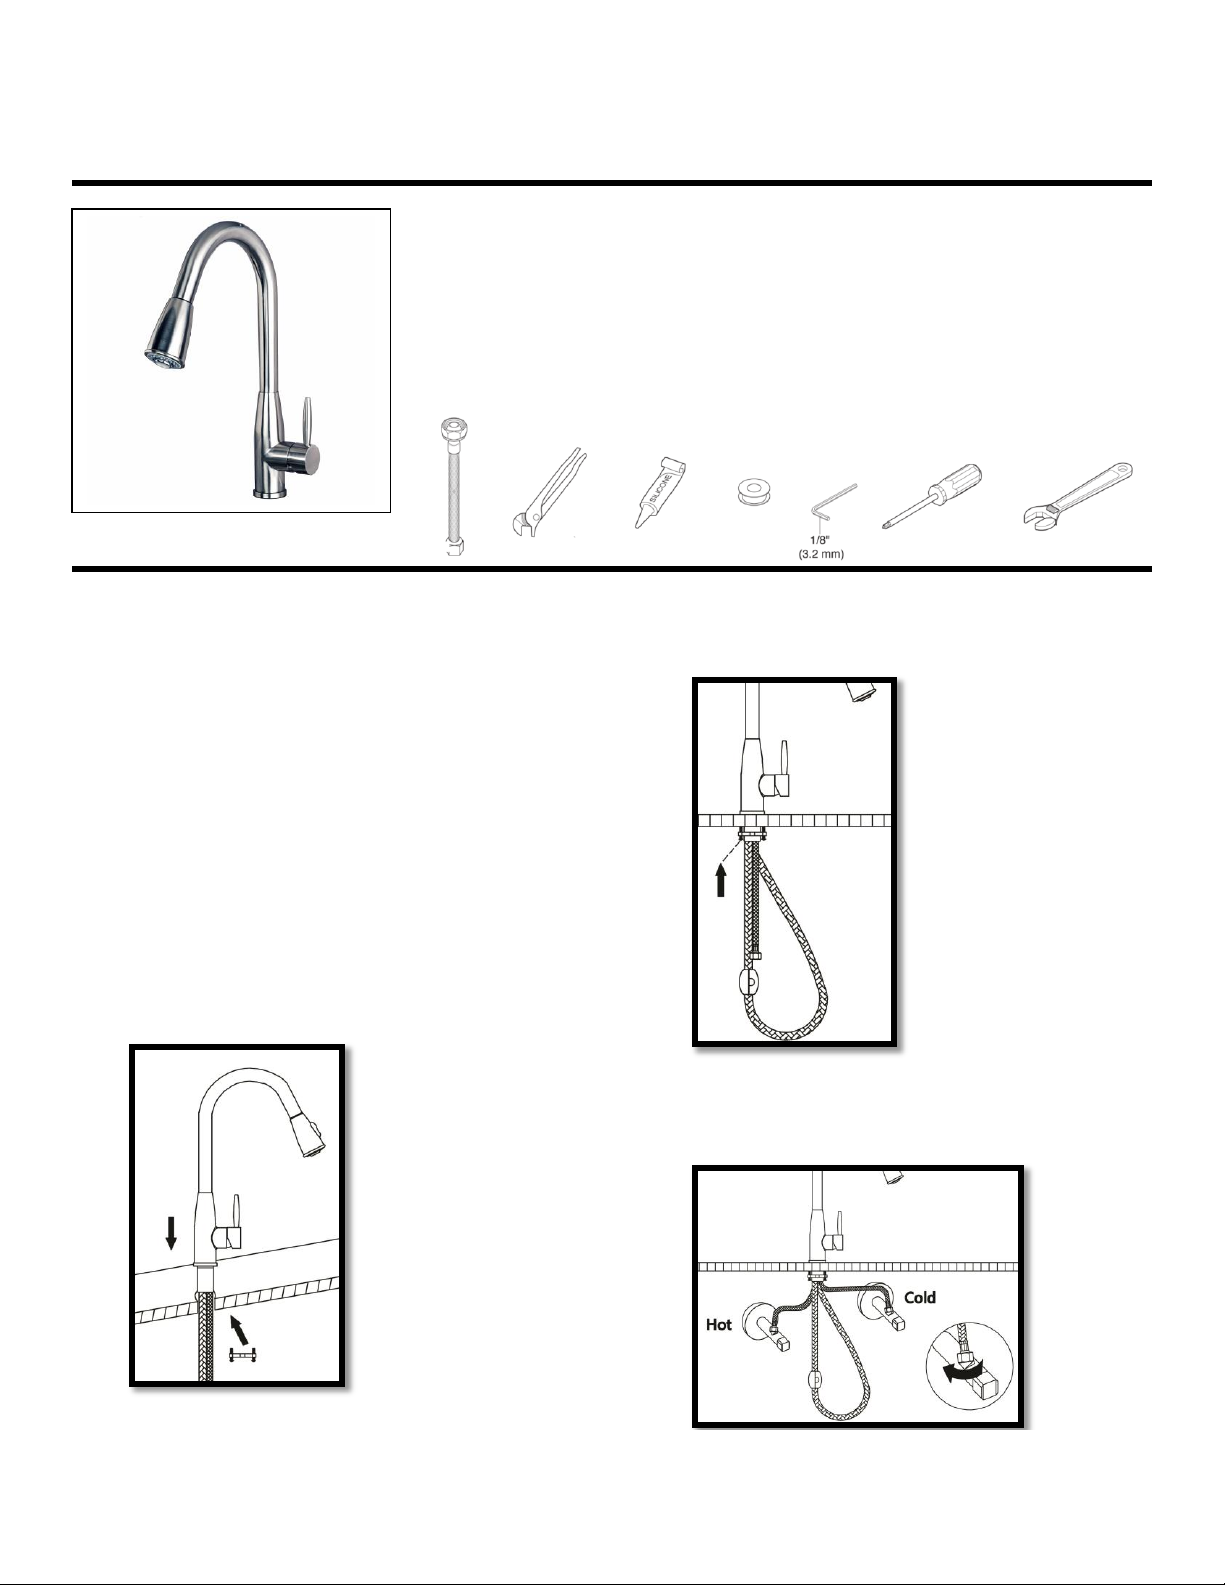
3. Secure New Faucet
Insert the shank through the sink hole. From
underneath the sink, attach the metal and rubber
washer through the shank and tighten the locknut
until the faucet is securely in place.
4. Connect Pull-Down Spray Hose
Connect the stainless steel braided pull-down
spray hose to the control as shown.
5. Connect to Water Supplies
Connect the water suppler lines directly to the
supply stops.
You may need:
For easy installation of your faucet
please:
READ ALL the instructions,
warnings, care and maintenance
information before beginning
Purchase the correct water supply
hook-up
ASSEMBLY INSTRUCTION
1 Hole Installation
Page 2

CLEANING AND CARE
Care should be given to the cleaning of this product. Although the finish is extremely durable, it can be damaged by harsh
abrasives or polish. To clean, simply wipe gently with a damp cloth and blot dry with a soft towel.
WARNING: SCRUBBING BUBBLES® BATHROOM CLEANER, LYSOL® BASIN TUB AND TILE CLEANER, and all other chemical
cleaners must not be used on the faucet body and handle. Use of these cleaners can crack and/or severely damage the faucet.
If overspray of these cleaners gets onto the faucet, immediately dry with a soft cotton cloth.
MAINTENANCE
If faucet exhibits very low flow
- Remove and clean aerator
If faucet leaks under the sink
- Inspect all supply line connections, tighten where necessary
If faucet leaks from under handle
- Remove handle. Ensure bonnet nut is tight. Clean or replace the o-ring
WARNING: Failure to securely tighten bonnet nut could result in water damage
LIMITED LIFETIME WARRANTY
 Loading...