

Lafayette Genesis series Installation Instructions Manual
®
2” Max. Space Evenly Space Evenly 2” Max
.
Custom WindoW shades
Cassette installation instruCtions
Thank you for choosing Genesis Custom Window Shades. With proper installation
and care, your new shades will provide many years of beauty and performance.
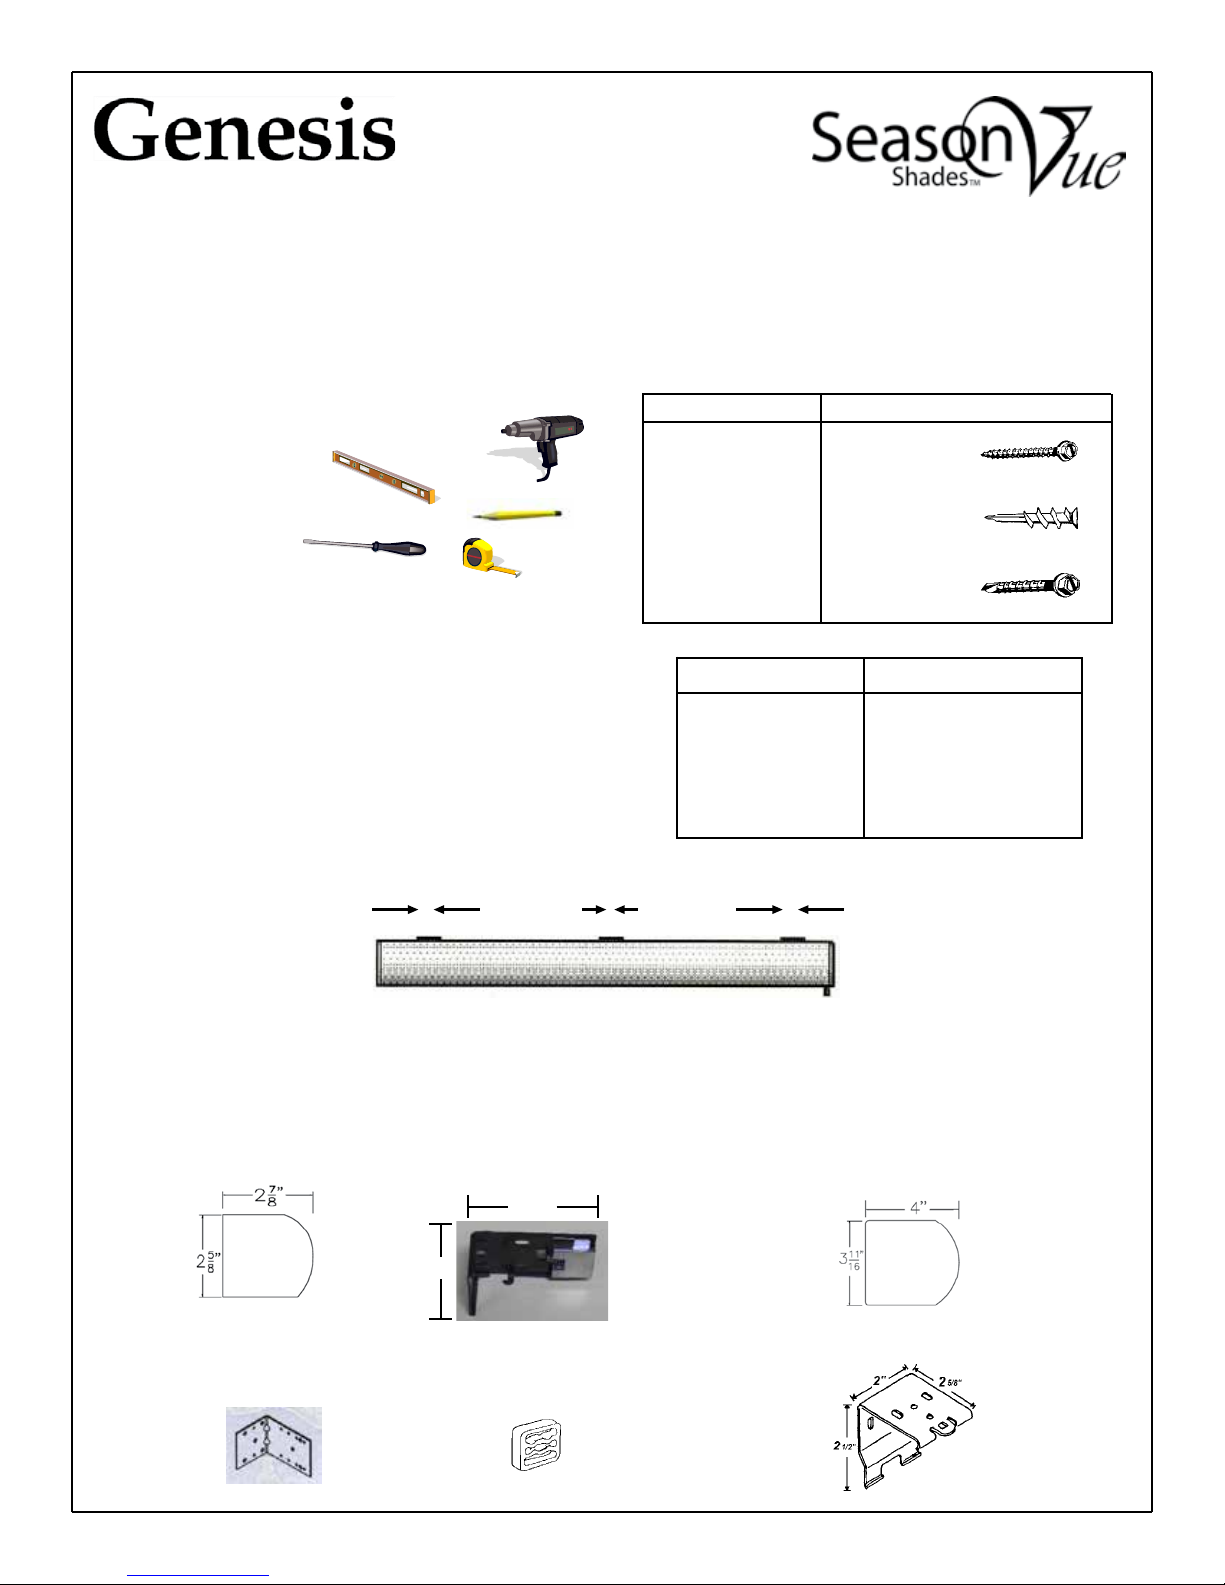
Tools and Fasteners Needed
Power Drill, 1/4” Driver and drill bits
Tape Measure
Flat blade Screwdriver
Phillips Screwdriver
Pencil
Level
Bracket Requirements
With inside and ceiling mounts, use a level to check that
the mounting surface is level. Shim brackets if necessary.
With outside mounts, the tops of the brackets must be
level and aligned at the same height.
For wider shades, additional brackets are required for
both inside and outside mounts. (See chart)
Mounting Surface
Wood
Drywall, Plaster
Metal
Shade Width
15” - 48”
48 1/16” - 72”
72 1/16” - 90”
90 1/16” - 120”
120 1/16” - 156”
Fastener
#6 Hex Head
Provided
Wall Anchors
Not Provided
Sheet Metal
Not Provided
Brackets Required
2
3
4
5
6
End Caps are not attached to the large cassette to avoid damage in shipping. Attach end caps
before installing the shade. NOTE: The shade can be removed while the cassette stays in the window opening.
Push up on the clutch side to disengage. While holding the shade up, push in on the idle end to remove the shade.
Small Cassette Bracket Provided
2 3/8”
1”
Optional Extension
Bracket
Optional Spacer
Bracket
Large Cassette
Bracket Provided
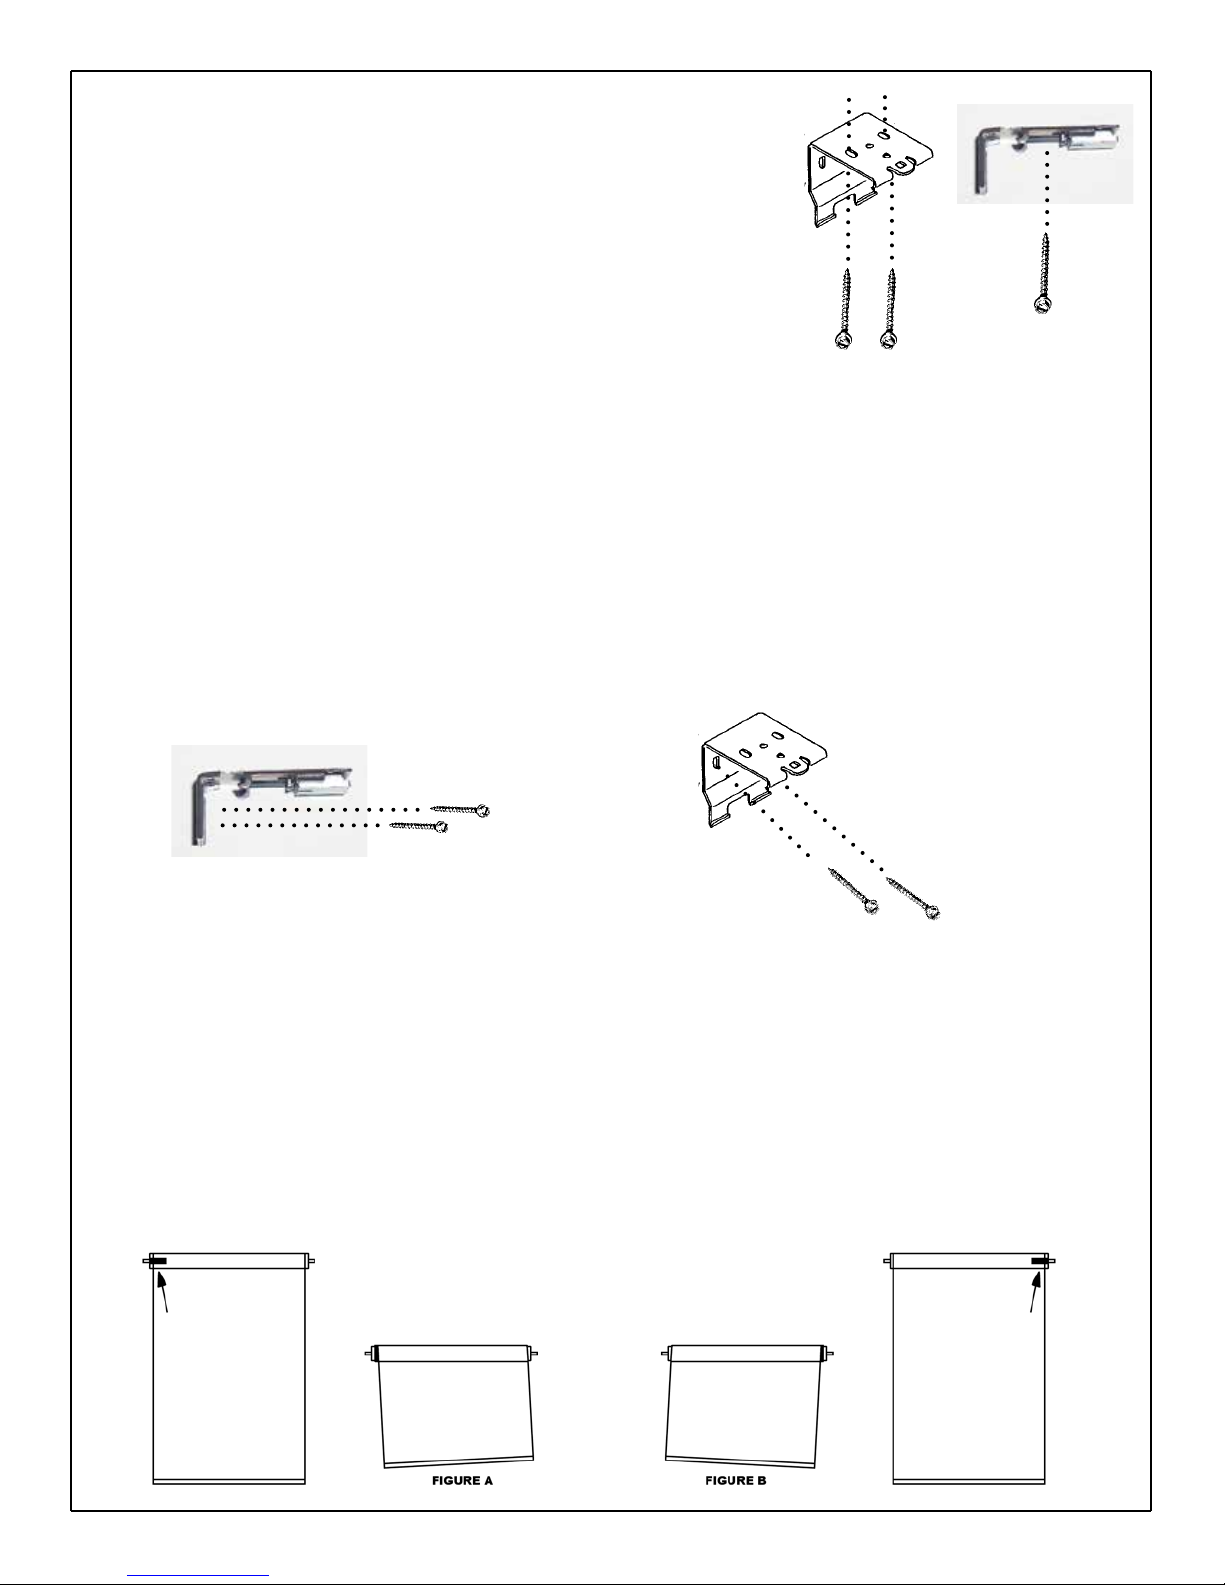
INSIDE MOUNT APPLICATIONS
2” minimum depth is required for inside mount. 3 ⅝” depth is required for
inside ush mount. Allow a minimum of ¾” from the back of the bracket to the
window for ease of installing the headrail.
• Use one mounting screw to attach each installation bracket to the top sill
of the window opening.
• Hold the shade and tilt the headrail 45° towards the room. Insert the
groove on the top backside of the headrail into the prongs on the back of
the brackets.
• Push the top of the headrail up until it snaps into the front of the bracket.
OUTSIDE MOUNT APPLICATIONS
The minimum mounting height for outside mount is 1” for the small cassette and 2” for the large cassette.
• Use a level and mark the mounting surface for bracket placement.
• Center each bracket over the mark made on the mounting surface and attach using two screws.
• Use a level to check that the brackets are level and aligned.
• Hold the shade and tilt the bottom of the headrail 45° towards the room. Insert the anodized spring-loaded plate
on the front of the bracket into the front groove on the top of the headrail.
• Push the back of the headrail up until it snaps into the back of the bracket.
• If an extension bracket is being used, attach the installation bracket after the extension bracket is installed.
Extension brackets provide an additional 1 1/8” clearance.
• Up to two optional spacers brackets can be attach. Each spacer provides an additional 3/8” clearance.
Large Cassette
Small Cassette
SHADE DOES NOT ROLL STRAIGHT
All shades are hung and inspected in the factory to ensure a straight roll. All spring roller shades should be pulled
from the center of the bottom of the shade. Pulling the shade from the sides can cause the shade to roll crooked and
possible damage the material. Masking tape used on the roller will act as a shim. Use the following instructions to
correct.
If shade veers toward the right (Fig. A) lower completely and place a 4” strip of masking tape on the
roller on the left side. Repeat as necessary until a
straight roll is achieved.
If shade veers toward the left (Fig. B) lower shade
completely and place a 4” strip of masking tape on the
right side. Repeat as necessary until a straight roll is
achieved.
 Loading...