

Page 1
LaCie blue eye 2
User’s Manual
How To Use This Manual
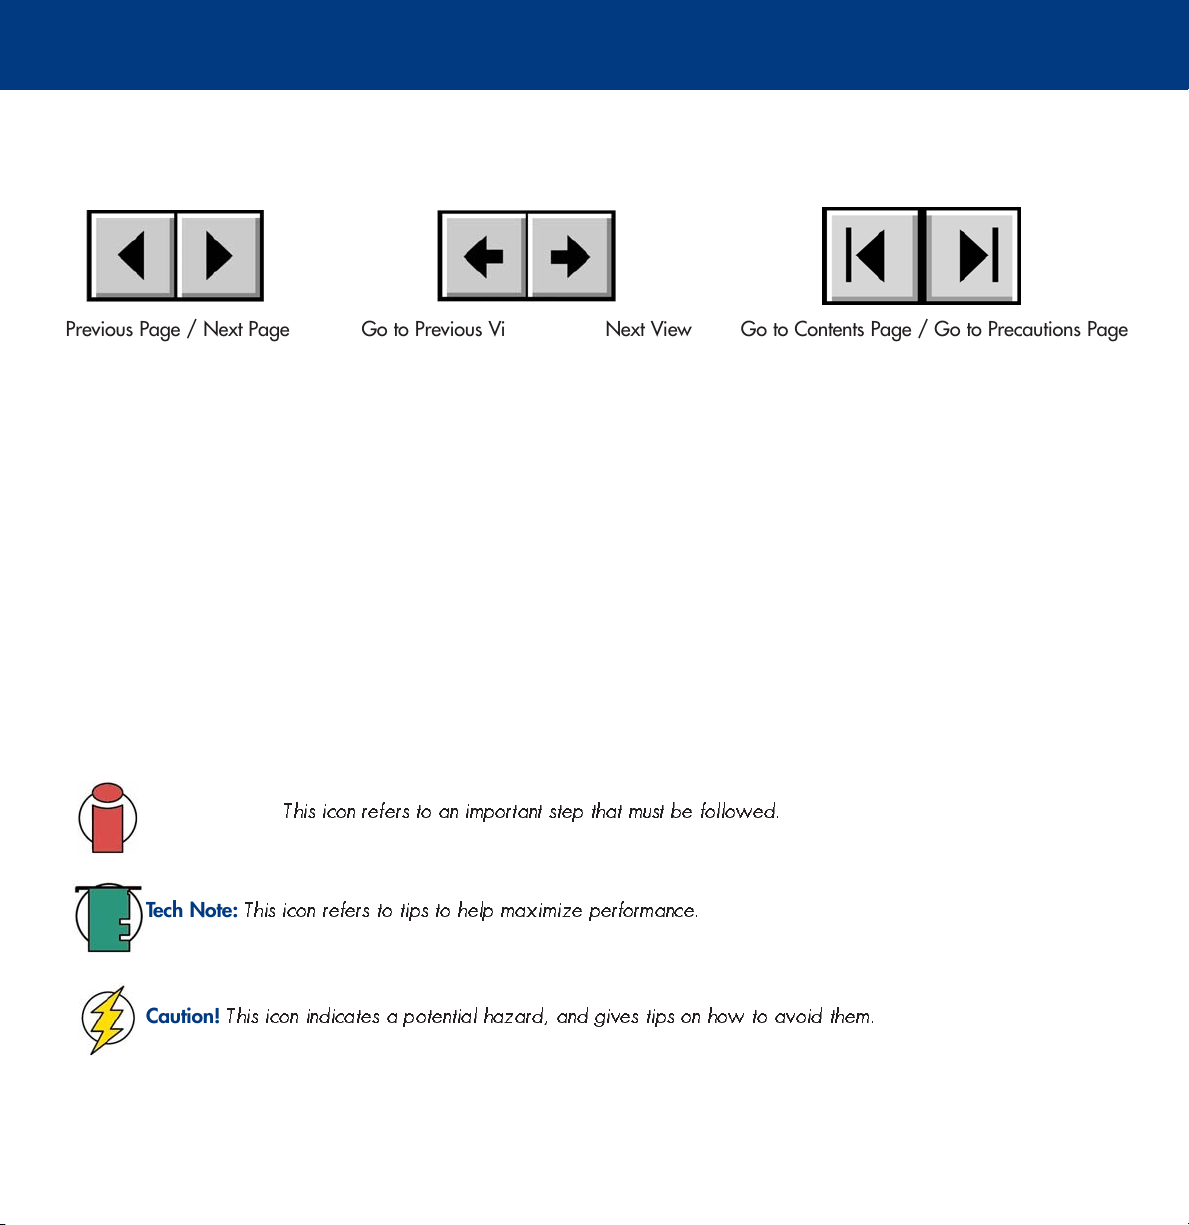
In the toolbar:
How To Use This Manual
Previous Page / Next Page
Go to Previous View / Go to Next View
Go to Contents Page / Go to Precautions Page
On the page:
Click on the text within the Contents page to jump to information on that topic.
Click on any red text to automatically jump to more information about that topic.
Printing:
While optimized for onscreen viewing, the pages of this manual are formatted for printing on 8 1/2” x 11” and A4 sized
paper, giving you the option to print the entire manual or just a specific page or section.
To Exit:
From the Menu bar at the top of your screen, select: File > Quit.
Icons Used In This Manual
Italicized paragraphs feature an icon describing the type of information being given.
Important Info:
This icon refers to an important step that must be followed.
Tech Note:
Caution!
This icon refers to tips to help maximize performance.
This icon indicates a potential hazard, and gives tips on how to avoid them.
Page 2

LaCie blue eye 2
Table of Contents
User’s Manual
Table of Contents
Foreword 3
1. Introduction 5
1.1. What The LaCie blue eye 2 Can Do 5
2. The LaCie blue eye 2 6
2.1. Minimum System Requirements 6
2.2. Package Contents 6
3. Color Management 7
3.1. Basic Issues With Monitor Color Rendering 7
3.1.1. Monitors Create Color With The Three Primaries – Red, Green And Blue 7
3.1.2. RGB Values Are Device-Dependent 8
3.1.3. The Consequences Of Device Dependency 9
3.2. Monitor Calibration And Device Profiles 9
3.2.1. Monitor Calibration 10
3.2.2. Device Profiles 11
4. Installing The LaCie blue eye 2 12
4.1. Installing The LaCie blue eye 2 Software 12
4.1.1. Mac Users 12
4.1.2. Windows Users 12
4.2. Connecting The LaCie blue eye vision Colorimeter 13
5. Using Your LaCie blue eye 2 Color Management Tools 14
5.1. Calibrating Your Monitor 14
5.1.1. Setting Target Values 15
5.1.2. Brightness Adjustment 16
5.1.3. Contrast Adjustment 17
5.1.4. White Point Adjustment 18
5.2. Creating A Monitor Profile 19
5.2.1. Saving The Profile 20
5.2.2. Calibration Report 21
5.3. Test And Report 22
6. Contacting Customer Support 23
7. Warranty 25
Page 3
LaCie blue eye 2
User’s Manual
Foreword
page 3
FCC Information
Information For Users
Any changes or modifications made to this device which are not expressly approved by LaCie are prohibited and may
void the user’s authority to operate this equipment.
General Information Statement
This device complies with Part 15 of the FCC Rules. Operation of this device is subject to the following two conditions:
1. This device may not cause harmful interference, and
2. This device must accept any interference received, including interference that may cause undesired operation.
This equipment has been tested and found to comply with the limits for a Class A digital device pursuant to part 15 of the
FCC Rules. These limits are designed to provide reasonable protection against harmful interference in a commercial
installation. This equipment causes, uses, and can radiate radio frequency energy and, if not installed and used in
accordance with the instructions, may cause harmful interference to radio communications. There is no guarantee,
however, that interference will not occur in a particular installation. If this equipment does cause harmful interference to
radio or television reception, which can be determined by turning the equipment off and then on, the user is encouraged
to try to correct the interference by one or more of the following measures:
1. Reorient or relocate the receiving antenna
2. Increase the separation between the equipment and the antenna
3. Connect the equipment into an outlet on a circuit different from that to which the receiver is connected
4. Consult the dealer or an experienced TV/radio technician for help
FCC Compliance Statement For United States Users
This equipment has been tested and found to comply with the limits for a Class B
digital device pursuant to Part 15 of the FCC rules. These limits are designed to
provide reasonable protection against harmful interference in a residential
installation. This equipment generates, uses, and can radiate radio frequency
energy and if not installed and used in accordance with the instructions may cause
harmful interference to radio communications. However, there is no guarantee that
interference will not occur in a particular installation. If this equipment does cause
harmful interference to radio or television reception, which can be determined by turning the equipment off and on, the
user is encouraged to try to correct the interference by one or more of the
following measures:
• Reorient or relocate the receiving antenna.
• Increase the separation between the equipment and receiver.
• Connect the equipment into an outlet on a circuit different from that to which the receiver is connected.
• Consult dealer or an experienced radio/TV technician for help.
LaCie blue eye 2
Tested To Comply
With FCC standards
FOR HOME OR OFFICE USE
Page 4

LaCie blue eye 2
User’s Manual
Changes or modifications not expressly approved by the manufacturer could void the authority of the user to operate this
equipment.
This device complies with Part 15 of the FCC Rules. Operation is subject to the following two conditions;
1. this device may not cause harmful interference, and
2. this device must accept any interference received, including interference that may cause undesired operation.
For Canadian Users
This Class B digital apparatus complies with Canadian ICES-003. Cet appareil numerique de la classe B est conforme a la
norme NMB-003 du Canada.
For European Users
This product conforms to the requirements of EC Directives 73/23/EEC and 89/336/EEC.
Declaration of Conformity / Déclaration de Conformité / Erklarung zur einhaltung von Produktnormen:
Sequel Imaging, Inc.
25 Nashua Road, Londonderry, NH 03053-USA
Product Name/ Designation / Produktname:
Sequel Imaging
Model Number / Numéro de modèle / Modelnummer:
Digital Control
Conforms to the following Product Specifications / Satisfait aux spécificatons produit suivantes / Den
folgenden Produktspezifi-kationen enspricht:
EMC: EN 60950 / EN 55022:1994 Class B / EN 61000-4-4:1995 / EN 55024:1998 / EN 61000-45:1995 EN 61000-4-2:1995 / EN 61000-4-6:1996 / EN 61000-4-3:1996 / EN 61000-4-11:199
Foreword
page 4
Page 5
LaCie blue eye 2
User’s Manual
1. Introduction
page 5
1. Introduction
Enter the LaCie blue eye 2 color management solution. The
LaCie blue eye vision colorimeter and LaCie blue eye 2
software deliver precise color control for monitors, allowing
for calibration of the three red, green and blue gains of the
monitor individually, and then creating an ICC profile of the
monitor.
These profiles provide a description of the monitor’s
individual characteristics, measuring the gamma, white point
and luminance. Profiles created with a colorimeter and
software, such as those created by the LaCie blue eye 2, are
more accurate and help programs like Adobe PhotoShop
LIGHT VIEW AUTO SOURCE
display images properly.
Graphic professionals working in color-managed
environments will be able to adjust every monitor in their
image chain, allowing them to evaluate images and perform
real-time edits with assured accuracy. A properly calibrated
and profiled monitor also allows for “soft-proofing,” because the image is verified, which saves time and money. Whether
you’re using Macs or PCs, CRTs or TFTs, every monitor will display the images as they were intended.
b
l
n
u
o
e
i
s
i
e
v
y
e
e
y
v
e
i
s
i
e
o
u
n
l
b
MENU
SELECT
1.1. What Your LaCie blue eye 2 Can Do
• Calibrate CRT and TFT display monitors
• Allows you to manage your color with ICC profiles
• Provide precise, accurate color correction
Page 6

LaCie blue eye 2
User’s Manual
2. Your LaCie blue eye 2
2.1. Minimum System Requirements
Mac Users
• Mac OS 9.2 or greater or Mac OS10.2.x or greater
• Power PC processor
• 128MB RAM
• 24-bit color display
• USB port
Windows Users
• Windows 98SE, Me, 2000 or XP
• Intel Pentium III or higher compatible processor
• 128MB RAM
• 24-bit color display
• USB port
2. Your LaCie blue eye 2
page 6
2.2. Package Contents
Your LaCie blue eye 2 should include the following:
• LaCie blue eye vision Colorimeter with attachments
• LaCie Color Utilities CD-ROM
Page 7

LaCie blue eye 2
User’s Manual
3. Color Management
page 7
3. Color Management
The digital age has brought about many important gains for color-conscious professionals, whether they work in fields
such as graphic design, pre-press, video or digital photography. With these improvements, though, new challenges arose.
One of those issues confronting professionals is the variability of the reproduction of color from one monitor to another.
Every monitor has its own color characteristics. In order to effectively deal with this variability in monitor “personalities,”
it’s important to have a means of controlling, or managing, this difference. The most effective color management solution
for monitors involves using a piece of hardware (the LaCie blue eye vision) and software (the LaCie blue eye 2) to adjust
and control the color among different monitors.
To implement color management, it is essential to properly calibrate and create custom, individual profiles for all your
monitors. Once a monitor has been calibrated and a profile has been created, the profile then communicates with the
operating system and the application software to ensure that images are displayed accurately.
This section will help to explain how color is created and how the LaCie blue eye 2 utilizes calibration and profiles to help
you implement your color management solution.
3.1. Basic Issues With Monitor Color Rendering
Human perception of color is the result of the addition by our brain of the stimuli received from three types of nerve cells
located in our eyes that are sensitive to the red, green and blue areas of the color spectrum. This is why the method used
in a computer monitor to reproduce color is for each pixel to be composed of three dots that respectively emit red, green
and blue light.
3.1.1. Monitors Create Color With The Three Primaries – Red, Green And Blue
1 pixel = 1 red dot + 1 green dot + 1 blue dot
LIGHT VIEW AUTO SOURCE
SELECT
MENU
Page 8

LaCie blue eye 2
User’s Manual
3. Color Management
page 8
The intensity of the light emitted by the red, green and blue
dot in each pixel is set as a function of three values
128 128 128
commonly called R,G and B. The R, G and B of a given pixel
can be set as any integer value from 0 to 255.
• A pixel set to R=255, G=255, B=0 has its red and green
dots emitting at maximum intensity and the blue dot not
255
255 255
00
0
emitting at all. The result is an intense yellow.
• A pixel set to R=128, G=128, B=128 has its three dots
emitting red, green and blue lights at a medium intensity.
The combined result is that this pixel is perceived as an
intermediate gray.
LIGHT VIEW AUTO SOURCE
SELECT
MENU
• A pixel set to R=0, G=0, B=255 has its red dot and its
green dot emitting no light and its blue dot emitting blue
light at its maximum intensity. The resulting pixel is globally
perceived as emitting an intense blue.
3.1.2. RGB Values Are Device-Dependent
As we noted earlier, every monitor has its own individual settings for reproducing the RGB, because monitor
manufacturers make very different choices as to the components that are used in their monitors. This leads to very strong
differences between the color produced by any given RGB settings on separate monitors.
Besides the different components, there are also several reasons for this variation. On a TFT, for instance, here are some of
the most important factors that come into consideration:
• the color filters used to create the dots of each pixel
• the nature of the backlights
• the light transmittance characteristics of the liquid crystal technology used in the display
• the brightness, contrast and other settings used on the monitor
• the age of the monitor
With this in mind, moving back to our example about the RGB setting to produce blue. We know that we’re getting the
color blue, but is the color of blue being displayed accurate? One particular monitor could display the blue as akin to sky
blue, another as Navy Blue, and another as another shade of blue. And this the case for all colors, not just blue.
Because the color that is actually produced by a given RGB setting is not necessarily the same from one monitor to
another, color scientists say that RGB values are device-dependent.
Page 9

LaCie blue eye 2
User’s Manual
3. Color Management
page 9
3.1.3. The Consequences Of Device Dependency
The direct consequence of this is that a given image (for instance a digital photograph) will not necessarily appear the
same on two separate monitors. One may often observe color shifts, loss of contrast or loss of detail.
As a result, considerable inefficiencies can appear in professional workflows. When receiving a picture from its
photographer, the news agency may have the impression that some color correction needs to be performed on the
photograph, even though it may already have been done by the photographer before sending the picture to the agency.
The same problem can occur when a printer receives digital art included in their customer’s document. The colors
displayed on the printer’s monitor may not be identical to the ones displayed at the customer site.
3.2. Monitor Calibration And Device Profiles
The LaCie blue eye 2 implements a convenient solution to these problems. It entails two steps:
Step 1
The monitor is set to a calibrated state that is described in terms of its Brightness, Gamma and White Point Temperature.
This allows the color-conscious professional to knowingly choose the range of colors that will be displayed on the monitor;
and in particular to be certain that the colors displayed on the monitor correspond to a standard environment.
Step 2
An ICC (International Color Consortium) monitor profile is created and systematically embedded in the artwork produced
from the professional’s workstation. The ICC profile acts as a translator between RGB values and absolute colorimetric
measurements that are expressed in a scientific color model such as CIELAB or Yxy.
MONITOR 1
RG B
MONITOR 1
ICC Profile
y
x
ICC Profiles form the links in your image chain between device-dependent monitors and the device-independent PCS.
PROFILE
CONNECTION
SPACE
RG B
MONITOR 2
ICC Profile
y
x
MONITOR 2
Page 10

LaCie blue eye 2
User’s Manual
By taking into account the translation mechanisms contained in the ICC profile, another computer monitor (or any other
device, such as a printer, for example) can reproduce the exact same absolute colors even though its components, settings
and aging may be significantly different. The benefit is that both professionals see the same colors, and that there is no
color shift across the workflow.
3. Color Management
page 10
3.2.1. Monitor Calibration
The calibration process allows the
professional to influence the range of
colors displayed. The main settings that
influence the range of colors displayed
are the following:
The Gamma Curve. This curve determines
the characteristics of the absolute colors
associated with all the RGB values
between the white point and the black
point. It expresses the intensity of the light
emitted by each of the RGB dots for each
of the intermediary values between 0 and
255. The shape of the gamma curve in
particular determines the level of detail
and contrast that are displayed on the
monitor. A practical way of describing this curve is through the use of a numerical value that describes its slope.
The White Point, i.e. the characteristics of the color displayed by the RGB value: R=255, G=255, B=255. These
characteristics are often summarized with the term White Point Temperature, because scientists have developed a model
where a given body brought to a certain temperature emits light of a given color. This temperature is expressed in degrees
Kelvin (°K). Common White Point Temperature settings in the pre-press workflow are 5000 K and 6500K. To influence
White Point Temperature, it is necessary to adjust the respective intensities (also called gains) of red, green and blue light
that are emitted by the RGB value of (255, 255,255).
The Luminance controls the overall brightness of the monitor.
With the LaCie blue eye 2, you can fine-tune all of these factors and target the Brightness, Gamma and White Point
Temperature settings of your choice. The sensor that is included is an advanced device that measures the light emitted by
your monitor and expresses it in absolute colorimetric terms.
Page 11

LaCie blue eye 2
User’s Manual
3. Color Management
page 11
3.2.2. Device Profiles
Device profiles are the most important part of the color management puzzle, because without an ICC profile within your
image chain, you can’t implement color management.
Profiles serve three very important functions:
• They describe what color the RGB pixel values actually represent.
• They relate device-dependent RGB values to device-independent CIELAB/Yxy values.
• They contain data to convert between the RGB value that each device produces, and the CIELAB/Yxy number value.
Tech Note:
position of a color on a red-green axis; and B= the position of a color on a yellow-blue axis.
Tech Note:
chromaticity diagram graph.
CIELAB refers to the Commission Internationale de l’Eclairage, and L= the “lightness”; A= the
Yxy refers to a specification where a color is specified by its x and y co-ordinates on a
Page 12

LaCie blue eye 2
User’s Manual
4. Installing Your LaCie blue eye 2
page 12
4. Installing Your LaCie blue eye 2
4.1. Installing The LaCie blue eye 2 Software
4.1.1. Mac Users
Mac OS 9.x
Insert the LaCie Color Utilities CD-ROM into your computer’s CD or DVD drive. Once the disc appears on your desktop,
double-click the icon to open the folder. From this folder, simply launch the software by clicking on the LaCie blue eye 2
icon.
Mac OS 10.x
Insert the LaCie Color Utilities CD-ROM into your computer’s CD or DVD drive. Once the disc appears on your desktop,
double-click the disc icon to open the LaCie Color Utilities CD-ROM. From this folder, click on the LaCie blue eye 2 installer
icon. Follow the on-screen instructions to begin the installation process. If you don’t have administrator privileges, click on
the User Install button, and if you have administrator privileges, click on the Admin Install button. By clicking on the User
Install button, the LaCie blue eye 2 program folder will be created and placed in the User/Applications folder. By clicking
on the Admin Install button, the LaCie blue eye 2 program folder will be created and placed in the main Applications
folder. You may need to enter your Administrator name and password to proceed. Please refer to your Apple User’s
Manual for information about Administrator rights and privileges.
4.1.2. Windows Users
Insert the LaCie Color Utilities CD-ROM into your computer’s CD or DVD drive. Follow the on-screen instructions to install
the software. Once installation is complete, go into Programs and launch the LaCie blue eye 2 software.
Page 13

LaCie blue eye 2
User’s Manual
4.2. Connecting The LaCie blue eye vision Colorimeter
4. Installing Your LaCie blue eye 2
page 13
Important Info:
fingerprints and dust.
Simply connect the USB end of the LaCie blue eye vision colorimeter to an available USB port on your computer.
Tech Note:
The LaCie blue eye vision has two separate attachments for calibrating CRT and LCD monitors. To calibrate CRT monitors,
utilize the attachment with the suction cups. To calibrate LCD monitors, utilize the attachment with the soft felt.
Before connecting the LaCie blue eye vision to your monitor, clean the monitor to remove
You may attach the LaCie blue eye vision colorimeter to powered USB hubs.
CRT Attachment
LCD Attachment
To computer
To computer
Page 14

LaCie blue eye 2
User’s Manual
5. Using Your LaCie blue eye 2
page 14
5. Using Your LaCie blue eye 2 Color Management Tools
This chapter details how to use the LaCie blue eye 2 software and LaCie blue eye vision colorimeter to calibrate your
monitor and build a profile.
Caution!
• Ensure that you have a copy of your monitor’s User’s Manual for OSD (On-Screen Display) reference, and
to help determine factory presets and configuration.
• Make sure that your monitor has been powered on for at least one hour. This ensures that the monitor has
had enough time to warm up and stabilize.
• Disable any screen savers.
• Delete or disable any competing profile programs you may have installed. These programs could compete
for control of the display, and it is important that only one program is running at a time.
• If another profile program is installed and it has a startup utility that is used at your computer’s boot time,
this program will need to be deleted.
• Setup your work area in the way that you will use it after calibrating and profiling. Room lighting has an
affect on the appearance of screen images.
• Tilt the monitor upwards 10° (with the axis measuring from the horizontal length of the bottom of the
monitor). This helps to prevent unwanted light from affecting the results.
• If your monitor’s OSD offers color adjustment mechanisms, set them as close to your targeted workflow
settings as possible before launching the LaCie blue eye 2 software.
Before you begin to calibrate, ensure that the following conditions are met:
5.1. Calibrating Your Monitor
Start by launching the LaCie blue eye 2 application by double-clicking on its icon. The LaCie blue eye 2 main application
window will then appear.
Tech Note:
computer, but only one monitor may be calibrated at a time. In order to calibrate more than monitor
connected to your computer, move the LaCie blue eye 2 application window onto the monitor that you want to
calibrate. Repeat this process for each monitor that you wish to calibrate.
The LaCie blue eye 2 is capable of calibrating more than one monitor connected to your
Page 15

LaCie blue eye 2
User’s Manual
5.1.1. Setting Target Values
STEP 1
TARGET SETTINGS
The initial window of the LaCie blue eye 2
application invites you to provide your target
values for your monitor’s settings of Gamma,
White Point Temperature, and Luminance.
• Gamma can be set at any value between 1
and 3 in 0.1 increments. Please choose the
gamma value that corresponds to your working
environment.
• White Point Temperature can be set either
through a preset value (From 5000 Kelvin to
9500 Kelvin in 500 K increments), or manually.
5. Using Your LaCie blue eye 2
page 15
• Luminance can be targeted as an absolute value in cd/m2 (candelas/meter2), or a predefined value expressed as a
portion of the maximum luminance offered by the monitor.
Important Info:
diminish the gain associated with one or several of your monitor’s three primaries: Red, Green, and Blue. This
will reduce the global luminance of your monitor. It is therefore recommended to use a Brightness target that is
slightly higher than the luminance you want to work with.
Important Info:
you are using a TFT monitor, high luminance settings may also reduce the lifetime of your monitor ’s backlights.
If you use your monitor in a darkened environment, it may not be necessary to use high luminance settings
after all.
Once you have established your targeted values, continue onto Step 2 by clicking on the Next button.
Depending on the White Point Temperature target you choose, the software may lead you to
Although high Luminance settings can be attractive, they may result in fatigue for the user. If
Page 16

LaCie blue eye 2
User’s Manual
5.1.2. Brightness Adjustment
STEP 2
BRIGHTNESS ADJUSTMENT
The Brightness Adjustment window will assist
you in placing your monitor in the optimal
range of brightness. When in this range, two
conditions are met:
• Full black and the darkest gray can be
distinguished one from the other. This insures
there is no loss of detail in the dark zones of
your artwork.
• The darkest black remains black. This
prevents any potential loss of contrast.
1) In your monitor’s OSD, please choose the lowest possible value for Brightness.
5. Using Your LaCie blue eye 2
page 16
2) Place the colorimeter over the (dark) measurement area and click Start.
3) You will now slowly increase the Brightness control in your monitor’s OSD a few increments at a time. While you do
this, the colorimeter constantly measures the actual luminosity of the monitor and displays it with the slider.
As you increase the brightness of your monitor, the slider will move to the right towards the green area. When it reaches
the green zone, a message will inform you the monitor is bright enough. You may then click on the Next button to go to
the Contrast Adjustment window.
Tech Note:
to the next step, 5.1.3. Contrast
Caution!
start the calibration and profiling process over.
If you cannot reach the green zone after adjusting your monitor to its maximum brightness, move
Adjustment, by clicking on the
Please do not modify your monitor’s brightness setting after this stage. Doing so will force you to
Next
button.
Page 17

LaCie blue eye 2
User’s Manual
5.1.3. Contrast Adjustment
STEP 3
CONTRAST ADJUSTMENT
The Contrast Adjustment window will assist
you in placing your monitor in its optimal
dynamic for your colors. The right contrast
setting produces brighter colors through
continuous tones, detailed shadows and
highlights.
5. Using Your LaCie blue eye 2
page 17
Important Info:
not have an OSD control for
contrast, move on to the next step,
5.1.4. White Point
clicking on the
1) Using your monitor’s OSD, set your monitor to its highest contrast value.
2) Press Start.
3) Using the OSD, decrease your monitor’s contrast value a few increments at a time. As you decrease the contrast of your
monitor, the slider will move to the left towards the green area. When it reaches this green area, a message will inform
you the monitor is correctly set. You may then click on the Next button to go to the White Point Adjustment window.
Caution!
start the calibration and profiling process over.
Please do not modify your monitor’s brightness setting after this stage. Doing so will force you to
If your monitor does
Adjustment, by
Next
button.
Page 18

LaCie blue eye 2
User’s Manual
5.1.4. White Point Adjustment
STEP 4
WHITE POINT ADJUSTMENT
The value of the White Point Temperature
determines the actual color of white.
5. Using Your LaCie blue eye 2
page 18
Important Info:
not offer individual R, G, B settings.
If your monitor does not offer these
settings, check to see if your
monitor’s OSD settings let you
choose a color temperature. If this is
the case, choose the nearest value to
your preferences. If your monitor
does not offer this feature, click
to skip this step.
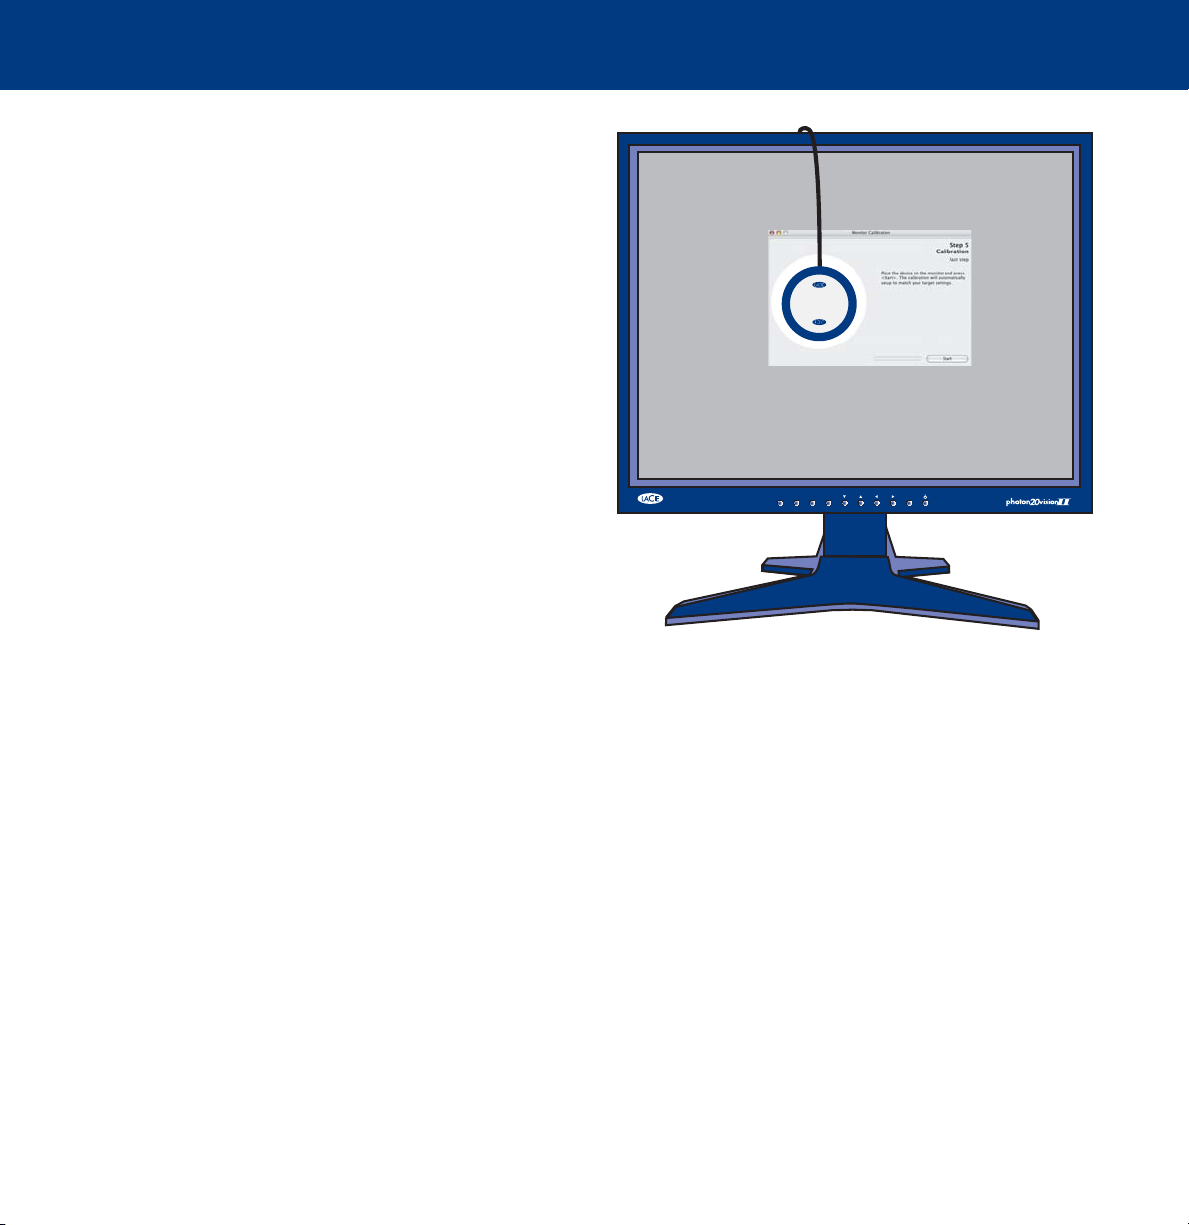
During this phase of the calibration process, the LaCie blue eye vision colorimeter constantly measures the colorimetric
characteristics of white as displayed by your monitor. To reach your target White Point Temperature, you will adjust the
relative quantities of Red, Green and Blue used by your monitor to create white.
To do this, you will sequentially increase or decrease the R, G, and B gain settings of your monitor, using the OSD.
1) Press the Start button.
2) Identify which of the settings need to be decreased by looking at the three sliders. The slider that needs to be reset first
will be the setting whose slider is furthest away from the center. Reduce or increase this setting’s gain by decreasing its
gain using your monitor’s OSD. The corresponding slider should move to the center towards the green area. When it
reaches this green area, this setting is correct.
Some monitors do
Next
3) Repeat the above steps on the next two sliders until all of the R, G, and B sliders have reached the green area. Your
monitor’s RGB gains are now set according to your target White Point Temperature.
Once the White Point Temperature has been set, click on the Next button to continue onto the last step.
Page 19

LaCie blue eye 2
User’s Manual
5.2. Creating A Monitor Profile
STEP 5
CALIBRATION
5. Using Your LaCie blue eye 2
page 19
Caution!
monitor’s OSD settings, or you will
have to restart the entire calibration
process.
Caution!
that nothing disrupts the
measurement: the LaCie blue eye
vision colorimeter should remain
aligned on the measurement area at
all times and no other window
should appear on the monitor.
After completing Steps 1, 2, 3 and 4, the LaCie blue eye 2 program will finish calibration by creating a custom ICC profile
of your monitor based on the information provided to the program by displaying color patches (which are measured by
the LaCie blue eye vision colorimeter) and comparing them to the theoretical values to be displayed. Press the Start button
to begin the profiling process.
Do not modify your
During this process, ensure
Page 20

LaCie blue eye 2
5. Using Your LaCie blue eye 2
User’s Manual
5.2.1. Saving The Profile
Once Step 5 is complete, the Save Profile
window will automatically appear. In this
window, you can simply choose the default
filename, or enter a custom filename for your
profile to be saved under. The default profile
filename contains the date of calibration, color
temperature, gamma and luminance settings.
With this practical format you can easily
remember, at a future date, when your last
calibration took place, and what the settings
were.
Once you have chosen the profile’s filename,
click on the Save Profile button.
• In Mac OS X, this file is stored in the Home/Library/ColorSync profile folder.
• In Mac OS 9.x, this file is stored in the System Folder/ColorSync Profiles folder.
• In Windows XP, this file is stored in the Windows/System32/Spool/Drivers/Color folder.
page 20
Your new profile automatically becomes the current profile for your monitor settings.
Important Info:
need to change them, you will need to rebuild a profile. Likewise, if you want to change your monitor’s
settings (to move to a different White Point, for instance) you will need to rebuild a profile.
The correctness of the ICC profile depends on your monitor’s OSD settings. If at any time you
Page 21

LaCie blue eye 2
User’s Manual
5.2.2. Calibration Report
Now that your monitor has been calibrated,
you can run a test to verify the quality of the
calibration. The LaCie blue eye 2 software will
measure the quality of the color correction
performed by the ICC profile you have built.
The measured values for gamma, white point
temperature and luminance are displayed.
There should only be a small difference
between your target values and those actually
displayed.
5. Using Your LaCie blue eye 2
page 21
Left Diagram – Chromaticity Diagram
The Chromaticity Diagram provides a graphic
representation of the monitor’s color gamut,
with the current settings applied. The larger the
area of the displayed triangle, the better.
Right Diagram – Gamma Curve
The Gamma Curve represents the three
correction curves that were applied to your
computer’s video card’s Computer Lookup
Table (CLUT).
Page 22

LaCie blue eye 2
User’s Manual
5.3. Test And Report
Before beginning the calibration process, you have the
opportunity to test your monitor’s current settings for
Gamma, White Point and Luminance. If you would like to
continue with the calibration process without first testing
your monitor, click on the Next button and refer to section
5.1.1. Setting T
By clicking on the Test & Report button, you will be directed to
place the LaCie blue eye vision Colorimeter onto your monitor.
The blue eye 2 software will display a sampling of colors to
determine the current values of your monitor’s Gamma, White
Point and Luminance.
arget Values for more information.
5. Using Your LaCie blue eye 2
page 22
At the end of the process, the blue eye 2 software will display
a chromaticity diagram of your monitor’s current settings,
before calibrating. It also lists your monitor’s current settings
for Gamma, White Point and Luminance. To continue with
the calibration process, press the Calibration button. To close
the program, click the Quit button.
Page 23

LaCie blue eye 2
User’s Manual
6. Contacting Customer Support
page 23
6. Contacting Customer Support
Before You Contact Technical Support
1) Read the manual.
2) Try to isolate the problem. If possible, make the device the only external device on the CPU, and make sure that all of
the cables are correctly and firmly attached.
If you still can't get your LaCie device to work properly, contact us via the provided Web link. Before contacting us, make
sure that you are in front of your computer and that you have the following information on hand:
• Your LaCie device's serial number
• Monitor brand and model
• Video card brand and model
• Operating system(Mac OS or Windows) and version
• Computer brand and model
• Names of CD or DVD drives installed on your computer
• Amount of memory installed
• Names of any other devices installed on your computer
Page 24

LaCie blue eye 2
User’s Manual
6. Contacting Customer Support
page 24
LaCie Technical Support
LaCie Australia
Contact Us At:
http://www.lacie.com/au/contact/
LaCie Canada
Contact Us At:
http://www.lacie.com/caen/contact/ (English)
LaCie Finland
Contact Us At:
http://www.lacie.com/fi/contact
LaCie Germany
Contact Us At:
http://www.lacie.com/de/contact/
LaCie Japan
Contact Us At:
http://www.lacie.co.jp
LaCie Norway
Contact Us At:
http://www.lacie.com/no/contact/
LaCie Belgium
Contact Us At:
http://www.lacie.com/be/contact/
LaCie Denmark
Contact Us At:
http://www.lacie.com/dk/contact/
LaCie France
Contact Us At:
http://www.lacie.com/fr/contact/
LaCie Italy
Contact Us At:
http://www.lacie.com/it/contact/
LaCie Netherlands
Contact Us At:
http://www.lacie.com/nl/contact/
LaCie Spain
Contact Us At:
http://www.lacie.com/es/support/request
LaCie Sweden
Contact Us At:
http://www.lacie.com/se/contact/
LaCie United Kingdom & Ireland
Contact Us At:
http://www.lacie.com/uk/support/request
LaCie Grand Export
Contact Us At:
http://www.lacie.com/intl/contact/
LaCie Switzerland
Contact Us At:
http://www.lacie.com/chfr/contact
LaCie USA
Contact Us At:
http://www.lacie.com/contact/
Page 25

LaCie blue eye 2
User’s Manual
7. Warranty
page 25
7. Warranty
LaCie warrants your device against any defect in material and workmanship, under normal use, for the period designated
on your warranty certificate. In the event this product is found to be defective within the warranty period, LaCie will, at its
option, repair or replace the defective device.
This warranty is void if:
• The device was operated/stored in abnormal use or maintenance conditions;
• The device is repaired, modified or altered, unless such repair, modification or alteration is expressly authorized in writing by LaCie;
• The device was subjected to abuse, neglect, lightning strike, electrical fault, improper packaging or accident;
• The device was installed improperly;
• The serial number of the device is defaced or missing;
• The broken part is a replacement part such as a pickup tray, etc.
• The tamper seal on the device casing is broken.
LaCie and its suppliers accept no liability for any loss of data during the use of this device, or for any of the problems
caused as a result.
LaCie will not, under any circumstances, be liable for direct, special or consequential damages such as, but not limited to,
damage or loss of property or equipment, loss of profits or revenues, cost of replacement goods, or expense or inconvenience caused by service interruptions.
Any loss, corruption or destruction of data while using a LaCie device is the sole responsibility of the user, and under no
circumstances will LaCie be held liable for the recovery or restoration of this data.
Under no circumstances will any person be entitled to any sum greater than the purchase price paid for the device.
To obtain warranty service, call LaCie Technical Support. You will be asked to provide your LaCie product’s serial number,
and you may be asked to furnish proof of purchase to confirm that the drive is still under warranty.
All drives returned to LaCie must be securely packaged in their original box and shipped with postage prepaid.
Important Info:
Register online for free technical support: www.lacie.com/register
 Loading...