

Lacava DE142 User Manual [en, es]

LACAVA®
Owner’s Manual
Furniture
Caution!
Remove doors and drawers from this cabinet during installation and
store them away from the work area. This will make the cabinet lighter,
easier to move, and also helps protect drawer and door faces during
installation. Drawers and doors can open unexpectedly and unbalance
the cabinet, causing injury or damage.
All cabinets, even free-standing, should be secured to the wall stud to
prevent any movement.
Damage caused during installation is not covered by warranty.
Please see our terms and conditions for additional details.
Important: Keep this manual for future technical assistance and/or replacement parts. Please read the instructions within
the booklet carefully prior to installation. LACAVA recommends that this fixture be installed by a professional plumber and
will not be held responsible for any damage caused by improper installation. It is the responsibility of the homeowner to
ensure that this fixture complies with all local plumbing codes. Please see the Terms & Conditions found within this
booklet for additional information. For technical assistance please contact 888-522-2823 (toll free).
Importante: Guarde este manual para futura asistencia técnica y / o piezas de repuesto. Por favor, lea las instrucciones
en el folleto cuidadosamente antes de la instalación. LACAVA recomienda que este aparato sea instalado por un técnico
y no se hace responsable de los daños causados por una instalación incorrecta. Es la responsabilidad del propietario
garantizar que este aparato cumpla con todos los códigos de plomería locales. Por favor, consulte nuestros Términos y
Condiciones que se encuentran en este folleto para información adicional. Para obtener asistencia técnica, por favor
contacte a: 888-522-2823 (llamada gratuita).
Table of Contents/Contenido:
Page 2: Wall-mounted Cabinet Instructions
Page 2: Wall-mounted Countertop Instructions
Page 3: Drawer Removal/Installation
Page 4: Drawer Adjustments
Page 5: Door Removal/Installation
Page 6: Door Adjustments
Page 7: Cleaning & Care
Page 8: Warranty
Page 9: Terms and Conditions
6630 west wrightwood ave chicago il 60707 usa tel 773 637 9600 fax 773 637 9601 info@lacava.com www.lacava.com
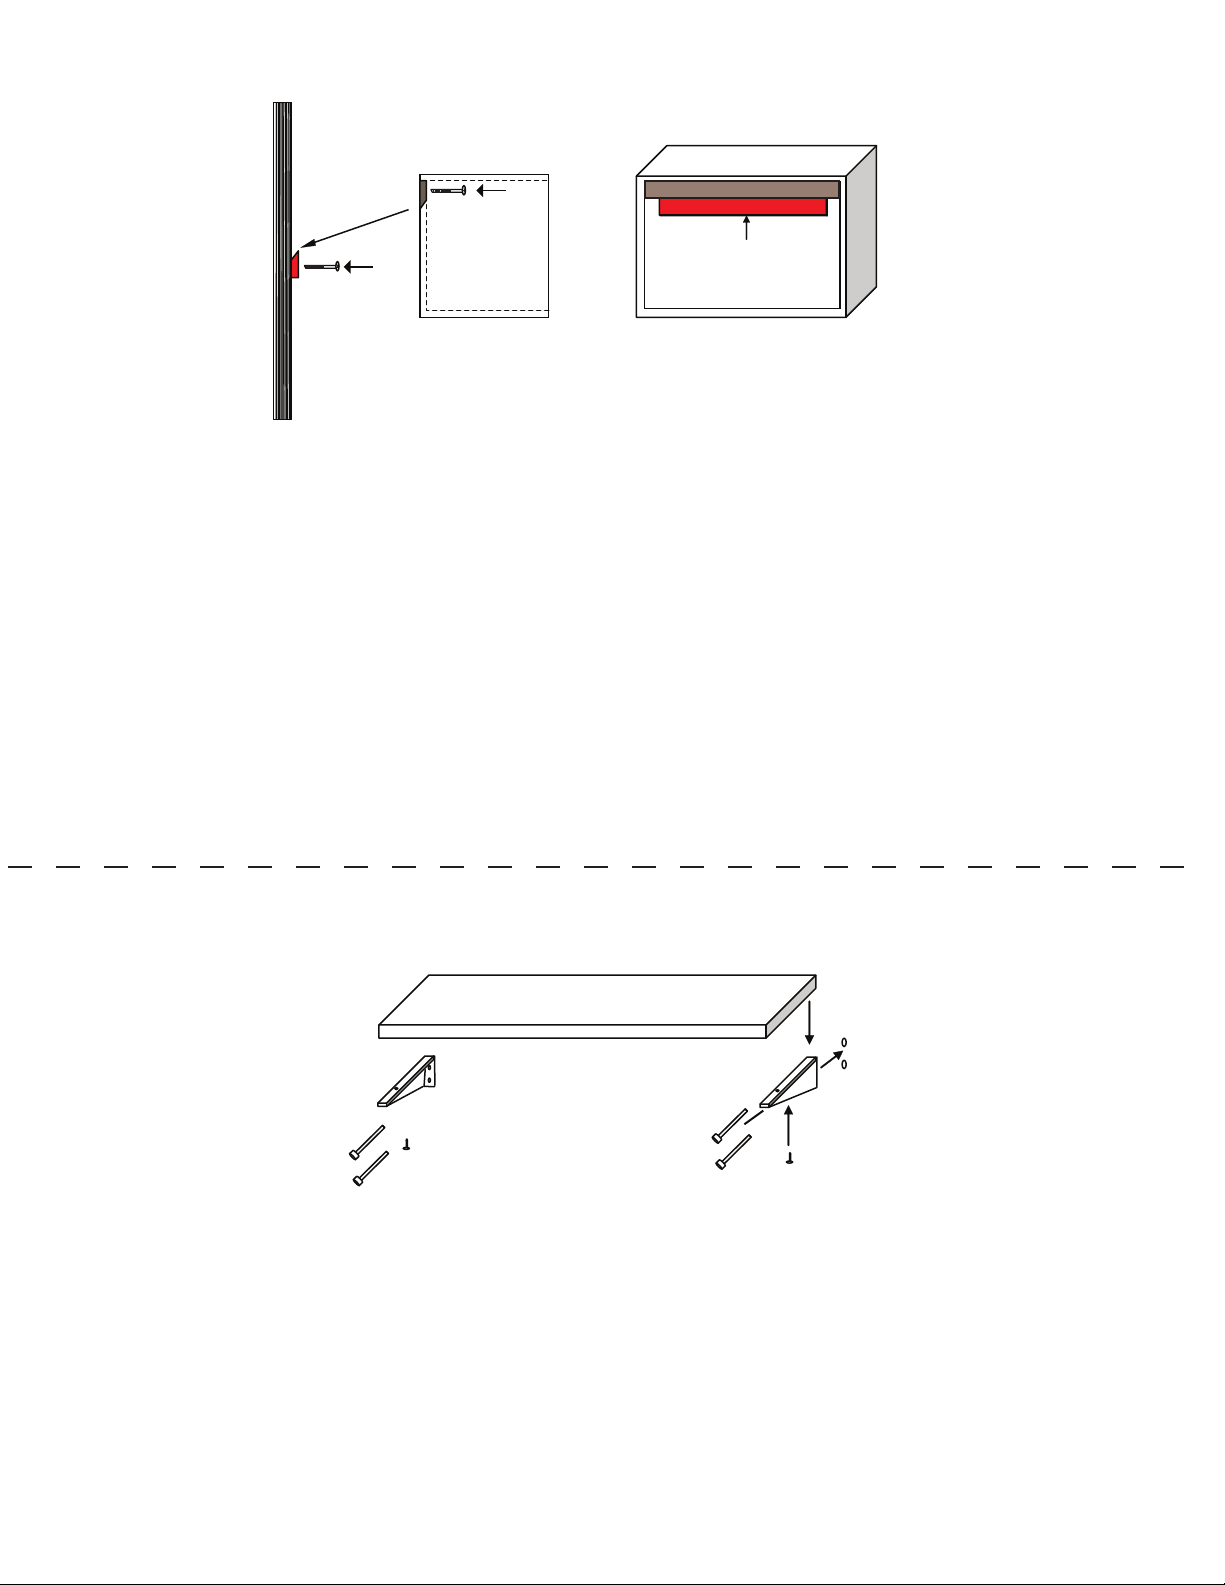
Wall-mounted Cabinet Instructions
Cleat
Min. 2X
Min. 2X
1. In order to provide proper support for wall-mounting a cabinet, it's usually necessary to remove a small section of
drywall so you can access the wall studs and attach blocking between them.
2. Based on the cabinet’s dimensions and mounting height, decide where support will be needed. Then remove the
drywall in that area and install 2-by-6 or 2-by-8 blocking between the wall studs. Then using 3 1/2” galvanized
common nails, toenail the blocking to the studs and repair the drywall.
3. If the studs cannot be used, then ¾” plywood behind the wall can also provide the necessary support.
4. Attach the wedged wood bracket (cleat) to the wall by drilling minimum two screws through the cleat directly into
the studs or reinforced wall.
5. Place cabinet onto the wall so that the wood bracket on the back of the cabinet sits on the wall cleat. There will
be some room so that the cabinet can be adjusted left to right once mounted onto the cleat.
side
6. Once the cabinet is hanging on the cleat in the desired position secure the cabinet to the wall so that it cannot
be lifted off the cleat. Use 2 x 2 1/2” wood screws driven from inside the top of the cabinet into the wall.
Wall-mounted Countertop Instructions
1. Perform steps 1-3 above to determine the proper height and support needed to mount countertop.
2. Measure and drill pilot holes in the reinforced wall for the anchors. Insert anchors and attach the brackets with
provided screws, so that the finished part of the bracket faces outwards.
3. Place the countertop on top of the brackets and attach with the provided screws.
LACAVA LLC 2
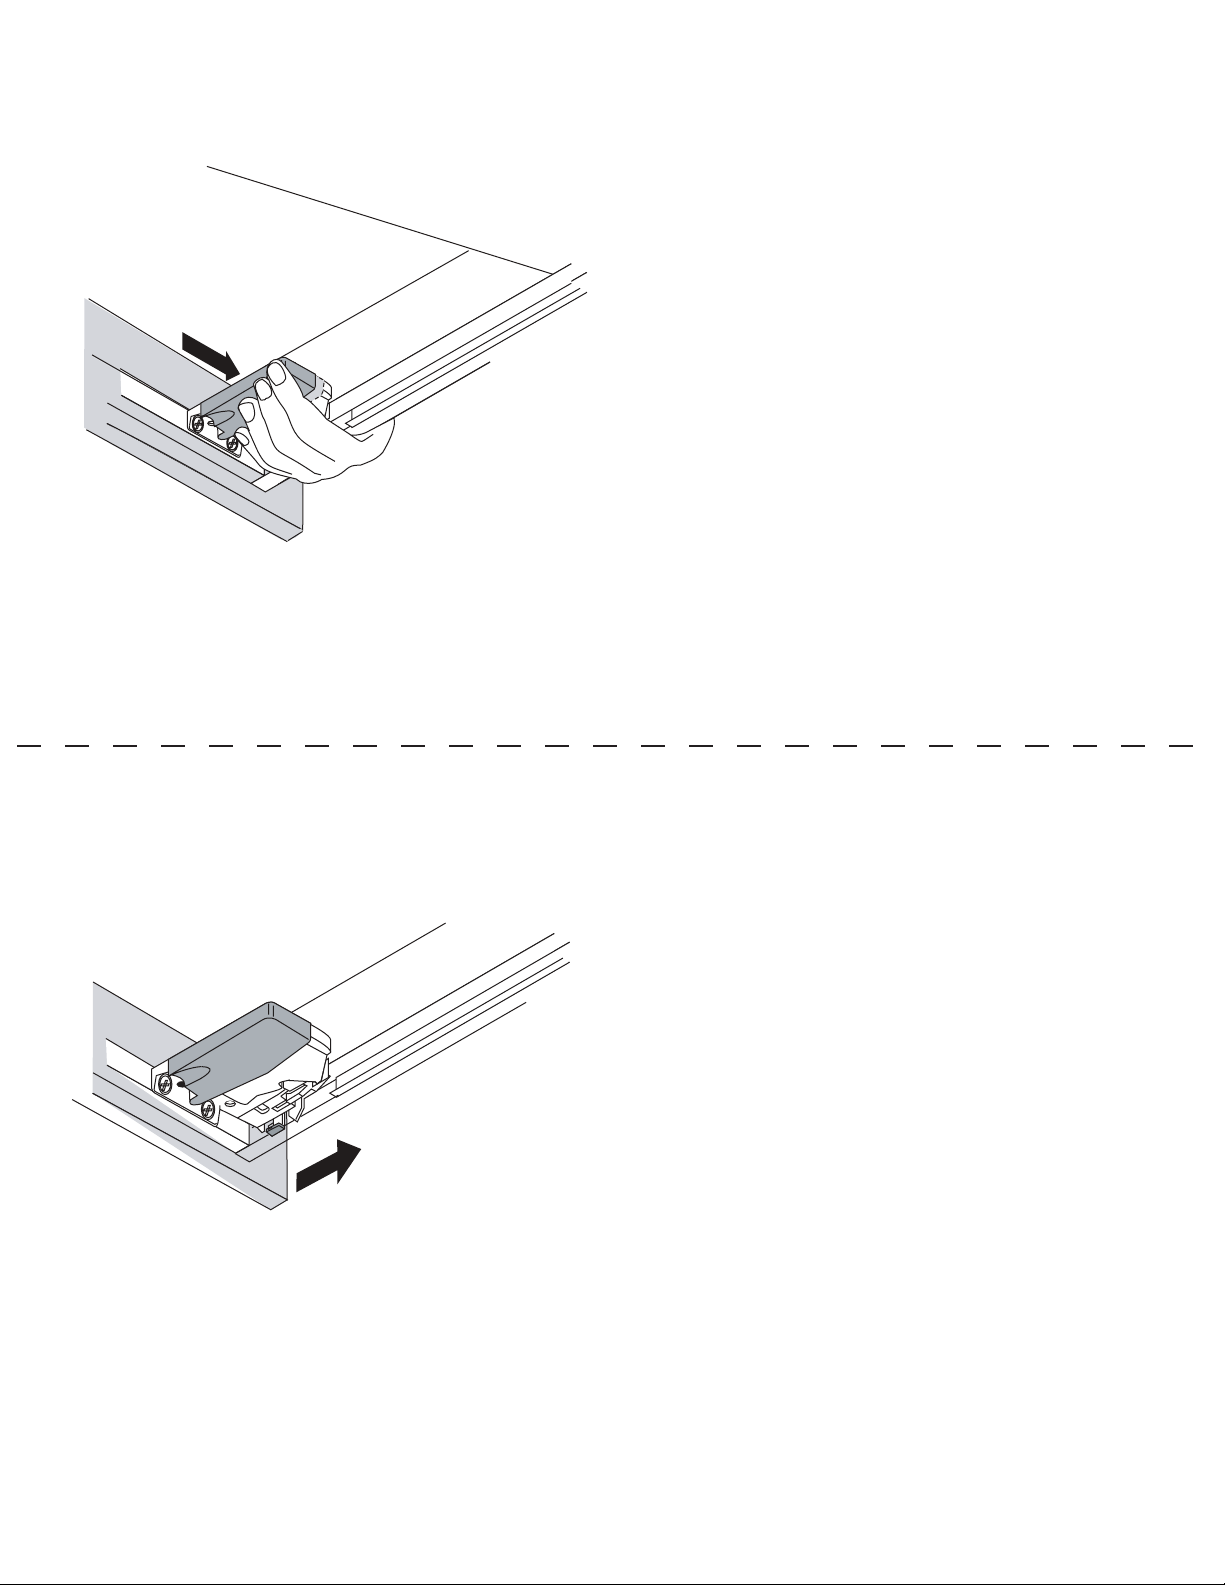
Drawer Removal/Installation
Drawer Removal:
1. Reach under the drawer and squeeze the orange
handles of both locking devices.
2. While holding the handles, pull the drawer straight
out and lift it off the runners.
Drawer Installation:
1. Place drawer on the runners (either extended or
retracted) and close.
2. The locking devices will automatically engage with
runners. Open drawer completely to confirm that
both locking devices have engaged.
LACAVA LLC3
 Loading...