

Page 1
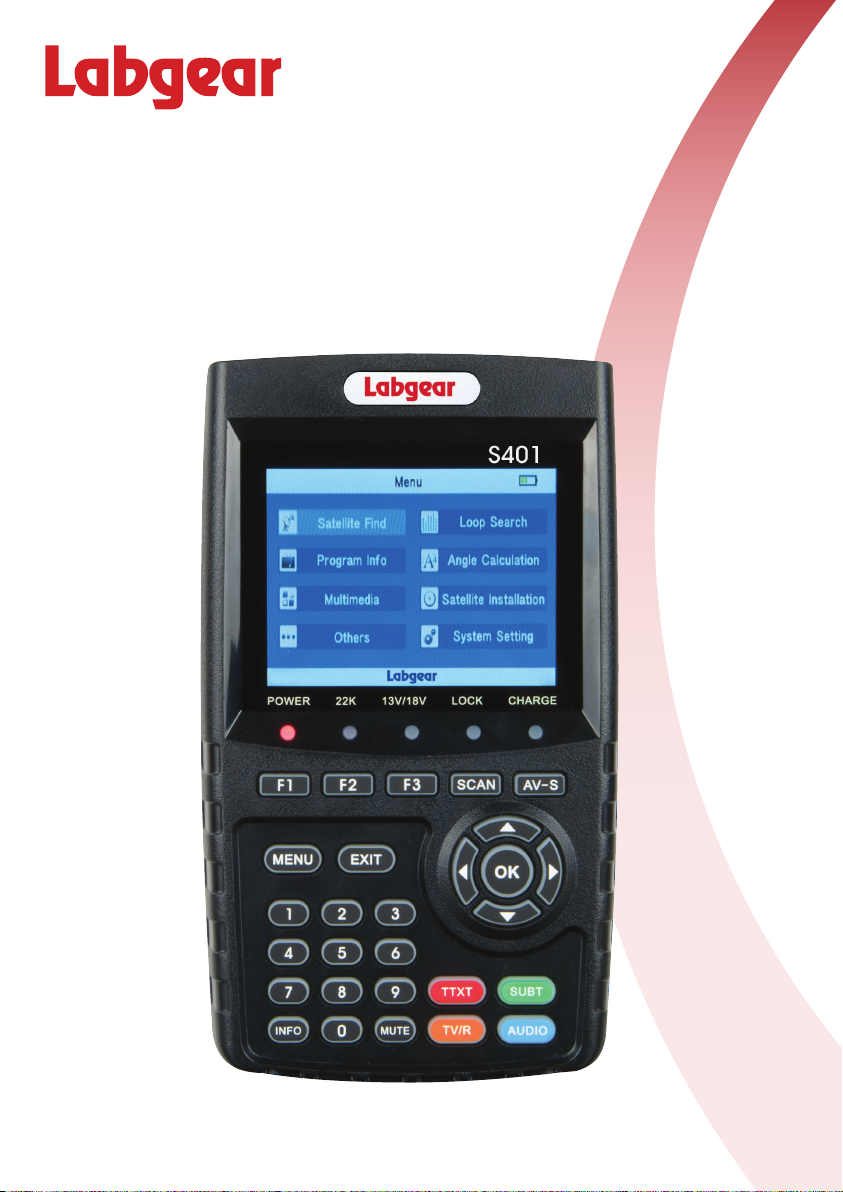
S401
Professional Satellite Meter
User Guide
Page 2

S401 - Contents
Contents
1 Safety warnings and important information .............................................................. 2
2-5 Introduction, Key Features,Pack Contents & Battery Charging ................................ 3
6 Product Overview ....................................................................................................... 4
7-8.1 Connections & Main Menu ........................................................................................ 5
8.2 Satellite Find Menu ...................................................................................................... 6
8.2-8.3 Quick Search and Loop Search ................................................................................. 7
8.4-8.6 Program Info, Angle Information & Multimedia .......................................................... 8
8.7 Satellite Installation & Satellite Setting ........................................................................ 9
8.7-8.8 Auto Scan, TP Manager & Others ............................................................................... 10
8 Channel/Radio Editor, System Info & EPG .................................................................. 11
8 System Setting .............................................................................................................. 12
9 Specications .............................................................................................................. 13
10 Troubleshooting ........................................................................................................... 14
1 Warning:
Do not disassemble the meter. Do not submerge in water.
Do not leave it unattended when charging.
Do not leave unused for extended periods of time. Routinely check the charge status of the
meter, and charge accordingly.
Lithium-ion batteries can explode, or cause injury if disassembled, short circuited, or exposed
to high temperature. The meter is powered by a 7.4V/800mAh Li-Ion rechargeable battery pack
and must be treated with caution and care.
To prevent the risk of re, electrical shock and personal injury, avoid using any mains charger or
12V car charger other than the one supplied with the product and avoid handling the
battery improperly. Always make sure the meter is disconnected from any power sources, and
the battery removed when performing any routine cleaning. Do not try to repair the unit or
charger yourself.
Important Information:
• Do not dispose of the battery with domestic waste, please use an appropriate recycling facility
• Do not charge the battery in a high temperature environment
• Do not let the battery become wet or immerse the battery in water
• Avoid exposing the battery to excessive shock or vibration
• Do not use a damaged battery
• Keep the battery away from children
• When charging has completed the charger must be switched off and disconnected from the
mains and the meter
• Do not pull the lead of the charger when disconnecting it from the mains power supply
• Do not use an extension lead. Plug the charger directly into an electrical socket
• Never use a damaged charger or a charger with a damaged lead. Dispose of the damaged
charger safely at your local recycling centre in the Waste Electrical and Electronic Equipment
(WEEE) disposal area, where facilities exist. Check with your local authority for recycling advice.
Contact our Customer Care line for a replacement.
• If the charger fails to operate dispose of it safely at your local recycling centre in the Waste
Electrical and Electronic Equipment (WEEE) disposal area, where facilities exist. Check with
your local authority for recycling advice. Contact our Customer Care line for a replacement.
• Charging temperature range: 0°C to 45°C
• Operating temperature range: -20°C to 60°C
2
Page 3
S401 - Introduction and Features
2 Introduction
Thank you for choosing the Labgear S401, a great aid to satellite dish and LNB alignment,
pre-loaded with masses of data and tools to make your job simpler and quicker.
Before you start please take time to read through this instruction leaet which we hope will help
you get the most out of your meter.
3 Key Features
• Digital Satellite Meter compatible with DVB-S and S2 and DiSEqC 1.0/1.1/1.2 with 22kHz tone
• Displays both signal strength and signal quality with sound and light alarms to aid alignment
• Computes Azimuth, dish Elevation and LNB Polarisation angles for all satellites based on
your location
• Stores information on 100 of the most popular satellites worldwide
• LNB short circuit protection built-in
• Includes magnetic compass to assist alignment
• 7.4V/3000mAh rechargeable Li-Ion battery and mains power charger included
• Easy to carry with protective sleeve and shoulder strap
• Software upgrades possible from a PC using the USB port and cable supplied
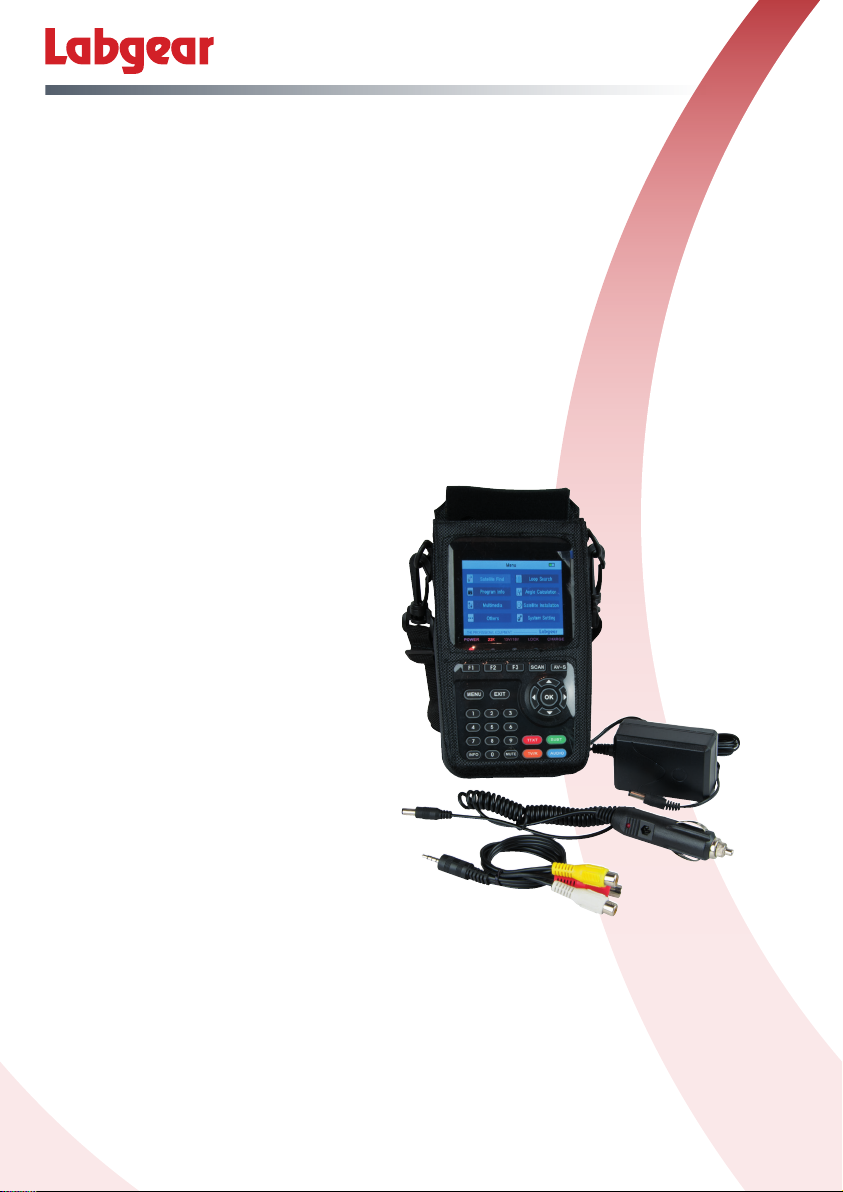
4 Pack Contents
Supplied with:
Supplied with:
1x Carrying Case with Shoulder Strap
1x Mains Charger
1x Car Charger
1x Jack to 3 Phono AV Lead
1x User Guide
5 Battery Charging
1. Ensure that the meter is switched off. Connect the charger plug to the charging socket (5)
on the right hand side of the meter.
2. Plug the charger into a mains socket the charging LED indicator (15) will light up green.
3. When the battery is fully charged, the charging LED indicator (15) will go out.
4. Unplug the charger from the mains socket and disconnect the charger from the meter.
Do not leave the meter unsupervised when charging is taking place.
3
Page 4

S401 - Product Overview
6 Product Overview
No. Description Function
1 LNB In Connect to satellite antenna cable
2 AV OUT Connect to AV port for TV
3 AV IN Connect to AV port for meter
4 USB Port Connect to USB media
5 DC Slot Connect to charger input
6 Power Switch Turn meter On/Off
7 Speaker Built in speaker
8 Torch LED Bright LED light
9 HDMI Port Use HDMI cable to connect for TV
10 LCD Screen 3.5 Inch TFT LCD Screen
11 Power LED Power indicator light
12 22KHz LED 22KHz indicator light
13 13V/18V LED Vertical /Horizontal polarization voltage output light
14 LOCK LED Signal lock indicator light
15 Charger Charger indicator light (On when charging switches off when charged)
16 F1 Auxiliary function key
17 F2 Auxiliary function key
18 F3 Auxiliary function key
19 SCAN ‘Quick Search’ menu shortcut key
20 AV-S Switch AV mode: AV Normal/AV IN/AV OUT (In AV out mode, speaker is off)
21 Navigation Keys Volume control or move cursor/channel or change, conrm etc.
22 MENU Show main menu or return to previous menu in sub-menu setting mode
23 EXIT Leave present menu and save settings
24 0-9 Number key to select channels or input numbers
25 INFO INFO key
26 MUTE MUTE
27 Red & TTXT Red KEY & Teletext interface
28 Green & SUBT Green key & Subtitle interface
29 Blue & AUDIO Blue key & Audio interface
30 Orange & TV/R Orange key & TV and radio switch
31 Battery Indicator Shows battery level when power is on
4
Page 5

7 Connections
!
!
Satellite LNB
Connection
HDMI/AV Out
to display
S401 - Product Overview & Main Menu
USB Device
Connection
AV In
8 Main Menu
Make the required connections as above, switch the power
ON and you will enter the main Menu which shows battery
status and has the following options:
• Satellite Find • Loop Search
• Program Info • Angle Calculation
• Multimedia • Satellite Installation
• Others • System Setting
Use the t u pq keys to move the cursor and navigate
the menu interface, then use the OK key to make a selection.
8.1 Setting Latitude and Longitude
Before using your satellite meter for aligning satellite dishes it
is best to rst set the Latitude and Longitude. Use the t u pq
keys and to select Angle Calculation in the main menu and
scroll down to Location, select Manual and use the number
keys to set your Local Longitude and Local Latitude.
!
Charger/PSU
Connection
!
!
5
Page 6

S401 - Satellite Find Menu
!
!
!
8.2.1 Satellite
Press u to enter the Satellite List and scroll q to nd the
satellite you want and press OK.
8.2.2 Local Frequency
Scroll down to Local Frequency press u to enter
the LNB List and scroll q to nd the LNB type you
want and press OK.
8.2.3 Transponder
Scroll down to Transponder press u to enter
the TP List and scroll q to nd the TP you
want and press OK.
8.2.4 Frequency
use the number keys to enter the frequency.
!
!
8.2.5 Symbol rate
use the number keys to enter the symbol rate.
8.1.6 Polarity
use the t u keys to select vertical or horizontal polarization
8.2.7 Tone
use the t u keys to turn the 22khz tone switch on or off.
8.2.8 Beep tone
use the t u keys to turn the beep tone on or off. If switched
on you will hear the tone when you enter the search screen.
8.2.9 DiSEqC mode
Use the t u keys to set the port type as DiseqC 1.0/1.1,
DiseqC 1.2/USALS or Unicable.
8.2.10 DiSEqC Type & Input
For diSEqC 1.0 or 1.1 scroll to DiSEqC 1.0/1.1 and use the
t u keys to set the port number or if Unicable is selected
use the pq to go to IF Channel, use the t u keys to select
channel and the number keys to set Center Frequency.
6
Page 7

S401 - Quick and Loop Search
!
!
8.2.0.1 Quick Search
In the Satellite Find menu when Satellite is selected if you
press OK the screen to the right opens, press OK again to
start quick search.If you have set the Longitude and Latitude
in Angle Calculation, the angle of LNB, the orientation and
elevation of antenna will all be displayed on the screen.
• TP Scan: Press OK to search the current TP.
• Auto Scan: Press the Red key to auto blind search the
current satellite.
8.3 Loop Search
Select Loop Search, then press OK in Loop Search.
8 TPs will be shown.
Press OK to enter TP Edit, you can edit the Satellite
and Transponder.
7
Page 8

S401 - Program Info - Multimedia
8.4 Program Info
In the Program Info, you can check the details of the current
selected TV program and you can scroll down to check the
details of other available programs.
8.5 Angle Calculation
You can edit angle settings for the selected satellite.
8.6 Multimedia
Select Multimedia and press OK.
Choose from Movie, Music and Photo options
• Movie
Press the Red TTXT key to change the folder view to detailed list.
Press the Green SUBT key to see play options e.g. Random,
Repeat text encode etc. Press the MENU key to return to list.
Press the orange key to change folder Icon size.
Press the arrow keys to move the cursor, and press OK to
enter/play a folder/video le.
While your video is playing press:
F1 Key: For Normal play.
F2 Key: For Pause.
F3 Key: For Fast backward. Press F1 key to play.
SCAN Key: Fast forward. Press F1 key to play.
Music and Photo folders and les can be accessed then
played/viewed in a similar way.
8
Page 9

S401 - Satellite Installation / Setting
8.7 Satellite Installation
• Satellite settings
• Auto scan
• TP manager
8.7.1 Satellite Setting
In the Satellite Setting main menu:
Press the Red key to enter the Transponder screen.
Press Green key to enter the Auto Scan screen.
Press pq keys to move the cursor to select a satellite press OK.
Press u to access the individual satellite properties.
Once in the individual satellite properties screen:
1. TP Manage press Red key to enter the TP manager screen.
2. Auto Scan: press the Green key to enter the Auto Scan.
3. LNB: Press t u key then change the LNB frequency.
4. Transponder: Press t u key to change the current TP.
5. DiSEqc 1.0: Press t u key to change the DiSEqC port.
6. DiSEqc 1.1: Press t u key to change the DiSEqC port.
7. Motor: Press t u key to change the DiSEqC port.
If you are selecting DiSEqC1.2/USALS, press OK to
enter the motor interface.
• Transponder: Press OK to change the current TP.
• Mode: A, Position
A1 Direction: Press t u key to move direction to west or east.
A2 Position: Save the dish position for the satellite.
• Mode: B, Drive to Zero
Move the cursor to GO, then press OK, the motor will move to zero.
• Mode: C, Drive to stored position
Move the cursor to GO, then press OK, the motor will go to the position saved in mode A Position.
• Mode: D, Drive to Satellite
Move the cursor to GO, then press OK , the motor will go to the auto calculate position.
• Mode: E, Recalculate
E1 Direction: Press t u key to move direction to west or east.
E2 Recalculate: Recalculate the satellite position.
• Mode: F, Set East Limit or Set west Limit to restrict the motor movement to the East or to the West.
F1 Direction: Press t u key to move direction to west or east.
F2 Store: Save the satellite position of A2
• Mode: G, Set Limit enable or disable - Set the limit enable or disable.
8. Unicable: Press t u key to select Unicable then press OK into the Unicable setting.
• Transponder: Press t u key to change the current TP.
• IF Channel: Press t u key to change SCR channel.
• Center Frequency: Use number key to input number.
9
Page 10

S401 - Auto Scan / TP Manager
!
!
8.7.2 AUTO SCAN
In the Satellite Installation menu select Auto Scan and press OK.
• Satellite: Press the u key to enter the satellite list. Use the pq
keys to select a satellite then press OK.
• Transponder: Press the u key to enter the TP list. Use the pq
keys to select a transponder then press OK.
• NIT: Press the u key to switch the network searcher On/Off.
•
Program: Press the u key to select ALL/Free Only TV search type.
• Scan Mode: To select Scan mode, p
Default TP/One TP/Blind.
• Scan Select:
satellites or just the current selected satellite.
Press the u key to select
8.7.3 TP MANAGER
In the Satellite Installation menu select Transponder and
press OK. Use the pq keys to select the current satellite
• Edit Satellite
Press the Red key to edit the satellite.
NO.: Satellite number.
W-E: Switches the satellite longitude to West or East.
Longitude: Use number key input value.
Satellite Name: Press OK to open the keyboard, use the
direction key to input satellite name.
• Add Sat
Press the Orange key to add a satellite.
Press the t u key to TP manager.
ress the u key
scan all of the selected
to select
• Edit TP
Press the Red key to edit TP.
NO.: TP number.
Frequency: Use the number keys to input values.
Symbol Rate: Use the number keys to input value.
Polarity: Press the
• Add TP
Press the Orange key to add a TP. Please refer to TP edit
operations.
u
to change polarity.
8.8 Others
• TV Channel Editor
• Radio Channel Editor
• EPG
• System Info
10
Page 11

S401 - Channel Editor / EPG
8.8.1 TV Channel Editor
Select TV Channel Editor, and press OK to enter CH List.
• Edit - Press the Red key to edit list, you can edit program
name, move program, sort program, and skip program.
• Lock - Choose the program you want to lock, and press the
Green key to nish the operation.
• Del - Choose the program you want to delete, and press the
Orange key to nish the operation.
• Sat - Press the Blue key to select All Satellites or the current
satellites.
8.8.2 Radio Channel Editor
Please refer to TV Channel Editor instructions above (as it
funtions in a similar way).
8.8.3 EPG
Press pq key to change program. If the current program has
EPG information, it will appear on the righthand side of the
window. Press t u key to view EPG information for different
days.
8.8.4 System Info
See the sort of information available in the screen to the right.
11
Page 12

S401 - Auto Scan / TP Manager
!
8.9 System Setting
• Country Setting - Press u key to change the country
• OSD Language - Press u key to change the OSD Language.
• TV Format - Press u key to change the TV Format.
• Video Output - Press u key to change the AV output from
phono (RCA) to HDMI. (This action will only work if the meter
is connected to an HDMI display).
• TV Resolution - For HDMI output only Press u key to select:
Auto/720i @ 50Hz/1080i @ 50Hz/1080p @ 50Hz TV resolution.
• Digital Audio Output - Press u key to change the audio
output format from LPCM to RAW.
• Time Zone - Press t u key to change the Time Zone.
• Channel Lock - Press u key to switch Channel Lock ON
To open channel lock, you will need to input the password
(default password is 0000).
• PWR Unit - Press u key to change the units used for power
dBµV/dBmV/dBm
• Key Beep Tone - Press u key to switch key beep tone ON/OFF.
• Flashlight - Press OK u key to switch the Flashlight ON/OFF.
• Upgrade - Press OK to update the rmware from a le loaded onto a connected USB device.
Use the direction key to select the update le, and press OK to update.
Warning: Please don’t turn power off or disconnect the USB device while upgrading as this can,
damage the meter’s software, and prevent the meter booting up.
• Factory Setting - Press u key, then press OK to conrm you want to do a factory reset.
PLEASE NOTE: if you reset, the database and all the user settings will be reset.
12
Page 13

S401 - Specications
Transmission Standards
DVB-S2/S, MPEG-2,MPEG-4,H.264
Satellite Input/Demodulation
Connector Type F Type
Input Frequency 950 to 2150 MHz
Signal Input Level - 65 to -25 dBm
Band Switch Control 22KHz
LNB Supply 13V/18V, IMax 400mA
Demodulation Type QPSK,8PSK
Symbol Rate 2<Rs<45Mband(SCPC/MCPC)
LCD Features
LCD Type TFT Transmissive
Number of Dots 480(RGB) x272
Active area (W x H) 70 x 52.6mm
AV Output Interface
Connector Type 3.5mm jack
Video Output CVBS
Audio Output Stereo Audio L/R output
HDMI Output connecter
Format HDMI 1.3a
AV Input Interface
Connector Type 3.5mm jack
Video Input CVBS
Audio Input Stereo Audio L/R input
Audio/Video Processing
Video decompression
Resolving rate PAL‐25 frame@720*576,NTSC‐30 frame@720*480
Signal compatibility Support conversion for different video formats
Video Format 4:3,16:9, By Pan & Scan and Letter Box conversion
Audio Decompression MPEG‐1 Layer I/II, MPEG‐2 Layer I/II
Audio Output Mode Stereo, Mono, R/L
Data Service Port
Connector USB
Data Protocol USB 2.0 interface
File Management System NTFS, FAT32, FAT16
File Format wma, mp3, mp4, avi, jpg, jpeg, bmp, img
Microprocessor
Microprocessor 78346
Clock Frequency 550MHz
SDRAM Memory DDR2 512Mbit
Power Supply
Li‐Ion Battery 7.4V/3000mAh
Mains Charger Output: DC12V/1.5A Input: 100‐240VAC 50/60Hz
Power Consumption Max. 10W
Physical Characerstics
Size (W x D x H) 10.1x17.7 x4.7(cm3)
Net Weight 0.46kg
MPEG‐2 MP@HL, MPEG‐1 Decoding, MPEG‐4 ASP@L5 HD resolution, H.264
MP&HP@L4, HW JPEG decoding
13
Page 14

S401 - Troubleshooting
Problem Possible Causes Solution
Check to make sure meter power
Display does not light upPower switch is not on or battery power
No sound or picture, but
the front panel power
light is ON.
No sound or picture
Bad picture/
Blocking Error
AV Out No picture
(Video)
The key is not working
is low
AV IN cable connected, but no video
input
The satellite dish is not pointing at the
satellite.
No signal or weak signal
The satellite dish in not pointing at the
satellite
Signal is too strong
Satellite dish is too small Change to a larger dish
LNB noise factor is too high
The LNB is faulty Change the LNB
The system is connected by SCART
cable and TV is not in AV mode.
Battery power is low Connect to charger/mains adaptor
Keys are blocked
switch is on
Connect to charger/mains adaptor
and make sure it is switched on
Check AV IN cable connection, check
AV source connection and signal
Adjust the dish. Check the Signal Level
in the Antenna Setup Menu
Check the cable connections. LNB and
other equipment connected between
the LNB and the meter and adjust the
dish.
Adjust the dish
Connect a signal attenuator to the
LNB input
Change to an LNB with lower noise
factor
Select rhe AV Input channel on the TV
Adjust the position of the meter in the
case or remove case
For further information or any queries
please contact
Technical Support:
www.labgear.co.uk/support
14
Page 15

Waste electrical and electronic products should not
be disposed of with household waste. Please recycle
where facilities exist. Check with your Local Authority
for recycling advice.
© Labgear 2017 V1
15
Page 16

 Loading...