

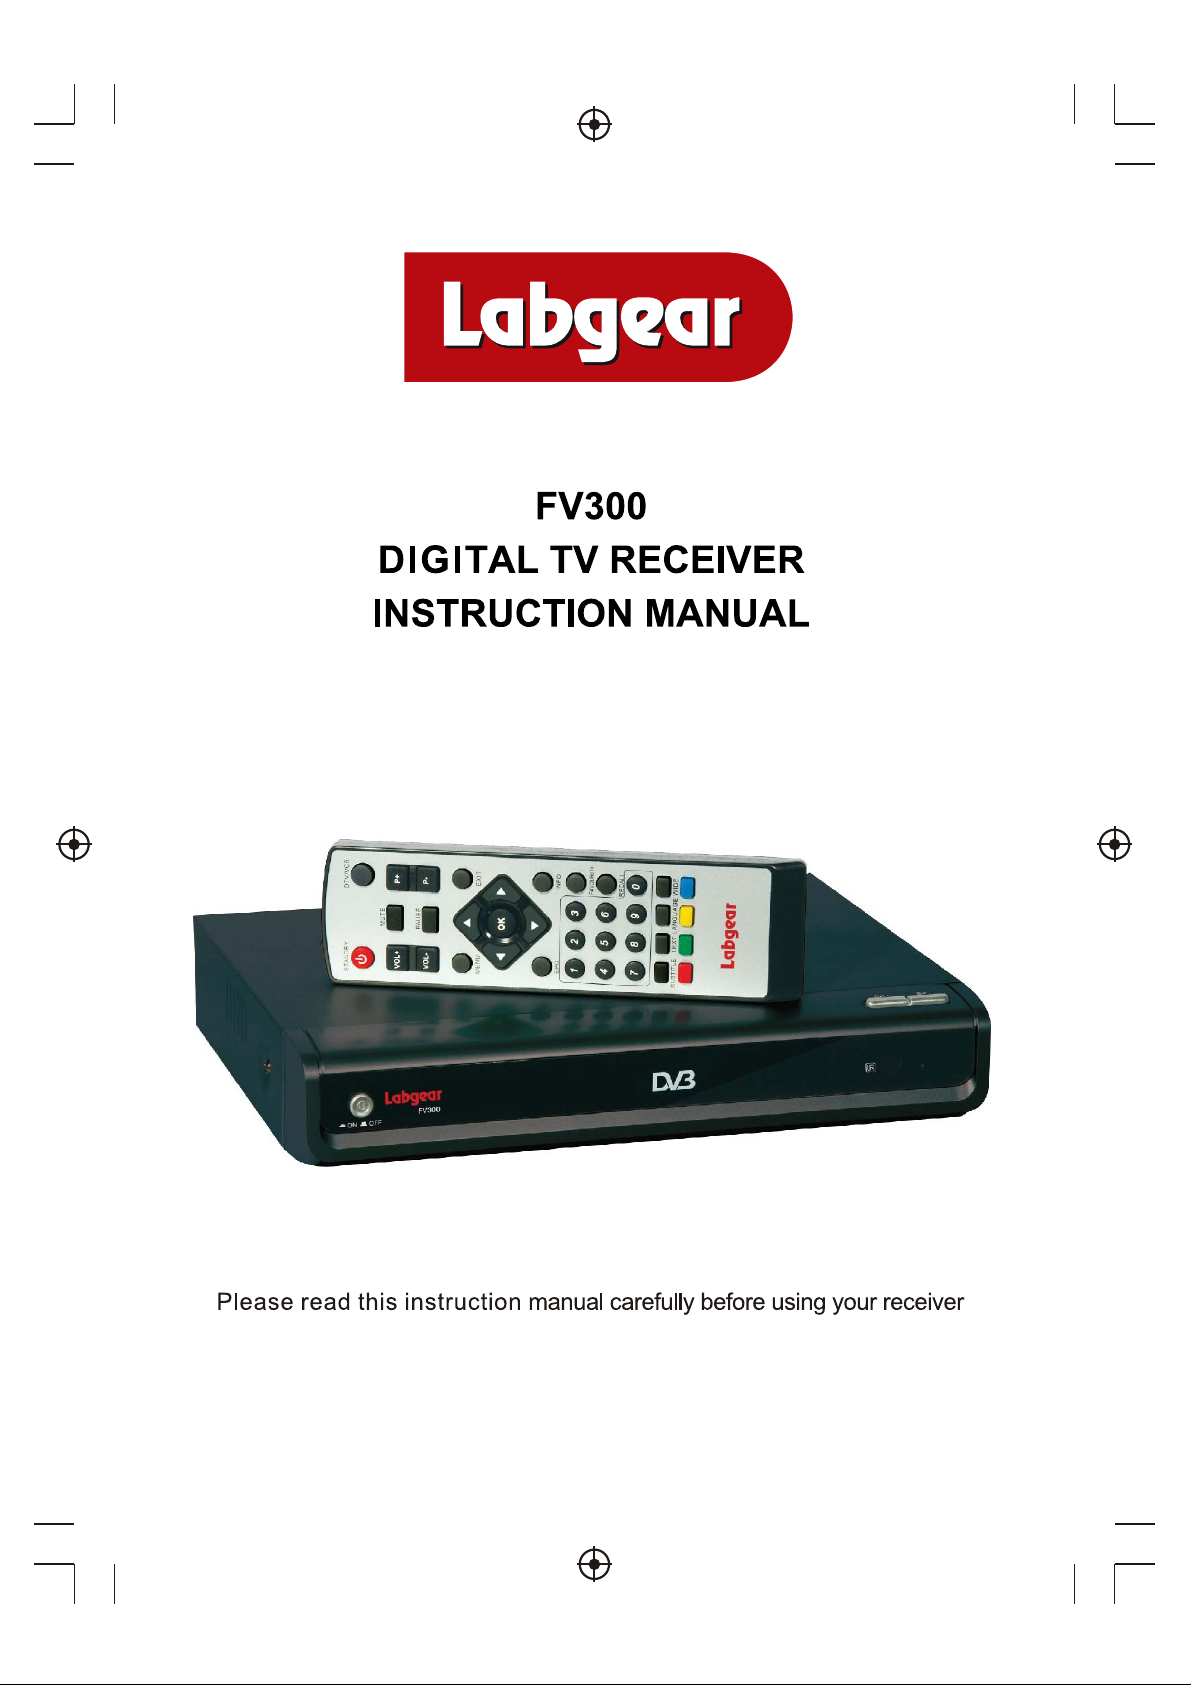
Page 1
Page 2

Table of Contents
Introduction----------------------------------------------------------------------------- 1
Safety Information--------------------------------------------------------------------- 2
Remote Control-------------------------------------------------------------------------- 3
Front and Rear panel illustration--------------------------------------------------- 5
Connecting to a Television ----------- ----------------------------------------------- 6
Connecting to a Television and Video--------------------------------------------- 7
Connecting to a Surround Sound System--------------------------------------- 8
User interface -------------------------------------------------------------------------- 9
Troubleshooting
Specifications
--------------------------------------------------------------------- 28
-------------------------------------------------------------------------29
Page 3

Introduction
Thank you for purchasing this product which has been designed and
manufactured to give you many years of trouble-free service.
About This User Guide
This user guide contains all the information you need to know about how to
setup and watch available free view Channels using your set top box.
What is Freeview™?
It is a free digital service currently providing up to 48 digital television channels,
over twenty digital radio stations plus a wide range of interactive services. It is
broadcast from transmitters and is received via a rooftop aerial.Freeview works
like traditional TV, but because the signals are digital you need a set top box or
interactive digital TV to convert them. This means more channels can be
transmitted with extra features such as interactivity and widescreen pictures.
Accessories In the Box
Remove your Digital set top box carefully from the box and remove the
packaging from each part.
You will find the following items:
Digital set top box with fitted mains plug
Remote Control with 2xAAA batteries (not installed)
Instruction Manual
Digital Video
Broadcasting
Trade Mark of the DVB Digital Video Broadcasting
Project (1991 to 1996)
1
Page 4

Safety Information
CAUTION
RISK OF ELECTRIC SHOCK
DO NOT OPEN
Safety is Important
To ensure your safety and the safety of others, please ensure you read
the Safety Instructions before you operate this product.
Keep this information in a safe place for future reference. Please read all
the safety information before using the product.
Safety Considerations.
Position the cables so that they cannot be walked on or pinched by items
placed on or against them.
Do not use the set top box in humid or damp conditions.
Do not allow the set top box to get wet.
Do not expose the set top box to dripping or splashing.
Do not place water filled objects such as vases on top of the set top box.
Do not place naked flame sources, such as candles, on the top of the set
top box.
Cleaning
ALWAYS unplug the set top box before you clean it.
Do not use liquid or aerosol cleaners.
Clean the set top box with a soft, damp (not wet) cloth.
Ventilation
The slots and openings on the set top box are for ventilation. Do not cover
or block them as it may cause overheating.
NEVER let children push anything into the holes or slots on the case.
Servicing
There are no user serviceable parts in this set top box.
When servicing, refer to qualified service personnel.
Consult your dealer if you are ever in doubt about the installation, operation
or safety of this unit.
Battery Disposal
Please ensure batteries are disposed of safely.
Never dispose of batteries in a fire or with other household waste.
Check with your local authority for disposal regulations.
WARNING: To reduce the risk of fire or electric shock, do not expose this
equipment to water or other liquids.
2
Page 5

Remote Control
STANDBY
MUTE
VOL+
PAUSE
VOL-
OK
123
456
7890
TEXT
LANGUAGESUBTITLE WIDE
DTV/VCR
P+
P-
EXITMENU
INFOEPG
FAVOURITE
RECALL
Remote Key Function:
DTV/VCR: Used to switch betweenthe VCR SCART
1.
input and theDTV output mode.
MUTE: Used to turn the sound on or off.
2.
+:Used to changechannels and pageup when
3. P
there are pages (i.e.channellist).
PAUSE: Used to pauseor playback theprogram
4.
being viewed .
P-: Used to changechannels and pagedown when
5.
there are pages (i.e.channellist).
EXIT: Used to clear all menus and return to non-menu
6.
state for normal viewing.
OK: Used to confirm a selection withina menu.
7.
8. CURSORS(Up/Down/Left/Right): Used to move
around the menu screens.
INFO: Used to displayinformation about the
9.
channel being viewed or further informationabout the
program when in normal play.
10 FAVOURITE:
Used to switch access to your favourite
channels.
11. RECALL: Used to switchbetween the last two
viewed channels.
12. LANGUAGE:
Used to select the audio language
13. WIDE: U se d t o change the aspect ratio to
4:3 or 16:9.
14.
STANDBY: Used to switchthe set top box on
or to standby.
15.
VOL+: Used to change the volume in non-menu
state.
16.
VOL-: Used to change the volume innon-menu state.
17.
MENU:Used to openthe main menuor return tothe
previous menu.
18.
EPG: Used to display information about the
program being viewed and what's on next.
19.
NUMBER KEYS: Used to selectchannel numbers or
input numbers in menus.
20.
TEXT: Used to openinteractive digital teletextif
available.
21.
SUBTITLE: Used to switchbetween different
subtitles that are broadcasted.
22.
COLOR KEYS(RED/GREEN/YELLOW/BLUE) :
Used to operate different functions in teletext.
Note: SUBTITLE/TEXT/LANGUAGE may not be
available for all channels.
3
Page 6
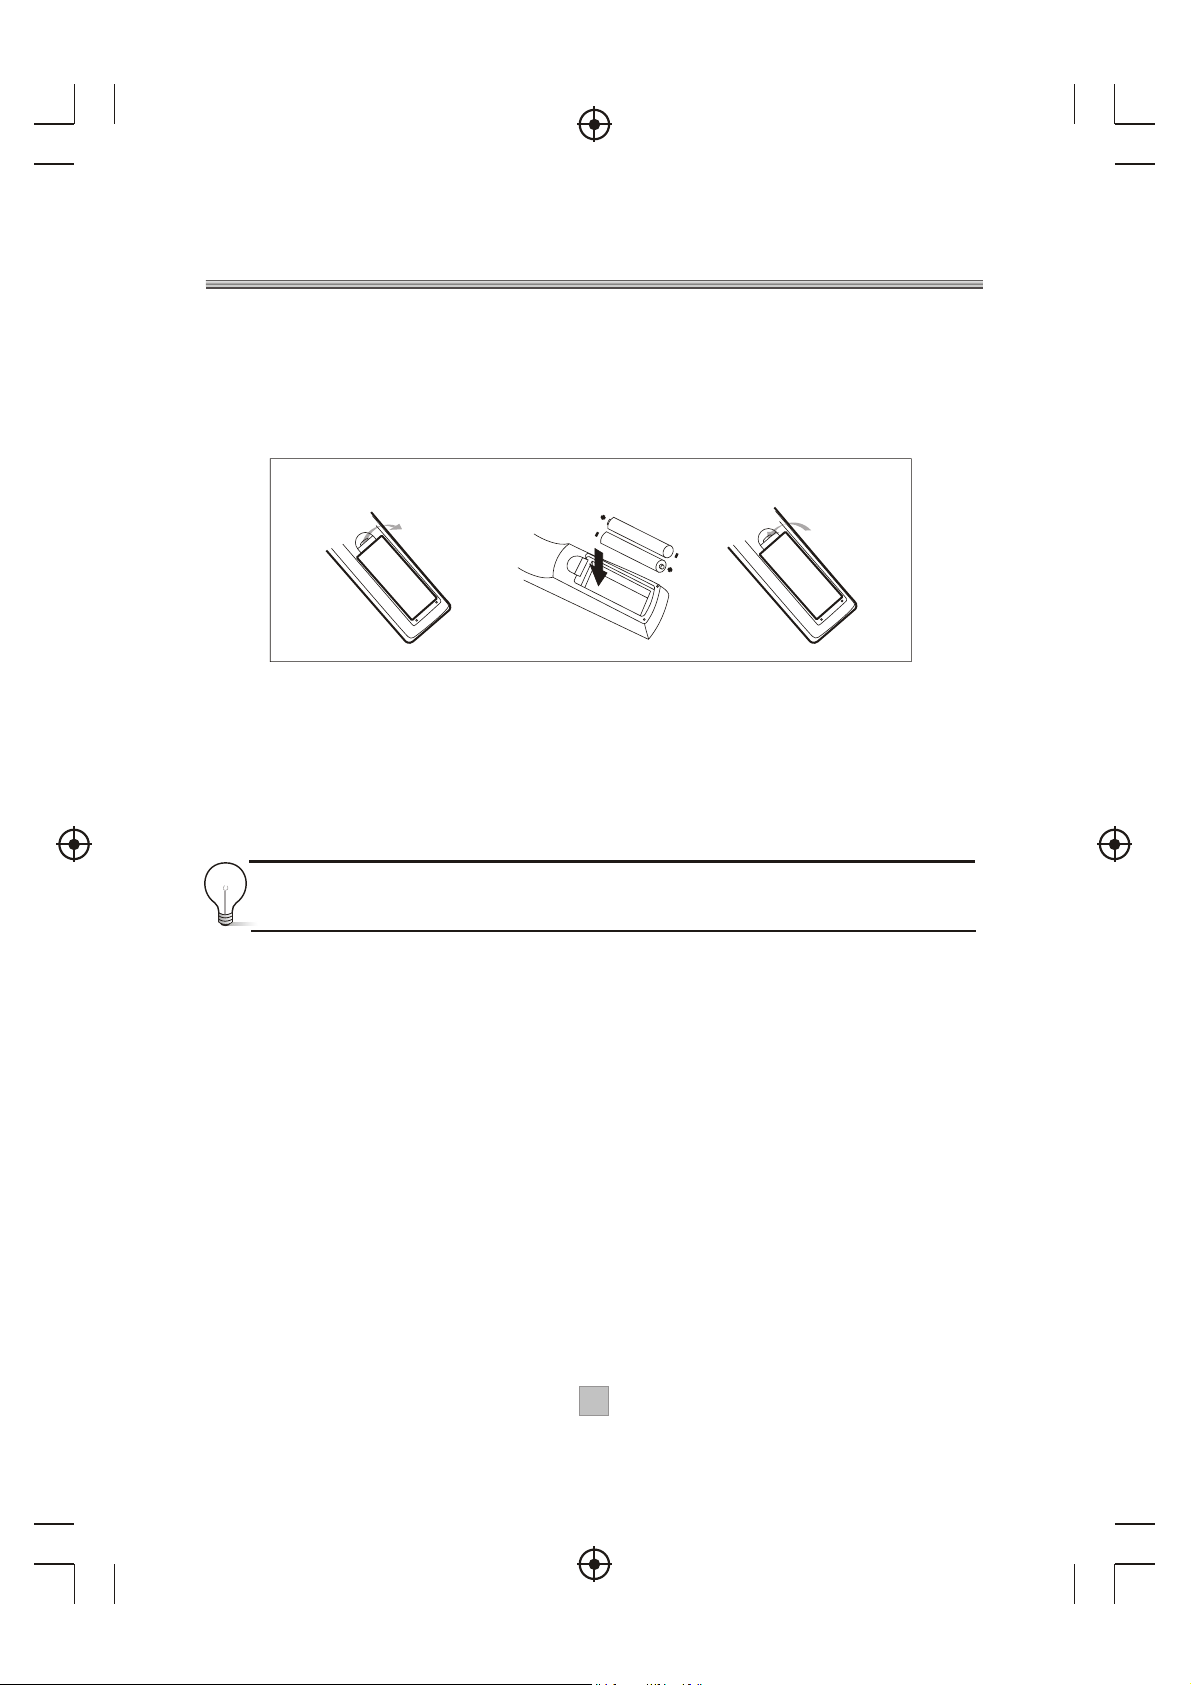
Installing the Batteries
Remove the battery cover from the remote control and put 2xAAA size batteries
inside the compartment.
The diagram inside the battery compartment shows the correct way to install the
batteries.
1.Open the cover
OPEN
2.Install batteries
3.Close the cover
CLOSE
Using the Remote Control
To use the remote control, point it towards the front of the digital set top box
The remote control has a range of up to 7 metres from the set top box at an angle
of up to 60 degrees.
The remote control will not operate if its path is blocked.
Sunlight or very bright light will decrease the sensitivity of the remote
control.
4
Page 7

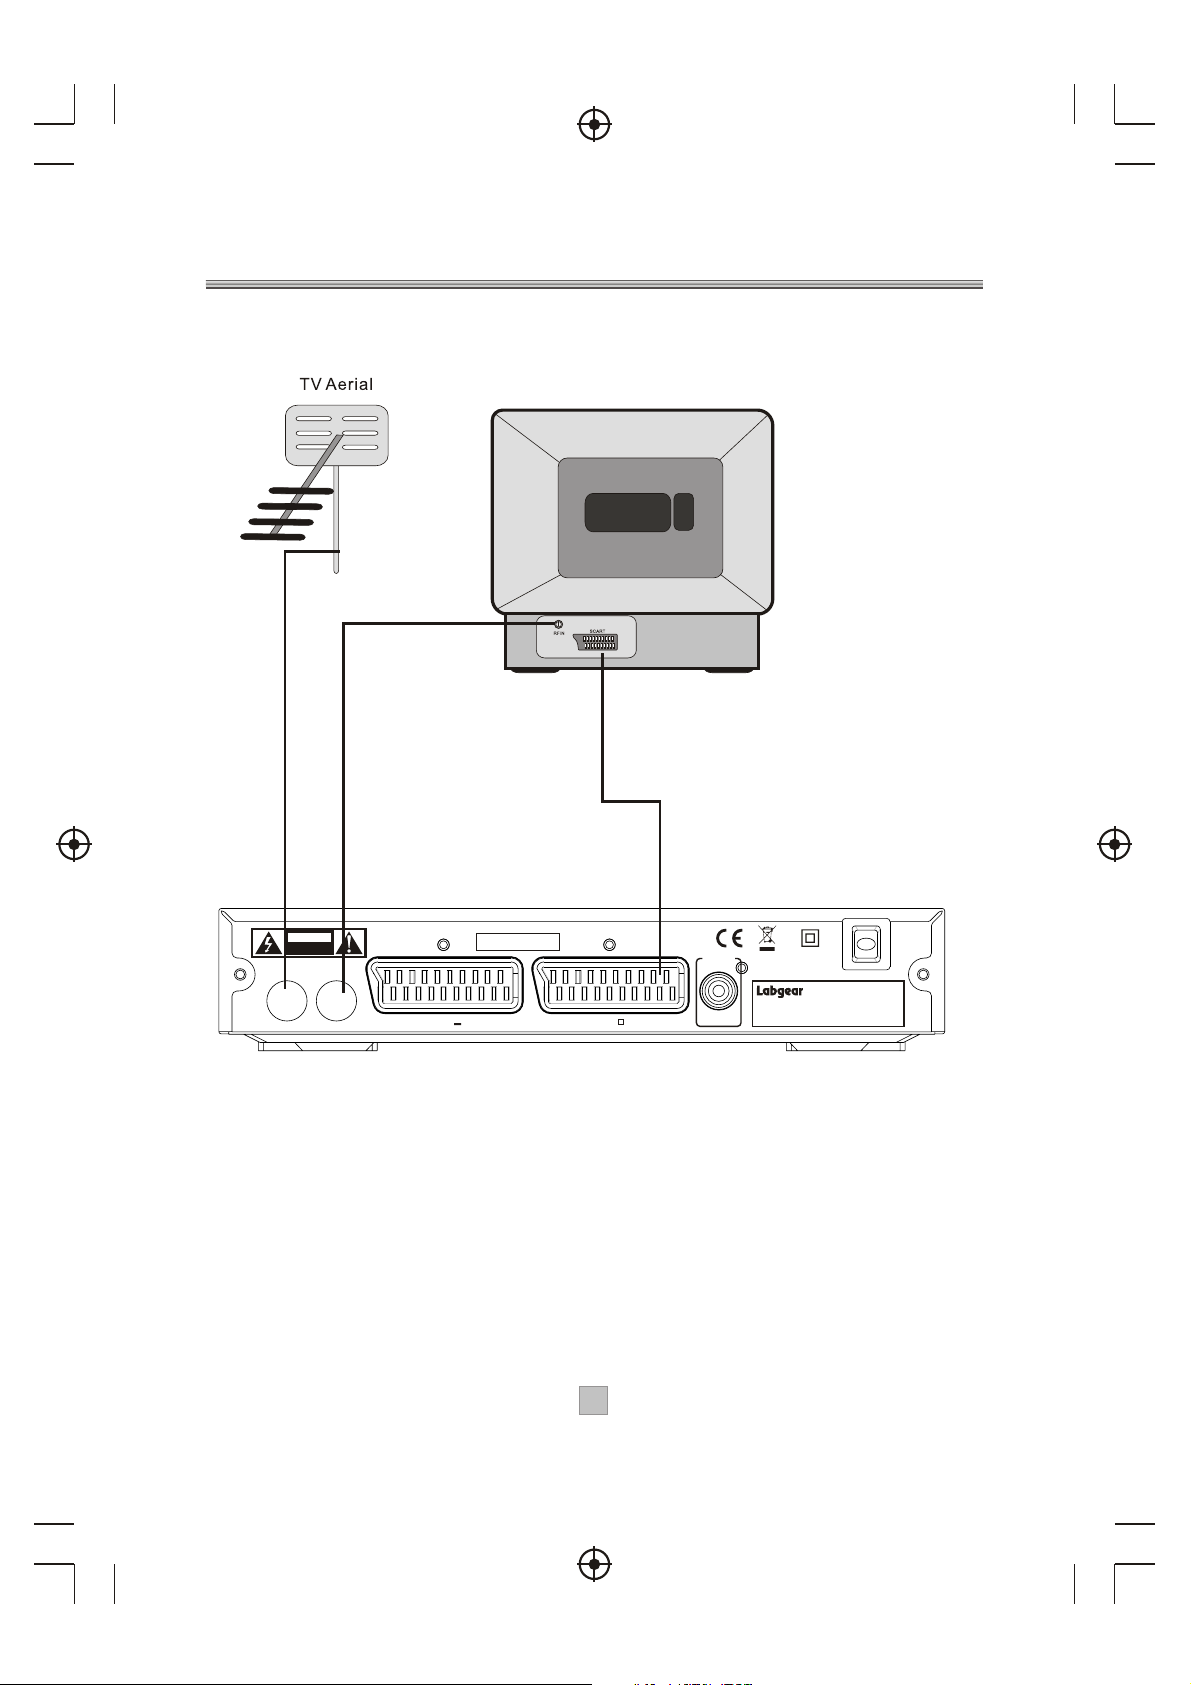
Front Panel and Rear Panel Illustration
1. Front panel
1 POWER BUTTON: Used to switch the set top box on and off.
2 REMOTE CONTROL SENSOR: Used to receive the signal from the remote control.
3 CHANNEL UP/DOWN: Used to change channels without using the remote control.
4 STANDBY INDICATOR: LED will show green when the unit is switched on and red
when the unit is in standby mode.
34
VCR O O
Serial No.:
Digital
Audio
TV
Coaxial
100-240V~
R09W32
50/60Hz
DIGITALTERRESTRIAL RECEIVER
POWER SUPPLY: 100-240V~ 50/60Hz
MAX POWER CONSUMPTION:10WATTS
FV300
CAUTION
RISK OF ELECTRIC SHOCK
DO NOT OPEN COVER
INRF
THROUGH
LOOPRF
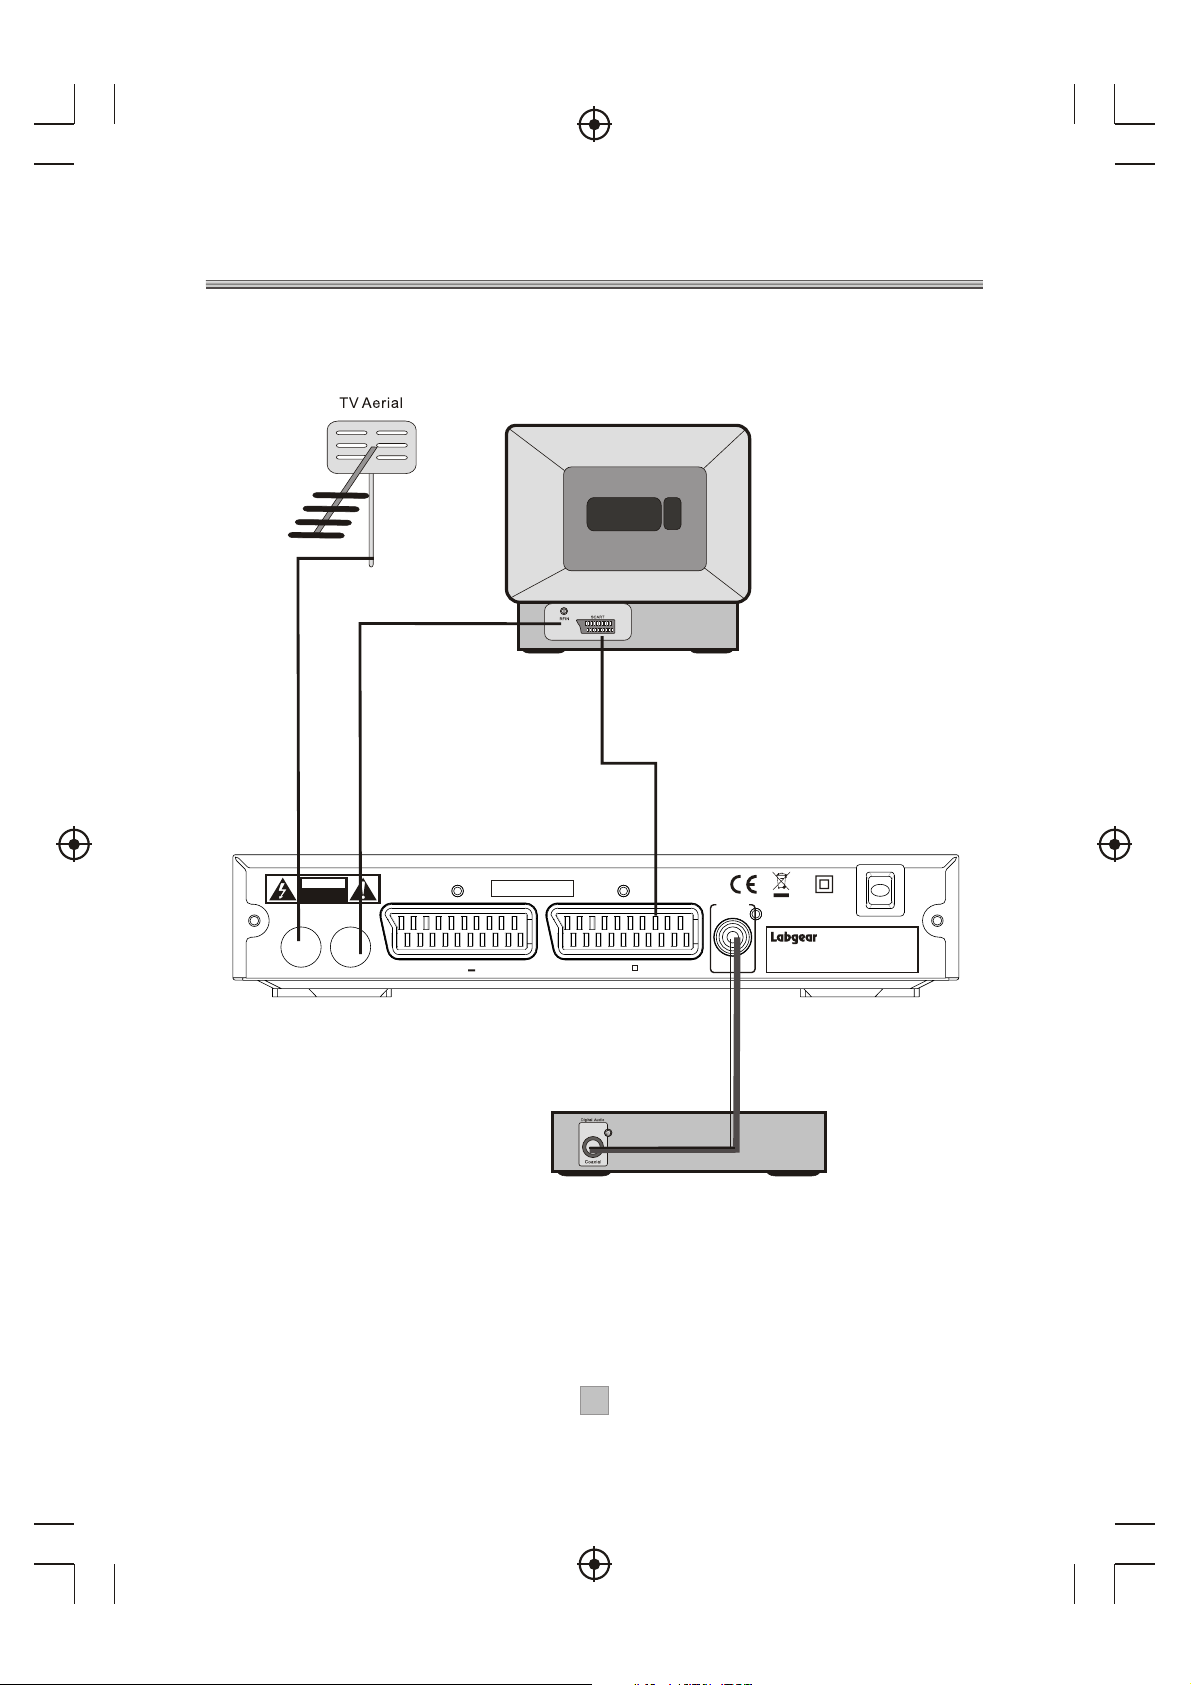
1 RF IN : This socket connects to your external aerial.
2 RF LOOP THROUGH: This socket will bypass the RF signal to either your TV or another
video system.
3 VCR SCART: This socket connects to either a DVD or other video system.
4 TV SCART: This socket connects to your TV.
5 COAXIAL (Digital Audio): Connects to a coaxial socket on a Hi-Fi or surround sound system
6 MAINS CABLE: This is used to connect to your main power supply.
5
Page 8
Coaxial
Digital
Audio
Connecting to a Television
TV
CAUTION
RISK OF ELECTRIC SHOCK
DO NOT OPEN COVER
INR F
THROUGH
Set top box
Serial No.:
Digital
Audio
LOOPR F
VCR O O
TV
Coaxial
100-240V~
R09W32
50/60Hz
DIGITALTERRESTRIAL RECEIVER
POWER SUPPLY: 100-240V~ 50/60Hz
MAX POWER CONSUMPTION:10WATTS
FV300
6
Page 9
Digital
Audio
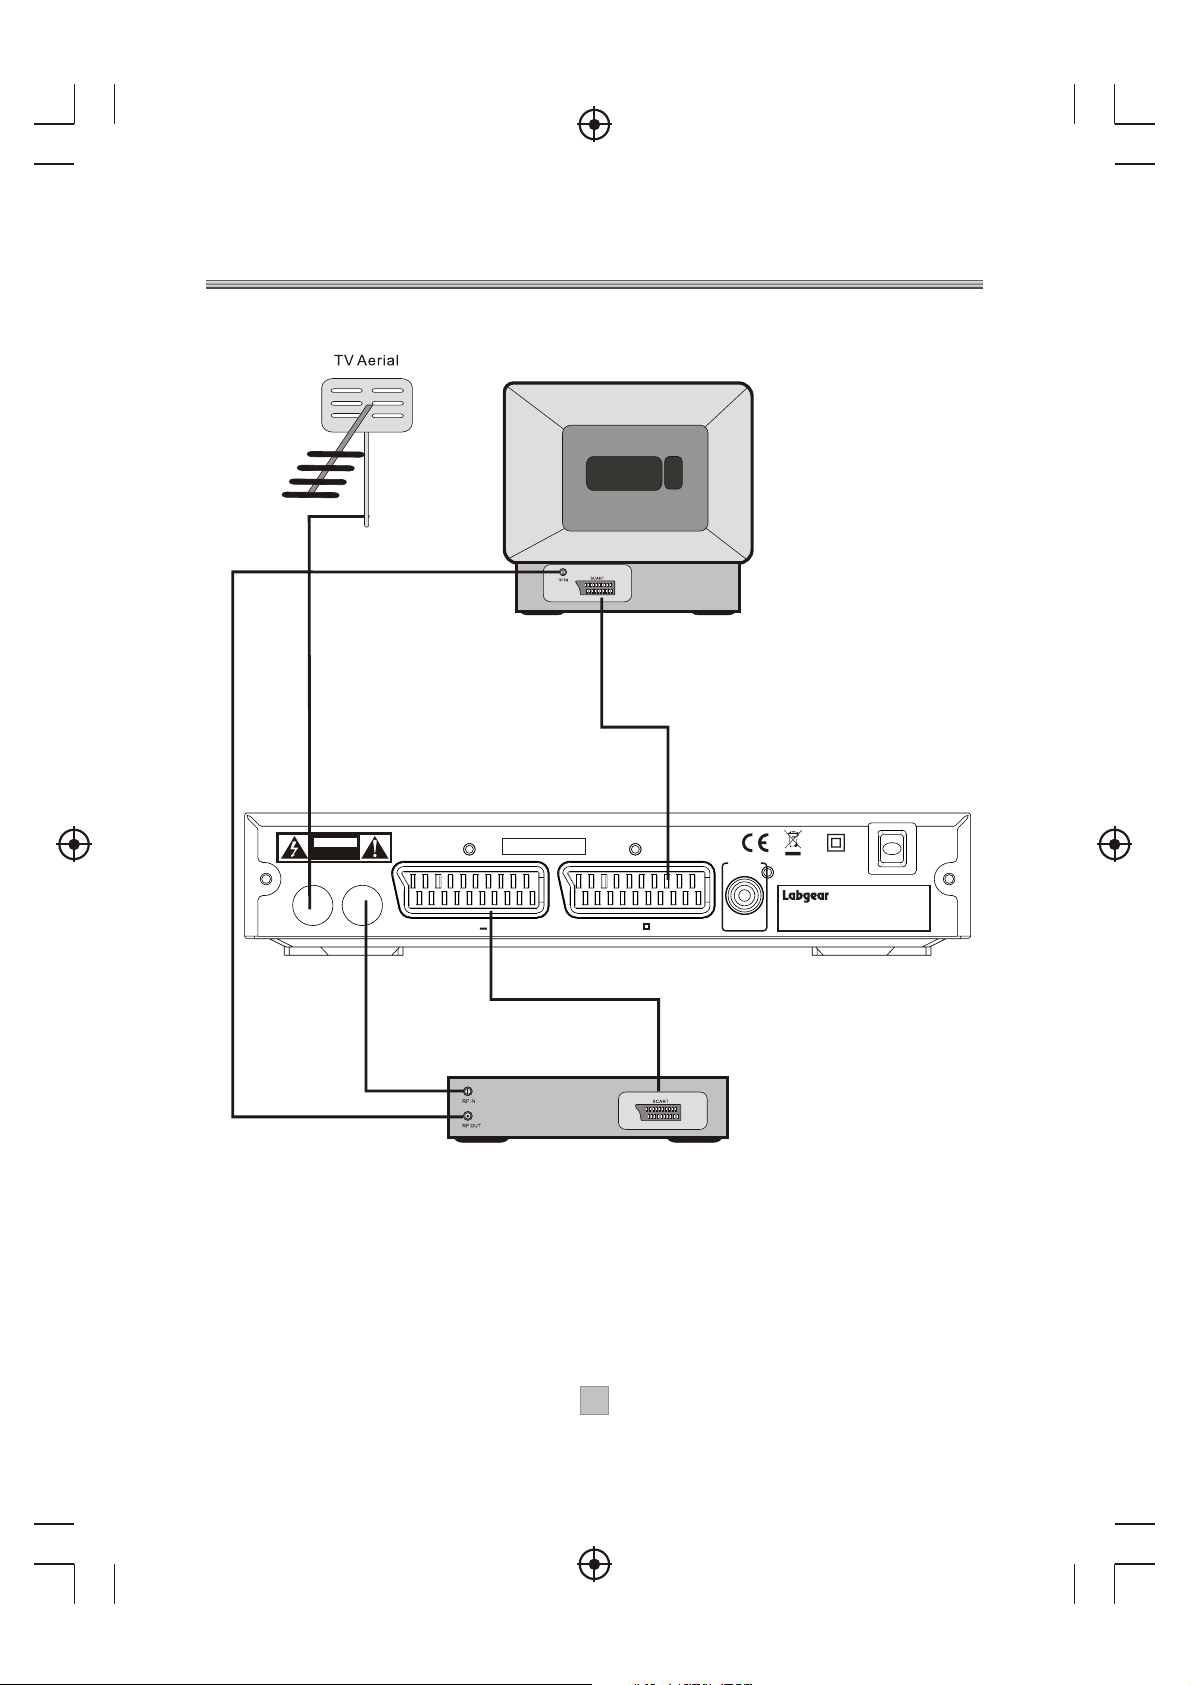
Connecting to a Television and Video
TV
Set top box
CAUTION
RISK OF ELECTRIC SHOCK
DO NOT OPEN COVER
INR F
THROUGH
Serial No.:
Digital
LOOPR F
VCR O O
TV
Audio
Coaxial
100-240V~
R09W32
50/60Hz
DIGITALTERRESTRIAL RECEIVER
POWER SUPPLY: 100-240V~ 50/60Hz
MAX POWER CONSUMPTION:10WATTS
FV300
VCRor Video system
7
Page 10
THROUGH
Digital
Audio
VCR O O
Connecting to a Surround Sound System
TV
Set top box
CAUTION
RISK OF ELECTRIC SHOCK
DO NOT OPEN COVER
INR F
THROUGH
Serial No.:
Digital
LOOPR F
VCR O O
TV
Audio
Coaxial
100-240V~
R09W32
50/60Hz
DIGITALTERRESTRIAL RECEIVER
POWER SUPPLY: 100-240V~ 50/60Hz
MAX POWER CONSUMPTION:10WATTS
FV300
Audio system
8
Page 11

User Interface
The 'Exit ' key will remove all digital menus.
The exception to this is for persistent banners i.e. encrypted service
etc and for service locked/censorship PIN entry OSDs.
All menus will automatically be removed after 30 seconds unless
otherwise stated.
The menus use a 256-colour palette.
The menus will currently support just English language.
1)Welcome Screen
When the STB is powered up for the first time or is brought out of
standby with no services, then a welcome screen will be displayed.
This will tell the user to press the OK key to start a full frequency
service scan.
OK
Press to set-up services on your receiver
2) Volume Control
A bar is to be displayed when volume is changed by pressing Vol+ or
Vol-. The bar will disappear after a predefined time following the last
Vol+ or Vol- key press. Automatically removed after 2 seconds.
3) Mute Symbol
Pressing the Mute key mutes the sound and a symbol is displayed,
Automatically removed after 2 seconds.
4) Screen Freeze
Pressing the Pause key to Freeze the Screen and a pause symbol is
displayed. Press the Pause key again to exit Freezing.
5) Direct Digit Entry
When the user initiates a channel change using the number keys,
the user can press the OK key to force the channel change before all
3 digits have been entered. If all 3 digits are entered then the channel
change will occur.
5 seconds after the last key press, the channel change will be initiated
if all digits have not been entered.
9
Page 12

6) DTV/VCR Switch
Press DTV/VCR key on remote to toggle between DTV and VCR mode.
7) Digital Information
When viewing a digital program, a single press of the INFO key will bring
up the first level of program information shown below. This shows the
time, logical channel number, channel name and 'Now' program
information. It also shows the current favourite list that is been
used/selected. The information banner appears at the bottom of the
screen.
Now Information Next Information
7.1) Small Now Information
The user can scroll through information for other channels in the
currently selected favourites list or the full service list if a favourites list
is not enabled. This is done using the up and down keys. Whilst
information for other channels is displayed the actual channel being
viewed will not change. The OK key will jump to the new channel. After a
channel change, the information banner will be removed after 4
seconds. In addition the user can toggle between 'Now' and 'Next'
information using the left and right keys. To display 'Next' information
from the 'Now' banner, the user presses the right key.
7.2) Small Next Information
The user can return from 'Next' to 'Now' Information using the left
arrow key.
A second press of the INFO key will bring up the extended program
information, and example is shown below.
7.3) Large Now Information
Large Information
10
Page 13

Icons are used to notify the user of some information about the displayed
event:
Again, the user will be able to scroll through information for other channels
whilst still watching the current program by using the P+/P- keys. In addition,
the left and right cursor keys will toggle extended info for 'Now' and ' Next' . A
third press of the INFO key clears all on screen information.
SUB DVB subtitles
TXT
CA
An MHEG application is available for this event.
This event is encrypted. Even if a CAM module is decrypting the
are available for this event.
event.
SUB DVB subtitlesare NOT available for this event.
TXT An MHEG application is NOT available for this event.
CA This event is NOT encrypted.
If none of the above are being displayed then if the service is audio or
data only, the following will be displayed.
TXT Service is data/txt only.
Service is audio only.
Event can be classified by the broadcaster and will show an icon to tell
the user the age restrictions.
18 The event has anadult content age rating. Broadcast age
rating 18+.
15 The event is notsuitable for children under the age of 15.
Broadcast age rating 15-17.
12 The event is notsuitable for children under the age of 12.
Broadcast age rating 12-14.
6 The event is notsuitable for children under the age of 6.
Broadcast age rating 6-11.
0
?
The eventis suitable for all ages. Broadcastage rating 0-5.
The eventhas NOTbeen given an age rating andmay contain
unsuitable content.
11
Page 14

8) Channel Change OSD
This banner will stay persistent when no video can be watched on the
TV. This banner will also display the current favourite list enabled. The
following messages will be displayed under various circumstances:
Channel Change Banner
This service is encrypted
No services are stored in the receiver
This is a data/MHEG only service
This is a audio only service No Signal
9) Audio
Pressing the LANGUAGE key will display the following menu. This menu
displays all the audio streams available on the current service.
The selection is done using the up/down keys.
Pressing the OK key selects the new audio.
This selection is only valid until power-down or service change.
This menu will be automatically removed after 5 seconds.
Audio menu
Subtitle menu
12
Page 15
10) Subtitle
Pressing the subtitle key will display the following menu. This menu
displays all the subtitle streams available on the current service and a
subtitle off option. The selection is done using the up/down keys.
Pressing the OK key selects the new subtitle language. This selection
is only valid until power-down or service change. Enhanced subtitle
streams are indicated by an ICON. This menu will be automatically
removed after 5 seconds.
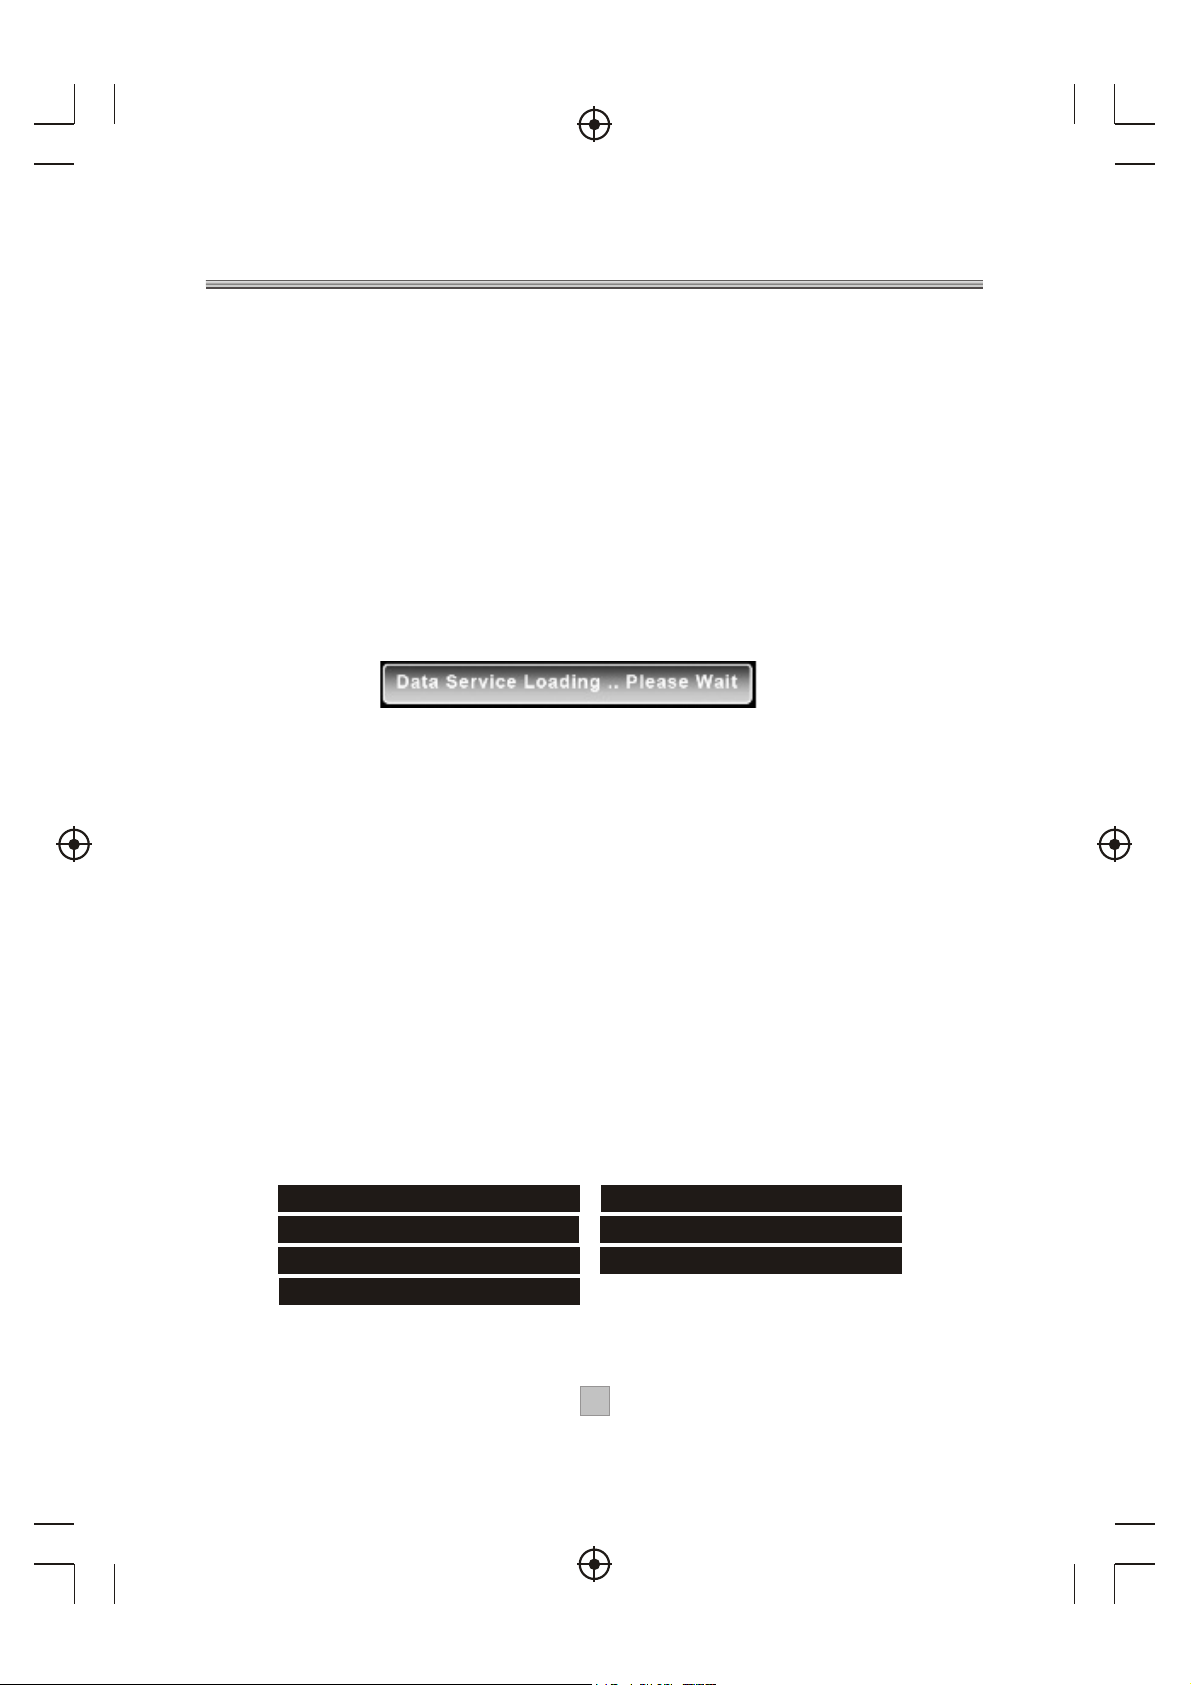
11) Data Service Loading
If the Teletext key is pressed on a service that contains an MHEG data
application and data services have been enabled in the languages
menu, then before the application has been fully loaded, this display
will be presented.
The graphic is displayed in the center of the screen.
This will be automatically removed when the MHEG application acquires
the display or will timeout after 60 seconds if the MHEG application fails
to launch.
12) TV Guide
Pressing the EPG key displays the following guide menu. The guide
contains all the channels in the service list rather than just the favourites
list. This allows the user to view the now and next event information for
every service as well as the extended information for a selected event.
Also a video/audio preview is given which shows the program that is
currently being watched if the user selects the 'INFO' button the preview
will change to show the user what is currently been shown on a
selected/highlighted service.
The user can scroll through the service list, select between now or next
information and also use the RED key to add a timer programming event.
If the video cannot be displayed then one of the following messages will
be displayed in the preview area:
ENCRYPTED SERVICE DATA SERVICE
AUDIO SERVICE CENSORED SERVICE
PARENTAL LOCKED NO SERVICE
NO SIGNAL
13
Page 16

13) Main Menu
The Main Menu contains the following options.
EPG menu
Main Menu
1. Service Organiser
Accessed from the main menu, the service list contains the details of the
services that have been added into the system. The list can be scrolled
through using up and down. The selected channel appears with a white
border. Channels can be tuned by using the 'OK' key. Channels can
be deleted with the 'Red' button(however, a full-scan will delete and readd channels), the user will be asked for the PIN number each time they
delete a channel. The 'Green' button is used to allow service re-ordering.
The 'Yellow' will allow the user to edit the service name.
Service Organiser
PIN requested for deletion
The UHF column showing the frequency channel that the service is on.
14
Page 17

2. Favourites
Accessed from the main menu. This menu allows the selection of a
favourite list which will be used when service 'surfing'. It also allows
new favourite lists to be created and existing favourite lists to be
modified.
When 'new' is selected a new favourite list will be displayed in the list
with a default name. The user can then set up this list using the edit
option and also change its name.
2.1) Favourites Edit
Accessed from the favourites menu. The order of the Favourite list
determines the order the programs appear when the user surfs up and
down the channels with the P+/P- keys. The full service list and the
favourite list can be scrolled through using up and down. The two lists
are selected by using the left/right keys. The selected channel appears
with a white border. The favourite list can be re-ordered using the
'Green' key. The favourite list name can be changed by pressing the
'Yellow' key which will bring up the edit menu.
Favourite Menu Favorite Edit
Depending on which list the user has selected the help will Change:
Left List (Service List)
Right List (Favourite List)
Left List Help Info
To re-order a favourite service the user must select the required service
using the up/down key and then use the green key to enter re-order mode.
When the green re-order is selected the user will be presented with
another help:
15
Right List Help Info
Page 18

16
Re-order Menu
2.2) Name Editor
This name editor menu is used for allowing the user to rename a favourite
group. The character selection is done by moving the highlight around a
character matrix and using OK to choose the character. The new name is
displayed at the top of the menu. 'CAPS' is used to toggle the letters
between upper-case and lower-case and 'Delete' is used to
backspace/delete the last character. When complete the 'Green' key
saves the new name and exits the menu. The 'Yellow' key will cancel the
current edit and return to previous menu with no name change.
Favourite Name Edit Menu
Timer Programming Menu
3. Timer Programming
This menu is arrived by selecting the timer programming option in the
main menu.
Note: The DVR option is not available with this model.
3.1) Enter Details
When the OK key is pressed, the following menu is displayed:
Timer Details Edit Menu
Enter PIN to remove parental locking
16
Page 19

The options are:
CN Three digit channel number.
Date Start date in DD/MM/YYYY format.
Time Start time in HH:MM format.
Duration Duration in HH:MM format.
DVR Set to Yes if to save event to internal hard drive if DVR
option enabled.
Repeat Event repeat mode. Options are No, Weekly, Daily, Mon Fri and Mon-Sat.
Subtitles This Options are Yes to use the current subtitle language
mode as set in the 'languages' menu. No will turn off
subtitles during the timed event if enabled in the 'anguages'
menu.
When the user presses 'OK', the entered items are validated.
If an error is detected a message is displayed such as:
Error message that can occur:
ERROR -Time overlaps with another entry
ERROR -Invalid service
ERROR -Invalid date
ERROR - Invalid time
ERROR - Invalid duration
ERROR - Current time not available
3.2) Viewing Restrictions
When the user presses 'OK' and the items are validated successfully,
the TV will check if censorship is enabled or the channel is parentally
locked.
If the service is parentally locked, the TV will ask the user to enter the
PIN number to remove viewing restrictions with the following menu:
If the PIN is not entered before a timeout, or it is cancelled, then the
event will NOT be added and the display will return to the enter details
menu.
If the censorship level has been set above no-block then the TV will
ask the user to enter the PIN number to remove viewing restrictions
with the following menu:
Enter PIN to remove censorship locking
The restricted program added in the timer list
17
Page 20

If the PIN is not entered before a timeout or it is skipped then the event
will still be added and viewing restrictions will apply to the event
depending on its censorship level. This is because the censorship
value of the event is not known at the time of entering the timed event.
Timer entries that have had a valid PIN entered are displayed with an
icon at the end of the line.
4. Setup Menu
This menu options allow the user to set up the system.
Setup Menu
Languages Menu
4.1) Languages
This menu allows the user to set-up default languages for subtitles,
data services and audio. The values are used on power up. In addition,
the 'Data Services' and 'Audio' values are used on channel change.
The subtitle value is also used on a channel change, but only if it hasn't
been over-ridden by the subtitle key.
The options are:
Subtitles Selects the default text language to be used for DVB subtitles.
The options are OFF, English, Welsh and Gaelic.
Data Services Selects the default text language to be sued for MHEG
data services. The options are OFF, English, Welsh and
Gaelic.
Audio Selects the default audio language to be used on power-up
and service change. The options are English, Welsh and Gaelic.
OSD Selects the default text language to be used in the menus and
off-air service information. This options just English currently.
4.2) TV Setup
The TV menu will have the following options:
18
Page 21

TV Setup Menu
Enter PIN for locked channel
The options are:
Television type Selects the type of tube that the set-top-box is
connected to. The options are 4:3 and 16:9.
Widescreen This option is only available when 4:3 is selected in
the shape option. It is used to select what the user
requires to be displayed for 16:9 transmissions.
The options are Letterbox, Center Cutout and Full
Frame.
Standard This option sets the SCART output mode. The options
are CVBS, RGB.
4.3) Parental control
The default Parental control PIN is "0000".
4.3.1) Viewing a Locked Cannel
Selecting a channel that is locked results in the following OSD being
displayed:
Entering a valid PIN will give access to the required service. Locking is
on a per-channel basis, so if the user switches to another locked
channel they will have to re-enter the PIN to view it. The channel will
remain unlocked until power-down. If the PIN is not entered then this
OSD will be displayed at all normal viewing times. i.e. After leaving the
menus this display will return.
4.3.2) Parental Locking via Menu Selection
The PIN must be entered to access the Parental Control menu:
Enter PIN to access Menu
Parental Control Menu
19
Page 22

System benefit from being supplied with a default PIN and a master
PIN. The master PIN is intended to be used to over-ride the user
supplied PIN if it is lost or forgotten.
4.3.3) Parental Control Menu
Entering a valid PIN gives access to a sub menu that provides options
to change the PIN, Lock and Unlock services or adjust Censorship.
The Censorship option allows the user to select a blocking age on
service programs.
The options are:
Block
18
15
12
Total block. Will block all service events.
Age rating 18. Will block service events with age rating 18+.
Age rating 15. Will block service events with age rating 15+.
Age rating 12. Will block service events with age rating 12+.
6 Age rating 6. Will block service events with age rating 6+.
OFF
No block. Will not block any service events.
When 'Change PIN' or 'Lock/Unlock Services' is selected then the
help will change to the following:
4.3.4) Censorship
The Television has a global censorship rating, which is set to the
Censorship block level in the above menu at power-up. If the user tries
to watch a program that has a broadcast rating above the global rating,
the user must raise the global censorship rating of the TV to match the
broadcast program.
The following OSD is displayed when a censored program is
encountered:
Enter PIN to view the censored service
Change PIN
The limit is raised to that of the broadcast program until the TV is put
into standby. If the PIN is not entered then this OSD will be displayed
at all normal viewing times. i.e. After leaving the menus this display
will return.
20
Page 23

4.3.5) Parental Locking Change PIN
Selecting the option to change the PIN takes the user to a further sub
menu that handles the confirmation and storing of the new PIN.
The menu prompts for a new PIN. The select option allows the user to edit
the numbers being entered. As each number is entered, the '-' in the
display is replaced by a '-'. Pressing the OK key causes the confirmation
input line to be highlighted and the process to be repeated. If the entered
numbers are not identical, 'Numbers no identical' is displayed in the gray
area.
4.3.6) Parental Control Lock/Unlock Services
Selecting the Lock/Unlock Services option gives access to the service
locking menu ad shown below. The program list is displayed and the user
can scroll through it, using the up and down keys. The 'Select' key is used
to lock and unlock access.
The 'LOCK' Icon indicates that the channel is locked.
4.4) Service Setup
Lock or Unlock Services
4.4.1) Full Scan Add New Services
When the'Full Scan Add New Services' option is selected, the end of the
service list is displayed. When new services are found , they are displayed
at the end of the existing list in a highlighted yellow colour. During the scan
a progress bar is displayed and a message giving the estimated time
remaining to complete the scan.
When the scan is complete the progress bar will show 100% and a message
stating how many new services have been found is displayed.
Service Setup Menu
9
Full Scan Add New Services
Show how many services added
21
Page 24

4.4.2) Full Scan Replace Existing Services
When 'Full Scan Replace Existing Services' option is selected, the
same as the 'Full Scan Add New Services' menu is displayed except
that the existing services in the system are deleted before the scan
starts.
Full Scan Replace Existing Services
Manual Scan Menu
4.4.3) Manual Scan
This menu allows the user to manually tune in services.
This menu will have different parameters.
Editable options are:
Channel Sets the required UHF channel. This will automatically
fill in the frequency entry.
Frequency Overrides and set the frequency in kHZ.
Tx Mode Selects the required transmission mode. The options are
2K and 8K.
Guard Interval
Selects the required guard interval. The options are 1/4,
1/8, 1/16, and 1/32.
Scan Starts or stops a service scan.
Information:
Modulation The modulation type of the locked stream. The values can
be QPSK, QAM16 or QAM64.
FEC The FEC rate of the locked stream. The values can be 1/2,
2/3, 3/4, 5/6 or 7/8.
Network ID The network id of the locked stream.
Transport ID The transport id of the locked stream.
Services Found Number of services found on the locked stream after
a scan.
Services Added Number of services added to the system after a scan.
If some of the services found are already stored then
they will not be re-added.
22
Page 25

Signal Level Bar indicator to show the current signal level.
This bar will have 3 colours to distinguish how good the
signal is: RED=Bad, YELLOW=Medium and GREEN=Good.
Text also displayed to state if the FE (Front-End) is locked.
Quality Bar indicator to show the current bit-error-ratio and text
displaying the quality. This bar also have 3 colours
indicating:
GREEN No front end errors.
YELLOW Errors detected but corrected.
RED Un-correctable errors.
Before a scan is started or when a scan is started and waiting for SI
information the in formation parameters will be filled with dashes.
When changing the connection settings, the FE connection settings
will be changed and the bars updated to show the current FE
information.
To start a service scan the SCAN option must be selected and toggled
to 'Started' . The user must then wait for the service information to be
found and displayed.
While waiting for the service information and the services to be added
the following will be displayed in the preview windows:
PLEASE WAIT••
After the scan has completed the scan option will automatically toggle
back to 'Stopped' .
The quarter screen preview will show the first service from the new
services that have been added, along with the service name and
provider name of the previewing service.
The user can then skip through the found services by using the P+ and
P- keys.
If no new services are added then the preview window will stay blanked
and no service or provider name will be displayed. The following will be
displayed in the preview windows:
NO SERVICES ADDED
23
Page 26

If the video can't be displayed then one of the following messages will
be displayed in the preview area:
ENCRYPTED SERVICE
AUDIO SERVICE
PARENTAL LOCKED
NO SIGNAL
4.4.4) Full Scan Setup
When the 'Full Scan Setup' option is selected, and option list will be
displayed allowing the user to modify what parameters will be used
during the full scan procedure.
This menu will have different parameters.
The options are:
Transmission Mode:
2K Yes/No
8K Yes/No
Guard Interval:
1/32 Yes/No
1/16 Yes/No
1/8 Yes/No
1/4 Yes/No
Full Scan Setup Menu
The default settings will be for the UK DTT network which is 'Yes' for
2K TX mode and 1/32 guard interval.
4.4.5) First Time Setup
This menu used to delete all channels and setting to the first time
installation, include Language, TV set, Service, Parental Control set,
and then show the First time welcome screen.
First Time Setup
After initialize, the welcome screen will show.
Press OK key to delete all channels and settings, the following menu
will displayed:
24
Page 27

4.5) Check For Download
The option allows the user to update the software.
Chec
.1)
4.5
This m
(1) F
irst c
Upda
enu f
opy t
te by
or th
he pr
USB
e SW u
ovide
pgr
d *.ss
k For D
ading
by a s
u
ownloa
pecia
d
l SCA
RT t
o US
B ada
pte
r.
upgrade file to the root directory of the USB disk and then insert the
USB t
o the
USB p
ort o
f the b
ox, y
ou sho
uld se
e USB
indic
ator
flash
ing
while reading.
(2) Select the upgrading file and press ok to start upgrading.
low,
s be
nds a
eco
20 s
bout
or a
last f
will
ress
rog
de p
pgra
he u
(3) T
Note: Please don't shut down the power during update, otherwise it will
box.
the
roy
dest
Software Upgrading
4.5.2) Update by OAD (Over Air Download)
(1)Notification
This menu is displayed when a new over air download is detected after
power-up. This allows the user to select whether to start the download
now or download later by adding the event to the timer programming table.
If the event cannot be added, then an error message will be displayed.
The user can refuse the download at this time by pressing exit (however,
the download may be re-detected and indicated at next power-up).
2525
Page 28
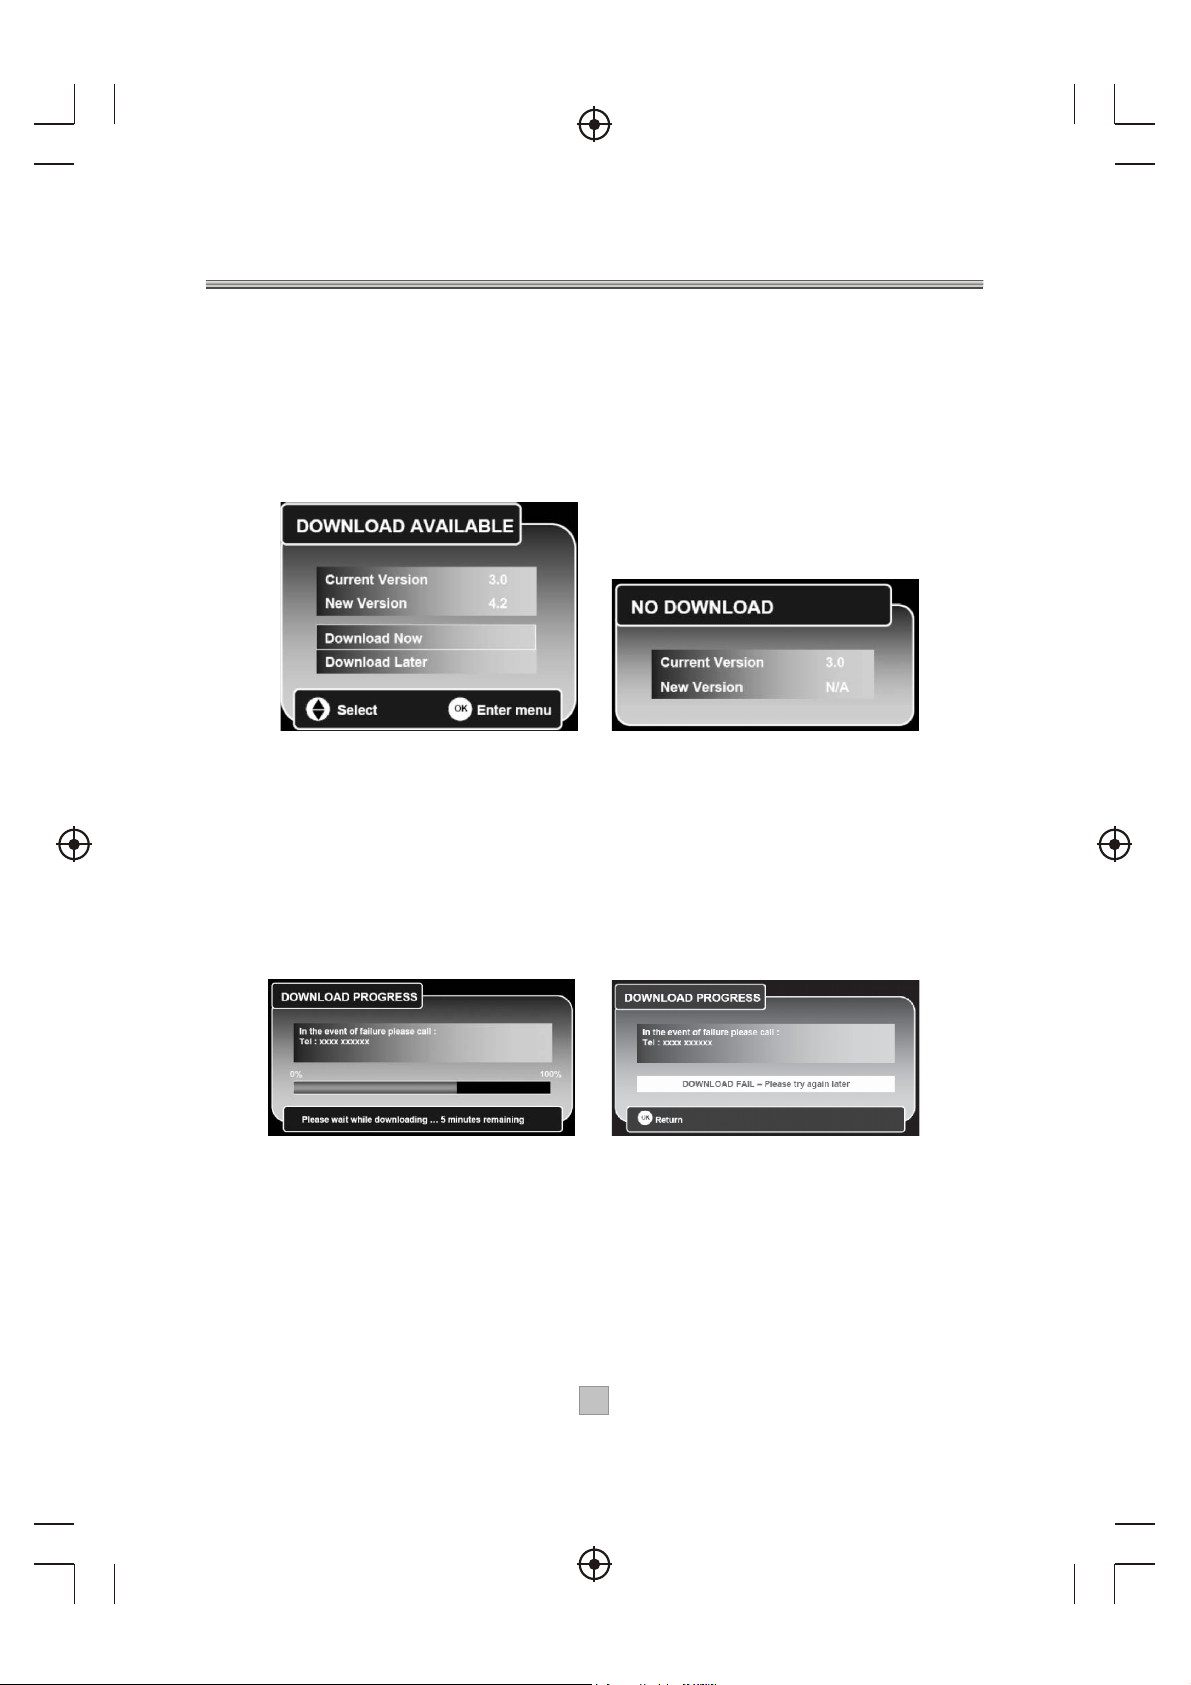
Some downloads may be signaled as high priority which means the
manufacturer of the receiver wants the user to perform the download.
In this case the download will automatically start when detected or
after leaving standby.
If a download is not available when manually checking for a download
or the download becomes not available while the above menu is being
shown, then the following menu will be displayed.
Download Available No Download
(2) Progress
During the download progress a message will be displayed which
details to the user any message that the manufacturer requires this
message is broadcast as part of the download and isn't hard-coded into
the interface. The message may describe new features of the download
or a contact number in case of download failure. A progress bar and a
time remaining countdown is displayed during the download.
If the download fails the following error message will be displayed.
Downloading
Download Fail
If the television uses one FLASH chip, the new images is download
into another memory space and then written to FLASH when the new
images has been verified.
During this period the user must not turn off the receiver and the
following message is displayed. While this message is displayed the
television will not respond to any key presses.
26
Page 29

(3) Download message after restart
When the receiver restarts after a download, the following menu will be
displayed. This can contain either a success or failure message and
any other information about the new software.
Don't Switch Off the Receiver
Download Completed
4.6) Technical Information
The Technical Information screen displays the hardware version
number and software version numbers. The software version numbers
depend on what modules are built into the software.
4.7) Antenna Setup
Antenna Setup menu allows the user to enable or disable the
antenna power supply for an external active digital antenna requiring
5V line powering.
1. Enter the SETUP menu, press the "UP" or "DOWN" cursor to
highlight the Antenna Setup menu.
2. Press the "OK" button to enter the Antenna Setup menu.
3. Press the "LEFT" or "RIGHT" cursor to to set the status to "ON" or "OFF".
4. Press the "EXIT" or "MENU" button to quit this menu and save the setting.
If you have any queries or require further information,
please contact
CUSTOMER CARELINE: 0901 293 0038
Calls are charged at £1 per minute from a BT landline
Call charges from other networks may vary
TECHNICAL SUPPORT: http://technical.philex.com
27
Page 30

Troubleshooting
If you experience problems with this receiver or its installation,
in the first instance please read carefully the relevant sections
of this User Manual and this Troubleshooting section.
28
Page 31

Specifications
If at any time in the future you need to dispose of this product please note that:
Waste electrical products should not be disposed of with household waste.
Please recycle where facilities exist.
Check with your Local Authority for recycling advice.
© Philex Electronic Ltd. 2009. v1.2
29
 Loading...