

Page 1
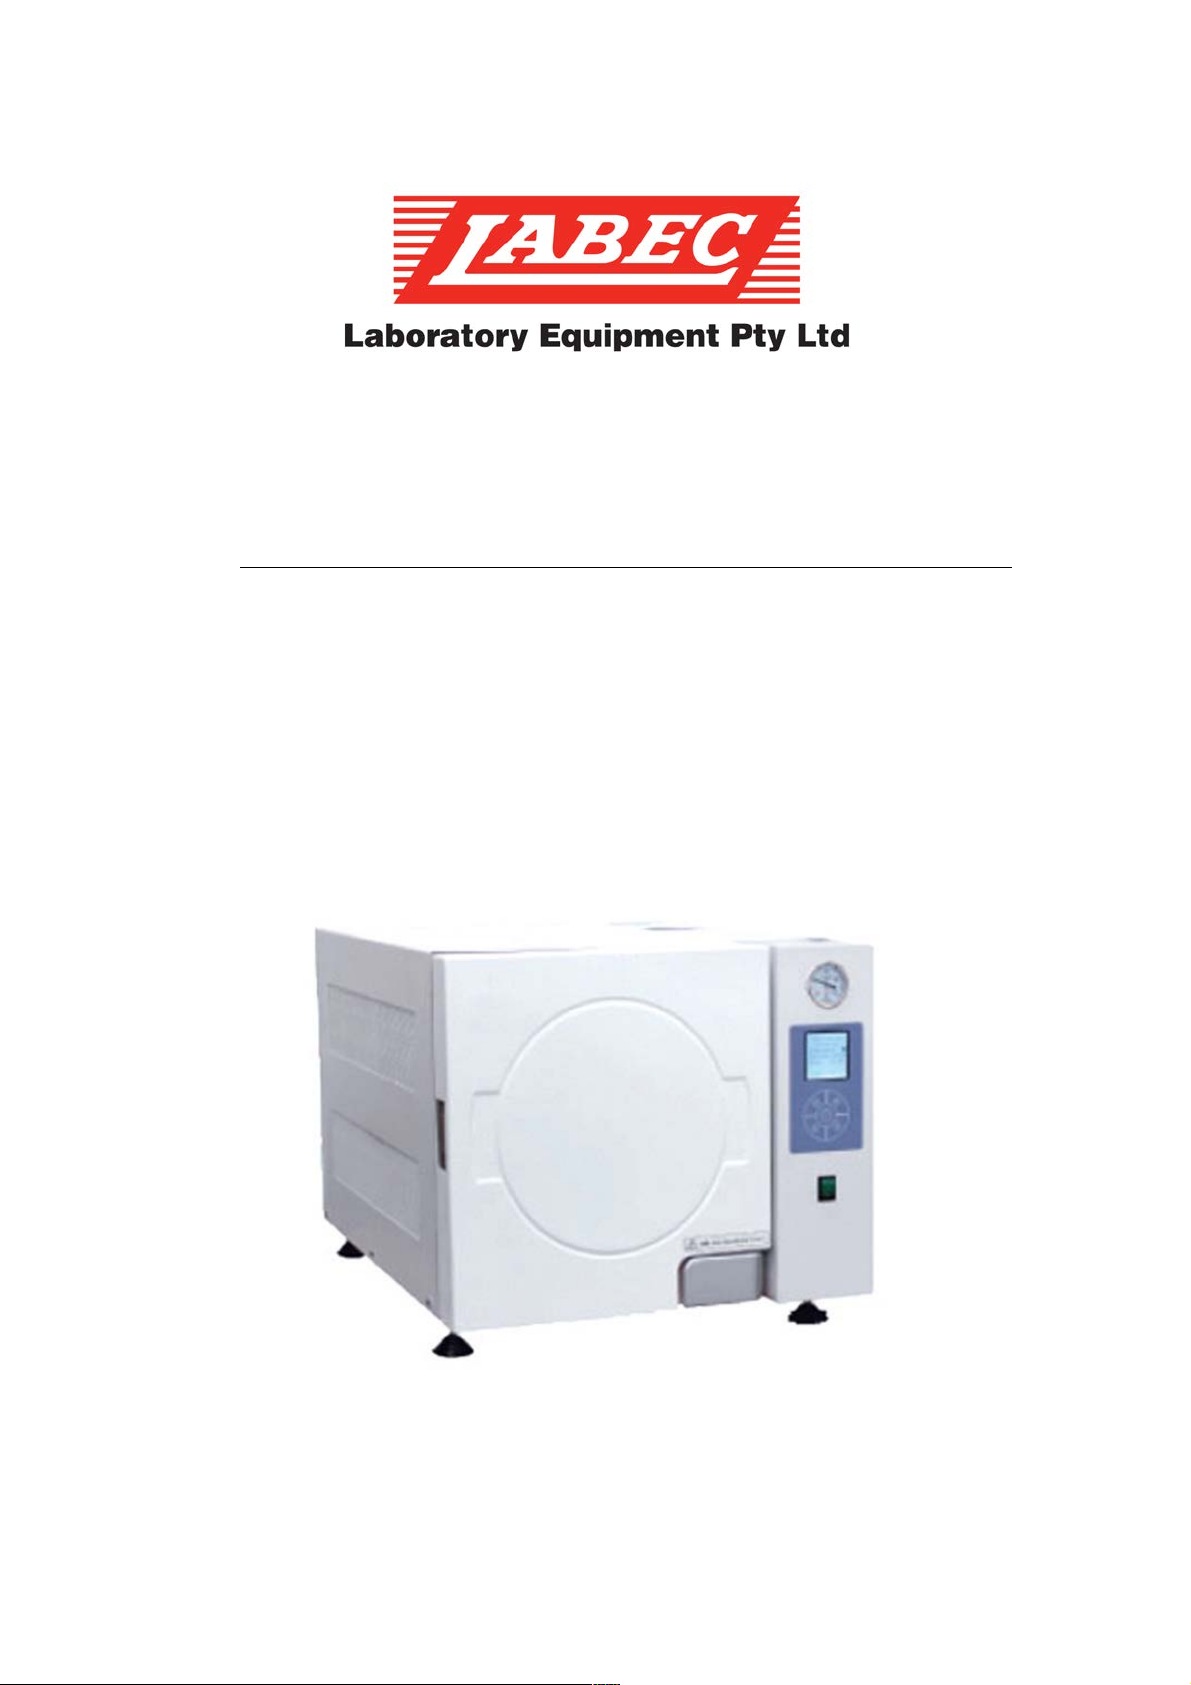
INSTRUCTION MANUAL
SHINVA 45 Litre
Page 2

Contents
Preface……………………………………………… …… ……… ……...1
Chapter 1 Overview……………………………… … … … …… … …....2
Chapter 2 Basic Introduction……………………… ………………...3
Chapter 3 Installation……………………………………………… ….6
Chapter 4 Preparation before Using………………………………10
Chapter 5 Operation……………………………………… …… … ….12
Chapter 6 Maintenance……………………………………… …… …13
Chapter 7 General Maintenance and Repairs……………………14
Page 3

1
Preface
1 Use of this Manual
The operation and maintenance manual is a part of the autoclave.
1) Instructions for equipment
2) How to assemble the machine correctly.
3) How to operate the machine correctly.
4) Daily maintenance of the machine.
5) Cautions about the safety matters.
2 Storage of the Manual
The manual must be kept properly with the equipment.
Explanation of warning marks
!!! Warning:
Notice user and operator: Avoid possible serious personal injury and equipment
damaged.
!! Be careful
Notice user and operator: Avoid possible slight personal injury and equipment damaged.
! Attention
Notice user and operator: The operation of the equipment will fail and sterilization will
not occur.
Please read and understand this manual before using the equipment.
It is very important!
Page 4

2
Chapter 1 Overview
1.1 Data and Marks for the Identification of the Equipment
Execution Standard:YZB/Shandong 0155-2008
The equipment passed CE certificate, ISO 9001 and ISO 13485 international quality
system certificate.
Technical parameters:
Designed pressure: 0.28MPa
Rated working temperature: 134
Model: TMQ.CV3250
Overall dimensions (mm): 835 x 600 x 515
Net weight: 85Kg
Power: 240V 50Hz 3.6KW
Rated working pressure: 0.22MPa
Water source: distilled water or pure
water
Volume: 45 litres
Diameter * depth (mm): φ317X580
Page 5
3
1.2 Attention
When the autoclave arrives, please open the package, check if the machine is damaged or
any parts are missing. During your check of the machine, please pay attention to the
packaging and keep the packaging materials. All autoclaves have been checked and
tested strictly before shipping.
The useful life of this equipment is 8 years.
Chapter 2 Basic Introduction
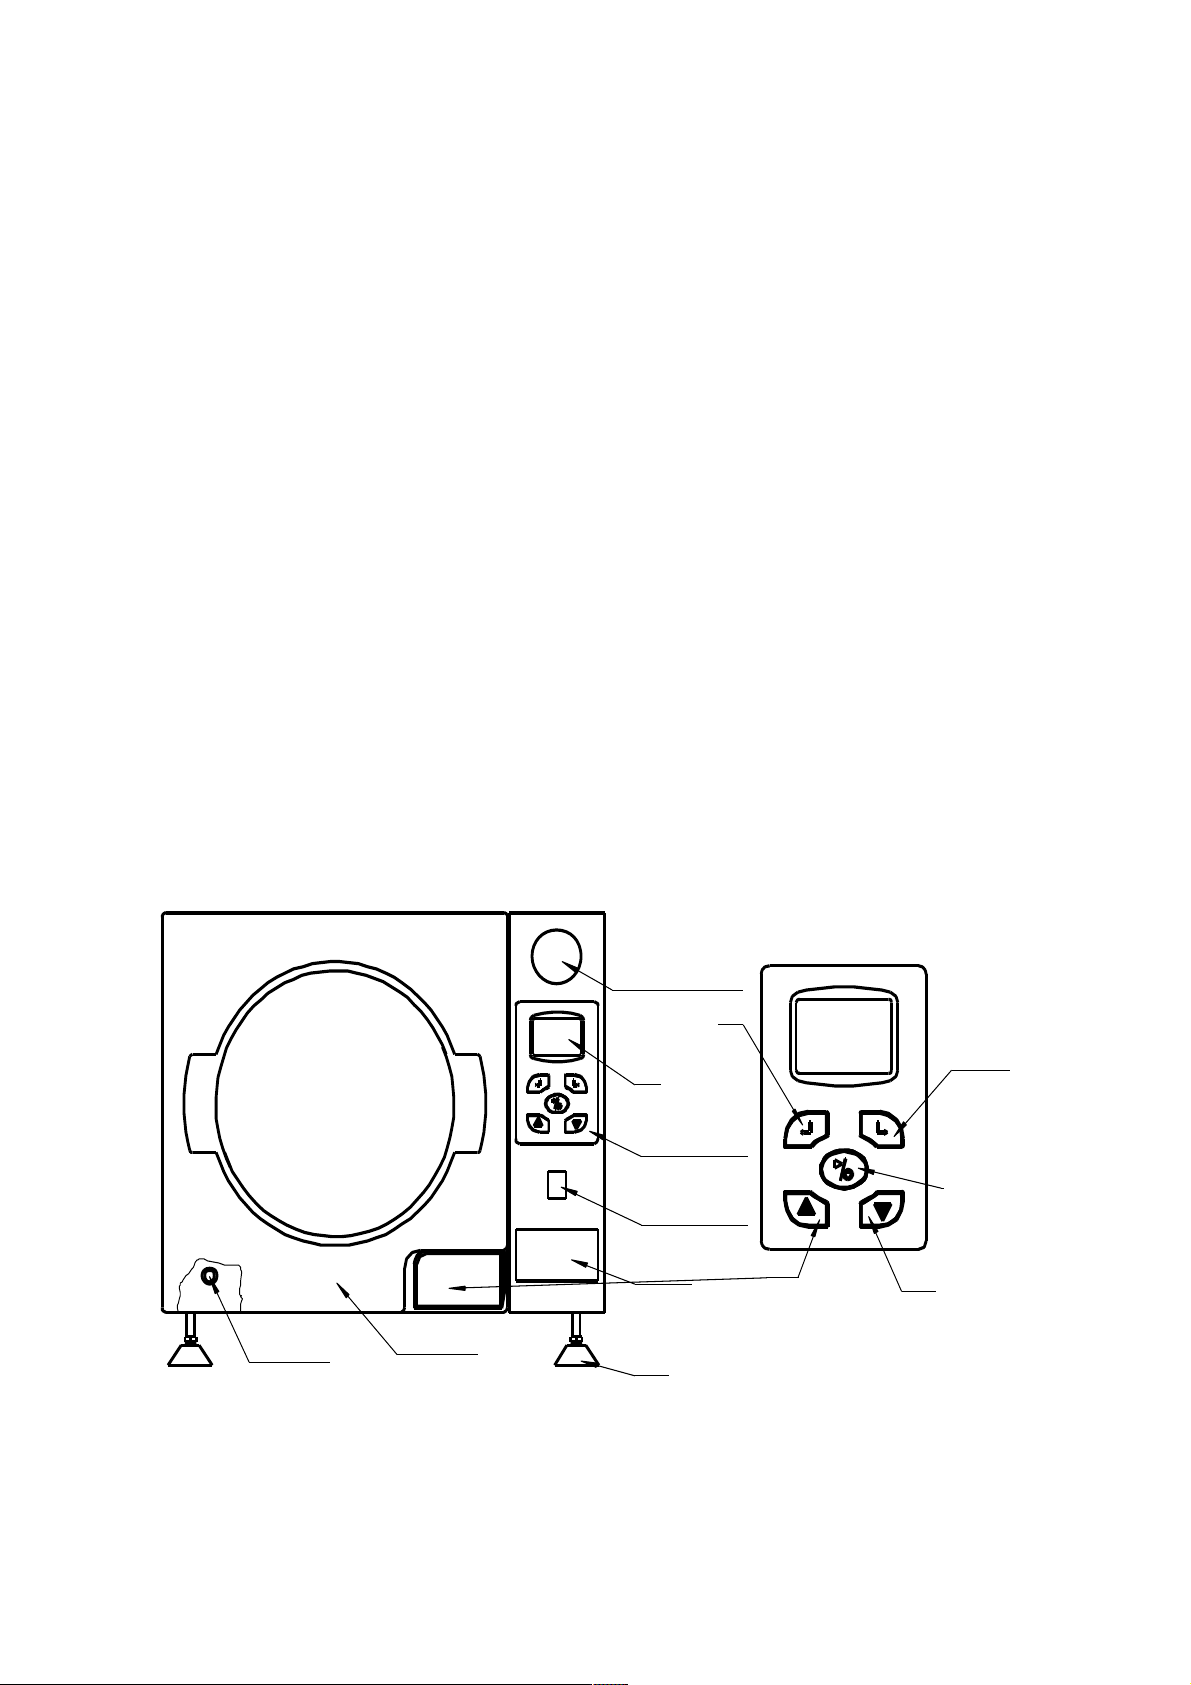
2.1 Overall and Key Pad
Instructions
p re ssu re m et er
L CD
co nt rol p an el
po we r s wi tc h
p rin te r
E sc
se t k e y
把手ad d
do wn
f oot
do or co v e r
wa te r p or t
Page 6

4
高水 位 H IGH LE VEL
L OW LEV EL
低水 位
w a te r l e v e l
2.2
Basic Features
! LCD display, touch key pad for easy operation.
! Independent steam generator device for heating quickly.
! Continuous pulse vacuum system together with air exhaust, thoroughly ensures
saturation of steam and efficient sterilization.
! The pulse vacuum system ensures dry products after sterilization.
2.3 Running: Environmental Requirements
1 Room temperature: 5—40。
2 Maximum relative humidity: 85%
3 The voltage fluctuation is ±10%
2.4 Safety Devices
! Auto protection device against over temperature:This system cuts off power
automatically if the designed temperature is surpassed
! Door safety interlock:The door cannot be opened until there is no pressure in the
chamber and power for heating cannot be switched on until the door is firmly
closed.
! The system will cut off the power when water not enough in steam generator.
Page 7
5
! Safety valve of auto release against overpressure:It opens when the designated
pressure is surpassed.
! Circuit safety device: AC loop short protection.
Chapter 3 Installation
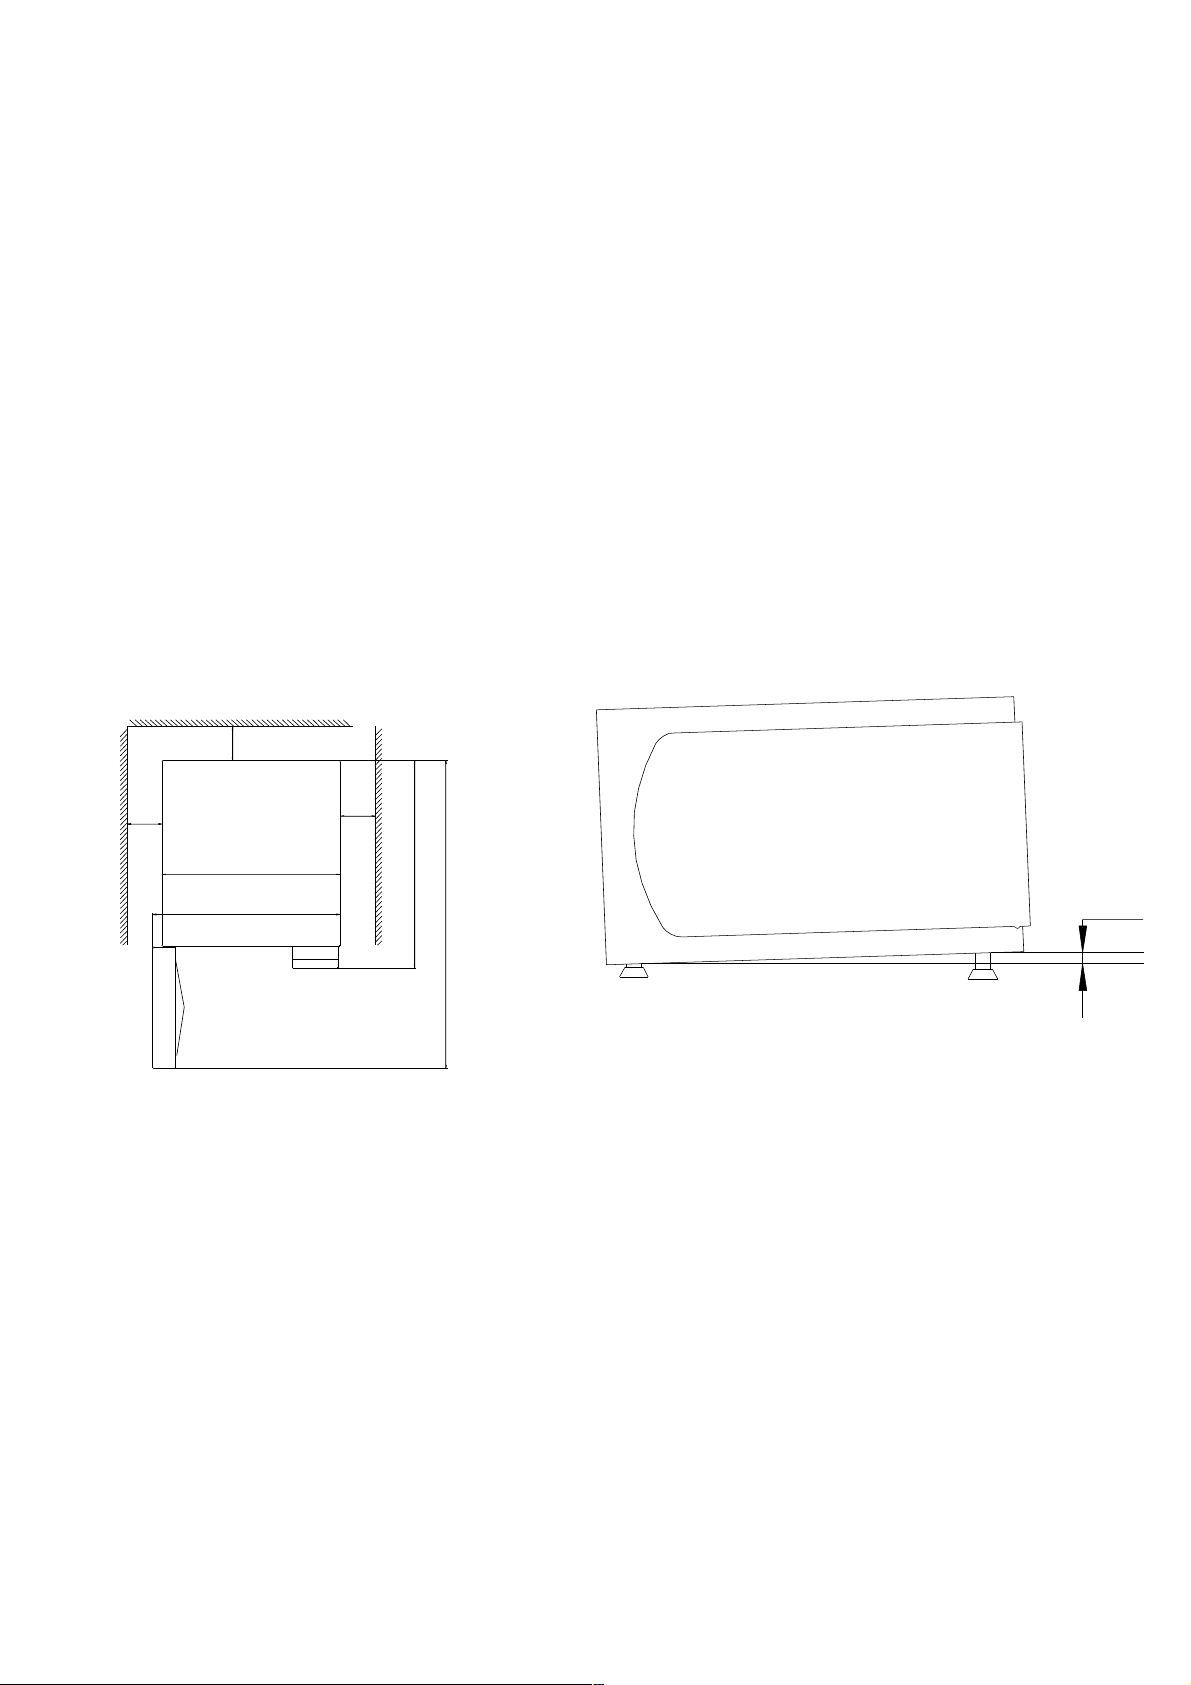
3.1 Installation Procedures
3.1.1 Placement of the Autoclave
Position the equipment on a level and firm surface in a room with good ventilation,
adjust the foot screws to make the equipment level. Allow at least 25cm ventilation space
on all sides of the equipment.
3.1.2 Water Preparation
Water quality:
! Conductivity less than 15µS/cm
! Bleacher content:≤2mg/l
! PH value is 5—7
! Hardness:≤0.02mmol/l
5 c m
2
5
c
m
2 5 c m
2 5 c m
5 8 0
6 2 0
8 2 8
1 2 0 0
Page 8

6
Pour distilled water into water tank. Do not exceed 4.6 litres the first time filling
tank.
3.1.3 Connection of Power
Connect power and turn air switch to ON position.
!
Caution:
Please check the plug is rated for current 15A
a ir filte rsa f e ty v a lv e
a ir sw itc h
p o w e rlin e
!!!
Caution:
1 Power supply must be grounded to earth.
2 Please attention safety when installing circuit.
3 Tag test the equipment annually.
Page 9

7
3.2 Debugging
3.2.1
Original Parameters Settings
TMQ.CV3250 table –top autoclave should display original parameters at first use. The
setting method is as follows:
1 Switch on power switch, and press “set”, the system entry picture is as follows:
Remark:P0-local atmospheric pressure, T0-local boiling point temperature
2 Set atmospheric pressure,original value is 101kPa,press“▲” key and “▼” key to
change the atmospheric pressure.
3 Press “Esc” key after set value completion.and system will return to original menu.
3.2.2
Opening the Door.
1 Quit original menu, the autoclave will self-test: balance pressure of inside and
outside. Close the door lock, LCD displays the following. This process need
several minutes
2 The screen display picture is as follows after the door lock is turned on, user can
open the door.
!!
Caution:
Please don’t open the door using force until it displays “Please open door”.
Original parameters
Atmospheric pressure:101kPa
Local boiling point:100℃
version:090000
Reminding:
Balancing pressure
XXXk P a XXX. X℃
Please wait
。。。
Reminding:
Door lock open
XXXk P a XXX. X℃
Please open the door
Page 10

8
3 The screen will display program parameters and picture as follows after the door is
opened
3.2.3
Vacuum Test
1 Press“▲” key or “▼” key until screen display 6# vacuum test program shows as
following,close the door and press “on/off” key and the vacuum test program will
start.
2 The buzzer alarming will remind user that the vacuum test program is finished, and
screen will display the following:
3
Leakage rate must be lower than 0.13KPa/min。
3.2.4
B&D Test
1 Press“▲”key or“▼” key until screen display 5#B&D test program picture shows as
following:
1#instrument door : open
Sterilization temperature :134. 0℃
Sterilization time: 4. 0 mi n u t e s
Dryness time: 2. 0 mi n u t e s
6#vacuum door : open
Test leakage rate
6#vacuum t est 20:00
Leakage r at e:
0. ***kPa/ Mi n
Please open the door
5#BDtest door : open
Sterilization temperature :134. 0℃
Sterilization time: 3. 5 mi n u t e s
Dryness time: 2. 0 mi n u t e s
Page 11

9
Put B&D test bag into autoclave and close the door, press “on/off ” key and program
will start.
2 Buzzer will sound after B&D test is finished.
3 Remove the tray and observe the B&D test bag.
!!
Caution:
Please use professional tongs and gloves with safety eyewear to remove the
tray in order to avoid injury.
Chapter 4 Preparation before Using
4.1 Preparation before Instrument Sterilization
The instruments must be cleaned before placing them into the chamber.
For example:Blood or other impurities.
Please refer to following methods:
1 Wash instruments immediately after use to dispose of any residue. It is
recommended that instruments should be washed with an ultrasonic cleaner, using
detergent solutions and distilled water.
2 After cleaning, rinse instruments again in order to ensure the instruments are free of
any residue.
3 Pay attention when arranging instruments on the tray:
Different instruments should be separated into different baskets, for example:
stainless steel instruments in one basket and carbon steel instruments are kept in another
basket. There must be a distance between the instruments. Sterile paper should be used
at the bottom of the basket if carbon steel instruments are to be treated, in order to prevent
the carbon steel from coming into direct contact with the stainless steel basket.
4 Place a sterilization indicator in each basket.
Page 12

10
5 Cuvette, glass bottles etc should be stood upside down vertically in order to allow
cold air exhaust and saturated steam goes inside.
4.2 Preparation for Rubber Tubing
Clean tubing and rinse with warm water. Ensure that both ends of the tubing are open,
without any sharp bends, twists or kinks.
4.3 Preparation for Dressings
Attention: Put dressing package into the tray vertically, avoid touching the inner wall of the
sterilizer.
Page 13

11
Chapter 5 Operation
5.1 Operation Process
1 Ensure there is enough water in the water tank and that the waste water tank is
empty.
To empty water from waste water tank, use water drain plug in the side of the water
tank and drain water.
If you want to drain water from water tank, the user can lay flat the drain tube.
2 Connect power and switch on, put articles into chamber when screen indicates
ready and then close the door.
3 Select correct program according to articles being sterlizied.
Press “▲” key,screen will in turn display 1#instrument, 2#instrument bag, 3#dressing,
4#rubber, 5#B&D test, 6# vacuum test program and related menu. As following:
Press “set” key, screen display mode shows as following:
Press“▲”key or“▼” key,select pre-heating mode,print mode or date and start to set.
For example, if you want to set the pre-heating mode, the background is clear after this
mode is selected, then press “set” key, the value will flicker and now user can press “▲”
or“▼” to adjust. Press “Esc” when setting is finished.
Program
Sterilization
temperature
Sterilization
time
Dryness time
1# instrument
134
4min
2min
2#instrument bag
134
4min
10min
3# dressing
134
6 min
15min
4# rubber
121
20 min
5min
5# B&D test
134
3.5 min
2 min
6#vacuum test
Test vacuum leakage rate of autoclave
Mode set
Pre-heating mode: Close
Print mode: Open
2008/11/19 09:20
Page 14

12
4、 After selecting desired program, press “start” key, when sterilization program is running,
the process are: preparation, pulse vacuum, pulse heating, pulse air exhaust, sterilization,
steam exhaust and pressure release, dryness, balance pressure, sterilization finished.
5、 In autoclave running, the user can observe the parameters information by screen, if the
autoclave is equipped with a printer, all process data can be record by it.
6、 The system will stop running and alarm will appear “surpassed temperature” or “lack of
water”. When these problems appear, please wait for the pressure to balance, buzzer to
sound and screen display “press Esc key”, and then open the door.
7、 When screen display shows “sterilization finished, please open the door” and the buzzer
sounds, the user can open the door and retrieve the articles.
8、 Close the door, turn off the power switch and disconnect power.
5.2 Quit while Autoclave is Running
User can not forcefully open the door when the autoclave is running, if there is a need stop the
program, please press “Esc” and wait for pressure to balance, buzzer to sound, and then press “Esc”
key again to open the door. Screen will go back to the menu picture.
Chapt er 6 Mai nt enanc e
The operations described in this chapter must be followed to keep the sterilizer in good
condition and to reduce breakdowns.
!!!
Caution
:
Before starting, ensure the electric cord is disconnected and there is no pressure in the
sterilizer.
Page 15

13
Daily
! Clean the door gasket with a soft cloth or a sponge.
! Clean the chamber, tray holder and trays with gauze with detergent and water.
Do not use steel wool or steel brush as this can damage the
chamber.
Periodical check:
! Once a week, empty the water tank, waste water tank and clean them with water.
! Once a month, inspect the safety valve.(refer 7.4)
! Once a year tighten the electrical connections and tag test. It should be done by an authorized
electrician.
! If the equipment is not used in a long time, please empty the water tank, waste water tank
and clean them. Close the door and disconnect power.
Chapt er 7 Ge ne r al Mai nt enance and Repai r
CAUTION:
Instructions in this chapter are provided to professionals. When problems occur, read the
instruction manual first, check and maintain the equipment following the instructions. The
maintenance methods have been described in this manual.
7.1 Troubleshooting
Symptom
Possible Cause
Correction
1 The power supply is
on, but the power
indication lamp does
not light
1.1 air switch disconnected
1.2 main power switch damaged
1.1 turn air switch to “ON”
position
testing door lock
2.1 door lock can not back
automatically
2.1 inspect electromagnetism
lock
3.1 door not closed correctly
3.2 door switch loose
3.1 close door again
3.2 adjust door switch
Warning!
Door open
Pressure: 0KPa
Page 16

14
Symptom
Possible Cause
Correction
4.1 too much water in waste water
tank
4.1 empty water from waste
water tank
5.1 safety valve does not open
5.1 open safety valve for 2
seconds and close it in B&D test
process, if will not open please
fit a new one.
6.1 short circuit in heating
controller
6.1 professional to inspect
circuit or fit a new controller
or drops slowly
7.1 high temperature in chamber
7.2 door gasket not sealing
correctly
7.3 air filter is blocked
7.4 steam exhaust pipe or water
drain pipe is blocked
7.1 open the door and try again
after half a hour
7.2 check door seal, may need a
new door gasket
7.3 detach filter and wash it
7.4 clean those pipes
pressure or temperature
not rising or rises slowly
8.1 controller of heater has short
circuit or is damaged
8.2 connection or safety valve
leakage
8.1 inspect and change damaged
parts
8.2 inspect and tighten
connector or safety valve
process, pressure or
temperature not
dropping or drops
slowly
9.1 filter of water drain is blocked
9.1 clean filter
process, pressure not
rising or rises slowly
10.1 air filter blocked
10.1 fit a new air filter
11.1 paper jammed or no paper
11.1 clear or fit new paper
Warni ng!
Ful l of was t e
wa t e r t a n k
XXXk P a XXX. X℃
Warning !
Higher pressure
Pressure : 0KPa
Warning !
Higher temperature
Pressure : 0KPa
Page 17

15
Symptom
Possible Cause
Correction
11.2 no printing ink
11.2 change new printing ink
7.2 How to Remove the Cover of Autoclave
!!!Make sure that the electrical cord is disconnected from the power supply and that there is no
pressure in the chamber.
Removal process:
1 Remove the screws on the side and back
2 Lift up the cover
7.3 How to Check the Safety Valve
In order to prevent the safety valve from blockage, every month under ordinary usage, it is necessary to allow the
steam pressure to escape through it.
1 Run 1# program
2 When pressure of chamber is 210Kpa, pull the ring of safety valve and open it 2 seconds
7.4 How to Replace the Safety Valve
Attention: This method should be used only by professionals.
Page 18

16
1 Remove the fastening screw of the safety valve with a screwdriver, take the valve from
base
2 Replace it with a qualified safety valve. (Ensure it opens at a pressure 0.25Mpa-0.26Mpa.)
7.5 Cleaning the Electromagnetic Valve.
1. Dismantle the sterilizer external cover and find broken electromagnetic valve.
2. Poke the pressing disc with screwdriver.
3. Take out the loop of valve.
4. Open the valve with spanner.
5. Clean the valve with water.
6. Restore the valve.
As following :
Page 19

17
7.2
Cleaning of the filter
Page 20

18
It is located inside and at the back of the autoclave; you can find filter cover at the bottom of
the autoclave.
1. Lift up the autoclave
2. Remove filter cover
3. Remove filter screen
4. Clean filter screen
5. Refit filter screen and cover
7.3 Door interlock system
It is a safety device that prevents the door being opened when there is pressure in the chamber.
Its function as following:
1. Right close the door, the program can start.
2. When the door was locked but electronic lock and can not open, the program can start
3. When pressure balance between inside and outside and the electronic lock get back, the
door can open
Cover of filter
Fi l t er screen
Page 21

19
in ch in g sw it ch
el ect r oni c l oc k
 Loading...