

Page 1
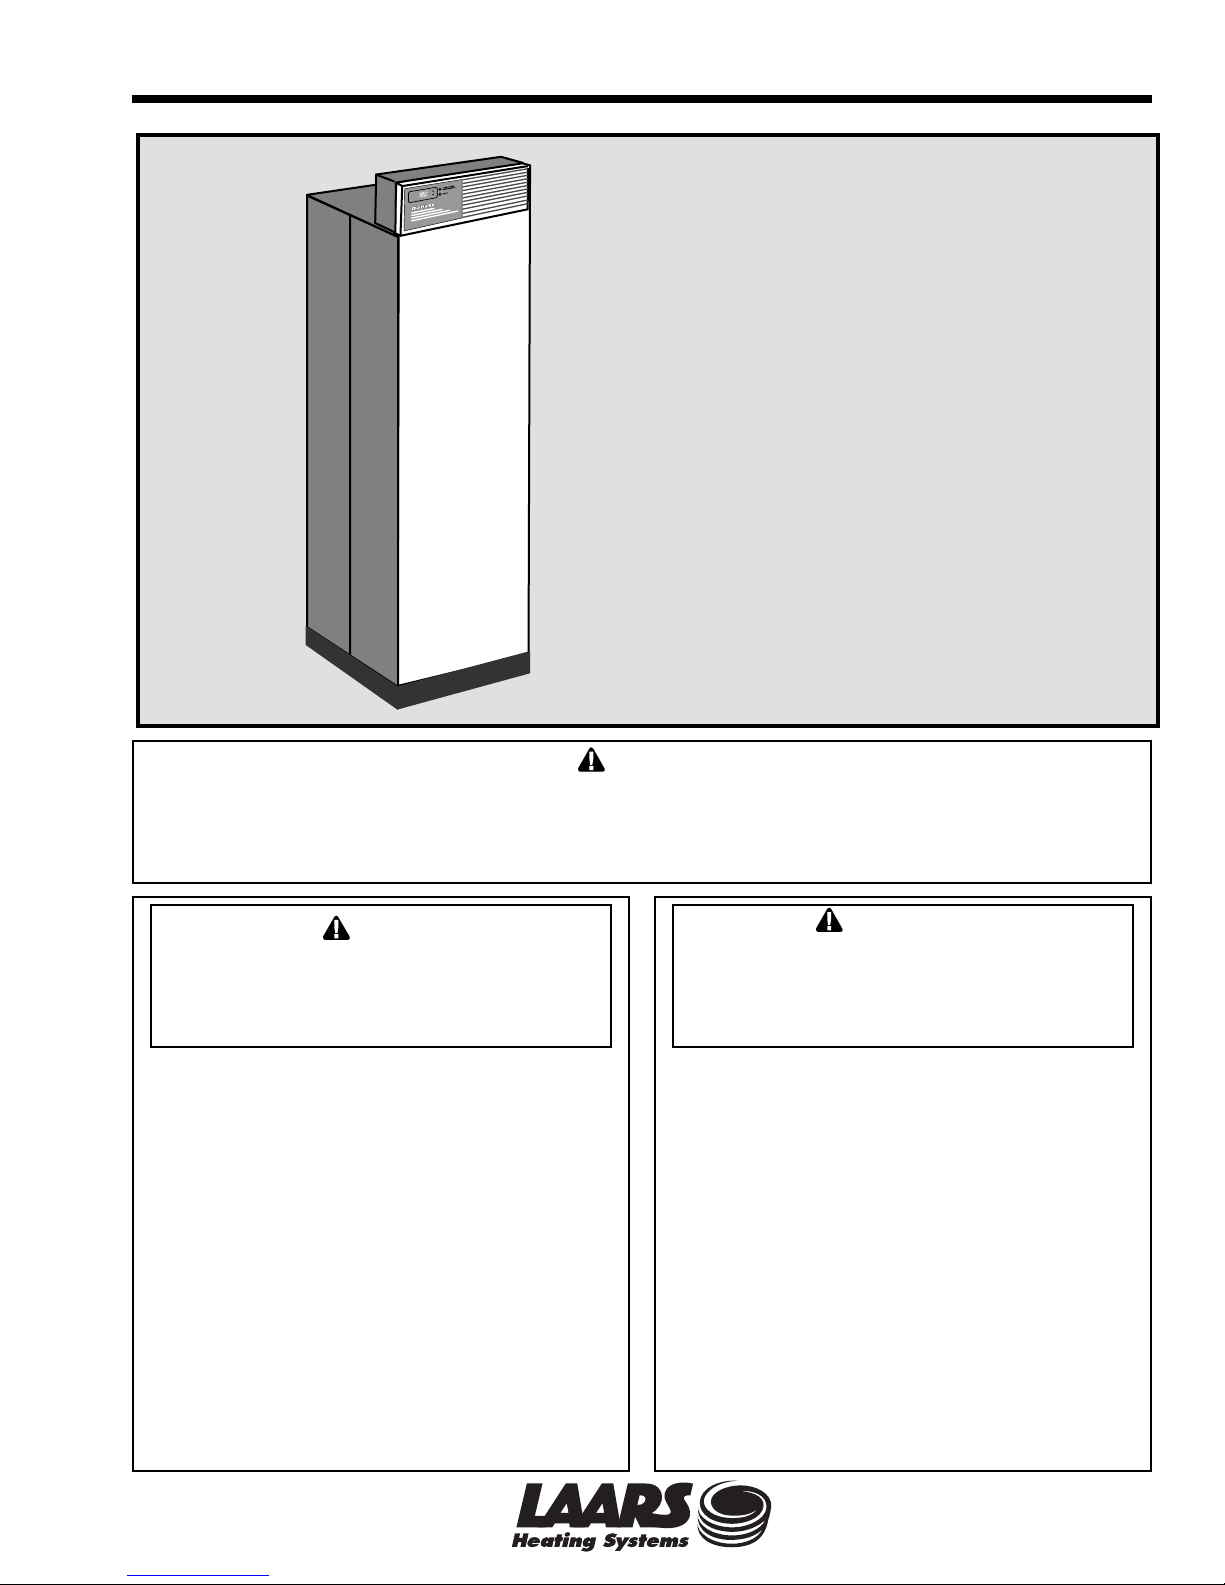
User's Information Document 1192
User's Information
Manual for
Endurance
EBP Series Modulating Combination Boiler
(natural or propane gas)
EDP Series Modulating Hydronic Boiler
(natural or propane gas)
EDN Series Non-ferrous
Modulating Hydronic Boiler
(natural or propane gas)
W ARNING
FOR YOUR SAFETY : This product must be installed and serviced by a professional service
technician, qualified in hot water boiler installation and maintenance. Improper installation and/or
operation could create carbon monoxide gas in flue gases which could cause serious injury, property
damage, or death. Improper installation and/or operation will void the warranty.
If the information in this manual is not
W ARNING
followed exactly, a fire or explosion may
result causing property damage, personal
injury or loss of life.
Do not store or use gasoline or other
flammable vapors and liquids in the vicinity
of this or any other appliance.
WHAT TO DO IF YOU SMELL GAS
• Do not try to light any appliance.
• Do not touch any electrical switch; do not
use any phone in your building.
• Immediately call your gas supplier from a
nearby phone. Follow the gas supplier's
instructions.
• If you cannot reach your gas supplier, call
the fire department.
Installation and service must be performed by
a qualified installer, service agency, or gas
supplier.
Assurez-vous de bien suivres les instructions
données dans cette notice pour réduire au
minimum le risque d’incendie ou d’explosion ou
pour éviter tout dommage matériel, toute
blessure ou la mort.
Ne pas entreposer ni utiliser d’essence ni
d’autres vapeurs ou liquides inflammables dans
le voisinage de cet appareil ou de tout autre
appareil.
QUE FAIRE SI VOUS SENTEZ UNE ODEUR DE GAZ:
• Ne pas tenter d’allumer d’appareils.
• Ne touchez à aucun interrupteur. Ne pas vous
servir des téléphones dansle bâtiment où vous
vous trouvez.
• Appelez immédiatement votre fournisseur de
gaz depuis un voisin. Suivez les instructions
du fournisseur.
• Si vous ne pouvez rejoindre le fournisseur de
gaz, appelez le sservice des incendies.
L’installation et l’entretien doivent être assurés par
un installateur ou un service d’entretien qualifié ou
par le fournisseur de gaz.
AVERTISSEMENT
H2314700-
Page 2

Page 2
TABLE OF CONTENTS
SECTION 1.
Caring For Your Endurance
1A. General Care................................................5
1B. Annual Inspection of Flues and Vents .......... 5
1C. Shutting Down the Endurance......................5
1D. To Restart Endurance .................................. 5
1E. In the Event of Power Failure ....................... 5
1F. Full Service Every 3 Years ...........................5
1G. Trouble Shooting - Fault Codes.................... 8
LAARS HEATING SYSTEMS
Page 3
Endurance User's Information
FOR YOUR SAFETY READ BEFORE OPERATING
If you do not follow these instructions exactly, a fire or explosion
may result, causing property damage, personal injury or loss of life.
Page 3
WARNING
A. This appliance does not have a pilot. It is
equipped with an ignition device which
automatically lights the burner. Do not try to
light the burner by hand.
B. BEFORE OPERATING smell all around the
appliance area for gas. Be sure to smell next to
the floor because some gas is heavier than air
and will settle on the floor.
WHAT TO DO IF YOU SMELL GAS
• Do not try to light any appliance.
• Do not touch any electric switch; do not use
any phone in your building.
• Immediately call your gas supplier from a
neighbor's phone. Follow the gas supplier's
instructions.
OPERATING INSTRUCTIONS
1. STOP! Read the safety information above on
this label.
2. Set the thermostat to lowest setting.
3. Turn off all electric power to the appliance.
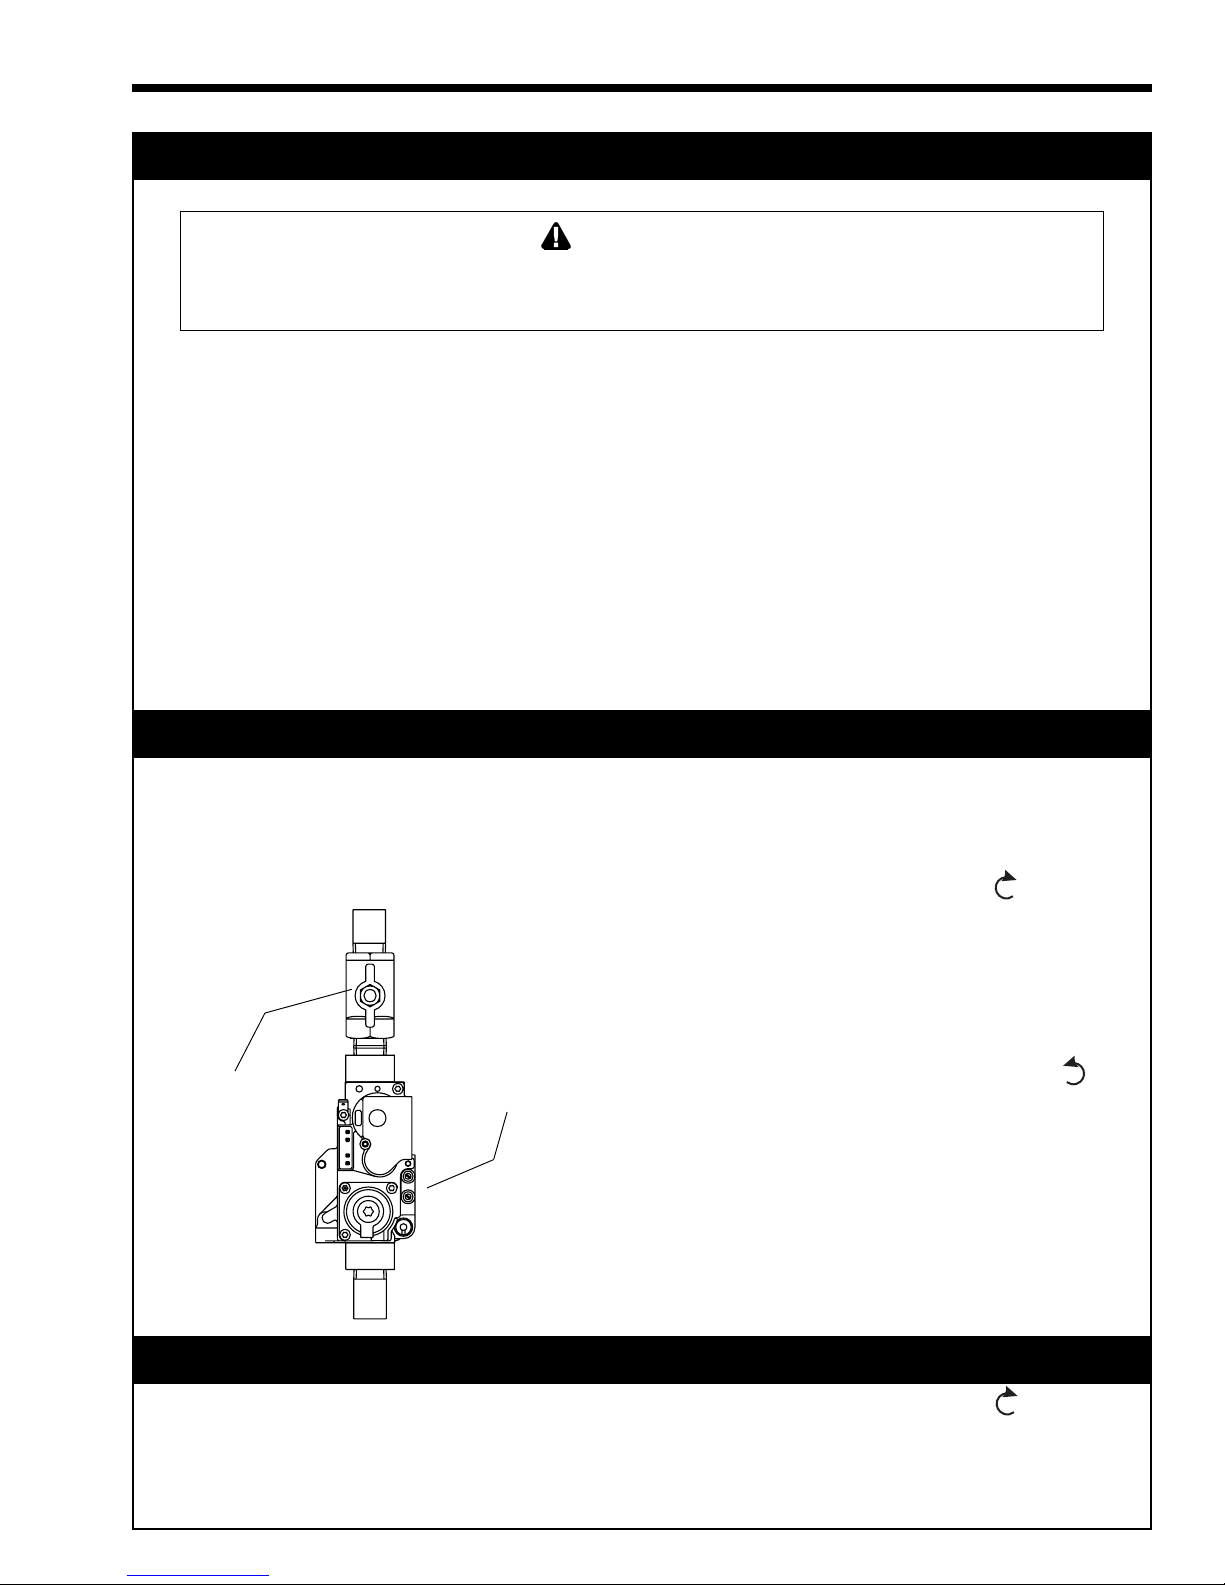
Gas Shutoff
Valve
Combination
Gas Control
• If you cannot reach your gas supplier, call
the fire department.
C. Turn on gas shutoff valve (located above the
combination gas control) so that the handle is
aligned with the gas pipe. If the handle will not
turn by hand, don't try to repair it, call a qualified
service technician. Force or attempted repair
may result in a fire or explosion.
D. Do not use this appliance if any part has been
under water. Immediately call a qualified
service technician to inspect the appliance and
to replace any part of the control system and
any gas control which has been under water.
4. This appliance is equipped with an ignition
device which automatically lights the burner.
Do not try to light the burner by hand.
5. Remove control access panel, and top front cover.
6. Turn gas shutoff valve clockwise to “off”.
Handle will be horizontal, do not force.
7. Wait five (5) minutes to clear out any gas. If you
then smell gas, STOP! Follow “B” in the safety
information above on this label. If you don't
smell gas, go to next step.
8. Turn gas shutoff valve counterclockwise to
“on”. Handle will be vertical.
9. Replace top front cover and control access panel.
10. Turn on all electric power to appliance, depress
on/off button on control panel, depress black
button on top of control panel.
11. Set thermostat to desired setting.
12. If the appliance will not operate, follow the
instructions “To Turn Off Gas To Appliance”
and call your service technician or gas supplier.
TO TURN OFF GAS TO APPLIANCE
1. Set the thermostat to lowest setting.
2. Turn off all electric power to the appliance if
service is to be performed.
3. Remove control access panel and top front
cover.
4. Turn gas shutoff valve clockwise to “off”. Do
not force.
5. Replace top front cover and control access
panel.
Page 4
Page 4
LAARS HEATING SYSTEMS
PAR MESURE DE PRUDENCE, LISEZ CE QUI SUIT AVANT DE
FAIRE FONCTIONNER L’APPAREIL
MISE EN GARDE
Si vous ne suivez pas ces instructions à la lettre, un incendie ou une
explosion pourrait se produire et causer des dommages matériels,
des blessures personnelles ou même la mort.
A. Cet appareil n’est pas doté d’une veilleuse. Il est
équipé d’un dispositif d’allumage qui allume
automatiquement le brûleur. Ne tentez
d’allumer le brûleur manuellement.
B. AVANT D’UTILISER, vérifiez s’il n’y a pas d’odeur
de gaz près de l’appareil. Vérifiez s’il n’y a pas
d’odeur de gaz près du plancher, car le gaz est
plus lourd que l’air et peut se déposer sur le
plancher.
QUE FAIRE EN CAS D’ODEUR DE GAZ
• N’essayez pas d’allumer n’importe quelque
appareil que ce soit.
• Ne touchez pas à un commutateur électrique.
N’utilisez pas le téléphone de votre résidence.
• Appelez immédiatement votre fournisseur de
gaz en utilisant le téléphone de votre voisin.
Suivez les instructions de votre fournisseur de
gaz.
pas
• Si vous ne pouvez joindre votre fournisseur de
gaz, appelez le service des incendies.
C. Fermez la soupape d’arrêt de gaz (située au-
dessus de la commande de gaz multifonctions)
de sorte que la poignée soit perpendiculaire au
tuyau de gaz. Si vous ne pouvez tourner la
poignée à la main, n’essayez pas de la réparer.
Communiquez avec un technicien de service
qualifié. Le fait de forcer ou de tenter de réparer
la poignée pourrait causer un incendie ou une
explosion.
D. N’utilisez pas cet appareil si l’une des pièces a
été plongée sous l’eau. Communiquez
immédiatement avec un technicien de service
qualifié afin qu’il inspecte l’appareil et remplace
toute pièce du système de commande et toute
commande de gaz qui aurait été plongée sous
l’eau.
NOTICE D’UTILISATION
1. ARRÊTEZ ! Lisez l’information de sécurité cidessus, sur cette étiquette.
2. Réglez le thermostat au réglage le plus bas.
3. Coupez l’alimentation électrique à l’appareil.
4. Cet appareil est doté d’un dispositif d’allumage
qui allumera automatiquement le brûleur.
Ne tentez
5. Retirez le panneau d’accès aux commandes et le
couvercle avant qui se trouve sur le dessus.
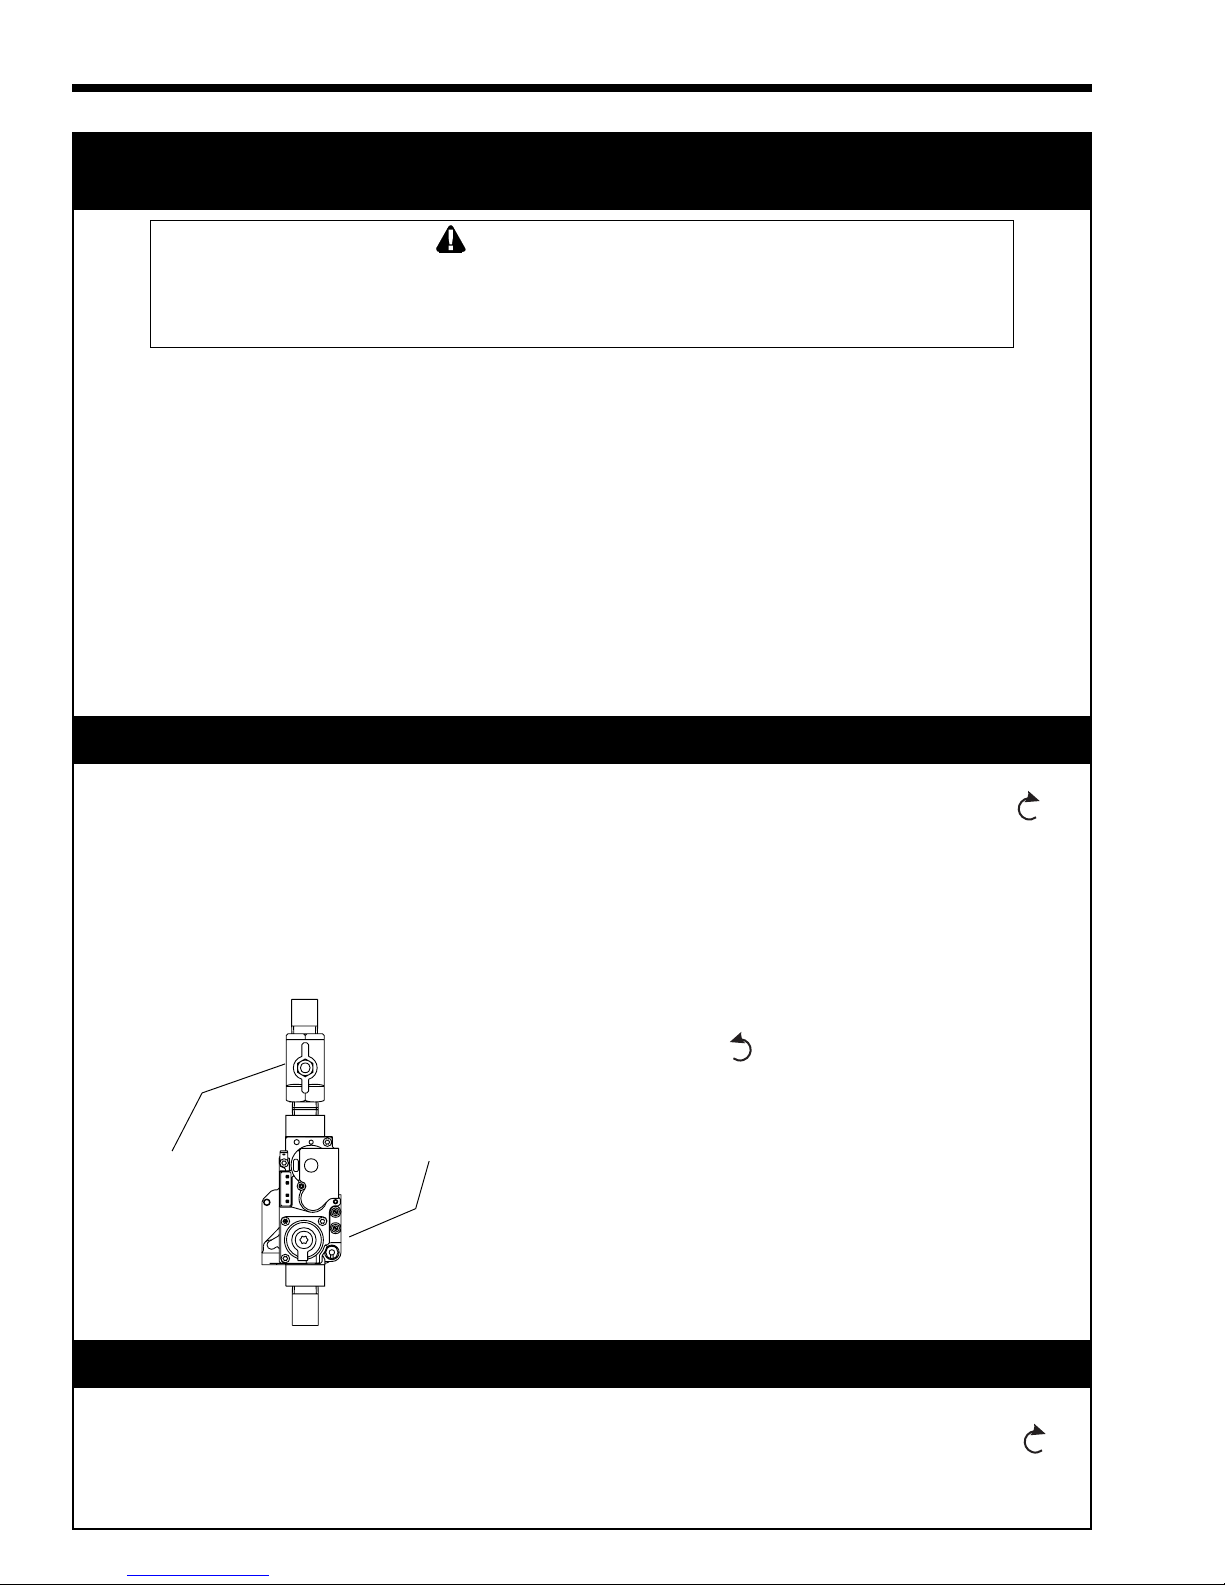
Valve de fermeture
pas d’allumer le brûleur manuellement.
Commande de gaz
multifonctions
du gaz
6. Faites tourner la valve de fermeture du gaz dans
le sens des aiguilles d’une montre et mettez-la
à «off». La poignée sera horizontale. N’employez
pas de force.
7. Attendez cinq (5) minutes afin que le gaz se
dissipe. Si vous croyez sentir une odeur de gaz,
ARRÊTEZ ! Reportez-vous aux instructions B cidessous, sur cette étiquette. S’il n’y a pas d’odeur
de gaz, passez à la prochaine étape
8. Faites tourner la valve de fermeture du gaz dans
le sens contraire des aiguilles d’une montre et
mettez-la à «on». La poignée sera verticale.
9. Replacez le couvercle avant et le panneau d’accès
de commandes.
10. Rétablissez l’alimentation électrique à l’appareil,
appuyez sur le bouton «on/off» qui se trouve sur le
panneau de commande, appuyez sur le bouton noir
qui se trouve sur le panneau de commande.
11. Réglez le thermostat à la température désirée.
12. Si l’appareil ne fonctionne pas, suivez les directives
relatives à la fermeture de l’alimentation en gaz et
communiquez avec votre technicien de service ou
le fournisseur de gaz.
FERMETURE DE L’ALIMENTATION EN GAZ
1. Réglez le thermostat au réglage le plus bas.
2. Coupez toute alimentation électrique à l’appareil
si celui-ci doit faire l’objet d’un entretien.
3. Retirez le panneau d’accès aux commandes et le
couvercle avant qui se trouve sur le dessus.
4. Faites tourner la valve de fermeture du gaz dans
le sens des aiguilles d’une montre et mettez-la
à «off». N’utilisez pas de force.
5. Replacez le couvercle avant.
30-414A
Page 5

Endurance User's Information
Page 5
SECTION 1.
Caring For Your Endurance
Your Endurance will require very little
maintenance. However, as with any fine appliance,
there are certain steps you should take to insure
continuing optimum performance.
1A. General Care
Keep your Endurance area clear and free from
combustible materials, gasoline and other flammable
vapors and liquids.
If you desire, clean the jacket surfaces with a
damp cloth and mild soap. Do not use flammable
cleaning materials.
Keep vent terminal free of obstructions. Do not
pile snow against vent terminal.
1B. Annual Inspection of Flues and Vents
You should visually inspect the vent pipe once a
year. Should any corrosion exist, have the affected
parts replaced.
On horizontally vented units installed with
p/n 2400-009 (Direct Vent Kit) inspect the metal vent
terminal (see Figure 3) on the outside of the building
for corrosion. Replace if necessary.
On all models installed without the Direct Vent
Kit, clean and inspect the condensate collection and
disposal system which is a part of the flue assembly.
1C. Shutting Down the Endurance
The need may arise to shut down your Endurance
(extended stay away from home, for example). If so,
the following steps are required:
1. Switch off main disconnect switch (located on
back of control panel).
2. Close gas shutoff valve above combination gas
control valve (inside unit).
3. Close main manual gas valve.
4. If freezing is anticipated, drain Endurance and
be sure to protect building piping from
freezing, also.
The above steps may require qualified service
personnel.
1D. To Restart Endurance
Should the need arise (power interruption, for
example), you may have to restart your Endurance.
Follow these steps:
1. Depress the reset button on the top of the control
panel for at least one second, and then release.
2. Turn up thermostat to call for heat.
3. In approximately 2 seconds, the blower will
operate and ignition should occur after 35-40
seconds. It may take as long as 2½ minutes.
4. If ignition does not occur, wait 5 minutes and
then repeat steps 1 through 3.
5. If, after three attempts, you still are unable to
achieve ignition, shut down the boiler and call
your service technician.
If drained, follow these steps:
1. Follow “Installation Manual” for proper filling
and purging.
2. Turn on main manual gas valve.
3. Remove control access panel and top front cover
and turn on gas shutoff valve, above combination
gas control valve.
4. Switch on main disconnect switch, depress on/
off button on front of control panel, and depress
black reset button on top of control panel (pump
and blower will start and igniter will be
energized, after 35 seconds the gas valve will be
energized, and ignition will occur). If ignition
does not occur within 2½ minutes switch “off”
main disconnect switch, wait 5 minutes and
switch “on” again. If after three attempts ignition
does not occur, initiate shutdown procedure and
call for service.
1E. In the Event of Power Failure
The Endurance cannot be operated during an
electrical power outage. If there is an extended power
outage with danger of freezing, then the Endurance
(and all other water systems) should be completely
drained. When draining the unit, turn off gas and turn
off the main power switch. When replacing in service,
refer to start-up instruction for proper filling and
purging.
1F. Full Service Every 3 Years
In addition to the annual visual inspections by
the homeowner, a qualified service agency should
conduct a detailed inspection of all flue product
carrying areas of the boiler and vent system. This
should be done in accordance with the service
instruction in the “Installation and Operating
Instructions Manual” for the Endurance.
Caution
Do not use this boiler if any part has been under
water. Immediately call a qualified service
technician to inspect the boiler and to replace any
part of the control system and any gas control
which has been under water.
WARNING
Should overheating occur or the gas supply fail to
shut off, do not turn off or disconnect the electrical
supply to the pump. Instead, shut off the gas supply
at a location external to the Endurance.
En cas de surchauffe ou si l’admission de gaz ne
peut être coupée, ne pas couper ni débrancher
l’alimentation électrique de la pompe. Fermer plutôt
le robinet d’admission de gaz à l’extérieur de
l’appareil.
Page 6
Page 6
Gas Shutoff
Valve
LAARS HEATING SYSTEMS
Gas
Shutoff
Valve
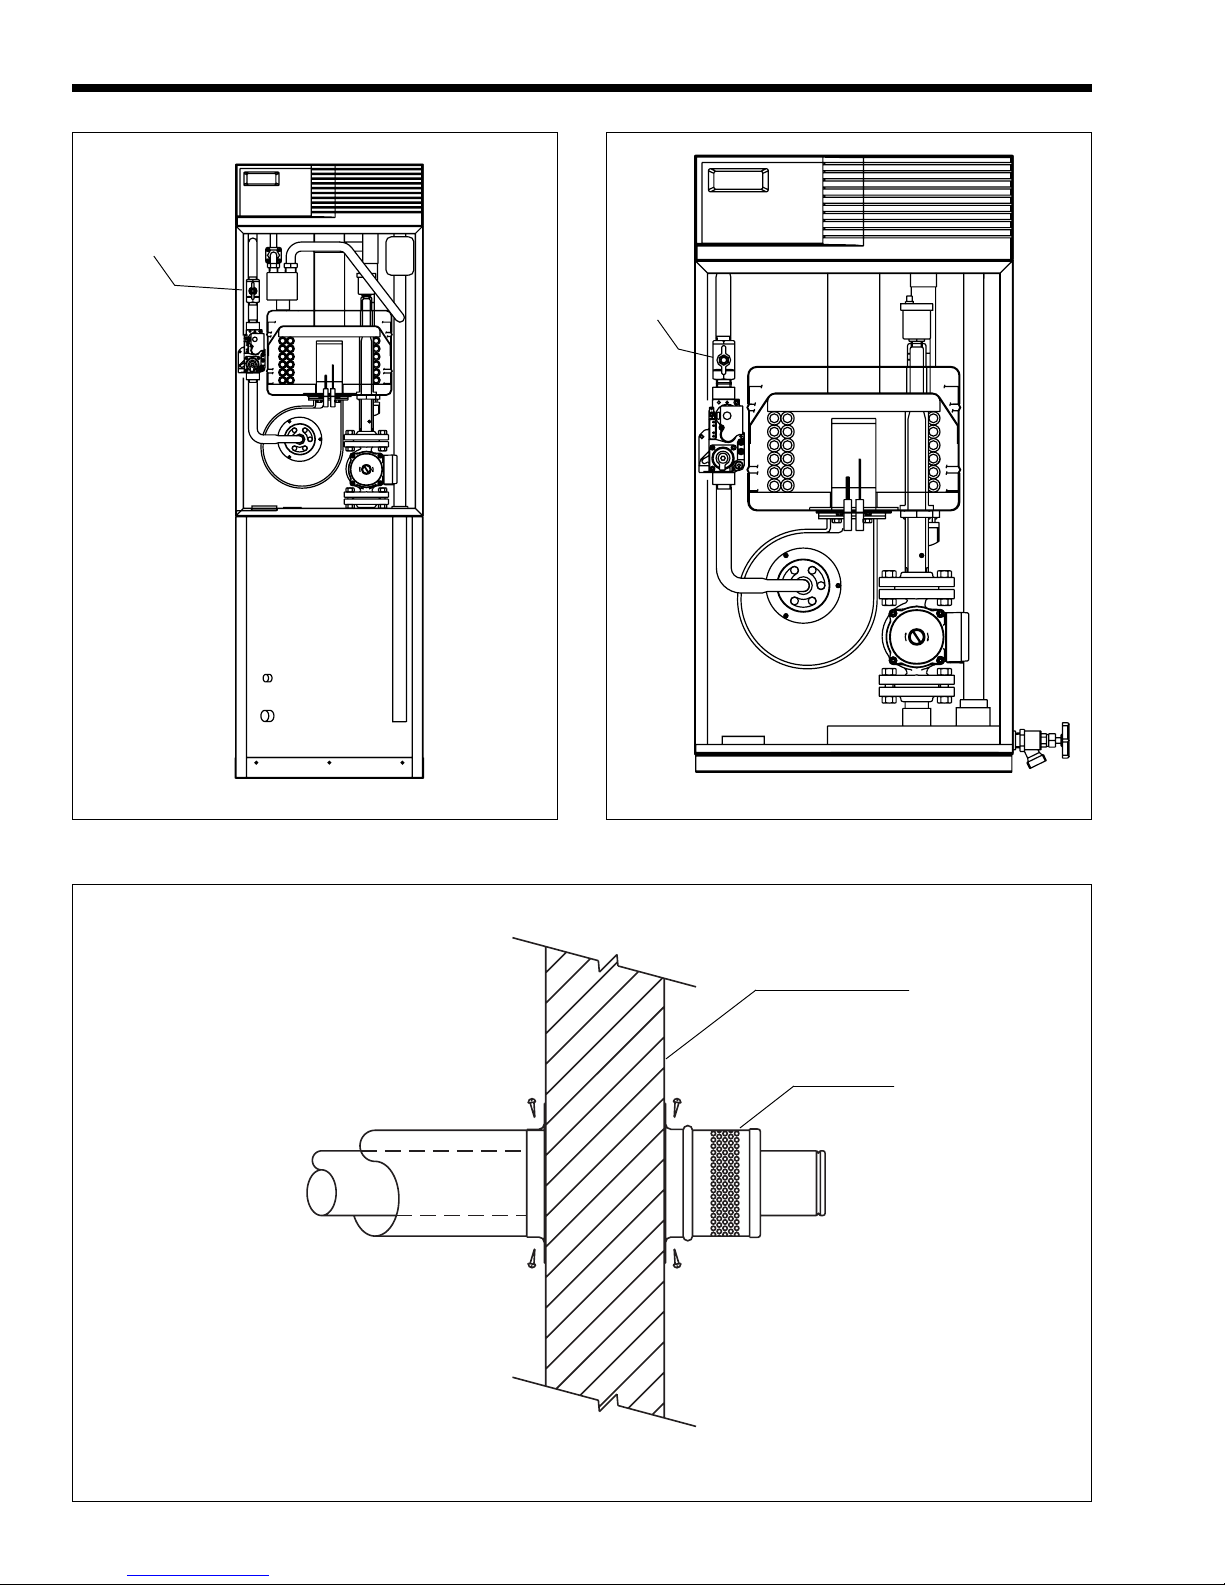
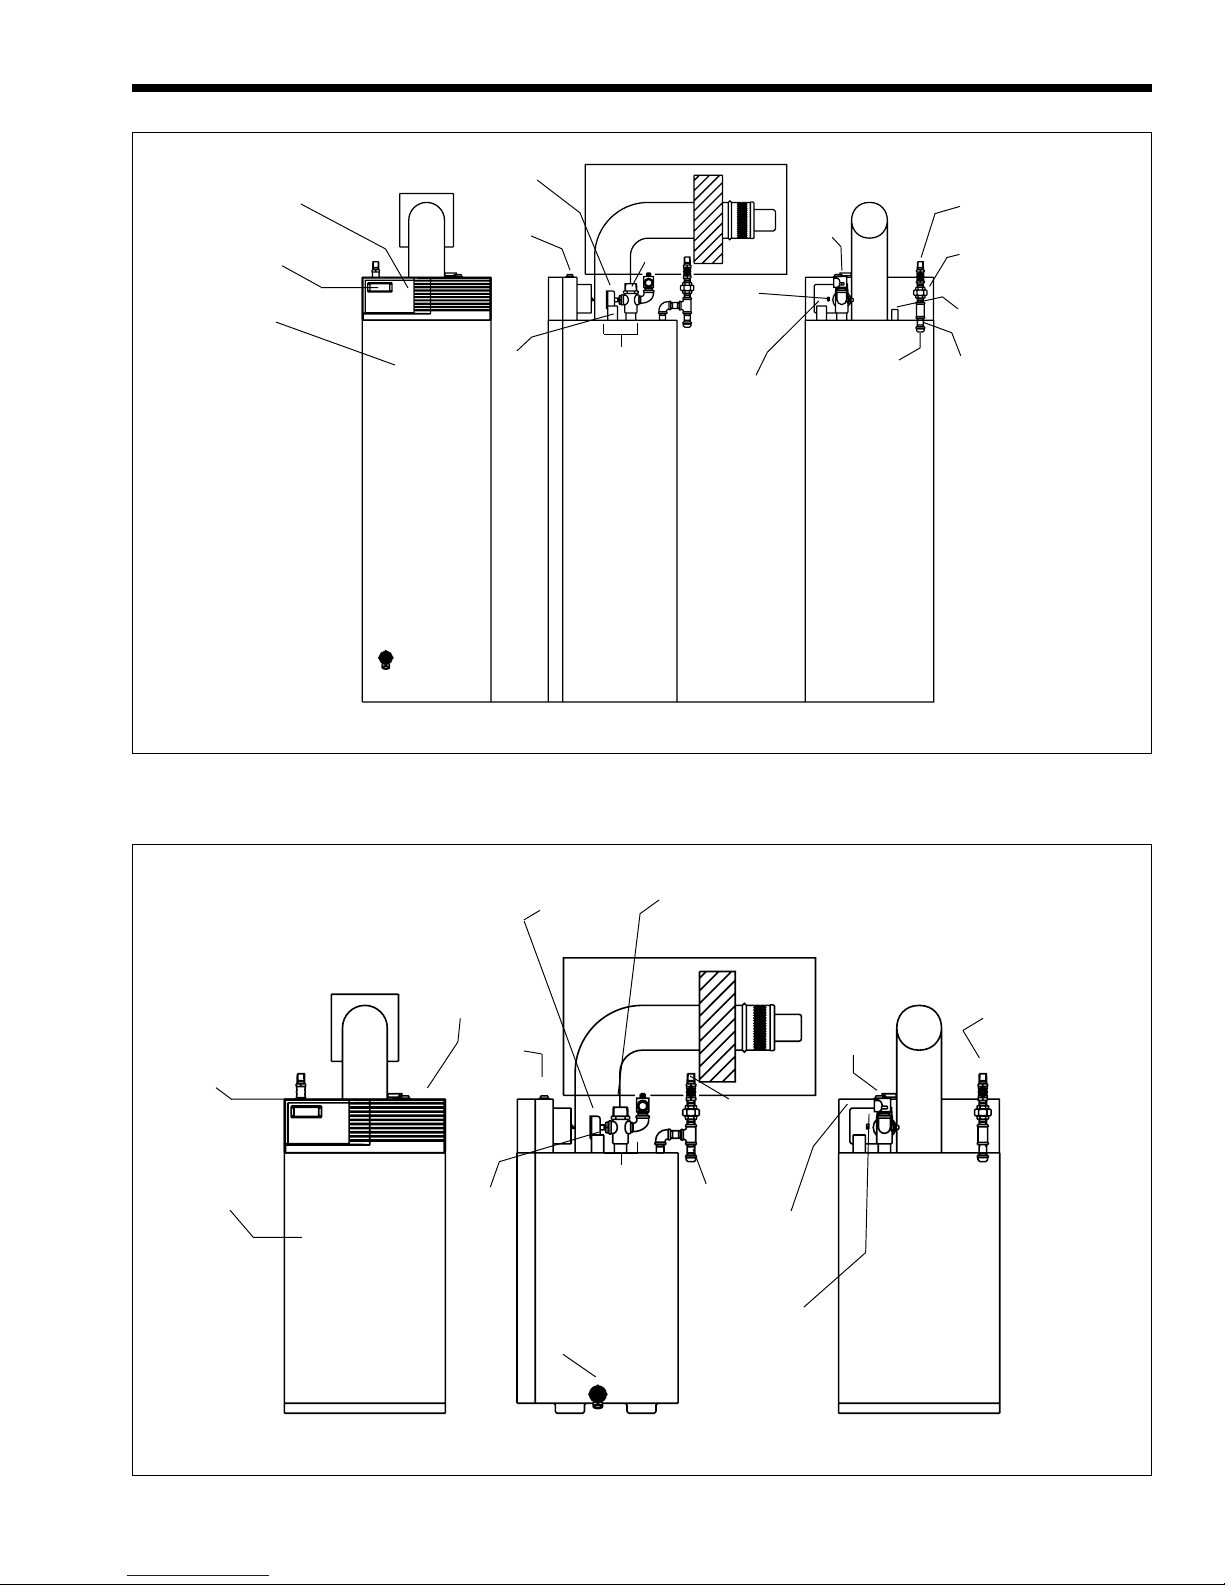
Figure 1. EBP Assembly View. Figure 2. EDP/EDN Assembly View.
Outside Wall
Vent Terminal
Figure 3. Vent Terminal.
Page 7
Endurance User's Information
Page 7
Removable Control
Access Panel
Temperature
LED Display
Removable
Front Cover
Pressure
Gauge
Reset
Button
Direct Vent Kit
p/n 2400-009
Supply
Relief
Valve
Main
Disconnect
Switch
Heating
Systems
Fittings
Field
Wiring
Box
Cap
DRAIN VALVE
INSIDE LOWER
FRONT COVER
Return
Front View Side View Rear View
Gas Supply
Manual Main
Shutoff
Domestic Hot
Water
Connections
Drip Leg
Figure 4. EBP Series.
Temperature
LED Display
Removable
Front
Cover
Removable
Control Access
Panel
Reset
Button
Return
Pressure
Gauge
Heating
Systems
Fittings
Boiler Drain
Supply
Manual
Main
Shut Off
Drip Leg
Cap
Field
Wiring
Box
Main
Disconnect
Switch
Relief
Valve
Gas
Supply
Front View Side View Rear View
Figure 5. EDP/EDN Series.
Page 8

FOR SERVICE
Contact your installing contractor, gas utility, Laars
dealer, or call Laars for the nearest authorized
representative in your area.
1G. Trouble Shooting – Fault Codes
The Endurance boiler uses an electronic boiler
controller that shows operation information and fault
codes in a three-character alphanumeric display.
Boiler Operation Information
default display = supply temperature, the temperature
of the water leaving the boiler heat exchanger
rtn = return temperature, the temperature of the
water entering the boiler heat exchanger
tnt = tank temperature, the temperature of the water
in the transfer tank (EBP only)
dt = delta tee, the difference in temperature
between the inlet and outlet of the boiler heat
exchanger
Oat = outdoor air temperature, the temperature at the
outdoor air sensor, if outdoor reset is used.
CSP = calculated setpoint, the calculated boiler
supply temperature, if outdoor reset is used.
Boiler Control Fault Codes
F1 = Boiler control internal error. Switch off boiler
and restart. If F1 repeats, replace boiler
control.
F3 = Gas valve status is on, with no call for heat.
This is an indication of a wiring error or a
seized relay. Check relay first, and then boiler
wiring.
F4 = Supply sensor error. Check for damaged
wiring or poor connection first. Check sensor
resistance per installation manual.
F5 = Tank sensor error (EBP only). Check for
damaged wiring or poor connection first.
Check sensor resistance per installation
manual.
F6 = Return sensor error. Check for damaged
wiring or poor connection first. Check sensor
resistance per installation manual.
F8 = Outdoor air sensor error. Check for damaged
wiring or poor connection first. Check sensor
resistance per installation manual.
LO = Lockout. Many conditions can cause a boiler
lockout. See boiler manual for possible
causes and resolution.
OFF = Controller is off. Press and hold the upper left
(power) button on the boiler control for 3
seconds.
ICE = Low temperature protection – boiler has
detected water temperature below 39°F (4°C),
and will attempt to run the boiler’s circulator.
Correct low temperature situation to avoid
freezing conditions. Although the pump
attempts to run, the Endurance boiler cannot
prevent boiler or system freeze-up. When
water freezes, it expands, and this expansion
can burst pipes and cause damage to the
boiler, or to the pipes and components
throughout the whole heating system
Waterpik Technologies
6000 Condor Drive, Moorpark, CA 93021 • 805.529.2000 • FAX 805.529.5934
20 Industrial Way, Rochester, NH 03867 • 603.335.6300 • FAX 603.335.3355
480 S. Service Road West, Oakville, Ontario, Canada L6K 2H4 • 905.844.8233 • FAX 905.844.2635
www.Laars.com Litho in U.S.A. © Laars Heating Systems 0502 Document 1192
H2314700-
 Loading...