

Page 1
BEDIENUNGSANWEISUNG
mit Montageanweisungen
Instructions for use and installation instructions
Instructions d’utilisation et avis de montage
Gebruiksaanwijzing en montagehandleiding
Istruzioni di uso e di montaggio
Instrucciones de uso y de montaje
Instruções de uso e de montagem
Ðtv³wuÒ xvÒvÒ ÊËw Ò´ÎËxÑÐÌгvÒvÒ
KGCT 907.2E
072594 L41
Page 2

14 KGCT 907.2E
For your information
Please read the instructions in this booklet carefully as it contains important
information concerning the safety, the installation, the use and the maintenance of your appliance.
The appliance should only be used for cooking in the household.
Keep the operation instructions in a safe place.
Notes on disposal
Disposing of the packaging
The transport packaging consists of the following materials: Corrugated cardboard, cardboard, styrofoam (CFC-free), Polyethylen-foil.
Do not put these materials in the household rubbish, but ask your local authority to give you the adress of the most convenient collection point.
What to do if you happen to have an old appliance
Old appliances contain many materials which can be recycled. For this reason
you should not simply put your old appliance on the rubbish tip, but ask your
local authority how it might be recycled.
Conditions of guarantee
The conditions of guarantee applicable for this product are subject to those
published by the representative in the relevant country. Details regarding same
may be obtained from the dealer from whom the appliance was purchased.
For claims under guarantee the sales receipt must be produced.
Contents
Your appliance at a glance. . . . . . . . . . . . . . . . . . . . . . . . 15
Safety instructions . . . . . . . . . . . . . . . . . . . . . . . . . . . . . 16
for connection and function
for the cooking zones and the grill area
Before first use . . . . . . . . . . . . . . . . . . . . . . . . . . . . . . . 16
Use of the
cooking zones and the grill area . . . . . . . . . . . . . . . . . . . . 16
Switch on the cooking area and the grill area
Extending and retracting cooking area
The cooking setting
The automatic boost function
Cooking zone heating indicator
Dual-circuit cooking zones
The grill area
The pan recognition function
Switching off the pan recognition function
The automatic pan size sensor of the dual circuit zone
Some instructions on cookware
The rapid switch-off function
Child proof lock (sensor-lock)
Time limit function (holiday function)
Other functions
Cleaning and care. . . . . . . . . . . . . . . . . . . . . . . . . . . . . . 21
What to do if there is a fault . . . . . . . . . . . . . . . . . . . . . . 21
Installation. . . . . . . . . . . . . . . . . . . . . . . . . . . . . . . . . . . 23
Installation in a fitted kitchen
Electrical connection
Page 3
KGCT 907.2E 15
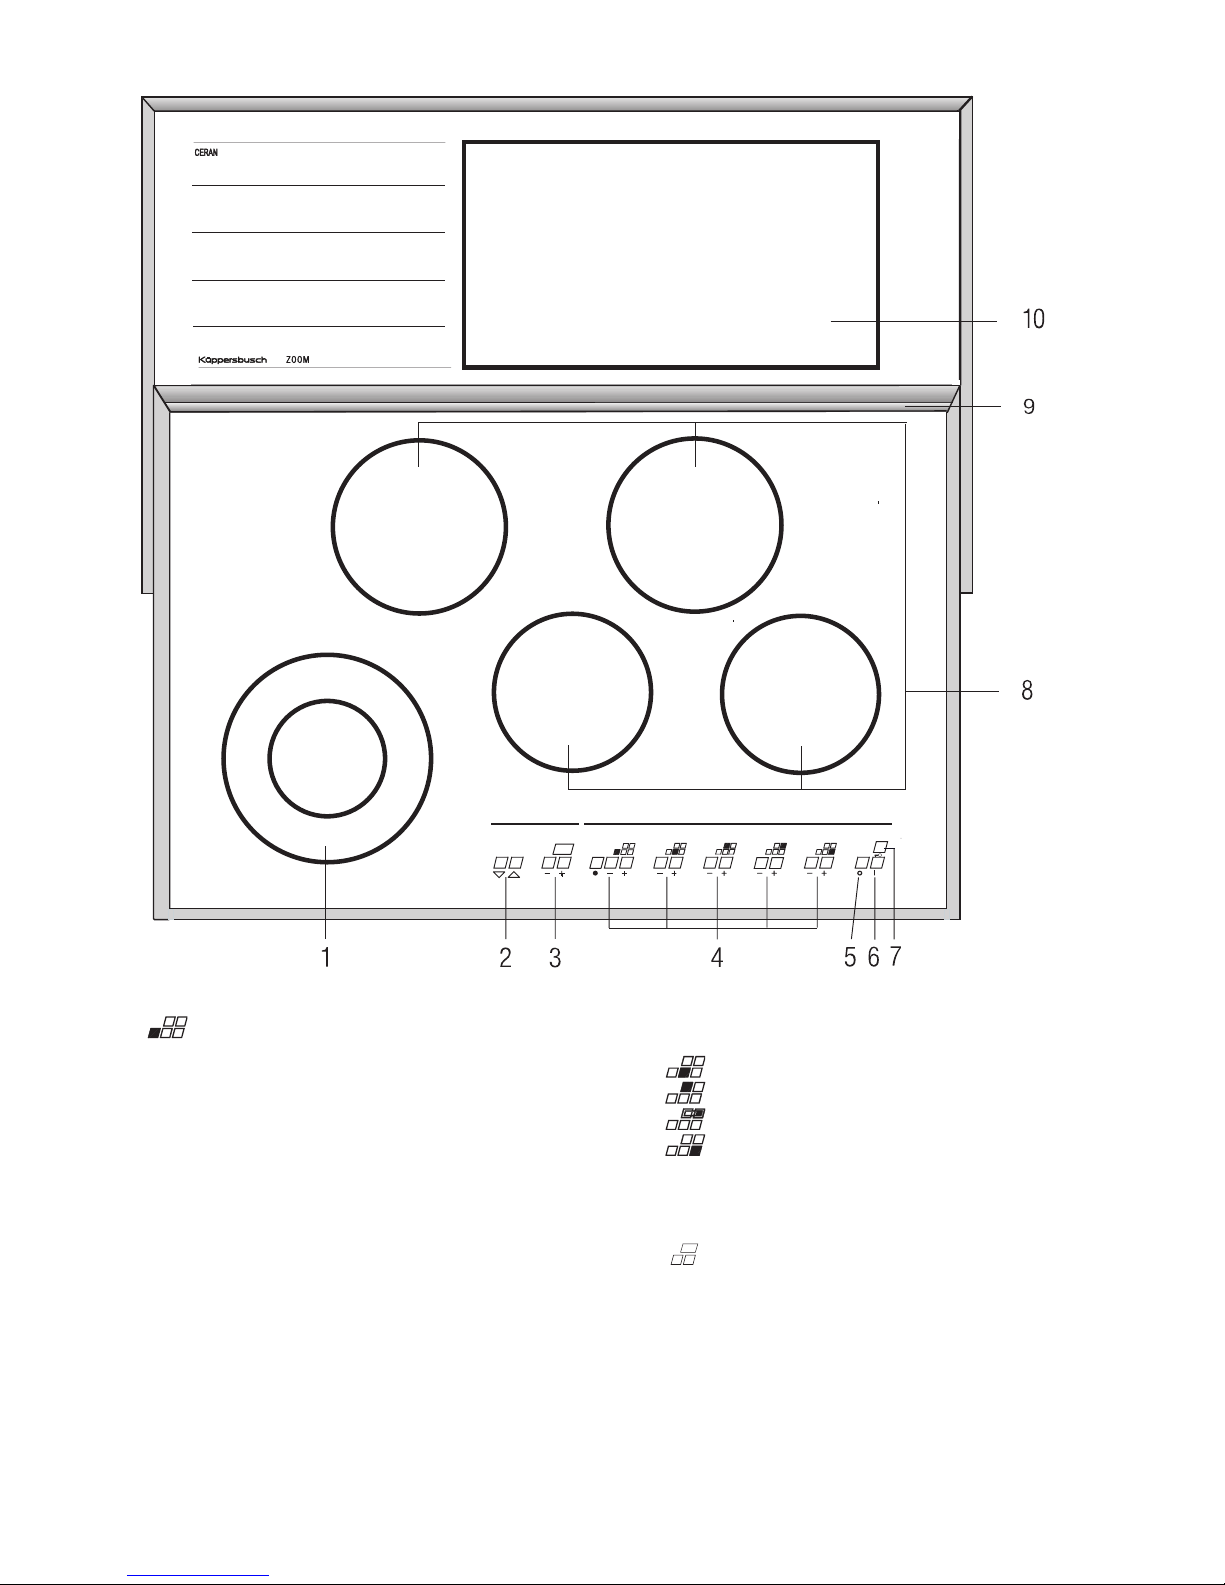
Your appliance at a glance
1 Dual-circuit cooking zone
Ø 230 mm, 2300 Watt;
Ø 140 mm, 1000 Watt
2 Extend/retract sensor buttons cooking area
3 Sensor buttons grill area
4 Sensor cooking zones
5Off-sensor
6 On-sensor (Stand-by-switch)
7 Sensor-child proof lock (sensor-lock)
8 Cooking zones
Ø 140 mm, 1200 Watt
Ø 180 mm, 1800 Watt
Ø 180 mm, 1800 Watt
Ø 140 mm, 1200 Watt
9 Safety strip
10 Grill area
ca. 440 x 200 mm, 1960 Watt
Page 4
16 KGCT 907.2E
Safety instructions
for connection and function
■ The mains connection, maintenance and repair jobs should only be carried
out by an authorised technician in accordance with the applicable safety
standards. Work which has been improperly carried out can endanger your
safety.
■ The surfaces of heating- and cooking zones become hot during operation.
The cooking area is moved by a motor. Therefore: Always keep children
away.
for the cooking zones and the grill area
■ Overheated fats and oils may spontaneously ignite. You should therefore
cook food involving the use of fats and oils, e.g. chipped potatoes, only under supervision. Never extinguish fats or oils with water! Place a lid on the
pan, switch off the cooking zone and take the pan off the hot cooking zone.
■ If cracks, fractures, or any other defects appear in your glass-ceramic coo-
king area, do not use your appliance. Unplug or otherwise disconnect your
appliance from the mains supply and call our service centre.
■ If the cooking area cannot be switched off due to a defect in the sensor
control immediately disconnect your appliance and call the service centre.
■ Be careful when working with additional appliances! The connection leads
must not come into contact with the hot cooking zones.
■ The glass ceramic cooking area should not be used as a storage area.
■ Do not place combustible or inflammable objects upon the cooking top
which might be dangerous in case of unintentional switching on.
■ Never use the cooking zones without cookware. Never use the appliance to
heat rooms!
■ Never put aluminium foil or plastic on top of the cooking zones. Substances
that melt, for example plastic, foils and especially sugar and food with a
high sugar content are to be kept away from the hot cooking zone. In order
to avoid damaging, sugar, while still hot, should immediately be scraped off
the cooking area with a scraper.
■ Avoid repeated burning of stains and boiling over.
■ Chalk deposits may damage the cooking area.
■ The appliance is equipped with a safety cut-out facility. It ensures that the
cooking area cannot be retracted if an obstacle hits against the safety strip
and presses it in.
■ If you have pets in your flat, who might reach the cooking top, activate the
child-proof unit.
Before first use
Remove packaging and moving parts. Before first use the cooking area should
be cleaned with a damp cloth and a little washing-up liquid.
The cooking area is insensitive to temperature shocks (cold and hot) and also
extremely robust.
■ Avoid dropping sharp objects onto the cooking area. Pointed objects falling
onto your cooking area might break it.
■ Please read through the cleaning and care instructions. Be especially careful
to keep the sensor keys clean since soiling could be mistaken for finger
contact by the appliance. Never put anything (pans, tea towels etc.) onto
the sensor keys! If food boils over onto the sensor keys, we advice you to
activate the emergency switch.
■ You might hear a humming sound from the heating when switching on the
appliance. This is due to technical reasons and has no influence on quality
and functioning of your appliance.
■ Hot pans should not cover the the sensor keys, otherwise the appliance
switches itself off automatically.
Use of the
cooking zones and the grill area
Read the safety instructions!
After initial connection and after a power failure the abbreviations “
'%0
” appears briefly in the LED displays. Then rotating circles are displayed. This means that the sensors are being checked in a self-test and at the same time
the button sensitivity reset.
Acknowledge this display by touching the Off-sensor. Provided that no objects
are lying on he sensors, these symbols are switched off immediately. Otherwise remove objects, switch off lighting (if on) and disconnect the cooking zone
again briefly from the mains (fuse).
Important:
There must be no objects on the sensors while the sensor sensitivity is being
set. Extreme lighting shining on the buttons, such as direct sunlight or bright
halogen lights, is to be avoided.
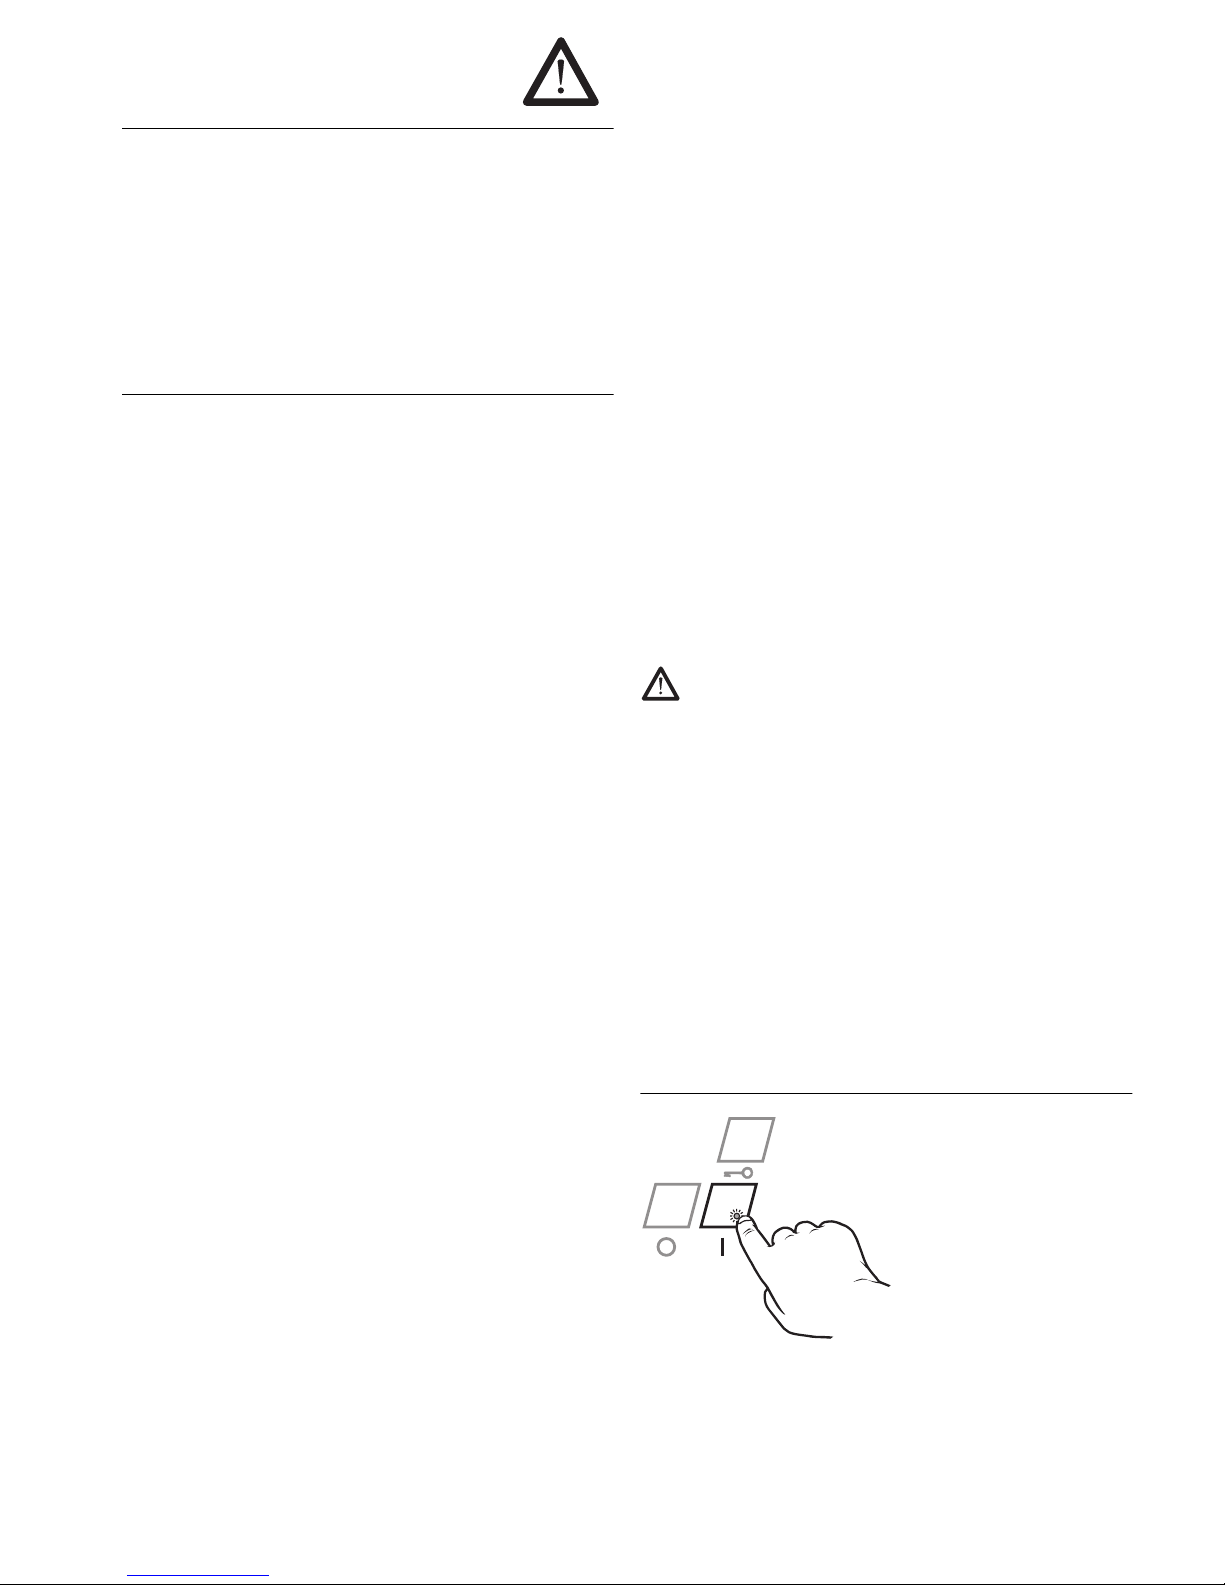
Switch on the cooking area and the grill area
Press the sensor-button for approx. 2 seconds. The LED-display
above the sensor lights up and the
appliance is in operation (stand-by
mode).
The stand-by mode automatically switches itself off,
– if no cooking zone is activated within 20 minutes (after 10 seconds an
acustic signal indicates that the appliance switches itself off after
another 10 seconds)
or
– if the appliance is not used 1 minute after starting operation.
Page 5

KGCT 907.2E 17
Extending and retracting cooking area
The cooking area cannot be extended and retracted unless the appliance is
switched on.
If you touch the button , the cooking area is extended.
The rear cooking zones can only be
used in the fully extended condition.
If you touch the button , the cooking area is retracted.
If the button is pressed when
the cooking area is switched on, an
acoustic signal is emitted.
The cooking area cannot be retracted,
if the rear cooking zones are switched on,
if the retraction function is interrupted by the safety strip being pressed slightly
to the rear, e.g. by kitchenware.
Caution: If the cooking area is retracted and extended consecutively very frequently, a safety cut-out facility is activated. This prevents the motor from
overheating. The moving part of the cooking area can no longer be retracted
or extended for a brief period.
If the moving part of the cooking area is blocked during extension or retraction,
a force-dependent safety cut-out responds and interrupts the „travel operation“. If the blockage lasts a lengthy period, the moving part no longer moves
back into the end position.
In this case press the buttons and , to move the moving part
of the cooking area back into its end position.
The cooking setting
You have 9 cooking settings available.Select the required cooking setting with
the plus- or minus-sensor. It will be indicated in the display.
The pan-detection function must either be deactivated or a pan that is suitable
for detection by the pan-detection function must have been placed on the cooking
zone in order to be able to select a setting for the cooking zone
.
The “0” position is visible for about 2 seconds after the appliance switches off.
When pressing the plus-sensor the
cooking zone starts at cooking setting 5, without boost.
When pressing the minus sensor
the cooking zone starts at cooking
setting 9.
This automatically starts the automatic boost.
Switching off the cooking zone:
Press the plus- and minus-sensor at the same time.
Cooking setting Suitable for
1-3 Heating, warming
creeing, defrosting
4-5 Steaming, poaching
boiling
6-8 roasting, deep-frying
9 Heating large quantities
or
and
Page 6

18 KGCT 907.2E
If the sensor of a rear cooking zone
is touched when the cooking area
is retracted, the symbol „ “ appears in the display and an acoustic signal is emitted.
The automatic boost
function
All cooking zones are equipped with an automatic boost function. Maximum
power is used for the boost. The time period of the boost depends on the
selected cooking setting. After the elapsed time the cooking zone automatically
switches back to the selected cooking setting.
F
The automatic cooking function will be deactivated if the pan-detection
function is activated and the pan is taken off the cooking zone. The automatic cooking function will continue to operate once the pan has been
put back onto the cooking zone.
When selecting the respective cooking setting by pressing the minussensor, the boost function switches on automatically.
During automatic operation a "A"
lights up in the display alternately
with the selected cooking setting.
When selecting the required cooking setting by pressing the plussensor, it is necessary to press the
plus-sensor again after reaching
cooking setting 9 if the automatic
boost function is to be activated.
Select the required cooking setting.
“A” lights up in the display alternately with the selected cooking setting.
Cooking zone heating indicator
As long as the cooking zone is still
hot, an “H” will appear in the display when the cooking zone has
been switched off.
Dual-circuit cooking zones
Usually the cooking zone with the smaller diameter is being heated.
Switch on the outer cooking zone circuit for bigger sauce pans.
Press the cooking zone symbol
next to the plus/minus sensor.
The light on the left below the
symbol for the dual-circuit-cooking
zone indicates that the cooking
zone has been activated.
Pressing the cooking zone symbol
once again deactivates the dual
circuit cooking zone.
The grill area
The setting of the grill area you want can be selected with the plus- or the
minus-sensor.
Preheat the grill area for about 5 minutes at setting 9. Grill the food on each
side at setting 9 for 1-2 minutes, then turn down and finish the grilling process.
The grill area can also be used as an area for keeping food warm at setting1.
In this case do not apply oil to the grill area!
The pan recognition function
All cooking zones have a saucepan sensor. The dual-circuit zone is also able
to detect the saucepan size.
F
The pan-detection function detects all pans made of metal.
The pan-detection function must be deactivated in order to use cooking
equipment made of glass or ceramics.
If a suitable pan is put onto the
cooking zone, “U” is indicated by
the display.
2 mal
or
Page 7

KGCT 907.2E 19
If no pan or an unsuitable pan is
put onto the cooking zone, an un-
derlined “U” is indicated. After
1 minutes the cooking zone automatically switches itself off.
Switching off the pan recognition function
(e.g. when using glass pans or other pans that are unsuitable for use with the
saucepan sensor)
Press the plus- and minus-sensor at the same time before making the cooking
setting.
A circle will appear in the display
next to the selected cooking setting.
There is a defect in the pan recognition function, if this circle lights up.
You can nevertheless continue to
use the cooking zone.
The automatic pan size sensor of the dual
circuit zone
The dual circuit zone has a sensor to detect the size of the pan being used.
When a small pan is placed on the cooking zone, only the inner ring will switch
on. If the entire zone is covered by the pan, both rings will switch on.
Please note that the outer ring must always be completely covered, even if
you are using pans with a rounded base.
Moving the pan during cooking can cause the outer ring to switch off if it has
not been completely covered.
F
The outer cooking zone circuit can also be switched on and off when the
pan-detection function is active.
Some instructions on cookware
Only use pans with even and flat bottoms.
Uneven pan bottoms prolong the boost
times and increase the power requirement. Rough pan bottoms scratch the
glass-ceramic area when shifted
about. When using fireproof glass or
porcelain cookware, please follow the manufacturers instructions.
Choose a pan with a diameter at least as large as the cooking zone.
You will thereby save energy and cooking time. You will also avoid overheating of the cooking area.
Wherever possible, place a lid on the pan.
You will save a lot of energy by cooking in a closed pan. Liquids and
foods will only boil over if the temperature is too high. For the cooking zones, you can precisely set the
temperature required. With a little practice, you will readily make the correct
choice of cooking settings so that nothing boils over even when a lid is in
place.
The rapid switch-off function
All the cooking zones can be switched off quickly with the OFF-sensor.
and
Page 8

20 KGCT 907.2E
Child proof lock (sensor-lock)
Operating the sensor-lock detains unauthorised persons from using the appliance. In order to activate this lock the cooking area has to be in operation.
Activating child proof lock:
Press the sensor-lock (2 seconds).
The child proof lock can be activated if the cooking area is in operation. In this case you can only
choose a lower cooking setting or
switch off.
The lock is indicated by 3 flashing control indicators.
Be careful:
Switching off the cooking area does not deactivate the lock!
Deactivating the child proof lock:
Press the sensors under the two left flasing control indicators at once.
After not more than 3 seconds press the sensor under the flashing control
indicator on the right.
Note:
When the power supply has been interrupted the child proof lock is no longer
active.
Time limit function (holiday function)
The appliance is equipped with an automatic time limit function. This function
makes sure that the appliance is not in operation for a long time. The time
period of the time limit depends on the selected cooking setting, eg.: The higher the selected cooking setting, the faster the appliance is switched off.
The function to limit operation time works separately for each cooking zone.
Other functions
■ If pressing two or more sensor keys – at the same time e.g. when a pan
is mistakenly put onto the sensor key no function is activated. An audible
signal sounds after 10 seconds. The appliance switches off automatically
after 20 seconds.
Exceptions:
– Deactivation of the child proof lock
– Switching off the cooking zones
■ If you continue to press a sensor button even after having set the highest
cooking setting, an audible signal sounds after 10 seconds. After 20 seconds the appliance switches off automatically.
■ In case of a break down of the mains supply the appliance does not auto-
matically switch on again. If the child proof lock was activated before the
power failure, this is now deactivated.
■ If the electronics overheat, the hob will switch off. All 4 LED indicators will
flash and a cyclical signal will be heard.
at once,
after max. 3 Sek.
Cooking setting Switching off time after
9
8
7
6
2 hours
5 3 hours
4 4 hours
3
2
5 hours
1 10 hours
Page 9

KGCT 907.2E 21
Cleaning and care
■ Never use sharp or abrasive agents!
It is sufficient to clean with a damp
cloth and a little washing-up liquid
after usage. Wipe dry.
■ Incrustation due to boilied over foods
are best presoftened with a wet
cloth. Then remove them with a glass
scraper. Sugar and melted plastic
should be removed while the cooking
area is still hot.
■ Clean the glass-ceramic cooking area after every use. Always keep the sen-
sor keys clean, since soiling could be detected as finger contact by the
aplliance. Immediately remove soiling. Never put anything (pans, tea-towels
etc.) on the sensor keys! If food boils over onto the sensor buttons, we advise you to activate the emergency switch.
■ Care for your glass-ceramic cooking area once a week. Regular care builds
up a protective layer and also eases day to day cleaning. Please follow the
instructions of the cleaner or cleanser manufacturer concerned. Even heavy
soiling can be cleaned with a cleanser and enough water. Wipe dry with a
cloth.
■ Do not use the cleaning agent on the grill surface as the protective film
would come into direct contact with food. We recommend you to rub down
the grill surface with half a lemon or lemon juice. Any slight dirt marks from
protein, e.g. from meat, is removed and the grill surface shines again.
What to do if there is a fault
Unplug the appliance befor repair!
Check carefully to make sure that the fault is not due to misoperation. You
can rectify many faults yourself
.
Important note:
Repairs should only be carried out by an authorised technician! Even during
the guarantee period repairs will not be free of charge if due to incorrect ope-
ration or to non-adherence to our instructions given under “What to do if there
is a fault”.
Fault Cause Remedy
Circulating dash
symbols on all 4
LED displays.
No faults; normal
display after power
interruption.
If no objects have been lying on
or obstructing the sensors, confirm this by pressing the “Off”sensor.
Horizontal dashes
that are shown on
the display running
from top to bottom.
Failure of electronic
component.
Switch off cooker fuse in fusebox. Call service centre.
Not possible to
switch off cooking
area.
Failure of electronic
component.
Switch off cooker fuse in fusebox, Call service centre.
Cooking area cannot
be retracted or
extended.
Safety cut-out after
too frequent retraction and extension of
the cooking area
owing to risk of
motor overheating.
Wait until duration of safety cutout has expired.
Cooking area cannot
be retracted.
Safety strip pressed
in, safety cut-out
has been activated.
Remove obstacle preventing
retraction of the cooking area.
Rear cooking zones
cannot be switched
on.
Cooking area not
fully extended.
Extend cooking area fully.
The LED indicator for
the cooking level or
heat indicator does
not light up or only
partly lights up.
LED indicator defective.
Call Customer Service. There is
a danger of being burned as the
temperature warning is not
reliable.
Cooking area does
not heat.
Fuse is defective. Check or replace cooker fuse in
fuse box.
Child proof lock
activated.
Deactivate child proof lock.
Cooking area is
defective.
Call service centre.
Inner circuit of the
dual-circuit zone is
defective.
Do not operate the functioning
outer circle. Immediately call
service centre.
Individual / all sensors do not react to
touch.
Disconnect the hob from the
mains (via the fuses).
Individual / all sensors do not react to
touch.
Sudden change in
heat radiation.
Remove the source of heat.
Electronic circuits
have experienced
slight movement due
to impact.
Disconnect the hob from the
mains (via the fuses).
Page 10

22 KGCT 907.2E
When this point flashes it indicates
that the saucepan sensor is defective. However, you can continue to
use the cooking zone when the
saucepan sensor is switched off.
You should always give the data on the rating plate to your service centre in
case you have enquiries or want to order spare parts. The rating plate is located underneath the cooking area. The rating label is located at the bottom
side of the hob. It is also stuck onto the cover page of this operating manual.
Page 11

KGCT 907.2E 23
Installation
Installation in a fitted kitchen
■ Be careful during fitting! Do not put or drop edged or pointed tools
(screwdriver etc.) on the glass top!
■ Any cooker hoods or wall cupboards must have a vertical clearance of at
least 650 mm from the hob unit.
■ The appliance must be installed absolutely horizontally.
■ The Küppersbusch built-in oven EEB 9800 / 9600 can be fitted underneath
the zoom-cooking centre KGCT 907.2E.
The cooker is Y-type design, providing overheating protection for surrounding
surfaces (fitted cupboard components). That means, that this appliance can
be placed with its back wall and one side wall next to cupboard or room walls
of any height. The other side wall may only be placed next to a fitted cupboard
of the same height at the most.
The plastic coating or veneer must be applied with a heat-resistant adhesive
(100 °C). This adhesive prevents the surfaces from warping or working loose.
- Have you connected the mains lead with the appliance?
- Using 4.2 x16 mm screws, install the supporting rails in horizontal position
on the right and on the left onto the cupboard sides according to measurements.
- Fit in the appliance.
- Fasten the appliance onto the supporting rails using 4.2 x 7 mm srews.
- Seal the appliance on the back and on the two sides with silicon.
Page 12

24 KGCT 907.2E
Electrical connection
■ The built-in cooking area must be connected to the mains supply by
a qualified electrician who is authorized to carry out such work.
■ Both legal wiring regulations and the requirements of your local electricity
supply board must be fully complied with.
■ When connecting the hob, a device must be provided which enables all-
pole disconnection of the hob from the supply with a gap construction of at
least 3 mm. Circuit breakers, fuses and contactors are considered to be
suitable disconnecting units.
■ When connecting and repairing the appliance disconnect it from the elec-
tricity supply with one of these devices.
■ Overall protection against electric shock must be ensured by the installation.
■ The earthed conductor lead must be sufficiently long so that, in the event
of failure of the strain relief, it is not subjected to strain until after the live
wires of the connection cable.
■ Any superfluous cable must be removed from the installation area beneath
the appliance.
At the factory the electronic hob has been equipped with a temperature-proof
cable with a connecting box for the oven connection cable.
The connecting box is fastened to the kitchen wall behind the built-in furniture.
If there is no built-in oven below the hob, the connecting box can also be fastened to the furniture below the hob.
■ When assembling the connecting box remember that it must be at least
300 mm from the floor, as shown in the drawing.
■
The connecting box must not come into contact with any hot appliance parts.
■ The connecting box must not be used as a voltage distributor for other
appliances.
■
The appliance is connected to the mains at the connecting box as shown in
the wiring diagram. The connection may only be made in the connector box.
■ The connector box must not be removed.
■ The fitted connection cable must be replaced by the KÜPPERSBUSCH Cu-
stomer Service if it becomes damaged.
■ The green-yellow earth conductor must be longer than the other wires.
Connection diagram:
[
Caution: Incorrect connection results in the total destruction of the power
electronics.
[
When assembling the connecting box remember that it must be at least
300 mm from the floor, as shown in the drawing.
Electrical
connection
Permanent connection by means of an oven connection
socket.
Connection
diagram
is depicted on the underside of the appliance, suitable for
the various types of mains.
Connection data Permanent connection 400 V 3 N
~
50 Hz
(AC 230 V in UK)
Voltage of heating element: 230 V
Total connection output: 10.4 kW
400 V 3 N
~
safety current 16 A
400 V 2 N
~
safety current 20 A
230 V 1 N
~
safety current 25 A
230 V 3
~
safety current 16 A
Connection cable
Use H 05 RR-F or H 07 RN-F. Length of cable as necessary.
Cable to
the hob
base
Single-phase connection 230 V phase against neutral conductor
Supply line from
cooker junktion box
The conductor colours may be different. The connection diagram
and the terminal numbers are the decisive factors.
Three-phase connection 400 V system with 230 V phase against neutral conductor
Three-phase system 230 V phase against phase
 Loading...