

Page 1
BEDIENUNGSANWEISUNG
mit Montageanweisungen
Instructions for use and installation instructions
Instructions d’utilisation et avis de montage
Gebruiksaanwijzing en montagehandleiding
Istruzioni di uso e di montaggio
Instrucciones de uso y de montaje
Instruções de uso e de montagem
KCI 907.1E
072585 K51
Page 2

KCI 907.1E 11
For your information...
Please read the instructions in this booklet carefully as it contains important
information concerning the safety, the installation, the use and the
maintenance of your appliance.
The appliance should only be used for cooking in the household.
Keep the operation instructions in a safe place.
Notes on disposal
Disposing of the packaging
The transport packaging consists of the following materials: Corrugated
cardboard, cardboard, styrofoam (CFC-free), Polyethylen-foil.
Do not put these materials in the household rubbish, but ask your local
authority to give you the adress of the most convenient collection point.
What to do if you happen to have an old appliance
Old appliances contain many materials which can be recycled. For this reason
you should not simply put your old appliance on the rubbish tip, but ask your
local authority how it might be recycled.
Conditions of guarantee
The conditions of guarantee applicable for this product are subject to those
published by the representative in the relevant country. Details regarding same
may be obtained from the dealer from whom the appliance was purchased.
For claims under guarantee the sales receipt must be produced.
Contents
Your appliance at a glance . . . . . . . . . . . . . . . . . . . . . . . 12
The operation panel . . . . . . . . . . . . . . . . . . . . . . . . . . . . 12
Safety instructions . . . . . . . . . . . . . . . . . . . . . . . . . . . . . 13
Connection and operation
For the hob
Before using the appliance for the first time . . . . . . . . . . . 13
The hob . . . . . . . . . . . . . . . . . . . . . . . . . . . . . . . . . . . . 13
Advantages of the induction hob
Some instructions on cookware
Use of the cooking zones . . . . . . . . . . . . . . . . . . . . . . . . 14
Switch on the hob
Switching the cooking zone on and off;
Changing the cooking setting
The power function
Residual heat indicators
The pot recognition
Other functions
Switching the hob off (rapid cut-out)
Child-proof lock (sensor-lock)
Notes on use
Cleaning and Care . . . . . . . . . . . . . . . . . . . . . . . . . . . . . 16
What to do if trouble occurs . . . . . . . . . . . . . . . . . . . . . . 16
IInstallation . . . . . . . . . . . . . . . . . . . . . . . . . . . . . . . . . . 17
Installation in a fitted kitchen
Electrical connection
Page 3

12 KCI 907.1E
Your appliance at a glance
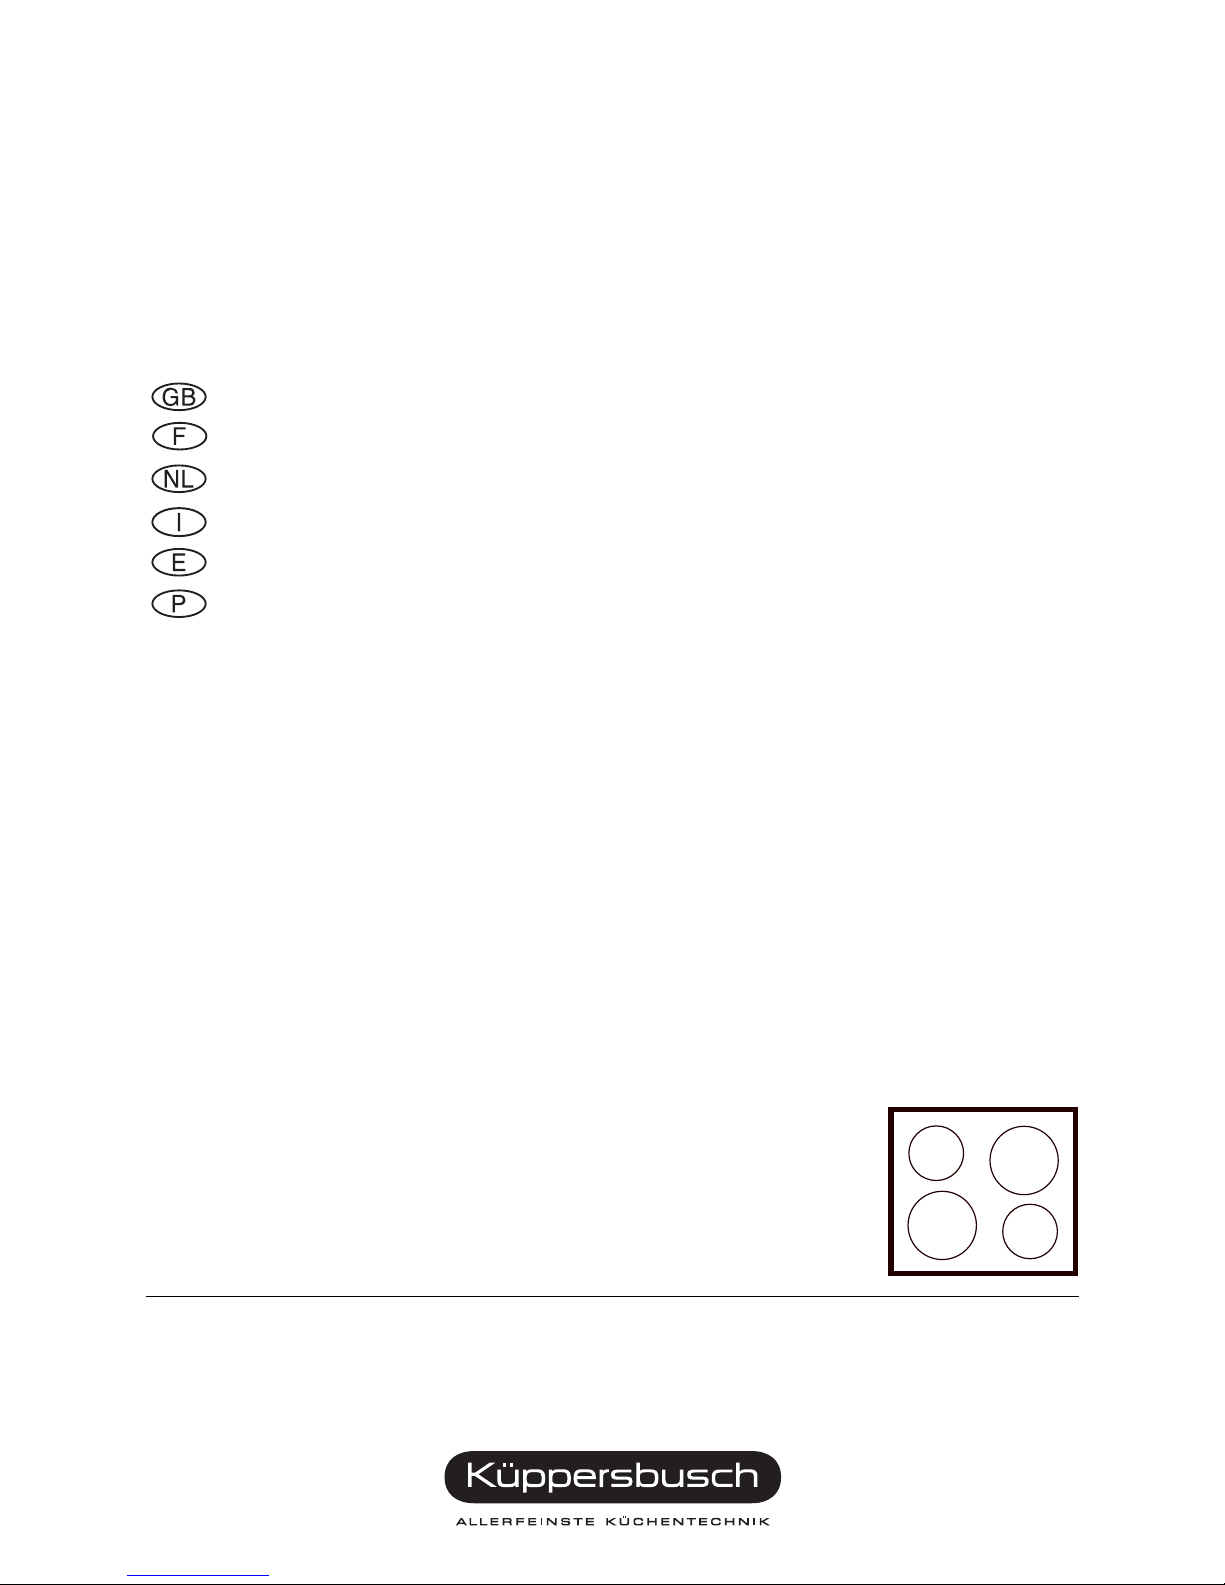
The operation panel
1 Cooking zones
«
210 mm, 2200 - 3000 W
«
145 mm, 1400 W
«
180 mm, 1800 - 2300 W
«
145 mm, 1400 W
2 Sensor switch for hob
3 Sensor keys for cooking zones
4 Indicator for cooking setting
5 Display symbols Position cooking zone
6 LED display Cooking zone ready for operation
7 LED display Child-proof lock
8 Off-sensor
9 Sensor key for child proof lock (lock of the operation fascia)
10 Sensor stand-by switch
11 Plus and minus keys (preselection keys for cooking settings)
12 Sensor key to deactivate the child-proof lock (no fascia)
13 LED display child-proof lock
Page 4

KCI 907.1E 13
Safety instructions
Connection and operation
■ Küppersbusch appliances are constructed in accordance with the relevant
safety regulations.
■ If the hob is operated with an oven installed underneath, this may only be
a Küppersbusch oven with fan cooling.
■ The appliances may only be connected to the mains, maintained and
repaired by a qualified electrician according to valid safety regulations. Work
carried out incorrectly places your safety at risk.
■ Persons with cardiac pacemakers or implanted insulin pumps must make
sure that their implants are not affected by the induction field (the frequency
range of the induction field is 25-50 kHz).
For the hob
■ Owing to the very fast reaction at the high power setting (power
level), do not use the induction hob without supervision!
■ When cooking, pay attention to the heat-up speed of the cooking zones.
Avoiding boiling the pots dry as there is a risk of the pots overheating!
■ Do not place empty pots and pans on cooking zones which have been
switched on.
■ Immediately switch off the cooking zone after using with the respective
minus key and not just by pot recognition.
■ Overheated fats and oils may spontaneously ignite. Food involving the use
of fats and oils, e.g. chips, may only be cooked under supervision. Never
extinguish ignited fats and oils with water! Put the lid on the pan and switch
off the cooking zone.
■ The glass ceramic hob is extremely robust. Avoid dropping hard objects onto
the the glass ceramic hob. Pointed objects falling onto your hob might break
it.
■ If cracks, fractures or any other defects appear in your glass ceramic hob,
immediately switch off the appliance. Disconnect fuse immediately and call
the Customer service.
■ If the hob cannot be switched off due to a defect in the sensor control
immediately disconnect your appliance and call the Customer service.
■ The glass ceramic hob should not be used as a storage area.
■ Do not put kitchen foil or plastic onto the cooking zone.
■ Metal objects, e.g. kitchen utensils, cutlery, must not be left on the surface
of the induction hob as they can become hot.
■ Take care with metal objects which are worn on the body if they come into
the direct vicinity of the induction hob as they can become hot. Nonmagnetisable objects (e.g. gold or silver rings) are not affected.
■ Do not heat any unopened food cans or laminated packing on the hob.
There is a risk of bursting!
■ Be especially careful to keep the sensor keys clean since soiling could be
mistaken for finger contact by the appliance. Never put anything (pans, tea
towels etc.) onto the sensor keys!
If food boils over onto the sensor keys, we advise you to activate the
emergency switch.
■ Hot pans should not cover the sensor keys, otherwise the appliance
switches itself off automatically. In this case the oven automatically shuts
off.
■ If there are any pets in the apartment which could come near the hob,
activate the child-proof lock.
Before using the appliance for
the first time
Remove foreign matter and packaging.
Before first use the hob should be cleaned with a damp cloth and a little
washing-up liquid.
The hob is resistant against thermal shocks (coldness and heat) and also very
robust.
Please observe the cleaning and servicing instructions.
The hob
The hob is provided with an induction cooking zone.
An induction coil underneath the glass ceramic hob generates an
electromagnetic alternating field which penetrates the glass ceramic and
induces the heat-generating current in the pot base.
With an induction cooking zone the heat is no longer transferred from a
heating element through the cooking pot into the food being cooked but the
necessary heat is generated directly in the container by means of induction
currents.
Advantages of the induction hob
– Energy-saving cooking through the direct transfer of energy to the pot
(suitable pots/pans made of magnetisable material are required).
– Increased safety as the energy is only transferred when a pot is placed on
the hob.
– Energy transfer between induction cooking zone and pot base with high
efficiency.
– High heat-up speed.
– The risk of burns is low as the cooking area is only heated through the pan
base, any food which boils over does not stick to the surface.
– Rapid, sensitive control of the energy supply.
Some instructions on cookware
The cookware used for the induction cooking zone must be made of metal,
have magnetic properties and a sufficient base area. Only use pots with a
base suitable for induction.
This is how to establish the suitability of a pot:
Conduct the magnet test described below or make sure that the pot bears the
symbol for suitability for cooking with induction current.
Magnet test:
– Move the magnet towards the base of your cookware. If it is attracted, you
can use the cookware on the induction hob.
Note:
When using pots suitable for induction from some manufacturers, noises may
occur which are attributable to the design of these pots.
Suitable cookware Unsuitable cookware
Enamelled steel pots with thick
base.
Pots made of copper, stainless
steel, aluminium, oven-proof glass,
wood, ceramic and terracotta
Cast iron pots with an enamelled
base.
Pots made of multi-layer stainless
steel, stainless ferrite steel and
aluminium with special base.
Page 5

14 KCI 907.1E
Use of the cooking zones
Please note the safety instructions!
The induction hob has four cooking zones. The display symbols on the control
panel indicate the position of the cooking zones on the hob.
While the hob is in use, each activation of a key is confirmed by an acoustic
signal.
Switch on the hob
Press the sensor-button (sensor stand-by switch) button for approx.
2 seconds.
The LED display above the sensor lights up.
The appliance is in operation (stand-by mode).
The four cooking zones can now be used.
In the setting displays of the four cooking zones the setting “0” appears.
The stand-by mode automatically switches itself off,
– if you do not press another sensor key during the following 10 seconds
and no cooking zone is in operation.
– if you do not press any other key again after you switch off the last
cooking zone in use.
The switching-off time for this is 10 seconds.
– if one or more keys are pressed for more than 10 seconds.
Switching the cooking zone on and off;
Changing the cooking setting
For each cooking zone you have nine cooking settings available.
By using the plus or minus keys the cooking zone is switched on and off and
the desired cooking level is selected.
The number of the cooking level will be indicated in the respective display.
– Brief activation of the keys changes the cooking setting by one unit.
– Prolonged touching increases or reduces the setting to the corresponding
stop.
As far as possible, start cooking at the highest setting and continue at a
smaller setting.
If you touch the plus key, the
cooking zone starts at cooking
setting “1”. The value of the
cooking setting can then be set.
If you touch the minus key, the
cooking zone starts at the
maximum setting (setting “9”).
The value of the cooking setting
can be changed.
Touch simultaneously the plusand minus keys to switch off the
cooking zone.
After the cooking zone has been switched off, the display changes after
3 seconds, with the hot display active, from “0” to “H”.
The power function
The front left and the back right cooking zones have a power function which
can be switched on to provide these cooking zones with a higher output
(3000 W and 2300 W respectively).
If the power function for the front left cooking zone is switched on, the front
right cooking zone only has a maximum of 600 W available. If the power function for the back right cooking zone is switched on, the back left cooking zone
only still has a maximum of 800 W available.
To activate the power function, the
plus sensor key is pressed again
after the cooking setting “9” has
been selected.
The highest cooking setting (setting 9) with additional power is activated.
A “P” is indicated on the
respective display.
The power function is effective for a period of 10 minutes. Then the appliance
is switched back to the maximum cooking setting. The setting “9” appears
again on the respective display.
Renewed activation of the plus-key after the automatic return activates the
power function for another 10 minutes.
If the pot is removed while the power function is active, the time is stopped.
If the pot is placed on the zone again before the pot detection time
(10 minutes) has elapsed, the power function continues to run for the
remaining period.
or
Page 6

KCI 907.1E 15
Coordination of the two front or two back cooking zones
If the front left-hand cooking zone is operated with the power function, the power
of the front right-hand cooking zone is reduced to 600 watt. The front right-hand
cooking zone can then be operated at a maximum setting of 7.
If the back left cooking zone is being operated with the power setting on, the
output of the back right cooking zone is reduced to 800 watts. This means
that operation of the back left cooking may not exceed cooking setting 8.
If a higher setting is selected, the numbers of the cooking setting selected and
the setting currently in use are displayed alternately in the cooking setting
display, e.g. 9 and 7 (9 and 8).
The power function can be switched off prematurely by pressing the minus
key of the respective cooking zone.
Residual heat indicators
As long as the cooking zone is still hot
(heating of the glass ceramic only through
hot pot) an “H” will appear in the display
when the cooking zone has been switched
off.
The pot recognition
All cooking zones have a pot recognition function.
If no pan or a pot unsuitable for induction
is placed on the activated cooking zone, a
appears in the display. Then the
cooking zone switches off automatically
after 10 minutes.
The pot recognition is for your safety and saves energy as it immediately
deactivates the pot recognition if no pot is placed. After use, however, switch
off the cooking zone with the correspondent minus key and do not only use
the pot recognition, as an empty pot that has been placed on the cooking zone
can activate the cooking zone again and heat up the empty pot.
Other functions
■ If two or more sensor keys are pressed at the same time – e.g. when a
pan is mistakenly put onto a sensor key – no function is activated. The
appliance switches off automatically after 10 seconds.
Exceptions:
– Deactivation of the sensor-lock
– Switching off the cooking zones
■ If you continue to press a sensor key after having set the highest cooking
setting, the appliance switches off automatically after 10 seconds.
■ The appliance does not automatically switch on again after a power failure.
■ The hob is switched off if the electronics become overheated. All LED
displays flash and a cyclical signal sounds.
Switching the hob off (rapid cut-out)
– Touch the sensor key Off for about 2 seconds.
The LED display above the sensor goes off. All cooking zones are immediately
switched off.
Child-proof lock (sensor-lock)
Operating the sensor lock detains unauthorised persons from using the
appliance.
– If a cooker which is not in operation is switched on when the child-proof
lock is activated, it will not be possible to select a cooking setting on
any of the cooking zones.
– If the child-proof lock is activated while cooking the hobs cannot be
switched higher.
The power function cannot be switched on. It is possible to switch off
the hobs and to switch down to a lower cooking level.
Activating the lock:
– Touch the children's safety sensor button for about 3 seconds.
The following three control lights flash on the control panel:
– ON button
– children's safety button
– Key to deactivate the child-proof lock (no fascia)
Attention:
Switching the hob off does not cancel the children's safety feature!
Cancelling the children’s safety feature:
– Simultaneously touch the ON key and the child-proof lock .
– Touch the key to deactivate the child-proof lock located under the LED
child-proof lock display within 5 seconds.
The control lights stop flashing. The hob is fully operable again.
Page 7

16 KCI 907.1E
Notes on use
If the hob is used at full power for a lengthy period, the power electronics may
no longer be cooled to the necessary extent at room temperature.
To ensure that no excessive temperatures occur in the electronics, the power
of the cooking zones may be reduced automatically.
This is indicated by two numbers flashing alternately in the cooking setting
display, e.g. 9 and 8. These are the numbers of the selected setting and the
setting currently in use.
If, during normal use of the hob and at normal room temperature, two
numbers frequently flash alternately in the cooking setting display, the cooling
is probably not sufficient. A lack of cooling openings in the furniture or leaks
in the air channel may be the cause.
The installation may have to be checked.
Cleaning and Care
■ Never use sharp or abrasive agents!
Usually it is sufficient to clean the
appliance with a damp cloth and a
little washing-up liquid each time you
use it. Wipe dry afterwards.
■ Incrustation due to boiled over foods
should first be soaked – best with a
wet cloth. Then remove them with a
glass scraper. Remove sugar and
melted plastic immediately while the
cooking surface is still hot.
■ Clean the glass ceramic cooking
surface after every use. Be especially careful to keep the sensor keys clean
since soiling could be mistaken for finger contact by the appliance.
Immediately remove soiling. If food boils over onto the sensor buttons, we
advise you to switch off the appliance.
■ Care for your glass ceramic hob once a week. Regular care builds up a
protective layer and also eases day to day cleaning. Please observe the
cleaning and servicing instructions. Even heavy soiling can be cleaned with
a cleanser and enough water. Afterward always wipe dry with a cloth.
What to do if trouble occurs
Unplug the appliance before repair!
First check whether there has been any operating error. You can deal with
some problems that occur yourself.
Important note:
Repairs should only be carried out by a qualified gas fitter!
Even during the guarantee period repairs will not be free of charge if due to
incorrect operation or to non-adherence to our instructions given under “What
to do if there is a fault”.
Always indicate the data provided on the rating label when calling in Customer
service or ordering spare parts. The rating label is located at the bottom side
of the hob.
Fault Cause Remedy
Not possible to
switch off the
appliance.
Electronic component
defective.
Remove pot from cooking
zone, switch off the fuse,
call Customer service.
LED display for
cooking settings and
heat display does
not come on or only
partially.
LED display defective. Call Customer service.
Risk of burning, as the
temperature warning is not
guaranteed.
Pot does not
become hot.
Unsuitable cookware
(non-magnetic,
ferromagnetic, pot
diameter too small) -
in the display.
Use suitable cookware.
Child-proof lock not
unlocked.
Unlock child-proof lock.
Electronics error–
F in the display.
Call Customer service.
(Cooking areas which still
work can continue to be
used until the Customer
service arrives.)
Thermal limit of the
power –
Flashing of the cooking
setting display.
Wait until hob cools down.
Plug or household fuse
defective –
Displays dark.
Check or replace plug or
fuse.
Cooling of the induction
element overloaded.
Air short-circuit – Hot air/
cold air can impair cooling,
allow appliance to cool
down.
Sensors do not react
to touch.
Pots, wet cleaning cloths
etc. in control area.
Clear away, clean and dry
the glass in the control
area,
if necessary call Customer
service.
Noises when using
pots of some makes.
Design of the pots. Unavoidable as due to
make.
(Noises may be reduced by
selecting the next cooking
setting.)
Page 8

KCI 907.1E 17
IInstallation
Installation in a fitted kitchen
■ Be careful during fitting! Do not put or drop edged or pointed tools (screw-
driver etc.) on the glass top!
■ Any cooker hoods or wall cupboards must have a vertical clearance of at
least 650 mm from the hob unit.
■ The appliance must be installed absolutely horizontally.
■ The Küppersbusch built-in oven EEB 970 can be fitted underneath the profi-
cooking centre KC 906.2E.
The cooker is Y-type design, providing overheating protection for surrounding
surfaces (fitted cupboard components). The plastic coating or veneer must be
applied with a heat-resistant adhesive (100°C). This adhesive prevents the
surfaces from warping or working loose.
This appliance can be placed with its back wall and one side wall next to cupboard or room walls of any height. The other side wall may only be placed
next to a fitted cupboard of the same height at the most.
– Have you connected the mains lead with the appliance?
– Using 4.2 x16mm screws, install the supporting rails in horizontal position
on the right and on the left onto the cupboard sides according to measurements..
– Fit in the appliance.
– Fasten the appliance onto the supporting rails using 4.2 x 7 mm srews.
– Seal the appliance on the back and on the two sides with silicon.
The appliance sucks in air at the front (A) and emits air which has been heated
up at the rear (B).
Suitable measures must be taken to ensure that no warm air which has been
emitted in the area around B is sucked into the area of A once again. In order
to stop any unwanted circulation of air, the foam rubber mat (C), which is
enclosed, can be used, depending on installation conditions (Illustration 2)
For example: Attach the mat diagonally under the appliance with adhesive
strips so that the stream of air is stopped.
Important:
Stopping the flow of air must be carried out in accordance with the respective
installation conditions.
Please note
Should the appliance, on installation, have been sealed with silicone rubber on
three sides (on the worktop and the rear wall), this silicone sealing will have
to be cut open by customer service if necessary. Customer service will
subsequently seal the appliance with standard silicone rubber only.
Page 9

18 KCI 907.1E
Electrical connection
■ The electrical connection must be carried out by a qualified
electrician who is authorised to carry out such work!
■ Statutory regulations and the connection specifications issued by the local
power supply company must be strictly observed.
■ When connecting the appliance it must be ensured that there is a device
which makes it possible to disconnect it from the mains at all poles with a
contact opening width of at least 3 mm. Line-protecting switches, fuses or
contactors are suitable cut-out devices.
■ When connecting and repairing the appliance disconnect it from the
electricity supply with one of these devices.
■ It must not be possible to touch components which are insulated under
operating conditions.
■ The earth wire must be so long that if the strain relief fails, the live wires
of the connecting cable are subjected to tension before the earth wire.
■ Any superfluous cable must be removed from the installation area beneath
the appliance.
■ The induction cooking hob is provided at the works with a temperature-
resistant cable with connector box for cooker connection cables.
■ The connector box is fastened on the kitchen wall behind the fitted
cupboard. If no built-in oven is installed underneath, the connector box can
also be fastened to the furniture under the hob.
■ When installing the connector box, a minimum distance to the ground of
300 mm is to be observed in accordance with the drawing.
■ The connector box must not come into contact with hot parts of the
appliance.
■ The connector box must not be used as a power distributor for other
appliances.
■ The mains connection is made in accordance with the connection diagram
on the connector box. The connection may only be made in the connector
box.
■ The connector box must not be removed.
■ The attached connection line must be replaced by the Küppersbusch
Customer service in the event of damage.
■ The end of the green/yellow protective conductor must be stripped more
than the other conductors.
Attention:
Incorrect connection results in the total destruction of the power electronics.
[
When installing the connector box, a minimum distance to the ground of
300 mm is to be observed in accordance with the drawing.
Electrical connection Permanent connection above a cooker socket.
Connection diagram is depicted on the underside of the appliance,
suitable for the various types of mains.
Electrical connection Permanent connection 400 V 2 N
~
50 Hz
Electronics Voltage: 230 V
Electrical connection 6,8 kW
400 V 2 N
~
safety current 16 A
230 V 1 N
~
safety current 32 A
230 V 3
~
safety current 16 A
Connection cable Use H 05 RR-F or H 07 RN-F.
Cable length as necessary.
Base
Single-phase connection 230 V phase against neutral conductor
Two-phase connection 400 V system with 230 V
phase against neutral conductor
Three phase curent 230 V phase against phase
Cable to
hob
Feeding of
cooker socket
The colour of the cable conductors can differ.
The connection diagramm and the terminal numbers are the decisive factors.
 Loading...