

Kuppersbusch IKE 309-5-2T, IKE 197-7 Operating Instructions Manual
2223 335-21
Gebrauchs- und Montageanleitung
Instructions for installation and use
Instructions de montage et d’emploi
Wichtig: Unbedingt lesen und aufbewahren!
Important: Read these instructions carefully and then store them in a safe place
Important: Lire attentivement et ranger soigneusemnt ce mode d’emploi
Integrierte Kühl-Gefriergerät
Integrated Fridge -Freezers
Réfrigérateur - Congélateurs à intégrer
Modell: IKE 309-5-2T
p.: 17-30 31-43
GB
F
KÜPPERSBUSCH HAUSGERÄTE AG
Postfach 10 01 32, D-45801 Gelsenkirchen, Küppersbuschstr. 16, D-45883 Gelsenkirchen
Telefon: (02 09) 4 01-0, Telefax: (02 09) 4 01-3 03
www.kueppersbusch.de
Küppersbusch Ges. m. b. H.
Eitnergasse 13, 1231 Wien, Telefon: 01 / 8 66 80-0, Telefax: 01 / 8 66 80 72
www.kueppersbusch.at · e-Mail: verkauf@kueppersbusch.at
15
Die Teile Ha, Hb, Hc, Hd abnehmen, wie in der Abb.
gezeigt wird.
In die Befestigungs- und Scharnierlöcher
beiliegende Abdeckkappen (C-D) eindrücken.
Belüttungsgitter (B) und Scharnierabdeckung (E)
aufstecken.
PR266
Ha
Hb
Hc
Hd
B
E
C
D
2
1
m
m
2
1
m
m
ca. 50 mm
90°
90°
ca. 50 mm
Die Schiene (Ha) auf der Innenseite der Möbeltür
oben und unten auflegen (siehe Abb.) und die
Position der äußeren Bohrlöcher anzeichnen.
Nachdem die Löcher gebohrt wurden, die Schiene
mit den mitgelieferten Schrauben befestigen.
Die Abdeckung (Hc) in die Schiene (Ha) eindrücken,
bis sie einrastet.
PR33
Hc
Ha
PR167
Ha
Hb
8mm
Gerätetür und Möbeltür auf ca. 90° öffnen. Den
Winkel (Hb) in der Schiene (Ha) einsetzen.
Gerätetür und Möbeltür zusammenhalten und die
Bohrlöcher anzeichnen (siehe Abb.).
30
PR168
Hb
PR167/1
Hd
Hb
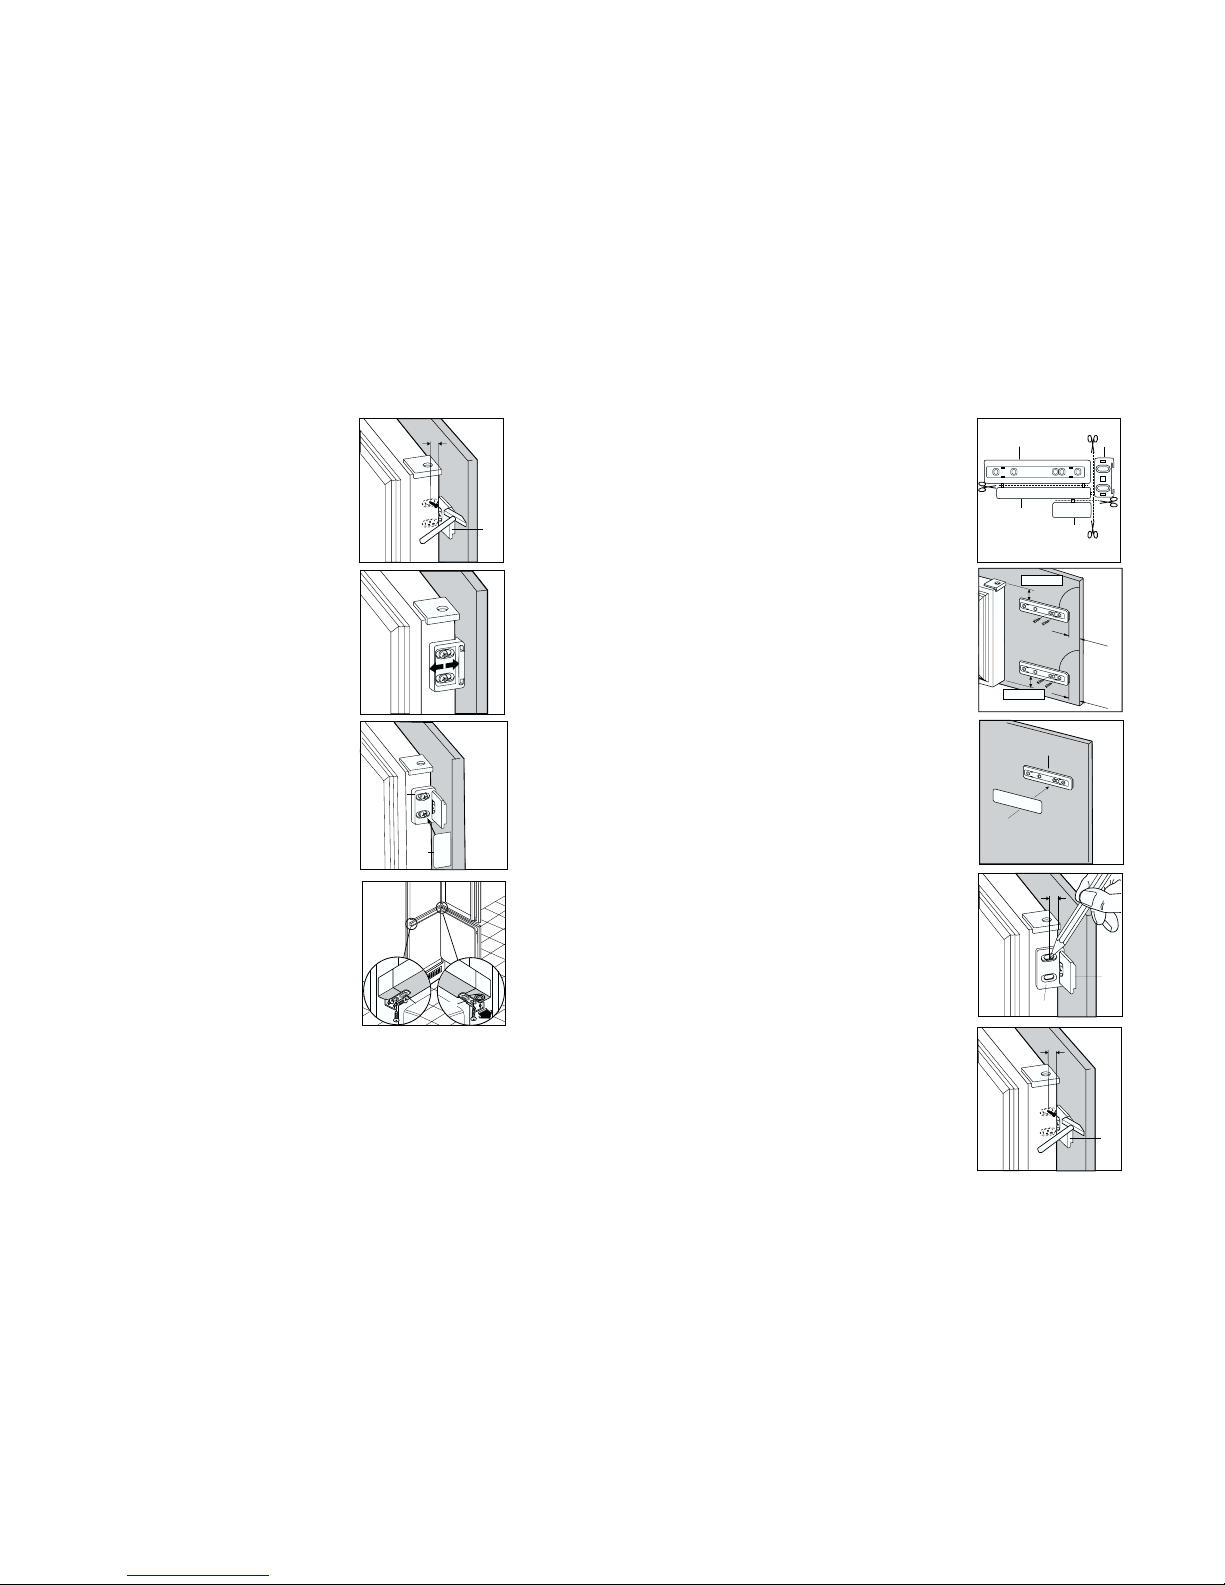
Place the small square on the guide again and fix it
with the screws supplied.
Should the lining up of the furniture door be
necessary, use the clearance of slots.
At the end of operations, it is necessary to check if
the door of the furniture closes properly.
Fix cover (Hd) on guide (Hb) until it clips into place.
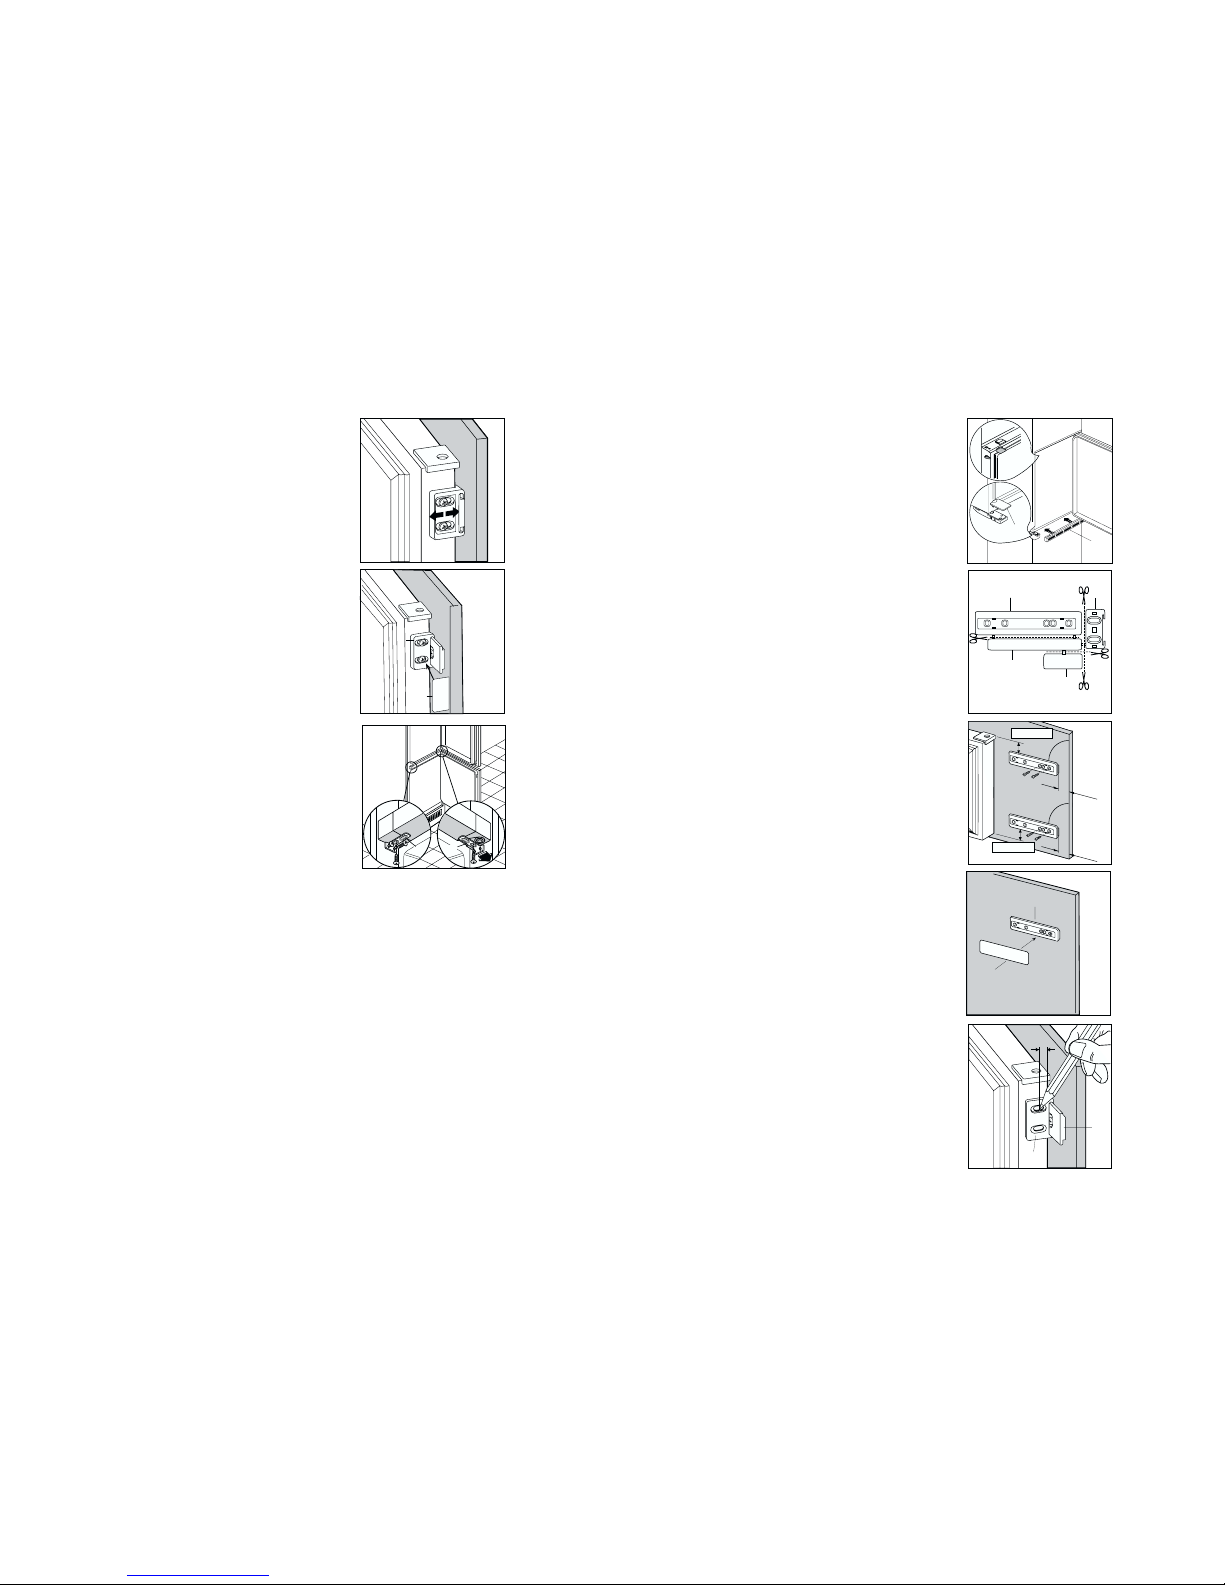
If the appliance is fixed to the side of the kitchen unit,
simply slacken the screws in the fixing brackets (E), move
the brackets as shown in the figure and re-tighten the
screws.
D735
E
E
16
Die Winkeleisen entfernen und 8 mm vom äusseren
Rand der Tür mit dem Nagel (K) kennzeichnen.
Ha
8mm
K
PR168
Hb
PR167/1
Hd
Hb
Den Winkel wieder auf der Schiene anbringen und
mit den mitgelieferten Schrauben befestigen.
Für eine allfällig notwendige Ausrichtung der
Möbeltür, den Spielraum der Langlöcher nutzen.
Nach Beendigung der Arbeiten den einwandfreien
Verschluß der Gerätetür überprüfen.
Die Abdeckung (Hd) in die Schiene (Hb) eindrücken,
bis sie einrastet.
D735
E
E
Das Gerät ist mit 2 Winkeln (E) ausgestattet. Diese
sind zur seitlichen Befestigung des Gerätes am
Möbel zu verwenden.
29
PR266
Ha
Hb
Hc
Hd
Separate parts Ha, Hb, Hc, Hd as shown in the
figure.
Place guide (Ha) on the inside part of the furniture
door, up and down as shown in the figure and mark
the position of external holes. After having drilled
holes, fix the guide with the screws supplied.
2
1
m
m
2
1
m
m
ca. 50 mm
90°
90°
ca. 50 mm
Fix cover (Hc) on guide (Ha) until it clips into place.
PR33
Hc
Ha
PR167
Ha
Hb
8mm
Open the appliance door and the furniture door at
90°. Insert the small square (Hb) into guide (Ha).
Put together the appliance door and the furniture
door and mark the holes as indicated in the figure.
Remove the brackets and mark a distance of 8 mm
from the outer edge of the door where the nail must
be fitted (K).
Ha
8mm
K
 Loading...