

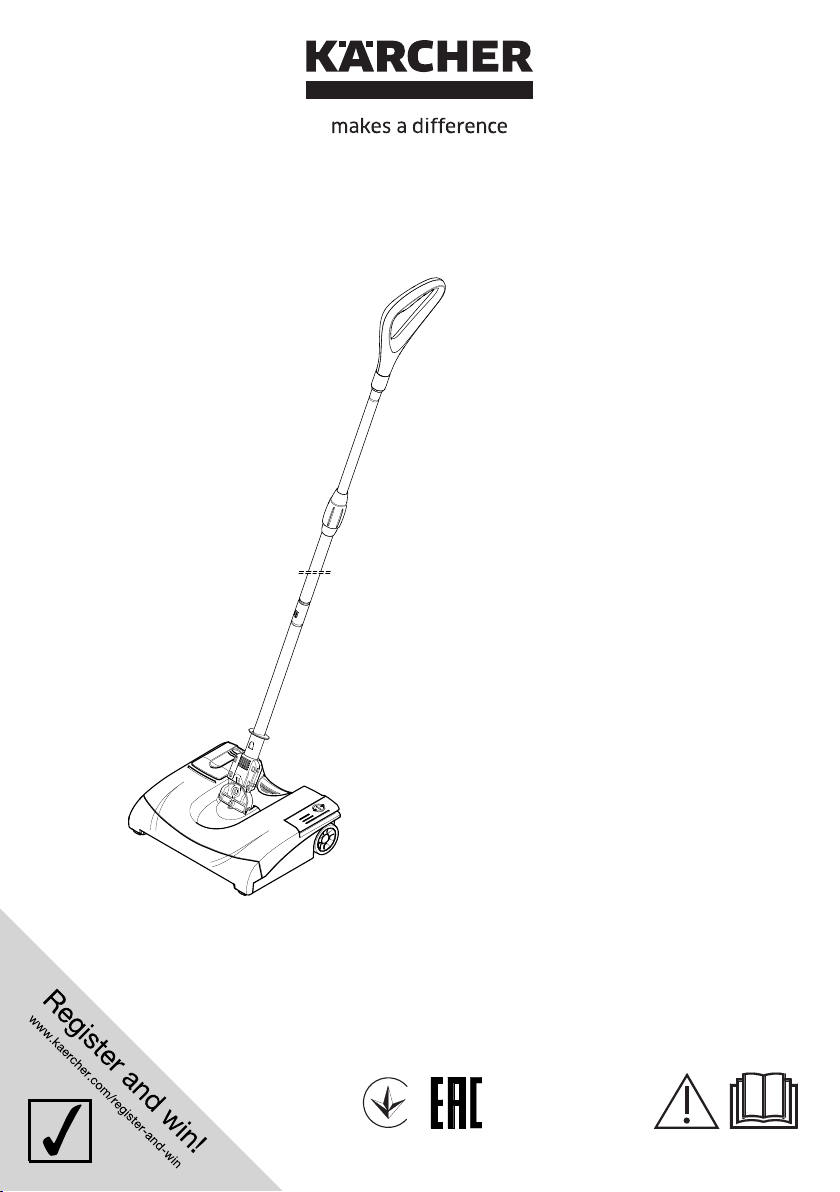
Page 1
EB 30/1
EB 30/1 Adv
Deutsch 3
English 9
Français 15
Italiano 21
Nederlands 27
Español 33
Português 39
Dansk 45
Norsk 51
Svenska 57
Suomi 63
Ελληνικά 69
Türkçe 75
Русский 81
Magyar 88
Čeština 94
Slovenščina 100
Polski 106
Româneşte 112
Slovenčina 118
Hrvatski 124
Srpski 130
Български 136
Eesti 142
Latviešu 148
Lietuviškai 154
Українська 160
Қазақша 166
001
59673200 04/16
Page 2
1
13
12
2
11
15
4
7
4
7
1
2
6
5
3
8
3
10
14
5
8
9
6
9
2
Page 3
Lesen Sie vor der ersten Benut-
zung Ihres Gerätes diese Originalbetriebsanleitung, handeln Sie danach
und bewahren Sie diese für späteren Gebrauch oder für Nachbesitzer auf.
Inhaltsverzeichnis
Inhaltsverzeichnis . . . . . . . . . . DE 1
Bestimmungsgemäße Verwen-
dung . . . . . . . . . . . . . . . . . . . . DE 1
Umweltschutz . . . . . . . . . . . . . DE 1
Gefahrenstufen . . . . . . . . . . . . DE 1
Sicherheitshinweise . . . . . . . . DE 2
Inbetriebnahme . . . . . . . . . . . . DE 2
Betrieb. . . . . . . . . . . . . . . . . . . DE 3
Transport. . . . . . . . . . . . . . . . . DE 4
Lagerung. . . . . . . . . . . . . . . . . DE 4
Pflege und Wartung . . . . . . . . DE 4
Service . . . . . . . . . . . . . . . . . . DE 4
Zubehör und Ersatzteile . . . . . DE 5
EU-Konformitätserklärung. . . . DE 5
Technische Daten . . . . . . . . . . DE 6
Bestimmungsgemäße
Verwendung
– Dieses Gerät ist für den gewerblichen
Gebrauch geeignet, z. B. in Hotels,
Schulen, Krankenhäusern, Fabriken,
Läden, Büros und Vermietergeschäften, mit von Kärcher zugelassenen Zubehör-, und Ersatzteilen.
– Das Gerät ist bedingt für hochflorige
Teppiche geeignet.
– Das Gerät ist nicht für nasse Bodenbe-
läge geeignet.
– Das Gerät ist nicht geeignet für Wasch-
beton, Schotter oder ähnlichem.
Jede darüber hinausgehende Verwendung
gilt als nicht bestimmungsgemäß. Für hieraus resultierende Schäden haftet der Hersteller nicht; das Risiko hierfür trägt allein
der Benutzer.
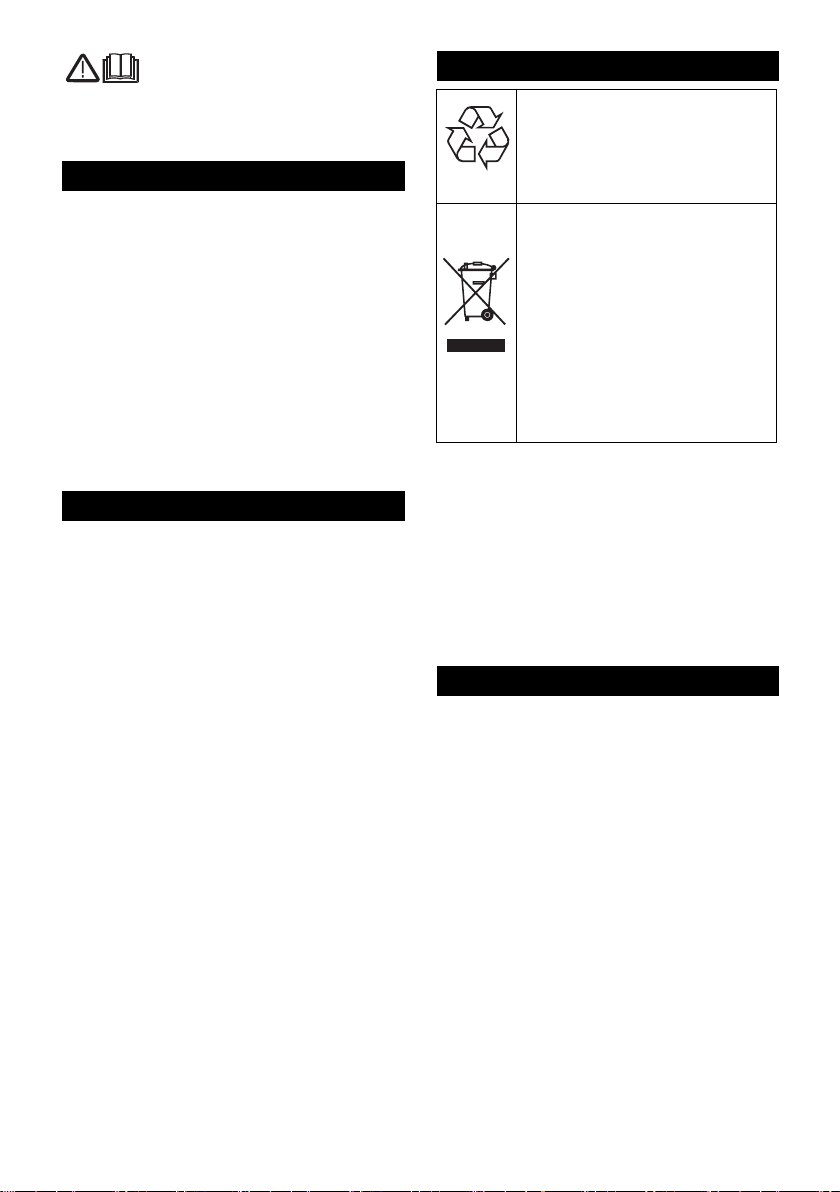
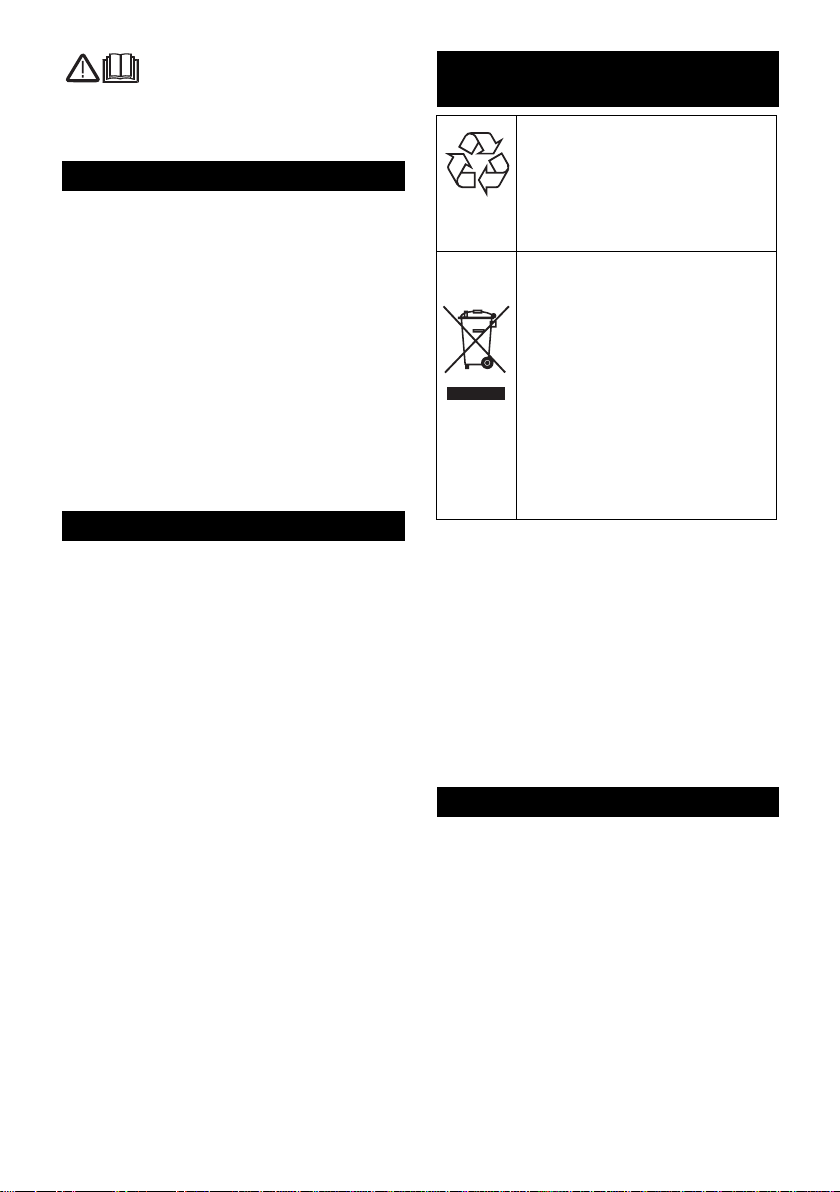
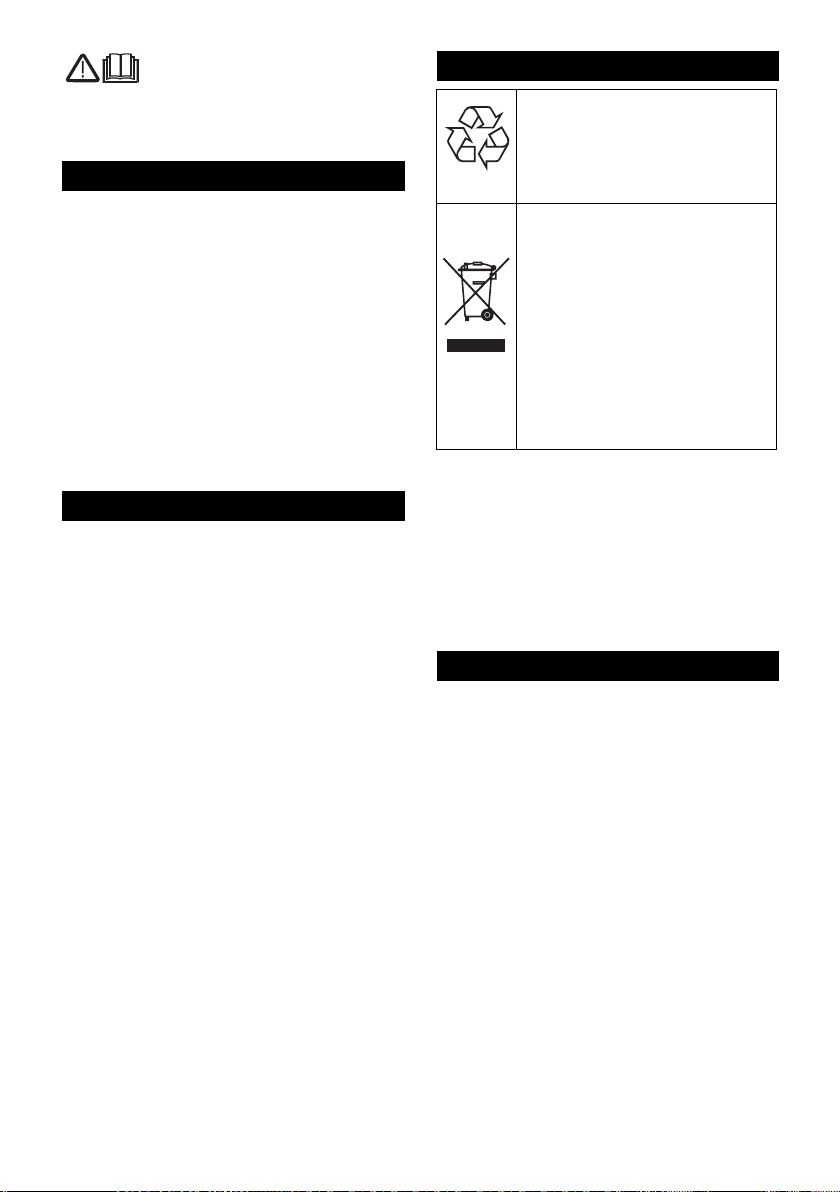
Umweltschutz
Die Verpackungsmaterialien
sind recyclebar. Bitte werfen Sie
die Verpackungen nicht in den
Hausmüll, sondern führen Sie
diese einer Wiederverwertung
zu.
Altgeräte enthalten wertvolle recyclingfähige Materialien, die einer Verwertung zugeführt werden sollten. Batterien und Akkus
enthalten Stoffe, die nicht in die
Umwelt gelangen dürfen. Bitte
entsorgen Sie Altgeräte, Batterien und Akkus deshalb über geeignete Sammelsysteme.
Eingebauten Akku vor der Verschrottung
des Gerätes entfernen und umweltgerecht
entsorgen!
Akku nicht öffnen, es besteht die Gefahr
eines Kurzschlusses, zusätzlich können
reizende Dämpfe oder ätzende Flüssigkeiten austreten.
Hinweise zu Inhaltsstoffen (REACH)
Aktuelle Informationen zu Inhaltsstoffen finden Sie unter:
www.kaercher.de/REACH
Gefahrenstufen
GEFAHR
Für eine unmittelbar drohende Gefahr, die
zu schweren Körperverletzungen oder zum
Tod führt.
몇 WARNUNG
Für eine möglicherweise gefährliche Situation, die zu schweren Körperverletzungen
oder zum Tod führen könnte.
몇 VORSICHT
Hinweis auf eine möglicherweise gefährliche Situation, die zu leichten Verletzungen
führen kann.
ACHTUNG
Hinweis auf eine möglicherweise gefährliche Situation, die zu Sachschäden führen
kann.
– 1
3DE
Page 4
Sicherheitshinweise
Neben den Hinweisen in der Betriebsanleitung müssen die allgemeinen Sicherheitsund Unfallverhütungs-Vorschriften des Gesetzgebers berücksichtigt werden.
Verletzungsgefahr
– Gerät enthält drehende Bürstenwalze,
auf keinen Fall während des Betriebes
mit Fingern oder Werkzeug hineinfas-
sen!
– Bei Pflege- und Wartungsarbeiten am
Gerät vorher den Akku entfernen!
Hinweise zum Akku und Ladegerät
– Das Laden des Akkus ist nur mit beilie-
gendem Originalladegerät oder den von
KÄRCHER zugelassenen Ladegeräten
erlaubt.
– Vor jeder Benutzung Ladegerät und Ak-
kupack auf Beschädigung kontrollieren.
Beschädigte Geräte nicht mehr verwen-
den und beschädigte Teile nur von
Fachpersonal instand setzen lassen.
– Ladegerät nicht in verschmutztem oder
nassem Zustand benutzen.
– Die Netzspannung muss mit der auf
dem Typenschild des Ladegerätes an-
gegebenen Spannung übereinstim-
men.
– Ladegerät nicht in explosionsgefährde-
ter Umgebung betreiben.
– An die Kontakte des Adapters dürfen
keine Metallteile gelangen, Kurz-
schlussgefahr.
– Ladegerät nur zum Laden zugelasse-
ner Akkupacks verwenden.
– Nur saubere und trockene Akkupacks
auf den Adapter des Ladegerätes stek-
ken.
– Keine Batterien (Primärzellen) aufla-
den, Explosionsgefahr.
– Keine beschädigten Akkupacks aufla-
den. Beschädigte Akkupacks ersetzen.
– Akkupacks nicht zusammen mit Metall-
gegenständen aufbewahren, Kurz-
schlussgefahr.
– Akkupacks nicht ins Feuer oder in den
Hausmüll werfen.
– Kontakt mit aus defekten Akkus austre-
tender Flüssigkeit vermeiden. Bei zufälligem Kontakt Flüssigkeit mit Wasser
abspülen. Bei Kontakt mit den Augen
zusätzlich einen Arzt konsultieren.
Symbole auf dem Gerät
Ladegerät vor Nässe schützen und
trocken lagern. Gerät ist nur zur Verwendung in Räumen geeignet, Gerät
nicht dem Regen aussetzen.
Inbetriebnahme
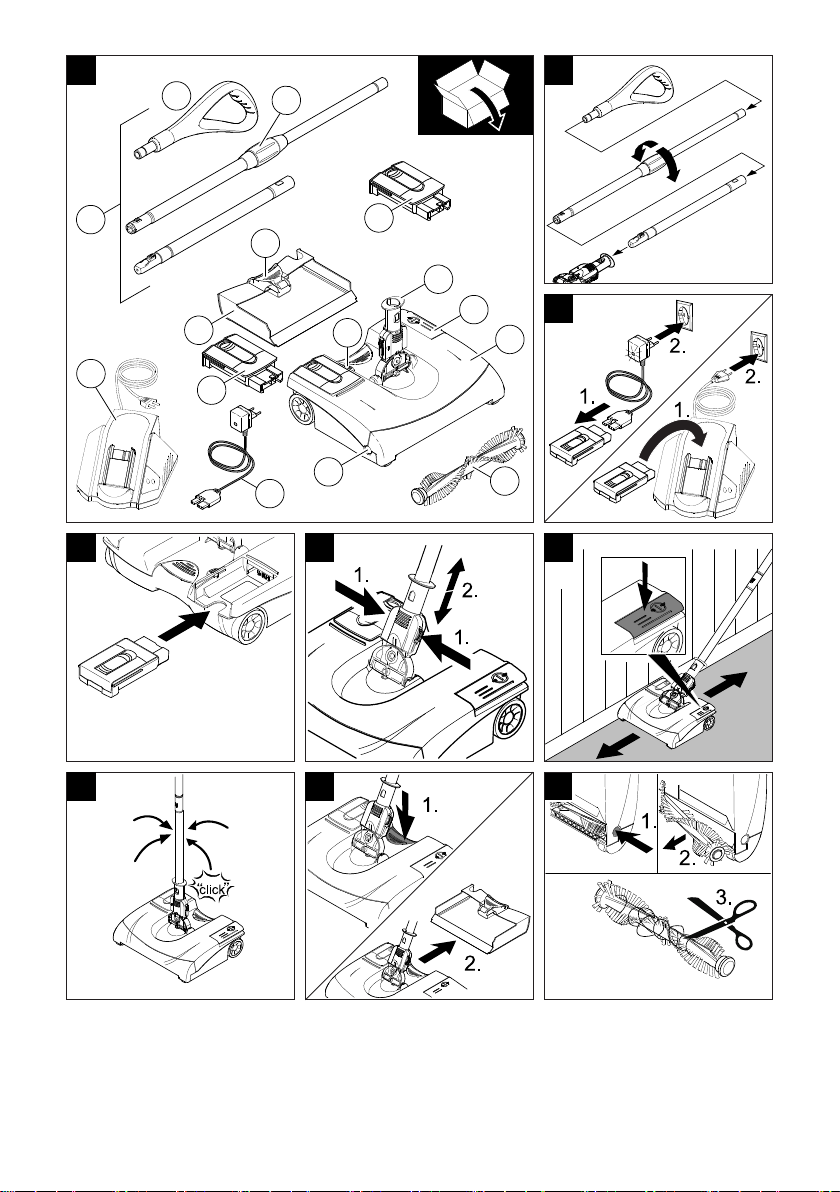
Gerätebeschreibung
Prüfen Sie beim Auspacken den Packungsinhalt auf fehlendes Zubehör oder
Beschädigungen. Benachrichtigen Sie bei
Transportschäden bitte Ihren Händler.
Hinweis:
Abbildungen von Gerät und Bedienung befinden sich auf Seite 2.
1 Kardangelenk mit Verriegelung
2 Ein-/Aus Fußschalter
3 Akku, herausnehmbar
4 Wechselakku
(nur EB 30/1 Adv)
5 Entriegelungsknopf, Akku
6 Schmutzbehälter, herausnehmbar
7 Entriegelung, Schmutzbehälter
8 Gehäuse
9 Bürstenwalze, auswechselbar
10 Entriegelungsknopf, Bürstenwalze
11 Teleskopstiel, höhenverstellbar
12 Drehgriff, für Höhenverstellung
13 Handgriff
14 Ladegerät mit Ladebetriebsanzeige
und Ladekabel
(nur EB 30/1)
15 Schnell-Ladegerät
(nur EB 30/1 Adv)
4 DE
– 2
Page 5
Teleskopstiel und Handgriff
montieren und Höhe einstellen
siehe Abbildung 2
Der Teleskopstiel besteht aus 3 Teilen.
Beim Zusammenbau darauf achten, dass
die Teile einrasten.
Handgriff auf den längeren Stiel mit
Drehgriff aufstecken.
Längeren und kürzeren Stiel zusam-
menstecken, dazu den Einrastknopf
beim Zusammenstecken drücken.
Kompletten Stiel mit Einrastknopf nach
vorne in das Gelenk am Gerät stecken.
Drehgriff lösen und Stiel auf gewünsch-
te Arbeitshöhe ausziehen, Handgriff in
die richtige Stellung drehen und Drehgriff festdrehen.
Akku aufladen
siehe Abbildung 3
Der Akku ist bei Auslieferung nicht geladen. Vor Inbetriebnahme und bei Bedarf
aufladen.
Hinweis: Das Laden des Akkus kann nur in
entnommenem Zustand erfolgen.
Akku mit Ladegerät durch Ladekabel
verbinden bzw. Akku in Ladegerät stecken.
Mitgeliefertes Ladegerät in einer ord-
nungsgemäßen Steckdose einstecken.
Die Ladebetriebsanzeige blinkt grün. Der
Akku wird geladen.
Ladezeit bei leerem Akku
Ladegerät Li-Ion
6.654-359.0
BC 1/0.5 6 h
BC 1/1.8 90 min
Hinweis
Wird die Ladezeit überschritten, geht das
Ladegerät auf Erhaltungsladung. Die Ladebetriebsanzeige leuchtet grün.
Fehleranzeige : blinkt rot
Im Zweifelsfalll an den autorisierten Kundendienst wenden.
Akku einsetzen
siehe Abbildung 4
Akku in Aufnahme einschieben und ein-
rasten.
Betrieb
Teleskopstiel seitlich verriegeln/
entriegeln
siehe Abbildung 5
Zum Reinigen von hochflorigen Teppichen
kann das Kardangelenk verriegelt werden,
um eine seitliche Bewegung des Teleskopstiels zu verhindern.
– Teleskopstiel seitlich verriegeln:
Verriegelung betätigen, nach unten
schieben und einrasten.
– Teleskopstiel entriegeln:
Verriegelung betätigen, nach oben
schieben und einrasten.
Arbeit beginnen
siehe Abbildung 6
Gerät einschalten, dazu Ein-/Aus Fuß-
schalter drücken.
Zum Reinigen das Gerät vorwärts und
rückwärts bewegen.
Für randnahes Reinigen die rechte Sei-
te benutzen (Akkuseite).
Arbeit unterbrechen
siehe Abbildung 7
Gerät ausschalten, dazu Ein-/Aus Fuß-
schalter drücken.
Für einen sicheren Stand des Teles-
kopstiels bei Arbeitspausen diesen
senkrecht stellen, eine Arretierung hält
ihn in dieser Position.
Arbeit beenden
Bei Arbeitsende Gerät ausschalten.
Schmutzbehälter nach jeder Reinigung
entleeren.
Entriegelungsknopf des Akkus drücken
und Akku entnehmen.
Akku aufladen.
– 3
5DE
Page 6
Schmutzbehälter entleeren
siehe Abbildung 8
Schmutzbehälter entriegeln und ent-
nehmen.
Schmutzbehälter entleeren.
Schmutzbehälter wieder einsetzen und
einrasten.
Gerät aufbewahren
Das Gerät kann am Handgriff aufge-
hängt werden, wenn notwendig Handgriff drehen (siehe dazu Kapitel „Teleskopstiel und Handgriff montieren und
Höhe einstellen“).
Transport
몇 VORSICHT
Verletzungs- und Beschädigungsgefahr!
Gewicht des Gerätes beim Transport beachten.
Beim Transport in Fahrzeugen Gerät nach
den jeweils gültigen Richtlinien gegen Rutschen und Kippen sichern.
Lagerung
몇 VORSICHT
Verletzungs- und Beschädigungsgefahr!
Gewicht des Gerätes bei Lagerung beachten.
Dieses Gerät darf nur in Innenräumen gelagert werden.
Pflege und Wartung
몇 VORSICHT
Vor allen Pflege- und Wartungsarbeiten am
Gerät Akku entfernen.
Gerät reinigen
Gerät außen mit einem feuchten Tuch
abwischen. Keine aggressiven Mittel
wie z. B. Scheuerpulver verwenden.
Bürstenwalze wechseln/reinigen
siehe Abbildung 9
Entriegelungsknopf drücken und Bürs-
tenwalze herausnehmen.
Umwickelte Haare entfernen Sie am
besten mit Messer bzw. Schere, durch
Entlangfahren an der vorgegebenen
Schnittkante der Bürstenwalze. Gelöste
Haare von der Bürstenwalze entfernen.
Gereinigte bzw. neue Bürstenwalze
einsetzen und auf richtigen Sitz prüfen.
Service
Garantie
In jedem Land gelten die von unserer zuständigen Vertriebsgesellschaft herausgegebenen Garantiebedingungen. Etwaige
Störungen an Ihrem Gerät beseitigen wir
innerhalb der Garantiefrist kostenlos, sofern ein Material- oder Herstellungsfehler
die Ursache sein sollte. Im Garantiefall
wenden Sie sich bitte mit Kaufbeleg an Ihren Händler oder die nächste autorisierte
Kundendienststelle.
Hilfe bei Störungen
몇 VORSICHT
Vor allen Arbeiten am Gerät, Gerät ausschalten und Akku entnehmen.
Ladebetriebsanzeige leuchtet nicht
Verbindung vom Ladegerät zum Akku
überprüfen.
Spannungsversorgung der Steckdose
überprüfen.
Gerät reinigt nicht zuverlässig
Bürstenwalze reinigen bzw. wechseln
(siehe Kapitel „Bürstenwalze wechseln/
reinigen“).
Akku aufladen (siehe Kapitel „Akku auf-
laden“).
Schmutz wird aus Gerät geschleudert
Vollen Schmutzbehälter entleeren (sie-
he Kapitel „Schmutzbehälter entlee-
ren“).
6 DE
– 4
Page 7
Kundendienst
Bei Fragen oder Störungen hilft Ihnen unsere KÄRCHER-Niederlassung gerne weiter. Adresse siehe Rückseite.
Zubehör und Ersatzteile
Nur Original-Zubehör und Original-Ersatzteile verwenden, sie bieten die Gewähr für
einen sicheren und störungsfreien Betrieb
des Gerätes.
Informationen über Zubehör und Ersatzteile finden Sie unter www.kaercher.com.
Sonderzubehör
Bezeichnung Bestell-Nr.
Schnell-Ladegerät BC 1/1.8, 1-fach (Standard bei EB 30/1 Adv)
EU/CH 6.654-190
GB 6.654-196
AU 6.654-201
Wechselakku Li-Ion 2,6Ah 4.654-328
Bürstenwalze, weich, rot 4.762-401
EU-Konformitätserklärung
Hiermit erklären wir, dass die nachfolgend
bezeichnete Maschine aufgrund ihrer Konzipierung und Bauart sowie in der von uns
in Verkehr gebrachten Ausführung den einschlägigen grundlegenden Sicherheitsund Gesundheitsanforderungen der EURichtlinien entspricht. Bei einer nicht mit
uns abgestimmten Änderung der Maschine
verliert diese Erklärung ihre Gültigkeit.
Produkt: Elektrobesen
Typ: 1.545-xxx
Einschlägige EU-Richtlinien
2006/95/EG
2014/30/EU
2011/65/EU
Angewandte harmonisierte Normen
EN 55014–1: 2006+A1: 2009+A2: 2011
EN 55014–2: 1997+A1: 2001+A2: 2008
EN 60335–1
EN 60335–2–10
EN 60335–2–29: 2004+A2: 2010
EN 61000–3–2: 2006+A1: 2009+A2: 2009
EN 61000–3–3: 2013
EN 62233: 2008
EN 50581
Die Unterzeichnenden handeln im Auftrag
und mit Vollmacht der Geschäftsführung.
CEO
Dokumentationsbevollmächtigter:
S. Reiser
Alfred Kärcher GmbH & Co. KG
Alfred-Kärcher-Str. 28 - 40
71364 Winnenden (Germany)
Tel.: +49 7195 14-0
Fax: +49 7195 14-2212
Winnenden, 2015/02/01
– 5
Head of Approbation
7DE
Page 8

Technische Daten
Akkutyp EB 30/1
Li-Ion
Max. Betriebszeit bei voller Akkuladung (abhängig vom Bodenbelag)
Arbeitsspannung Akku V 7,2
Ausgangsspannung des Ladegerätes V 4,2
Ladestrom A 1,8
Nennleistung W 25
Netzspannung des Ladegerätes
EU/CH V 230
GB V 230-240
AU V 240
Schalldruckpegel (EN 60704-2-1) dB(A) 56
Typisches Betriebsgewicht kg 2,8
min 61
Hz 50 - 60
Hz 50 - 60
Hz 50-60
8 DE
– 6
Page 9
Please read and comply with
these original instructions prior
to the initial operation of your appliance and
store them for later use or subsequent owners.
Contents
Proper use . . . . . . . . . . . . . . . EN 1
Environmental protection . . . . EN 1
Danger or hazard levels . . . . . EN 1
Safety instructions. . . . . . . . . . EN 2
Start up . . . . . . . . . . . . . . . . . . EN 2
Operation . . . . . . . . . . . . . . . . EN 3
Transport. . . . . . . . . . . . . . . . . EN 4
Storage . . . . . . . . . . . . . . . . . . EN 4
Care and maintenance . . . . . . EN 4
Service . . . . . . . . . . . . . . . . . . EN 4
Accessories and Spare Parts . EN 5
EU Declaration of Conformity . EN 5
Technical specifications . . . . . EN 6
Proper use
– This appliance is suited for the commer-
cial use, e.g. in hotels, schools, hospitals, factories, shops, offices, and rental
companies along with the authorised
accessories and spare parts.
– This appliance has restrictive use for
carpets with high flounce.
– The appliance is not suitable for wet
floors.
– The appliance is not suitable for wash-
ing concrete, gravel, etc.
Any use extending beyond this is not considered as proper use. The manufacturer is
not liable for any losses resulting from this;
the user alone bears the risk for this.
Environmental protection
The packaging material can be
recycled. Please do not throw
the packaging material into
household waste; please send it
for recycling.
Old appliances contain valuable
materials that can be recycled;
these should be sent for recycling. Batteries and accumulators contain substances that
must not enter the environment.
Please dispose off old devices,
batteries and rechargeable batteries through suitable waste
collection systems.
Remove the integrated battery prior to disposing of the appliance and dispose of
properly!
Do not open the battery, as there is a risk
of an electrical shock; also, irritating or
caustic vapors can escape.
Notes about the ingredients (REACH)
You will find current information about the
ingredients at:
www.kaercher.com/REACH
Danger or hazard levels
DANGER
Immediate danger that can cause severe
injury or even death.
몇 WARNING
Possible hazardous situation that could
lead to severe injury or even death.
몇 CAUTION
Pointer to a possibly dangerous situation,
which can lead to minor injuries.
ATTENTION
Pointer to a possibly dangerous situation,
which can lead to property damage.
– 1
9EN
Page 10
Safety instructions
In addition to the information contained in
the operating instructions, all statutory
safety and accident prevention regulations
must be observed.
Risk of injury
– The appliance contains rotary brush
roller; please never touch them with the
fingers or any other tool when the appli-
ance is in operation!
– Remove the batteries before starting
any maintenance jobs or repairs to the
machine!
Tips about rechargeable battery and
charger
– You may recharge the battery using
only the original charger provided with
the appliance or a charger approved by
KÄRCHER.
– Check charger, mains cable and battery
pack for damages before every use. Do
not use damaged devices and get the
damaged parts repaired only by ex-
perts.
– Do not use the charger if dirty or wet.
– The mains voltage must match the volt-
age mentioned on the type plate of the
charger.
– Do not operate the charger in explosive
environment.
– Ensure that no metal pieces reach the
contacts of the adapter, else there will
be a short circuit.
– Use the charger only to charge ap-
proved battery packs.
– Insert only clean and dry battery packs
on the adapter of the charger.
– Do not charge batteries (primary cells);
risk of explosion.
– Do not charge damaged battery packs.
Replace damaged battery packs.
– Do not store battery packs along with
metal objects; risk of short circuit.
– Do not dispose off battery packs by
throwing them into fire or into house-
hold garbage.
– Avoid contact with liquids oozing out of
defective battery packs. Rinse thoroughly if you accidentally come in contact with the fluid. Also consult a doctor
if the fluid comes in contact with your
eyes.
Symbols on the machine
Protect the charger against moisture; store it dry. The appliance is
suitable for use only in rooms; do not
expose the appliance to rain.
Start up
Description of the Appliance
When unpacking the product, make sure
that no accessories are missing and that
none of the package contents have been
damaged. If you detect any transport damages please contact your dealer.
Note:
Please refer to page 2 for figures of the appliance and the operation.
1 Cardan joint with lock
2 ON/OFF foot switch
3 Rechargeable battery, detachable
4 Spare battery
(only EB 30/1 Adv)
5 Unlocking button, battery
6 Dirt container, detachable
7 Unlocking mechanism for dirt container
8 Casing
9 Brush roller, changeable
10 Unlocking button for brush roller
11 Telescopic strut, adjustable height
12 Turning handle for height adjustment
13 Handle
14 Charger with charging status display
and charging cable
(only EB 30/1)
15 Quick charger
(only EB 30/1 Adv)
10 EN
– 2
Page 11

Installing the telescopic handle and the handle and adjusting the height
see Figure 2
The telescopic strut consists of 3 parts.
While assembling it, make sure that the
parts lock into each other.
Insert the handle on the longer strut
with turning handle.
Insert together the longer and shorter
struts; while assembling it, press the
locking button.
Insert the entire strut with the locking
button into the joint on the appliance.
Loosen the handle and pull out the strut
to the desired working height; turn the
handle to the correct position and tighten using the turning handle.
Charge the battery
see Figure 3
The battery is not charged at the time of delivery. Charge it before commissioning the
appliance and then as and when required.
Note: The battery can be charged only
when it is removed out of the appliance.
Connect the battery to the charger us-
ing the charging cable or rather insert
the battery in the charger.
Insert the charger delivered with the ap-
pliance into a proper socket.
The charger display blinks green. The battery is being charged.
Charging time for empty battery
Charger Li-Ion
6.654-359.0
BC 1/0.5 6 h
BC 1/1.8 90 min
Note
If the charging time is exceeded, the charger shifts to retention charging. The charger
display blinks green.
Error display : blinks red
In case of doubt, contact the authorised
customer service.
Insert the battery
see Figure 4
Insert the battery into the intake and
lock it.
Operation
Lock/unlock telescope strut on the
side
see Figure 5
The Cardan joint can be locked to clean
high-fiber carpets to prevent the telescope
strut from moving from side to side.
– Lock/unlock telescope strut on the side:
Activate the lock, then move it down
and lock it in.
– Unlock telescopic strut:
Activate the lock, then move it up and
lock it in.
Starting the work
see Figure 6
Switch on the appliance; press the on/
off foot switch to do so.
Move the appliance forward and back-
ward to clean it.
Use the right side (battery side) to clean
the appliance close to the edges.
Interrupting the work
see Figure 7
Switch off the appliance; press the on/
off foot switch to do so.
To ensure that the telescopic strut
stands safely during breaks in opera-
tion, hold it vertically; there is a stopper
that holds it in position.
Finishing your work
Switch off the appliance when finished.
Empty dirt container after each clean-
ing.
Press the unlocking button of the bat-
tery and remove the battery.
Charge the battery.
– 3
11EN
Page 12
Emptying the dirt container
see Figure 8
Unlock the dirt container and remove it.
Empty the dirt container.
Insert and lock into place the dirt con-
tainer.
Storing the appliance
The appliance can be hung with the
handle; turn the handle if required (see
chapter "Install Telescopic strut and
handle and adjust the height").
Transport
몇 CAUTION
Risk of injury and damage! Observe the
weight of the appliance when you transport
it.
When transporting in vehicles, secure the
appliance according to the guidelines from
slipping and tipping over.
Storage
몇 CAUTION
Risk of injury and damage! Note the weight
of the appliance in case of storage.
This appliance must only be stored in interior rooms.
Care and maintenance
몇 CAUTION
Remove the battery prior to any care and
maintenance work.
Cleaning the device
Wipe the appliance using a damp cloth.
Do not use any aggressive agents,
such as cleaning powder.
Change/ clean the brush roller
see Figure 9
Press the unlocking button and remove
the brush roller.
Remove wound up hair using a knife or
scissors by moving the knife along the
defined cutting edge of the brush roller.
Remove loosened hair from the brush
roller.
Insert the cleaned or new brush roller
and ensure that it sits properly.
Service
Warranty
The warranty terms published by the relevant sales company are applicable in each
country. We will repair potential failures of
your appliance within the warranty period
free of charge, provided that such failure is
caused by faulty material or defects in manufacturing. In the event of a warranty claim
please contact your dealer or the nearest
authorized Customer Service centre.
Please submit the proof of purchase.
Troubleshooting
몇 CAUTION
Turn the appliance off and remove the accumulator prior to performing any tasks on
the appliance.
Charger display does not glow
Check connection from charger to bat-
tery
Check power supply of the socket.
Appliance does not clean properly
Clean or replace the brush rollers (refer
chapter "Replace/ clean brush roller").
Charge the battery (refer chapter
"Charging the battery).
Dirt is being thrown out of the appliance
Empty the full dirt container (refer chap-
ter "Empty dirt container").
12 EN
– 4
Page 13
Customer Service
Our KÄRCHER branch will be pleased to
help you further in the case of questions or
faults. See address on the reverse.
Accessories and Spare Parts
Only use original accessories and spare
parts, they ensure the safe and trouble-free
operation of the device.
For information about accessories and
spare parts, please visit www.kaercher.com.
Special accessories
Description Order No.
Quick charger, BC 1/1.8, single (standard
with EB 30/1 Adv)
EU/CH 6.654-190
GB 6.654-196
AU 6.654-201
Spare battery Li-Ion 2,6Ah 4.654-328
Brush rollers, soft, red 4.762-401
EU Declaration of Conformity
We hereby declare that the machine described below complies with the relevant
basic safety and health requirements of the
EU Directives, both in its basic design and
construction as well as in the version put
into circulation by us. This declaration shall
cease to be valid if the machine is modified
without our prior approval.
Product: Electrical brooms
Type: 1.545-xxx
Relevant EU Directives
2006/95/EEC
2014/30/EU
2011/65/EU
Applied harmonized standards
EN 55014–1: 2006+A1: 2009+A2: 2011
EN 55014–2: 1997+A1: 2001+A2: 2008
EN 60335–1
EN 60335–2–10
EN 60335–2–29: 2004+A2: 2010
EN 61000–3–2: 2006+A1: 2009+A2: 2009
EN 61000–3–3: 2013
EN 62233: 2008
EN 50581
The undersigned act on behalf and under
the power of attorney of the company management.
CEO
Authorised Documentation Representative
S. Reiser
Alfred Kärcher GmbH Co. KG
Alfred-Kärcher-Str. 28 - 40
71364 Winnenden (Germany)
Phone: +49 7195 14-0
Fax: +49 7195 14-2212
Winnenden, 2015/02/01
– 5
Head of Approbation
13EN
Page 14
Technical specifications
Rechargeable battery type EB 30/1
Li-Ion
Max. operating time when battery is fully charged (depends on the
flooring)
Working voltage of the battery V 7,2
Output voltage of the charger V 4,2
Charging current A 1,8
Rated power W 25
Mains voltage of the charger
EU/CH V 230
GB V 230-240
AU V 240
Sound pressure level (EN 60704-2-1) dB(A) 56
Typical operating weight kg 2,8
min 61
Hz 50 - 60
Hz 50 - 60
Hz 50-60
14 EN
– 6
Page 15
Lire ce manuel d'utilisation origi-
nal avant la première utilisation
de votre appareil, le respecter et le conserver pour une utilisation ultérieure ou pour le
futur propriétaire.
Table des matières
Utilisation conforme . . . . . . . . FR 1
Protection de l’environnement FR 1
Niveaux de danger . . . . . . . . . FR 1
Consignes de sécurité . . . . . . FR 2
Mise en service . . . . . . . . . . . . FR 2
Fonctionnement . . . . . . . . . . . FR 3
Transport. . . . . . . . . . . . . . . . . FR 4
Entreposage . . . . . . . . . . . . . . FR 4
Entretien et maintenance . . . . FR 4
Service . . . . . . . . . . . . . . . . . . FR 4
Accessoires et pièces de re-
change . . . . . . . . . . . . . . . . . . FR 5
Déclaration UE de conformité . FR 5
Caractéristiques techniques . . FR 6
Utilisation conforme
– Cet appareil convient à un usage indus-
triel, par exemple dans le cadre d'hôtels, d'écoles, d'hôpitaux, d'usines, de
magasins, de bureaux et d'agences de
location, avec les accessoires et pièces
de rechange autorisés par Kärcher.
– L'appareil est partiellement approprié
pour les tapis trop poil.
– L'appareil n'est pas approprié pour les
sols mouillés.
– Cet appareil n'est pas approprié pour
nettoyer du béton lavé, du cailloutis ou
des choses semblables.
Toute utilisation sortant du cadre donné est
considérée comme non conforme. Le
constructeur décline toute responsabilité
pour des dommages en résultant, seul l'utilisateur en assume le risque.
Protection de
l’environnement
Les matériaux constitutifs de
l’emballage sont recyclables. Ne
pas jeter les emballages dans
les ordures ménagères, mais les
remettre à un système de recyclage.
Les appareils usés contiennent
des matériaux précieux recyclables lesquels doivent être apportés à un système de recyclage. Les batteries et les accumulateurs contiennent des substances ne devant pas être tout
simplement jetées. Pour cette
raison, utiliser des systèmes de
collecte adéquats afin d'éliminer
les batteries et les accumulateurs.
Retirer l'accumulateur de l'appareil avant
l'élimination de ce dernier et l'éliminer dans
le respect de l'environnement !
Ne pas ouvrir l'accumulateur, Risque de
court-circuit ! Il est en outre possible que
des vapeurs irritantes ou des fluides agressifs s'en échappent.
Instructions relatives aux ingrédients
(REACH)
Les informations actuelles relatives aux ingrédients se trouvent sous :
www.kaercher.com/REACH
Niveaux de danger
DANGER
Pour un danger immédiat qui peut avoir
pour conséquence la mort ou des blessures corporelles graves.
몇 AVERTISSEMENT
Pour une situation potentiellement dangereuse qui peut avoir pour conséquence des
blessures corporelles graves ou la mort.
몇 PRÉCAUTION
Remarque relative à une situation potentiellement dangereuse pouvant entraîner
des blessures légères.
– 1
15FR
Page 16
ATTENTION
Remarque relative à une situation éventuellement dangereuse pouvant entraîner
des dommages matériels.
Consignes de sécurité
Outre les instructions figurant dans le mode
d'emploi, il est important de prendre en
considération les consignes générales de
sécurité et de prévention contre les accidents imposées par la loi.
Risque de blessures
– L'appareil contient un rouleau rotatif de
brosse, en aucun cas mettre les doigts
ou les outils dedans pendant qu'il est en
service.
– En cas de travaux d'entretien et mainte-
nance à l'appareil, tirer l'accumulateur
avant!
Consignes à l'accumulateur et à l'ap-
pareil de charge
– Le chargement de l'accumulateur n'est
permis que avec l'appareil de charge
original ci-joint ou avec l'appareil de
charge autorisé par Kärcher
– Controller l'état de l'appareil de charge
et du groupe d'accumulateur avant
chaque utilisation. Ne plus utiliser des
appareil endommagés et pour faire ré-
parar des pièces endommagées
s'adresse uniquement à des spécia-
listes.
– Ne pas utiliser l'appareil de charge en
état sale ou mouillé.
– La tension de réseau doit correspondre
à la tension indiqué sur la plaque signa-
létique de l'appareil de charge.
– Ne pas utiliser l'appareil de charge dans
un environnement où il y a un risque de
explosion.
– Des pièces de métal ne peuvent pas
touchés l'adaptateur, risque de court-
circuit.
– Ne utiliser l'appareil de charge que pour
le chargement des groupes d'accumu-
lateurs autorisés.
– Indroduire uniquement des groupes
d'accumulateurs propres et secs sur
l'adaptateur de l'appareil de charge.
®
.
– Ne pas charger des piles (cellule pri-
maire), risque d'explosion.
– Ne pas charger des groupes d'accumula-
teurs endommagés. Remplacer des
groupes d'accumulateurs endommagés.
– Ne pas garder des groupes d'accumu-
lateurs avec des objets de métal, risque
de court-circuit.
– Ne pas jeter des groupes d'accumula-
teurs dans le feu ou dans le déchet domestique.
– Eviter le contact avec le liquide qui sort
des accumulateurs en panne. En cas
d'un contact par hazard, ringer le liquide
avec l'eau. En cas d'un contacte avec
les yeux, consulter en plus un médecin.
Des symboles sur l'appareil
Proteger l'appareil de charge de l'humidité et déposer dans un endroit
sec. L'utilisation de l'appareil est
apropriée uniquement pour l'intérieur, ne pas exposer l'appareil à la
pluie.
Mise en service
Description de l’appareil
Contrôler le matériel lors du déballage pour
constater des accessoires manquants ou
des dommages. Si des dégâts dus au
transport sont constatés, il faut en informer
le revendeur.
Remarque :
Voir page 2 pour les illustrations d’utilisation et des éléments de l’appareil.
1 Rotule de cardan avec verrouillage
2 Interrupteur à pied- Marche/Arrêt
3 Accumulateur, amovible
4 Accumulateur de change
(uniquement EB 30/1 Adv)
5 Bouton de deverrouillage, accumula-
teur
6 Poubelle, amovible
7 Deverrouillage, poubelle
8 Boîtier
9 Rouleau de brosse, échangeable
10 Bouton de deverrouillage, rouleau de
brosse
16 FR
– 2
Page 17
11 Manche à téléscope, réglable en hau-
teur
12 Poignée rotative pour déplacement en
hauteur
13 Poignée
14 L'appareil de charge avec affichage de
service de chargement et cable de
chargement
(uniquement EB 30/1)
15 Chargeur rapide
(uniquement EB 30/1 Adv)
Monter le manche télescopique et la
poignée; en régler la hauteur
cf. Illustration 2
Le manche à téléscope se compose de 3
pièces. Faire attention au montage que les
pièces s'enclenchent.
Mettre la poignée sur le manche plus
long avec la poignée rotative.
Assembler le manche plus long et le
manche plus court, pour cela pressio-
ner le bouton d'encliqueter.
Mettre le manche complet avec le bou-
ton d'encliqueter dans la joint de l'appa-
reil.
Desserrer la poignée rotative et allon-
ger le manche à l'hauteur souhaitée,
tourner la poignée à la position correcte
et serrer la poignée rotative.
Charger l'accumulateur
cf. figure 3
L'accumulateur n'est pas charge à la livraison. Charge avant la mise en service et en
cas de besoin.
Remarque : Le chargement de l'accu ne
peut se faire qu'à l'état demonté.
Connecter l'accumulateur avec le char-
geur à l'aide d'un câble de chargement
ou poser l'accumulateur dans le char-
geur.
Brancher l'appareil de charge, qui est li-
vré avec, réglementairement dans une
prise de courant.
L'affichage du chargement clignote vert.
L’accumulateur est chargé.
Temps de charge d'un accumulateur
vide
Chargeur Li-Ion
6.654-359.0
BC 1/0.5 6 h
BC 1/1.8 90 min
Remarque
Lorsque la durée de charge est dépassée,
le chargeur bascule en charge de conservation. L'affichage de mode de charge est
allumé en vert.
Affichage de
défauts
En cas de doute, s'adresser au service
après-vente agréé.
: le témoin
clignote
(rouge)
Mettre l'accumulateur
cf. figure 4
Indroduire l'accumulateur dans le com-
partiment et encliqueter.
Fonctionnement
Verrouiller/déverrouiller
latéralement le manche
télescopique
cf. figure 5
Pour le nettoyage des moquettes épaisses,
la rotule de cardan peut être verrouillée
pour empêcher un mouvement latéral du
manche télescopique.
– Verrouiller latéralement le manche té-
lescopique :
Actionner le verrouillage, le pousser
vers le bas et l'enclencher.
– Déverrouiller le manche télescopique :
Actionner le verrouillage, le pousser
vers le haut et l'enclencher.
Commencer le travail
cf. figure 6
Mettre l'appareil en marche. Pour cela
pressioner l'interrupteur à pied Marche/
Arrêt.
Pour la nettoyage, bouger l'appareil en
avant et en arrière.
Pour un nettoyage près de bord utiliser
la côté droite (côté de l'accumulateur).
– 3
17FR
Page 18

Interrompre le travail
cf. figure 7
Eteindre l'appareil. Pour cela pressio-
ner l'interrupteur à pied Marche/Arrêt.
Pour garantir une position sûre du
manche à téléscope, celui-ci doit être
posé verticalement à la pause. C'est au
moyenne d'un blocage qu'il reste dans
cette position.
Fin des travaux
Au fin de service éteindre l'appareil.
Vider la poubelle après chaque net-
toyage.
Pressioner le bouton de deverrouillage
de l'accumulateur et retirer l'accumulateur.
Charger l'accumulateur.
Vider le collecteur d'impuretés
cf. figure 8
Deverrouiller la poubelle et retirer.
Vider le collecteur d'impuretés.
Remettre la poubelle et encliqueter.
Rangement de l’appareil
L'appareil peut être accroché à la poi-
gnée, si nécessaire tourner la poignée
(cf. le chapitre "Monter le manche à téléscope et la poignée et régler l'hauteur").
Transport
몇 PRÉCAUTION
Risque de blessure et d'endommagement !
Respecter le poids de l'appareil lors du
transport.
Sécuriser l'appareil contre les glissements
ou les basculements selon les directives en
vigueur lors du transport dans des véhicules.
Entreposage
몇 PRÉCAUTION
Risque de blessure et d'endommagement !
Prendre en compte le poids de l'appareil à
l'entreposage.
Cet appareil doit uniquement être entreposé en intérieur.
Entretien et maintenance
몇 PRÉCAUTION
Retirer l'accu de l'appareil avant d'effectuer
des travaux d'entretien et de maintenance.
Nettoyage de l’appareil
Essuyer l'extérieur de l’appareil avec un
chiffon humide. Ne pas utiliser de pro-
duits agressifs (des poudres à récurer
par exemple).
Changer/nettoyer le rouleau de
brosse
cf. figure 9
Pressioner le bouton de deverrouillage
et retirer le rouleau de brosse.
Eliminer des cheveux entournés avec
un couteau ou un ciseaux, en passant
pour le rebord de coup du rouleau de
brosse qui est fixé par avance. Eliminer
les cheveux enoués du rouleau de
brosse.
Poser le rouleau de brosse nettoyé ou
nouveau et vérifier s'il est bien mis.
Service
Garantie
Dans chaque pays, les conditions de garantie en vigueur sont celles publiées par
notre société de distribution responsable.
Les éventuelles pannes sur l’appareil sont
réparées gratuitement dans le délai de validité de la garantie, dans la mesure où
celles-ci relèvent d'un défaut matériel ou
d'un vice de fabrication. En cas de recours
en garantie, adressez-vous à votre revendeur ou au service après-vente agréé le
plus proche munis de votre preuve d'achat.
18 FR
– 4
Page 19
Assistance en cas de panne
몇 PRÉCAUTION
Avant d'effectuer tout type de travaux sur
l'appareil, le mettre hors service et retirer
l'accumulateur.
L'affichage de service de chargement ne s'allume pas
Vérifier la connexion de l'appareil de
charge à l'accumulateur.
Vérifier l'alimentation de la prise de cou-
rant.
L'appareil ne nettoye pas bien
Nettoyer ou changer le rouleau de
brosse (cf. le chapitre "Changer/nettoyer le rouleau de brosse").
Charger l'accumulateur (cf. le chapitre
"Charger l'accumulateur").
La salissure est jetée de l'appareil
Vider la poubelle pleine (cf. le chapitre
"Vider la poubelle").
Service après-vente
Notre succursale Kärcher
entière disposition pour d'éventuelles questions ou problèmes. L'adresse figure au
dos.
®
se tient à votre
Accessoires et pièces de
rechange
N'utiliser que des accessoires et pièces de
rechange d'origine, ils garantissent le bon
fonctionnement de l'appareil.
Vous trouverez des informations relatives
aux accessoires et pièces de rechange sur
www.kaercher.com.
Accessoires en option
Désignation N° de réf.
Chargeur rapide BC 1/1,8, 1 compartiment
(standard pour EB 30/1 Adv)
EU/CH 6.654-190
GB 6.654-196
AU 6.654-201
Accumulateur de
change Li-Ion
Brosse d'aération, douce,
rouge
2,6Ah 4.654-328
4.762-401
Déclaration UE de conformité
Nous certifions par la présente que la machine spécifiée ci-après répond de par sa
conception et son type de construction ainsi que de par la version que nous avons
mise sur le marché aux prescriptions fondamentales stipulées en matière de sécurité et d’hygiène par les directives européennes en vigueur. Toute modification apportée à la machine sans notre accord rend
cette déclaration invalide.
Produit: Balai électrique
Type: 1.545-xxx
Directives européennes en vigueur :
2006/95/CE
2014/30/UE
2011/65/UE
Normes harmonisées appliquées :
EN 55014–1: 2006+A1: 2009+A2: 2011
EN 55014–2: 1997+A1: 2001+A2: 2008
EN 60335–1
EN 60335–2–10
EN 60335–2–29: 2004+A2: 2010
EN 61000–3–2: 2006+A1: 2009+A2: 2009
EN 61000–3–3: 2013
EN 62233: 2008
EN 50581
Les soussignés agissent sur ordre et sur
procuration de la Direction commerciale.
CEO
Responsable de la documentation:
S. Reiser
Alfred Kärcher GmbH Co. KG
Alfred-Kärcher-Str. 28 - 40
71364 Winnenden (Germany)
Téléphone : +49 7195 14-0
Télécopieur : +49 7195 14-2212
Winnenden, 2015/02/01
Head of Approbation
– 5
19FR
Page 20

Caractéristiques techniques
Type d'accumulateur EB 30/1
Li-Ion
Temps max. de service d'un accumulateur plein (dependament du
sol)
Tension local de l'accumulateur V 7,2
Tension de sortie de l'appareil de charge V 4,2
Courant de charge A 1,8
Puissance nominale W 25
Tension de réseau de l'appareil de charge
EU/CH V 230
GB V 230-240
AU V 240
Niveau de pression acoustique (EN 60704-2-1) dB(A) 56
Poids de fonctionnement typique kg 2,8
min 61
Hz 50 - 60
Hz 50 - 60
Hz 50-60
20 FR
– 6
Page 21
Prima di utilizzare l'apparecchio
per la prima volta, leggere le
presenti istruzioni originali, seguirle e conservarle per un uso futuro o in caso di rivendita dell'apparecchio.
Indice
Uso conforme a destinazione . IT 1
Protezione dell’ambiente. . . . . IT 1
Livelli di pericolo . . . . . . . . . . . IT 1
Norme di sicurezza . . . . . . . . . IT 2
Messa in funzione . . . . . . . . . . IT 2
Funzionamento . . . . . . . . . . . . IT 3
Trasporto. . . . . . . . . . . . . . . . . IT 4
Supporto . . . . . . . . . . . . . . . . . IT 4
Cura e manutenzione . . . . . . . IT 4
Assistenza. . . . . . . . . . . . . . . . IT 4
Accessori e ricambi. . . . . . . . . IT 5
Dichiarazione di conformità UE IT 5
Dati tecnici . . . . . . . . . . . . . . . IT 6
Uso conforme a destinazione
– Questo apparecchio si adatta all'uso
professionale, ad esempio in alberghi,
scuole, ospedali, fabbriche, negozi e uffici, utilizzando accessori e ricambi autorizzati dalla Kärcher.
– L'apparecchio si adatta solo limitata-
mente alla pulizia di tappeti con fibra
lunga.
– L'apparecchio non si adatta alla pulizia
di pavimenti bagnati.
– L'apparecchio non è idoneo alla pulizia
di calcestruzzo lavato, pietrisco o simili.
Ogni altro utilizzo è considerato non conforme a destinazione. Il produttore non risponde per danni da ciò risultanti e sarà l'utilizzatore ad assumersi qualsiasi relativo rischio.
Protezione dell’ambiente
Tutti gli imballaggi sono riciclabili. Gli imballaggi non vanno gettati nei rifiuti domestici, ma consegnati ai relativi centri di raccolta.
Gli apparecchi dismessi contengono materiali riciclabili preziosi
e vanno consegnati ai relativi
centri di raccolta. Sia le batterie
che gli accumulatori contengono
sostanze che non devono essere disperse nell’ambiente. Si
prega quindi di smaltire gli apparecchi dismessi, le batterie e gli
accumulatori mediante i sistemi
di raccolta differenziata.
Prima di smaltire l'apparecchio rimuovere
l'accumulatore e smaltirlo a regola d'arte!
Non aprire l'accumulatore, sussiste il rischio di corto circuito, inoltre possono fuoriuscire vapori irritanti o liquidi irritanti.
Avvertenze sui contenuti (REACH)
Informazioni aggiornate sui contenuti sono
disponibili all'indirizzo:
www.kaercher.com/REACH
Livelli di pericolo
PERICOLO
Per un rischio imminente che determina lesioni gravi o la morte.
몇 AVVERTIMENTO
Per una situazione di rischio possibile che potrebbe determinare lesioni gravi o la morte.
몇 PRUDENZA
Indica una probabile situazione pericolosa
che potrebbe causare lesioni leggere.
ATTENZIONE
Indica una probabile situazione pericolosa
che potrebbe determinare danni alle cose.
– 1
21IT
Page 22
Norme di sicurezza
Oltre alle indicazioni del manuale d’uso è
necessario osservare le norme di sicurezza
e antinfortunistiche generali vigenti.
Rischio di lesioni
– L'apparecchio contiene un rullo spazzo-
la rotante. Non introdurre in nessun
caso le dita o utensili durante il funzio-
namento dello stesso!
– Prima di ogni intervento di cura e di ma-
nutenzione staccare l'accumulatore
dall'apparecchio!
Indicazioni per quanto riguarda l'ac-
cumulatore e il caricabatterie
– La carica dell'accumulatore è consenti-
ta solo con l'utilizzo del caricabatterie
originale o con caricabatterie autorizzati
dalla KÄRCHER.
– Prima di ogni utilizzo verificare che il ca-
ricabatterie e l'unità accumulatore non
siano danneggiati. Non mettere in fun-
zione apparecchi danneggiati e far ripa-
rare parti che risultano difettose solo da
personale qualificato.
– Non utilizzare il caricabatterie sporco o
bagnato.
– La tensione indicata sulla targhetta del
caricabatterie deve corrispondere alla
tensione di rete.
– Non utilizzare il caricabatterie in am-
bienti a rischio d'esplosione.
– I contatti dell'adattatore non devono
toccare parti in metallo. Pericolo di cor-
to circuito.
– Utilizzare il caricabatterie solo per cari-
care unità accumulatore autorizzate.
– Le unità accumulatore devono essere
pulite e asciutte al momento dell'inseri-
mento nell'adattatore.
– Non caricare batterie (celle primarie).
Pericolo di esplosioni.
– Non caricare unità accumulatore dan-
neggiate. Sostituire le unità accumula-
tore danneggiate.
– Le unità accumulatore devono essere
depositate lontano da oggetti in metallo.
Pericolo di corto circuito.
– Non gettare le unità accumulatore nel
fuoco o nei rifiuti domestici.
– Evitare il contato con il liquido che fuori-
esce da accumulatori danneggiati.
Sciacquare eventualmente con acqua il
liquido toccato accidentalmente. In
caso di contatto con gli occhi ricorrere
inoltre all’assistenza di un medico.
Simboli riportati sull’apparecchio
Proteggere il caricabatterie da umidità e tenerlo in un luogo asciutto.
L'apparecchio si adatta alla pulizia di
ambienti interni. Non va esposto alla
pioggia.
Messa in funzione
Descrizione dell’apparecchio
Durante il disimballaggio controllare l'eventuale mancanza di accessori o la presenza
di danni del contenuto. Nel caso in cui si riscontrino danni dovuti al trasporto, informare immediatamente il proprio rivenditore.
Avviso:
Le illustrazioni relative all’apparecchio e
all’uso si trovano a pagina 2.
1 Giunto cardanico con dispositivo di
chiusura
2 Interruttore on/off a pedale
3 Accumulatore rimovibile
4 Accumulatore di ricambio
(solo EB 30/1 Adv)
5 Tasto di sbloccaggio, accumulatore
6 Contenitore dello sporco, rimovibile
7 Sbloccaggio, contenitore dello sporco
8 Carter
9 Rullo della spazzola, intercambiabile
10 Tasto di sbloccaggio, rullo della spaz-
zola
11 Manico regolabile in altezza
12 Impugnatura per regolare l'altezza
13 Impugnatura
14 Caricabatteria con indicatore stato di
carica e rispettivo cavo
(solo EB 30/1)
15 Caricabatterie rapido
(solo EB 30/1 Adv)
22 IT
– 2
Page 23
Montare sia il manico allungabile,
sia l'impugnatura e regolarne
l'altezza
vedi Figura 2
Il manico allungabile si compone di 3 parti.
Fare attenzione che durante il montaggio le
parti scattino in posizione.
Inserire l'impugnatura sul manico più
lungo dotato di manopola.
Unire il manico più lungo con quello più
corto, premendo il dispositivo di arresto.
Inserire il manico completo nello snodo
dell'apparecchio (il dispositivo di arresto deve essere rivolto in avanti).
Staccare l'impugnatura ed allungare il
manico per ottenere l'altezza operativa
desiderata. Girare l'impugnatura nella
corretta direzione e stringere la manopola.
Caricare l'accumulatore
vedi Figura 3
L'accumulatore non è carico al momento
della consegna. Caricarlo prima della messa in funzione e non appena è scarico.
Nota: L'accumulatore può essere caricato
solo quando si trova all'esterno della sede.
Collegare l'accumulatore usando il ri-
spettivo cavo e/o innestare l'accumulatore nel caricabatterie.
Inserire l'accumulatore in dotazione in
una presa conforme alle normative vi-
genti.
La spia verde dell'indicatore stato di carica
lampeggia. L'accumulatore si sta caricando.
Tempo di carica, accumulatore scarico
Caricabatterie
BC 1/0.5 6 h
BC 1/1.8 90 min
Nota
Quando l'accumulatore è completamente
carico, il caricabatterie passa alla modalità
carica di mantenimento. La spia verde
dell'indicatore stato di carica si accende.
Li-Ion
6.654-359.0
Visualizzazione errori
In caso di dubbi rivolgersi al servizio di assistenza clienti autorizzato.
: luce rossa
lampeggia
Inserire l'accumulatore
vedi Figura 4
Inserire l'accumulatore nell'apposita
sede fino allo scatto in posizione.
Funzionamento
Bloccare/sbloccare lateralmente il
manico telescopico
vedi Figura 5
Per la pulizia di tappeti a pelo alto è possibile bloccare il giunto cardanico per impedire lo spostamento laterale del manico telescopico.
– Bloccare lateralmente il manico tele-
scopico:
Attivare il dispositivo di chiusura, spin-
gerlo verso il basso ed agganciarlo.
– Sbloccare il manico telescopico:
Attivare il dispositivo di chiusura, spin-
gerlo verso l'alto ed agganciarlo.
Messa in funzione
vedi Figura 6
Accendere l'apparecchio premendo l'in-
terruttore on/off a pedale.
Spostare l'apparecchio in avanti e in-
dietro per effettuare la pulizia.
Usare il lato destro per le zone vicine ai
bordi (lato accumulatore).
Interrompere i lavori
vedi Figura 7
Spegnere l'apparecchio premendo l'in-
terruttore on/off a pedale.
Per ottenere una collocazione sicura,
posare il manico allungabile in posizio-
ne verticale. Un apposito dispositivo di
bloccaggio provvederà a tenerlo in po-
sizione.
– 3
23IT
Page 24

A lavoro terminato
Spegnere l'apparecchio a lavoro termi-
nato.
Svuotare il contenitore dello sporco
dopo ogni pulizia.
Premere il tasto di sbloccaggio dell'ac-
cumulatore e togliere lo stesso.
Caricare l'accumulatore.
Svuotare il contenitore dello sporco
vedi Figura 8
Sbloccare il contenitore dello sporco e
toglierlo.
Svuotare il serbatoio dello sporco.
Reinserire il contenitore dello sporco
fino allo scatto in posizione.
Deposito dell’apparecchio
L'apparecchio può essere appeso tra-
mite l'impugnatura. Se necessario girare l'impugnatura (vedi capitolo "Montare
e regolare in altezza il manico allungabile e l'impugnatura“).
Trasporto
몇 PRUDENZA
Pericolo di lesioni e di danneggiamento! Rispettare il peso dell'apparecchio durante il
trasporto.
Per il trasporto in veicoli, assicurare l'apparecchio secondo le direttive in vigore affinché non possa scivolare e ribaltarsi.
Supporto
몇 PRUDENZA
Pericolo di lesioni e di danneggiamento! Rispettare il peso dell'apparecchio durante la
conservazione.
Questo apparecchio può essere conservato solo in ambienti interni.
Cura e manutenzione
몇 PRUDENZA
Staccare l'accumulatore dall'apparecchio
prima di qualsiasi lavoro di cura e di manutenzione.
Pulizia dell’apparecchio
Pulire l’esterno dell’apparecchio con un
panno umido. Non usare sostanze ag-
gressive come ad esempio polvere
abrasiva.
Sostituire/pulire il rullo della
spazzola
vedi Figura 9
Premere il tasto di sbloccaggio e toglie-
re il rullo della spazzola.
Eliminare peli/capelli impigliati usando
preferibilmente un coltello o delle forbici
passando sopra l'apposito bordo di ta-
glio del rullo spazzola. Togliere i peli/ca-
pelli così staccati.
Inserire il rullo della spazzola pulita/
nuova e controllare la corretta posizio-
ne.
Assistenza
Garanzia
Le condizioni di garanzia valgono nel rispettivo paese di pubblicazione da parte
della nostra società di vendita competente.
Entro il termine di garanzia eliminiamo gratuitamente eventuali guasti all’apparecchio,
se causati da difetto di materiale o di produzione. Nei casi previsti dalla garanzia si
prega di rivolgersi al proprio rivenditore, oppure al più vicino centro di assistenza autorizzato, esibendo lo scontrino di acquisto.
Guida alla risoluzione dei guasti
몇 PRUDENZA
Disattivare l'apparecchio e rimuovere l'accumulatore prima di effettuare interventi
sull'apparecchio.
L'indicatore stato di carica non si accende
Controllare che il caricabatterie sia col-
legato correttamente all'accumulatore.
Controllare l'alimentazione di tensione
della presa.
24 IT
– 4
Page 25
L'apparecchio non pulisce in modo affidabile
Pulire/sostituire il rullo della spazzola
(vedi capitolo "Sostituire/pulire il rullo
della spazzola“).
Caricare l'accumulatore (vedi capitolo
"Caricare l'accumulatore“).
L'apparecchio espelle lo sporco
Svuotare il contenitore dello sporco.
(vedi capitolo "Svuotare il contenitore
dello sporco.“).
Servizio assistenza
In caso di domande o anomalie la filiale
KÄRCHER è felice di poterla aiutare. Indirizzo vedi retro.
Accessori e ricambi
Utilizzando solamente accessori e ricambi
originali, si garantisce un funzionamento sicuro e privo di disturbi dell'apparecchio.
Si possono trovare informazioni riguardo
ad accessori e ricambi su www.kaercher.com.
Accessori optional
Denominazione Codice N°
Caricabatterie rapido BC 1/1.8, 1x (Standard per EB 30/1 Adv)
EU/CH 6.654-190
GB 6.654-196
AU 6.654-201
Accumulatore di ri-
cambio Li-Ion
Rullo spazzola, modello mor-
bido, rosso
2,6Ah 4.654-328
4.762-401
Dichiarazione di conformità
UE
Con la presente si dichiara che la macchina
qui di seguito indicata, in base alla sua concezione, al tipo di costruzione e nella versione da noi introdotta sul mercato, è conforme ai requisiti fondamentali di sicurezza
e di sanità delle direttive UE. In caso di modifiche apportate alla macchina senza il nostro consenso, la presente dichiarazione
perde ogni validità.
Prodotto: Spazzola elettrica
Modelo: 1.545-xxx
Direttive UE pertinenti
2006/95/CE
2014/30/UE
2011/65/UE
Norme armonizzate applicate
EN 55014–1: 2006+A1: 2009+A2: 2011
EN 55014–2: 1997+A1: 2001+A2: 2008
EN 60335–1
EN 60335–2–10
EN 60335–2–29: 2004+A2: 2010
EN 61000–3–2: 2006+A1: 2009+A2: 2009
EN 61000–3–3: 2013
EN 62233: 2008
EN 50581
I firmatari agiscono su incarico e con la procura dell’amministrazione.
CEO
Responsabile della documentazione:
S. Reiser
Head of Approbation
Alfred Kärcher GmbH & Co. KG
Alfred-Kärcher-Str. 28 - 40
71364 Winnenden (Germany)
Tel.: +49 7195 14-0
Fax: +49 7195 14-2212
Winnenden, 2015/02/01
– 5
25IT
Page 26
Dati tecnici
Tipo accumulatore EB 30/1
Li-Ion
Tempo di funzionamento max. a carica massima (indipendentemente dal tipo di pavimento)
Tensione di lavoro, accumulatore V 7,2
Tensione di uscita caricabatterie V 4,2
Corrente di carica A 1,8
Potenza nominale W 25
Tensione di alimentazione caricabatterie
EU/CH V 230
GB V 230-240
AU V 240
Pressione acustica (EN 60704-2-1) dB(A) 56
Peso d'esercizio tipico kg 2,8
min 61
Hz 50 - 60
Hz 50 - 60
Hz 50-60
26 IT
– 6
Page 27
Lees vóór het eerste gebruik
van uw apparaat deze originele
gebruiksaanwijzing, ga navenant te werk
en bewaar hem voor later gebruik of voor
een latere eigenaar.
Inhoudsopgave
Reglementair gebruik . . . . . . . NL 1
Zorg voor het milieu . . . . . . . . NL 1
Gevarenniveaus . . . . . . . . . . . NL 1
Veiligheidsinstructies. . . . . . . . NL 2
Inbedrijfstelling . . . . . . . . . . . . NL 2
Werking. . . . . . . . . . . . . . . . . . NL 3
Vervoer . . . . . . . . . . . . . . . . . . NL 4
Opslag. . . . . . . . . . . . . . . . . . . NL 4
Onderhoud . . . . . . . . . . . . . . . NL 4
Service . . . . . . . . . . . . . . . . . . NL 4
Toebehoren en reserveonder-
delen . . . . . . . . . . . . . . . . . . . . NL 5
EU-conformiteitsverklaring . . . NL 5
Technische gegevens . . . . . . . NL 6
Reglementair gebruik
– Dit apparaat is uitsluitend bedoeld voor
bedrijfsmatig gebruik, bijv. in hotels,
scholen, ziekenhuizen, fabrieken, winkels, kantoren en verhuurbedrijven, met
door Kärcher goedgekeurde accessoires en onderdelen.
– Het apparaat is beperkt geschikt voor
hoogpolig tapijt.
– Het apparaat is niet geschikt voor een
natte ondergrond.
– Het apparaat is niet geschikt voor uit-
gewassen beton, grind en dergelijke.
Ieder daarboven uitgaand gebruik geldt als
niet volgens de voorschriften. Voor hieruit
resulterende schades is de fabrikant niet
aansprakelijk, het risico hiervoor draagt alleen de gebruiker.
Zorg voor het milieu
Het verpakkingsmateriaal is herbruikbaar. Deponeer het verpakkingsmateriaal niet bij het huishoudelijk afval, maar bied het
aan voor hergebruik.
Onbruikbaar geworden apparaten bevatten waardevolle materialen die geschikt zijn voor hergebruik. Lever de apparaten
daarom in bij een inzamelpunt
voor herbruikbare materialen.
Batterijen en accu's bevatten
stoffen die niet in het milieu mogen terechtkomen. Gelieve oude
apparaten, batterijen en accu's
in te leveren op de geschikte inzamelpunten.
Ingebouwde accu uit het toestel nemen
vooraleer het tot schroot verwerkt wordt en
milieuvriendelijk verwijderen!
Accu niet openen, er bestaat gevaar van
kortsluiting en er kunnen irriterende dampen of bijtende vloeitsoffen vrijkomen.
Aanwijzingen betreffende de inhoudsstoffen (REACH)
Huidige informatie over de inhoudsstoffen
vindt u onder:
www.kaercher.com/REACH
Gevarenniveaus
GEVAAR
Voor een onmiddellijk dreigend gevaar dat
leidt tot ernstige en zelfs dodelijke lichamelijke letsels.
몇 WAARSCHUWING
Voor een mogelijks gevaarlijke situatie die
zou kunnen leiden tot ernstige en zelfs dodelijke lichamelijke letsels.
몇 VOORZICHTIG
Verwijzing naar een mogelijk gevaarlijke situatie die tot lichte verwondingen kan leiden.
LET OP
Verwijzing naar een mogelijke gevaarlijke
situatie die tot materiële schade kan leiden.
– 1
27NL
Page 28
Veiligheidsinstructies
Naast de aanwijzingen in de gebruiksaanwijzingen moeten de algemene veiligheidsvoorschriften en voorschriften ter vermijding van ongevallen van de wetgever in
acht genomen worden.
Letselrisico
– Het apparaat bevat een draaiende bor-
stelrol, in geen geval tijdens het gebruik
vingers of gereedschap ertussen steken!
– Bij onderhouds- en reparatiewerkzaam-
heden van het apparaat eerst de accu
verwijderen!
Instructies betreffende accu en laad-
apparaat
– Het laden van de accu is uitsluitend toe-
gestaan met het meegeleverde origine-
le laadapparaat of met de door KÄR-
CHER goedgekeurde laadapparaten.
– Voor elk gebruik dient u het laadappa-
raat en het accupack op beschadigin-
gen te controleren. Beschadigde appa-
raten niet meer gebruiken en bescha-
digde onderdelen alleen door vaklieden
laten repareren.
– Laadapparaat niet in vervuilde of natte
toestand gebruiken.
– De netspanning moet met de op het
typeplaatje vermelde spanning over-
eenkomen.
– Laadapparaat niet in explosiegevaarlij-
ke omgeving gebruiken.
– Er mogen geen metalen voorwerpen te-
gen de contacten van de adapter wor-
den aangehouden: gevaar voor kort-
sluiting.
– Laadapparaat uitsluitend voor het opla-
den van goedgekeurde accupacks ge-
bruiken.
– Uitsluitend schone en droge accupacks
op de adapter van het laadapparaat
steken.
– Geen batterijen (primaire cellen) opla-
den, explosiegevaar.
– Geen beschadigde accupacks opladen.
Beschadigde accupacks vervangen.
– Accupacks niet samen met metalen
voorwerpen bewaren, gevaar voor kortsluiting.
– Accupacks niet in het vuur of in de vuil-
nisbak gooien.
– Vermijd het contact met uit defecte ac-
cu's uitlopende vloeistof. Bij toevallig
contact vloeistof met water afspoelen.
Bij contact met de ogen bovendien een
arts opzoeken.
Symbolen op het apparaat
Laadapparaat voor vocht beschermen en droog opslaan. Het apparaat
is uitsluitend voor het gebruik in binnenruimtes geschikt, stel het niet
bloot aan regen.
Inbedrijfstelling
Beschrijving apparaat
Controleer bij het uitpakken de inhoud van
de verpakking op ontbrekende toebehoren,
of beschadigingen. Neem bij transportschades contact op met uw leverancier.
Opmerking:
U vindt afbeeldingen van het apparaat en
de bediening ervan op pagina 2.
1 Cardankoppeling met vergrendeling
2 Voetschakelaar -Aan/Uit
3 Accu, uitneembaar
4 Vervangende accu
(uitsluitend EB 30/1 Adv)
5 Ontgrendelknop, accu
6 Vuilreservoir, uitneembaar
7 Ontgrendeling, vuilreservoir
8 Behuizing
9 Borstelrol, vervangbaar
10 Ontgrendelknop, borstelrol
11 Telescoopsteel, in hoogte verstelbaar
12 Draaigreep, voor hoogteverstelling
13 Handgreep
14 Laadapparaat met laadbedrijf-indicatie
en laadkabel
(uitsluitend EB 30/1)
15 Snellaadtoestel
(uitsluitend EB 30/1 Adv)
28 NL
– 2
Page 29

Telescopische steel en handgreep
monteren en hoogte instellen
zie afbeelding 2
De telescoopsteel bestaat uit 3 delen. Let
er bij het in elkaar zetten op dat de delen
vastklikken.
Handgreep op de langere steel met
draaigreep steken.
Langere en kortere steel in elkaar ste-
ken, hiervoor de vastklikknop bij het in
elkaar steken indrukken.
De in elkaar gezette steel met de vast-
klikknop naar voren in het koppelscharnier van het apparaat steken.
Maak de draaigreep los en trek de steel
uit tot een geschikte werkhoogte bereikt
is, draai de handgreep in de juiste stand
en draai de draaigreep vast.
Accu opladen
zie afbeelding 3
De accu is bij levering niet opgeladen. Voor
inbedrijfname en naar behoefte opladen.
Instructie: Het opladen van de batterij kan
alleen in verwijderde toestand gebeuren.
Batterij met laadtoestel door laadkabels
verbinden resp. batterij in laadtoestel
steken.
Het meegeleverde laadapparaat in een
geschikt stopcontact steken.
Aanduiding laadtoestand knippert groen.
De accu wordt geladen.
Oplaadtijd bij lege accu
Oplaadapparaat
BC 1/0.5 6 h
BC 1/1.8 90 min
Instructie
Indien de laadtijd overschreden wordt,
schakelt het laadtoestel over op ladingsbehoud. De laadbedrijf-indicatie brand groen.
Foutindicatie : knippert
rood
Wend u in geval van twijfel tot de geautoriseerde klantendienst.
Li-Ion
6.654-359.0
Accu plaatsen
zie afbeelding 4
Accu op zijn plaats schuiven en vast-
klikken.
Werking
Telescoopsteel zijdelings
vergrendelen/ontgrendelen
zie afbeelding 5
Voor het reinigen van hoogpolige tapijten
kan de cardankoppeling vergrendeld worden, om een zijdelingse beweging van de
telescoopsteel te verhinderen.
– Telescoopsteel zijdelings vergrende-
len:
Vergrendeling hanteren, naar beneden
schuiven en in elkaar sluiten.
– Telescoopsteel ontgrendelen:
Vergrendeling hanteren, naar boven
schuiven en in elkaar sluiten.
Werk beginnen
zie afbeelding 6
Apparaat inschakelen door op de voet-
schakelaar -Aan/Uit te drukken.
Voor het reinigen het apparaat voor- en
achteruit bewegen.
Voor het reinigen langs de randen de
rechte kant gebruiken (accukant).
Werk onderbreken
zie afbeelding 7
Apparaat uitzetten door op de voet-
schakelaar -Aan/Uit te drukken.
Voor een stabiele stand van de teles-
coopsteel bij werkpauzes zet u deze
rechtop neer, een vergrendeling zet
hem in deze positie vast.
Werk beëindigen
Na beëindiging van het werk zet u het
apparaat uit.
Na elke reinigingsbeurt het vuilreservoir
ledigen.
Ontgrendelknop van de accu indrukken
en de accu uitnemen.
Accu opladen.
– 3
29NL
Page 30
Vuilcontainer leegmaken
zie afbeelding 8
Vuilreservoir ontgrendelen en afnemen.
Vuilcontainer legen.
Vuilreservoir weer plaatsen en vastklik-
ken.
Apparaat opslaan
Het apparaat kan aan de handgreep
worden opgehangen, als nodig de
handgreep draaien (zie hiervoor het
hoofdstuk „Telescoopsteel en handgreep monteren en in hoogte verstellen“).
Vervoer
몇 VOORZICHTIG
Gevaar voor letsels en beschadigingen!
Houd bij het transport rekening met het gewicht van het apparaat.
Bij het transport in voertuigen moet het apparaat conform de geldige richtlijnen beveiligd worden tegen verschuiven en kantelen.
Opslag
몇 VOORZICHTIG
Gevaar voor letsel en beschadiging! Het
gewicht van het apparaat bij opbergen in
acht nemen.
Het apparaat mag alleen binnen worden
opgeborgen.
Onderhoud
몇 VOORZICHTIG
Voor alle verzorgings- en onderhoudswerken aan het apparaat de accu verwijderen.
Reiniging van het apparaat
Wis de buitenkant van het apparaat met
een vochtige doek af. Gebruik geen
agressieve middelen, zoals bijvoorbeeld schuurpoeder.
Borstelrol vervangen / reinigen
zie afbeelding 9
Ontgrendelknop indrukken en borstelrol
uitnemen.
Haren die om de rol gewikkeld zitten,
worden het best met een mes of een
schaar verwijderd, door langs de hier-
voor bedoelde snijrand van de borstel-
rol te rijden. Verwijder de losgemaakte
haren van de borstelrol.
Gereinigde c.q. nieuwe borstelrol weer
inzetten en controleren of deze goed
vastzit.
Service
Garantie
In ieder land zijn de door ons bevoegde
verkoopkantoor uitgegeven garantiebepalingen van toepassing. Eventuele storingen
aan het apparaat verhelpen wij zonder kosten binnen de garantietermijn, mits een materiaal of fabrieksfout de oorzaak van deze
storing is. Neem bij klachten binnen de garantietermijn contact op met uw leverancier
of de dichtstbijzijnde klantenservicewerkplaats en neem uw aankoopbewijs mee.
Hulp bij storingen
몇 VOORZICHTIG
Voor alle werkzaamheden aan het apparaat, het apparaat uitschakelen en de accu
verwijderen.
Laadbedrijf-indicatie brandt niet
Verbinding van het laadapparaat met
de accu controleren.
Controleren of het stopcontact wel
spanning heeft.
Apparaat maakt niet goed schoon
Borstelrol reinigen c.q. vervangen (zie
hoofdstuk „Borstelrol vervangen/reini-
gen“).
Accu opladen (zie hoofdstuk „Accu op-
laden“).
Er wordt vuil uit het apparaat geslingerd
Vol vuilreservoir leegmaken (zie hoofd-
stuk „Vuilreservoir ledigen“).
30 NL
– 4
Page 31

Klantenservice
Bij vragen of storingen helpt onze KÄRCHER-filiaal u graag verder. Adres zie achterzijde.
Toebehoren en
reserveonderdelen
Gebruik alleen origineel toebehoren en originele reserveonderdelen. Deze garanderen dat het apparaat veilig en zonder storingen functioneert.
Informatie over het toebehoren en de reserveonderdelen vindt u op www.kaercher.com.
Extra toebehoren
Benaming Bestelnr.
Accusnellaadapparaat BC 1/1.8, enkelvoudig (Standaard bij EB 30/1 Adv)
EU/CH 6.654-190
GB 6.654-196
AU 6.654-201
Vervangende accu Li-
Ion
Borstelwals, zacht, rood 4.762-401
2,6Ah 4.654-328
EU-conformiteitsverklaring
Hierbij verklaren wij dat de hierna vermelde
machine door haar ontwerp en bouwwijze
en in de door ons in de handel gebrachte
uitvoering voldoet aan de betreffende fundamentele veiligheids- en gezondheidseisen, zoals vermeld in de desbetreffende
EU-richtlijnen. Deze verklaring verliest haar
geldigheid wanneer zonder overleg met
ons veranderingen aan de machine worden
aangebracht.
Product: Elektrische borstel
Type: 1.545-xxx
Van toepassing zijnde EU-richtlijnen
2006/95/EG
2014/30/EU
2011/65/EU
Toegepaste geharmoniseerde normen
EN 55014–1: 2006+A1: 2009+A2: 2011
EN 55014–2: 1997+A1: 2001+A2: 2008
EN 60335–1
EN 60335–2–10
EN 60335–2–29: 2004+A2: 2010
EN 61000–3–2: 2006+A1: 2009+A2: 2009
EN 61000–3–3: 2013
EN 62233: 2008
EN 50581
De ondergetekenden handelen in opdracht
en met volmacht van de bedrijfsleiding.
CEO
Gevolmachtigde voor de documentatie:
S. Reiser
Alfred Kärcher GmbH & Co. KG
Alfred Kärcher-Str. 28 - 40
71364 Winnenden (Germany)
Tel.: +49 7195 14-0
Fax: +49 7195 14-2212
Winnenden, 2015/02/01
– 5
Head of Approbation
31NL
Page 32

Technische gegevens
Accutype EB 30/1
Li-Ion
Max. bedrijfstijd bij volle batterijlading (afhankelijk van vloerbedekking)
Bedrijfsspanning accu V 7,2
Uitgangsspanning van het laadapparaat V 4,2
Laadstroom A 1,8
Nominaal vermogen W 25
Netspanning van het laadapparaat
EU/CH V 230
GB V 230-240
AU V 240
Geluidsdrukniveau (EN 60704-2-1) dB(A) 56
Typisch bedrijfsgewicht kg 2,8
min 61
Hz 50 - 60
Hz 50 - 60
Hz 50-60
32 NL
– 6
Page 33

Antes del primer uso de su apa-
rato, lea este manual original,
actúe de acuerdo a sus indicaciones y
guárdelo para un uso posterior o para otro
propietario posterior.
Índice de contenidos
Uso previsto . . . . . . . . . . . . . . ES 1
Protección del medio ambiente ES 1
Niveles de peligro . . . . . . . . . . ES 1
Indicaciones de seguridad . . . ES 2
Puesta en marcha. . . . . . . . . . ES 2
Funcionamiento . . . . . . . . . . . ES 3
Transporte. . . . . . . . . . . . . . . . ES 4
Almacenamiento . . . . . . . . . . . ES 4
Cuidados y mantenimiento . . . ES 4
Servicio . . . . . . . . . . . . . . . . . . ES 4
Accesorios y piezas de repuestoES 5
Declaración UE de conformidadES 5
Datos técnicos . . . . . . . . . . . . ES 6
Uso previsto
– Este aparato es apto para el uso en
aplicaciones industriales, como en hoteles, escuelas, hospitales, fábricas,
tiendas, oficinas y negocios de alquiler,
con los accesorios y piezas de repuesto
de Kärcher.
– El aparato sólo es apto para alfombras
de pelo alto en casos puntuales.
– El aparato no es appto para pavimen-
tos húmedos.
– El aparato no es apto para hormigón la-
vado, grava o similares.
Cualquier uso diferente a éstos se considerá un uso no previsto. El fabricante no se
hace responsable de los daños causados
por un uso no previsto; el usuario será el
único que correrá con este riesgo.
Protección del medio
ambiente
Los materiales empleados para
el embalaje son reciclables y recuperables. No tire el embalaje a
la basura doméstica y entréguelo en los puntos oficiales de recogida para su reciclaje o recuperación.
Los aparatos viejos contienen
materiales valiosos reciclables
que deberían ser entregados para
su aprovechamiento posterior.
Las baterías y los acumuladores
contienen sustancias que no deben entrar en contacto con el medio ambiente. Por este motivo, entregue los aparatos usados, las
baterías y acumuladores en los
puntos de recogida previstos para
su reciclaje.
Antes de desguazar el aparato retire la batería integrada y elimínela de forma respetuosa con el medio ambiente.
No abrir la batería, hay peligro de que se
produzca un cortocircuito, adicionalmente
puede producirse la salida de vapores irritantes o líquidos corrosivos.
Indicaciones sobre ingredientes
(REACH)
Encontrará información actual sobre los ingredientes en:
www.kaercher.com/REACH
Niveles de peligro
PELIGRO
Para un peligro inminente que acarrea lesiones de gravedad o la muerte.
몇 ADVERTENCIA
Para una situación que puede ser peligrosa, que puede acarrear lesiones de gravedad o la muerte.
몇 PRECAUCIÓN
Indicación sobre una situación que puede
ser peligrosa, que puede acarrear lesiones
leves.
CUIDADO
Aviso sobre una situación probablemente
peligrosa que puede provocar daños materiales.
– 1
33ES
Page 34

Indicaciones de seguridad
Además de las indicaciones contenidas en
este manual de instrucciones, deben respetarse las normas generales vigentes de
seguridad y prevención de accidentes.
Peligro de lesiones
– El aparato tiene cepillos giratorios, ¡no
los toque, bajo ningún concepto, con
los dedos ni con una herramienta
mientras estén en funcionamiento!
– ¡Retire la batería antes de realizar tra-
bajos de conservación y mantenimien-
to!
Indicaciones sobre la batería y el
cargador
– Sólo está permitido cargar la batería
con el cargador original suministrado o
con el cargador autorizado por KÄR-
CHER.
– Compruebe si el cargador y batería es-
tán dañados antes de usarlo. No vuelva
a usar los aparatos dañados y encar-
gue sólo al personal técnico que repare
las piezas dañadas.
– No utilizar el cargador si está sucio o
húmedo.
– La tensión de red tiene que coincidir
con la indicada en la placa de caracte-
rísticas del cargador.
– No utilizar el cargador en un ambiente
con peligro de explosión.
– No deben entrar piezas de metal en los
contactos del adaptador, puede provo-
car un cortocircuito.
– Utilice el cargador sólo para cargar la
batería permitida.
– Insertar sólo baterías limpias y secas
en el adaptador del cargador.
– No cargar baterías (células primarias),
riesgo de explosión.
– No cargar baterías defectuosas. Susti-
tuir las baterías defectuosas.
– No guardar las baterías con objetos
metálicos, puede provocar un cortocir-
cuito.
– No tirar las baterías al fuego ni a la ba-
sura doméstica.
– Evitar entrar en contacto con el líquido
que sale de baterías defectuosas. Si
entra en contacto con el líquido, enjuagar con agua. Si entra en contacto con
los ojos consultar también a un médico.
Símbolos en el aparato
Proteger el cargador de la humedad
y guardar en un sitio seco El aparato
sólo es apto para el uso en interiores, no exponerlo a la lluvia.
Puesta en marcha
Descripción del aparato
Cuando desempaque el contenido del paquete, compruebe si faltan accesorios o si
el aparato presenta daños. Informe a su
distribuidor en caso de detectar daños ocasionados durante el transporte.
Nota:
Las ilustraciones del aparato y de su manejo se encuentran en la página 2.
1 Articulación cardan con bloqueo
2 Interruptor de pedal de conexión y des-
conexión
3 Batería, extraíble
4 Batería de repuesto
(sólo EB 30/1 Adv)
5 Botón de desbloqueo, batería
6 Recipiente para suciedad, extraíble
7 Desbloqueo, recipiente para suciedad
8 Carcasa
9 Cepillo rotativo, cambiable
10 Botón de desbloqueo, cepillo rotativo
11 Mango telescópico, de altura regulable
12 Empuñadura giratoria, para ajuste ver-
tical
13 Mango
14 Cargador con indicador de carga y ca-
ble
(sólo EB 30/1)
15 Cargador rápido
(sólo EB 30/1 Adv)
34 ES
– 2
Page 35

Montar el mango telescópico y el
mango de mano y ajustar la altura
véase la figura 2
El mango telescópico tiene 3 partes. Cuando lo monte procure que encajen bien.
Insertar el mango para mano sobre el
mango largo con la empuñadura giratoria.
Unir el mango largo y el corto, presionar
para ello el botón de enganche.
Insertar el mango completo con el bo-
tón de enganche hacia delante en la
parte articulada del aparato.
Soltar la empuñadura giratoria y ex-
traerla hasta la posición de trabajo deseada, girar el mango en la posición correcta y apretar la empuñadura giratoria.
Cargar la batería
véase la figura 3
La batería no viene cargada. Cargar antes
de la puesta en marcha y siempre que lo
necesite.
Indicación: Se puede cargar la batería
sólo cuando está fuera del aparato.
Conectar la batería con el cargador me-
diante el cable de carga o insertar la batería en el cargador.
Introducir el cargador suministrado en
el enchufe de forma correcta.
El indicador de funcionamiento de carga
parpadea en verde. Se carga la batería.
Tiempo de carga cuando la batería esté
vacía
Cargador Li-Ion
6.654-359.0
BC 1/0.5 6 h
BC 1/1.8 90 min
Nota
Si se sobrepasa el tiempo de carga, el cargador pasa a carga de mantenimiento. El
piloto indicador de carga está iluminado en
verde.
Mensaje de
error
En caso de duda, dirigirse al servicio de
atención al cliente autorizado.
: parpedeo
en rojo
Colocar la batería
véase la figura 4
Insertar la batería en el alojamiento y
encajar.
Funcionamiento
Bloquear/desbloquear el mango
telescópico en el lateral
véase la figura 5
Para limpiar alfombras de pelo alto, se puede bloquear la articulación de cardan, para
evitar el movimiento lateral del mango telescópico.
– Bloquear el mango telescópico en el la-
teral:
Confirmar el bloqueo, deslizar hacia
abajo y encajar.
– Desbloquear el mango telescópico:
Confirmar el bloqueo, deslizar hacia
arriba y encajar.
Comenzar el trabajo
véase la figura 6
Encender el aparato, pulse para ello el
interruptor de conexión y desconexión.
Para limpiar mueva el aparato hacia de-
lante y hacia atrás.
Para limpiar las zonas cercanas a las
esquinas, utilice el lateral derecho (late-
ral de la batería).
Interrumpir el trabajo
véase la figura 7
Apagar el aparato, pulse para ello el in-
terruptor de conexión y desconexión.
Cuando realice pausas durante el tra-
bajo, coloque el mango telescópico ver-
ticalmente, un dispositivo de bloqueo lo
mantendrá en esta posición.
Finalizar el trabajo
Cuando finalice el trabajo apague el
aparato.
Vacíe el depositivo para suciedad des-
pués de cada limpieza.
Presione el botón de desbloqueo y ex-
traer la batería.
Cargar la batería.
– 3
35ES
Page 36

Vaciar el depósito acumulador de
suciedad
véase la figura 8
Desbloquear y extraer el depósito para
suciedad.
Vacíe el depósito acumulador de sucie-
dad.
Colocara e insertar de nuevo el depósi-
to.
Almacenamiento del aparato
El aparato se puede colgar del mango,
si es necesario gírelo (véase el capítulo
„Montar el mango telescópico y el mango de mano y ajustar la altura“).
Transporte
몇 PRECAUCIÓN
¡Peligro de lesiones y daños! Respetar el
peso del aparato para el transporte.
Al transportar en vehículos, asegurar el
aparato para evitar que resbale y vuelque
conforme a las directrices vigentes.
Almacenamiento
몇 PRECAUCIÓN
¡Peligro de lesiones y daños! Respetar el
peso del aparato en el almacenamiento.
Este aparato sólo se puede almacenar en
interiores.
Cuidados y mantenimiento
몇 PRECAUCIÓN
Antes de realizar los trabajos de conservación y mantenimiento en el aparato, quite la
batería.
Limpieza del aparato
Limpie el exterior del aparato con un
paño húmedo. No utilice agentes abrasivos (como, p. ej., polvos de fregar).
Cambio/limpieza del cepillo rotativo
véase la figura 9
Presionar el botón de desbloqueo y ex-
traer el cepillo rotativo.
Para retirar los pelos que estén engan-
chados se puede utilizar un cuchillo o
unas tijeras. Cortar a lo largo del canto
de corte del cepillo rotativo. Elimine los
pelos sueltos del cepillo.
Colocar de nuevo los cepillos rotativos
nuevos o limpios y comprobar si está
bien encajados.
Servicio
Garantía
En todos los países rigen las condiciones
de garantía establecidas por nuestra empresa distribuidora. Las averías del aparato
serán subsanadas gratuitamente dentro
del periodo de garantía, siempre que se deban a defectos de material o de fabricación.
En un caso de garantía, le rogamos que se
dirija con el comprobante de compra al distribuidor donde adquirió el aparato o al servicio al cliente autorizado más próximo a su
domicilio.
Ayuda en caso de avería
몇 PRECAUCIÓN
Antes de efectuar cualquier trabajo en el
aparato, hay que desconectarlo y sacar las
baterías.
El indicador de carga no se ilumina
Verifique la conexión entre cargador y
batería.
Comprobar el suministro de energía de
la clavija de enchufe.
El aparato no limpia bien.
Limpiar o cambiar el cepillo rotativo
(véase el capítulo "Cambiar/limpiar el
cepillo rotativo")
Cargar la batería (véase el capítulo
"Cargar la batería").
El aparato lanza suciedad hacia afuera.
Vaciar el recipiente cuando esté lleno
(véase el capítulo "Vaciar el recipiente
acumulador de suciedad").
36 ES
– 4
Page 37

Servicio de atención al cliente
En caso de dudas o alteraciones, la sucursal de KÄRCHER estará encantada de
ayudarle. La dirección figura al dorso.
Accesorios y piezas de
repuesto
Utilice solamente accesorios y recambios
originales, ya que garantizan un funcionamiento correcto y seguro del equipo.
Puede encontrar información acerca de los
accesorios y recambios en www.kaercher.com.
Accesorios especiales
denominación Nº de pedi-
do
Cargador rápido BC 1/1.8, simple (estándar para EB 30/1 Adv)
EU/CH 6.654-190
GB 6.654-196
AU 6.654-201
Batería de repuesto
Li-Ion
Cepillo rotativo, suave, rojo 4.762-401
2,6Ah 4.654-328
Declaración UE de
conformidad
Por la presente declaramos que la máquina designada a continuación cumple, tanto
en lo que respecta a su diseño y tipo constructivo como a la versión puesta a la venta
por nosotros, las normas básicas de seguridad y sobre la salud que figuran en las directivas comunitarias correspondientes. La
presente declaración perderá su validez en
caso de que se realicen modificaciones en
la máquina sin nuestro consentimiento explícito.
Producto: Escoba eléctrica
Modelo: 1.545-xxx
Directivas comunitarias aplicables
2006/95/CE
2014/30/UE
2011/65/UE
Normas armonizadas aplicadas
EN 55014–1: 2006+A1: 2009+A2: 2011
EN 55014–2: 1997+A1: 2001+A2: 2008
EN 60335–1
EN 60335–2–10
EN 60335–2–29: 2004+A2: 2010
EN 61000–3–2: 2006+A1: 2009+A2: 2009
EN 61000–3–3: 2013
EN 62233: 2008
EN 50581
Los abajo firmantes actúan con plenos poderes y con la debida autorización de la dirección de la empresa.
CEO
Persona autorizada para la documentación:
S. Reiser
Alfred Kärcher GmbH & Co. KG
Alfred-Kärcher-Str. 28 - 40
71364 Winnenden (Germany)
Tele.: +49 7195 14-0
Fax: +49 7195 14-2212
Winnenden, 2015/02/01
– 5
Head of Approbation
37ES
Page 38

Datos técnicos
Tipo de batería EB 30/1
Li-Ion
Tiempo máx. de servicio con la batería llena (dependiendo del tipo
de pavimento)
Tensión de trabajo de la batería V 7,2
Corriente de salida del cargador V 4,2
Corriente de carga A 1,8
Potencial nominal W 25
Tensión de red del cargador
EU/CH V 230
GB V 230-240
AU V 240
Nivel de presión acústica (EN 60704-2-1) dB(A) 56
Peso de funcionamiento típico kg 2,8
min 61
Hz 50 - 60
Hz 50 - 60
Hz 50-60
38 ES
– 6
Page 39

Leia o manual de manual origi-
nal antes de utilizar o seu aparelho. Proceda conforme as indicações no
manual e guarde o manual para uma consulta posterior ou para terceiros a quem
possa vir a vender o aparelho.
Índice
Utilização conforme o fim a que
se destina a máquina . . . . . . . PT 1
Proteção do meio-ambiente . . PT 1
Níveis de perigo . . . . . . . . . . . PT 1
Avisos de segurança. . . . . . . . PT 2
Colocação em funcionamento PT 2
Funcionamento . . . . . . . . . . . . PT 3
Transporte. . . . . . . . . . . . . . . . PT 4
Armazenamento . . . . . . . . . . . PT 4
Conservação e manutenção . . PT 4
Assistência técnica . . . . . . . . . PT 4
Acessórios e peças sobressa-
lentes . . . . . . . . . . . . . . . . . . . PT 5
Declaração UE de conformida-
de . . . . . . . . . . . . . . . . . . . . . . PT 5
Dados técnicos . . . . . . . . . . . . PT 6
Utilização conforme o fim a
que se destina a máquina
– Este aparelho, juntamente com os
acessórios e peças sobressalentes da
Kärcher, destina-se ao uso industrial, p.
ex. em hotéis, escolas, hospitais, fábricas, lojas, escritórios e lojas à exploração.
– O uso do aparelho em tapetes felpudos
é limitado.
– O aparelho não é adequado para pavi-
mentos molhados.
– O aparelho não é adequado para betão
lavado, brita ou similar.
Qualquer outra utilização, para além das
aqui indicadas, é considerada como não
conforme com as disposições legais. O fabricante não pode ser responsabilizado por
danos daí resultantes. Os riscos devidos a
essa utilização indevida são da exclusiva
responsabilidade do utilizador.
Proteção do meio-ambiente
Os materiais da embalagem são
recicláveis. Não coloque as embalagens no lixo doméstico, envie-as para uma unidade de reciclagem.
Os aparelhos velhos contêm
materiais preciosos e recicláveis
e deverão ser reutilizados. Pilhas e baterias acumuladoras
contêm materiais que não devem entrar em contacto com o
meio-ambiente. Por isso, elimine os aparelhos velhos, as pilhas e baterias acumuladoras
(recarregáveis) através de sistemas de recolha de lixo adequados.
Retirar a bateria acumuladora do aparelho
antes de o encaminhar para a eliminação e
eliminar de forma compatível com o meioambiente!
Não abrir a bateria acumuladora, uma
vez que existe o perigo de um curto-circuito
e, adicionalmente, podem ser evacuados
líquidos ou vapores irritantes ou corrosivos.
Avisos sobre os ingredientes (REACH)
Informações actuais sobre os ingredientes
podem ser encontradas em:
www.kaercher.com/REACH
Níveis de perigo
PERIGO
Para um perigo eminente que pode conduzir a graves ferimentos ou à morte.
몇 ATENÇÃO
Para uma possível situação perigosa que
pode conduzir a graves ferimentos ou à
morte.
몇 CUIDADO
Aviso referente a uma situação potencialmente perigosa que pode causar ferimentos leves.
ADVERTÊNCIA
Aviso referente a uma situação potencialmente perigosa que pode causar danos
materiais.
– 1
39PT
Page 40

Avisos de segurança
Juntamente com os avisos do manual de
instruções deve respeitar igualmente as regras gerais de segurança e de prevenção
de acidentes em vigor.
Perigo de lesão
– O aparelho está equipado com um cilin-
dro de escova rotativo. Durante o fun-
cionamento, não introduza os dedos ou
ferramentas sob quaisquer circunstân-
cias!
– Remova a bateria acumuladora antes
de efectuar trabalhos de manutenção e
conservação.
Avisos relativos à bateria acumula-
dora e ao carregador
– O carregamento da bateria acumulado-
ra só é permitido com o carregador ori-
ginal incluído no volume de fornecimen-
to, ou com carregadores devidamente
autorizados pela KÄRCHER.
– Controlar antes de cada utilização o
carregador e a bateria acumuladora
quanto a eventuais danos. Não utilizar
aparelhos danificados e requerer a re-
paração de aparelhos avariados so-
mente por técnicos especializados de-
vidamente autorizados.
– Não utilizar o carregador em estado hú-
mido ou sujo.
– A tensão de rede deve estar em confor-
midade com a tensão indicada na placa
de características do carregador.
– Não utilizar o carregador em ambientes
potencialmente explosivos.
– Manter afastadas dos contactos do
adaptador quaisquer peças metálicas,
de modo a evitar o risco de um curto-
circuito.
– Utilizar o carregador somente para car-
regar as baterias acumuladoras autori-
zadas.
– Colocar somente baterias limpas e se-
cas no adaptador do carregador.
– Não carregar pilhas (células primárias)
- Perigo de explosão.
– Não carregar baterias acumuladoras
danificadas. Substituir as baterias acu-
muladoras danificadas.
– Não guardar ou armazenar as baterias
acumuladoras juntamente com objectos metálicos - perigo de curto-circuito.
– Não atirar as baterias acumuladoras
para fogueiras ou eliminá-las no lixo doméstico.
– Evitar o contacto com o líquido prove-
niente de baterias acumuladoras danificadas. Na eventualidade de contacto
com esse líquido deve-se proceder
imediatamente à lavagem da zona
afectada com água. Em caso de contacto com os olhos deve-se consultar
adicionalmente um médico.
Símbolos no aparelho
Proteger o carregador contra humidade e guardar num local seco. O
aparelho destina-se somente à utilização em espaços fechados. Não
expor o aparelho à chuva.
Colocação em funcionamento
Descrição da máquina
Verifique o conteúdo da embalagem a respeito de acessórios não incluídos ou danos. No caso de danos provocados durante o transporte, informe o seu revendedor.
Aviso:
na página 2 encontra ilustrações do aparelho e da utilização.
1 Cardan com bloqueio
2 Interruptor de pé Ligar/Desligar
3 Bateria acumuladora amovível
4 Bateria acumuladora de substituição
(apenas EB 30/1 Adv)
5 Botão de desbloqueio, bateria acumu-
ladora
6 Recipientes de sujidade, amovível
7 Desbloqueio do recipiente de sujidade
8 Carcaça
9 Cilindro da escova, substituível
10 Botão de desbloqueio do cilindro da es-
cova
11 Barra telescópica, ajustável em altura
12 Manípulo rotativo para ajuste em altura
13 Punho
40 PT
– 2
Page 41

14 Carregador com indicação de funciona-
mento em carga e cabo de carregamento
(apenas EB 30/1)
15 Aparelho de carregamento rápido
(apenas EB 30/1 Adv)
Montar a barra telescópica e o
punho e ajustá-los em altura
ver figura 2
A barra telescópica é composta por 3 partes. Durante a montagem deve ter-se em
atenção que essas partes encaixem correctamente.
Encaixar o punho na barra mais longa
com o manípulo rotativo.
Unir a barra mais curta com a barra
mais comprida, premindo para o efeito
o botão de encaixe.
Encaixar a barra completa, com o botão
de encaixe virado para a frente, na articulação do aparelho.
Soltar o manípulo rotativo e puxar a
barra para a altura de trabalho desejada, rodar o punho para a posição correcta e fixar o manípulo rotativo.
Carregar a bateria acumuladora
ver figura 3
A bateria acumuladora não está carregada
em estado de fornecimento. Carregar antes da colocação em funcionamento e
sempre que necessário.
Aviso: O carregamento da bateria só pode
ser efectuado em estado desmontado.
Ligar a bateria acumuladora com o
cabo de carregamento ao carregador
resp., colocar a bateria acumuladora no
carregador.
Ligar o carregador incluído no volume
de fornecimento a uma tomada.
A indicação de funcionamento em carga
pisca a verde. A bateria acumuladora é carregada.
Tempo de carga de uma bateria acumuladora vazia
Carregador Li-Ion
6.654-359.0
BC 1/0.5 6 h
BC 1/1.8 90 min
Aviso
Se o tempo de carga for excedido, o carregador comuta automaticamente para o
modo de carregamento de manutenção.
Na indicação de funcionamento em carga
brilha uma luz verde.
Indicação de erros : pisca em vermelho
Em caso de dúvidas, contactar o serviço de
assistência técnica autorizado.
Inserir a bateria acumuladora
ver figura 4
Inserir a bateria acumuladora no aloja-
mento e encaixá-la.
Funcionamento
Bloquear/desbloquear a barra
telescópica lateralmente
ver figura 5
Para a limpeza de tapetes felpudos é possível bloquear o cardan, de modo a evitar
um movimento lateral da barra telescópica.
– Bloquear barra telescópica lateralmente:
Accionar bloqueio, deslocar para baixo
e encravar.
– Desbloquear a barra telescópica:
Accionar bloqueio, deslocar para cima
e encravar.
Iniciar o trabalho
ver figura 6
Ligar o aparelho, premindo para o efei-
to o interruptor de pé Ligar/Desligar.
Para proceder à limpeza deve-se deslo-
car o aparelho para a frente e para trás.
Para trabalhos próximos de bordas
deve-se utilizar o lado direito do apare-
lho (lado da bateria acumuladora).
Interromper trabalho
ver figura 7
Desligar o aparelho, premindo para o
efeito o interruptor de pé Ligar/Desligar.
De modo a assegurar um posiciona-
mento seguro da barra telescópica du-
rante as pausas de trabalho, deve-se
colocar a mesma numa posição verti-
cal. Um dispositivo de fixação mantém
a barra nesta posição.
– 3
41PT
Page 42

Terminar trabalho
Desligar o aparelho no fim do trabalho.
Esvaziar o recipiente de sujidade após
cada limpeza.
Premir o botão de desbloqueio da bate-
ria acumuladora e retirá-la.
Carregar a bateria acumuladora.
Esvaziar o recipiente de sujidade
ver figura 8
Desbloquear e retirar o recipiente de
sujidade.
Esvaziar o recipiente de sujidade.
Inserir novamente o recipiente de suji-
dade e fixá-lo.
Guardar a máquina
O aparelho pode ser colocado numa
posição suspensa através do punho, o
qual, se necessário, pode ser rodado
(ver capítulo "Montar a barra telescópica e o punho e ajustá-los em altura“).
Transporte
몇 CUIDADO
Perigo de ferimentos e de danos! Ter atenção ao peso do aparelho durante o transporte.
Durante o transporte em veículos, proteger
o aparelho contra deslizes e tombamentos,
de acordo com as directivas em vigor.
Armazenamento
몇 CUIDADO
Perigo de ferimentos e de danos! Ter atenção ao peso do aparelho durante o armazenamento.
Este aparelho só pode ser armazenado em
espaços fechados e cobertos.
Conservação e manutenção
몇 CUIDADO
Antes de quaisquer intervenções de conservação e manutenção no aparelho deve
retirar a bateria acumuladora.
Limpeza do aparelho
Limpar o aparelho por fora com um
pano húmido. Não utilizar produtos
agressivos como, p. ex., pó abrasivo.
Substituir/limpar o cilindro da
escova
ver figura 9
Premir o botão de desbloqueio e retirar
o cilindro da escova.
Cabelos enrolados são facilmente re-
movidos com uma faca ou tesoura atra-
vés de uma deslocação na margem de
corte do cilindro da escova. Remover
os cabelos soltos do cilindro da escova.
Aplicar um cilindro de escova novo ou
limpo e verificar a sua fixação e posicio-
namento correcto.
Assistência técnica
Garantia
Em cada país vigem as respectivas condições de garantia estabelecidas pelas nossas Empresas de Comercialização. Eventuais avarias no aparelho durante o período de garantia serão reparadas, sem encargos para o cliente, desde que se trate
dum defeito de material ou de fabricação.
Em caso de garantia, dirija-se, munido do
documento de compra, ao seu revendedor
ou ao Serviço Técnico mais próximo.
Ajuda em caso de avarias
몇 CUIDADO
Desligar o aparelho e retirar a bateria acumuladora antes de efectuar quaisquer trabalhos no aparelho.
A indicação de funcionamento em carga não acende
Verificar a ligação entre o carregador e
a bateria acumuladora.
Verificar a alimentação eléctrica da to-
mada.
O aparelho não limpa correctamente
Limpar ou substituir o cilindro da esco-
va (ver capítulo "Substituir/limpar o ci-
lindro da escova“).
Carregar a bateria acumuladora (ver
capítulo "Carregar a bateria acumula-
dora“).
42 PT
– 4
Page 43

O aparelho lança sujidade para fora
Esvaziar o recipiente de sujidade cheio
(ver capítulo "Esvaziar o recipiente de
sujidade“).
Serviço de assistência técnica
Em caso de dúvidas ou avarias, a nossa filial KÄRCHER local está à sua disposição.
Endereços no verso.
Acessórios e peças
sobressalentes
Utilizar apenas acessórios e peças sobressalentes originais. Só assim poderá garantir uma operação do aparelho segura e sem
avarias.
Para mais informações sobre acessórios e
peças sobressalentes, consulte www.kaercher.com.
Acessórios especiais
Denominação N.º de en-
comenda
Aparelho de carregamento rápido BC 1/
1.8, singular (padrão com EB 30/1 Adv)
EU/CH 6.654-190
GB 6.654-196
AU 6.654-201
Bateria acumuladora
de substituição Li-Ion
Escova rotativa (cilindro), ma-
cia, vermelha
2,6Ah 4.654-328
4.762-401
Declaração UE de
conformidade
Declaramos que a máquina a seguir designada corresponde às exigências de segurança e de saúde básicas estabelecidas
nas Directivas UE por quanto concerne à
sua concepção e ao tipo de construção assim como na versão lançada no mercado.
Se houver qualquer modificação na máquina sem o nosso consentimento prévio, a
presente declaração perderá a validade.
Produto: Vassoura eléctrica
Tipo: 1.545-xxx
Respectivas Directrizes da UE
2006/95/CE
2014/30/UE
2011/65/UE
Normas harmonizadas aplicadas
EN 55014–1: 2006+A1: 2009+A2: 2011
EN 55014–2: 1997+A1: 2001+A2: 2008
EN 60335–1
EN 60335–2–10
EN 60335–2–29: 2004+A2: 2010
EN 61000–3–2: 2006+A1: 2009+A2: 2009
EN 61000–3–3: 2013
EN 62233: 2008
EN 50581
Os abaixo assinados têm procuração para
agirem e representarem a gerência.
CEO
Responsável pela documentação:
S. Reiser
Alfred Kärcher GmbH & Co. KG
Alfred-Kärcher-Str. 28 - 40
71364 Winnenden (Germany)
Tel.: +49 7195 14-0
Fax: +49 7195 14-2212
Winnenden, 2015/02/01
– 5
Head of Approbation
43PT
Page 44

Dados técnicos
Tipo de acumulador EB 30/1
Li-Ion
Tempo de operação máx. com bateria totalmente carregada (dependente do pavimento)
Tensão de trabalho da bateria acumuladora V 7,2
Tensão de saída do carregador V 4,2
Corrente de carga A 1,8
Potência nominal W 25
Tensão de rede do carregador
EU/CH V 230
GB V 230-240
AU V 240
Nível de pressão acústica (EN 60704-2-1) dB(A) 56
Peso de funcionamento típico kg 2,8
min 61
Hz 50 - 60
Hz 50 - 60
Hz 50-60
44 PT
– 6
Page 45

Læs original brugsanvisning in-
den første brug, følg anvisningerne og opbevar vejledningen til senere
efterlæsning eller til den næste ejer.
Indholdsfortegnelse
Bestemmelsesmæssig anven-
delse . . . . . . . . . . . . . . . . . . . . DA 1
Miljøbeskyttelse . . . . . . . . . . . DA 1
Faregrader . . . . . . . . . . . . . . . DA 1
Sikkerhedsanvisninger . . . . . . DA 2
Ibrugtagning . . . . . . . . . . . . . . DA 2
Drift . . . . . . . . . . . . . . . . . . . . . DA 3
Transport. . . . . . . . . . . . . . . . . DA 4
Opbevaring . . . . . . . . . . . . . . . DA 4
Pleje og vedligeholdelse . . . . . DA 4
Service . . . . . . . . . . . . . . . . . . DA 4
Tilbehør og reservedele . . . . . DA 5
EU-overensstemmelses-erklæ-
ring . . . . . . . . . . . . . . . . . . . . . DA 5
Tekniske data . . . . . . . . . . . . . DA 6
Bestemmelsesmæssig
anvendelse
– Denne maskine er egnet til erhvervs-
mæssig brug, f.eks. på hoteller, skoler,
sygehuse, fabrikker, butikker, kontorer
og udlejningsvirksomheder.
– Denne maskine er betinget velegnet til
høj luvet tæppe
– Denne maskine er ikke velegnet til
våde gulve.
– Maskinen er ikke egnet til frilægnings-
beton, grus eller lignende.
Enhver anvendelse, der går herudover,
gælder som ikke-bestemmelsesmæssig.
Producenten er ikke ansvarlig for skader,
der måtte opstå som følge heraf; risikoen er
brugerens alene.
Miljøbeskyttelse
Emballagen kan genbruges.
Smid ikke emballagen ud sammen med det almindelige husholdningsaffald, men aflever den
til genbrug.
Udtjente apparater indeholder
værdifulde materialer, der kan
og bør afleveres til genbrug.
Akku'er og batterier indeholder
stoffer, der ikke må komme ud i
naturen. Aflever derfor udtjente
apparater, batterier og akkuer på
en genbrugsstation eller lignende.
Fjern det integrerede batteri inden maskinen
skrottes og bortskaf batteriet miljørigtigt!
Batteriet må ikke åbnes, der er fare for en
kortslutning, yderligere kan der udtræde irriterende dampe eller ætsende væsker.
Henvisninger til indholdsstoffer
(REACH)
Aktuelle oplysninger til indholdsstoffer finder du på:
www.kaercher.com/REACH
Faregrader
FARE
En umiddelbar truende fare, som kan føre
til alvorlige personskader eller død.
몇 ADVARSEL
En muligvis farlig situation, som kan føre til
alvorlige personskader eller til død.
몇 FORSIGTIG
Henviser til en mulig farlig situation, der kan
føre til lette personskader.
BEMÆRK
Henviser til en mulig farlig situation, der kan
føre til materiel skade.
– 1
45DA
Page 46

Sikkerhedsanvisninger
Ud over anvisningerne i denne brugsanvisning skal lovens generelle sikkerheds- og
ulykkesforebyggelsesforskrifter overholdes.
Risiko for tilskadekomst!
– Maskinen har en drejende børstevalse,
grib aldrig ind i maskinen med fingrene
eller med værktøj under driften!
– Fjern akkuer før vedligeholdelses- og
servicearbejder på maskinen!
Henvisninger til akkuer og opladeap-
paratet
– Opladningen af akkuer er kun tilladt
med vedlagte original oplader eller op-
ladere som er blevet godkendt af KÄR-
CHER.
– Kontroller opladeapparatet og akkuer
før hver brug med hensyn til skader.
Brug ingen apparater der har skader og
lad parter med skader kun sætte i stand
fra kvalificeret personale.
– Brug opladeapparatet ikke i en tilsmud-
set eller våd tilstand.
– Netspændingen skal svare til den
spænding som angives på opladeappa-
ratets mærkeskilt.
– Brug opladeapparatet ikke i områder
der er eksplosionstruet.
– Adapteren må ikke komme i kontakt med
metalgenstande, kortslutningsfare.
– Brug opladeapparatet kun til opladning
af godkendte akkuer.
– Sæt kun rene og tørre akkuer på opla-
deapparatets adapter.
– Oplad ingen batterier (primærceller),
eksplosionsfare.
– Oplad ingen akkuer der har skader.
Skift beskadigede akkuer ud.
– Opbevar akkuer ikke sammen med me-
talgenstande, kortslutningsfare.
– Kast ingen akkuer ind i ild eller i hus-
holdningsaffald.
– Undgå kontakt med væsker som slipper
ud af beskadigede akkuer. Skyld væ-
sken af med med vand ved tilfældig
kontakt. Ved kontakt med øjnene kon-
takt yderligere en læge.
Symboler på apparatet
Beskyt opladeapparatet imod fugtighed og opbevar det tørt. Maskinen er
kun egnet til indendørsbrug, udsæt
maskinen ikke for regn.
Ibrugtagning
Beskrivelse af apparat
Kontroller pakningens indhold for manglende tilbehør eller beskadigelser, når den
pakkes ud. Kontakt Deres forhandler i tilfælde af transportskader.
Bemærk:
Illustrationer af apparatet og betjeningen
findes på side 2.
1 Kardanled med låsemekanisme
2 Tænd-/sluk fodkontakt
3 Akku, udtageligt
4 Skifteakku
(kun EB 30/1 Adv)
5 Udløsningsknap, akku
6 Snavsbeholder, udtageligt
7 Udløsning, snavsbeholder
8 Hus
9 Børstevalse, udtageligt
10 Udløsningsknap, børstevalse
11 Teleskopskaft, højdejusterbar
12 Drejehåndtag til højdejustering
13 Håndtag
14 Opladeapparat med driftsindikator og
ladekabel
(kun EB 30/1)
15 Hurtig-oplader
(kun EB 30/1 Adv)
46 DA
– 2
Page 47

Monter teleskopskaftet og
håndtaget og juster højden
se figur 2
Teleskopskaftet består af 3 dele. Ved sammensætning hold øje med at delene går i
hak.
Sæt håndtaget på det længere skaft
med drejehåndtag.
Sæt det længere og kortere skaft sam-
men, tryk hertil på låseknappen under
sammensætningen.
Sæt hele skaftet med låseknappen for-
an ind i maskinens led.
Løsn drejehåndtaget og træk skaftet ud
til den ønskede længde, drej håndtaget
til den rigtige position og skru håndtaget
fast.
Oplade akkuer
se figur 3
Akkuer er ikke opladet ved leveringen. Oplad før ibrugtagningen eller efter behov.
Bemærk: Akkuer kan kun oplades i udtaget tilstand.
Forbind opladeren og akkuet med lade-
kablet, henholdsvis sæt akkuet i ladeaggregatet.
Stik det vedlagte opladeapparat i en
stikdåse.
Opladeindikatoren blinker grønt. Akkuer lades.
Opladetid ved tomt akku
Oplader Li-Ion
6.654-359.0
BC 1/0.5 6 h
BC 1/1.8 90 min
OBS
Hvis opladningstiden overskrides, går opladeapparatet i opretholdelsestilstand. Opladeindikatoren lyser grønt.
Fejlvisning : blinker
rødt
Hvis du er i tvivl, så henvend dig til vores
autoriserede kundeservice.
Isæt akku
se figur 4
Skub akku ind i holderen og lad det å i
hak.
Drift
Låse/åbne teleskopskaftet fra siden
se figur 5
Til rengøring af gulvtæpper med høj luv og
for at forhindre, at teleskopskaftet bevæger
sig til siden, kan kardanleddet låses.
– Låse teleskopskaftet fra siden:
Tryk på låsemekanismen, skub den
nedad og lad den gå i hak.
– Åbne teleskopskaftet:
Tryk på låsemekanismen, skub den
opad og lad den gå i hak.
Starte arbejdet
se figur 6
Tænd maskinen, tryk hertil tænd/sluk
fodkontakten.
Til rengøring, bevæg maskinen fremad
og tilbage.
Brug den højre side for at rengøre nær
ved kanterne (akkuside).
Afbryde arbejdet
se figur 7
Slukke maskinen, tryk hertil tænd/sluk
fodkontakten.
Stil teleskopskaftet lodret i arbejdspau-
ser for en sikker stand, en låseanord-
ning holder skaftet i denne position.
Afslutte arbejdet
Sluk maskinen hvis arbejdet er afsluttet.
Tøm snavsbeholderen efter hver ren-
gøring.
Tryk på akkuets udløsningsknap og
fjern det.
Oplade akkuer
– 3
47DA
Page 48

Tømme snavsbeholderen
se figur 8
Udløs snavsbeholderen og tag den ud.
Tøm smudsbeholderen.
Sæt snavsbeholderen tilbage og lad
den gå i hak.
Opbevaring af apparatet
Maskinen kan hænges op på håndta-
get, drej håndtaget hvis det bliver nødvendigt (se hertil kapitel "Montere teleskopskaftet og håndtaget og justere
højden").
Transport
몇 FORSIGTIG
Fare for person- og materialeskader! Hold
øje med maskinens vægt ved transporten.
Ved transport i biler skal renseren fastspændes i.h.t. gældende love.
Opbevaring
몇 FORSIGTIG
Fare for person- og materialeskader! Hold
øje med maskinens vægt ved opbevaring.
Denne maskine må kun opbevares indendørs.
Pleje og vedligeholdelse
몇 FORSIGTIG
Fjern altid akkuer før service- og vedligeholdelsesarbejder.
Rengøring af apparatet
Tør maskinen af udvendigt med en fug-
tig klud. Brug ikke aggressive midler
som f.eks. skurepulver.
Skifte/rense børstevalsen
se figur 9
Tryk på udløsningsknappen og tag bør-
stevalsen ud.
Omviklede hår fjernes bedst med en
kniv eller en saks idet du kører langs på
børstevalsens skæringskant. Fjern løs-
nede hår fra børstevalsen.
Sæt den rensede/nye børstevalse i og
kontroller om den sidder rigtigt.
Service
Garanti
I de enkelte lande gælder de af vore forhandlere fastlagte garantibetingelser.
Eventuelle fejl på apparatet afhjælpes gratis inden for garantien, såfremt fejlen kan tilskrives en materiale- eller produktionsfejl.
Hvis De ønsker at gøre garantien gældende, bedes De henvende Dem til Deres forhandler eller nærmeste kundeservice medbringende kvittering for købet.
Hjælp ved fejl
몇 FORSIGTIG
Tag batterierne ud og afbryd maskinen inden der arbejdes på maskinen.
Driftsindikatoren lyser ikke
Kontroller forbindelsen fra opladeappa-
ratet til akku.
Kontroller stikdåsens spændingsforsy-
ning.
Maskinen renser ikke pålideligt
Rens/udskift børstevalsen (se kapitel
"Udskifte/rense børstevalsen").
Oplade akkuer (se kapitel "Oplade ak-
kuer").
Snavs slynges ud af maskinen
Tøm den opfyldte snavsbeholder (se
kapitel "Tøm snavsbeholderen").
48 DA
– 4
Page 49

Kundeservice
Vores KÄRCHER-afdeling hjælper gerne,
hvis De har spørgsmål, eller der er fejl på
støvsugeren. Se adressen på bagsiden.
Tilbehør og reservedele
Anvend kun originaltilbehør og -reservedele. De er en garanti for en sikker og fejlfri
drift af maskinen.
Informationer om tilbehør og reservedele
findes www.kaercher.com
Ekstratilbehør
Navn Bestil-
lingsnr.
Hurtig-ladeaggregat BC 1/1.8, enkelt
(standard ved EB 30/1 Adv)
EU/CH 6.654-190
GB 6.654-196
AU 6.654-201
Skifteakku Li-Ion 2,6Ah 4.654-328
Børstevalse, blød, rødt 4.762-401
EU-overensstemmelses-
erklæring
Hermed erklærer vi, at den nedenfor nævnte maskine i design og konstruktion og i den
af os i handlen bragte udgave overholder
de gældende grundlæggende sikkerhedsog sundhedskrav i EU-direktiverne. Ved
ændringer af maskinen, der foretages uden
forudgående aftale med os, mister denne
erklæring sin gyldighed.
Produkt: El-kost
Type: 1.545-xxx
Gældende EU-direktiver
2006/95/EF
2014/30/EU
2011/65/EU
Anvendte harmoniserede standarder
EN 55014–1: 2006+A1: 2009+A2: 2011
EN 55014–2: 1997+A1: 2001+A2: 2008
EN 60335–1
EN 60335–2–10
EN 60335–2–29: 2004+A2: 2010
EN 61000–3–2: 2006+A1: 2009+A2: 2009
EN 61000–3–3: 2013
EN 62233: 2008
EN 50581
Undertegnede agerer på vegne af og med
fuldmagt fra ledelsen.
CEO
Dokumentationsbefuldmægtiget:
S. Reiser
Alfred Kärcher GmbH & Co. KG
Alfred-Kärcher-Str. 28 - 40
71364 Winnenden (Germany)
Tlf.: +49 7195 14-0
Fax: +49 7195 14-2212
Winnenden, 2015/02/01
– 5
Head of Approbation
49DA
Page 50

Tekniske data
Akkutype EB 30/1
Li-Ion
Maks. driftstid ved fuld akkuladning (afhængig af gulvbelægningen) min 61
Arbejdspænding akku V 7,2
Opladeapparatets udgangsspænding V 4,2
ladestrøm A 1,8
Nominel ydelse W 25
Opladeapparatets netspænding
EU/CH V 230
Hz 50 - 60
GB V 230-240
Hz 50 - 60
AU V 240
Hz 50-60
Lydtryksniveau (EN 60704-2-1) dB(A) 56
Typisk driftsvægt kg 2,8
50 DA
– 6
Page 51

Før første gangs bruk av appa-
ratet, les denne originale bruksanvisningen, følg den og oppbevar den for
senere bruk eller for overlevering til neste
eier.
Innholdsfortegnelse
Forskriftsmessig bruk . . . . . . . NO 1
Miljøvern . . . . . . . . . . . . . . . . . NO 1
Risikotrinn . . . . . . . . . . . . . . . . NO 1
Sikkerhetsanvisninger. . . . . . . NO 2
Ta i bruk . . . . . . . . . . . . . . . . . NO 2
Drift . . . . . . . . . . . . . . . . . . . . . NO 3
Transport. . . . . . . . . . . . . . . . . NO 4
Lagring . . . . . . . . . . . . . . . . . . NO 4
Pleie og vedlikehold . . . . . . . . NO 4
Service . . . . . . . . . . . . . . . . . . NO 4
Tilbehør og reservedeler. . . . . NO 5
EU-samsvarserklæring . . . . . . NO 5
Tekniske data . . . . . . . . . . . . . NO 6
Forskriftsmessig bruk
– Denne maskinen egner seg til industri-
elt bruk, f.eks. i hoteller, skoler, sykehus, fabrikker, butikker, kontorer og utleiefirmaer, med ekstrautstyr og reservedeler godkjent av Kärcher.
– Maskinen er godt egnet til langflossede
tepper.
– Maskinen er ikke egnet for våte gulv.
– Maskinen er ikke egnet for våtromsbe-
tong, steingulv og lignende.
All bruk ut over dette anses som ikke i tråd
med hensikten med apparatet. Produsenten fraskriver seg ansvar for skader som
skyldes slik bruk - denne risikoen hviler på
brukeren alene.
Miljøvern
Materialet i emballasjen kan resirkuleres. Ikke kast emballasjen
i husholdningsavfallet, men lever den inn til resirkulering.
Gamlle apparater inneholder
verdifulle materialer som kan
gjenbrukes og som bør sendest
til gjenbruk. Akkumulatorene
inneholder stoffer som ikke må
komme ut i miljøet. Gamle apparater, batterier og akkumulatorer
skal derfor avhendes i egnede
innsamlingssystemer.
Fjern monterte batterier før kassering av
apparatet, og deponer dem på en miljøvennlig måte!
Ikke åpne batteriet, det er fare for kortslutning, i tillegg kan irriterende damper eller
etsende væsker strømme ut.
Anvisninger om innhold (REACH)
Aktuell informasjon om stoffene i innholdet
finner du under:
www.kaercher.com/REACH
Risikotrinn
FARE
For en umiddelbar truende fare som kan
føre til store personskader eller til død.
몇 ADVARSEL
For en mulig farlig situasjon som kan føre til
store personskader eller til død.
몇 FORSIKTIG
Anvisning om en mulig farlig situasjon som
kan føre til mindre personskader.
OBS
Anvisning om en mulig farlig situasjon som
kan føre til materielle skader.
– 1
51NO
Page 52

Sikkerhetsanvisninger
I tillegg til anvisningene i bruksveiledningen
må det tas hensyn til lokale, generelle forskrifter vedrørende sikkerhet og forebygging av ulykker.
Fare for personskader
– Maskinen inneholder roterende børster,
stikk ikke under noen omstendigheter
finger eller verktøy inn i maskinen når
den går!
– Ved pleie og vedlikehold av maskinen
skal batteriene tas ut!
Anvisninger for batteri og ladeapparat
– Lading av batteriene skal kun gjøres
med vedlagte originale ladeapparat el-
ler annet ladeapparat godkjent av KÄR-
CHER.
– Før all bruk skal ladeapparat og batteri-
pakke kontrolleres for skader. Skadede
apparater skal ikke brukes, skadede
deler skal bare repareres av fagfolk.
– Bruk ikke ladeapparat i skitten eller våt
tilstand.
– Nettspenningen må stemme overens
med angitt spenning på typeskiltet på
ladeapparatet.
– Ladeapparatet skal ikke brukes i ek-
splosjonsfarlige omgivelser.
– Det skal ikke komme metalldeler bort i
kontakten på batteriholderen, fare for
kortslutning.
– Ladeapparatet skal bare brukes til la-
ding av godkjente batteripakker.
– Sett bare rene og tørre batteripakker
inn i adapteren på ladeapparatet.
– Ikke lad opp vanlige batterier (primær-
celler), fare for eksplosjon.
– Ikke lad skadede batteripakker. Skift ut
skadede batteripakker.
– Ikke oppbevar batteripakker sammen
med metalldeler, fare for kortslutning.
– Kast ikke batteripakker i ilden eller i
husholdningsavfall.
– Unngå kontakt med væske som komm-
mer ut av defekte batterier. Ved ufrivillig
kontakt må du straks skylle bort væs-
ken ved hjelp av vann. Ved kontakt med
øynene skal du kontakte lege.
Symboler på maskinen
Beskytt ladeapparatet mot fuktighet
og lagre det tørt. Apparatet er bare
egnet for bruk innendørs, må ikke utsettes for regn.
Ta i bruk
Beskrivelse av apparatet
Kontroller ved utpakkingen at innholdet i
pakken er komplett og uskadd. Kontakt din
forhandler ved eventuelle transportskader.
Merk:
Illustrasjoner av maskinen og betjeningen
av den finner du på side 2.
1 Kardangledd med låsing
2 Av/på fotbryter
3 Avtagbart batteri
4 Reservebatteri
(kun EB 30/1 Adv)
5 Låseknapp batteri
6 Avtagbar smussbeholder
7 Lås, smussbeholder
8 Hus
9 Skiftbar børstevalse
10 Låseknapp, børstevalse
11 Teleskopskaft, regulerbart
12 Dreiehåndtak for høyderegulering
13 Håndtak
14 Ladeapparat med indikator for ladepro-
sessen og ladekabel
(kun EB 30/1)
15 Hurtigladeapparat
(kun EB 30/1 Adv)
52 NO
– 2
Page 53

Montere og stille inn teleskopskaft
og håndtak
se figur 2
Teleskopskaft består av 3 deler. Pass på at
delene går i lås ved monteringen.
Håndtaket settes på det lange skaftet
med dreiegrep.
Sett sammen langt og kort skaft ved å
trykke inn låseknappen når de trykkes
mot hverandre.
Komplett skaft settes med låseknappen
foran inn i leddet på maskinen.
Løsne dreiegrepet og trekk ut til ønsket
arbeidshøyde, drei håndtak til riktig stilling og skru fast dreiegrepet.
Lade opp batteri
se figur 3
Batteriet er ikke ladet opp ved levering.
Skal lades før bruk og ved behov.
Merk: Lading av batteriet kan bare gjøres
med batteriet tatt ut.
Batteriet kobles til ladeapparatet via la-
dekabel, eller sett batteriet i ladeapparatet.
Vedlagte ladeapparat settes inn i en
vanlig stikkontakt.
Ladeprosess-indikatoren blinker grønt.
Batteriet lades.
Ladetid ved tomt batteri
Batterilader
BC 1/0.5 6 h
BC 1/1.8 90 min
Anvisning
Dersom ladetiden overskrides går ladeapparatet over til vedlikeholdslading. Ladeindikatoren lyser grønt.
Feilvisning : blinker
rødt
I tvilstilfeller, kontakt autorisert kundeservice.
Li-Ion
6.654-359.0
Sette inn batteri
se figur 4
Skyv batteriet inn i holderen og la det gå
i lås.
Drift
Låse/åpne teleskophåndtak
sideveis
se figur 5
For rengjøring av tepper med lang floss kan
kardangleddet låses for å forhindre sideveis bevegelse av teleskophåndtaket.
– Låse telsekophåndtak sideveis:
Trykk inn låsen, skyv ned og la den gå i lås.
– Åpne teleskophåndtak:
Trykk inn låsen, skyv opp og la den gå i lås.
Begynne arbeidet
se figur 6
Slå på maskinen ved å trykke på på/av
fotbryteren.
Beveg maskinen frem og tilbake ved
rengjøringen.
For rengjøring langs kanter bruk høyre
side (batterisiden).
Avbryte arbeidet
se figur 7
Slå av maskinen ved å trykke på på/av
fotbryteren.
For sikker plassering av teleskopskaftet
ved arbeidspauser settes det i loddrett
posisjon, en låsing vil da holde det på
plass.
Avslutting av arbeidet
For å avslutte arbeidet slås maskinen
av.
Smussbeholderen skal tømmes etter
hver rengjøring.
Trykk inn låseknappen for batteriet og
ta ut batteriet.
Lad opp batteriet.
– 3
53NO
Page 54

Tømming av beholderen
se figur 8
Lås opp smussbeholderen og ta den ut.
Tøm smussbeholderen.
Sett inn igjen smussbeholderen og la
den gå i lås.
Oppbevaring av apparatet
Maskinen kan henges opp etter håndta-
ket, om nødvendig dreies håndtaket (se
kapittel "Montere og stille inn teleskopskaft og håndtak").
Transport
몇 FORSIKTIG
Fare for personskader og materielle skader! Pass på vekten av apparatet ved transport.
Ved transport i kjøretøyer skal apparatet
sikres mot å skli eller velte etter de til enhver tid gjeldende regler.
Lagring
몇 FORSIKTIG
Fare for personskader og materielle skader! Pass på vekten av apparatet ved lagring.
Dette apparatet skal kun lagres innendørs.
Pleie og vedlikehold
몇 FORSIKTIG
Ta ut batteriet før alle stell- og vedlikeholdarbeider.
Rengjøring av apparatet
Tørk apparatet utvendig med en fuktig
klut. Ikke bruk aggressive vaskemidler
(som f. eks. skurepulver).
Skifte/rengjøre børstevalse
se figur 9
Trykk på låseknappen og ta ut børste-
valsen.
Fjerne fastviklede hår, helst ved hjelp
av kniv eller saks som føres langs den
angitte kanten av børstevalsen. Fjern
løsnede hår fra børstevalsen.
Sett inn rengjort eller ny børstevalse,
kontroller at den sitter godt fast.
Service
Garanti
Vår ansvarlige salgsorganisasjon for det
enkelte land har utgitt garantibetingelsene
som gjelder i det aktuelle landet. Eventuelle
feil på maskinen blir reparert gratis i garantitiden dersom disse kan føres tilbake til
material- eller produksjonsfeil. Ved behov
for garantireparasjoner, vennligst henvend
deg med kjøpskvitteringen til din forhandler
eller nærmeste autoriserte kundeservice.
Feilretting
몇 FORSIKTIG
Før alt arbeid på apparatet skal apparatet
slås av og batteri tas ut.
Ladeprosessindikatoren lyser ikke
Kontroller forbindelse mellom ladeap-
parat og batteri.
Kontroller at det er spenning til stikkon-
takten.
Maskinen rengjør ikke riktig
Rengjør eller skift børstevalse (se kapit-
tel "Rengjøre/skifte børstevalse").
Lad opp batteri (se kapittel "Lade batte-
ri").
Det slynges smuss ut av maskinen
Tøm full smussbeholder (se kapittel
"Tømme smussbeholder").
54 NO
– 4
Page 55

Kundetjeneste
Våre Kärcher-avdelinger hjelper deg gjerne
ved feil eller om du har spørsmål. Se baksiden for adressen.
Tilbehør og reservedeler
Bruk bare originalt tilbehør og originale reservedeler; de garanterer for en sikker og
problemfri drift av maskinen.
Informasjon om tilbehør og reservedeler
finner du på www.kaercher.com.
Tilleggsutstyr
Betegnelse Bestil-
lingsnr.
Hurtiglader BC 1/1.8, 1-spor (standard for
EB 30/1 Adv)
EU/CH 6.654-190
GB 6.654-196
AU 6.654-201
Reservebatteri Li-Ion 2,6Ah 4.654-328
Børstevalse, myk, rød 4.762-401
EU-samsvarserklæring
Vi erklærer hermed at maskinen angitt nedenfor oppfyller de grunnleggende sikkerhets- og helsekravene i de relevante EU-direktivene, med hensyn til både design, konstruksjon og type markedsført av oss. Ved
endringer på maskinen som er utført uten
vårt samtykke, mister denne erklæringen
sin gyldighet.
Produkt: Elektrobørster
Type: 1.545-xxx
Relevante EU-direktiver
2006/95/EF
2014/30/EU
2011/65/EU
Anvendte overensstemmende normer
EN 55014–1: 2006+A1: 2009+A2: 2011
EN 55014–2: 1997+A1: 2001+A2: 2008
EN 60335–1
EN 60335–2–10
EN 60335–2–29: 2004+A2: 2010
EN 61000–3–2: 2006+A1: 2009+A2: 2009
EN 61000–3–3: 2013
EN 62233: 2008
EN 50581
De undertegnede handler på oppdrag fra,
og med fullmakt fra selskapsledelsen.
CEO
Dokumentasjonsansvarlig:
S. Reiser
Alfred Kärcher GmbH & Co. KG
Alfred-Kärcher-Str. 28 - 40
71364 Winnenden (Germany)
Tlf: +49 7195 14-0
Faks: +49 7195 14-2212
Winnenden, 2015/02/01
– 5
Head of Approbation
55NO
Page 56

Tekniske data
Batteritype EB 30/1
Li-Ion
Maks. driftstid ved fullt ladet batteri (avhengig av gulvbelegg) min 61
Arbeidsspenning batteri V 7,2
Utgangsspenning på ladeapparat V 4,2
Ladestrøm A 1,8
Nominell effekt W 25
Nettspenning til ladeapparat
EU/CH V 230
Hz 50 - 60
GB V 230-240
Hz 50 - 60
AU V 240
Hz 50-60
Lydtrykksnivå (EN 60704-2-1) dB(A) 56
Typisk driftsvekt kg 2,8
56 NO
– 6
Page 57

Läs bruksanvisning i original
innan aggregatet används första
gången, följ anvisningarna och spara driftsanvisningen för framtida behov, eller för
nästa ägare.
Innehållsförteckning
Ändamålsenlig användning. . . SV 1
Miljöskydd . . . . . . . . . . . . . . . . SV 1
Risknivåer . . . . . . . . . . . . . . . . SV 1
Säkerhetsanvisningar . . . . . . . SV 2
Idrifttagning . . . . . . . . . . . . . . . SV 2
Drift . . . . . . . . . . . . . . . . . . . . . SV 3
Transport. . . . . . . . . . . . . . . . . SV 4
Förvaring. . . . . . . . . . . . . . . . . SV 4
Skötsel och underhåll . . . . . . . SV 4
Service . . . . . . . . . . . . . . . . . . SV 4
Tillbehör och reservdelar. . . . . SV 4
EU-försäkran om överensstäm-
melse . . . . . . . . . . . . . . . . . . . SV 5
Tekniska data . . . . . . . . . . . . . SV 6
Ändamålsenlig användning
– Denna maskin är avsedd för yrkesmäs-
sig användning, t.ex. på hotell, i skolor,
på sjukhus, i fabriker, i butiker och på
kontor samt hos uthyrningsfirmor.
– Apparaten är delvis lämplig för långhå-
riga mattor.
– Apparaten är inte lämplig för våta golv-
beläggningar.
– Apparaten är inte lämplig för tvättbe-
tong, grus eller liknande.
All annan användning betraktas som ej föreskriftsmässig. Tillverkaren ansvarar inte
för skador som orsakats av sådan användning; användaren bär ensam ansvaret.
Miljöskydd
Emballagematerialen kan återvinnas. Kasta inte emballaget i
hushållssoporna utan lämna det
till återvinning.
Förbrukade apparater innehåller
delar som kan återvinnas, de bör
därför föras till recycling. Batterier, engångs och uppladdningsbara, innehåller ämnen, som inte
får komma ut i miljön. Överlämna därför kasserade apparater
och batterier till lämpligt återvinningssystem.
Ta bort det inbyggda batteriet innan apparaten skrotas och ta om hand detta på ett
miljövänligt sätt!
Öppna inte batteriet, risk för kortslutning,
dessutom kan irriterande ångor eller frätande vätska läcka ut.
Upplysningar om ingredienser (REACH)
Aktuell information om ingredienser finns
på:
www.kaercher.com/REACH
Risknivåer
FARA
För en omedelbart överhängande fara som
kan leda till svåra skador eller döden.
몇 VARNING
För en möjlig farlig situation som kan leda
till svåra skador eller döden.
몇 FÖRSIKTIGHET
Varnar om en möjligen farlig situation som
kan leda till lättare personskador.
OBSERVERA
Varnar om en möjligen farlig situation som
kan leda till materiella skador.
– 1
57SV
Page 58

Säkerhetsanvisningar
Förutom anvisningarna i bruksanvisningen
ska gällande allmänna säkerhets- och
olycksfallsföreskrifter beaktas.
Risk för skada
– Apparaten innehåller roterande borst-
valsar. Stoppa aldrig in fingrar eller
verktyg under drift!
– Vid underhålls- och servicearbete på
apparaten tas batteriet först bort!
Anvisningar beträffande uppladd-
ningsbart batteri och laddare
– Laddning av batteriet får endast ske
med medföljande originalladdare eller
av KÄRCHER godkända laddare.
– Före varje användning kontrolleras lad-
dare och uppladdningsbart batteri så att
dessa är felfria. Använd inte skadade
apparater och låt endast fackpersonal
reparera skadade delar.
– Använd inte laddaren när den är smut-
sig eller fuktig.
– Nätspänningen måste överensstämma
med på laddarens typskylt angiven
spänning.
– Använd inte laddaren på platser där det
finns risk för explosion.
– Inga metalldelar får hamna på adap-
terns kontakter, risk för kortslutning.
– Laddaren får endast användas för ladd-
ning av godkända, uppladdningsbara
batterier.
– Lägg endast rena och torra batterier i
laddarens adapter.
– Ladda inte engångsbatterier (primär-
batterier), risk för explosion.
– Ladda inte skadade, uppladdningsbara
batterier. Byt ut skadade batterier.
– Förvara inte batterier tillsammans med
metallföremål, risk för kortslutning.
– Kasta inte batterierna i eld eller hus-
hållssopor.
– Undvik kontakt med vätska som kom-
mer ur defekta batterier. Spola bort
vätskan med vatten vid oavsiktlig kon-
takt. Kontakta läkare om vätska hamnar
i ögonen.
Symboler på apparaten
Skydda laddaren mot väta och förvara den torrt. Apparaten är endast avsedd för användning inomhus. Utsätt
den inte för regn.
Idrifttagning
Beskrivning av aggregatet
Kontrollera vid uppackningen att inga tillbehör saknas eller är skadade. Kontakta återförsäljaren om skador uppkommit vid transporten.
Hänvisning:
Bilder på apparat och hantering finns på sidan 2.
1 Kardangelenk mit Verriegelung
2 Fotreglage Till/Från
3 Uppladdningsbart batteri, uttagbart
4 Utbytesbatteri
(endast EB 30/1 Adv)
5 Upplåsningsknapp, batteri
6 Smutsbehållare, uttagbar
7 Upplåsning, smutsbehållare
8 Hölje
9 Borstvals, utbytbar
10 Upplåsningsknapp, borstvals
11 Teleskoprör, justerbart i höjd
12 Vridreglage, för justering av höjd
13 Handtag
14 Laddare med laddningsdisplay och
laddkabel
(endast EB 30/1)
15 Snabbladdare
(endast EB 30/1 Adv)
58 SV
– 2
Page 59

Montera teleskoprör och handtag
samt ställ in höjd
se bild 2
Teleskopröret består av tre delar. Se vid
montering till att delarna hakar fast ordentligt.
Sätt handtaget på det längre röret med
vridreglage.
Sätt ihop längre och kortare rör, tryck
på spärren vid ihopsättningen.
Placera komplett ihopsatt rör, med
spärren riktad framåt, i den ledade delen på apparaten.
Lossa vridreglaget och drag ut röret till
önskad arbetshöjd, vrid handtaget till
rätt position och skruva till vridreglaget.
Ladda det uppladdningsbara
batteriet
se bild 3
Batteriet är inte laddat vid leverans. Ladda
före ibruktagning och vid behov.
Observera: Batteriet kan bara laddas när
det är urtaget..
Förbind batteri och laddare med hjälp
av laddkabel, alt. lägg batteriet i laddaren.
Medföljande laddare ansluts till godkänt
vägguttag.
Laddningsdisplayen blinkar grönt. Batteriet
laddas upp.
Laddtid vid tomt batteri
Laddare Li-Ion
6.654-359.0
BC 1/0.5 6 h
BC 1/1.8 90 min
Hänvisning
Överskrids laddningstiden går laddaren
över till underhållsladdning. Laddningsdisplayen lyser grönt.
Felindikering : blinkar
rött
Vänd dig till en auktoriserad serviceverkstad i tveksamma fall.
Lägg i batteri.
se bild 4
Skjut in batteri i hållare och haka fast.
Drift
Spärra / regla upp teleskopskaftet
på sidan
se bild 5
För att rengöra mattor med långa fibrer kan
kardanlänken spärras för att förhindra att
teleskopskaftet rör sig i sidled.
– Spärra teleskopskaftet i sidled:
Skjut spärren nedåt tills den hakar fast.
– Regla upp teleskopskaftet:
Skjut spärren uppåt tills den hakar fast.
Påbörja arbete
se bild 6
Starta apparaten, tryck Till/Från på fot-
reglage.
Förflytta apparaten framåt och bakåt vid
rengöring.
Använd höger sida för kantrengöring
(batterisidan).
Avbryt arbete
se bild 7
Stäng av apparaten, tryck Till/Från på
fotreglaget.
Lodrät placering av teleskopröret vid ar-
betspauser ger röret stabilitet, en arretering håller det i denna position.
Avsluta arbete
Vid arbetets slut stängs apparaten av.
Töm smutbehållaren efter varje rengö-
ring.
Tryck på upplåsningsknappen för batte-
riet och tag ur detta.
Ladda det uppladdningsbara batteriet.
– 3
59SV
Page 60

Töm smutsbehållaren
se bild 8
Lossa och lyft ur smutsbehållaren.
Töm smutsbehållaren.
Sätt tillbaka, och spärra, smutsbehålla-
ren.
Förvaring av apparaten
Apparaten kan hängas upp i handtaget,
vrid handtaget om så behövs (se avsnitt
"Montera, och ställ in höjd på, teleskoprör och handtag").
Transport
몇 FÖRSIKTIGHET
Risk för person och egendomsskada! Observera vid transport maskinens vikt.
Vid transport i fordon ska maskinen säkras
enligt respektive gällande bestämmelser så
den inte kan tippa eller glida.
Förvaring
몇 FÖRSIKTIGHET
Risk för person och egendomsskada! Observera maskinens vikt vid lagring.
Denna maskin får endast lagras inomhus.
Skötsel och underhåll
몇 FÖRSIKTIGHET
Avlägsna batteriet före alla skötsel- och underhållsarbeten på apparaten.
Rengöra apparaten
Torka av apparaten utvändigt med en
fuktig duk. Använd inga aggressiva
medel som t.ex. skurmedel.
Byt/rengör borstvals
se bild 9
Tryck på upplåsningsknappen och tag
ur borstvalsen.
Hår som fastnat tas enklast bort med
kniv eller sax. Dra kniven, eller saxen,
längs med angiven snittkant på borstvalsen. Tag bort hår som lossnat från
borstvalsen.
Sätt i rengjord eller ny borstvals och
kontrollera att den sitter rätt.
Service
Garanti
I respektive land gäller de garantivillkor
som publicerats av våra auktoriserade distributörer. Eventuella fel på aggregatet repareras utan kostnad under förutsättning
att det orsakats av ett material- eller tillverkningsfel. I frågor som gäller garantin ska du
vända dig med kvitto till inköpsstället eller
närmaste auktoriserade serviceverkstad.
Åtgärder vid störningar
몇 FÖRSIKTIGHET
Stäng alltid av maskinen och ta ur batteriet
innan arbeten utförs på den.
Laddningsdisplay lyser inte
Kontrollera anslutning mellan laddare
och batteri.
Kontrollera spänningsförsörjning i kon-
takten.
Apparaten rengör inte tillförlitligt
Rengör, alternativt byt ut, borstvals (se
avsnitt "Byt/rengör borstvals").
Ladda batteriet (se avsnitt "Ladda upp-
laddningsbart batteri").
Smuts kastas ut ur apparaten
Töm den fulla smutsbehållaren (se av-
snitt "Töm smutsbehållare").
Kundservice
För frågor eller problem står närmaste
KÄRCHER-filial till förfogande. Se baksidan för adress.
Tillbehör och reservdelar
Använd endast originaltillbehör och originalreservdelar, så att en säker och störningsfri drift av maskinen är garanterad.
Information om tillbehör och reservdelar
finns på www.kaercher.com.
60 SV
– 4
Page 61

Specialtillbehör
Beteckning Beställ-
ningsnr.
Snabbladdare BC 1/1.8, enkel (standard
för EB 30/1 Adv)
EU/CH 6.654-190
GB 6.654-196
AU 6.654-201
Utbytesbatteri Li-Ion 2,6Ah 4.654-328
Borstvals, mjuk, röd 4.762-401
EU-försäkran om
överensstämmelse
Härmed försäkrar vi att nedanstående betecknade maskin i ändamål och konstruktion samt i den av oss levererade versionen
motsvarar EU-direktivens tillämpliga grundläggande säkerhets- och hälsokrav. Vid
ändringar på maskinen som inte har godkänts av oss blir denna överensstämmelseförklaring ogiltig.
Produkt: Elektrisk borste
Typ: 1.545-xxx
Tillämpliga EU-direktiv
2006/95/EG
2014/30/EU
2011/65/EU
Tillämpade harmoniserade normer
EN 55014–1: 2006+A1: 2009+A2: 2011
EN 55014–2: 1997+A1: 2001+A2: 2008
EN 60335–1
EN 60335–2–10
EN 60335–2–29: 2004+A2: 2010
EN 61000–3–2: 2006+A1: 2009+A2: 2009
EN 61000–3–3: 2013
EN 62233: 2008
EN 50581
Undertecknade agerar på order av och
med fullmakt från företagsledningen.
CEO
Dokumentationsbefullmäktigad:
S. Reiser
Alfred Kärcher GmbH & Co. KG
Alfred-Kärcher-Str. 28 - 40
71364 Winnenden (Germany)
Tel.: +49 7195 14-0
Fax: +49 7195 14-2212
Winnenden, 2015/02/01
– 5
Head of Approbation
61SV
Page 62

Tekniska data
Typ av uppladdningsbart batteri EB 30/1
Li-Ion
Maximal drifttid med fulladdat batteri (beroende på golvbeläggning) min 61
Arbetsspänning batteri V 7,2
Laddarens utspänning V 4,2
Laddström A 1,8
Normeffekt W 25
Laddarens nätspänning
EU/CH V 230
Hz 50 - 60
GB V 230-240
Hz 50 - 60
AU V 240
Hz 50-60
Ljudtrycksnivå (EN 60704-2-1) dB(A) 56
Typisk driftvikt kg 2,8
62 SV
– 6
Page 63

Lue tämä alkuperäisiä ohjeita
ennen laitteesi käyttämistä, säilytä käyttöohje myöhempää käyttöä tai
mahdollista myöhempää omistajaa varten.
Sisällysluettelo
Käyttötarkoitus . . . . . . . . . . . . FI 1
Ympäristönsuojelu . . . . . . . . . FI 1
Vaarallisuusasteet. . . . . . . . . . FI 1
Turvaohjeet . . . . . . . . . . . . . . . FI 2
Käyttöönotto . . . . . . . . . . . . . . FI 2
Käyttö . . . . . . . . . . . . . . . . . . . FI 3
Kuljetus . . . . . . . . . . . . . . . . . . FI 4
Säilytys . . . . . . . . . . . . . . . . . . FI 4
Hoito ja huolto . . . . . . . . . . . . . FI 4
Huolto . . . . . . . . . . . . . . . . . . . FI 4
Varusteet ja varaosat . . . . . . . FI 5
EU-vaatimustenmukaisuus-va-
kuutus . . . . . . . . . . . . . . . . . . . FI 5
Tekniset tiedot. . . . . . . . . . . . . FI 6
Käyttötarkoitus
– Tämä laite soveltuu ammattimaiseen
käyttöön esim. hotelleissa, kouluissa,
sairaaloissa, tehtaissa, kaupoissa, toimistoissa ja välittäjäliikkeissä. Laitteessa on käytettävä ainoastaan Kärcherin
hyväksymiä lisävarusteita ja varaosia.
– Laite soveltuu korkeanukkaisten lattioi-
den puhdistukseen.
– Laite ei märkien lattiapintojen puhdista-
miseen.
– Laite ei sovellu pesubetonin, soran ja
vastaavien puhdistamiseen.
Kaikki tästä poikkeava käyttö katsotaan tarkoituksenvastaiseksi. Valmistaja ei vastaa
poikkeavasta käytöstä johtuvista vahingoista, riski on yksin käyttäjän.
Ympäristönsuojelu
Pakkausmateriaalit ovat kierrätettäviä. Älä käsittelee pakkauksia kotitalousjätteenä, vaan toimita ne jätteiden kierrätykseen.
Käytetyt laitteet sisältävät arvokkaita kierrätettäviä materiaaleja,
jotka tulisi toimittaa kierrätykseen. Paristot ja akut sisältävät
aineita, joita ei saa päästää ympäristöön. Toimita tästä syystä
vanhat laitteet, paristot ja akut
vastaaviin keräilylaitoksiin.
Poista sisäänrakennettu akku ennen laitteen romuttamista ja huolehdi akun ympäristöystävällisestä hävittämisestä!
Älä avaa akkua, vaarana on oikosulun
muodostuminen, lisäksi akusta voi poistua
ärsyttäviä höyryjä tai syövyttäviä nesteitä.
Huomautuksia materiaaleista (REACH)
Ajantasaisia tietoja ainesosista löytyy osoitteesta:
www.kaercher.com/REACH
Vaarallisuusasteet
VAARA
Välittömästi uhkaava vaara, joka aiheuttaa
vakavan ruumiinvamman tai johtaa kuolemaan.
몇 VAROITUS
Mahdollisesti vaarallinen tilanne, joka voi
aiheuttaa vakavan ruumiinvamman tai voi
johtaa kuolemaan.
몇 VARO
Huomautus mahdollisesta vaarallisesta tilanteesta, joka voi aiheuttaa vähäisiä vammoja.
HUOMIO
Huomautus mahdollisesta vaarallisesta tilanteesta, joka voi aiheuttaa aineellisia vahinkoja.
– 1
63FI
Page 64

Turvaohjeet
Tämän käyttöohjeen ohjeiden ohella on
noudatettava lainmukaisia yleisiä turvallisuus- ja tapaturmantorjuntamääräyksiä.
Loukkaantumisvaara
– Laitteessa on pyörivä harjatela, älä kos-
ke siihen sormilla tai työkaluilla missään
käyttövaiheessa!
– Irrota ennen hoito- ja huoltotöitä akku
laitteesta!
Akkuun ja latauslaitteeseen liittyviä
ohjeita
– Akun lataaminen laitteessa on sallittua
vain toimituksessa mukana seuraavalla
latauslaitteella tai KÄRCHERin hyväk-
symällä latauslaitteella.
– Tarkasta ennen jokaista käyttökertaa,
että latauslaite ja akkupakkaus eivät ole
vahingoittuneita. Älä käytä vahingoittu-
neita laitteita ja korjauta vialliset osat
ammattilaisella.
– Älä käytä latauslaitetta, jos se on likai-
nen tai märkä.
– Latauslaitteen tyyppikilvessä ilmoitetun
jännitteen on oltava sama kuin käytettä-
vä verkkojännite.
– Älä käytä latauslaitetta räjähdysalttiissa
tiloissa.
– Sovittimen kosketinpintoja ei saa kos-
kettaa metalliosilla oikosulkuvaaran
vuoksi.
– Käytä latauslaitetta vain hyväksyttyjen
akkupakkausten lataamiseen.
– Työnnä vain puhtaat ja kuivat akkupak-
kaukset latauslaitteen sovittimeen.
– Älä lataa paristoja (ensiöpareja) räjäh-
dysvaaran vuoksi.
– Älä lataa vahingoittuneita akkupakka-
uksia. Vaihda vahingoittuneet akkupak-
kaukset.
– Älä säilytä akkupakkauksia yhdessä
metalliesineiden kanssa oikosulkuvaa-
ran vuoksi.
– Älä heitä akkupakkauksia tuleen tai ko-
titalousjätteiden sekaan.
– Vältä koskettamasta viallisiin, akkunes-
tettä vuotaviin akkuihin. Jos vahingossa
joudut kosketuksiin nesteen kanssa,
huuhdo vedellä. Jos nestettä pääsee
kosketuksiin silmiisi, ota yhteys lääkäriin.
Laitteessa olevat symbolit
Suojaa latauslaite kosteudelta ja varastoi se kuivassa tilassa. Laite on
tarkoitettu ainoastaan käytettäväksi
sisätiloissa, suojaa laite sateelta.
Käyttöönotto
Laitekuvaus
Tarkasta purkaessasi pakkauksesta, ovatko kaikki varusteet olemassa ja ovatko osat
vaurioituneet Jos havaitset kuljetusvaurioita ota yhteyttä myyjäliikkeeseen.
Ohje:
Piirrokset laitteesta ja sen käytöstä sijaitsevat sivulla 2.
1 Kardaaninivel lukituksella
2 Jalkakytkin, päälle/pois
3 Irrotettava akku
4 Vaihtoakku
(vain EB 30/1 Adv)
5 Akun vapautuspainike
6 Irrotettava lika-astia
7 Lika-astian lukituksen vapautus
8 Kotelo
9 Vaihdettava harjatela
10 Harjatelan vapautuspainike
11 Säädettävä teleskooppivarsi
12 Kiertokahva korkeuden säätöä varten
13 Käsikahva
14 Latauslaite, latauskäytön näyttö ja la-
tausjohto
(vain EB 30/1)
15 Pikalatauslaite
(vain EB 30/1 Adv)
64 FI
– 2
Page 65

Teleskooppivarren ja käsikahvan
asentaminen sekä korkeuden
säätäminen
katso kuva 2
Teleskooppivarsi koostuu 3 osasta. Huolehdi, että osat kiinnittyvät toisiinsa asennusvaiheessa.
Aseta käsikahva pidempään kiertokah-
valla varustettuun varteen.
Työnnä pidempi ja lyhyempi varsi yh-
teen lukituspinnettä samanaikaisesti
painaen.
Työnnä täydellinen varsi lukitsinpinne
edellä laitteen niveleen.
Vapauta kiertokahva ja vedä varsi ha-
luamaasi työskentelypituuteen, käännä
käsikahva oikeaan asentoon ja kierrä
kiertokahva kiinni.
Akun lataaminen
katso kuva 3
Akkua ei ole toimitusvaiheessa vielä ladattu. Lataa akku ennen käyttöönottoa ja tarvittaessa.
Huomautus: Akku voidaan ladata ainoastaan irrallisena.
Liitä akku latauslaitteeseen latausjoh-
dolla tai kytke akku latauslaitteen pistokkeeseen.
Työnnä toimituksessa mukana seuraa-
va latauslaite asianmukaiseen pistora-
siaan.
Lataustilanäyttö vilkkuu vihreänä. Akkua ladataan.
Tyhjän akun latausaika
Latauslaite Li-Ion
6.654-359.0
BC 1/0.5 6 h
BC 1/1.8 90 min
Huomautus
Kun latausaika ylittyy, latauslaite siirtyy
kunnossapitovaraukseen. Latauskäytön
valo palaa vihreänä.
Virhenäyttö : punainen
valo vilk-
kuu
Epäselvässä tilanteessa, käänny valtuutetun asiakaspalvelun puoleen.
Akun asettaminen paikoilleen
katso kuva 4
Työnnä akku kiinnittimeensä ja lukitse se.
Käyttö
Teleskooppivarren lukitus/vapautus
sivusuunnassa
katso kuva 5
Pitkänukkaisten mattojen puhdistamista
varten kardaaninivel voidaan lukita paikolleen siten, että teleskooppivarren sivuttaisliike on estettynä
– Teleskooppivarren lukitus sivusuun-
nassa:
Paina lukitusta, työnnä alas ja napsauta
lukitukseen.
– Teleskooppivarren vapautus:
Paina lukitusta, työnnä ylös ja napsauta
lukitukseen.
Työskentelyn aloittaminen
katso kuva 6
Kytke laite päälle painamalla jalkakyt-
kintä (päälle/pois).
Puhdista liikuttamalla laitetta eteen- ja
taaksepäin.
Kun puhdistat reunojen läheisyydestä,
käytä oikeaa puolta (akun puolta).
Työskentelyn keskeyttäminen
katso kuva 7
Kytke laite pois päältä painamalla jalka-
kytkintä (päälle/pois).
Jotta teleskooppivarsi pysyy paikoillaan,
aseta se tauon ajaksi pystysuoraan, luki-
tus pitää varren siinä asennossa.
Työskentelyn päättäminen
Kytke laite pois päältä lopettaessasi
työskentelyn.
Tyhjennä lika-astia jokaisen puhdistus-
kerran jälkeen.
Löysää akun lukitus ja poista akku pak-
kauksestaan.
Lataa akku.
– 3
65FI
Page 66

Lika-astian tyhjentäminen
katso kuva 8
Vapauta lika-astian lukitus ja poista li-
kasäiliö.
Tyhjennä lika-astia.
Aseta uusi lika-astia takaisin paikoilleen
ja lukitse se.
Laitteen säilytys
Laitteen voi ripustaa myös käsikahvas-
taan, käännä kahvaa tarvittaessa (katso kappale "Teleskooppivarren ja käsikahvan asentaminen ja korkeuden säätäminen").
Kuljetus
몇 VARO
Loukkaantumis- ja vahingoittumisvaaravaara! Huomioi kuljetettaessa laitteen paino.
Kun kuljetat laitetta ajoneuvoissa, varmista
laite liukumisen ja kaatumisen varalta kulloinkin voimassa olevien ohjesääntöjen
mukaisesti.
Säilytys
몇 VARO
Loukkaantumis- ja vahingoittumisvaaravaara! Huomioi säilytettäessä laitteen paino.
Tätä laitetta saa säilyttää vain sisätiloissa.
Hoito ja huolto
몇 VARO
Akku irrotettava laitteesta ennen kaikkia
hoito- ja huoltotöitä.
Laitteen puhdistus
Pyyhi laite ulkopuolelta puhtaaksi kos-
tealla liinalla. Älä käytä aggressiivisia
aineita, kuten esim. hankauspulveria.
Harjatelan vaihto/puhdistus
katso kuva 9
Paina vapautuspainiketta ja irrota harja-
tela.
Voit poistaa harjatelaan kiertyneet hiuk-
set parhaiten veitsellä tai saksilla. Kulje-
ta saksien tai veitsen harjatelaa harjaa
pitkin. Poista irronneet hiukset harjate-
lasta.
Asetat puhdistettu tai uusi harjatela
huolellisesti oikealle paikalleen.
Huolto
Takuu
Kussakin maassa ovat voimassa valtuuttamamme myyntiorganisaation julkaisemat
takuuehdot. Materiaali- ja valmistusvirheistä aiheutuvat virheet laitteessa korjaamme
takuuaikana maksutta. Takuutapauksessa
ota yhteys ostotositteen kanssa jälleenmyyjään tai lähimpään valtuutettuun huoltoon.
Häiriöapu
몇 VARO
Akku on poistettava ja laite on kytkettävä
pois päältä ennen kaikkia laitteeseen kohdistuvia töitä.
Latausnäytön valo ei pala
Tarkasta akun ja latauslaitteen liitäntä.
Tarkista tuleeko pistorasiaan virta.
Laite ei puhdista kunnollisesti
Puhdista tai vaihda harjatela (katso
"Puhdista/vaihda harjatela").
Lataa akku (katso kappale "Akun lataa-
minen").
Laite syytää likaa ulos
Tyhjennä täysi lika-astia (katso kappale
"Lika-astian tyhjentäminen").
66 FI
– 4
Page 67

Asiakaspalvelu
KÄRCHER -edustustomme vastaa mielellään kysymyksiisi ja auttaa häiriön ilmaantuessa. Osoite, katso takasivua.
Varusteet ja varaosat
Käytä vain alkuperäisiä tarvikkeita ja varaosia. Ne takaavat laitteen turvallisen ja häiriöttömän toiminnan.
Tietoja tarvikkeista ja varaosista on sivustolla www.kaercher.com.
Lisävaruste
Nimike Tilausnro
Pikalatauslaite BC 1/1.8, 1-akulle (vakiona
EB 30/1 Adv)
EU/CH 6.654-190
GB 6.654-196
AU 6.654-201
Vaihtoakku Li-Ion 2,6Ah 4.654-328
Harjatela, pehmeä, punainen 4.762-401
EU-vaatimustenmukaisuus-
vakuutus
Vakuutamme, että alla mainitut tuotteet
vastaavat suunnittelultaan ja rakenteeltaan
sekä valmistustavaltaan EU-direktiivien
asianomaisia turvallisuus- ja terveysvaatimuksia. Jos tuotteeseen/tuotteisiin tehdään muutoksia, joista ei ole sovittu kanssamme, tämä vakuutus ei ole enää voimassa.
Tuote: Sähköharja
Tyyppi: 1.545-xxx
Yksiselitteiset EU-direktiivit
2006/95/EY
2014/30/EU
2011/65/EU
Sovelletut harmonisoidut standardit
EN 55014–1: 2006+A1: 2009+A2: 2011
EN 55014–2: 1997+A1: 2001+A2: 2008
EN 60335–1
EN 60335–2–10
EN 60335–2–29: 2004+A2: 2010
EN 61000–3–2: 2006+A1: 2009+A2: 2009
EN 61000–3–3: 2013
EN 62233: 2008
EN 50581
Allekirjoittaneet toimivat yrityksen johton
puolesta ja sen valtuuttamina.
CEO
Dokumentointivaltuutettu:
S. Reiser
Alfred Kärcher GmbH & Co. KG
Alfred-Kärcher-Str. 28 - 40
71364 Winnenden (Germany)
Puh.: +49 7195 14-0
Faksi: +49 7195 14-2212
Winnenden, 2015/02/01
– 5
Head of Approbation
67FI
Page 68

Tekniset tiedot
Akkutyyppi EB 30/1
Li-Ion
Maksimi käyttöaika täyteen ladatulla akulla (riippuu lattiapinnasta) min 61
Akun työskentelyjännite V 7,2
Latauslaitteen lähtöjännite V 4,2
Latausvirta A 1,8
Nimellisteho W 25
Latauslaitteen verkkojännite
EU/CH V 230
Hz 50 - 60
GB V 230-240
Hz 50 - 60
AU V 240
Hz 50-60
Äänen painetaso (standardi EN 60704-2-1) dB(A) 56
Tyypillinen käyttöpaino kg 2,8
68 FI
– 6
Page 69

Πριν χρησιμοποιήσετε τη συ-
σκευή σας για πρώτη φορά, διαβάστε αυτές τις πρωτότυπες οδηγίες χρήσης, ενεργήστε σύμφωνα με αυτές και κρατήστε τις για μελλοντική χρήση ή για τον
επόμενο ιδιοκτήτη.
Πίνακας περιεχομένων
Χρήση σύμφωνα με τους κανο-
νισμούς . . . . . . . . . . . . . . . . . . EL 1
Προστασία περιβάλλοντος . . . EL 1
Διαβάθμιση κινδύνων . . . . . . . EL 1
Υποδείξεις ασφαλείας . . . . . . . EL 2
Έναρξη λειτουργίας. . . . . . . . . EL 2
Λειτουργία . . . . . . . . . . . . . . . . EL 3
Μεταφορά . . . . . . . . . . . . . . . . EL 4
Αποθήκευση . . . . . . . . . . . . . . EL 4
Φροντίδα και συντήρηση. . . . . EL 4
Σέρβις . . . . . . . . . . . . . . . . . . . EL 4
Εξαρτήματα και ανταλλακτικά . EL 5
Δήλωση Συμμόρφωσης των ΕEEL 5
Τεχνικά χαρακτηριστικά. . . . . . EL 6
Χρήση σύμφωνα με τους
κανονισμούς
– Η παρουσα συσκευή προορίζεται για
επαγγελματική χρήση, π.χ. σε ξενοδοχεία, σχολεία, νοσοκομεία, εργοστάσια,
καταστήματα, γραφεία και ενοικιαζόμενους χώρους, με τα εγκεκριμένα από
την Κarcher εξαρτήματα και ανταλλακτικά.
– Η συσκευή είναι κατάλληλη υπό όρους
για χαλιά με υψηλό πέλος.
– Η συσκευή δεν είναι κατάλληλη για
υγρές επιστρώσεις δαπέδων.
– Η συσκευή δεν είναι κατάλληλη για
χυτό σκυρόδεμα, χαλίκια ή παρόμοια
δάπεδα.
Κάθε είδους χρήση που δεν αναφέρεται
εδώ θεωρείται ως μη ενδεδειγμένη. Ο κατασκευαστής δεν φέρει ευθύνη για ενδεχόμενες βλάβες που μπορεί να προκύψουν από
παρόμοια χρήση. Σε αυτή την περίπτωση,
η ευθύνη βαρύνει τον χρήστη.
Προστασία περιβάλλοντος
Τα υλικά συσκευασίας είναι ανακυκλώσιμα. Μην πετάτε τις συσκευασίες στα οικιακά απορρίμματα, αλλά σε ειδικό σύστημα
επαναχρησιμοποίησης.
Οι παλιές συσκευές περιέχουν
χρήσιμα ανακυκλώσιμα υλικά,
τα οποία θα πρέπει να παραδίδονται προς επαναχρησιμοποίηση. Οι μπαταρίες και οι συσσωρευτές περιέχουν υλικά, τα
οποία δεν επιτρέπεται να καταλήξουν στο περιβάλλον. Για τον
λόγο αυτόν, διαθέστε τις άχρηστες συσκευές, τις μπαταρίες και
τους συσσωρευτές μέσω του κατάλληλου συστήματος διαχείρισης απορριμμάτων.
Αφαιρέστε τον ενσωματωμένο συσσωρευτή πριν πετάξετε την άχρηστη συσκευή και
διαθέστε τον με τρόπο φιλικό προς το περιβάλλον!
Μην ανοίγετε το συσσωρευτή, υφίσταται
κίνδυνος βραχυκυκλώματος, ενώ ενδέχεται
να εξέλθουν τοξικοί ατμοί ή καυστικά υγρά.
Υποδείξεις για τα συστατικά (REACH)
Ενημερωμένες πληροφορίες για τα συστατικά μπορείτε να βρείτε στη διεύθυνση:
www.kaercher.com/REACH
Διαβάθμιση κινδύνων
ΚΙΝΔΥΝΟΣ
Για άμεσα επαπειλούμενο κίνδυνο, ο οποίος μπορεί να οδηγήσει σε σοβαρό τραυματισμό ή θάνατο.
몇 ΠΡΟΕΙΔΟΠΟΙΗΣΗ
Για ενδεχόμενη επικίνδυνη κατάσταση, η
οποία μπορεί να οδηγήσει σε σοβαρό τραυματισμό ή θάνατο.
몇 ΠΡΟΣΟΧΗ
Υπόδειξη για μια ενδεχομένως επικίνδυνη
κατάσταση,
ελαφρό τραυματισμό.
ΠΡΟΣΟΧΗ
Υπόδειξη για μια δυνητικά επικίνδυνη κατάσταση, η οποία μπορεί να έχει ως συνέπεια
υλικές ζημίες.
η οποία μπορεί να οδηγήσει σε
– 1
69EL
Page 70

Υποδείξεις ασφαλείας
Εκτός από τις υποδείξεις στο εγχειρίδιο λειτουργίας, λάβετε παράλληλα υπόψη τους
γενικούς κανονισμούς ασφάλειας και πρόληψης ατυχημάτων που προβλέπει ο νομοθέτης.
Κίνδυνος τραυματισμού
– Η συσκευή διαθέτει περιστρεφόμενη κυ-
λιόμενη βούρτσα, μη αγγίζετε με τα δά-
κτυλα ή με εργαλεία στην διάρκεια της
λειτουργίας!
– Αφαιρέστε τον συσσωρευτή πριν από
κάθε εργασία φροντίδας ή συντήρησης
στην συσκευή!
Υποδείξεις για τον συσσωρευτή και
τον φορτιστή
– Η φόρτιση του συσσωρευτή επιτρέπε-
ται μόνο με τον γνήσιο φορτιστή που
συνοδεύει την συσκευή ή με τους εγκε-
κριμένους από την KARCHER φορτι-
στές.
– Πριν από κάθε χρήση, ελέγξτε τον φορ-
τιστή και τον συσσωρευτή για ενδεχό-
μενες βλάβες. Μην χρησιμοποιείτε συ-
σκευές που παρουσιάζουν βλάβες και
αναθέστε την επιδιόρθωση σε ένα εξει-
δικευμένο συνεργείο.
– Μην χρησιμοποιείτε τον φορτιστή, εάν
είναι λερωμένος ή υγρός.
– Η τάση του δικτύου πρέπει να είναι ταυ-
τόσημη με την τάση που αναγράφεται
στην πινακίδα στοιχείων του φορτιστή.
– Μην χρησιμοποιείτε τον φορτιστή σε
χώρους, όπου υπάρχει κίνδυνος έκρη-
ξης.
– Στις επαφές του προσαρμογέα δεν πρέ-
πει να εισέρχονται μεταλλικά αντικείμε-
να. Κίνδυνος βραχυκυκλώματος.
– Χρησιμοποιήστε τον φορτιστή αποκλει-
στικά για την φόρτιση των εγκεκριμένων
τύπων συσσωρευτή.
– Εισάγετε στον προσαρμογέα του φορτι-
στή μόνο καθαρούς και στεγνούς συσ-
σωρευτές.
– Μην φορτίζετε μπαταρίες (πρωτεύοντα
στοιχεία). Κίνδυνος έκρηξης.
– Μην φορτίζετε συσσωρευτές που πα-
ρουσιάζουν βλάβη. Αντικαταστήστε
τους συσσωρευτές που παρουσιάζουν
βλάβη.
– Μην φυλάγετε τους συσσωρευτές μαζί
με μεταλλικά αντικείμενα. Κίνδυνος
βραχυκυκλώματος.
– Μην πετάτε τους συσσωρευτές στην
φωτιά ή στα οικιακά απορρίμματα.
– Αποφύγετε την επαφή με τα υγρά που
διαρρέουν από χαλασμένους συσσωρευτές. Σε περίπτωση τυχαίας επαφής
με παρόμοια υγρά, ξεπλύνετε με νερό.
Εάν τα υγρά έρθουν σε επαφή με τα μάτια, συμβουλευτείτε επιπλέον τον γιατρό σας.
Σύμβολα στην συσκευή
Προστατέψτε τον φορτιστή από την
υγρασία και φυλάξτε τον σε στεγνό
χώρο. Η συσκευή ενδείκνυται για χρήση αποκλειστικά σε κλειστούς χώρους, να μην εκτίθεται στην βροχή.
Έναρξη λειτουργίας
Περιγραφή της συσκευής
Κατά τον άνοιγμα της συσκευασίας, ελέγξτε
το περιεχόμενο για τυχόν ελλείψεις σε
εξαρτήματα ή γιαβλάβες. Σε περίπτωση ζημιών που προκλήθηκαν από τη μεταφορά,
παρακαλείσθε να πληροφορήσετε αμέσως
το κατάστημα, από το οποίο αγοράσατε το
μηχάνημα.
Υπόδειξη:
Στην σελίδα 2 θα βρείτε εικόνες της συσκευής και του τρόπου χρήσης της.
1 Συναρμογή Cardan με διάταξη ασφάλισης
2 Διακόπτης ποδός On/Off
3 Συσσωρευτής, αποσπώμενος
4 Συσσωρευτής, ανταλλακτικό
(μόνο EB 30/1 Adv)
5 Πλήκτρο απασφάλισης, συσσωρευτής
6 Κάδος απορριμμάτων, αποσπώμενος
7 Απασφάλιση, κάδος απορριμμάτων
8 Περίβλημα
9 Κυλιόμενη βούρτσα, αντικαθιστώμενη
10 Πλήκτρο απασφάλισης, κυλιόμενη
βούρτσα
70 EL
– 2
Page 71

11 Τηλεσκοπικός σωλήνας, με προσαρμό-
σιμο ύψος
12 Περιστρεφόμενη λαβή, για προσαρμο-
γή του ύψους
13 Χειρολαβή
14 Φορτιστής με ένδειξη λειτουργίας φόρ-
τισης και καλώδιο φόρτισης
(μόνο EB 30/1)
15 Ταχυφορτιστής
(μόνο EB 30/1 Adv)
Συναρμολόγηση τηλεσκοπικού
σωλήνα και προσαρμογή ύψους
βλέπε εικόνα 2
Ο τηλεσκοπικός σωλήνας αποτελείται από 3
τεμάχια. Κατά την συναρμολόγηση, φροντίστε να κλειδώσετα τα τεμάχια μεταξύ τους.
Εισάγετε την χειρολαβή στον μεγαλύτε-
ρο σωλήνα με την περιστρεφόμενη λα-
βή.
Συνδέσετε τον μεγαλύτερο με τον μι-
κρότερο σωλήνα, πιέζοντας ταυτόχρο-
να το πλήκτρο ασφάλισης.
Εισάγετε τον συναρμολογημένο σωλή-
να στην άρθρωση της συσκευής, με το
πλήκτρο ασφάλισης να δείχνει προς τα
εμπρός.
Χαλαρώστε την περιστρεφόμενη λαβή
και τραβήξτε τον σωλήνα στο επιθυμη-
τό ύψος εργασίας, περιστρέψτε την χει-
ρολαβή στην σωστή θέση και σφίξτε την
περιστρεφόμενη λαβή.
Φόρτιση του συσσωρευτή
βλ. εικόνα 3
Ο συσσωρευτής δεν παραδίδεται φορτισμένος. Φορτίστε τον πριν την πρώτη χρήση και όταν κρίνεται απαραίτητο.
Υπόδειξη: Η φόρτιση του συσσωρευτή είναι δυνατή μόνο όταν αφαιρεθεί ο συσσωρευτής.
Συνδέστε τον συσσωρευτή και τον φορ-
τιστή με το καλώδιο φόρτισης ή τοποθε-
τήστε τον συσωρευτή στη θήκη του
φορτιστή.
Συνδέστε τον φορτιστή που συνοδεύει
την συσκευή με την κατάλληλη πρίζα.
Η ένδειξη λειτουργίας φόρτισης αναβοσβήνει με πράσινο χρώμα. Ο συσσωρευτής
φορτίζεται.
Διάρκεια φόρτισης άδειου συσσωρευτή
Φορτιστής Li-Ion
6.654-359.0
BC 1/0.5 6 h
BC 1/1.8 90 min
Υπόδειξη
Εάν υπάρξει υπέρβαση του απαιτούμενο
χρόνου φόρτισης, ο φορτιστής μεταβαίνει
στην κατάσταση συντήρησης. Η ενδεικτική
λυχνία φόρτισης ανάβει με πράσινο χρώμα.
Ένδειξη σφάλματος
Εάν έχετε αμφιβολίες, απευθυνθείτε στην
εξουσιοδοτημένη υπηρεσία εξυπηρέτησης
πελατών.
: κόκκινο
χρώμα
που αναβοσβήνει
Τοποθέτηση του συσσωρευτή
βλ. εικόνα 4
Εισάγετε τον συσσωρευτή στην υποδο-
χή και ασφαλίστε τον.
Λειτουργία
Πλευρική ασφάλιση/απασφάλιση
τηλεσκοπικού στελέχους
βλ. εικόνα 5
Για τον καθαρισμό χαλιών με ψηλό πέλος
είναι δυνατή η ασφάλιση της συναρμογής
Cardac, ώστε να αποτραπεί η πλευρική κίνηση του τηλεσκοπικού στελέχους.
– Πλευρική ασφάλιση τηλεσκοπικού στε-
λέχους:
Πιάστε τη διάταξη ασφάλισης, ωθήσετε
την προς τα κάτω και ασφαλίστε την.
– Απασφάλιση τηλεσκοπικού στελέχους:
Πιάστε τη διάταξη ασφάλισης, ωθήσετε
την προς τα πάνω και ασφαλίστε την.
Έναρξη εργασιών
βλ. εικόνα 6
Θέστε σε λειτουργία την συσκευή, πιέ-
ζοντας τον διακόπτη ποδός Οn/Off.
Για να καθαρίσετε, κυλίστε την συσκευή
μπρος - πίσω.
Για να καθαρίσετε τις γωνίες, χρησιμο-
ποιήστε την δεξιά πλευρά (πλευρά συσ-
σωρευτή).
– 3
71EL
Page 72

Διακοπή λειτουργίας
βλ. εικόνα 7
Απενεργοποιήστε την συσκευή, πιέζο-
ντας τον διακόπτη ποδός Οn/Off.
Για την ασφαλή στήριξη του τηλεσκοπι-
κού σωλήνα στα διαλείμματα των εργασιών, τοποθετήστε τον σε όρθια θέση.
Το σύστημα ασφάλισης θα τον κρατήσει στην θέση του.
Ολοκλήρωση εργασιών
Απενεργοποιήστε την συσκευή μετά το
πέρας των εργασιών.
Αδειάζετε τον κάδο απορριμμάτων
έπειτα από κάθε χρήση.
Πιέστε το πλήκτρο απασφάλισης του
συσσωρευτή και αφαιρέστε τον συσσωρευτή.
Φορτίστε τον συσσωρευτή.
Άδειασμα του κάδου απορριμμάτων
βλ. εικόνα 8
Απασφαλίστε και αφαιρέστε τον κάδο
απορριμμάτων.
Αδειάστε τον κάδο απορριμμάτων.
Τοποθετήστε και ασφαλίστε ξανά τον
κάδο απορριμμάτων.
Φύλαξη της συσκευής
Η συσκευή μπορεί να κρεμαστεί από
την χειρολαβή, εάν περιστρέψετε την
χειρολαβή στην κατάλληλη θέση (βλέπε
κεφάλαιο "Συναρμολόγηση τηλεσκοπικού σωλήνα και ρύθμιση ύψους").
Μεταφορά
몇 ΠΡΟΣΟΧΗ
Κίνδυνος τραυματισμού και βλάβης! Κατά
τη μεταφορά λάβετε υπόψη το βάρος της
συσκευής.
Κατά τη μεταφορά με οχήματα, ασφαλίστε
τη συσκευή έναντι ενδεχόμενης ολίσθησης
και ανατροπής, σύμφωνα με τις εκάστοτε
ισχύουσες κατευθυντήριες οδηγίες.
Αποθήκευση
몇 ΠΡΟΣΟΧΗ
Κίνδυνος τραυματισμού και βλάβης! Κατά
την αποθήκευση λάβετε υπόψη το βάρος
της συσκευής.
Η συσκευή αυτή μπορεί να αποθηκεύεται
μόνο σε εσωτερικούς χώρους.
Φροντίδα και συντήρηση
몇 ΠΡΟΣΟΧΗ
Αφαιρέστε το
σίες φροντίδας και συντήρησης στη συσκευή.
συσσωρευτή πριν από τις εργα-
Καθαρισμός συσκευής
Σκουπίζετε το εξωτερικό της συσκευής
με βρεγμένο πανί. Μην χρησιμοποιείτε
διαβρωτικά μέσα, όπως π.χ. σκόνη τρι-
ψίματος.
Αντικατάσταση/καθαρισμός της
κυλιόμενης βούρτσας
βλ. εικόνα 9
Πιέστε το πλήκτρο απασφάλισης και
αφαιρέστε την κυλιόμενη βούρτσα.
Απομακρύνετε τις μπερδεμένες τρίχες,
κατά προτίμηση με ένα μαχαίρι ή ψαλί-
δι, περνώντας την βούρτσα κατα μήκος
της λάμας. Απομακρύνετε τις χαλαρές
τρίχες από την βούρτσα.
Τοποθετήστε την καθαρισμένη ή και-
νούρια βουρτσα στην θέση της και ελέγ-
ξτε την στρήριξή της.
Σέρβις
Εγγύηση
Σε κάθε χώρα ισχύουν οι όροι εγγύησης
που εκδόθηκαν από την αρμόδια εταιρία
μας προώθησης πωλήσεων. Αναλαμβάνουμε τη δωρεάν αποκατάσταση οποιασδήποτε βλάβης στη συσκευή σας, εφόσον
οφείλεται σε αστοχία υλικού ή κατασκευαστικό σφάλμα, εντός της προθεσμίας που
ορίζεται στην εγγύηση. Σε περίπτωση που
επιθυμείτε να κάνετε χρήση της εγγύησης,
παρακαλούμε απευθυνθείτε με την απόδειξη αγοράς στο κατάστημα από το οποίο
προμηθευτήκατε τη συσκευή ή στην πλησιέστερη εξουσιοδοτημένη υπηρεσία τεχνικής εξυπηρέτησης πελατών μας.
72 EL
– 4
Page 73

Αντιμετώπιση βλαβών
몇 ΠΡΟΣΟΧΗ
Πριν από όλες τις εργασίες στη συσκευή,
απενεργοποιήστε τη συσκευή και αφαιρέστε το συσσωρευτή.
Η ένδειξη λειτουργίας φόρτισης δεν ανάβει
Ελέγξτε την σύνδεση του φορτιστή με
τον συσσωρευτή.
Ελέγξτε την παροχή τάσης της πρίζας.
Η συσκευή δεν καθαρίζει ικανοποιητικά
Καθαρίστε ή αντικαταστήστε την κυλιό-
μενη βούρτσα (βλέπε κεφάλαιο "Αντικατάσταση/καθαρισμός της κυλιόμενης
βούρτσας").
Φορτίστε τον συσσωρευτή (βλέπε κε-
φάλαιο "Φόρτιση του συσσωρευτή").
Η συσκευή εκσφενδονίζει σκόνη
Αδειάστε τον γεμάτο κάδο απορριμμά-
των (βλέπε κεφάλαιο "Άδειασμα κάδου
απορριμμάτων").
Υπηρεσία εξυπηρέτησης πελατών
Σε περίπτωση αποριών ή βλαβών μπορείτε να απευθύνεστε στο υποκατάστημα του
Οίκου KARCHER. Για τη διεύθυνση βλ.
στην πίσω σελίδα.
Εξαρτήματα και ανταλλακτικά
Χρησιμοποιείτε μόνο γνήσια παρελκόμενα
και ανταλλακτικά τα οποία διασφαλίζουν
την ασφαλή και απρόσκοπτη λειτουργία
της συσκευής.
Πληροφορίες για παρελκόμενα και ανταλλακτικά θα βρείτε στη διεύθυνση
www.kaercher.com.
Προαιρετικά εξαρτήματα
Περιγραφή Κωδ. πα-
ραγγελίας
Ταχυφορτιστής BC 1/1.8, μονός (μόνιμος
εξοπλισμός για EB 30/1 Adv)
EU/CH 6.654-190
GB 6.654-196
AU 6.654-201
Συσσωρευτής, ανταλ-
λακτικό Li-Ion
Κυλινδρική βούρτσα, μαλακή,
κόκκινη
2,6Ah 4.654-328
4.762-401
Δήλωση Συμμόρφωσης των
ΕE
Δια της παρούσης δηλώνουμε ότι το μηχάνημα που χαρακτηρίζεται παρακάτω, με
βάση τη σχεδίαση και την κατασκευή του,
υπό τη μορφή που διατίθεται στην αγορά,
πληροί στις σχετικές βασικές απαιτήσεις
ασφαλείας και υγιεινής των οδηγιών της
ΕE. Η παρούσα δήλωση παύει να ισχύει σε
περίπτωση τροποποιήσεων του μηχανήματος χωρίς προηγούμενη συνεννόηση
μαζί μας.
Προϊόν: Ηλεκτρική σκούπα
Τύπος: 1.545-xxx
Σχετικές οδηγίες των ΕE
2006/95/EΚ
2014/30/EE
2011/65/EE
Εφαρμοσθέντα εναρμονισμένα πρότυπα
EN 55014–1: 2006+A1: 2009+A2: 2011
EN 55014–2: 1997+A1: 2001+A2: 2008
EN 60335–1
EN 60335–2–10
EN 60335–2–29: 2004+A2: 2010
EN 61000–3–2: 2006+A1: 2009+A2: 2009
EN 61000–3–3: 2013
EN 62233: 2008
EN 50581
Οι υπογράφοντες ενεργούν κατ' εντολή του
και με εξουσιοδότηση της διεύθυνσης της
επιχείρησης.
CEO
Υπεύθυνος τεκμηρίωσης:
S. Reiser
Alfred Karcher GmbH & Co. KG
Alfred-Karcher-Str. 28 - 40
71364 Winnenden (Germany)
Τηλ.: +49 7195 14-0
Φαξ: +49 7195 14-2212
Winnenden, 2015/02/01
Head of Approbation
– 5
73EL
Page 74

Τεχνικά χαρακτηριστικά
Τύπος συσσωρευτή EB 30/1
Li-Ion
Μέγ. χρόνος λειτουργίας με πλήρη φόρτιση (ανάλογα με το δάπεδο) min 61
Τάση εργασίας συσσωρευτή V 7,2
Τάση εξόδου φορτιστή V 4,2
Ρεύμα εισόδου A 1,8
Ονομαστική ισχύς W 25
Ονομαστική τάση φορτιστή
EU/CH V 230
Hz 50 - 60
GB V 230-240
Hz 50 - 60
AU V 240
Hz 50-60
Στάθμη ακουστικής πίεσης (EN 60704-2-1) dB(A) 56
Τυπικό βάρος λειτουργίας kg 2,8
74 EL
– 6
Page 75

Cihazın ilk kullanımından önce
bu orijinal kullanma kılavuzunu
okuyun, bu kılavuza göre davranın ve daha
sonra kullanım veya cihazın sonraki sahiplerine vermek için bu kılavuzu saklayın.
İçindekiler
Kurallara uygun kullanım . . . . TR 1
Çevre koruma . . . . . . . . . . . . . TR 1
Tehlike kademeleri . . . . . . . . . TR 1
Güvenlik uyarıları . . . . . . . . . . TR 2
İşletime alma. . . . . . . . . . . . . . TR 2
Çalıştırma . . . . . . . . . . . . . . . . TR 3
Taşıma . . . . . . . . . . . . . . . . . . TR 4
Depolama . . . . . . . . . . . . . . . . TR 4
Koruma ve Bakım . . . . . . . . . . TR 4
Servis . . . . . . . . . . . . . . . . . . . TR 4
Aksesuarlar ve yedek parçalar TR 5
AB uygunluk bildirisi . . . . . . . . TR 5
Teknik Bilgiler . . . . . . . . . . . . . TR 6
Kurallara uygun kullanım
– Bu cihaz, Örn; oteller, okullar, hastane-
ler, fabrikalar, mağazalar, bürolar ve kiralık mağazalarda Kärcher tarafından
onaylanan aksesuar ve yedek parçalarla birlikte mesleki kullanım için uygun-
dur.
– Cihaz, uzun tüylü halılar için uygundur.
– Cihaz, ıslak zemin kaplamaları için uy-
gun değildir.
– Cihaz, yıkama betonu, çakıl ve benzeri
cisimler için uygun değildir.
Bunun dışındaki her türlü kullanım, amacına uygun olmayan kullanım olarak geçerlidir. Bu nedenle ortaya çıkan hasarlar için
üretici hiçbir sorumluluk üstlenmez; bu konudaki riski tek başına kullanıcı üstlenir.
Çevre koruma
Ambalaj malzemeleri geri dönüştürülebilir. Ambalaj malzemelerini evinizin çöpüne atmak
yerine lütfen tekrar kullanılabilecekleri yerlere gönderin.
Eski cihazlarda, yeniden değerlendirme işlemine tabi tutulması
gereken değerli geri dönüşüm
malzemeleri bulunmaktadır. Piller ve aküler çevreye yayılmaması gereken, zararlı maddeler
içerir. Bu nedenle eski cihazlar,
piller ve aküleri lütfen uygun toplama sistemleri aracılığıyla imha
edin.
Takılı aküyü cihazı hurdaya vermeden
önce çıkartın ve çevreye uyumlu şekilde
tasfiye edin!
Aküyü açmayın, kısa devre tehlikesi bulunmaktadır, ek olarak tahriş edici buharlar
ya da yakıcı sıvılar dışarı çıkabilir.
İçindekiler hakkında uyarılar (REACH)
İçindekiler hakkında ayrıntılı bilgileri bulabileceğiniz adres:
www.kaercher.com/REACH
Tehlike kademeleri
TEHLIKE
Ağır bedensel yaralanmalar ya da ölüme
neden olan direkt bir tehlike için.
몇 UYARI
Ağır bedensel yaralanmalar ya da ölüme
neden olabilecek olası tehlikeli bir durum
için.
몇 TEDBIR
Hafif yaralanmalara neden olabilecek olası
tehlikeli bir duruma yönelik uyarı.
DIKKAT
Maddi hasarlara neden olabilecek olası
tehlikeli bir duruma yönelik uyarı.
– 1
75TR
Page 76

Güvenlik uyarıları
Kullanım kılavuzundaki uyarıların yanında,
yerel yönetimin belirlediği güvenlik ve kaza
önleme talimatları dikkate alınmalıdır.
Yaralanma tehlikesi
– Cihaz dönen bir fırça merdanesi içer-
mektedir, çalışma sırasında parmakla-
rınız ya da bir aletle fırçayı kesinlikle tut-
mayın!
– Cihazdaki temizlik ve bakım çalışmala-
rından önce aküyü çıkartın!
Akü ve şarj cihazına yönelik uyarılar
– Sadece birlikte teslim edilen orijinal şarj
cihazı ya da KÄRCHER tarafından
onaylanmış şarj cihazlarıyla akülerin
şarj edilmesine izin verilmiştir.
– Her kullanımdan önce şarj cihazı ve akü
grubuna hasar kontrolü yapın. Hasarlı
cihazları kullanmayın ve hasarlı parça-
ları sadece teknik personelin onarması-
nı sağlayın.
– Şarj cihazını kirli ve ıslak durumda kul-
lanmayın.
– Şebeke gerilimi, şarj cihazının tip etike-
tinde belirtilen gerilimle aynı olmalıdır.
– Şarj cihazını patlama tehlikesi bulunan
ortamlarda çalıştırmayın.
– Adaptörün kontaklarına metal parçalar
girmemelidir; kısa devre tehlikesi.
– Şarj cihazını, sadece izin verilen akü
gruplarının şarj edilmesi için kullanın.
– Sadece temiz ve kuru akü gruplarını
şarj cihazının akü tutucusuna takın.
– Pilleri şarj etmeyin (birincil hücreli); pat-
lama tehlikesi.
– Hasarlı akü gruplarını şarj etmeyin. Ha-
sarlı akü gruplarını değiştirin.
– Akü gruplarını, metal cisimlerle birlikte
saklamayın; kısa devre tehlikesi.
– Akü gruplarını ateş ya da ev çöpüne at-
mayın.
– Arızalı akülerden çıkan sıvıyla teması
önleyin. Sıvıyla temas etmeniz duru-
munda, temas eden yerleri suyla yıka-
yın. Gözlerle temas olması durumunda,
ek olarak bir doktora muayene olun.
Cihazdaki semboller
Şarj cihazını ıslanmaya karşı koruyun ve kuru şekilde depolayın. Cihaz, sadece odalarda kullanım için
uygundur; cihazı yağmura maruz bırakmayın.
İşletime alma
Cihaz tanýmý
Ambalajı çıkartırken, ambalajın içinde bulunan malzemelerde eksik aksesuar ya da
hasar olup olmadığını kontrol edin. Nakliye
hasarlarında yetkili satıcınızı bilgilendirin.
Uyarı:
Cihaz ve kullanıma ait şekiller 2. sayfada
yer almaktadır.
1 Kilitli kardan mafsalı
2 Açma/Kapama ayak şalteri
3 Akü, çıkartılabilir
4 Değişim aküsü
(sadece EB 30/1 Adv)
5 Kilit açma düğmesi, akü
6 Toz haznesi, çıkartılabilir
7 Kilit açma mekanizması, toz haznesi
8 Muhafaza
9 Fırça merdanesi, değiştirilebilir
10 Kilit açma düğmesi, fırça merdanesi
11 Teleskopik sap, yüksekli ayarlı
12 Döner kol, yükseklik ayarı için
13 Tutamak
14 Şarj modu göstergesi ve şarj kablosu ile
birlikte şarj cihazı
(sadece EB 30/1)
15 Hızlı şarj cihazı
(sadece EB 30/1 Adv)
76 TR
– 2
Page 77

Teleskopik sap ve tutamağı takın ve
yüksekliği ayarlayın
Bkz. Şekil 2
Teleskopik sap 3 parçadan oluşur. Toplama sırasında parçaların iç içe kilitlenmesine dikkat edin.
Tutamağı, döner kollu uzun sapa takın.
Daha uzun ve daha kısa sapı iç içe yer-
leştirin; bunun için, toplama sırasında
kilit düğmesine basın.
Komple sapı, kilit düğmesi birlikte öne
doğru cihazdaki mafsala sokun.
Döner kolu gevşetin ve sapı istediğiniz
çalışma yüksekliğine çekin, tutamağı
doğru konuma döndürün ve döner kolu
sıkın.
Akünün şarj edilmesi
Bkz. Şekil 3
Akü, teslimat sırasında dolu değildir. İşletime almadan önce ve ihtiyaç anında şarj
edin.
Not: Aküler,sadece çıkartılmış durumda
şarj edilebilir.
Şarj kablosunu kullanarak aküyü şarj ci-
hazına bağlayın ya da aküyü şarj cihazına takın.
Birlikte teslim edilen şarj cihazını kural-
lara uygun bir prize takın.
Şarj modu göstergesi yeşil şekilde yanıp
söner. Akü şarj edilir.
Akü boşken şarj süresi
Şarj cihazı Li-Ion
6.654-359.0
BC 1/0.5 6 h
BC 1/1.8 90 min
Not
Şarj süresi aşılırsa, şarj cihazı koruma şarjına geçer. Şarj modu göstergesi yeşil olarak yanar.
Hata göstergesi
Şüphe etmeniz durumunda, yetkili müşteri
hizmetlerine başvurun.
: Kırmızı
olarak yanıp söner
Akünün yerleştirilmesi
Bkz. Şekil 4
Aküyü yuvasına yerleştirin ve kilitleyin.
Çalıştırma
Teleskopik parçayı yandan
kilitleme/açma
Bkz. Şekil 5
Tüyleri yüksek olan halıları temizlemek
amacıyla, teleskopik parçanın yana hareket etmesini önlemek için kardan mafsalı kilitlenebilir.
– Teleskopik parçanın yandan kilitlenme-
si:
Kilide basın, kilidi aşağı itin ve yerine
oturtun.
– Teleskopik parça kilidinin açılması:
Kilide basın, kilidi yukarı itin ve yerine
oturtun.
Çalışmaya başlanması
Bkz. Şekil 6
Cihazı çalıştırın, bu amaçla açma/kapa-
ma ayak şalterine basın.
Temizlemek için, cihazı ileri ve geri ha-
reket ettirin.
Kenara yakın temizlik için sağ tarafı kul-
lanın (akü tarafı).
Çalışmanın durdurulması
Bkz. Şekil 7
Cihazı kapatın, bu amaçla açma/kapa-
ma ayak şalterine basın.
Teleskop sapın çalışma sırasında gü-
venli bir şekilde durması için, sapı dik
konumda tutun; bir kilit mekanizması
sapı bu pozsiyonda tutar.
Çalışmanın tamamlanması
Çalışma sonunda cihazı kapatın.
Her temizlikten sonra toz haznesini bo-
şaltın.
Akünün kilit açma düğmesine basın ve
aküyü çıkartın.
Aküyü şarj edin.
– 3
77TR
Page 78

Toz haznesinin boşaltılması
Bkz. Şekil 8
Toz haznesinin kilidini açın ve hazneyi
çıkartın.
Çöp deposunu boşaltın.
Toz haznesini tekrar yerleştirin ve kilit-
leyin.
Cihazın saklanması
Cihaz, tutamaktan asılıabilir; gerekirse
tutamağı döndürün (bu amaçla Bkz.
"Teleskop sap ve tutamağın takılması
ve yüksekliğin ayarlanması" bölümü).
Taşıma
몇 TEDBIR
Yaralanma ve hasar tehlikesi! Taşıma sıra-
sında cihazın ağırlığına dikkat edin.
Araçlarda taşıma sırasında, cihazı geçerli
yönetmeliklere göre kaymaya ve devrilmeye karşı emniyete alın.
Depolama
몇 TEDBIR
Yaralanma ve hasar tehlikesi! Depolama
sırasında cihazın ağırlığına dikkat edin.
Bu cihaz sadece iç mekanlarda depolanmalıdır.
Koruma ve Bakım
몇 TEDBIR
Cihazdaki tüm temizlik ve bakım çalışmala-
rından önce aküyü çıkartın.
Cihazın temizlenmesi
Cihazı nemli bir bezle dışardan silin.
Agresif maddeler Örn. ovalama tozu
kullanılmayın.
Fırça merdanesinin değiştirilmesi/
temizlenmesi
Bkz. Şekil 9
Kilit açma düğmesine basın ve fırça
merdanesini çıkartın.
Sarılmış olan tüyleri, en iyi şekilde fırça
merdanesinin belirtilen kesme kenarın-
da boylamasına hareket ettirerek bir bı-
çak ya da makasla temizleyebilirsiniz.
Çözülen tüyleri fırça merdanesinden çı-
kartın.
Temizlenmiş ya da yeni fırça merdane-
sini yerleştirin ve doğru oturma kontrolü
yapın.
Servis
Garanti
Her ülkede yetkili distribütörümüz tarafından verilmiş garanti şartları geçerlidir. Garanti süresi içinde cihazınızda oluşan muhtemel hasarları, arızanın kaynağı üretim
veya malzeme hatası olduğu sürece ücretsiz olarak karşılıyoruz. Garanti hakkınızdan
yararlanmanızı gerektiren bir durum olduğu
zaman, ilgili faturanız ile birlikte satıcınıza
veya size en yakın yetkili servisimize başvurunuz.
Arızalarda yardım
몇 TEDBIR
Cihazdaki tüm çalışmalardan önce cihazı
kapatın ve aküyü çıkartın.
Şarj modu göstergesi yanmıyor
Şarj cihazından aküye giden bağlantıyı
kontrol edin.
Prizin gerilim beslemesini kontrol edin.
Cihaz güvenilir şekilde temizlemiyor
Fırça merdanesini temizleyin ya da de-
ğiştirin (Bkz. "Fırça merdanesinin de-
ğiştirilmesi/temizlenmesi" bölümü).
Aküyü şarj edin (Bkz. "Akünün şarj edil-
mesi" bölümü).
Kir, cihazdan dışarı savruluyor
Dolu olan toz haznesini boşaltın (Bkz.
"Toz haznesinin boşaltılması" bölümü).
78 TR
– 4
Page 79

Müşteri hizmeti
Sorularızın veya arızalar söz konusu olursa
KÄRCHER distribütörümüz size seve yardımcı olacaktır. Adres için bkz. Arka sayfa.
Aksesuarlar ve yedek
parçalar
Sadece orijinal aksesuarlar ve orijinal yedek parçalar kullanın; cihazın güvenli şekilde ve arızasız işletilmesini garantilerler.
Aksesuarlar ve yedek parçalar hakkında
bilgi için sitemizi ziyaret edin: www.kaercher.com.
Özel aksesuar
Tanımlama Sipariş No.
Hızlı şarj cihazı BC 1/1.8, 1'li (EB 30/1
Adv'da standart)
EU/CH 6.654-190
GB 6.654-196
AU 6.654-201
Değişim aküsü Li-Ion 2,6Ah 4.654-328
Fırça merdanesi, yumuşak,
kırmızı
4.762-401
AB uygunluk bildirisi
İşbu belge ile aşağıda tanımlanan makinenin konsepti ve tasarımı ve tarafımızdan piyasaya sürülen modeliyle AB yönetmeliklerinin temel teşkil eden ilgili güvenlik ve sağlık yükümlülüklerine uygun olduğunu bildiririz. Onayımız olmadan cihazda herhangi
bir değişiklik yapılması durumunda bu beyan geçerliliğini yitirir.
Ürün: Elektrikli fırça
Tip: 1.545-xxx
İlgili AB yönetmelikleri
2006/95/EG
2014/30/EU
2011/65/EU
Kullanılmış olan uyumlu standartlar
EN 55014–1: 2006+A1: 2009+A2: 2011
EN 55014–2: 1997+A1: 2001+A2: 2008
EN 60335–1
EN 60335–2–10
EN 60335–2–29: 2004+A2: 2010
EN 61000–3–2: 2006+A1: 2009+A2: 2009
EN 61000–3–3: 2013
EN 62233: 2008
EN 50581
İmzası bulunanlar, işletme yönetimi adına
ve işletme yönetimi tarafından verilen vekalete dayanarak işlem yapar.
CEO
Dokümantasyon yetkilisi:
S. Reiser
Alfred Kärcher GmbH & Co. KG
Alfred-Kärcher-Str. 28 - 40
71364 Winnenden (Germany)
Tel.: +49 7195 14-0
Faks: +49 7195 14-2212
Winnenden, 2015/02/01
– 5
Head of Approbation
79TR
Page 80

Teknik Bilgiler
Akü tipi EB 30/1
Li-Ion
Akü tam doluyken maksimum çalışma süresi (zemin kaplamasına
bağlıdır)
Akü çalışma gerilimi V 7,2
Şarj cihazının çıkış gerilimi V 4,2
Şarj akımı A 1,8
Nominal güç W 25
Şarj cihazının şebeke gerilimi
EU/CH V 230
GB V 230-240
AU V 240
Ses şiddeti seviyesi (EN 60704-2-1) dB(A) 56
Tipik çalışma ağırlığı kg 2,8
min 61
Hz 50 - 60
Hz 50 - 60
Hz 50-60
80 TR
– 6
Page 81

Перед первым применением
вашего прибора прочитайте
эту оригинальную инструкцию по эксплуатации, после этого действуйте соответственно и сохраните ее для дальнейшего пользования или для следующего
владельца.
Оглавление
Использование по назначе-
нию . . . . . . . . . . . . . . . . . . . . . RU 1
Защита окружающей среды . RU 1
Степень опасности . . . . . . . . RU 1
Указания по технике безопа-
сности. . . . . . . . . . . . . . . . . . . RU 2
Начало работы . . . . . . . . . . . RU 2
Эксплуатация. . . . . . . . . . . . . RU 3
Транспортировка . . . . . . . . . . RU 4
Хранение . . . . . . . . . . . . . . . . RU 4
Уход и техническое обслужи-
вание . . . . . . . . . . . . . . . . . . . RU 4
Сервисное обслуживание. . . RU 5
Принадлежности и запасные
детали . . . . . . . . . . . . . . . . . . RU 5
Заявление о соответствии ЕU RU 6
Технические данные . . . . . . . RU 7
Использование по
назначению
– Этот прибор предназначен для профес-
сионального использования, т.е. в гостиницах, школах, больницах, на промышленных предприятиях, в магазинах,
офисах и в арендуемых помещениях c
применением принадлежностей и запасных частей, допущенных фирмой
Kдrcher.
– Прибор приспособлен для высоковор-
систых ковров.
– Прибор не предназначен для влажных
половых покрытий.
– Прибор не предназначен для бетонных
покрытий, гальки и тому подобного.
Любой другой вид использования прибора считается использованием не по назначению. Изготовитель прибора не несет ответственности за вред, причиненный вследствие такого использования.
Риск за такое использование несет только пользователь.
Защита окружающей среды
Упаковочные материалы пригодны для вторичной переработки. Пожалуйста, не выбрасывайте упаковку вместе с бытовыми отходами, а сдайте ее
в один из пунктов приема вторичного сырья.
Старые приборы содержат
ценные перерабатываемые
материалы, подлежащие передаче в пункты приемки вторичного сырья. Батареи и аккумуляторы содержат вещества, которые не должны попасть в окружающую среду.
Пожалуйста, утилизируйте
старые приборы и аккумуляторы через соответствующие системы приемки отходов.
Перед отправкой прибора на слом необходимо снять встроенный аккумулятор и
утилизировать его без ущерба для окружающей среды!
Не вскрывайте аккумулятор, существует опасность короткого замыкания,
кроме того, могут выделиться раздражающие пары или агрессивные жидкости.
Инструкции по применению компонентов (REACH)
Актуальные сведения о компонентах
приведены на веб-узле по следующему
адресу:
www.kaercher.com/REACH
Степень опасности
ОПАСНОСТЬ
Для непосредственно грозящей опасности, которая приводит к тяжелым
увечьям или к смерти.
몇 ПРЕДУПРЕЖДЕНИЕ
Для возможной потенциально опасной
ситуации, которая может привести к
тяжелым увечьям или к смерти.
몇 ОСТОРОЖНО
Указание на потенциально опасную ситуацию, которая может привести к
получению легких травм.
– 1
81RU
Page 82

ВНИМАНИЕ
Указание относительно возможной потенциально опасной ситуации, которая может повлечь материальный
ущерб.
Указания по технике
безопасности
Наряду с указаниями по технике безопасности, содержащимися в руководстве
по эксплуатации, необходимо также соблюдать общие положения законодательства по технике безопасности и предотвращению несчастных случаев.
Опасность получения травм!
– Аппарат содержит в себе вращаю-
щиеся щетки, к которым во время
работы ни в коем случае нельзя при-
касаться пальцами или инструмен-
том.
– При проведении работ по уходу и
техническому обслуживанию пред
варительно снять аккумулятор!
Указания по аккумулятору и за-
рядному устройству
– Зарядка аккумуляторов разрешена
только с помощью прилагаемого ори-
гинального зарядного устройства
или допущенных фирмой KARCHER
зарядных устройств.
– Перед каждым использованием про-
верять зарядное устройство и акуму-
ляторный блок на повреждения. По-
врежденные приспособления боль-
ше не использовать, а поврежден-
ные части ремонтировать только с
помощью специализированного пер-
сонала.
– Не использовать зарядное устройст-
во в грязном или мокром состоянии.
– Напряжение, указанное на заводской
табличке зарядного устройства,
должно соответствовать напряже-
нию сети.
– Не эксплуатировать зарядное
устройство во взрывоопасной среде.
– В контакты адаптера не должны по-
пасть металлические предметы, опа-
сность короткого замыкания.
-
– Зарядное устройство использовать
только для зарядки разрешенных видов аккумуляторных блоков.
– В адартер зарядного устройства
вставлять только сухие и чистые аккумуляторные блоки.
– Не заряжать батареи (одноячейные),
взрывоопасность.
– Не заряжать поврежденные аккуму-
ляторные блоки. Поврежденные аккумуляторные блоки заменить.
– Аккумуляторные блоки не хранить
вместе с металлическими предметами, опасность короткого замыкания.
– Не бросать аккумуляторные блоки в
огонь и не выбрасывать в бытовые
отходы.
– Избегать контакта с жидкостью, кото-
рая вытекает из поврежденных аккумуляторов. При случайном контакте
смыть жидкость водой. При контакте
с глазами дополнительно проконсультироваться с врачом.
Символы на аппарате
Оберегать зарядное устройство
от влаги и хранить в сухом месте.
Аппарат предназначен для использования только в помещении,
не подвергать аппарат воздействию дождя.
Начало работы
Описание прибора
При распаковке прибора проверьте его
комплектность, а также его целостность.
При обнаружении повреждений, полученных во время транспортировки, следует уведомить торговую организацию,
продавшую прибор.
Указание:
Изображения прибора и управления находятся на стр. 2.
1 Карданный шарнир с блокировкой
2 Ножной включатель Вкл./Выкл.
3 Аккумулятор, съемный
4 Сменный аккумулятор
(только EB 30/1 Adv)
82 RU
– 2
Page 83

5 Кнопка разблокирования аккумуля-
тора
6 Мусорный бак, съемный
7 Разблокировка мусорного бака
8 Корпус
9 Вал щетки, сменный
10 Кнопка разблокировки вала щетки
11 Телескопическая рукоятка, регулиру-
емая по высоте
12 Вращающаяся ручка для установки
высоты
13 Рукоятка
14 Зарядное устройство с индикатором
режима зарядки и зарядным кабелем
(только EB 30/1)
15 Устройство быстрой зарядки
(только EB 30/1 Adv)
Установка телескопической ручки
и рукоятки и регулировка по
высоте
см. рисунок 2
Телескопическая рукоятка состоит из 3
частей. При сборке обратить внимание
на то, чтобы части зафиксировались.
Ручку надеть на более длинную руко-
ятку с вращаемой ручкой.
Состыковать более длинную и корот-
кую рукоятку, для этого при сочлене-
нии нажать кнопку фиксатора.
Рукоятку целиком с кнопкой фиксато-
ра по направлению вперед вставить
в сочленение на аппарате.
Отпустить вращающуюся ручку и вы-
тянуть рукоятку на желаемую рабо-
чую высоту, ручку повернуть в нуж-
ном направлении и затянуть враща-
ющуюся ручку.
Зарядить аккумулятор
см. рисунок 3
При поставке аккумулятор не заряжен.
Перед началом эксплуатации и по необходимости зарядить.
Указание: Возможна зарядка только
снятого аккумулятора.
Соединить кабелем аккумулятор с
зарядным устройством или устано-
вить аккумулятор в зарядное устрой-
ство.
Поставляемое в комплекте зарядное
устройство подключить к соответст-
вующей требованиям розетке.
Индикатор режима зарядки мигает зеленым светом. Аккумулятор заряжается.
Время зарядки разряженного аккумулятора
Зарядное
устройство
BC 1/0.5 6 h
BC 1/1.8 90 min
Указание
Если время зарядки превышено, то зарядное устройство переходит на подзарядку. Индикатор режима зарядки
светится зеленым светом.
Индикация
неисправностей
В случае сомнения обратиться в уполномоченную службу сервисного обслуживания.
: мигает
красным
цветом
Li-Ion
6.654-359.0
Установить аккумулятор
см. рисунок 4
Установить аккумулятор в приемное
устройство и защелкнуть.
Эксплуатация
Зафиксировать/освободить
сбоку телескопическую рукоятку
см. рисунок 5
Для очистки высоковорсых ковров можно заблокировать карданное соединение, чтобы предотвратить перемещение
в сторону телескопической рукоятки.
– Фиксирование сбоку телескопиче-
ской рукоятки:
Нажать на блокировку, переместить
ее вниз и зафиксировать.
– Освобождение телескопической ру-
коятки:
Нажать на блокировку, переместить
ее вверх и зафиксировать.
– 3
83RU
Page 84

Начало работы
см. рисунок 6
Включить аппарат, для этого нажать
ножной включатель Вкл./Выкл.
Для уборки перемещать аппарат
вперед и назад.
Для чистки мест около порогов ис-
пользовать правую сторону (сторона
аккумулятора).
Прекращение работы
см. рисунок 7
Выключить аппарат, для этого на-
жать ножной включатель Вкл./Выкл.
Для безопасного положения телеско-
пической рукоятки во время перерывов в работе установить ее вертикально, фиксатор удерживает ее в
этой позиции.
Окончание работы
При завершении работы выключить
аппарат.
Мусорный бак опорожнять после ка-
ждой чистки.
Нажать кнопку разблокировки акку-
мулятора и вынуть его.
Зарядить аккумулятор.
Опорожнение резервуара для
грязи
см. рисунок 8
Разблокировать и опорожнить му-
сорный бак.
Слейте воду из емкости с грязной во-
дой.
Снова установить и зафиксировать
мусорный бак.
Хранение прибора
Аппарат можно повесить за ручку,
если необходимо, повернуть ручку
(для этого смотреть главу "Монтаж
телескопической рукоятки и ручки и
установка высоты").
Транспортировка
몇 ОСТОРОЖНО
Опасность получения травм и повреждений! При транспортировке следует обратить внимание на вес устройства.
При перевозке аппарата в транспортных
средствах следует учитывать действующие местные государственные нормы,
направленные на защиту от скольжения
и опрокидывания.
Хранение
몇 ОСТОРОЖНО
Опасность получения травм и повреждений! При
тить внимание на вес устройства.
Это устройство разрешается хранить
только во внутренних помещениях.
хранении следует обра-
Уход и техническое
обслуживание
몇 ОСТОРОЖНО
Перед проведением любых работ по
уходу и техническому обслуживанию
прибора сетевой шнур необходимо отсоединить от розетки.
Чистка прибора
Аппарат протерть снаружи влажной
тканью. Использование агрессивных
средств (например, чистящих порош-
ков) не допускается.
Замена/чистка щеточного валика
см. рисунок 9
Нажать кнопку разблокировки и вы-
нуть вал щетки.
Намотанные волосы лучше всего
удалить с помощью ножа или нож-
ниц, пройдясь ими по режущей кром-
ке вала щетки. Высвободившиеся
волосы удалить с щетки вала.
Установить очищенный или новый
вал щетки и проверить правильность
посадки.
84 RU
– 4
Page 85

Сервисное обслуживание
Гарантия
В каждой стране действуют соответственно гарантийные условия, изданные
уполномоченной организацией сбыта
нашей продукции в данной стране. Возможные неисправности прибора в течение гарантийного срока мы устраняем
бесплатно, если причина заключается в
дефектах материалов или ошибках при
изготовлении. В случае возникновения
претензий в течение гарантийного срока
просьба обращаться, имея при себе чек
о покупке, в торговую организацию, продавшую вам прибор или в ближайшую
уполномоченную службу сервисного обслуживания.
Помощь в случае неполадок
몇 ОСТОРОЖНО
Перед проведением любых работ следует выключить устройство и извлечь аккумулятор.
Индикатор режима зарядки не горит
Проверить соединение от зарядного
устройства до аккумулятора.
Проверить наличие напряжения в ро-
зетке.
Аппарат не чистит должным образом
Очистить или заменить вал щетки
(смотреть главу „Чистка/замена вала
щетки“).
Зарядить аккумулятор (см. главу „За-
рядка аккумулятора“).
Из аппарата выбрасывается грязь
Опорожнить заполненный мусорный
бак (см. главу „Опорожнение мусор-
ного бака“).
Сервисная служба
Филиал фирмы KARCHER с удовольствием ответит на ваши вопросы и окажет
содействие при устранении неисправностей в приборе. Адрес указан на обороте
Принадлежности и
запасные детали
Используйте оригинальные принадлежности и запчасти — только они гарантируют безопасную и бесперебойную работу устройства.
Информацию о принадлежностях и запчастях вы можете найти на сайте
www.kaercher.com.
Специальные принадлежности
Обозначение № заказа:
Устройство быстрой зарядки BC 1/1.8,
для 1-го аккумулятора (обычно для EB
30/1 Adv)
EU/CH 6.654-190
GB 6.654-196
AU 6.654-201
Сменный аккумуля-
тор Li-Ion
Вал щетки, мягкий, красный 4.762-401
2,6Ah 4.654-328
– 5
85RU
Page 86

Заявление о соответствии
ЕU
Настоящим мы заявляем, что нижеуказанный прибор по своей концепции и
конструкции, а также в осуществленном
и допущенном нами к продаже исполнении отвечает соответствующим основным требованиям по безопасности и
здоровью согласно директивам ЕU. При
внесении изменений, не согласованных
с нами, данное заявление теряет свою
силу.
Продукт Электрощетки
Тип: 1.545-xxx
Основные директивы ЕU
2006/95/EC
2014/30/EU
2011/65/ЕC
Примененные гармонизированные
нормы
EN 55014–1: 2006+A1: 2009+A2: 2011
EN 55014–2: 1997+A1: 2001+A2: 2008
EN 60335–1
EN 60335–2–10
EN 60335–2–29: 2004+A2: 2010
EN 61000–3–2: 2006+A1: 2009+A2: 2009
EN 61000–3–3: 2013
EN 62233: 2008
EN 50581
Нижеподписавшиеся лица действуют по
поручению и по доверенности руководства предприятия.
CEO
уполномоченный по документации:
S. Reiser
Alfred Kaercher GmbH & Co. KG
Alfred-Kaercher-Str. 28 - 40
71364 Winnenden (Germany)
Тел.: +49 7195 14-0
Факс: +49 7195 14-2212
Winnenden, 2015/02/01
86 RU
Head of Approbation
– 6
Page 87

Технические данные
Тип аккумулятора EB 30/1
Li-Ion
Макс. время работы при полной зарядке аккумулятора (в зависимости от типа полового покрытия)
Рабочее напряжения аккумулятора V 7,2
Выходное напряжение зарядного устройства V 4,2
Ток зарядки A 1,8
Номинальная мощность W 25
Сетевое напряжение зарядного устройства
EU/CH V 230
GB V 230-240
AU V 240
Уровень звукового давления (EN 60704-2-1) dB(A) 56
Типичный рабочий вес kg 2,8
min 61
Hz 50 - 60
Hz 50 - 60
Hz 50-60
– 7
87RU
Page 88

A készülék első használata előtt
olvassa el ezt az eredeti használati utasítást, ez alapján járjon el és tartsa meg a későbbi használatra vagy a következő tulajdonos számára.
Tartalomjegyzék
Rendeltetésszerű használat . . HU 1
Környezetvédelem . . . . . . . . . HU 1
Veszély fokozatok . . . . . . . . . . HU 1
Biztonsági tanácsok . . . . . . . . HU 2
Üzembevétel . . . . . . . . . . . . . . HU 2
Üzem. . . . . . . . . . . . . . . . . . . . HU 3
Szállítás . . . . . . . . . . . . . . . . . HU 4
Tárolás . . . . . . . . . . . . . . . . . . HU 4
Ápolás és karbantartás . . . . . . HU 4
Szerviz . . . . . . . . . . . . . . . . . . HU 4
Tartozékok és alkatrészek. . . . HU 5
EU konformitási nyilatkozat. . . HU 5
Műszaki adatok . . . . . . . . . . . . HU 6
Rendeltetésszerű használat
– Ez a készülék ipari használatra alkal-
mas, pl. szállodákban, iskolákban, kórházakban, üzemekben, boltokban, irodákban és kölcsönző üzletekben, a
Kärcher által engedélyezett kiegészítőkkel és alkatrészekkel.
– A készülék csak feltételesen alkalmas
hosszú szálú szőnyegekre.
– A készülék nem alkalmas nedves pad-
lóburkolatokra.
– A készülék nem alkalmas mosott be-
tonra, zúzottkőre vagy hasonlóra.
Minden ezen túlmenő használat nem rendeltetésszerű használatnak minősül. Az
ebből származó károkért a gyártó nem vállal felelősséget; a kockázatot ezért egyedül
a felhasználó viseli.
Környezetvédelem
A csomagolási anyagok újrahasznosíthatók. Kérjük, ne dobja a csomagolást a házi szemétbe, hanem vigye el egy újrahasznosító helyre.
A használt készülékek értékes
újrahasznosítható anyagokat
tartalmaznak, amelyeket újrahasznosító helyen kell elhelyezni. Az elemek és az akkuk olyan
anyagokat tartalmaznak, amelyeknek nem szabad a környezetbe kerülni. Ezért kérjük, a
használt készülékeket, elemeket
és akkukat megfelelő gyűjtőrendszeren keresztül távolítsa
el.
Távolítsa el a beépített akkut a készülék kidobása előtt és környezetbarát módon ártalmatlanítsa!
Ne nyissa ki az akkut, fennáll a rövidzárlat
veszélye, továbbá izgató hatású gőzök
vagy maró folyadékok léphetnek ki.
Megjegyzések a tartalmazott anyagokkal kapcsolatban (REACH)
Aktuális információkat a tartalmazott anyagokkal kapcsolatosan a következő címen
talál:
www.kaercher.com/REACH
Veszély fokozatok
VESZÉLY
Azonnal fenyegető veszély, amely súlyos
testi sérüléshez vagy halálhoz vezet.
몇 FIGYELMEZTETÉS
Esetlegesen veszélyes helyzet, amely súlyos testi sérüléshez vagy halálhoz vezethet.
몇 VIGYÁZAT
Figyelmeztetés esetlegesen veszélyes
helyzetre, amely könnyű sérüléshez vezethet.
FIGYELEM
Lehetséges veszélyes helyzetre való figyelmeztetés, amely anyagi kárhoz vezethet.
88 HU
– 1
Page 89

Biztonsági tanácsok
Az üzemeltetési útmutatóban szereplő
megjegyzések mellett a törvényhozó általános biztonsági- és baleset elhárítási előírásait is figyelembe kell venni.
Sérülésveszély
– A készülékben forgó kefék vannak,
semmi esetre se nyúljon bele üzem
közben ujjal vagy szerszámmal!
– Ápolási- vagy karbantartási munkák
előtt a készülékről távolítsa el az akkut!
Megjegyzések az akkuhoz és a töltő
készülékhez
– Az akkut tölteni csak a mellékelt eredeti
töltő készülékkel vagy a KÄRCHER ál-
tal engedélyezett töltő készülékkel sza-
bad.
– Minden használat előtt ellenőrízze a töl-
tő készüléket és az akku csomagot
esetleges sérülésekre. Sérült készülé-
keket ne használjon tovább és a sérült
részeket csak szakember által hozassa
rendbe.
– A töltő készüléket ne használja piszkos
vagy nedves állapotban.
– A hálózati feszültségnek meg kell
egyezni a töltő készülék típustábláján
megadott feszültséggel.
– A töltő készüléket ne üzemeltesse rob-
banásveszélyes környezetben.
– Az adapter érintkezéseire nem kerülhet
fém darab, rövidzárlat veszély.
– A töltő készüléket csak az engedélyezett
akku csomagok töltésére használja.
– Csak tiszta és száraz akku csomagot
toljon rá a töltő készülék akku tartójára.
– Ne töltsön fel elemet (primer elemek),
robbanásveszély.
– Ne töltsön fel sérült akku csomagot. A
sérült akku csomagot cserélje ki.
– Az akku csomagot ne tárolja együtt fém
tárgyakkal, rövidzárlat veszély.
– Az akku csomagot ne dobja tűzbe vagy
a házi szemétbe.
– Kerülje az érintkezést a hibás akkuból
kifolyó folyadékkal. A folyadékkal való
véletlen érintkezés esetén vízzel mossa
le. Szembe kerülés esetén ezen felül
konzultáljon orvossal.
Szimbólumok a készüléken
A töltő készüléket nedvességgel
szemben óvja és tárolja szárazon. A
készülék csak szobai használatra alkalmas, a készüléket ne tegye ki
esőnek.
Üzembevétel
A készülék ismertetése
Ellenőrizze kicsomagoláskor a csomag tartalmának teljességét és sértetlenségét.
Szállítás közben keletkezett sérülés esetén
értesítse az eladót.
Megjegyzés:
Rajzok a készülékről és használatáról a 2.
oldalon találhatók.
1 Kardáncsukló zárral
2 Be-/Ki lábkapcsoló
3 Akku, kivehető
4 Csere akku
(csak EB 30/1 Adv)
5 Kioldási gomb, akku
6 Szennytartály, kivehető
7 Kioldás, szennytartály
8 Ház
9 Kefehenger, cserélhető
10 Kioldási gomb, kefehenger
11 Teleszkópnyél, magassága állítható
12 Forgó markolat, magasság állítására
13 Markolat
14 Töltő készülék töltési üzem kijelzővel és
töltőkábellel
(csak EB 30/1)
15 Gyors-töltő készülék BC
(csak EB 30/1 Adv)
– 2
89HU
Page 90

Szerelje fel a teleszkópos nyelet és a
markolatot és állítsa be a
magasságot
lásd 2 ábra
A teleszkópnyél 3 részből áll. Az összerakásnál figyeljen arra, hogy a részek bekattanjanak.
A markolatot a forgó markolatos hos-
szabb nyélre tegye fel.
A hosszabb és a rövidebb nyelet rakja
össze, ehhez összerakáskor nyomja a
rögzítőpecket.
Az összeszerelt nyelet a rögzítőpecek-
kel előre helyezze be a készülék csuklójába.
A forgó markolatot oldja ki és húzza ki a
nyelet a kívánt munkamagasságra, a
markolatot fordítsa a megfelelő állásra
és a forgó markolatot húzza meg.
Akku feltöltése
lásd 3 ábra
Az akku szállításkor nincs feltöltve. Üzembe helyezés előtt és igény szerint töltse fel.
Megjegyzés: Az akku feltöltése csak kivett
állapotban történhet.
Az akkut a töltőkábel segítségével kös-
se össze a töltő készülékkel ill. helyezze be az akkut a töltő készülékbe.
A mellékelt töltő készüléket dugja be
egy rendeltetésszerű konnektorba.
A töltési üzem kijelző zölden villog. Az akku
töltődik.
Töltési idő üres akkunál
Töltőkészülék
BC 1/0.5 6 h
BC 1/1.8 90 min
Megjegyzés
Ha a töltési időt túllépi, akkor a töltő készülék átkapcsol fenntartási töltésre. A töltési
üzem kijelző zölden világít.
Hibakijelzés : pirosan
villog
Kétség esetén forduljon a szerviz szolgálathoz.
Li-Ion
6.654-359.0
Akku behelyezése
lásd 4. ábra
Az akkut tolja és kattintsa be a helyére.
Üzem
Teleszkópnyél bereteszelése/
kireteszelése oldalt
lásd 5. ábra
Hosszú szálú szőnyegek tisztításához a
kardáncsuklót be lehet reteszelni, a teleszkópnyél oldalsó mozgásának megakadályozása érdekében.
– Teleszkópnyél bereteszelése oldalt:
Reteszt megnyomni, lefelé tolni és be-
kattintani.
– Teleszkópnyél kireteszelése:
Reteszt megnyomni, felfelé tolni és be-
kattintani.
Munka kezdése
lásd 6. ábra
Kapcsolja be a készüléket, ehhez
nyomja meg a Be-/Ki lábkapcsolót .
Tisztításhoz mozgassa a készüléket
előre és hátra.
Szélek közeli tisztításhoz használja a
jobb oldalt (akku oldal).
A munka megszakítása
lásd 7. ábra
Kapcsolja ki a készüléket, ehhez nyom-
ja meg a Be-/Ki lábkapcsolót .
A teleszkópnyél biztos állása érdeké-
ben munkaszünetekben állítsa függőle-
gesen, egy rögzítés ebben a pozíció-
ban tartja.
A munka befejezése
A munka befejeztével kapcsolja ki a ké-
szüléket.
A szennytartályt minden tisztítás után
ürítse ki.
Nyomja meg az akku kioldási gombját
és vegye ki az akkut.
Akku feltöltése.
90 HU
– 3
Page 91

A szeméttartály kiürítése
lásd 8. ábra
Oldja ki és vegye ki a szennytartályt.
Szennytartály kiürítése.
Helyezze és kattintsa be újra a szenny-
tartályt.
A készülék tárolása
A készüléket a markolatnál lehet fel-
akasztani, ha szükséges fordítsa el a
markolatot (lásd ehhez a „Teleszkópnyél és markolat szerelése és magasság beállítása“ fejezetet).
Szállítás
몇 VIGYÁZAT
Sérülés- és rongálódásveszély! Szállítás
esetén vegye figyelembe a készülék súlyát.
Járművel történő szállítás esetén a készüléket az adott irányelveknek megfelelően
kell csúszás és borulás ellen biztosítani.
Tárolás
몇 VIGYÁZAT
Sérülés- és rongálódásveszély! Tárolás
esetén vegye figyelembe a készülék súlyát.
Ezt a készüléket csak beltéri helyiségben
szabad tárolni.
Ápolás és karbantartás
몇 VIGYÁZAT
Minden tisztítási- és karbantartási munka
előtt vegye ki az akkumulátort a készülékből.
A készülék tisztítása
A készüléket kívülről nedves ronggyal
törölje le. Ne használjon erős szereket,
mint pl. súrolóport.
A kefehenger cseréje/tisztítása
lásd 9. ábra
Nyomja meg a kioldási gombot és ve-
gye ki a kefehengert.
A feltekeredett hajakat legjobban kés-
sel ill. ollóval tudja eltávolítani, végig-
menve a kefehenger megadott vágóéle
mentén. A kioldott hajakat távolítsa el a
kefehengerről.
Helyezze be a kitisztított ill. új kefehen-
gert és ellenőrízze a helyes állást.
Szerviz
Garancia
Minden országban az illetékes forgalmazónk által kiadott garancia feltételek érvényesek. Az esetleges üzemzavarokat az
Ön készülékén a garancia lejártáig költségmentesen elhárítjuk, amennyiben anyagvagy gyártási hiba az oka. Garanciális esetben kérjük, forduljon a vásárlást igazoló bizonylattal kereskedőjéhez vagy a legközelebbi hivatalos szakszervizhez.
Hibaelhárítás
몇 VIGYÁZAT
A készüléken történő bármiféle munka előtt
kapcsolja ki a készüléket és vegye ki az akkumulátort.
A töltési üzem kijelző nem világít
Ellenőrízze a csatlakozást a töltő ké-
szülék és az akku között.
Ellenőrízze a konnektor feszültségellá-
tását.
A készülék nem tisztít megbízhatóan
Tisztítsa ill. cserélje a kefehengert (lásd
a "Kefehenger cseréje/tisztítása" feje-
zetet).
Akku feltöltése (lásd az "Akku feltölté-
se" fejezetet).
A szenny kipereg a készülékből
Ürítse ki a megtelt szennytartályt (lásd
a "Szennytartály ürítése" fejezetet).
– 4
91HU
Page 92

Szerviz
Kérdések vagy üzemzavar esetén Kärchertelephelyünk szívesen segít Önnek. A címet lásd a hátoldalon.
Tartozékok és alkatrészek
Kizárólag eredeti tartozékokat és eredeti
pótalkatrészeket alkalmazzon, mivel ezek
szavatolják a készülék biztonságos és zavarmentes üzemét.
A tartozékokkal és pótalkatrészekkel kapcsolatos információkat a www.kaercher.com oldalon olvashatja.
Külön tartozékok
Megnevezés Megrende-
lési szám
Gyors-töltő készülék BC 1/1.8, 1-szer
(szabvány EB 30/1 Adv esetén)
EU/CH 6.654-190
GB 6.654-196
AU 6.654-201
Csere akku Li-Ion 2,6Ah 4.654-328
Kefehenger, puha, piros 4.762-401
EU konformitási nyilatkozat
Ezennel tanúsítjuk, hogy az alábbiakban
megnevezett gép tervezése és építési
módja alapján az általunk forgalomba hozott kivitelben megfelel az EU irányelvek
vonatkozó, alapvető biztonsági és egészségügyi követelményeinek. A gép jóváhagyásunk nélkül történő módosítása esetén
ez a nyilatkozat elveszti érvényességet. A
készülék megfelel az EU-ban és Magyarországon (HU) harmonizált szabványoknak.
Termék: Akkus seprő
Típus: 1.545-xxx
Vonatkozó európai közösségi irányelvek:
2006/95/EG
2014/30/EU
2011/65/ЕU
Alkalmazott harmonizált szabványok:
EN 55014–1: 2006+A1: 2009+A2: 2011
EN 55014–2: 1997+A1: 2001+A2: 2008
EN 60335–1
EN 60335–2–10
EN 60335–2–29: 2004+A2: 2010
EN 61000–3–2: 2006+A1: 2009+A2: 2009
EN 61000–3–3: 2013
EN 62233: 2008
EN 50581
92 HU
Alulírottak az ügyvezetés megbízásából és
felhatalmazásával lépnek fel.
CEO
A dokumentációért felelős személy:
S. Reiser
Alfred Kärcher GmbH & Co. KG
Alfred-Kärcher-Str. 28 - 40
71364 Winnenden (Germany)
Tel.: +49 7195 14-0
Fax: +49 7195 14-2212
Winnenden, 2015/02/01
– 5
Head of Approbation
Page 93

Műszaki adatok
Akku típus EB 30/1
Li-Ion
Max. üzemidő teljes akkufeltöltésnél (függ a padlóburkolattól) min 61
Munkafeszültség akku V 7,2
A töltő készülék kimenő feszültsége V 4,2
Töltőáram A 1,8
Névleges teljesítmény W 25
A töltő készülék hálózati feszültsége
EU/CH V 230
Hz 50 - 60
GB V 230-240
Hz 50 - 60
AU V 240
Hz 50-60
Hangnyomásszint (EN 60704-2-1) dB(A) 56
Tipikus üzemi súly kg 2,8
– 6
93HU
Page 94

Před prvním použitím svého za-
řízení si přečtěte tento původní
návod k používání, řiďte se jím a uložte jej
pro pozdější použití nebo pro dalšího majitele.
Obsah
Používání v souladu s určením CS 1
Ochrana životního prostředí . . CS 1
Stupně nebezpečí . . . . . . . . . . CS 1
Bezpečnostní pokyny . . . . . . . CS 2
Uvedení do provozu . . . . . . . . CS 2
Provoz. . . . . . . . . . . . . . . . . . . CS 3
Přeprava . . . . . . . . . . . . . . . . . CS 4
Ukládání . . . . . . . . . . . . . . . . . CS 4
Ošetřování a údržba . . . . . . . . CS 4
Servis . . . . . . . . . . . . . . . . . . . CS 4
Příslušenství a náhradní díly. . CS 5
EU prohlášení o shodě . . . . . . CS 5
Technické údaje . . . . . . . . . . . CS 6
Používání v souladu s
určením
– Tento přístroj je vhodný k profesionální-
mu použití např. v hotelech, školách,
nemocnicích, továrnách, obchodech,
úřadech a půjčovnách, a to s příslušenstvím a náhradními díly schválenými
společností Kärcher.
– Za určitých podmínek je tento přístroj
vhodný pro koberce s dlouhým vlasem.
– Tento přístroj není vhodný pro mokré
podlahové krytiny.
– Přístroj není vhodný pro vymývaný be-
ton, štěrk ani podobné materiály.
Jakékoli jiné používání se považuje za nesprávné. Za škody vzniklé takovým používáním výrobce neručí; rizika nese výhradně uživatel.
Ochrana životního prostředí
Obalové materiály jsou recyklovatelné. Obal nezahazujte do
domovního odpadu, ale odevzdejte jej k opětovnému zužitkování.
Přístroj je vyroben z hodnotných
recyklovatelných materiálů, které se dají dobře znovu využít.
Baterie a akumulátory obsahují
látky, které se nesmí dostat do
životního prostředí. Likvidujte
proto staré přístroje, baterie a
akumulátory ve sběrnách k tomuto účelu určených.
Integrované akumulátory před odevzdáním
zařízení do šrotu odstraňte a ekologicky
zlikvidujte!
Akumulátory neotvírejte, existuje nebezpečí krátkého spojení a navíc z nich mohou
vycházet dráždivé páry nebo vytékat žíravé
kapaliny.
Informace o obsažených látkách (REACH)
Aktuální informace o obsažených látkách
naleznete na adrese:
www.kaercher.com/REACH
Stupně nebezpečí
NEBEZPEČÍ
Pro bezprostředně hrozící nebezpečí, které
vede k těžkým fyzickým zraněním nebo k
smrti.
몇 VAROVÁNÍ
Pro potencionálně nebezpečnou situaci,
která by mohla vést k těžkým fyzickým zraněním nebo k smrti.
몇 UPOZORNĚNÍ
Upozornění na případnou nebezpečnou situaci, která může vést k lehkým fyzickým
zraněním.
POZOR
Upozornění na potenciálně nebezpečnou
situaci, která může mít za následek poškození majetku.
94 CS
– 1
Page 95

Bezpečnostní pokyny
Kromě pokynů uvedených v návodu na použití je nutné dodržovat všeobecné bezpečnostní právní předpisy.
Nebezpečí úrazu
– V přístroji je rotující kartáčový válec.
Tohoto kartáče se během provozu v
žádném případě nedotýkejte prsty ani
nástroji!
– Před ošetřováním a údržbou přístroje
nejprve vyjměte akumulátor!
Pokyny k akumulátoru a nabíječce
– Akumulátor se smí nabíjet pouze přilo-
ženou originální nabíječkou nebo nabí-
ječkou schválenou společností
KÄRCHER.
– Před každým použitím zkontrolujte, zda
nejsou akumulátory a nabíječka poško-
zené. Poškozená zařízení dále nepou-
žívejte a poškozené součásti nechte
opravovat jen odborníkům.
– Nabíječku nepoužívejte znečištěnou
ani mokrou.
– Napětí sítě musí odpovídat napětí uve-
denému na identifikačním štítku nabí-
ječky.
– Nabíječku nepoužívejte v prostředí s
nebezpečím výbuchu.
– Ke kontaktům adaptéru se nesmějí do-
stat kovové předměty, jinak hrozí zkrat.
– Nabíječku používejte pouze k nabíjení
schválených akumulátorů.
– Na adaptér nabíječky dávejte jen čisté a
suché akumulátory.
– Nenabíjejte baterie (primární články), ji-
nak hrozí výbuch.
– Nenabíjejte poškozené akumulátory.
Poškozené akumulátory vyměňte.
– Akumulátory neskladujte společně s ko-
vovými předměty, jinak hrozí zkrat.
– Akumulátory nevhazujte do ohně ani do
domovního odpadu.
– Zamezte styk s tekutinou vytékající z
poškozených akumulátorů. Při náhod-
ném styku s touto tekutinou příslušné
místo opláchněte vodou. Při zasažení
očí ještě vyhledejte lékařskou pomoc.
Symboly na zařízení
Chraňte nabíječku před vlhkem a
skladujte ji v suchu. Zařízení je vhodné k použití v místnostech, chraňte
je před deštěm.
Uvedení do provozu
Popis přístroje
Při vybalení zkontrolujte obsah zásilky, zda
nechybí příslušenství či zda dodaný přístroj
není poškozen. Při škodách způsobených
dopravou informujte laskavě Vašeho obchodníka.
Upozornění:
Znázornění přístroje a obsluhy najdete na
straně 2.
1 Kardanový kloub s blokovacím mecha-
nismem
2 Nožní vypínač
3 Akumulátor, vyjímatelný
4 Náhradní akumulátor
(jen EB 30/1 Adv)
5 Uvolňovací tlačítko akumulátoru
6 Nádoba na nečistoty, vyjímatelná
7 Uvolňování, nádoba na nečistoty
8 Plášť
9 Kartáčový válec, vyměnitelný
10 Uvolňovací tlačítko, kartáčový válec
11 Teleskopická násada s nastavitelnou
výškou
12 Otočná rukojeť k nastavení výšky
13 Rukojeť
14 Nabíječka s ukazatelem nabíjení a na-
bíjecím kabelem
(jen EB 30/1)
15 Rychlonabíječka
(jen EB 30/1 Adv)
– 2
95CS
Page 96

Montáž teleskopické násady a
rukojeti a nastavení výšky
Viz obrázek 2
Teleskopická násada se skládá ze tří částí.
Při sestavování dbejte na to, aby do sebe
části zaklaply.
Rukojeť nasaďte na delší část násady s
otočnou rukojetí.
Delší a kratší část násady spojte. Při
spojování stiskněte západku.
Celou násadu zasuňte západkou do-
předu do kloubu na přístroji.
Povolte otočnou rukojeť a násadu vy-
táhněte do požadované pracovní výšky.
Rukojeť otočte správným směrem a
otočnou rukojeť utáhněte.
Nabíjení akumulátoru
Viz obrázek 3
Dodaný akumulátor není nabitý. Před uvedením do provozu a podle potřeby ho dobijte.
Upozornění: Akumulátor lze nabíjet jen vyjmutý.
Akumulátor připojte nabíjecím kabelem
k nabíječce nebo akumulátor zastrčte
do nabíječky.
Dodanou nabíječku zapojte do vhodné
zásuvky.
Kontrolka nabíjení bliká zeleně. Akumulátor se nabíjí.
Doba nabíjení vybitého akumulátoru
Nabíječka Li-Ion
6.654-359.0
BC 1/0.5 6 h
BC 1/1.8 90 min
Upozornění
Při překročení doby nabíjení se nabíječka
přepne na udržovací nabíjení. Ukazatel nabíjení svítí zeleně.
Zobrazení
chyb
V případě pochybností se obraťte na autorizovaný zákaznický servis.
: bliká čer-
veně
Nasazení akumulátoru
Viz obrázek 4
Akumulátor zasuňte do držáku a za-
klapněte.
Provoz
Teleskopickou tyč zajišťujte /
odjišťujte na straně
Viz obrázek 5
K čištění koberců s dlouhým vlasem lze
kardanový kloub zablokovat, aby se zabránilo stranovému pohybu teleskopické tyče.
– Teleskopickou tyč zajišťujte na straně:
Zatlačte na blokovací mechanismus,
posuňte jej dolů a zaaretujte.
– Odjištění teleskopické tyče:
Zatlačte na blokovací mechanismus,
posuňte jej nahoru a zaaretujte.
Zahájení práce
Viz obrázek 6
Zapněte přístroj stisknutím nožního vy-
pínače.
Při čištění pohybuje přístrojem dopředu
a dozadu.
K čištění okrajů používejte pravou stra-
nu (stranu s akumulátorem).
Přerušení práce
Viz obrázek 7
Vypněte přístroj stisknutím nožního vy-
pínače.
K bezpečnému upevnění během pře-
stávek postavte teleskopickou násadu
do svislé polohy, v níž ji drží aretace.
Ukončení práce
Po dokončení práce přístroj vypněte.
Po každém čištění vyprázdněte nádobu
na nečistoty.
Stiskněte uvolňovací tlačítko akumulá-
toru a akumulátor vyndejte.
Nabijte akumulátor.
96 CS
– 3
Page 97

Vyprázdnění nádrže na nečistoty
Viz obrázek 8
Nádrž na nečistoty uvolněte a vyndejte.
Nádrž na nečistoty vyprázdněte.
Nádrž na nečistoty nasaďte zpět a za-
klapněte.
Uložení přístroje
Přístroj lze pověsit za rukojeť. V přípa-
dě potřeby rukojeť otočte (viz kapitola
„Montáž a nastavení výšky teleskopické
násady a rukojeti“).
Přeprava
몇 UPOZORNĚNÍ
Nebezpečí úrazu a nebezpečí poškození!
Dbejte na hmotnost přístroje při přepravě.
Při přepravě v dopravních prostředcích zajistěte zařízení proti skluzu a překlopení
podle platných předpisů.
Ukládání
몇 UPOZORNĚNÍ
Nebezpečí úrazu a nebezpečí poškození!
Dbejte na hmotnost přístroje při jeho
uskladnění.
Toto zařízení smí být uskladněno pouze v
uzavřených prostorách.
Ošetřování a údržba
몇 UPOZORNĚNÍ
Než začnete provádět jakékoli údržbářské
práce na přístroji, vytáhněte akumulátor.
Čištění přístroje
Povrch přístroje otřete vlhkým hadří-
kem. Nepoužívejte agresivní čisticí prostředky, např. čisticí prášek.
Výměna / čištění kartáčového válce
viz ilustraci 9
Stiskněte uvolňovací tlačítko a vyjměte
kartáčový válec.
Odstraňte namotané chlupy, nejlépe
nožem nebo nůžkami. Přejeďte po pří-
slušné hraně kartáčového válce. Uvol-
něné chlupy z kartáčového válce od-
straňte.
Nasaďte vyčištěný, resp. nový kartáčový
válec a zkontrolujte správné nasazení.
Servis
Záruka
V každé zemi platí záruční podmínky vydané příslušnou distribuční společností. Případné poruchy zařízení odstraníme během
záruční lhůty bezplatně, pokud byl jejich
příčinou vadný materiál nebo výrobní závady. V případě uplatňování nároku na záruku se s dokladem o zakoupení obraťte na
prodejce nebo na nejbližší oddělení služeb
zákazníkům.
Pomoc při poruchách
몇 UPOZORNĚNÍ
Před zahájením jakýchkoliv prací na přístroji, přístroj vypněte a vyjměte akumulátor.
Ukazatel nabíjení nesvítí.
Zkontrolujte spojení mezi nabíječkou a
akumulátorem.
Zkontrolujte napájení ze zásuvky.
Přístroj nečistí kvalitně.
Vyčistěte, resp. vyměňte kartáčový vá-
lec (viz kapitola „Výměna / čištění kartá-
čového válce“).
Nabijte akumulátor (viz kapitola „Nabí-
jení akumulátoru“).
Z přístroje létají nečistoty.
Vyprázdněte naplněnou nádobu na ne-
čistoty (viz kapitola „Vyprázdnění nádr-
že na nečistoty“).
– 4
97CS
Page 98

Oddělení služeb zákazníkům
Při eventuelních dotazech či poruchách se
s důvěrou obraťte na jakoukoli pobočku firmy Kärcher. Adresy poboček najdete na
zadní straně.
Příslušenství a náhradní díly
Používejte pouze originální příslušenství a
originální náhradní díly, ty poskytují záruku
bezpečného a bezporuchového provozu
přístroje.
Informace o příslušenství a náhradních dílech naleznete na adrese www.kaercher.com.
Zvláštní příslušenství
Označení Objednací
č.
Rychlonabíječka BC 1/1.8, jednonásobná
(standard u typu EB 30/1 Adv)
EU/CH 6.654-190
GB 6.654-196
AU 6.654-201
Náhradní akumulátor
Li-Ion
Kartáčový válec, měkký, čer-
vený
2,6Ah 4.654-328
4.762-401
EU prohlášení o shodě
Tímto prohlašujeme, že níže označené
stroje odpovídají jejich základní koncepcí a
konstrukčním provedením, stejně jako
námi do provozu uvedenými konkrétními
provedeními, příslušným zásadním požadavkům o bezpečnosti a ochraně zdraví
směrnic EU. Při jakýchkoli na stroji provedených změnách, které nebyly námi odsouhlaseny, pozbývá toto prohlášení svou
platnost.
Výrobek: Elektrický smeták
Typ: 1.545-xxx
Příslušné směrnice EU:
2006/95/ES
2014/30/EU
2011/65/EU
Použité harmonizační normy
EN 55014–1: 2006+A1: 2009+A2: 2011
EN 55014–2: 1997+A1: 2001+A2: 2008
EN 60335–1
EN 60335–2–10
EN 60335–2–29: 2004+A2: 2010
EN 61000–3–2: 2006+A1: 2009+A2: 2009
EN 61000–3–3: 2013
EN 62233: 2008
EN 50581
Podepsaní jednají v pověření a s plnou
mocí jednatelství
98 CS
CEO
Osoba zplnomocněná sestavením dokumentace:
S. Reiser
Alfred Kärcher GmbH & Co. KG
Alfred-Kärcher-Str. 28 - 40
71364 Winnenden (Germany)
Tel.: +49 7195 14-0
Fax: +49 7195 14-2212
Winnenden, 2015/02/01
– 5
Head of Approbation
Page 99

Technické údaje
Typ akumulátoru EB 30/1
Li-Ion
Maximální provozní doba při úplném nabití akumulátoru (závisí na
podlahové krytině)
Pracovní napětí akumulátoru V 7,2
Výstupní napětí nabíječky V 4,2
Nabíjecí proud A 1,8
Jmenovitý výkon W 25
Napětí sítě pro nabíječku
EU/CH V 230
GB V 230-240
AU V 240
Hladina akustického tlaku (EN 60704-2-1) dB(A) 56
Typická provozní hmotnost kg 2,8
min 61
Hz 50 - 60
Hz 50 - 60
Hz 50-60
– 6
99CS
Page 100

Pred prvo uporabo Vaše napra-
ve preberite to originalno navodilo za uporabo, ravnajte se po njem in
shranite ga za morebitno kasnejšo uporabo
ali za naslednjega lastnika.
Vsebinsko kazalo
Namenska uporaba. . . . . . . . . SL 1
Varstvo okolja . . . . . . . . . . . . . SL 1
Stopnje nevarnosti . . . . . . . . . SL 1
Varnostna navodila . . . . . . . . . SL 2
Zagon . . . . . . . . . . . . . . . . . . . SL 2
Obratovanje . . . . . . . . . . . . . . SL 3
Transport. . . . . . . . . . . . . . . . . SL 4
Skladiščenje . . . . . . . . . . . . . . SL 4
Vzdrževanje . . . . . . . . . . . . . . SL 4
Servis . . . . . . . . . . . . . . . . . . . SL 4
Pribor in nadomestni deli . . . . SL 5
Izjava EU o skladnosti. . . . . . . SL 5
Tehnični podatki . . . . . . . . . . . SL 6
Namenska uporaba
– Ta naprava je primerna za industrijsko
uporabo, npr. v hotelih, šolah, bolnišnicah, tovarnah, trgovinah, pisarnah in
najemnih poslovalnicah, s priborom in
nadomestnimi deli, ki jih dopušča podj.
Kärcher.
– Naprava je le pogojno primerna za ko-
smate preproge.
– Naprava ni primerna mokre talne oblo-
ge.
– Naprava ni primerna za pralni beton,
gramozna tla in podobno.
Vsaka uporaba izven teh okvirjev velja kot
nenamenska. Proizvajalec ne odgovarja za
tako nastalo škodo; tveganje nosi izključno
uporabnik.
Varstvo okolja
Embalaža je primerna za recikliranje. Prosimo, da embalaže ne
odvržete med gospodinjske odpadke, temveč jo odložite v zbiralnik za ponovno obdelavo.
Stare naprave vsebujejo dragocene reciklirne materiale, ki jih je
treba odvajati za ponovno uporabo. Baterije in akumulatorske
baterije vsebujejo snovi, ki ne
smejo priti v okolje. Zato stare
naprave, baterije in akumulatorske baterije zavrzite v ustrezne
zbiralne sisteme.
Vgrajeno akumulatorsko baterijo odstranite
preden napravo zavržete in jo zavrzite na
okolju prijazen način.
Akumulatorske baterije ne odpirajte, obstaja nevarnost kratkega stika, poleg tega
lahko izstopijo dražeči hlapi ali jedke tekočine.
Opozorila k sestavinam (REACH)
Aktualne informacije o sestavinah najdete
na:
www.kaercher.com/REACH
Stopnje nevarnosti
NEVARNOST
Za neposredno grozečo nevarnost, ki vodi
do težkih telesnih poškodb ali smrti.
몇 OPOZORILO
Za možno nevarno situacijo, ki bi lahko vodila do težkih telesnih poškodb ali smrti.
몇 PREVIDNOST
Opozorilo na možno nevarno situacijo, ki
lahko vodi do lažjih poškodb.
POZOR
Opozorilo na možno nevarno situacijo, ki
lahko vodi do premoženjskih škod.
100 SL
– 1
 Loading...