

Kyocera Mita FS-1800N+, HS-8E Operation Manual
Bulk Paper Stacker
Massenpapierablage
Récepteur de papier à grande capacité
Impilatore in quantit di carta
Apilador de papel de gran capacidad
Operation Guide
Bedienungsanleitung
Manuel d’utilisation
Guida operativa
Guía de instrucciones
For the Kyocera Mita Page Printers
Für Kyocera Mita Seitendrucker
Pour imprimantes de page Kyocera Mita
Per la stampanti Kyocera Mita
Para la impresora de páginas Kyocera Mita
HS8-cvr_front.p65 8/8/01, 11:27 AM1

HS8-cvr_front.p65 8/8/01, 11:27 AM2
1
English
Note on Paper
Before purchasing paper, test a sample on the printer installed with the
paper stacker and check that printing quality is satisfactory.
Notice
We shall have no liability or responsibility to customers or any other
person or entity with respect to any liability, loss or damage caused or
alleged to be caused directly or indirectly by equipment sold or furnished
by us, including but not limited to, any interruption of service, loss of
business or anticipatory profits, or consequential damages resulting from
the use or operation of the equipment or software.
Caution
NO LIABILITY IS ASSUMED FOR ANY DAMAGE CAUSED BY
IMPROPER INSTALLATION.
The information in this manual is subject to change without notification.
Additional pages may be insefted in future editions. The user is asked to
excuse any technical inaccuracies or typographical errors in the present
edition.
No responsibility is assumed if accidents occur while the user is following the instructions in this manual.
The contents of this manual are protected by copyright. No paft of this
manual may be reproduced or copied by any means without the
permission of the copyright holder.
HS8-Eng.p65 8/8/01, 11:27 AM1

2
Information to users:
This equipment has been tested and found to comply with the limits for a
Class B digital device, pursuant to Part 15 of FCC Rules. These limits are
designed to provide reasonable protection against harmful interference in
a residential installation. This equipment generates, uses, and can
radiate radio frequency energy and, if not installed and used in
accordance with the instructions, may cause harmful interference to
radio communications. However, there is no guarantee that interference
will not occur in a particular installation. If this equipment does cause
harmful interference to radio or television reception, which can be
determined by turning the equipment off and on, the user is encouraged
to try to correct the interference by one or more of the following
measures:
❒ Reorient or relocate the receiving antenna.
❒ Increase the separation between the equipment and receiver.
❒ Connect the equipment into an outlet on a circuit different from
that to which the receiver is connected.
❒ Consult the dealer or an experienced radio/TV technician for help.
Changes or modifications not expressly approved by the manufacturer for
compliance could void the user’s authority to operate the equipment.
HS8-Eng.p65 8/8/01, 11:27 AM2

3
English
Table of contents
Introduction ............................................................................................... 3
Packing List .............................................................................................. 3
Installing the Bulk Paper Stacker with a PF-8E Bulk Paper Feeder ... 4
Removing the sub tray .....................................................................7
Operating the Bulk Paper Stacker .......................................................... 7
Clearing Paper Jams ................................................................................ 9
Specifications .......................................................................................... 11
Introduction
The HS-8E is a bulk paper stacker for with the Kyocera Mita page
printers. The bulk paper stacker provides face-up delivery of up to
approximately 2,000 printed pages at one time.
The bulk paper stacker must be installed to the printer together with a
PF-8E bulk paper feeder. Before installing the paper stacker, please read
these manuals carefully.
Packing List
Make sure that the paper stacker package contains each of the following
items in the indicated quantities.
❐ HS-8E optional bulk paper stacker, 1
❐ Paper receiving sub tray, 2 (1 large and 1 small)
❐ Instruction manual (this booklet), 1
HS8-Eng.p65 8/8/01, 11:27 AM3
4
Installing the Bulk Paper Stacker with a PF-8E Bulk Paper
Feeder
When the printer is installed with a PF-8E option bulk paper feeder, the
printer is mounted onto the mounting base (PB-60[option]). (For details on
the bulk paper feeder installation, refer to the instructions provided with the
PF-8E option bulk paper feeder.) Then, the HS-8E bulk paper stacker
mounts on the rear of the printer.
❐❐
❐❐
❐ Always turn off the printer’s power before installing or
removing the bulk paper stacker.
❐❐
❐❐
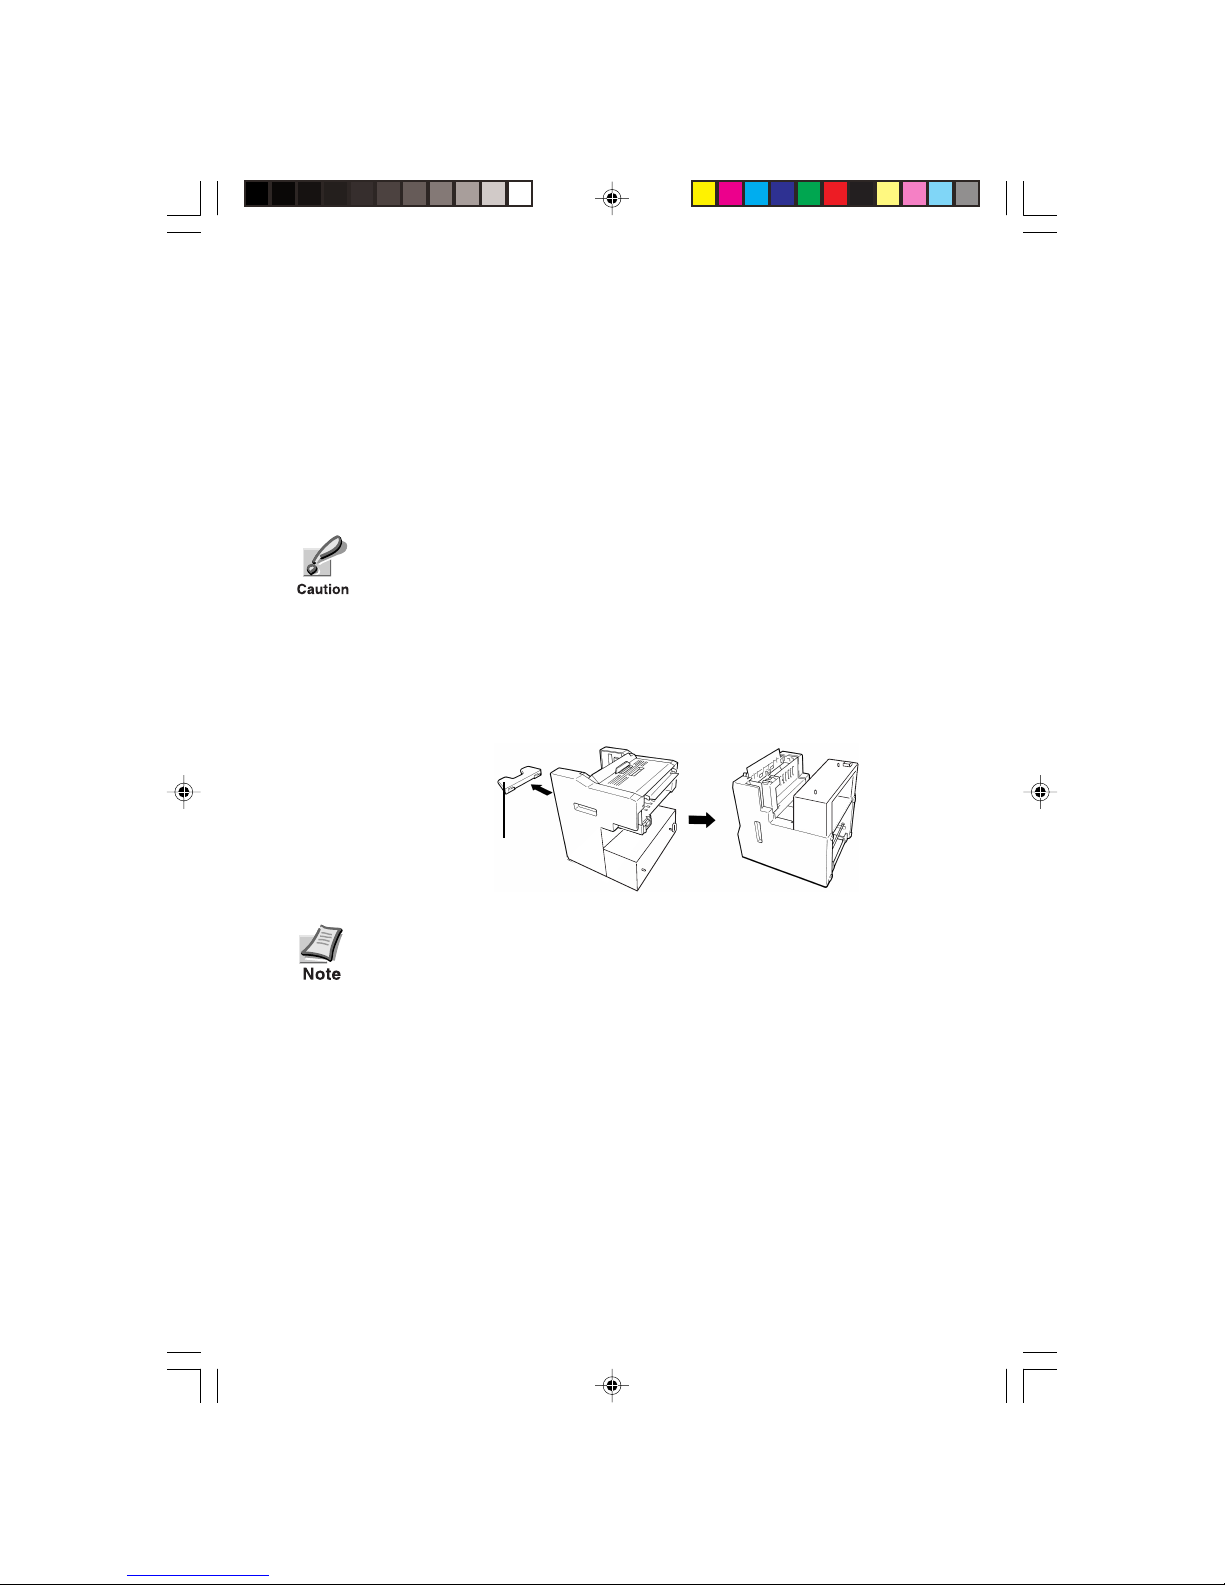
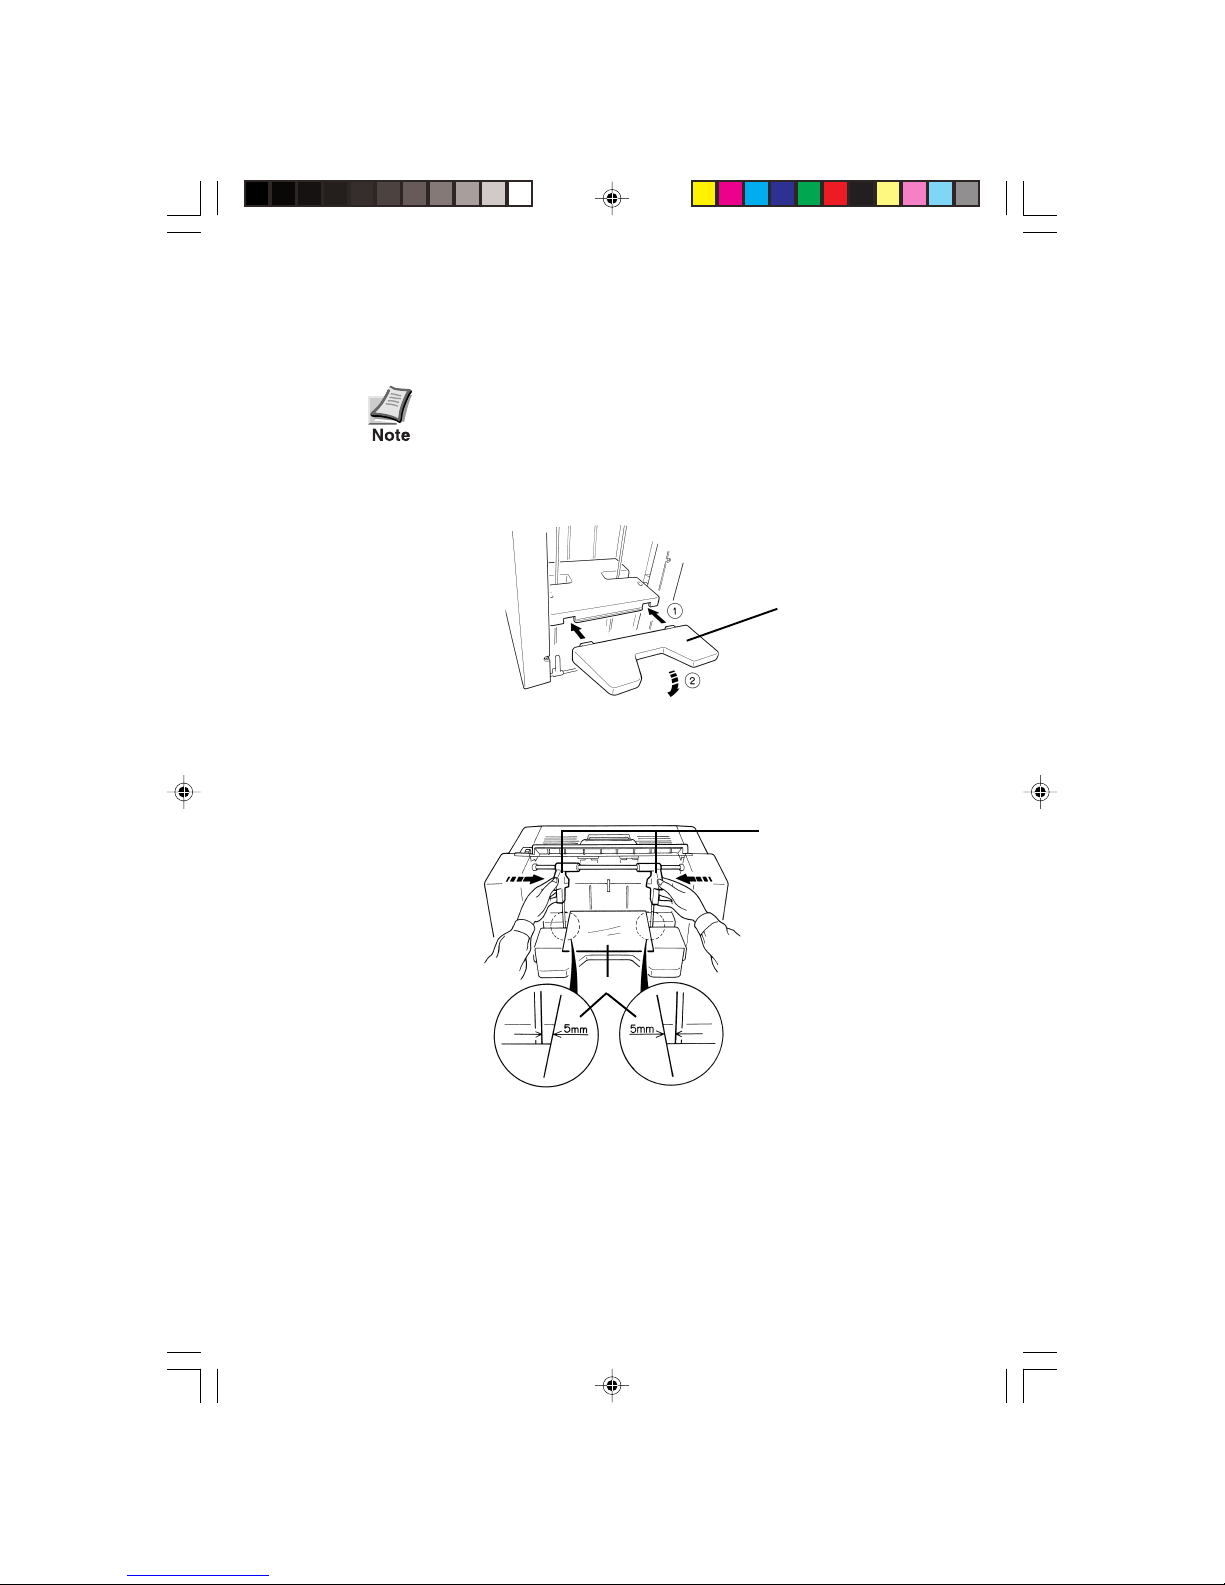
❐ When setting the bulk paper stacker before installihg it
or after removing it from the printer, remove the sub
tray and lay the bulk paper stacker on its side as shown
below.
When using the legal cassette in the printer; remove the
cassette until the bulk paper stacker is installed.
Sub Tray
HS8-Eng.p65 8/8/01, 11:27 AM4
5
English
1. If installed, remove the printer’s face-up tray from the printer.
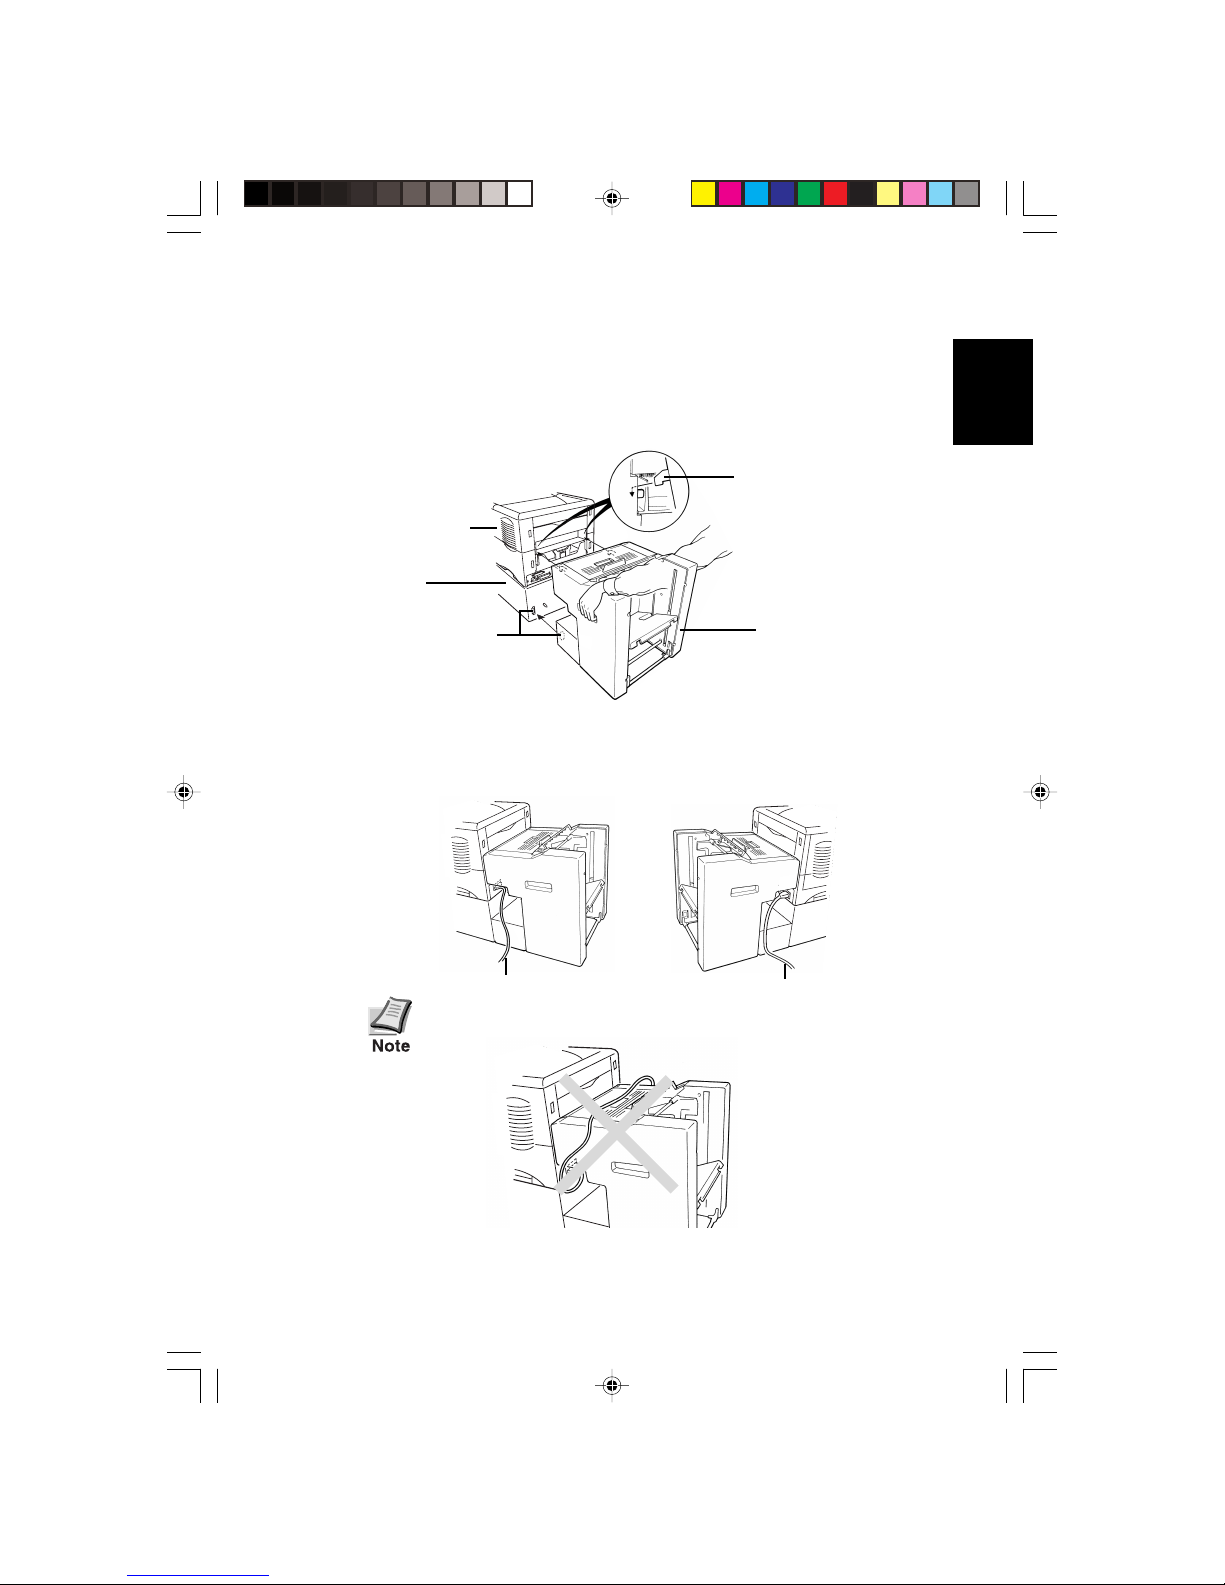
2. Mount the bulk paper stacker on the rear of the printer as
shown.
3. When installing the bulk paper stacker, arrange the printer’s
power and interface cables to fit through the slots at the side of
the bulk paper stacker as shown below.
Do not let cables hang on the bulk paper stacker.
Interface Cable
Power Cable
Connector
Hook
Printer
HS-8E
Base
(PB-60
[option])
HS8-Eng.p65 8/8/01, 11:27 AM5
6
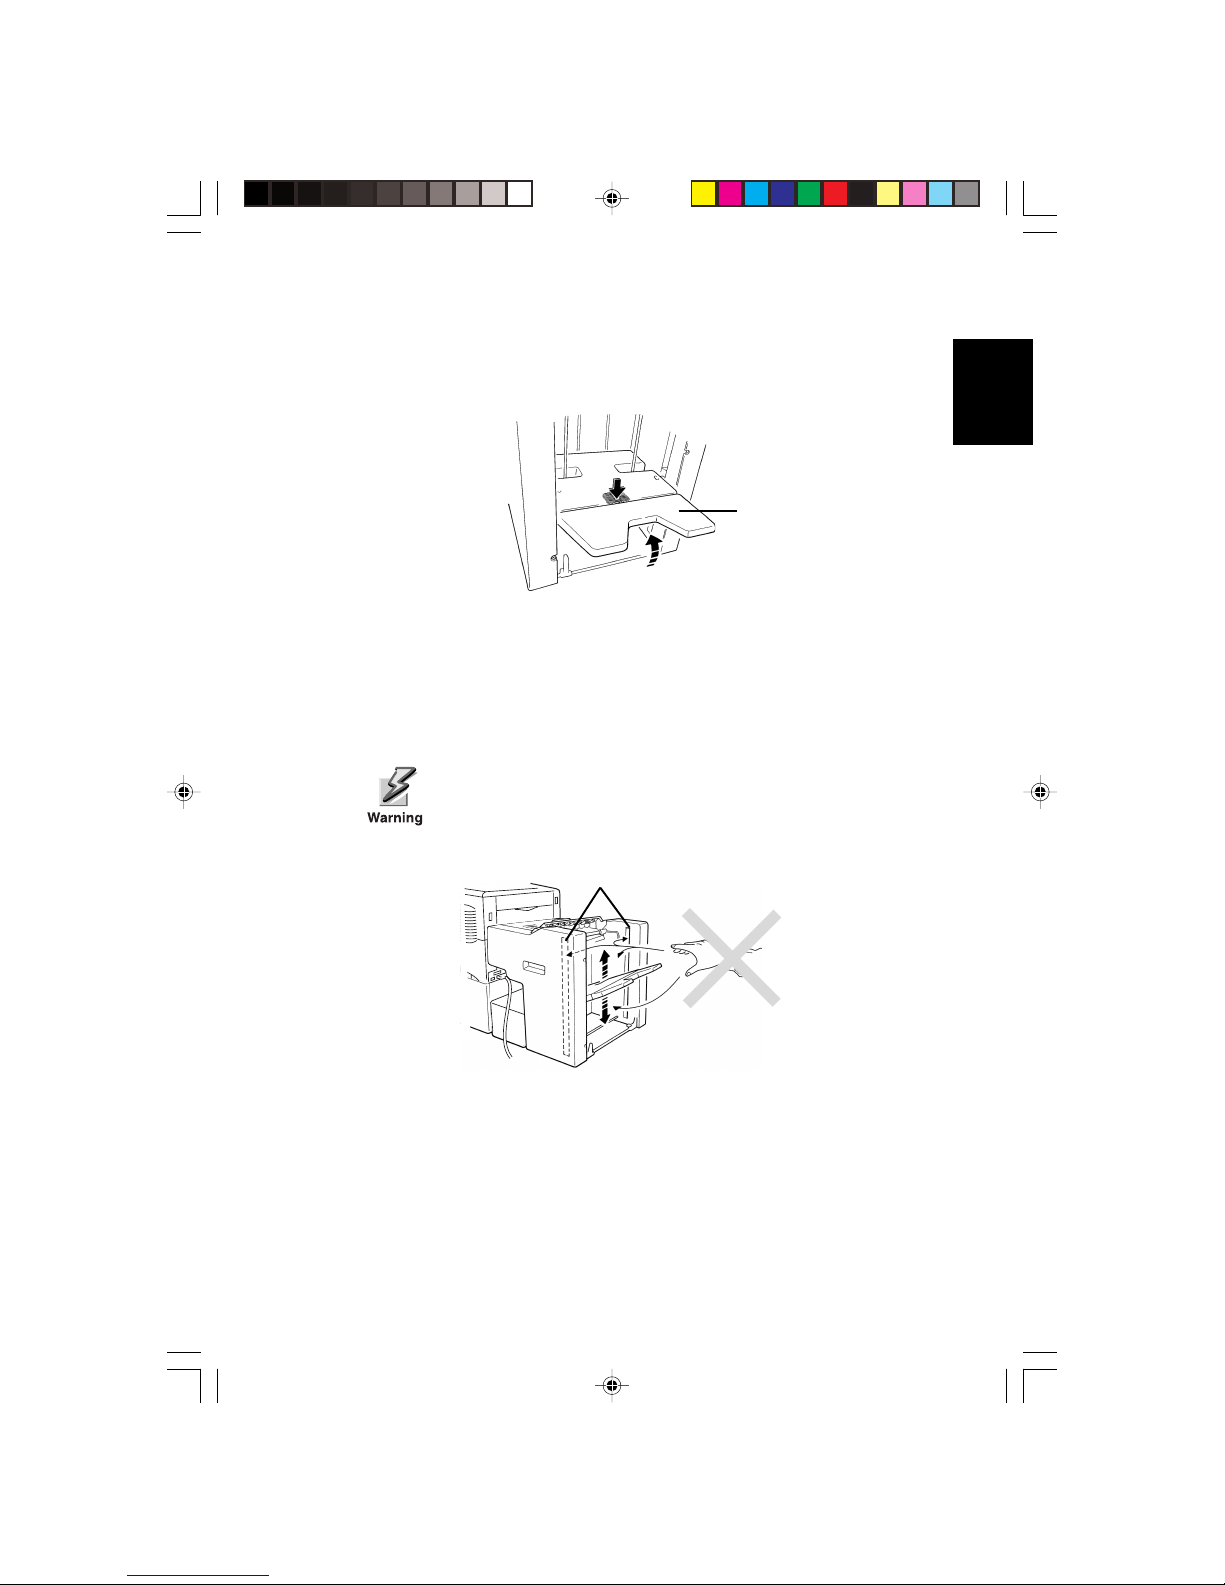
4. Mount the sub tray to the main tray as shown below.
This unit is provided with two sub trays, one large
and one small. Ordinarily, you should use the small
sub tray. However, in case printouts fall out of the
tray, you can replace the small sub tray with the
larger one.
5. Adjust the left and right paper guides according to the paper size
of the paper on the tray. Note that the paper guides are best
adjusted when there is an approximately 5-mm gap on each side
of the paper delivered to the adjuster.
This completes setting up the paper stacker. Before using the stacker,
make sure that the top cover is closed. Then, plug the printer to power.
Paper Guides
Paper
Sub Tray
HS8-Eng.p65 8/8/01, 11:27 AM6
7
English
Removing the sub tray
To remove the sub tray, press at (A) as shown in the figure below.
Operating the Bulk Paper Stacker
1. Turn printer power on by pressing the printer’s power switch. If
there is no paper in the stacker, the stacker’s tray rises to the
home (uppermost) position.
When the paper tray is rising or descending, do not
put your hand above or below the tray. Keep your
fingers out of the left and right cutouts inside the
paper stacker.
2. Make sure that the printer’s message display shows Ready.
Sub Tray
(A)
When the tray is rising or
descending, keep your fingers
out from the inside of the bulk
paper stacker.
Cutouts
HS8-Eng.p65 8/8/01, 11:28 AM7
8
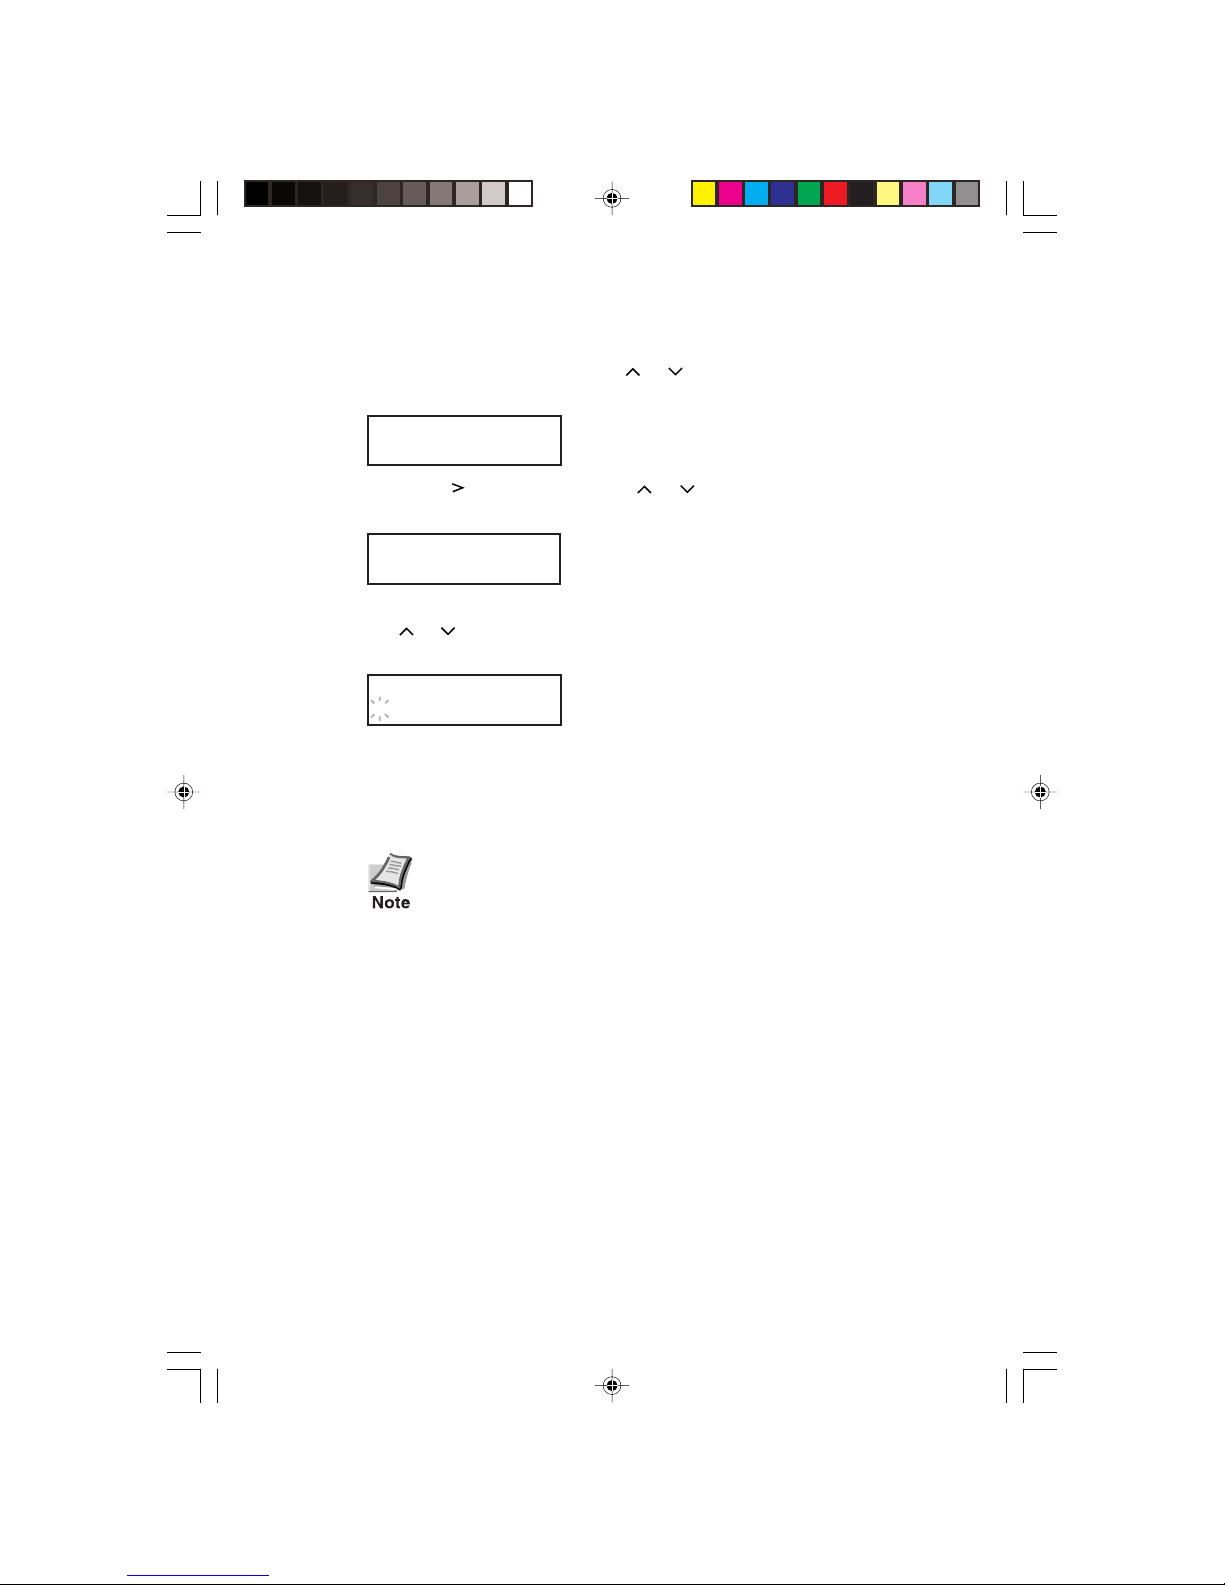
3. To select the stacker for face-up delivery of printed pages, press
the MENU key, then press the or key repeatedly until the
printer’s message display shows Paper Handline >.
Paper Handling >
4. Press the key, then press the or key repeatedly until the
printer’s message display shows > Stack Select.
>Stack Select
5. Press the ENTER key. When the ? mark begins flashing, press
the or key to display Option Stacker, then press the
ENTER key.
>Stack Select
? Option Stacker
6. Make sure that the printer is on-line, then begin printing.
During printing, the paper tray in the stacker automatically
lowers as it receives printed pages.
The printer does not stop printing when the stacker
tray becomes full. If printing is continued, paper will
fall out of the tray or jam inside the stacker.
Therefore, when the tray becomes full, set the
printer off line and remove the paper as described
below, then set the printer back on line to resume
printing.
HS8-Eng.p65 8/8/01, 11:28 AM8

9
English
Tray Elevate Button
Top Cover
7. When printing is finished, remove all paper from the paper
stacker and press the tray elevate button at the top of the stacker
to reset the tray to its home position.
Pressing the tray elevate button may not return the
stacker’s tray to the home (uppermost) position if
there are printed pages remaining in the stacker.
Clearing Paper Jams
If paper jams during printing, the message Paper jam appears on the
printer’s message display. If the paper jams inside the paper stacker,
clear the jam as follows.
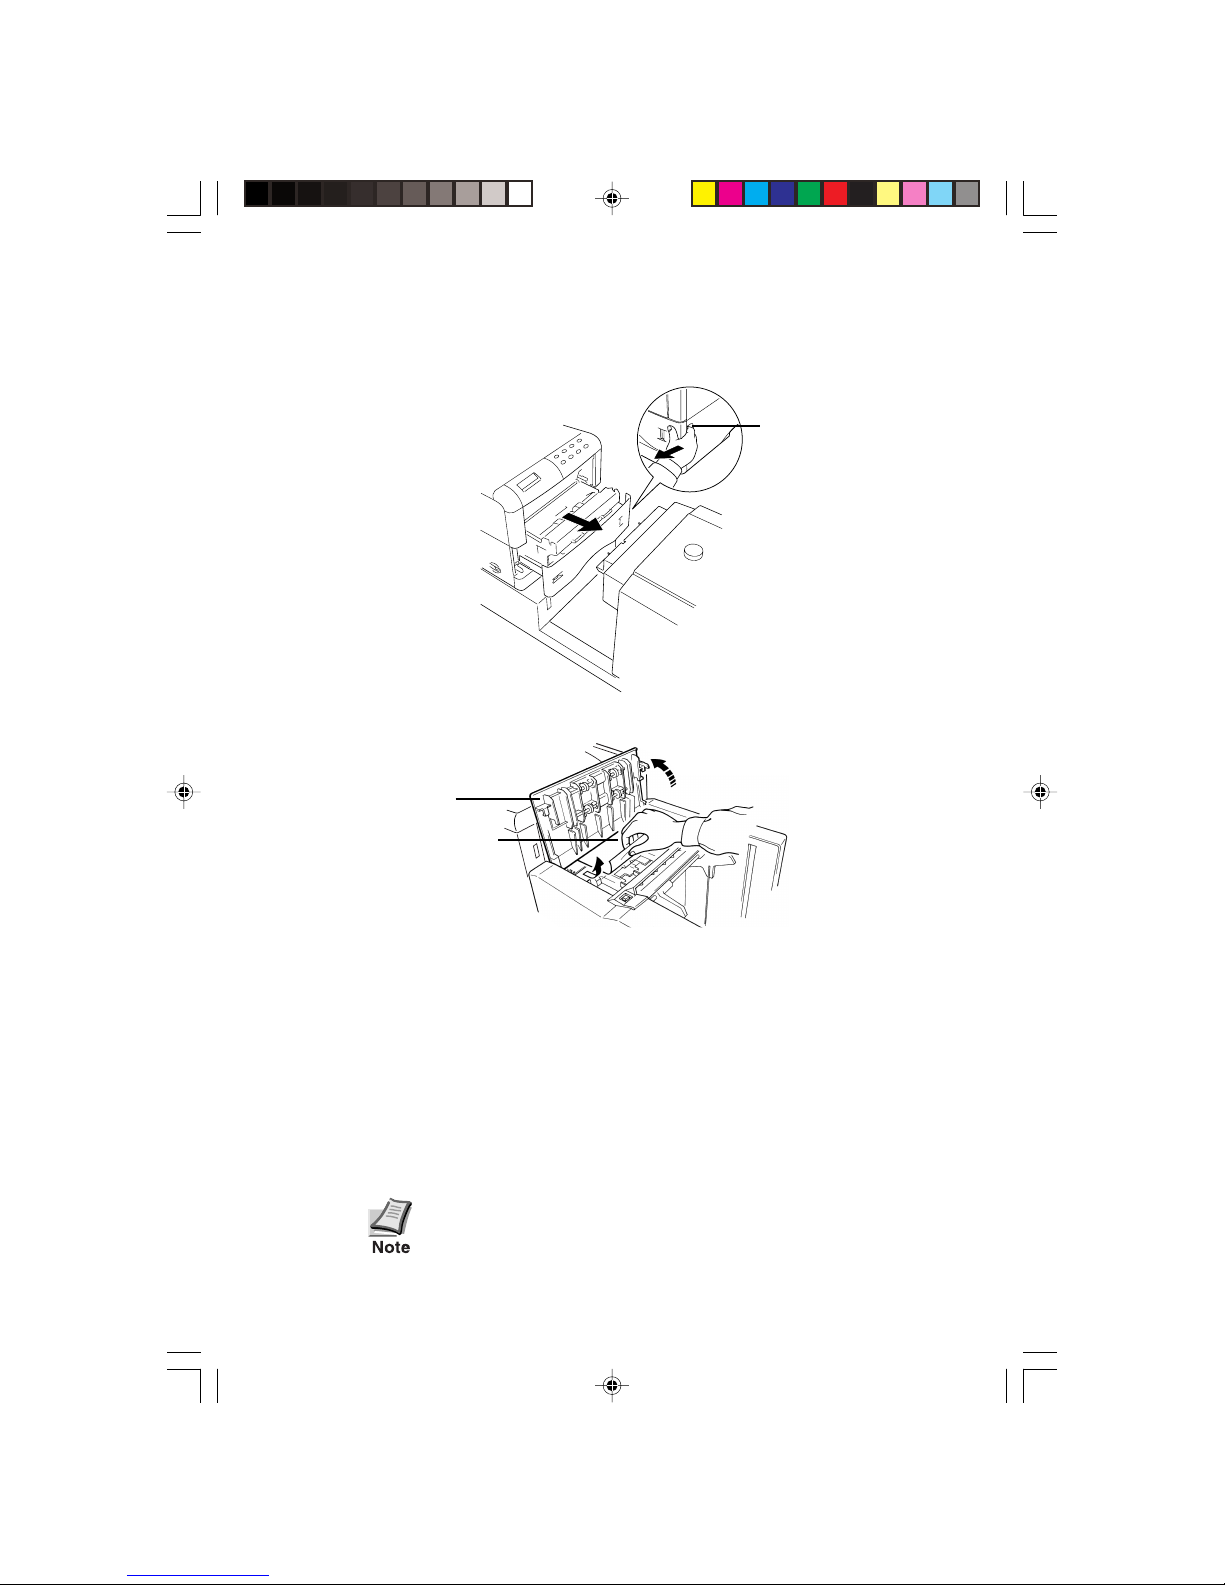
1. Open the top cover of the paper stacker as shown below. To open
the top cover, hold the handle in the top cover and slide toward
the tray side, then pivot open.
Top Cover
HS8-Eng.p65 8/8/01, 11:28 AM9
10
2. Pull the paper feed unit release lever up and draw the paper feed
unit half the way out.
3. Clear the jammed paper from the stacker.
If paper is not found inside the cover, check paper jam inside the
printer.
4. After removing the jammed paper, close the stacker top cover
properly, using the reverse manner of step 1. Then, close the
printer’s paper feed unit until it latches in. Wait until the
printer’s message display indicates Ready. Then the printer
automatically goes on-line and continues printing. Depending on
the place at which the jam occurred, the printer may or may not
reprint the jammed page.
If the paper stacker’s cover is not closed properly,
the message Option stacker cover Open appears
on the printer’s message display. Make sure that the
covers are properly closed.
Paper Feed Unit
Release Lever
Top Cover
Jammed Paper
HS8-Eng.p65 8/8/01, 11:28 AM10

11
English
Specifications
Item Specification
Applicable printers Kyocera Mita page printers
Paper capacity With PF-8E option:
2,000 sheets maximum (75 g/m
2
[0.1 mm] thickness)
Paper size Width: 76 to 216 mm (3 to 8-1/2") × Height: 148 to 305 mm
(5-13/16 to 12")
Environmental
requirements
Temperature: 10 to 32.5 °C
Humidity: 20 to 80 % RH
Ideal conditions are 23 °C/60 % RH, altitude under 2,000 m.
Noise
(Excl. peak values)
Max. 54 dB(A) during paper feeding
Max. 60 dB(A) during moving tray
Dimens ions
(Excl. protrusions)
345 (13-6/16") W × 373 (14-11/16") H × 332 mm
(13-1/16") D
Weight 7.2 kg (15-7/8 lb)
Power supply Supplied from printer
HS8-Eng.p65 8/8/01, 11:28 AM11

12
HS8-Eng.p65 8/8/01, 11:28 AM12
13
Deutsch
Hinweis zum Papier
Bevor Sie Papier kaufen, drucken Sie einige Testblätter bei
installiertem Papierstapler aus um festzustellen, ob die Druckqualität
zufriedenstellend ist.
Hinweis
Wir haften nicht für direkte oder indirekte Verluste oder Schäden, die
einem Kunden oder irgendeiner anderen Person oder Rechtsperson durch
von uns verkaufte oder ausgerüstete Geräte direkt oder indirekt
entstehen oder geltend gemacht werden, und lehnen jedwede Haftung für
eine eventuelle Unterbrechung einer Dienstleistung, für
Geschäftsverluste oder für den Verlust erwarteter Profite
sowie von Folgeschäden, die aus der Benutzung des Gerätes oder der
Software entstehen könnten, ab.
Vorsicht
FÜR SCHÄDEN, DIE AUF UNRICHTIGE INSTALLATION
ZURÜCKZUFÜHREN SIND, WIRD KEINE HAFTUNG
ÜBERNOMMEN.
Der Inhalt dieser Anleitung kann ohne Vorankündigung geändert werden.
In zukünftigen Ausgaben können zusätzliche Seiten eingefügt werden.
Wir bitten den Benutzer, eventuelle technische Ungenauigkeiten oder
drucktechnische Fehler in dieser Ausgabe zu entschuldigen.
Für Unfälle, die sich während dem Befolgen der Anweisungen in dieser
Anleitung ereignen, wird keine Haftung übernommen.
Der Inhalt dieser Anleitung ist urheberrechtlich geschützt. Kein Teil
dieser Anleitung darf in welcher Form auch immer ohne schriftliche
Genehmigung des Urheberrechtinhabers reproduziert oder kopiert
werden.
HS8-ger.p65 8/8/01, 11:28 AM13

14
Inhaltsverzeichnis
Einleitung .................................................................................................. 14
Verpackungsinhalt ..................................................................................... 14
Installieren der Massenpapierablage mit einer PF-8E
Massenpapierzuführung ........................................................................ 15
Entfernen der Zusatzablage ........................................................... 18
Benutzen der Massenpapierablage .......................................................... 18
Beseitigen von Papierstaus ...................................................................... 20
Technische Daten ...................................................................................... 22
Einleitung
Die HS-8E ist eine Massenpapierablage, die zusammen mit Kyocera Mita
Seitendruckern benutzt wird. Mit der Massenpapierablage können bis zu
etwa 2000 Seiten auf einmal mit der bedruckten Seite nach oben
ausgegeben werden.
Die Massenpapierablage muß zusammen mit einer PF-8E
Massenpapierzuführung am Drucker installiert werden. Lesen Sie diese
Anleitungen sorgfältig durch, bevor Sie die Massenpapierablage
installieren.
Verpackungsinhalt
Überprüfen Sie, ob sich in der Verpackung der Papierablage die folgenden
Teile in der angegebenen Anzahl befinden.
❐ Optionale Massenpapierablage HS-8E, 1
❐ Zusätzliche Papierablage 2 (1 große und 1 kleine)
❐ Benutzeranleitung (diese Broschüre), 1
HS8-ger.p65 8/8/01, 11:28 AM14
15
Deutsch
Installieren der Massenpapierablage mit einer PF-8E
Massenpapierzuführung
Ist am Drucker eine optionale PF-8E Massenpapierzuführung installiert,
ist der Drucker am Montagesockel (PB-60, Option) angebracht.
(Einzelheiten über die Installierung der Papierzuführung entnehmen Sie
bitte der mit der optionalen Massenpapierzuführung PF-8E mitgelieferten
Anleitung.) Die HS-8E Massenpapierablage wird an der Rückseite des
Druckers installiert.
❐❐
❐❐
❐ Schalten Sie den Drucker vor dem Anbringen oder
Entfernen der Massenpapierablage immer aus.
❐❐
❐❐
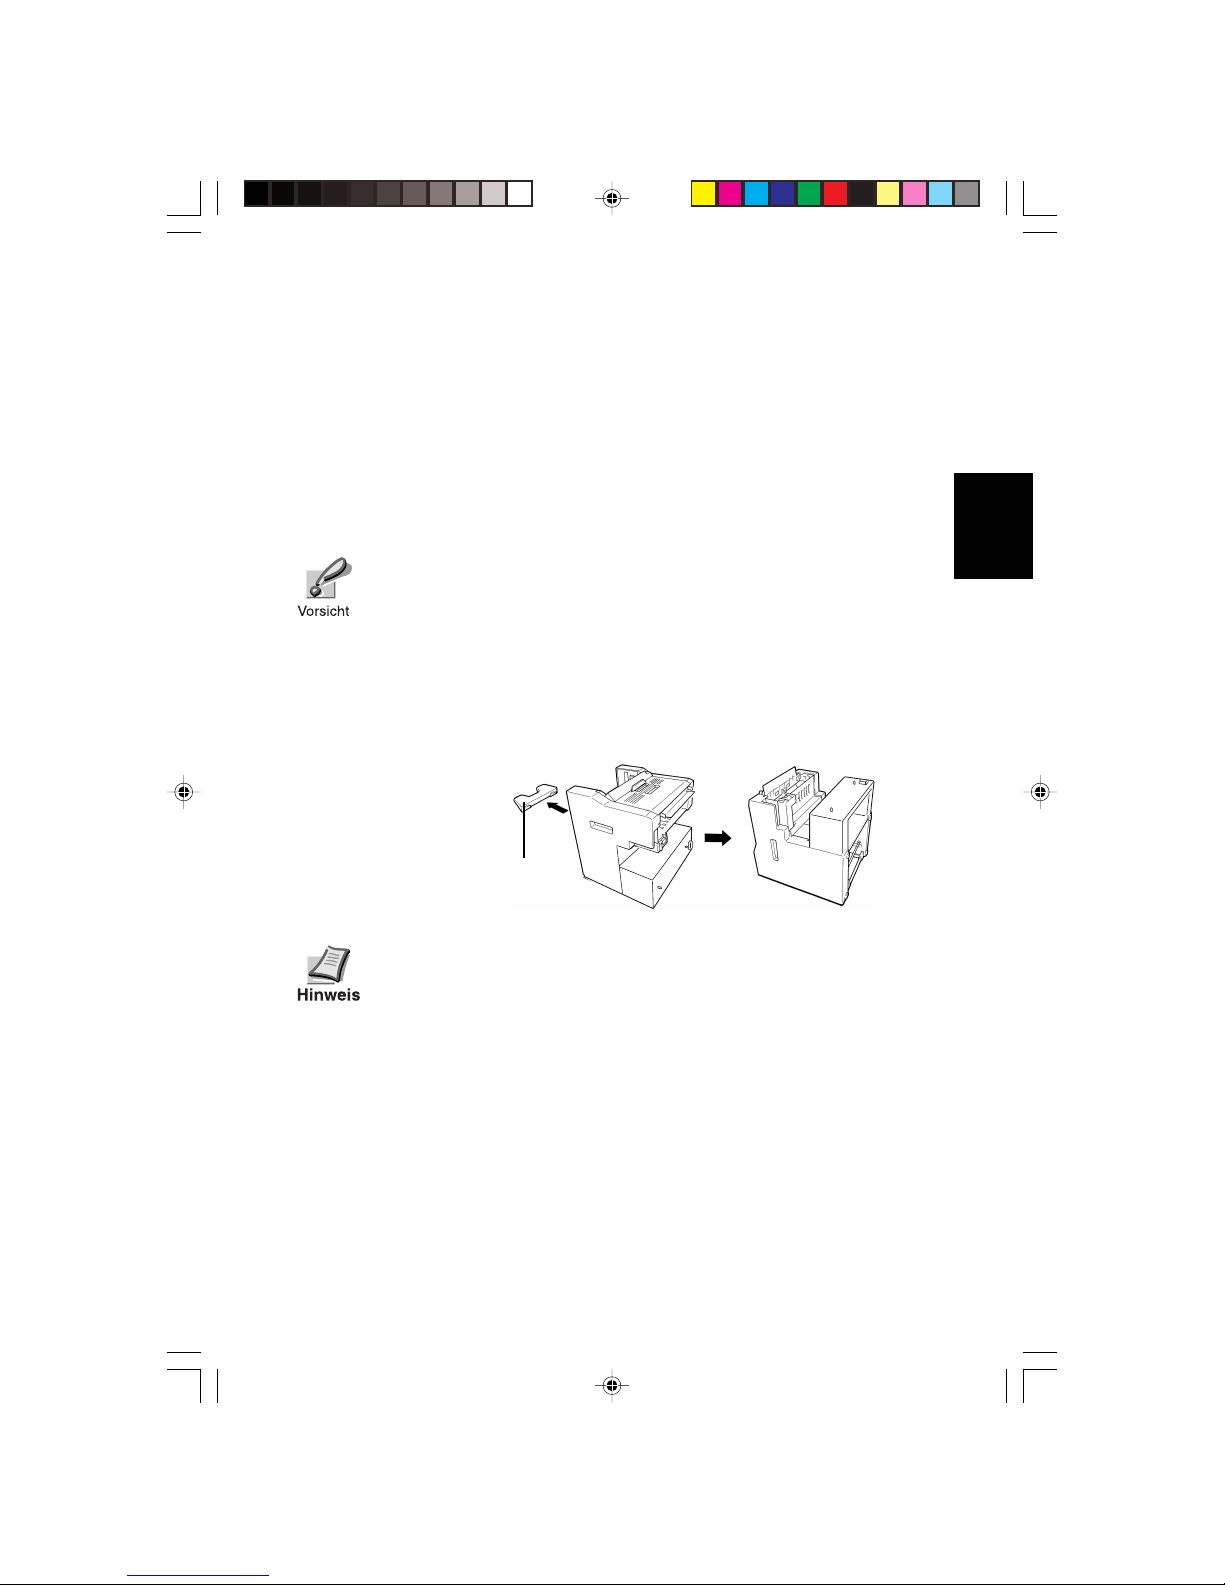
❐ Vor dem Installieren oder nach dem Entfernen der
Massenpapierablage zunächst die Zusatzablage
abnehmen und die Massenpapierablage wie nachfolgend
abgebildet auf die Seite legen.
Eine eventuell benutzte Legal-Kassette muß vor dem
Installieren oder Entfernen der Massenpapierablage vom
Drucker abgenommen werden.
Zusatzablage
HS8-ger.p65 8/8/01, 11:28 AM15
 Loading...