

Page 1

Single Mode Iridium Handset
SS-66K
Owner's Manual
English
Page 2
Contents
(The shaded services will become available in the future.)
2 Before Use
Before Use
Introduction .......................................................................................................5
Safety Precautions............................................................................................6
Organization of This Manual...........................................................................10
Accessories.....................................................................................................11
Overview of Features and Controls.................................................................12
Display Items on the LCD Panel.....................................................................14
Using Software Keys.......................................................................................15
Operations of LEDs.........................................................................................15
About the antenna...........................................................................................16
Battery and Charging......................................................................................17
SIM Card.........................................................................................................19
How to Attach the Grip Belt.............................................................................20
Separate Vibrator............................................................................................20
Turning the Power On/Off
Turning the Power On.....................................................................................22
Entering Your PIN1 Code................................................................................24
Entering Your PUK1 Code..............................................................................24
Basic Telephone Operations
Making a Call ..................................................................................................25
Answering a Call.............................................................................................25
Receiving a Text Mail......................................................................................26
Ending a Call...................................................................................................26
Making Calls by Searching the Phone Book...................................................26
Dialing by Scrolling through Abbreviated Numbers in the Phone Book
Dialing by Entering an Abbreviated Number Stored in the Phone Book
Making Calls from the Memory Menu .............................................................27
Searching for a Phone Number by Name in the Phone Book
Dialing from the Outgoing Call Log (Using "Last Number")
Dialing from the Incoming Call Log (Using "Received")
Dialing from the Scratch Pad
Making an Emergency Call
Inserting a Pause Before Dialing.....................................................................28
"Manner Talk" System.....................................................................................28
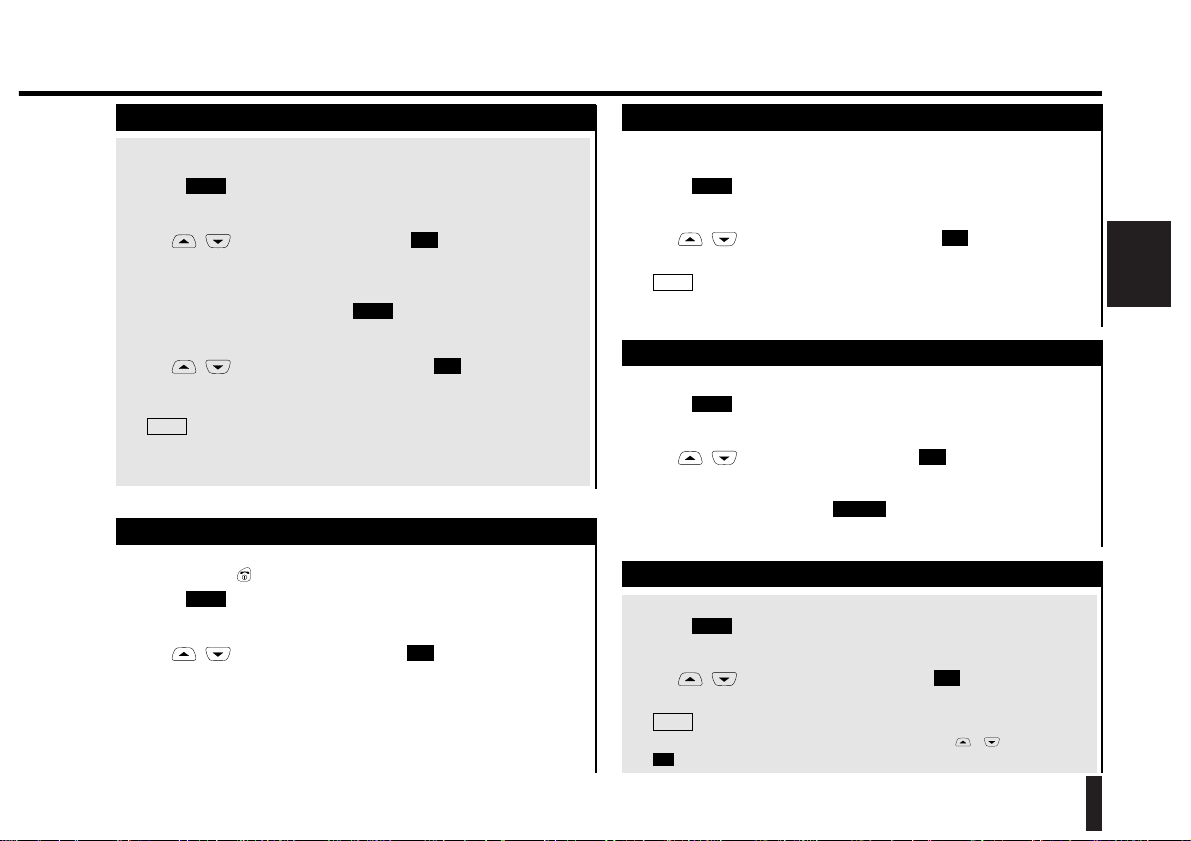
Using the In Call Menu....................................................................................28
Holding an Active Call and Reactivating a Held Call ("Hold")/("Retrieve").....29
Ending a Call ("End") ......................................................................................29
Switching DTMF Tones On/Off ("Tone Off (On)")..........................................29
Muting the Current Call and Canceling Call Muting ("Mute")..........................29
Viewing the Charge for the Current Call ("Charge")........................................29
Call Waiting
Using the In Call Menu for Different Call Combinations..................................30
Answering an Incoming Call during a Current Call ("Answer") .......................30
Ending the Current Call and Answering an Incoming Call ("Replace")...........30
Rejecting an Incoming Call during a Current Call ("Reject")...........................31
Sending a Busy Message to an Incoming Call during a Current Call
("I am busy")....................................................................................................31
Ending a Call on Hold, Holding the Active Call, and Answering an Incoming
Call ("Replace2").............................................................................................31
Multiparty Call
Using the In Call Menu for Different Call Combinations..................................32
Holding a Selected Party ("Exclude")..............................................................33
Ending the Call Between You and a Selected Party ("Drop").........................33
Reactivating All Parties ("Join All")..................................................................33
Holding All Parties ("Hold All") ........................................................................33
Speaking to a Selected Party ("Private").........................................................33
Viewing the Charge for the Current Call ("Total Charge")...............................33
Muting the Current Call and Canceling Call Muting ("Mute")..........................34
Swapping the Held and Active Calls ("Swap")................................................34
Switching DTMF Tones On/Off ("Tone Off (On)")...........................................34
Entering Text
Selecting the Input Character Type.................................................................36
Switching Alphabetic Character Input between Lowercase and Uppercase...36
Character Input Table .....................................................................................36
Correcting Characters.....................................................................................37
Page 3

3Before Use
Before Use
Deleting Characters ........................................................................................37
Phone Book
Phone Book Menu Map...................................................................................38
Storing a Phone Number in the Phone Book
(by Entering the Phone Number) ....................................................................39
Storing a Phone Number in the Phone Book (Using "Create") ("Create") ......40
Editing the Phone Book ("Edit") ......................................................................42
Deleting Information from the Phone Book ("Delete").....................................43
Adding a Country Code ("INT'L") ....................................................................43
Memory Menu
Memory Menu Map.........................................................................................44
Viewing the Outgoing Call Log ("Last number")..............................................45
Viewing the Incoming Call Log ("Received")...................................................45
Scratch Pad ("Scratch pad") ...........................................................................46
Clearing Memory ("Clear")..............................................................................46
Viewing Your Phone Number ("Own number")...............................................47
Retrieving an Emergency Call Number ("SOS").............................................47
Menu Functions
Main Menu Map ..............................................................................................49
Settings
Settings Menu Map.........................................................................................50
Changing the Settings ("Settings")..................................................................51
1. Setting the Display Language ("Language")...............................................51
2. Setting the Ringer ("Ringer").......................................................................51
2-1. Setting the Ringer Tone ("Type")..........................................................52
2-2. Setting the Ringer Volume ("Ringer volume").......................................52
2-3. Setting the User Melody ("User Melody") .............................................52
2-3-1. Composing a User Melody ("Compose")........................................53
2-3-2. Replaying the User Melody ("Playback")........................................54
2-3-3. Deleting the User Melody ("Delete")...............................................54
3. Setting the Volume ("Volume")....................................................................54
3-1. Setting the Volume for Key Click, Warning, or Power-ON/OFF Tone
("Sound volume")..................................................................................54
3-2. Setting the Sound Pattern ("Sound Pattern")........................................55
3-3. Setting the Speech Volume ("Talk volume").........................................55
4. Setting the Type of DTMF Tone ("DTMF type")..........................................56
5. Setting the Backlight ("Back light")..............................................................56
6. Setting Any-key Answer Mode ("Any Key Answer")....................................56
7. Setting Automatic Answering ("Auto answer")............................................56
Clock
Clock Menu Map.............................................................................................57
Setting the Clock Functions ("Clock") .............................................................58
1. Setting the Local Clock ("Set clock")...........................................................58
2. Displaying the Date/Time Display ("Clock mode")......................................59
3. Setting the Alarm ("Set alarm")...................................................................59
4. Automatically Turning the Power On ("Auto Power ON")............................61
5. Automatically Turning the Power Off ("Auto Power OFF")..........................61
6. Setting the World Clock ("World clock")......................................................62
6-1. Setting an Area ("Set Country")............................................................62
6-2. Setting Destinations ("Destination")......................................................62
6-3. Automatically Switching to Destination Time ("Auto change")..............63
6-4. Viewing the World Clock on a World Map ("Reference")......................63
7. Setting Summer Time ("Summer time")......................................................63
Messages
Messages Menu Map......................................................................................64
Managing Your Messages ("Messages")........................................................65
1. Reading Text Mails ("Read new")/("Read all")............................................65
1-1. Editing a Text Mail ("Edit")....................................................................66
1-2. Replying to a Received Text Mail ("Reply")..........................................67
1-3. Extracting a Phone Number from a Text Mail ("Extract")......................67
1-4. Deleting a Text Mail ("Erase")...............................................................68
1-5. Viewing Supplementary Information for a Text Mail ("Information") .....68
2. Creating a New Text Mail ("Create")...........................................................69
2-1. Inserting a Fixed Text Phrase in a Text Mail.........................................69
Page 4

Contents
4 Before Use
3. Delete All Text Mails ("Erase all") ...............................................................69
4. Setting Items for Transmission of Text Mails ("Settings")...........................69
4-1. Setting the Service Centre Phone Number ("MSG Centre").................69
4-2. Setting the Reply Path to the Service Centre ("Reply path")................70
4-3.
Setting the Term of Validity for Untransmitted Text Mails ("Valid period")
.......70
4-4. Setting the Text Mail Receiver Protocol ("MSG type")..........................70
Call Meter
Call Meter Menu Map......................................................................................72
Setting the Call Meter ("Call meter")...............................................................73
1. Viewing the Last Call Charge and Duration ("Last call") ............................73
2. Viewing the Cumulative Call Charge and Duration ("All calls")...................74
3. Setting the Maximum Cumulative Call Charge ("Charge limit")..................74
4. Setting the Charge per Time-charge ("Currency")......................................75
5. Viewing the Call Duration and Charge during a Call ("Display").................76
Services
Services Menu Map ........................................................................................77
Setting the Services ("Services") ....................................................................78
1. Setting Service Features for Outgoing and Incoming Calls ("Barring").......78
1-1. Registering a New Password ("Password")..........................................78
1-2. Setting Outgoing Call Barring ("Outgoing")...........................................79
1-3. Setting Incoming Call Barring ("Incoming")...........................................79
2. Setting Call Forwarding ("Forwarding").......................................................80
2-1. Setting the Destination Phone Number.................................................80
3. Setting Call Waiting ("Waiting")...................................................................81
4. Setting Caller's Number Notification ("Caller Id")........................................81
4-1. Displaying the Called Party's Number When Dialing ("Far Id").............81
4-2.
Displaying Your Phone Number on the Called Party's Phone ("Your Id")
..81
4-3.
Checking the Current Setting for Caller's Number Notification ("Status")
...82
5. Setting Registration ("Registration")............................................................82
Security
Security Menu Map.........................................................................................83
Setting the Security Functions ("Security") .....................................................84
1. Setting Keylock ("Keylock").........................................................................84
2. Disabling the PIN1 Code ("PIN1 ON/OFF")................................................85
3. Setting New PIN1/PIN2 Codes ("New PIN1")/("New PIN2").......................85
4. Restricting Outgoing Calls Using Fixed Dial ("Fixed dial")..........................86
Message Memo/Voice Memo Features
Message Memo/Voice Memo Menu Map........................................................87
Using the Message Memo/Voice Memo Features..........................................88
1. Using the Message Memo Feature ("Msg memo").....................................88
1-1. Recording/Replaying a Response Message ("Response")...................88
1-2. Turning the Message Memo Feature On/Off ("Memo ON/OFF")..........89
1-3. Playing a Selected Message ("Select").................................................90
1-4. Playing All Unplayed Messages ("Playback all") ..................................90
1-5. Erasing All Messages ("Erase all") .......................................................90
2. Using the Voice Memo Feature ("Voice memo").........................................91
2-1. Recording a Voice Memo ("Recording")...............................................91
2-2. Replaying a Voice Memo ("Select")......................................................91
2-3. Erasing All Voice Memos ("Erase all")..................................................91
Quick Reference for Troubleshooting..................................................................92
Specifications ......................................................................................................93
Country Codes for International Calls .................................................................94
Index....................................................................................................................96
Page 5

5Before Use
Before Use
Introduction
Thank you for purchasing the SS-66K Single Mode Iridium Handset.
Read this manual thoroughly first to ensure you use your phone safely
and correctly.
The screens and illustrations shown in this manual are for explanation purposes
only. Note that the actual product and screens may differ in some respects from
the images depicted here.
■ Notes on Use
● Iridium services are not available in some countries and regions
due to communications regulations.
● Even inside a service area, your phone may not work if you are in
a location that cannot be reached by radio waves, such as in a
tunnel, underground, in a building, close to a building wall, or in
mountains. Also, your call may be cut off if you move to a place
with poor radio conditions.
■ Precautions Regarding Safety
● Do not use your phone while driving. Pull over and park in a safe
place before using the phone.
● Since your phone uses radio waves which can affect the
operation of electronic equipment, follow the instructions below:
• The use of mobile phones in an aircraft is prohibited. Switch
the phone off before boarding.
• When a mobile phone is used in some types of car, it may
affect the operation of automotive electronic components. Be
careful when using your phone in a car.
● To prevent radio waves from affecting electronic medical
equipment, follow the instructions below:
• Switch the phone off before entering a place where the use of
mobile phones is prohibited, such as in a hospital or any other
medical facility, or around electronic medical equipment.
• If you use a pacemaker, consult your medical
institution/agency or the device manufacturer/supplier for
detailed information on the use of mobile phones and their
effects on the pacemaker.
Introduction Before Using Your Single Mode Iridium Handset
This manual contains additional services which will become
available in the future. For further information on these
additional services, contact your Iridium service provider. Note
that the names of the additional services and what they provide
may be different from the descriptions in this manual.
Page 6
6
Do not store this product in a very damp,
dusty, or hot location, as this could result in
faulty operation.
Keep this product out of the reach of small
children, as it could cause injury if used as a
toy.
Do not leave this product on an unstable or
sloping surface, as the product could fall,
causing damage or injury.
Only use the battery and charger (AC adapter)
specified by KYOCERA for use with this
phone.
The use of a battery or charger other than that
specified could result in the battery leaking
fluids, overheating, bursting, or igniting.
Do not subject this product to strong shocks or
vibrations, or throw or drop it, as this could
result in the battery leaking fluids, overheating,
bursting, or igniting, and could damage the
phone and cause faults or a fire.
Do not place the battery, the phone unit, or the
charger in a microwave oven or pressure
vessel, as this could result in the battery
leaking fluids, overheating, bursting, or
igniting, or could cause the phone unit or
charger to overheat, emit smoke, or ignite, or
could damage the circuitry inside the device.
Do not use this product in places where there
are flammable gases, as this could cause the
gases to ignite or result in device damage,
malfunction, or fire.
Safety Precautions
●Before using your phone, read these precautions carefully
to use the phone safely and correctly.
●The precautions listed here are intended to prevent injury to
the phone user and others, and to prevent unintended
damage to property.
■The designations below indicate the severity of the injury or
damage that may be incurred if the designated precautions
are not followed or the product is used incorrectly.
e
This icon notifies the user that the action
indicated is prohibited.
■The icons shown below are used to indicate instructions
that should be observed.
This icon notifies the user that the action
indicated must be performed.
This icon indicates that the device must not be
disassembled.
This icon indicates that the device must be
unplugged from the power socket.
Essential
DANGER
WARNING
CAUTION
General Precautions when Handling
the Phone Unit, Battery, and Charger
Indicates that, if this warning is ignored, improper
handling of the product is likely to result in death or
serious injury.
DANGER
Indicates that, if this warning is ignored, improper
handling of the product may lead to death or serious
injury.
WARNING
Indicates that, if this warning is ignored, improper
handling of the product could result in personal injury or
material damage.
CAUTION
Prohibited
Essential
Prohibited
Do not use your phone while driving, as this is
dangerous and could cause a traffic accident.
Pull over and park in a safe place before using
the phone.
Switch the phone off in places where the use
of mobile phones is prohibited, such as in an
aircraft or hospital. Mobile phones can
adversely affect the operation of electronic
instrumentation and medical equipment. For
information on using your phone in a medical
facility, refer to the directives provided by the
facility itself.
Do not use your phone around electronic
devices that require precise control or use
weak signals. Radio interference can cause
malfunctions or other problems in electronic
devices.
Examples of affected devices:
Hearing aids, pacemakers and other electronic
medical aids, fire alarms, self-opening doors
and other automatic control devices, etc.
For more information on the effects of mobile
phones on pacemakers and other electronic
medical aids, check with the device
manufacturer or supplier.
Do not press or hit the liquid crystal display
(LCD) as this could break the LCD panel and
cause it to leak liquid crystal fluid.
Liquid crystal fluid coming into contact with the
eye could cause loss of eyesight. If eye
contact occurs, rinse the affected eye well with
clean water without rubbing and consult a
doctor immediately.
Do not attempt to disassemble or modify your
phone as this could cause injury, an electric
shock, or malfunction.
Prohibited
Prohibited
Essential
Essential
Prohibited
Do not
disassemble
Precautions when Using the Phone
WARNING
Prohibited
Essential
Do not
disassembl
Unplug
Prohibited
Prohibited
Prohibited
Page 7
7
CAUTION
When the phone is used in some types of
automobile, it may affect the operation of
electronic components in the car. Do not use
the phone if it adversely affects the safe
operation of the vehicle in any way.
Do not use any sharply pointed object (such
as a needle or mechanical pencil) to press
keys or buttons as doing so can damage the
device.
Do not use your phone in crowded places as
the antenna could strike someone and cause
injury.
Keep your phone away from electromagnetic
cards. Emissions from the phone can erase
the information stored on floppy disks and
cash cards or credit cards.
Keep sharp metal objects such as thumbtacks
away from the earpiece speaker. The speaker
in the earpiece is magnetic and could attract
such objects, causing injury.
Keep your phone dry. Water or other fluids
entering the phone could cause overheating,
an electric shock, or damage.
The use of an alarm system to operate a
vehicle's lights or horn to indicate an incoming
call is prohibited on public roads in some
countries. Check the local regulations.
Do not use your phone if the antenna is
damaged. Touching a damaged antenna could
inflict a minor skin burn. Have a damaged
antenna replaced by a qualified technician.
Make sure that it is replaced only with an
antenna recommended by your service
provider.
Prohibited
Prohibited
Prohibited
Prohibited
Prohibited
Prohibited
Prohibited
Prohibited
DANGER
Do not dispose of the battery by throwing it in
a fire, as this could cause the battery to ignite
or burst.
If you are having difficulty connecting the
battery to the phone unit, do not use force as
this could cause the battery to leak fluids,
overheat, burst, or ignite.
Do not short-circuit the battery terminals, and
do not touch the terminals with metal objects
such as paper clips or wire. Also, do not carry
or store the battery with objects such as metal
necklaces. Any of these could cause the
battery to leak fluids, overheat, burst, or
ignite.
Do not solder the terminals as this could cause
the battery to leak fluids, overheat, burst, or
ignite.
Any fluid from inside the battery coming into
contact with the eyes could cause loss of
vision. If this occurs, flush the affected eye
with clean water without rubbing and seek
immediate medical treatment.
Do not attempt to disassemble or modify the
battery as this could cause the battery to leak
fluids, overheat, burst, or ignite.
Do not use or leave the battery in hot places
such as near a fire or heating appliance. This
could cause the battery to leak fluids,
overheat, burst, or ignite.
Prohibited
Prohibited
Prohibited
Prohibited
Do not
disassemble
Essential
Prohibited
Precautions when Using the Battery
If there are any noticeable changes in the
battery while being used, charged, or stored
(overheating, discoloration, deformation, etc.),
remove the battery from the phone unit and
discard it. Continued use of the battery in
such conditions could cause the battery to leak
fluids, overheat, burst, or ignite.
Any battery fluid coming into contact with your
skin or clothing could cause skin damage.
Wash the fluid off immediately with clean
water.
If the battery is leaking fluid or producing an
odor, keep it away from flames as this could
cause the leaking fluid to ignite, resulting in a
fire or in the battery bursting.
Prohibited
Essential
Essential
WARNING
CAUTION
Keep the battery dry. Moisture on the battery
could cause the battery to overheat, emit
smoke, or corrode.
Do not use or leave the battery in direct
sunlight or in hot places such as in a car on a
hot day. This could cause the battery to leak
fluids or overheat, and could impair
performance or reduce the lifetime of the
battery.
Prohibited
Prohibited
Prohibited
Prohibited
Page 8
8
Precautions when Using the Charger
DANGER
Always use the charger (AC adapter) with a
standard household power supply. The use of
other voltages could cause an electric shock,
fire, or faults.
Never short-circuit the DC plug, as this could
cause device faults, an electric shock, smoke,
or fire.
Do not use the charger if the power cord is
damaged (core wiring exposed or cut, etc.) as
this could cause a fire or electric shock.
Clean off any dust on the power plug as this
could cause a fire.
Do not place any container of water (such as
an aquarium or jug) near the charger. Water
or other fluids on the charger could cause
overheating, an electric shock, or damage.
If any water or other liquid gets into the
charger, immediately unplug the power cord.
Failure to do so could cause the charger to
overheat or catch fire, or cause an electric
shock or faults.
Do not attempt to disassemble or modify the
charger, as this could cause injury, an electric
shock, fire, or faults.
Do not use the charger in places with
condensing of water vapor, such as a
bathroom, as this could cause an electric
shock.
Do not touch the charger, power cord, or
power socket with wet hands, as this could
cause an electric shock.
Essential
Prohibited
Prohibited
Essential
Prohibited
Do not
disassemble
Unplug
Prohibited
Prohibited
CAUTION
Do not place heavy objects on the power cord
or attempt to modify the power cord as this
could cause an electric shock or fire.
Always unplug the charger before performing
any cleaning or maintenance. Failure to do so
could cause an electric shock.
Always grasp the plug itself when you unplug
the charger. Pulling on the power cord can
damage the cord and cause an electric shock
or fire.
Prohibited
Essential
Essential
General Notes on Cleaning and Maintenance
Do not splash water on the phone unit, battery, or charger.
Although the phone unit, battery, and charger are water
resistant, you should avoid using them in places where
there is a lot of water vapor, such as in a bathroom, and
take care to protect them from rain.
Use a soft, dry cloth to clean the phone unit, battery, and
charger.
Wiping them with a wet cloth could cause faults. Also,
solvents such as alcohol, thinner, benzine, or detergent
may remove the printed lettering on the device or cause
discoloration.
Notes on the Phone Unit
Do not expose your phone to extremely low or high
temperatures.
Use the phone at temperatures between –30°C and 60°C.
Use your mobile phone as far away as possible from
equipment such as conventional phones, TVs, radios, and
electronic office equipment, as the mobile phone can
affect the operation of such equipment.
Notes on the Battery
Store the battery in a cool, well-ventilated location that is
not exposed to direct sunlight.
If you leave the battery uncharged, it may be impossible to
recharge it later. When the battery is left unused for
extended periods, recharge it occasionally.
The battery has a limited life.
KYOCERA lithium ion batteries use the latest low power
consumption technology and can be used for far longer
periods than conventional batteries. However, the life of
any battery is limited, and the amount of time for which a
battery can be used between recharges gradually
decreases. If repeated recharging fails to restore the
battery's functionality, the battery has failed and should be
replaced with a new battery of the specified type.
Do not dispose of used batteries with ordinary household
garbage.
Apply insulating tape to the battery terminals before
disposing of the battery. Check with the relevant local
authorities for the correct method of disposing of your
battery.
Notes on the Charger
Do not charge the battery in the following places:
• In direct sunlight.
• In ambient temperatures below -20°C or above 50°C.
• In humid or dusty locations or places subject to
vibrations (this could cause malfunctions).
• Near an appliance such as a TV or radio (this could
impair picture or sound quality).
KYOCERA guarantees this product according to the
guarantee specifications described in the Warranty
Booklet.
However, Kyocera will assume no responsibility for any
incidental damages resulting from any inability to transmit
or receive calls or messages due to breakdown,
malfunction or any other failure of this product.
If your phone needs to be repaired, any data stored within
it may be lost or corrupted. Keep backup copies of all
important data to prevent loss.
Page 9
9
Your Phone and Its Environment
Inadequately protected electronic equipment may be
affected by radio waves. This interference can lead to
accidents. Listed below are the most dangerous situations
in which this can occur. Do not hesitate to inquire whether
or not your phone can affect surrounding equipment.
Vehicles
Check with the vehicle manufacturer that electronic
equipment used in your vehicle will not be affected by
radio waves.
Aircraft
• Switch off your phone when in an aircraft. The use of
phones while airborne is illegal in some countries. It
may disrupt the operation of the aircraft or of the Iridium
network. Failure to observe these warnings may lead to
suspension or denial of access to the network or to
legal action.
• Check with a member of the aircraft crew before you
use your telephone in or around an aircraft on the
ground.
Blasting Areas
Switch off your phone in any areas where you are
requested to turn off radio transmission devices, such as
quarries or other areas where blasting is in progress.
Explosive Environments
It is dangerous to use your phone in potentially explosive
environments.
• Switch off your phone in any area with a potentially
explosive atmosphere. This includes areas in which
petrol or other flammable chemicals are handled
(service stations, fuel depots, chemicals plants, etc.)
and areas where the air contains dust particles, such as
metal powders or seeds.
• If you wish to use your phone in a vehicle used for
transporting flammable substances (even when parked)
or vehicle powered by liquefied petroleum gas (LPG),
check first that the vehicle complies with the applicable
safety regulations.
Medical Equipment and Hospitals
• Switch off your phone in hospitals, clinics and other
health care facilities where you are requested to turn off
radio transmitting devices. These establishments may
use equipment that is sensitive to radio emissions.
• If you have any questions about the radio wave
shielding on electronic medical devices that you
yourself use (pacemakers, hearing aids, etc.), contact
the manufacturer of the medical device.
Using Your Phone Efficiently and Safely
Using your phone in the most efficient manner will improve
the performance of your phone, reduce radio emissions
and reduce battery consumption.
• Always extended the antenna fully before using the
phone.
• For your own safety as well as for the satisfactory
operation of the phone, you are advised to use the
phone only in the normal operation position (with the
antenna extended over your shoulder and the earpiece
to your ear).
• For best performance, avoid touching the antenna while
a call is in progress.
• Do not use your phone if the antenna is damaged.
Touching a damaged antenna could inflict a minor skin
burn. Have a damaged antenna replaced by a qualified
technician. Make sure that it is replaced only with an
antenna recommended by KYOCERA.
• Avoid low reception areas (such as in a tunnel or
between tall buildings). In low reception areas, the
symbol on the LCD panel shows fewer than 3 bars. If
possible, move to a more favorable location.
• Do not use a battery charger other than those specified
in the KYOCERA catalog. Use of any other type of
charger may be dangerous and will invalidate the
phone’s warranty.
• Do not allow metal objects (keys in your pocket, etc.) to
short-circuit the battery contacts.
• The radio equipment must be connected to the antenna
via a non-radiating cable (e.g.coaxial).
The antenna must be mounted in a position such that
no part of the human body will normally rest close to
any part of the antenna unless there is an intervening
metallic screen, for example, a metallic roof.
Using Your Phone Responsibly
Safe use of the phone is your responsibility. Careless
handling of the phone can result in harm to others and
damage to the phone itself. To avoid such problems, read
and follow all the security instructions presented here and
make them known to anyone borrowing your phone. To
prevent unauthorized use of your phone:
• Keep your phone in a safe place and keep it out of the
reach of small children.
• Avoid writing down your PIN code. Try to remember it
instead.
• Switch off the phone if you are going to leave it unused
for an extended period.
• Use the Security menu to restrict the calls that can be
made from your phone.
• Use the Security menu to change the security code
after you purchase the phone.
CAUTION!
Your phone is not a toy. Keep it in a safe place and out of
the reach of small children. Children could hurt
themselves or others and could damage the phone.
Using Your Phone while Driving
• Avoid using your phone while driving, except in an
emergency.
CAUTION!
Using your phone and driving at the same time can be
dangerous as it lowers your concentration.
• You should always concentrate solely on driving.
Whenever possible, pull off the road and park before
using your phone.
• If you want to use your phone while driving, install the
hands-free kit that is available for that purpose.
• Respect the local regulations in countries where you
drive and use your phone.
• Check with the manufacturer of your car that the
electronic equipment used in your car will not be
affected by the radio waves emitted by your phone.
CAUTION!
The use of an alarm system to operate a vehicle's lights
or horn to indicate an incoming call is prohibited on public
roads in some countries. Check the local regulations.
Page 10
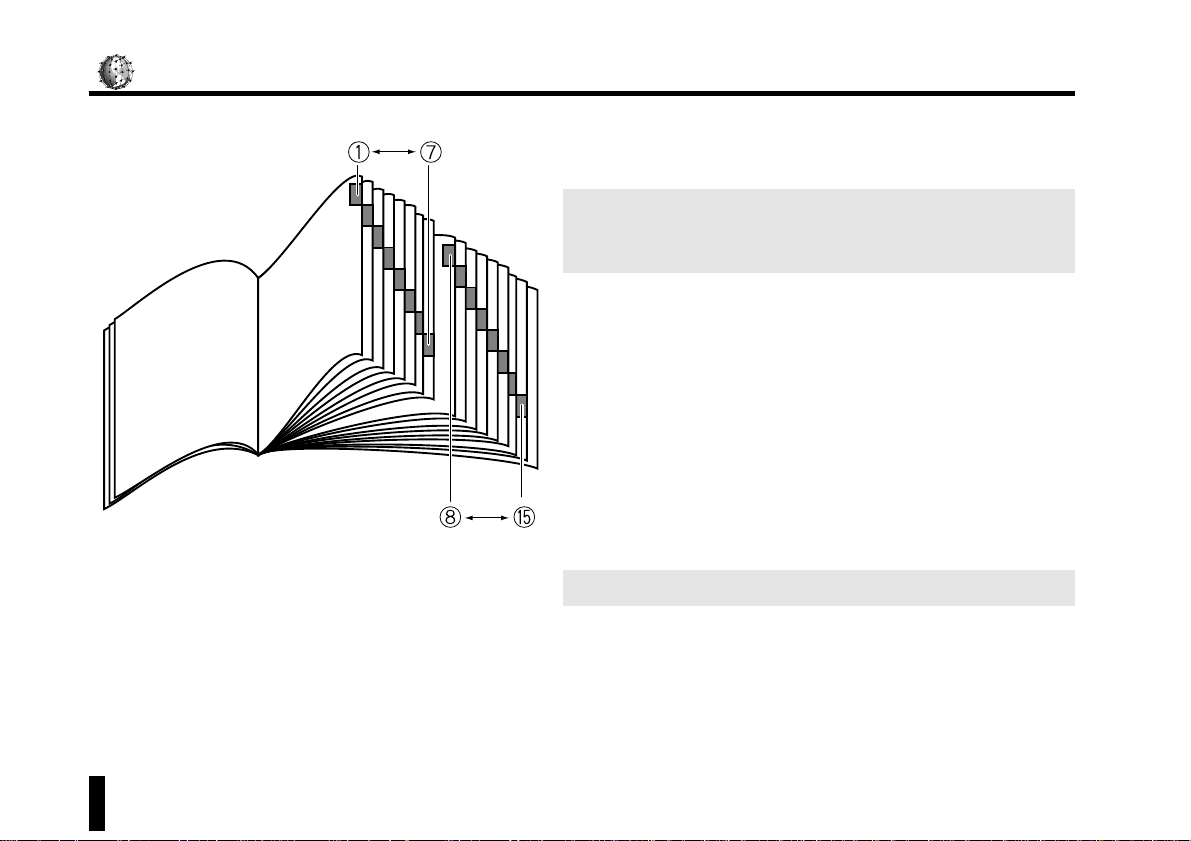
Organization of This Manual
10 Before Use
q
Before Using Your Phone
Provides basic information you need to know before using your phone, including
information about accessories, SIM cards, and charging the battery.
w
Basic Telephone Operations
Describes your phone’s basic operations, including making and receiving calls.
e
Call Waiting
Describes menu operations for handling an incoming call during another call.
r
Multiparty Calls
Details various menu operations such as holding a call and swapping between two
parties on the line.
t
Entering Text
Describes how to enter alphanumeric characters.
y
Phone Book
Explains how to register names and phone numbers in the Phone Book and how to
search for and retrieve them.
u
Memory Menu
Describes the Memory Menu, which allows you to retrieve phone numbers from the
outgoing call log, incoming call log, and Scratch Pad.
i
Menu Functions
Introduces the Main Menu (comprising the items listed below) for setting a variety of
phone functions.
o
Settings
Explains how to select language and sound settings for your phone.
!0
Clock
Explains how to select clock and alarm settings.
!1
Messages
Explains how to select text mail settings.
!2
Call Meter
Explains how to select call duration and charge settings.
!3
Services
Explains how to select additional service settings.
!4
Security
Explains how to make the keylock and PIN ON/OFF settings and to store your PIN.
!5
Message Memo and Voice Memo Features
Describes the Message Memo feature, which automatically plays your reply
message to the calling party and records incoming messages, and the Voice Memo
feature, which lets you record conversations.
Page 11
11Before Use
Before Use
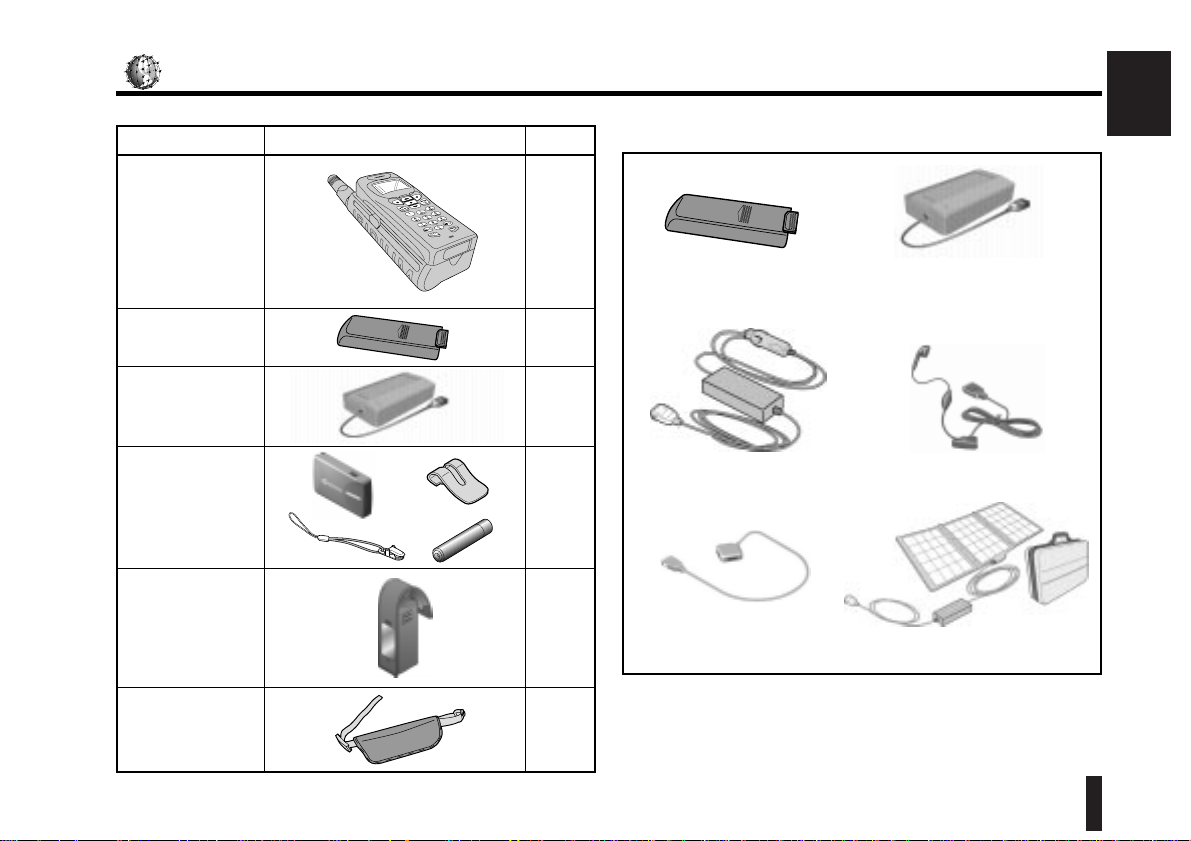
Accessories
■ The components listed below are provided as accessories.
■ The following optional accessories are available for use with this product.
Accessory names and designs are subject to change without notice.
Name
Appearance
Qty
AC Charger
(Cables are included
which comply with the
country standard)
1
Battery
2
1
Phone
1
Separate
Vibrator Kit
Soft Case
1
Two-Way Cable
(TW-S100)
DC Charger
(DC-S100)
Battery
(BP-S100)
Personal Hands Free
(EM-S100)
Solar Power Supply (SP-S100)
AC Charger
(AC-S100)
(Cables are included
which comply with the
country standard)
Grip Belt
1
Page 12
Overview of Features and Controls
12 Before Use
■
This section identifies each part of your phone.
Page 13
13Before Use
Before Use
q
Extendable antenna
When using the phone, fully extend this antenna and bend it so that
the top section is vertical to the ground. Also, make sure there are
no obstacles above or around you.
During a call, do not touch the antenna. (See page 16.)
w
Earpiece speaker
e
LCD panel
Displays phone numbers, text, and a status features.
r
Soft key 1 (
)
Executes the function displayed at the lower left corner of the LCD
panel.
t
Speak/Redial key ( )
Used for initiating an outgoing call or answering an incoming call. In
standby mode, pressing this key displays the outgoing call log.
y
Dial keys ( — )
Lets you enter characters including numbers, symbols, and letters.
u
Clear/Manner key ( )
Deletes characters, and enables "Manner Talk" during a call.
i
Microphone
o
MEMO key ( )
Pressing this key displays the Memo Menu and holding it down
records a Voice Memo.
!0
Down key ( )
Moves the focus (highlight) to select an item, controls the speaker
volume during a call, and toggles character input between
uppercase and lowercase.
!1
Power/Hang-up key ( )
Ends the call. Holding down this key for 3 seconds or more turns
the power on and off.
!2
Selector key ( )
Toggles the Up/Down key function (between function selector and
volume control) during a call.
!3
Soft key 2 ( )
Executes the function displayed at the lower right corner of the LCD
panel.
!4
Up key ( )
Moves the focus (highlight) to select an item, controls the speaker
volume during a call, and toggles character input between
uppercase and lowercase.
!5
Charging (green) LED indicator
Blinks slowly while the battery charges.
Remains lit when charging is complete.
!6
Incoming call (red) indicator
Blinks to indicate an incoming call.
!7
Mounting screw hole for Grip Belt
!8
Battery lock lever
!9
Charging socket
Accepts the battery charger connector.
@0
Battery
@1
Through-hole for Grip Belt
@2
Battery release lever
Page 14
Display Items on the LCD Panel
14 Before Use
q Shows the remaining battery charge. The entire indicator lights
when the battery is fully charged. The indicator blinks when the
battery is low.
Now charging:
Charging completed:
Requires charging:
y Indicates that the alarm has been set. The icon remains on
when the alarm has been set.
e Remains on to indicate a Text Mail which has not been read.
The icon blinks when the Text Mail memory is full.
t Remains on when the Message Memo feature is turned on. The
icon blinks when the memory is full.
r Blinks during recording or replaying a Message Memo or Voice
Memo. The icon remains on when any Message Memo has not
yet been replayed.
w Remains on during a call. The icon blinks during dialing.
u Indicates that your phone is inside a service area.
i Indicates the incoming signal strength.
o Shows the function of soft key 1. Display varies according to
the function. To execute the function, press .
Soft1
!0 Shows the function of soft key 2. Display varies according to
the function. To execute the function, press .
Soft2
!1 Appears when you have options to select. When adjusting the
volume ± is displayed. Use and to move to your choice.
■ This section describes each item displayed on the LCD panel.
12345678901234
12345678901234
12345678901234
12345678901234
Soft1 Soft2
Page 15
LED Start of LED operation End of LED operation
15Before Use
Before Use
Using Software Keys
In this manual, pressing a
soft key is indicated as
follows:
Press .
Means "Press the key with
displayed on the LCD
panel."
Menu
Menu
■ Your phone has two soft keys. Press these keys to execute their
respective functions displayed on the LCD panel.
Label
Soft key
Operations of LEDs
Incoming call The red LED blinks and the
backlight blinks.
Call answered.
Text mail
posted
The red LED blinks End of 1 cycle
Text mail
memory full
The red LED blinks
End of Text mail memory
overflow warning display
Power on The green/red LED lights and
the backlight lights.
End of the power-on
sequence
Alarm activated The red LED blinks and the
backlight blinks.
End of the alarm display
screen
Device error
•
The green LED lights.
•
The green and red LEDs
light.
5 seconds
During
charging
The green LED blinks slowly. The LED comes on when
charging is completed; it
goes off when the connector
is unplugged.
Page 16
About the antenna
16 Before Use
1.
Grasp the top of the antenna.
■ To ensure optimum communication performance when using your
phone, extend the antenna as described below.
4.
Bend the top of the antenna to the right or left until it stops.
If you bend it to the right, the antenna will lock in position.
When using the phone, keep the antenna vertical to the ground.
Bending to the left.
To ensure optimum communication performance, make sure there are
no obstacles above or around you.
Be sure to bend the top of the antenna so that it is vertical to the
ground.
When extending or replacing the antenna, always hold the top of the
antenna. Holding the lower part may damage it.
2.
Extend the top half of the antenna.
Bending to the right.
• Do not use excessive force. Doing so may damage the antenna.
• When replacing the antenna, first bring the top section back in line,
then grip the top and reverse the procedure used for extending the
antenna. Holding the bottom section of the antenna and then trying
to replace it may damage it.
Using the phone on the right side Using the phone on the left side
CAUTION!
CAUTION!
CAUTION!
3.
Extend the rest of the antenna.
Page 17

17Before Use
Before Use
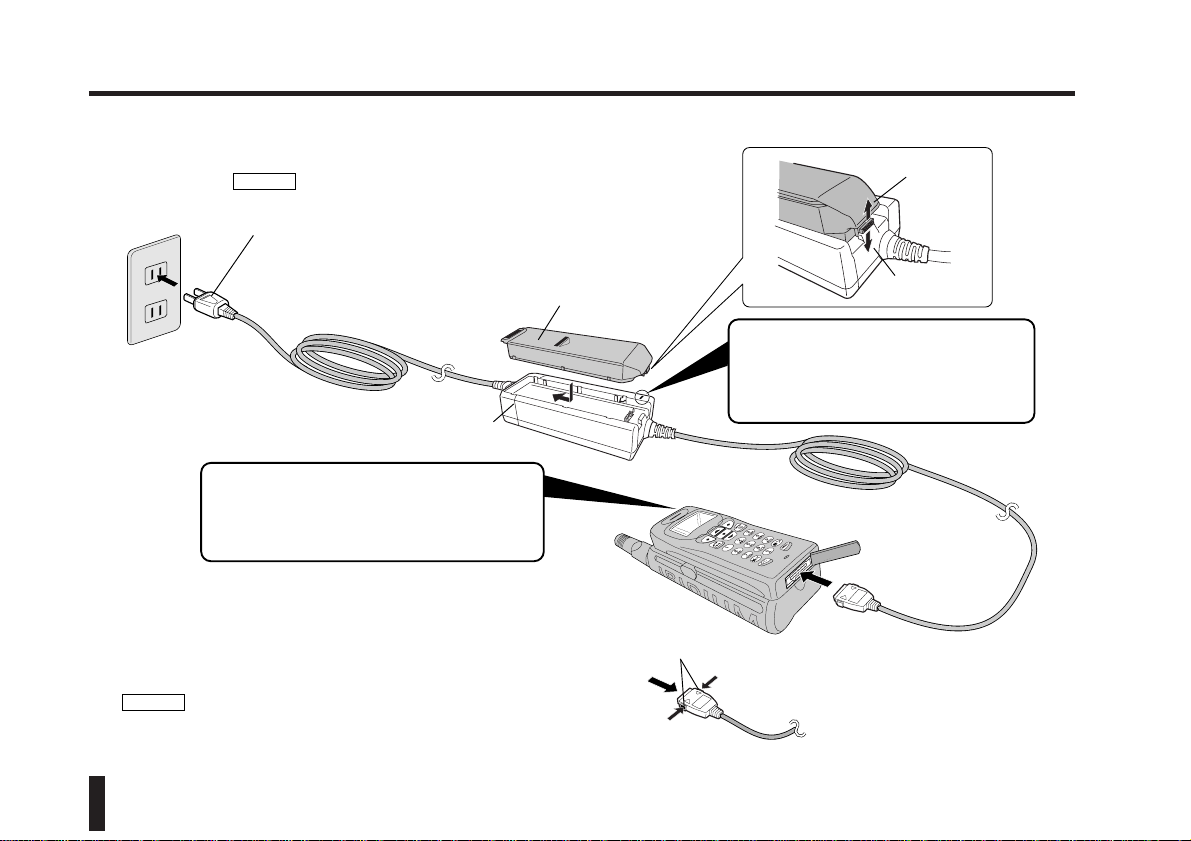
Battery and Charging
■ Removing the Battery
■ Inserting the Battery
2.
Slide the battery release lever on the
back of the phone.
1.
Align the battery with the phone and
push the battery in the direction of the
arrow to secure.
3.
Swing the battery up and then lift it off
the phone.
2.
Place the battery lock lever (on top of
the phone) to the lock position.
Always switch off your phone before removing the battery. Failure to do
so may cause the phone to malfunction.
1.
Release the battery lock lever on top of
the phone.
The battery has a limited life. While the lifetime of the battery will
depend on how frequently you use your phone, you should replace the
battery once a year. When you replace the battery, always purchase a
new KYOCERA lithium-ion battery of the same type.
Battery lock lever
Battery lock lever
Battery release lever
CAUTION!
CAUTION!
■ Charging the Battery
1.
Insert the battery firmly in the phone.
If you charge the battery in a foreign country, check the voltage in that
country and adjust the voltage of your charger (AC Charger) as required
before charging.
2.
Plug the connector into the charging socket in the base of the phone.
3.
Plug the Charger cable into an AC power outlet.
• Do not handle the charger with wet hands.
• Do not use any device other than the charger bundled with your
phone to charge the battery.
• If the battery is left unused for extended periods, the battery may
become discharged so that it cannot be recharged as quickly as
usual by the charger.
Battery lock lever
Connector
Charging socket
Cap
CAUTION!
CAUTION!
Page 18
Battery and Charging (cont.)
18 Before Use
When both batteries (on the phone and AC charger) are to be charged
at the same time, the battery on the phone is charged first.
Unlock
Lock
Power outlets vary from country to country. Use the
plug provided for use in the particular country.
AC charger
● This indicator shows the charging status when
the battery mounted on the AC charger is to be
charged (charging requires 3 to 4 hours).
Lamp blinking: charge in progress
Lamp lit: charge completed
● This indicator shows the charging status when the
battery mounted on the phone is to be charged
(charging requires 3 to 4 hours).
Lamp blinking: charge in progress
Lamp lit: charge completed
Spare battery
Remove by pressing the lock release buttons
on either side of the socket and pulling out.
CAUTION!
CAUTION!
Page 19
19Before Use
SIM Card
Before Use
■ About the SIM Card
• Your Iridium phone uses a "plug-in" SIM card.
• Your Iridium phone cannot use credit card-sized SIM cards.
To use your phone, you must insert a valid SIM card. The SIM card is
supplied by your Iridium service provider.
The SIM card contains Iridium Network subscription information and your
personal information such as your subscription ID number and your phone
number. It also contains the authentication commands required to access the
Iridium Network. The SIM card usually cannot be read unless a valid password
(PIN1 or PIN2) is entered.
■ Removing the SIM Card
2.
Slide the battery release lever in the
direction of an arrow.
3.
Swing the battery up and then lift it off
the phone unit.
Be sure to switch off your phone before removing the battery.
Failure to do so may cause the phone to malfunction.
1.
Slide the battery lock lever on top of
the phone.
Battery lock lever
Battery release lever
CAUTION!
CAUTION!
4.
Slide the card holder lock down in
the direction indicated.
This will unlock the card holder.
5.
Lift up the card holder and pull out
the SIM card.
■ Inserting the SIM Card
1.
Insert the SIM card into the card
holder.
2.
Close the card holder and slide the card
holder lock up in the direction indicated.
Card holder
Page 20
How to Attach the Grip Belt
20 Before Use
■ The separate vibrator will vibrate when it detects incoming or outgoing
calls. It also vibrates when the phone is accessing the network, for
example when settings are being updated. To ensure you can feel it
clearly, always carry the vibrator on your belt or another location in close
contact with your body.
● The battery (AAA size) for the separate vibrator has a limited life.
Although the battery life depends on how frequently the phone is
used, you should replace the battery with a new one when the
vibration has weakened. Replace the battery with a similar alkaline
cell battery.
CAUTION!
1.
Remove the battery housing cover.
2.
Check the + and - polarities of the
battery and insert it.
1.
Fasten the grip belt screw on the top of the phone using a coin.
■ Using a grip belt can help you hold the phone.
2.
Place the belt through the hole, as shown below.
3.
Adjust the length of the strap to fit your hand.
■ Loading the battery
Separate Vibrator
Page 21
21Before Use
Before Use
ON OFF
ON
OFF
S
T
O
P
Squeeze the clip at qfrom both
sides and pull it toward you. If the
clip won't come off easily, squeeze
the clip in the same way and pull it
toward you while turning it left and
right.
■ Removing the belt clip
■ Before using the separate vibrator
■ Attaching the belt strap
● This separate vibrator works with Iridium phones only. Since no ID is
required to use the separate vibrator, it may detect incoming or outgoing
calls to or from other Iridium phones in the vicinity.
● Place the separate vibrator so that you can feel the vibration directly
(belt, etc). You will feel less vibration if the separate vibrator is not in
close contact with your body.
● Since the separate vibrator uses a small current, it may not vibrate or
may vibrate late depending on the place and other conditions such as:
• When the phone unit is in a metal or thick bag
• When the separate vibrator is 1.5 m or more away from the phone unit
• When there is a metal wall or a person standing between the separate
vibrator and the phone unit
• When the separate vibrator and the phone are moving apart
● Use the separate vibrator as far away as possible from devices such as
radios.
● Do not drop the vibrator or let it get wet, as this may damage it.
CAUTION!
Insert the hook of the belt clip in the slot and push the clip in the
direction of the arrow while squeezing it at q from both sides.
Slot
Hook
Power switch
Switch on the separate vibrator before use.
Stop button
Press this button to stop vibration.
Belt clip
■ Attaching the belt clip
ON OFF
ON
OFF
S
T
O
P
ON
OFF
ON
OFF
S
T
O
P
Page 22
Turning the Power On/Off
22 Turning the Power On/Off
To switch your phone on or off,
hold down for 3 seconds or more.
An animation appears on the LCD panel and the power is turned on. To
turn the power off, hold down again for 3 seconds or more.
• You can adjust the power-on tone volume or eliminate the tone.
(See page 52.)
• You can set a time at which you want your phone to switch on
automatically. (See "4. Automatically Turning the Power On" on page 61.)
You can also set the alarm so that it sounds when the power is turned on
and off.
• The time, date, and time zone can be displayed automatically after the
power is turned on. (See "2. Displaying the Date/Time Display" on page
59.)
If you perform any operation that involves reading information from
the SIM card, e.g., using the memory menu (page 44), messages menu
(page 64) or message/voice memo feature (page 87), immediately after
the phone is switched on, the message "SIM Reading..." will appear.
Wait until the SIM access has completed before performing the next
operation.
CAUTION!
NOTE
Turning the Power On
When your phone is ready for use, the standby screen appears on the LCD
panel. If the phone is not in Standby mode, one of the following messages
appears on the LCD panel depending on the phone status.
"Adjust clock"
If the clock has not been set, press to adjust the clock. (See "1.
Setting the Local Clock" on page 58.) This message also appears after a
completely discharged battery has been recharged.
"Alarm2"
When the alarm is set, the alarm sound and an alarm message notify you
once the alarm time has been reached. Even when the phone is switched
off, the phone will turn on automatically and the alarm will sound after the
set time is reached. If you do not touch any key for 30 seconds when the
alarm message is displayed, the phone will switch off automatically.
The above message indicates that "Alarm2" has been set.
(See "3. Setting the Alarm" on page 59.)
"Insert SIM"
This message indicates that no SIM card has been inserted in your phone.
Insert your SIM card correctly in the phone. (See page 19.)
"Low Battery!"
Your phone will switch off after 10 seconds. Start charging the battery as
soon as possible with the power off. (See page 17.)
"Enter PIN1"
If you have set PIN1 input to ON, you must enter your PIN1 code after
switching the phone on. (See below.)
You can set PIN1 input to OFF if you prefer. This will disable the PIN-based
safeguard for the SIM card, eliminating the need for PIN input even when
you switch on your phone. (See "2. Disabling the PIN1 Code" on page 85.)
NOTE
Clock
Page 23
25Basic Telephone Operations
Turning the
Power On/Off
Basic
Telephone
Operations
Basic Telephone Operations
Making a Call
To ensure the best communication quality, operate the phone in open
areas with the antenna fully extenteded and vertical to the ground.
1.
Hold down .
A plus sign (+) appears on the screen.
Pressing twice to display "00" has the same effect.
2.
Enter the country code followed by the area code.
Major country codes are listed on page 94.
3.
Enter the desired phone number, then press .
The entered phone number is displayed on the LCD panel. The phone
number for an international call can be up to 28 digits long including the "+"
sign.
• Pressing erases the last digit you entered as part of the phone
number. Holding down for 1 second or more erases all the phone
number digits you have entered.
• If the entered phone number has been registered in the Phone Book, that
party's name is displayed on the LCD panel.
• If you have entered the phone number first, press to display the
country code select screen. Use
/
to select the area and country,
then press .
• Pressing registers the entered phone number in the Phone Book.
(See page 40.)
• You can dial a phone number retrieved from the Phone Book. (See page
27.)
• Pressing during a call displays the last number dialed. (See page
45.)
• You can use
/
to control the volume of the earpiece speaker
Store
OK
INT'L
NOTE
NOTE
NOTE
NOTE
Engaged
Congestion
Radio Path Unavailable
Number Not Obtainable
Authentication Failure
Channel Busy
FDN Restricted
Bearer Capability
Emergency Only
Max Charge Exceeded
Barred
Answering a Call
Make sure that your telephone has power on in a place with a sufficient
signal strength available and that the Services/Barring/Incoming setting is
OFF.
1.
When you receive an incoming call, the ringer sounds in the alert tone
which has been set.
The LCD panel displays the "Incoming Call" phone status. If the caller's
phone number notification setting is ON, the caller's phone number is
displayed. (This service will become available in the future.) If the caller’s
phone number and name have been registered in the Phone Book, the
caller’s name is also displayed.
Some networks do not provide the caller's phone number even if the
notification setting is turned on.
2.
To answer the call, extend the antenna, then press or .
You can now talk to the other party. To reject the call, press or .
• You can adjust the ringer volume using / . You can also change
the type of ringer tone.
• If you reject an incoming call, the LCD panel displays "Call Missed" along
with the time at which you received the incoming call.
• You can answer an incoming call even during another call. (See page
30.)
• You can answer an incoming call even with Keylock on.
NOTE
Rej
Ans
NOTE
If you fail to make a call
If you fail to establish a connection while dialing, one of the following
messages is displayed, indicating the failure:
during a call. To adjust the volume while setting a function, press first
to display "±" at the bottom of the screen, then use
/
.
Page 24
Basic Telephone Operations (cont.)
26 Basic Telephone Operations
Ending a Call
This operation ends an active call, hanging up the phone.
Press .
This ends the call.
• You can view the call duration and charge. (See page 76.)
• If a phone number was entered during the call, the phone number remains
displayed even after you end the call. To return to the Standby screen,
erase the telephone number.
• You can use the Charge Limit option to end a call. (See page 74.)
NOTE
Receiving a Text Mail
You can receive a text message.
1.
When the entire message is received, an alarm tone sounds.
"Text mail received" is displayed for a maximum of 30 seconds. " " is
also shown on the display.
Some networks do not provide the above message even if the notification
setting is turned on.
2.
To read the received Text mail, see "Messages" on page 64.
NOTE
Making Calls by Searching the Phone Book
You can dial a phone number easily if that number has been registered in
the Phone Book. See page 39 on registering phone numbers in order to
use this shortcut.
■ Dialing by Scrolling through Abbreviated Numbers in the Phone Book
1.
Press / .
Pressing scrolls the Phone Book down one entry at a time. Pressing
scrolls the Phone Book up one entry at a time, starting from the last
entry.
If the Scratch Pad (see page 46) contains entries, these are displayed
before those in the Phone Book.
2.
When the phone number of the desired party is displayed, press .
This dials the phone number currently displayed on the screen.
■
Dialing by Entering an Abbreviated Number Stored in the Phone Book
1.
Enter an abbreviated number of up to three digits registered in the
Phone Book.
2.
Press / .
The phone number assigned to the entered abbreviated number is
displayed.
• You can also use / to search for an entry close to the entered
abbreviated number.
• You can also dial by entering an abbreviated number from the Phone
Book.
3.
Press .
This dials the phone number currently displayed on the screen.
NOTE
NOTE
• The caller who failed to call you can leave a text message for you. The
message will be displayed on your phone the next time you access the
network.
Page 25

27Basic Telephone Operations
Basic
Telephone
Operations
You can also make a call from within the Phone Book. See the Phone
Book menu map on page 38.
■ Searching for a Phone Number by Name in the Phone Book
1.
Press .
The Memory Menu appears on the LCD panel.
2.
Use / to select "Phone book", then press .
The Phone book Menu appears.
3.
Use / to select "Search", then press .
The Search Menu appears.
4.
Use / to select "Name", then press .
The screen prompts you to enter a name.
5.
Enter the text you want to search for, then press .
If the Phone Book contains any matching names, they are displayed on the
screen. Use / to view the previous or next entry.
See page 36 for delails on how to enter text.
6.
When the telephone number of the party you want to call appears on
the screen, press .
This dials the phone number currently displayed on the screen.
■ Dialing from the Outgoing Call Log (Using "Last number")
1.
Press .
The Memory Menu appears on the LCD panel.
2.
Use / to select "Last number", then press .
The screen displays up to the last 10 phone numbers dialed, along with the
outgoing date and time of each.
OK
Mem
NOTE
OK
OK
OK
OK
Mem
Making Calls from the Memory Menu
3.
Use / to select the phone number you want to dial, then
press .
This dials the phone number of the selected call log record.
Pressing during a call displays the last number list (outgoing call log).
(See page 45.)
■ Dialing from the Incoming Call Log (Using "Received")
1.
Press .
The Memory Menu appears on the LCD panel.
2.
Use / to select "Received", then press .
The screen displays the phone numbers of up to 10 last incoming calls
received, along with the incoming date and time of each.
3.
Use / to select the phone number you want to dial, then
press .
This dials the phone number in the selected call record.
The phone number is stored in memory only when the caller's phone
number is processed by the network, so that you can dial the number
from "Received" (see page 45). Some networks will not display the
number even if the notification setting is turned on.
■ Dialing from the Scratch Pad
1.
Press .
The Memory Menu appears on the LCD panel.
2.
Use / to select "Scratch pad", then press .
The entry in the Scratch Pad is displayed on the screen.
3.
Press .
This dials the phone number contained in the Scratch Pad.
OK
Mem
CAUTION!
OK
Mem
NOTE
Page 26
Basic Telephone Operations (cont.)
28 Basic Telephone Operations
■ Making an Emergency Call
1.
Press .
The Memory Menu appears on the LCD panel.
2.
Use / to select "SOS", then press .
The "Emergency" phone status is displayed on the screen.
3.
Press .
This makes an emergency call.
OK
Mem
Inserting a Pause Before Dialing
You can provide a delay of 3 seconds for each number dialing after
placing a pause.
1.
Press and hold at the place where you want to insert a pause.
"P" is displayed on the screen, indicating a pause inserted.
• A pause cannot be inserted at the beginning of a phone number.
• If a pause is included in an outgoing call, the entire number dialed,
including the pause and any subsequent characters, is stored in the
outgoing call log (last number list).
2.
Press .
This makes a call. Three seconds after the other party answers, the
number after "P" is transmitted as DTMF tones. On completing the
transmission of the tone, the normal speech mode is resumed.
CAUTION!
"Manner Talk" System
The "Manner Talk" feature allows you to talk in a low voice during a call
while boosting your voice to normal volume to the other end of the line.
This feature lets you answer a call when you cannot speak loudly.
Press during a call.
Your phone enters the Manner Talk mode. Pressing the key again cancels
the mode. When you hang up, the phone returns to the normal mode.
During a two-party call
With a two-party call on hold
Menu
Hold
End
Tone Off (Tone On)
Charge
Mute
Quit
Menu
Retrieve
End
Tone Off (Tone On)
Charge
Mute
Quit
In Call Menu
In Call Menu
■ Using the In Call Menu (The shaded services will become available in the
future.)
Page 27
29Basic Telephone Operations
Basic
Telephone
Operations
Ending a Call
("End")
The "End" function ends the current, single call. You can end the call
either by pressing or by using the following procedure:
1.
Press during a call.
The In Call Menu is displayed.
2.
Use / to select "End", then press .
This ends the call.
OK
Menu
Switching DTMF Tones On/Off
("Tone Off (On)")
You can switch on and off DTMF (Dual Tone Multifrequency) tones, which
are used for remote services (such as Pagers).
1.
Press during a call.
The In Call Menu is displayed.
2.
Use / to select "Tone On", then press .
DTMF tones can now be transmitted.
"Tone Off" appears as an option in the In Call Menu when DTMF tones are
available.
NOTE
OK
Menu
Holding an Active Call and Reactivating a Held Call
("Hold")/("Retrieve")
You can put the other party on hold, for example, when you want to
suspend the call.
1.
Press during a call.
The In Call Menu is displayed.
2.
Use / to select "Hold", then press .
The phone status of "Call Held" is displayed on the screen, with the holding
tone sounding at the other end of the line.
3.
To reactivate the held call, press first.
The In Call Menu is displayed.
4.
Use / to select "Retrieve", then press .
The phone status of "Call Active" is displayed on the screen, reactivating the
held call.
To hold a party during a multiparty call, see "Holding a Selected Party" on
page 33.
NOTE
OK
Menu
OK
Menu
Viewing the Charge for the
Current
Call
("
Charge")
The "Charge" function displays the charge for the current call.
1.
Press during a call.
The In Call Menu is displayed.
2.
Use / to select "Charge", then press .
The call charge is displayed on the screen.
During a multiparty call, select "Total Charge" using / , then press
.
OK
NOTE
OK
Menu
Muting the Current Call and Canceling Call Muting
("Mute")
You can mute the current call.
1.
Press during a call.
The In Call Menu is displayed.
2.
Use / to select "Mute", then press .
While the call is being muted, no sound can be heard by the other party.
3.
To cancel call muting, press .
This restores the call.
Unmute
OK
Menu
Page 28

23Turning the Power On/Off
Turning the
Power On/Off
What is PIN1?
PIN stands for Personal Identification Number. It serves as a secret code
required to use your phone to make or answer calls or to retrieve your personal
information (such as Phone Book data). Unless this password is entered
correctly, your phone cannot retrieve information required to enter Standby mode.
The password is a 4- to 8-digit, user-definable numeric code. Also you can
disable PIN1 if you prefer. If you disable PIN 1, you can retrieve the information
required for your phone to receive incoming calls and to make calls without
entering the password. If you enter the PIN1 code incorrectly 3 times in
succession, your SIM card will become locked. The number of times you enter
the PIN1 code is retained on the SIM card even after the phone is switched off.
Entering the valid PIN1 code clears the invalid-code memory.
What is PUK1?
When your SIM card becomes locked after you enter the PIN1 code incorrectly 3
times in succession, you can unlock your SIM card by entering the PUK1 code
(PIN Unblock Key 1). PUK is an 8-digit numeric code that cannot be changed by
the user. If you enter the PUK1 code incorrectly 10 times in succession, your SIM
card will become locked. The number of times you enter the PUK1 code
incorrectly is retained on the SIM card even after the phone is switched off. Once
the SIM card is locked through invalid PUK1 entry, there is no way for the user to
unlock the SIM card.
If your SIM card is PUK1-locked, contact your service provider to unlock it.
What is PIN2?
PIN2 is the secret password required to write/change/delete Fixed Dial phone
numbers, set/reset the call limit, or clear the cumulative call charge. This
password must be entered immediately before you can access PIN2-protected
data. Once you have entered your PIN2 code, it remains stored on the SIM card
until the phone is switched off but it must be entered whenever you attempt to
perform an operation involving PIN2-protected data. The password is a 4- to 8digit, user-definable numeric code. Unlike PIN1, you cannot disable PIN2 input.
If you enter the PIN2 code incorrectly 3 times in succession, your SIM card will
become locked. The number of times you enter the PIN2 code incorrectly is
retained on the SIM card even after the phone is switched off. Entering the valid
PIN2 code clears the invalid-code memory. To enter the PIN2 code, use the
same procedure as for the PIN1 code. (See page 24.)
What is PUK2?
When you have entered the PIN2 code incorrectly 3 times in succession, you can
unlock your SIM card by entering the PUK2 code (PIN Unblock Key 2). To enter
the PUK2 code, use the same procedure as for the PUK1 code. (See page 24.)
PUK2 is an 8-digit numeric code that cannot be changed by the user. If you enter
the PUK2 code incorrectly 10 times in succession, your SIM card will become
locked. The number of times you enter the PUK2 code incorrectly is retained on
the SIM card even after the phone is switched off. Once the SIM card is locked
through invalid PUK2 entry, there is no way for the user to unlock the SIM card. If
your SIM card is PUK2-locked, contact your service provider to unlock it.
■ If your SIM card is PUK1/2-locked, contact your local customer center. For a
list of customer centers see Guidelines for Operation.
NOTE
Page 29
Turning the Power On/Off (cont.)
24 Turning the Power On/Off
Entering Your PIN1 Code
If you have set PIN1 input to ON, you must enter your PIN1 code after
switching the phone on.
1.
Use the numeric keys ( to ) to enter your PIN1 code.
Each digit in the PIN1 code is represented by an asterisk " ✻ " on the LCD
panel as you enter it.
Pressing erases the last digit you entered as part of the PIN1 code.
Holding down for 1 second or more erases all the PIN1 code digits you
have entered.
2.
When you have entered the PIN1 code, press .
appears when you have entered four digits. If the entered PIN1 code
is valid, the phone enters Standby mode, and the phone is then ready to
use.
• Up to 8 digits can be entered.
• If you enter the PIN1 code incorrectly, you can try again. If you enter
the PIN1 code incorrectly 3 times in succession, your SIM card will
become locked and you must enter the PUK1 code to unlock the SIM
card. (See "What is PUK1?" on Page 23.)
• Pressing dials the Emergency Call number "112."
You can set PIN1 input to OFF if you prefer. This disables the PIN1-based
safeguard for the SIM card, eliminating the need for PIN1 input even when
you switch on your phone. (See "2. Disabling the PIN1 Code" on page 85.)
NOTE
SOS
CAUTION!
OK
OK
NOTE
Entering Your PUK1 Code
If you enter the PIN1 code three incorrectly 3 in succession, you must
enter the PUK1 code to unlock the SIM card.
1.
Use the numeric keys ( to ) to enter your PUK1 code.
Each digit in the PUK1 code is represented by an asterisk " ✻ " on the LCD
panel as you enter it.
Pressing erases the last digit you entered as part of the PUK1 code.
Holding down for 1 second or more erases all the PUK1 code digits you
have entered.
2.
When you have entered the PUK1 code, press .
appears when you have entered 8 digits.
• Keep in mind that, if you enter the PUK1 code incorrectly 10 times in
succession, your SIM card will become permanently locked.
• Pressing dials the Emergency Call number "112."
3.
Enter your new PIN1 code and press .
appears when you have entered 4 digits.
4.
Enter the new PIN1 code again, then press .
Your new PIN1 code has now been set.
OK
OK
OK
SOS
CAUTION!
OK
OK
NOTE
Page 30
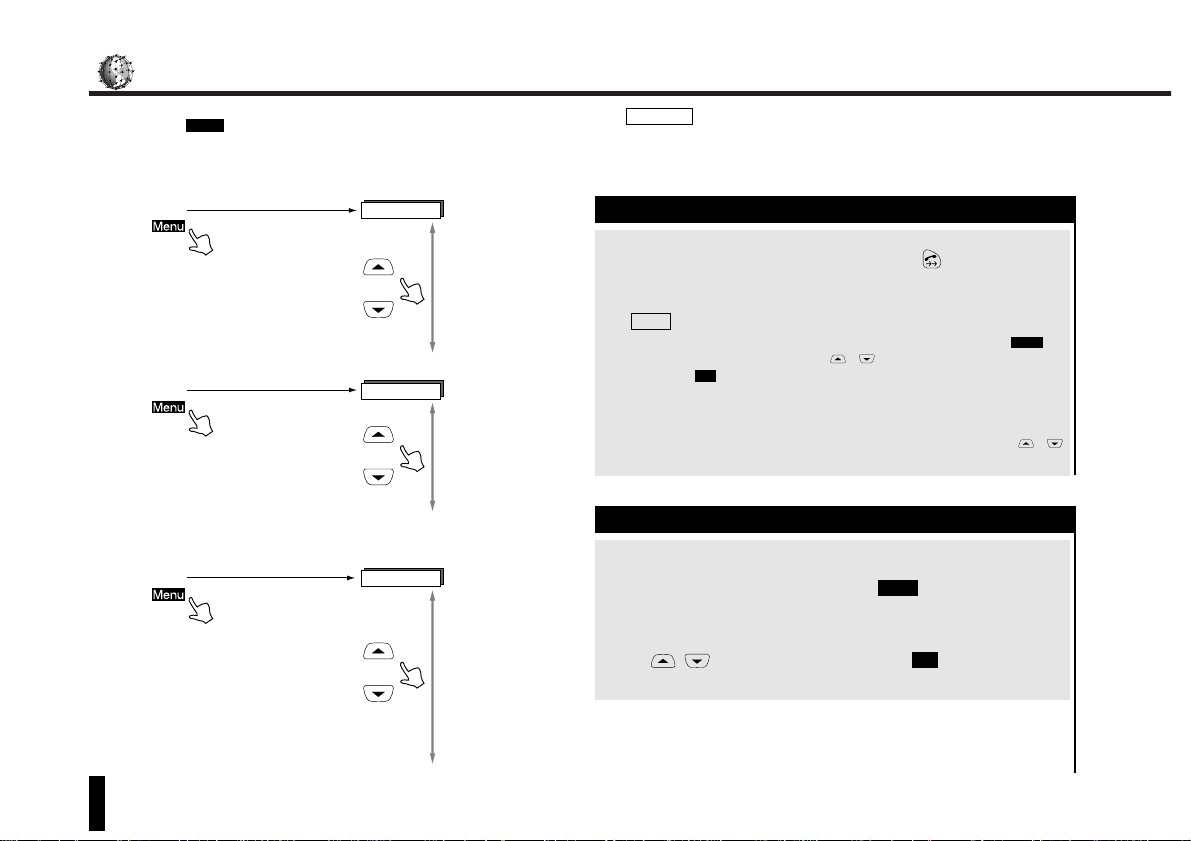
Call Waiting
(This service will become available in the future.)
30 Call Waiting
When you receive an incoming call during another call, you can answer the
new call using .
Menu
Menu
Answer
Replace
Reject
I am busy
Quit
Menu
Answer
Reject
I am busy
Quit
Incoming call during a two-party call
Incoming call with a call on hold
Menu
Answer
Replace
Replace2
Reject
I am busy
Quit
Incoming call during a multiparty call, including a call in progress
and a call on hold
In Call Menu
In Call Menu
In Call Menu
Answering an Incoming Call during a Current Call
("Answer")
You can answer an incoming call during a call.
To answer an incoming call during a call, press .
The "Answer" function puts all other calls on hold and answers the incoming
call.
• You can also answer an incoming call during a call by pressing to
bring up the In Call Menu, using / to select "Answer", then
pressing .
• The caller's phone number is displayed if it is available. If the phone
number and name of the caller have been registered in the Phone Book,
the caller’s name is also displayed.
•
If you have more than one incoming call during a call, you can use /
to select the call you want to answer.
OK
Menu
NOTE
Ending the Current Call and Answering an Incoming Call
("Replace")
The "Replace" function ends the current call and answers the incoming
call.
1.
When an incoming call is waiting, press .
The In Call Menu is displayed.
2.
Use / to select "Replace", then press .
This ends the current call and answers the incoming call.
OK
Menu
■ Using the In Call Menu for Different Call Combinations
Before you can answer an incoming call during another call, you must
enable call waiting by following the procedure in "3. Setting Call
Waiting" on page 81.
CAUTION!
Page 31

31Call Waiting
Call Waiting
Rejecting an Incoming Call during a Current Call
("Reject")
The "Reject" function allows you to reject the incoming call during a call.
When an incoming call is waiting, press .
This rejects the incoming call and continues the current call in progress.
You can also reject an incoming call during a call and continue the current
call by pressing to display the In Call Menu, using / to select
"Reject", then pressing .
OK
Menu
NOTE
Sending a Busy Message to an Incoming Call during a Current
Call
("I am busy")
When an incoming call is waiting, the "I am busy" function posts the
message "I am busy" to the network.
1.
When an incoming call is waiting, press .
The In Call Menu is displayed.
2.
Use / to select "I am busy", then press .
This sends the message to the network, allowing you to continue the call in
progress.
OK
Menu
Ending a Call on Hold, Holding the Active Call, and Answering an
Incoming Call
("Replace2")
The "Replace2" function ends the call being held, puts the active call on
hold, and then answers the incoming call.
1.
When an incoming call is waiting, press .
The In Call Menu is displayed.
2.
Use / to select "Replace2", then press .
This ends the call already on hold, puts the active call on hold, then
answers the incoming call.
OK
Menu
Page 32

Multiparty Call
(This service will become available in the future.)
32 Multiparty Call
You can select a variety of settings using the In Call Menu invoked by
pressing during a call. The Multiparty Call feature allows you to
have a call with 2 to 5 parties alternately or simultaneously. You can use
the In Call Menu to hold an active call and return to a held call, to hold a
selected party or end the call between you and a selected party (during a
multiparty call), to swap the held and current calls, and to perform other
multiparty operations.
Menu
Mute
Menu
Exclude
Drop
Hold all
Private
Tone Off (Tone On)
Total Charge
Quit
During a multiparty call
Quit
Menu
Drop
Join All
Private
Tone Off (Tone On)
Total Charge
Mute
During a multiparty call with all other parties on hold
Menu
Swap
Drop
Join All
Private
Tone Off (Tone On)
Total Charge
Mute
Quit
During a multiparty call with some parties on hold and the others active
In Call Menu
In Call Menu
In Call Menu
■ Using the In Call Menu for Different Call Combinations
Page 33

33Multiparty Call
Multiparty
Call
The "Exclude" function lets you select one of the parties during a
multiparty call and puts that party on hold. This selection appears in the
In Call Menu when all of the parties in the call are active.
1.
Use / during a multiparty call to select the party you want to
put on hold, then press .
The In Call Menu is displayed.
2.
Use / to select "Exclude", then press .
The "Mpty Held" phone status is displayed on the screen. The selected
party is put on hold.
OK
Menu
Holding a Selected Party
("Exclude")
The "Private" function allows you to select the party you want to talk to.
1.
Use / during a multiparty call to select the party you want to
talk to, then press .
The In Call Menu is displayed.
2.
Use / to select "Private", then press .
The "Private" status is displayed on the screen.
This makes the call to the selected party active. All calls other than the
selected call are put on hold.
OK
Menu
Ending the Call Between You and a Selected Party
("Drop")
The "Drop" function hangs up the selected party.
1.
Use / during a multiparty call to select the party you want to
disconnect, then press .
The In Call Menu is displayed.
2.
Use / to select "Drop", then press .
This ends the call with the selected party.
OK
Menu
Reactivating All Parties
("Join All")
The "Join All" function makes all the parties in a single multiparty call
active.
1.
Press during a multiparty call.
The In Call Menu is displayed.
2.
Use / to select "Join All", then press .
The "Call Mpty" phone status is displayed on the screen and all the parties
in the multiparty call are made active.
OK
Menu
Holding All Parties
("Hold All")
The "Hold All" function puts all the parties in a multiparty call on hold.
1.
Press during a multiparty call.
The In Call Menu is displayed.
2.
Use / to select "Hold All", then press .
The "Mpty Held" phone status is displayed on the screen and all the parties
in the multiparty call are put on hold.
OK
Menu
Speaking to a Selected Party
("Private")
Viewing the Charge for the Current Call
("Total Charge")
The "Total Charge" function displays the charge for the current call .
1.
Press during a call.
The In Call Menu is displayed.
2.
Use / to select "Total Charge", then press .
The call charge is displayed on the screen.
OK
Menu
Page 34

Multiparty Call (cont.)
34 Multiparty Call
Swapping the Held and Active Calls
("Swap")
The "Swap" function swaps the held and active parties. "Swap" appears
in the In Call Menu when there are both active and held parties.
1.
Press during a multiparty call.
The In Call Menu is displayed.
2.
Use / to select "Swap", then press .
This swaps the held and active parties in the call.
OK
Menu
Muting the Current Call and Canceling Call Muting
("Mute")
You can mute the current call.
1.
Press during a call.
The In Call Menu is displayed.
2.
Use / to select "Mute", then press .
When the call is being muted, no sound is sent to the other party.
3.
To cancel call muting, press .
This restores the call.
Unmute
OK
Menu
Switching DTMF Tones On/Off
("Tone Off(On)")
You can switch on and off DTMF (Dual Tone Multifrequency) tones, which
are used for remote services (such as Pagers)
1.
Press during a call.
The In Call Menu is displayed.
2.
Use / to select "Tone On", then press .
DTMF tones can now be transmitted.
"Tone Off" appears as an option in the In Call Menu when DTMF tones are
available.
NOTE
OK
Menu
Page 35

35Multiparty Call
Multiparty
Call
Page 36

Entering Text
36 Entering Text
When using your phone, you may need to enter text to enter names and to
create or edit Text mail. See the character input list on the right for the list
of keys used for text entry and the characters assigned to them. You can
enter characters in uppercase or lowercase.
Selecting the Input Character Type
Use to select the type of characters you want to enter: letters
(alphabetic characters and symbols) and numbers (numeric characters).
Pressing cycles through the two types. You can check the type of
characters currently available with the indicator displayed at the bottom of
the screen.
"Alp" ......................Accepts letters (Roman characters and symbols).
None......................Accepts numbers (numeric characters).
Switching Alphabetic Character Input between Lowercase and Uppercase
To switch between uppercase and lowercase, use . Pressing
toggles case between uppercase and lowercase. You can check the
current case with the indicator displayed at the bottom of the screen.
"A".........................Accepts characters in uppercase.
"a"..........................Accepts characters in lowercase.
When the cursor is positioned at a character, you can toggle the case of
that character between uppercase and lowercase by pressing .
NOTE
Character Input Table
Key Characters assigned in alphabetic character (uppercase) mode
Space
- _ . , : ; ' " ? ¿ ! ¡
A B C á Ä Å Æ Ç
D E F è É ∆
Φ
G H I Ì
Γ
J K L
Λ
M N O Ñ Ò Ö Ø
P Q R S ß ∏
Θ Σ
T U V ù Ü
W X Y Z Ω
Ξ Ψ
∗
# / ( ) < = > % £ $ ¥ @ & §
Moves to the left.
Moves to the right.
Deletes the underlined character. Holding down the key deletes all characters.
Changes the input character type (letters, numbers).
Toggles between uppercase and lowercase modes.
Key Characters assigned in alphabetic character (lowercase) mode
Space
- _ . , : ; ' " ? ¿ ! ¡
a b c á ä å æ Ç
d e f è é ∆
Φ
g h i ì
Γ
j k l
Λ
m n o ñ ò ö ø
p q r s ß ∏
Θ Σ
t u v ù ü
w x y z Ω
Ξ Ψ
∗
# / ( ) < = > % £ $ ¥ @ & §
Moves to the left.
Moves to the right.
Deletes the underlined character. Holding down the key deletes all characters.
Changes the input character type (letters, numbers).
Toggles between uppercase and lowercase modes.
Page 37

37Entering Text
Entering Text
Correcting Characters
To correct an entered letter or number, use / to move the cursor to
the character position, then edit the character.
Deleting Characters
To delete an entered letter or number, use / to move the cursor to
the character position. Pressing deletes the character at the current
cursor position. To delete the entire text you have entered, hold down
.
The shaded characters in the character input table depend on the language
currently selected on the display language setting menu. Only characters
available in the selected language are displayed.
CAUTION!
Page 38

Phone Book
38 Phone Book
■ Phone Book Menu Map
Phone book
Search
Create
Name
Enter name
Phone001-300
Enter ADN
SIM301-XXX
Fixed yyy-zzz
Quit
Abbreviated
Quit
Last number
Received
Scratch pad
Clear
Own number
SOS
Quit
Enter ADN
Enter name
Quit
Edit
Edit Name
Delete
Delete?
INT'L
Select area
Quit
Edit Number
Enter Number
Enter PIN2
(Enter PIN2)
Overwrite
Other ADN
Quit
(Enter PIN2)
(Enter PIN2)
Phone001-300
SIM301-XXX
Fixed yyy-zzz
Quit
Memory Menu
Phone book
Search
Select book
Select Memory
Edit
ADN number
Select Country
・・・Selection
range
・・・Selected
You can store (register) a phone number in the Phone Book in either of two ways. You can enter the phone number first, then press . Or, you can
press first to open the Memory Menu, select "Phone book" to open the Phone Book, then use the "Create" function to input
the phone number as shown in the following menu map.
Mem
Store
Page 39

You can Store a phone number in the Phone Book using the procedure
described below. The Phone Book provides 3 different areas for storing
phone numbers.
• Phone Memory
This area is the internal memory in your phone and can store up to 300
abbreviated numbers (numbered 1 to 300).
• SIM Memory
This area is the memory on the SIM card, excluding the "Fixed Dial
Memory". It can store abbreviated numbers starting from abbreviated
number 301. The size of this memory depends on the capacity of the
SIM card.
• Fixed Dial Memory
This area is the memory on the SIM card, used for dialing using the
"Fixed dial" feature. The maximum number of entries to the Fixed Dial
Memory depends on the SIM card loaded in your phone. If you set
"Fixed dial" to ON (as described in "4. Restricting Outgoing Calls Using
Fixed Dial" on page 86), your phone cannot dial any number other than
the phone numbers Stored in the Fixed Dial Memory.
1.
Enter the phone number you want to store in the Phone Book.
The entered phone number is displayed on the screen.
2.
Press .
The screen prompts you to select the area in which to store the phone
number. The required procedure varies depending on the area. Follow the
appropriate procedure below to store the phone number.
■ To store the phone number in an area other than the Fixed Dial Memory:
3.
Use / to select the desired area, then press .
The screen displays the first unassigned abbreviated number in the
selected area. Next, go to step 5.
OK
Store
39Phone Book
Phone Book
Storing a Phone Number in the Phone Book (by Entering the
Phone Number)
■To store the phone number in the Fixed Dial Memory:
3.
Use / to select "Fixed yyy-zzz", then press .
The screen prompts you to enter your PIN2 code. To enter the PIN2 code,
use the same procedure as for the PIN1 code. (See page 24.)
4.
After entering the PIN2 code correctly, press .
The digits in the PIN2 code are displayed as a string of asterisks " ✻ " as
you enter them.
The screen displays the lowest abbreviated number unassigned, from Fixed
yyy to Fixed zzz.
• Pressing erases the last digit you entered as part of the PIN2 code.
Holding down for 1 second or more erases all the PIN2 code digits
you have entered.
• appears when you have entered 4 digits.
5.
Check the abbreviated number, then press .
The screen prompts you to enter a name.
• You can change the abbreviated number using / .
• Pressing with an abbreviated number displayed erases the last digit.
Holding down for 1 second or more erases all digits.
• If you select an abbreviated number which has already been assigned, a
warning appears. Pressing returns to the screen to prompt you to
select the area for storing the phone number. Pressing or
assigns the currently selected abbreviated number to the phone number
you are storing, overwriting the existing entry.
• If the entered name is too long, a warning appears. (The name can be
up to 20 characters long on 2 lines. The maximum number of characters
for a name depends on your SIM card.) Pressing any key brings you to
step 7.
OK
Quit
NOTE
OK
OK
NOTE
OK
OK
Page 40

Phone Book (cont.)
40 Phone Book
6.
After entering the name, press .
The phone number to be stored is displayed on the screen.
• See page 36 for information on how to enter text.
• Pressing with a name displayed erases the last character. Holding
down for 1 second or more erases all characters.
• If you enter an already stored name, a warning appears on the screen.
Pressing accepts the name to be stored with the phone number you
are storing. Pressing or returns you to the screen prompting
for a name.
7.
Check the phone number, then press .
The phone number is now stored in the Phone Book.
• You can store a phone number in the Phone Book even during a call.
• Pressing with a phone number displayed erases the last digit.
Holding down for 1 second or more erases all digits.
• You can also store a phone number using the "Create" function in the
Phone Book Menu invoked by selecting "Phone book" from the Memory
Menu.
• Wild card function
If you store a phone number containing a " ? " in the Phone Book, you
can replace the " ? " with any numeric character when you retrieve the
phone number from the Phone Book. To enter "?", press and hold .
When you press a numeric key after retrieving the phone number, the
entered numeric character replaces the "?" in that number.
NOTE
OK
Quit
OK
NOTE
OK
Storing a Phone Number in the Phone Book (Using "Create" )
("Create")
You can use "Create" on the Phone Book Menu to store a phone number
in the Phone Book.
1.
Press .
The Memory Menu is displayed on the screen.
2.
Use / to select "Phone book", then press .
The Phone Book Menu is displayed.
3.
Use / to select "Create", then press .
The screen prompts you to select the area in which to store the phone
number. The required procedure varies depending on the area. Follow the
appropriate procedure below to store the phone number.
■ To store the phone number in an area other than the Fixed Dial Memory:
4.
Use / to select the desired area, then press .
The screen displays the first unassigned abbreviated number in the
selected area. Next, go to step 5.
■ To store the phone number in the Fixed Dial Memory:
4.
Use / to select "Fixed yyy-zzz", then press .
The screen prompts you to enter your PIN2 code. (See page 23.) To enter
the PIN2 code, use the same procedure as for the PIN1 code. (See page
24.) The digits in the PIN2 code are displayed as a string of asterisks " ✻ "
as you enter them.
• Pressing erases the last digit you entered as part of the PIN2 code.
Holding down for 1 second or more erases all the PIN2 code digits
you have entered.
• appears when you have entered 4 digits.
OK
NOTE
OK
OK
OK
OK
Mem
Page 41

41Phone Book
Phone Book
5.
After entering the PIN2 code, press .
"Enter ADN" (ADN: Abbreviated Dialing Number) appears on the screen.
The screen displays the first unassigned abbreviated number between
Fixed yyy and Fixed zzz.
6.
Enter the abbreviated number to be assigned for the phone number,
then press .
The screen prompts you to enter a name.
• You can change the abbreviated number using / .
• Pressing with an abbreviated number displayed erases the last digit.
Holding down for 1 second or more erases all digits.
• If you select an abbreviated number which has already been assigned, a
warning appears on the screen. To overwrite the assignment of the
abbreviated number, use / to select "Overwrite" and press .
To assign a different abbreviated number, select "Other ADN" and press
. The screen then returns to the ADN input state.
If ess or you will be prompted to select the area in which to
store the phone number.
7.
After entering the name, press .
The phone number to be stored is displayed on the screen.
• See page 36 for information on how to enter text.
• Pressing with a name displayed erases the last character. Holding
down for 1 second or more erases all characters.
• If a name is already stored, a warning appears. To overwrite the existing
name, press . To store a different name, press or . The
screen then returns to name input.
• If the entered name is too long, a warning appears. (The name can be
up to 20 characters long on two lines. The maximum number of
characters for a name depends on your SIM card.) Pressing any key
returns to name input.
QuitOK
NOTE
OK
Quit
OK
OK
NOTE
OK
OK
8.
Enter the phone number you want to store, then press .
The phone number is now stored in the Phone Book.
• You can store a phone number in the Phone Book even during a call.
• You can also store a phone number by entering the phone number first.
(See page 39.)
• Wild card function
If you store a phone number containing a " ? " in the Phone Book, you
can replace the " ? " with any numeric character when you retrieve the
phone number from the Phone Book. To enter "?", press and hold .
When you press a numeric key after retrieving the phone number, the
entered numeric character replaces the "?" in that number.
NOTE
OK
Page 42

Phone Book (cont.)
42 Phone Book
Editing the Phone Book
("Edit")
The "Edit" function lets you edit or change entries in the Phone Book.
1.
Search the Phone Book for an entry you want to edit.
See page 26 for information on how to search for entries.
2.
Press .
The Edit Menu is displayed on the screen.
3.
Use / to select "Edit", then press .
The screen changes to the name edit mode.
4.
Edit the name as required, then press .
The screen changes to the phone number edit mode.
• See page 36 for information on how to enter text.
• If you enter a name which has already been stored, a warning appears.
Pressing accepts the name to be stored. Pressing or
returns you to the screen prompting for a name.
5.
Edit the phone number as required, then press .
The screen prompts you to select the area in which you want to store the
abbreviated number.
If you enter an already stored phone number, a warning appears. Pressing
changes the screen to select the area in which to store the abbreviated
number; pressing or returns you to the phone number input
screen.
6.
Use / to select the area in which to store the abbreviated
number, then press .
OK
Quit
OK
NOTE
OK
QuitOK
NOTE
OK
OK
Edit
NOTE
"Overwrite" (Overwrite the existing entry with the same abbreviated
number)
• If the edited entry has been stored in Fixed yyy-zzz, press after
entering your PIN2 code to finish.
• If the entry has been stored in any other area, the existing entry is
replaced by edited one.
"Other ADN" (Assign a different abbreviated number.)
• If the edited entry has been stored in Fixed yyy-zzz, pressing after
entering your PIN2 code displays the first unassigned abbreviated
number. Next, go to step 7.
• If the entry has been stored in any other area, the screen displays the
first unassigned abbreviated number in the selected memory. Next, go to
step 7.
7.
After entering the desired abbreviated number, press .
The edited entry is now stored.
• You can change the abbreviated number using to or / .
• Pressing with an abbreviated number displayed erases the last digit.
Holding down for 1 second or more erases all digits.
• If you select an abbreviated number which has already been assigned, a
warning appears, asking whether you want to overwrite the existing
number.
NOTE
OK
OK
OK
Page 43

43Phone Book
Phone Book
Deleting Information from the Phone Book
("Delete")
The "Delete" function allows you to delete entries from the Phone Book.
1.
Search the Phone Book for the entry you want to delete from the
Phone Book.
2.
Press .
The Edit Menu is displayed on the screen.
3.
Use / to select "Delete", then press .
The screen displays a delete confirmation message.
To delete a phone number containing "?", press after searching for
and retrieving the number.
4.
After re-checking the entry to be deleted, press .
The entry has now been deleted from the Phone Book.
If the entry to be deleted has been stored has been stored in Fixed yyy-zzz,
you must enter your PIN2 code in order to delete it.
NOTE
OK
Erase
NOTE
OK
Edit
Adding a Country Code
("INT'L")
The "INT'L" function adds an international country code prefix to a phone
number stored in the Phone Book.
1.
Search the Phone Book for an entry to which you want to add a
country code prefix.
2.
Press .
The Edit Menu is displayed on the screen.
3.
Use / to select "INT'L", then press .
The screen prompts you to select a country code.
4.
Use / to select the desired country code, then press .
The selected country code prefix is added to the phone number.
OK
OK
Edit
Page 44

Memory Menu
44 Memory Menu
The Memory Menu provides the following functions:
1. Phone book..............................Allows you to create, edit, or delete entries in the Phone Book. See page 38.
2. Last number.............................Displays the phone numbers dialed recently.
3. Received...................................Displays the phone numbers of recent incoming calls.
4. Scratch pad..............................Used for temporarily storing a phone number.
5. Clear..........................................Clears a selected memory area or all memory areas.
6. Own number.............................Displays your phone number.
7. SOS...........................................Makes an emergency call.
■ Memory Menu Map
Memory menu
Phone book
Last number
Received
Scratch pad
Clear
Own number
SOS
Quit
・・・Selection range
See page 38.
Last number:1–10
Received:1–10
Scratch pad
Own number
Emergency
・・・Selected
Display
Save
Quit
Memory Clear
Phone book
Last number
Received
Scratch pad
All Memory
Quit
Select Memory
Phone
SIM
Fixed
Quit
(Enter PIN2)
Enter PIN2
Clear Phone Memory?
Clear SIM Memory?
Clear Fixed Memory?
Clear Last number?
Clear Received?
Clear Scratch pad?
Clear all memory?
Page 45

45Memory Menu
Memory
Menu
Viewing the Outgoing Call Log
("Last number")
Viewing the Incoming Call Log
("Received")
Your phone can store and display the phone numbers of the 10 most
recently received incoming calls.
1.
To view the phone number of the most recent incoming call, press
.
The Memory Menu is displayed.
2.
Use / to select "Received", then press .
The most recent incoming call phone number is displayed.
The phone number is stored in memory only when the caller's phone
number is processed by the network. (This service will become
available in the future.) Some networks may not display the phone
number even if the notification setting is turned on.
• When the most recent incoming call’s phone number is on the screen,
you can dial that number by pressing . (See page 27.)
• When the most recent incoming call’s phone number is on the screen,
you can store that number in the Phone Book by pressing .
• If the incoming call log contains no phone numbers, press any key to
return to the Memory Menu.
3.
Press / .
You can view the phone number of the previous/next most recent incoming
call.
Store
NOTE
CAUTION!
OK
Mem
Your phone can store and display the 10 most recently dialed phone
numbers.
1.
To view the most recent phone number dialed, press first.
The Memory Menu is displayed.
2.
Use / to select "Last number", then press .
The most recent phone number dialed is displayed.
• When the most recent phone number dialed is displayed, you can dial
that number by pressing . (See page 27.)
• When the most recent phone number dialed is displayed, you can store
that number in the Phone Book by pressing .
• You can also view the most recent phone number dialed by pressing
in Standby mode. Use / to scroll through the outgoing call log.
• If the outgoing call log contains no phone numbers, press any key to
return to the Memory Menu.
3.
Press / .
You can view the phone number of the previous/next most recent outgoing
call.
Store
NOTE
OK
Mem
Page 46

Memory Menu (cont.)
46 Memory Menu
Scratch Pad
("Scratch pad")
The "Scratch pad" function displays the phone number stored temporarily
in the Scratch Pad.
1.
Enter the phone number you want to store in the Scratch Pad.
The entered phone number is displayed.
2.
Press .
You are prompted to select the memory area in which to store the phone
number.
3.
Use / to select "Scratch pad", then press .
4.
Press .
Now the phone number is stored in the Scratch Pad.
■ Viewing the Scratch Pad
1.
Press first.
The Memory Menu is displayed.
2.
Use / to select "Scratch pad", then press .
The temporary entry (phone number) in the Scratch Pad is displayed.
• When the phone number in the Scratch Pad is displayed, you can dial
that number by pressing the key. (See page 27.)
• When the phone number in the Scratch Pad is displayed, you can store
that number in the Phone Book by pressing .
• If no phone number has been stored in the Scratch Pad, press any key to
return to the Memory Menu.
Store
NOTE
OK
Mem
OK
OK
Store
Clearing Memory
("Clear")
The "Clear" function can delete data from one or all of the memories listed
on the Memory Menu.
1.
Press first.
The Memory Menu is displayed.
2.
Use / to select "Clear", then press .
The Memory Clear Menu is displayed, prompting you to select the memory
area to be cleared.
3.
Use / to select the memory you want to clear, then press .
If you select "Phone book", the screen displays the Select Memory Menu to
further select the memory area to be cleared. If you select "All memory",
you are prompted to enter your PIN2 code. If you select any other memory
area, the screen asks whether you want to clear the selected memory area.
■ Selecting "Phone book"
4.
Use / to select the memory area you want to clear, then press
.
If you select "Fixed" with any phone number stored in the Fixed Dial
Memory, the screen displays the PIN2 code input prompt. Enter the PIN2
code, then press .
5.
Press .
The selected area within the Phone Book is cleared and the Select Memory
Menu is displayed.
OK
OK
OK
OK
OK
Mem
Page 47

47Memory Menu
Memory
Menu
Viewing Your Phone Number
("Own number")
The "Own number" function displays the phone number of your Iridium
phone. If your phone number changes, you can enter the new phone
number and store it.
1.
Press .
The Memory Menu is displayed.
2.
Use / to select "Own number", then press .
Your number is displayed.
1. Display Displays the phone number of your Iridium phone.
2. Save Changes and stores the currently displayed phone
number.
OK
Mem
Retrieving an Emergency Call Number
("SOS")
The "SOS" function retrieves an emergency call number.
1.
Press .
The Memory Menu is displayed.
2.
Use / to select "SOS", then press .
The screen displays an emergency call number.
If you have stored 2 or more emergency call numbers, you can scroll
through them using / .
3.
Press .
This dials the emergency call number currently displayed.
• The telephone number displayed during the emergency call
depends on the SIM card supplied by your Iridium service provider.
• The emergency call number cannot be stored.
CAUTION!
NOTE
OK
Mem
■ Selecting "Last number," "Received," or "Scratch pad"
4.
Press .
The selected memory area is cleared and the screen returns to the Memory
Clear Menu.
■ Selecting "All Memory"
You must enter your PIN2 code if any entry is already stored in the Fixed
Dial Memory.
4.
Enter your PIN2 code, then press .
The screen displays a clear confirmation message.
5.
Press .
All memory areas are cleared and the screen returns to the Memory Menu.
OK
OK
OK
3.
Use / to select the desired option, then press .
The phone number of your Iridium phone is displayed on the screen. If you
select "Save", pressing erases digits one by one. Holding down
for 1 second or more erases the entire phone number. Enter the new
phone number.
4.
Press any key.
The screen returns to "Own number." If you have selected "Save" in step 3
above, the screen returns to "Own number" by pressing .
OK
OK
Page 48

Menu Functions
(The shaded services will become available in the future.)
48 Menu Functions
The Main Menu provides the following functions:
1. Language Changes the language displayed on your phone.
2. Ringer Sets the type of ringer tone, the ringer volume, and
the user melody.
3. Volume Sets the volume for key click, warning, and powerON/OFF tones, selects a sound pattern, and sets
the speech volume.
4. DTMF type Sets the type of DTMF tones.
5. Backlight Keeps the backlight on for 10 seconds after any
key operation.
6. AnykeyAnswer Answers an incoming call by pressing any key.
7. Auto answer Answers an incoming call automatically a certain
number of seconds after detecting the call.
Settings
Clock
1. Clock mode Sets the date/time display mode, including 12-hour
and 24-hour time display options.
2. Set alarm Sounds the alarm at the set time. Up to three
alarms can be set.
3. AutoPowerON Turns the power on automatically at the set time.
4. AutoPowerOFF Turns the power off automatically at the set time.
5. Set clock Sets a country/city and date/time.
6. World clock Corrects the current time, sets the destination for
automatic time switching, and displays the world
clock on a world map.
7. Summer time Turns summer time display on or off.
Messages
1. Read new Read received but unread Text mails.
2. Read all Read all received Text mails.
Create Create a new Text mail.
3. Erase all Delete all Text mails.
Settings Settings for Text mails.
Call Meter
1. Last call Displays the charge for the last call and its duration.
2. All calls Displays the cumulative charge for calls and their
cumulative duration.
3. Charge limit Sets the maximum cumulative call charge.
4. Currency Sets the charge per time-charge.
5. Display Allows real-time call charge/duration display during
a call.
Services
1. Barring Sets service features for outgoing and incoming
calls.
2. Forwarding Sets Call Forwarding.
Waiting Sets Call Waiting.
Caller Id Sets called/calling line identification.
3. Registration Checks for the registered location.
Security
1. Keylock Locks key operations.
2. PIN1 ON/OFF Enables/disables the PIN1-based safeguard
applied when your phone is switched on.
3. New PIN1 Sets a new PIN1 code.
4. New PIN2 Sets a new PIN2 code.
5. Fixed dial Sets restriction on outgoing calls using the Fixed
Dial feature.
Page 49

49Menu Functions
Menu
Functions
■ Main Menu Map (The services shown shaded will become available in the future.)
Quit
Quit
Fixed dial
PIN1 ON/OFF
New PIN1
New PIN2
Security
Keylock
Quit
Waiting
Caller Id
Registration
Services
Barring
Forwarding
Quit
Currency
Display
Call meter
Last call
All calls
Charge limit
Quit
Erase all
Settings
Read all
Create
Messages
Read new
Quit
AutoPowerOFF
Set clock
Summer time
World clock
Clock
Clock mode
AutoPowerON
Set alarm
Settings
・・・Selected
・・・Selection
range
AnykeyAnswer
Auto answer
Quit
Back light
DTMF Type
Ringer
Volume
Language
Page 50

Settings
50 Settings
Settings
Clock
Messages
Call meter
Services
Security
Quit
Language
German
Ringer
Type
OFF
Low
Medium
High
Step1
Step Ringer
Sign call
Step2
Step3
Step4
Quit
Sign call
Compose
Playback
Delete
Quit
RingerVolume
UserMelody
Quit
Volume
7
8
9
4
5
6
0
1
2
3
Back light
AnykeyAnswer
Auto answer
Delete
UserMelody?
Playback
Type1
Type2
Type3
Type4
Type5
Type6
Type7
Melody1
Melody2
Custom
Quit
Quit
English
Italian
French
Spanish
Dutch
Swedish
Danish
Portuguese
Finnish
Norwegian
Greek
Turkish
Russian
Korean
Chinese-Trad
Chinese-Simp
Japanese
Quit
ON
OFF
Quit
Menu
Settings
Ringer
Sound Item
Volume
Backlight
Any key answer
Auto Answer
Number of ring
UserMelody
Ringer volume
Ringer type
Language
Pattern1
Pattern2
Pattern3
Pattern4
Quit
SoundPattern
Key click
Warning
Power ON
Power OFF
Quit
OFF
Low
Medium
High
Quit
OFF
Low
Medium
High
Quit
OFF
Low
Medium
High
Quit
OFF
Low
Medium
High
Quit
Power OFF
Power ON
Warning
Key click
Sound volume
SoundPattern
Talk volume
Quit
DTMF type
Short
Long
OFF
Quit
DTMF type
ON
OFF
Quit
ON
OFF
Quit
・・・Selection
range
・・・Selected
■ Settings Menu Map
Page 51

51
Settings
Settings
Changing the Settings
("Settings")
Changing the Settings
1.
Press .
The Main Menu is displayed on the screen.
2.
Use / to select "Settings", then press .
The Settings Menu is displayed. You can now make the settings shown in
the following table:
1. Language Changes the language displayed on your phone.
2. Ringer Sets the type of ringer tone, the ringer volume, and
the user melody.
3. Volume Sets the volume for key click, warning, and powerON/OFF tones, select a sound pattern, and to set the
speech volume.
4. DTMF type Sets the type of DTMF tones.
5. Back light Keeps the backlight to remain on for 10 seconds
after completion of key operation.
6. AnykeyAnswer Answers an incoming call by pressing any key.
7. Auto answer Answers an incoming call automatically a certain
number of seconds after detecting the call.
OK
Menu
1. Setting the Display Language
("Language")
The "Language" function lets you change the language to be displayed on
your phone.
1.
Use / to select the "Language", then press .
The currently selected language is indicated by ●.
2.
Use / to select the desired language, then press .
A ● appears next to the selected language. Press to return to the
Settings Menu. The Language Menu lists the following available languages:
German → English → Italian → French → Spanish → Dutch → Swedish →
Danish → Portuguese → Finnish → Norwegian → Greek → Turkish →
Russian → Korean → Chinese-Trad → Chinese-Simp → Japanese → German →...
Once you have selected a language, all screen information is displayed in
that language. You can change the language back to English by
pressing or .
NOTE
Quit
OK
OK
2. Setting the Ringer
("Ringer")
The "Ringer" function lets you set the type and volume of the ringer tone
and the user melody.
Use / to select "Ringer", then press .
The Ringer Menu is displayed on the screen, which provides the following
functions:
1. Type Sets the type of ringer tone to be used.
2. Ringer Volume Sets the ringer volume.
3. User Melody Sets the user melody.
OK
Page 52

Settings (cont.)
52 Settings
2-1. Setting the Ringer Tone
("Type")
The "Type" function lets you set the type of ringer tone.
1.
Use / to select "Type", then press .
The Ringer Type Menu is displayed. The currently selected type of ringer
tone is indicated by ●. There are 10 types of ringer tones available:
Type1 to Type7, Melody1, Melody2, and Custom. (Creation of the user
melody is described in "2-3-1. Composing a User Melody" on page 53.)
2.
Use / to select the desired type of ringer tone.
The selected type of ringer tone sounds for one cycle.
3.
Press .
A ● appears next to the selected type of ringer tone. Press to return
to the Ringer Menu.
Melody1 is set as the ringer tone when you select "Custom" if no user
melody has been created.
CAUTION!
Quit
OK
OK
Step1 to Step4 cause the ringer to sound in the following volume patterns,
respectively:
Step1 Low →High →High →Continuously High
Step2 Low →Medium →High →Continuously High
Step3 Low →Medium →High →Muted →(Pattern)
Step4 Low →High →Low →High →(Pattern)
Sign call Sounds the ringer for the set period of time after an incoming
call is received.
2.
Use / to select the desired volume option.
The ringer sounds at the selected volume or in the selected volume
pattern.
3.
Press .
A ● appears next to the selected volume option. If you select Step1 to
Step4, you are prompted to set the step interval. Enter the desired value
using a numeric key ( to ).
After you set the ringer volume, select "Sign call" and use a numeric
key ( to ) to set the desired number of rings to sound when
an incoming call is received.
4.
Press .
The screen returns to the Ringer Menu.
OK
OK
NOTE
2-3. Setting the User Melody
("User Melody")
The "User Melody" function lets you create your own melody.
Use / to select "UserMelody", then press .
The User Melody menu is displayed, which provides the following
functions:
1. Compose Composes a user melody.
2. Playback Replays the user melody.
3. Delete Deletes the user melody.
OK
2-2. Setting the Ringer Volume
("RingerVolume")
The "Ringer volume" function lets you set the ringer volume.
1.
Use / to select "RingerVolume", then press .
The Ringer volume Menu is displayed. The currently selected ringer
volume is indicated by ●. There are nine volume options available: OFF,
Low, Medium, High, and Step1 to Step4 and sign call.
OK
Page 53

53Settings
Settings
2-3-1. Composing a User Melody
("Compose")
The "Compose" function lets you compose a user melody.
1.
Use / to select "Compose", then press .
The User Melody menu is displayed.
• A note represents a sound of a particular pitch and length. The pitch
can be selected from among 24 options; the length can be selected
from among 5 options.
• The user melody can contain up to 8 measures. The total number of
measures and the number of the measure currently being edited are
displayed in the form of a fraction.
• Each measure can contain up to 6 notes regardless of their length. The
user melody can therefore contain up to 48 notes (8 measures x 6
notes).
NOTE
OK
Sixteenth note
Eighth note Quarter note Half note Whole noteName
Character
Output duration
80ms 160ms 320ms 640ms 1280ms
Sixteenth rest
Eighth rest Quarter rest Half rest Whole restName
Character
Output duration
80ms 160ms 320ms 640ms 1280ms
2.
Enter the desired melody.
Use the numeric keys as shown in the table on the right to create the
desired melody.
3.
When you have finished composing the user melody, press .
To use the user melody as the ringer sound, select "Custom" on the
Ringer Type menu (described on page 52).
OK
Blank Low note High note Rest
Add/delete # (sharp)
(Only to c/d/f/g/a)
Move the
cursor left.
Move the
cursor left.
Move the
cursor left.
Move the
cursor left.
Move the
cursor right.
Move the
cursor right.
Move the
cursor right.
Sixteenth
note (c)
Sixteenth
note (d)
Sixteenth
note (e)
Sixteenth
note (f)
Sixteenth
note (g)
Sixteenth
note (a)
Sixteenth
note (b)
1 octave down
Delete Delete Delete
Sixteenth
note (c)
Sixteenth
note (d)
Sixteenth
note (e)
Sixteenth
note (f)
Sixteenth
note (g)
Sixteenth
note (a)
Sixteenth
note (b)
Sixteenth
rest
Sixteenth
rest
Sixteenth
rest
Extend the rest
by one step.
● For the same note (even
with a #), these keys
extend it by one step in
length.
● For a different note, these
keys enter a sixteenth note
one octave apart.
1 octave up
Cursor position
Input key
Page 54

Settings (cont.)
54 Settings
2-3-2. Replaying the User Melody
("Playback")
The "Playback" function replays the user melody you have created.
Use / to select "Playback", then press .
You phone plays the user melody. Upon completion, the screen returns to
the User Melody Menu.
• To stop playing the user melody, press .
• The replay volume is "Medium".
Quit
NOTE
OK
2-3-3. Deleting the User Melody
("Delete")
The "Delete" function deletes the user melody you created.
1.
Use / to select "Delete", then press .
You are asked to confirm whether you want to delete the user melody.
2.
Press .
The user melody is deleted and the screen returns to the User Melody
Menu.
OK
OK
3. Setting the Volume
("Volume")
The "Volume" function lets you make a variety of volume settings.
Use / to select "Volume", then press .
The Volume Menu is displayed, which provides the following functions:
1. Sound volume Sets the volume for key click, warning, and powerON/OFF tones.
2. SoundPattern Sets a sound pattern as a combination of tones.
3. Talk volume Sets the speech volume.
OK
2.
Use / to select the type of sound whose volume you want to
set, then press .
Volume setting options for the selected type of sound are provided. The
current setting is indicated by ●. If you select one of the options, you can
hear the sound at the selected volume.
OFF Mute
Low Low volume
Medium Medium volume
High High volume
3.
Use / to select the desired volume option, then press .
The screen returns to the Sound Item Menu.
OK
OK
The "Sound volume" function lets you set the volume for key click,
warning, and power-ON/OFF tones.
1.
Use / to select "Sound volume", then press .
The Sound Item Menu is displayed.
1. Key click Key click tone
2. Warning Warning tone
3. Power ON Power-on tone
4. Power OFF Power-off tone
OK
3-1. Setting the Volume for Key Click, Warning, or Power-
ON/OFF Tone
("Sound volume")
Page 55

55Settings
Settings
The "Sound Pattern" function lets you select a sound pattern as a
combination of key click, warning, and power-ON/OFF tones.
1.
Use / to select "SoundPattern", then press .
The Sound Pattern Menu is displayed. The current setting is indicated by
●. The following table shows the different sounds assigned to functions for
each sound pattern.
OK
Key click tone Warning Power ON tone Power OFF tonePattern
Pattern1
Pattern2
Pattern3
Pattern4
Sound 1-1
Sound 2-1
Sound 3-1
Sound 4-1
Sound 1-2
Sound 2-2
Sound 3-2
Sound 4-2
Sound 1-3
Sound 2-3
Sound 3-3
Sound 4-3
Sound 1-4
Sound 2-4
Sound 3-4
Sound 4-4
3-2. Setting the Sound Pattern
("Sound Pattern")
3-3. Setting the Speech Volume
("Talk volume")
The "Talk volume" function lets you set the speech volume of the
earpiece speaker.
1.
Use / to select "Talk volume", then press .
The Talk Volume Menu is displayed. A graph appears, showing the
current speech volume.
2.
Use / to set the desired speech volume.
You can adjust the speech volume in 5 steps.
You cannot use to to set the speech volume.
3.
Press .
You have now finished setting the speech volume. The screen returns to
the Volume Menu.
You can use / to control the speech volume of the earpiece speaker
during a call. To adjust the speech volume while setting a function,
press to display "±" at the center bottom of the screen, then use
/.
NOTE
Quit
CAUTION!
OK
2.
Use / to select the desired sound pattern, then press .
The screen returns to the Volume Menu.
The setting you make here assumes that each type of sound on the
Sound Volume Menu has not been set to "OFF".
CAUTION!
OK
Page 56

The "Auto answer" function allows your phone to answer an incoming call
automatically a specified number of seconds (0 to 27 seconds) after
detecting the call.
1.
Use / to select "Auto answer", then press .
The Auto Answer Menu is displayed with the current setting indicated by ●.
ON Enables automatic answering.
OFF Disables automatic answering.
2.
Use / to select to select the desired option, then press .
A ● appears next to the selected option. Press to return to the
Settings Menu.
If you select "ON", the screen prompts you to set the "Number of ring".
Use to to set the number of rings between 0 and 9 (0 to 27 seconds),
then press .
OK
NOTE
Quit
OK
OK
Settings (cont.)
56 Settings
5. Setting the Backlight
("Back light")
The "Back light" function allows the backlight to remain on for 10 seconds
after pressing any key.
1.
Use / to select "Back light", then press .
The Backlight Menu is displayed with the current setting indicated by ●.
ON The backlight remains on for 10 seconds after any key is
pressed.
OFF The backlight is not activated after key operation.
2.
Use / to select the desired option, then press .
The screen returns to the Settings Menu.
OK
OK
6. Setting Any-key Answer Mode
("Any key answer")
The "Any key answer" function lets you answer an incoming call by
pressing any of the keys to , or .
1.
Use / to select "AnykeyAnswer", then press .
The Any Key Answer Menu is displayed with the current setting indicated by
●.
ON Enables to , or to answer an incoming call.
OFF Disables the any-key answer mode.
2.
Use / to select the desired option, then press .
The screen returns to the Settings Menu.
OK
OK
7. Setting Automatic Answering
("Auto answer")
4. Setting the Type of DTMF Tone
("DTMF type")
The "DTMF type" function lets you set the type of DTMF tone to be used
for various remote services (such as Pagers) during a call.
1.
Use / to select "DTMF type", then press .
The DTMF Type Menu is displayed with the current DTMF type setting
indicated by ●.
Short Sends a DTMF tone for +180 ms.
Long While a key is being held down, sends that key's DTMF
tone.
OFF Sends no DTMF tone.
2.
Use / to select one of the options, then press .
The screen returns to the Settings Menu.
OK
OK
Page 57

57Clock
Settings Clock
Clock
■ Clock Menu Map
Menu
Settings
Clock
Messages
Call meter
Service
Security
Quit
・・・Selection
range
・・・Selected
Clock
Clock mode
Set alarm
AutoPowerON
AutoPowerOFF
Set clock
World clock
Summer time
Quit
Set area
Asia
Europe
Africa
World clock
Summer time
Alarm select
Alarm1 [ON/OFF]
Alarm2 [ON/OFF]
Alarm3 [ON/OFF]
Power on mode
Set country
Destination
Auto change
Reference
Quit
ON
OFF
Quit
Once
Every day
MON-FRI
MON-SAT
Every SUN
OFF
Quit
Set country
Australia
Austria
Azerbaijan
Alarm mode
Once
Every day
MON-FRI
MON-SAT
Every SUN
Short range
OFF
Quit
Power on date Power on time
Power on time
Power on time
Power on time
Power on time
(Set city)
Adelaide
Canberra
Darwin
Select area
Asia
Europe
Africa
Select country
Australia
Austria
Azerbaijan
Set alarm date
Set alarm time
Set alarm time
Set alarm time
Set alarm time
Set timer
Power off mode
Once
Every day
MON-FRI
MON-SAT
Every SUN
Short range
OFF
Quit
Set date
ON
OFF
Quit
Auto change
Set area
Set alarm time
Power off date Power off time
Power off time
Power off time
Power off time
Power off time
Power off timer
Set time
Set country
(Select city)
Adelaide
Canberra
Darwin
Australia
Austria
Azerbaijan
Asia
Europe
Africa
Clock mode
OFF
12H
24H
12H&DATE
24H&DATE
12H&LOC
24H&LOC
Quit
(Set city)
Adelaide
Canberra
Darwin
Page 58

Clock (cont.)
58 Clock
Setting the Clock Functions
("Clock")
You can set the various Clock functions using the following procedure:
1.
Press .
The Main Menu is displayed on the screen.
2.
Use / to select "Clock", then press .
The Clock Menu is displayed, which provides the following functions:
1. Clock mode Sets the date/time display mode, including 12-hour
and 24-hour time display options.
2. Set alarm Sounds the alarm at the set time. Up to three alarms
can be set.
3. AutoPowerON Turns the power on automatically at the set time.
4. AutoPowerOFF Turns the power off automatically at the set time.
5. Set clock Sets the local time/date in your current city.
6. World clock Corrects the current time, sets the destination for
automatic time switching, and displays the world
clock on a world map.
7. Summer time Turns summer time display on or off.
OK
Menu
1. Setting the Local Clock
("Set clock")
3.
Use / key to select your local country.
The current setting is indicated by ●.
The default country is the home country registered in your SIM card.
4.
Press .
The "Set date" prompt appears. The current date in the selected country
(region) is displayed between square brackets [ ].
If there is a difference in time among regions within the selected country, the
Set City Menu is displayed prior to the "Set date" prompt, asking you to
select a city. Select the appropriate city and press , and the "Set date"
prompt appears.
5.
Use the numeric keys ( to ) to enter the date.
Enter today’s date.
Pressing erases the last digit.
6.
Press .
The "Set time" prompt appears. The current time is displayed between
square brackets [ ].
7.
Use the numeric keys ( to ) to enter the time.
Enter the current time.
Pressing with a time displayed erases the last digit. Holding down
for 1 second or more erases all digits.
8.
Press .
The settings are now completed. The screen returns to the Clock Menu.
OK
NOTE
OK
NOTE
OK
NOTE
OK
NOTE
The "Set clock" function allows you to set the country/city and date/time
for the local time of your phone.
1.
Use / to select "Set clock", then press .
The Set area Menu is displayed.
2.
Use / to select your local area, then press .
The Set Country Menu is displayed.
OK
OK
Page 59

59Clock
Clock
2. Displaying the Date/Time Display
("Clock mode")
The "Clock mode" function lets you turn off the date/time display or turn it
on in 12-hour or 24-hour format. The date and time can be displayed on
the screen in Standby mode and during a call.
1.
Use / to select "Clock mode", then press .
The Clock Mode Menu is displayed.
2.
Use / to select the desired date/time display mode.
The current setting is indicated by ●. The available settings are as follows:
OFF: Disables date/time display.
12H: Displays the time in 12-hour format. Example: "08:30 PM
Sat"
24H: Displays the time in 24-hour format. Example: "20:30 Sat"
12H&DATE: Displays the date and time in 12-hour format.
Example: "1998/09/23 Sat","08:30 PM"
24H&DATE: Displays the date and time in 24-hour format.
Example: "1998/09/23 Sat","20:30"
12H&LOC: Displays the date, country (region), and time in 12-hour
format.
Example: "1998/09/23 Sat","JPN 08:30 PM"
24H&LOC: Displays the date, country (region), and time in 24-hour
format.
Example: "1998/09/23 Sat","JPN 20:30"
3.
Press .
The screen returns to the Clock Menu.
OK
OK
3. Setting the Alarm
("Set alarm")
The "Set alarm" function lets you set a time at which to sound an alarm.
You can set up to 3 alarms: Alarm1, Alarm2 and Alarm3.
1.
Use / to select "Set alarm", then press .
The Alarm Select Menu is displayed. An alarm which is already set is
marked "ON".
Once you set an alarm, the [ ] icon appears on the screen.
2.
Use / to select the alarm you want to set, then press .
The Alarm Mode Menu is displayed.
3.
Use / to select the desired alarm mode, then press .
The current setting is indicated by ●.
Once Sounds the alarm only at the date/time you specify.
Every day Sounds the alarm every day at the time you specify.
MON-FRI Sounds the alarm at the time you specify, every Monday to
Friday.
MON-SAT Sounds the alarm at the time you specify, every Monday to
Saturday.
Every SUN Sounds the alarm at the time you specify, on every Sunday.
Short range Sounds the alarm after the time period you specify has
elapsed.
OFF Disables the alarm.
• If you select "Once", perform "Setting the Date" and then "Setting
the Time" (steps 4 to 7).
• If you select "Short range", perform "Setting the Timer" to specify
the time to lapse before sounding the alarm (step 8 and 9).
• If you select any other option, perform "Setting the Time" (steps 6
and 7).
CAUTION!
OK
OK
NOTE
OK
Page 60

Clock (cont.)
60 Clock
■ Setting the Date (for "Once")
The "Set alarm date" prompt appears. The current date is displayed
between square brackets [ ]. If the alarm was previously set for the
"Once" mode, however, the previously set date is displayed.
4.
Use the numeric keys ( to ) to enter the desired date.
Enter the date on which you want the alarm to sound.
Pressing with a date displayed erases the last digit. Holding down
for 1 second or more erases all digits.
5.
Press .
The "Set alarm time" prompt appears. Go to step 6.
■ Setting the Time
The "Set alarm time" prompt is displayed. The current time is displayed
between square brackets [ ]. If the alarm was previously set for the
"Once" mode, however, the previously set time is displayed.
6.
Use the numeric keys ( to ) to enter the desired time.
Enter the time at which you want the alarm to sound.
Pressing erases the last digit. Holding down for 1 second or more
erases all digits.
7.
Press .
Settings are now completed. The screen returns to the Alarm Select Menu.
■ Setting the Timer (for "Short range")
The "Set timer" prompt appears, with 00:00 enclosed in square brackets [ ].
If the previous alarm mode was "Short range", however, the previously set
time is displayed (not the remaining time).
OK
NOTE
OK
NOTE
8.
Use the numeric keys ( to ) to enter the time to elapse before
sounding the alarm.
Enter the desired time to elapse.
Pressing erases the last digit. Holding down for 1 second or more
erases all digits.
9.
Press .
The settings are now completed. The screen returns to the Alarm Select
Menu.
If you set the Timer value to 00:00, the alarm mode will be automatically set
to OFF.
When the Alarm Sounds:
At the specified time, the alarm sounds according to the current Ringer Type
and Ringer Volume settings (as on page 52). An alarm message also
appears on the screen display.
To Stop the Alarm:
Press any key. (If no key is pressed, the alarm stops automatically within
30 seconds.)
NOTE
OK
NOTE
Page 61

61Clock
Clock
4. Automatically Turning the Power On
("Auto Power ON")
The "Auto Power ON" function automatically turns on the power and
enters Standby mode at the specified time.
1.
Use / to select "AutoPowerON", then press .
The Power ON Mode Menu is displayed.
2.
Use / to select the desired option.
The current setting is indicated by ●. For how to set the time, see "Setting
the Alarm" (page 59).
Once Turns on the power automatically only at the date/time you
specify.
Every day Turns on the power automatically every day at the time you
specify.
MON-FRI Turns on the power automatically at the time you specify, from
every Monday to Friday.
MON-SAT Turns on the power automatically at the time you specify, from
every Monday to Saturday.
Every SUN Turns on the power automatically at the time you specify, on
every Sunday.
OFF Disables the automatic power-on function.
If you select "Once", specify the date and then the time.
3.
Press .
The screen returns to the Clock Menu.
• The automatic power-on time cannot be set to the automatic poweroff time.
• This function cannot be used when the battery is low.
CAUTION!
OK
NOTE
OK
5. Automatically Turning the Power Off
("Auto Power OFF")
The "Auto Power OFF" function automatically turns off the power at the
specified time.
1.
Use / to select "AutoPowerOFF", then press .
The Power OFF Mode Menu is displayed.
2.
Use / to select the desired option.
The current setting is indicated by ●. To set the time, see "Setting the
Alarm" (page 59).
Once Turns off the power automatically only at the date/time you
specify.
Every day Turns off the power automatically every day at the time you
specify.
MON-FRI Turns off the power automatically at the time you specify,
from every Monday to Friday.
MON-SAT Turns off the power automatically at the time you specify,
from every Monday to Saturday.
Every SUN Turns off the power automatically at the time you specify,
on every Sunday.
Short range Turns off the power automatically after the time you specify
has elapsed.
OFF Disables the automatic power-off function.
• If you select "Once", specify the date and then the time.
• If you select "Short range", specify the time period to elapse after which
the power should turn off.
3.
Press .
The screen returns to the Clock Menu.
The automatic power-off time cannot be set to the automatic power-on
time.
CAUTION!
OK
NOTE
OK
Page 62

Clock (cont.)
62 Clock
6. Setting the World Clock
("World clock")
The "World clock" function lets you correct the current time, set the
destination for automatic time switching, and view the world clock on a
world map.
Use / to select "World clock", then press .
The World Clock Menu is displayed, which provides the following functions:
1. Set country Lets you select an area/country and corrects the current
time.
2. Destination Sets the destinations for automatic time switching.
3. Auto change Turns on/off the automatic time switching function.
4. Reference Displays the world clock on a world map.
OK
6-1. Setting an Area
("Set Country")
The "Set Country" function lets you select a country and corrects the
current time.
1.
Use / to select "Set country", then press .
The Set area Menu is displayed.
2.
Use / to select your local area.
The Set Country Menu is displayed.
3.
Use / to select your local country.
The current setting is indicated by ●.
4.
Press .
The screen returns to the World Clock Menu.
If there is a difference in time among regions within the selected country,
the Set City Menu is displayed prior to the "Set City" prompt, asking you to
select a city. Select the appropriate city and press .
OK
NOTE
OK
OK
6-2. Setting Destinations
("Destination")
The "Destination" function lets you select up to 10 countries as possible
destinations for automatic time switching. If you enter one of these
countries while the Auto Change feature is set to ON (as described in
"6-3. Automatically Switching to Destination Time") your phone displays
the current local time automatically.
1.
Use / to select "Destination", then press .
The Select area Menu is displayed.
2.
Use / to select the area you want to set as a destination, then
press .
The Select Country Menu is displayed.
3.
Use / to select the country you want to set as a destination,
then press .
A ● appears next to the selected country. If you select a city in that
country (as described in NOTE below), ●● appears next to that country
instead. To deselect the country, press again.
• If there is a difference in time between regions in the selected country,
the Set City Menu is displayed following the Select Country Menu.
Select the appropriate city name, then press .
• You can set up to 10 destinations.
4.
Press .
You have now finished making the required settings. The screen returns to
the World Clock Menu. For automatic time switching, see "6-3.
Automatically Switching to Destination Time".
To deselect a destination, repeat the procedure used to select the country
or city and press .
OK
NOTE
Quit
OK
NOTE
OK
OK
OK
OK
Page 63

63Clock
Clock
6-3. Automatically Switching to Destination Time
("Auto change")
The "Auto change" function enables automatic switching to the local time
in a destination using the settings you made with the "Destination"
function.
1.
Use / to select "Auto change", then press .
The Auto Change Menu is displayed with the current setting indicated by
●.
ON Automatically switches to the destination time.
OFF Disables automatic switching to the destination time.
2.
Use / to select the desired option, then press .
The screen returns to the World Clock Menu.
• If a country has not been set as a destination in "6-2. Setting
Destinations", the automatic time switching feature does not work
even when you visit the country.
• When used around a time difference boundary, the phone may fail
to switch to the local time correctly.
CAUTION!
OK
OK
6-4. Viewing the World Clock on a World Map
("Reference")
The "Reference" function allows you to find the time in a selected city on
a world map.
1.
Use / to select "Reference", then press .
A world map appears. The city currently being set is located and its local
time is displayed.
The time is displayed in the 12H&LOC/24H&LOC format.
2.
Press / .
This scrolls the world map one city at a time.
3.
Press .
The world map closes and the screen returns to the World clock Menu.
NOTE
OK
7. Setting Summer Time
("Summer time")
The "Summer time" function turns on/off the summer time display mode.
1.
Use / to select "Summer time", then press .
The Summer Time Menu is displayed. The current setting is indicated by ●.
ON Displays the time in summer time mode.
OFF Displays the time in normal mode.
2.
Use / key to select the desired option, then press .
The screen returns to the World Clock Menu.
OK
OK
Page 64

Messages
64 Messages
Read new
Read all
Save & Send
Erase all
Settings
Quit
Refer
Refer
Erase
Erase?
Information
Quit
Edit
Destination
Reply
Extract
Select
Erase all?
Save
Send
Quit
Destination
Msg Centre
Reply path
Valid period
Msg type
Quit
Text
Telex
G3 telefax
G4 telefax
Voice
ERMES
Paging
X.400
E-Mail
Quit
One hour
Two hours
One day
Two days
One week
Four weeks
Six months
Quit
Msg Centre
Settings
Clock
Messages
Call meter
Service
Security
Quit
Menu
Text mail
Option
Settings
Reply path
Valid period
Option
Option
Save
Send
Quit
Option
ON
OFF
Quit
Msg type
Save & Send
Please call me
I will be late
I will call you back
Meeting cancelled
Quit
Select
Select
Please call me
I will be late
I will call you back
Meeting cancelled
Quit
Save
Send
Quit
Save & Send
Create
Selection
range
Selected
■ Messages Menu Map (The shaded services will become available in the future.)
Page 65

The [ ] icon blinks when the area of memory for Text mails is full,
indicating that no more messages can be received. Delete existing
messages to free up more memory.
3.
Use / to select a message, then press .
The selected message is displayed, starting with the first 3 lines. Selecting
an unread message removes the asterisk used as an unread-message
indicator.
4.
Use / to read the entire message.
You can scroll the message to read previous or succeeding lines. Pressing
displays the Option Menu. (See "Option Menu" below.)
5.
Press .
The screen returns to the message select screen from the message display
screen.
Option Menu
The Option Menu appears if you press with a message displayed.
Edit Edits a Text mail.
Reply Replies to a message.
Extract Extracts a phone number from the selected message.
1. Erase Deletes the selected message.
2.Information Displays supplementary information for the selected
message.
Menu
Quit
Menu
OK
CAUTION!
65Messages
Messages
Managing Your Messages
("Messages")
You can manage your messages using the following procedure:
1.
Press .
The Main Menu is displayed on the screen.
2.
Use / to select "Messages", then press .
The Messages Menu is displayed, which provides the following functions:
1. Read new Lets you read received but unread Text mails.
2. Read all Lets you read all received Text mails.
Create Lets you create a new Text mail.
3. Erase all Deletes all Text mails.
Settings Makes settings for Text mails.
OK
Menu
1. Reading Text Mails
("Read new")/("Read all")
The "Read new" and "Read all" functions allow you to read Text mails
which have been received.
1.
Use / to select "Read new" or "Read all".
Select "Read new" to read only those messages which you have not yet
read. Select "Read all" to read all messages.
2.
Press .
The screen lets you select a message.
• When there is any unread message, the [ ] icon on the screen is
displayed.
• Messages are displayed in reverse chronological order i.e., newest first.
Unread messages are marked with an asterisk " ✻ ".
• Even when you have selected "Read new", the message select screen is
not displayed if there are no unread messages.
NOTE
OK
Page 66

4.
After entering the phone number, press .
The message is now transmitted. Upon completion of transmission, the
screen displays the Option Menu shown below. To save the edited Text
mail before transmission or to save and transmit it at the same time, use
.
Option Menu
1. Save Saves the edited Text mail in the SIM card.
2. Send Transmits the edited Text mail.
3. Save & Send Saves and transmits the edited Text mail.
Opt
Messages (cont.)
66 Messages
1-1. Editing a Text Mail
("Edit")
The "Edit" function allows you to edit a Text mail.
1.
Press with a message displayed.
The Option Menu is displayed.
2.
Use / to select "Edit", then press .
The screen enters the Edit mode.
• See page 36 for information on how to enter text. You can enter up to
160 alphanumeric characters.
• Pressing erases the character at the cursor position. Holding
down for 1 second or more erases all characters.
• You can insert a fixed text phrase by pressing . Use / to
select the fixed text, then press . (See "2-1. Inserting a Fixed Text
Phrase in a Text Mail" on page 69.)
3.
After finishing editing, press .
The "Destination" prompt appears. Enter the phone number of the
destination of the edited message. To send the message to a party
already stored in the Phone Book, follow the procedure below:
Searching for a phone number
• Pressing / with no phone number entered lets you search the
Phone Book, starting with the lowest abbreviated number stored in the
Phone Book.
• Pressing / after entering 3 digits of an abbreviated number
displays the message content.
If a received or stored message is associated with stored phone number
information, the corresponding phone number is displayed.
NOTE
OK
OK
Refer
NOTE
OK
Opt
■ To save the Text mail:
Use / to select "Save", then press .
This saves the edited message to the SIM card. Phone operations are
temporarily suspended during saving.
■ To transmit the Text mail:
Use / to select "Send", then press .
This transmits the edited message. Phone operations are temporarily
suspended during transmission.
■ To save and transmit the Text mail:
Use / to select "Save & Send", then press .
This saves and transmits the edited message. Phone operations are
temporarily suspended during saving and transmission.
OK
OK
OK
Page 67

67Messages
Messages
1-2. Replying to a Received Text Mail
("Reply")
The "Reply" function sends a reply message to the sender of a Text mail.
1.
Press with a Text mail displayed.
The Option Menu is displayed.
2.
Use / to select "Reply", then press .
The screen enters the Reply mode. If the reply message requires editing,
do so first as described in "1-1. Editing a Text Mail" on page 66.
3.
Press .
The Option Menu is displayed.
1. Save Saves the edited Text mail in the SIM card.
2. Send Transmits the edited Text mail.
3. Save & Send Saves and transmits the edited Text mail.
■ To save the Text mail reply:
Use / to select "Save", then press .
This saves the edited reply in the SIM card. Phone operations are
temporarily suspended during saving.
■ To transmit the Text mail reply:
Use / to select "Send", then press .
This transmits the edited reply. Phone operations are temporarily
suspended during transmission.
■ To save and transmit the Text mail reply:
Use / to select "Save & Send", then press .
This saves and transmits the edited reply. Phone operations are
temporarily suspended during saving and transmission.
The phone number is only displayed and transmission possible when
the caller's number is provided by the network.
CAUTION!
OK
OK
OK
Opt
OK
Opt
1-3. Extracting a Phone Number from a Text Mail
("Extract")
The "Extract" function extracts a phone number from the selected Text
mail, allowing you to dial the number.
1.
Press with a Text mail displayed.
The Option Menu is displayed.
2.
Use / to select "Extract", then press .
If the selected message contains a phone number (including numeric
characters, P, -, and +) enclosed in double quotes " ", the phone number is
displayed on the screen. If the phone number has been stored with a
name the Phone Book, the name is displayed instead.
• If the Text mail contains two or more double-quoted phone numbers, you
can select one using / .
• If the Text mail contains no double-quoted phone number, press any key
to return to the Option Menu.
• Pressing with a phone number displayed erases the digit at the
cursor position. Holding down for 1 second or more returns to
Standby mode.
• You can store the displayed or extracted phone number in the Phone
Book by pressing .
Dialing the extracted phone number
Press .
This dials the currently displayed phone number.
Store
NOTE
OK
Opt
Page 68

Messages (cont.)
68 Messages
1-4. Deleting a Text Mail
("Erase")
The "Erase" function deletes the currently displayed Text mail.
1.
Press with a Text mail displayed.
The Option Menu is displayed.
2.
Use / to select "Erase", then press .
The screen asks whether you want to delete the Text mail.
3.
To confirm the deletion of the message, press .
The Text mail is deleted and the screen returns to the Text mail Menu.
To delete all Text mails, see "3. Delete All Text Mails" (on page 69).
NOTE
OK
OK
Opt
1-5. Viewing Supplementary Information for a
Text Mail
("Information")
The "Information" function displays supplementary information on the
selected Text mail.
1.
Press with a Text mail displayed.
The Option Menu is displayed.
2.
Use / to select "Information", then press .
The Text mail information is provided. The first line shows the date of
reception; the second line shows the time of reception.
The reception date/time information is displayed in the format selected on
the Clock Mode Menu. (See "2. Displaying the Date/Time Display" on
page 59.)
3.
Use / to scroll through supplementary information.
The following items of information are displayed.
First line Date of reception
Second line Time of reception
Third line Message sender name (a maximum of two lines)
Fourth line Message sender No. (a maximum of two lines)
The third and fourth lines are displayed only when the calling line
identification (Caller ID) setting of the message sender is set to ON. If
the phone number of the message sender has been stored in the
Phone Book along with the name, the stored name is displayed.
4.
After checking the information, press or .
The screen returns to the Option Menu.
OK
CAUTION!
NOTE
OK
Opt
Page 69

69Messages
Messages
2. Creating a New Text Mail
("Create")
The "Create" function allows you to create a new Text mail.
Use / to select "Create", then press .
The screen changes to create a Text mail.
The subsequent steps required to create a new Text mail are the same as
those described in "1-1. Editing a Text Mail" on page 66.
NOTE
OK
2-1. Inserting a Fixed Text Phrase in a Text Mail
You can insert a pre-written text phase in the Text mail you are creating or
editing.
1.
While the target message is being displayed, press .
A list of fixed text phrases appears.
1. Please call me
2. I will be late
3. I will call you back
4. Meeting cancelled
2.
Use / to select the fixed text you want to insert, then press
.
The selected text phrase is inserted in the Text mail you are creating or
editing.
OK
Refer
3. Delete All Text Mails
("Erase All")
The "Erase All" function deletes all Text mails.
1.
Use / to select "Erase all".
The screen asks whether you want to delete all Text mails.
2.
To confirm the deletion of all Text mails, press .
All Text mails are deleted and the screen returns to the Text mail Menu.
OK
4. Settings Items for Transmission of Text Mails
("Settings")
The "Settings" function allows you to make various settings for Text mails
to be transmitted.
Use / to select "Settings", then press .
The Settings Menu is displayed, which provides the following functions:
1. Msg Centre Sets the Service Centre phone number.
2. Reply path Turns on/off the Reply path setting request to the Service
Centre.
3. Valid period Sets the term of validity of Text mails which have not
been transmitted from the Service Centre.
4. Msg type Sets the protocol used by the communications terminal at
the Text mail destination.
OK
4-1. Setting the Service Centre Phone Number
("MSG Centre")
The "Msg Centre" function allows you to set the Service Centre phone
number.
1.
Use / to select "Msg Centre", then press .
If it has been set, the Service Centre phone number is displayed.
2.
Use the numeric keys ( to ) to enter the phone number.
The entered number is displayed.
Pressing erases the last digit entered. Holding down for 1 second
or more erases all digits entered.
3.
Press .
The setting is now completed. The screen returns to the Settings Menu.
OK
NOTE
OK
Page 70

Messages (cont.)
70 Messages
4-2. Setting the Reply Path to the Service Centre
("Reply path")
The "Reply path" function turns on or off the Reply path setting request to
the Service Centre.
1.
Use / to select "Reply path", then press .
The setting for automatic switching is displayed. The current setting is
indicated by ●.
ON Requests the Service Centre to set a Reply path.
OFF Does not request the Service Centre to set a Reply path.
2.
Use / to select the desired option, then press .
The screen returns to the Settings Menu.
OK
OK
4-3. Setting the Term of Validity of Untransmitted Text Mails
("Valid period")
The "Valid period" function lets you set the term of validity of any Text
mails waiting at the Service Centre which have not been transmitted.
1.
Use / to select "Valid period", then press .
The setting for automatic switching is displayed. The current setting is
indicated by ●.
One hour
Two hours
One day
Two days
One week (Default)
Four weeks
Six months
2.
Use / to select the desired option, then press .
The screen returns to the Settings Menu.
OK
OK
4-4. Setting the Text Mail Receiver Protocol
("MSG type")
The "Msg type" function lets you set the protocol used by the
communications terminal at the Text mail destination.
1.
Use / to select "Msg type", then press .
The supported protocols are listed. The current setting is indicated by ●.
Text (Default) A GSM Mobile Station
Telex Telex or teletext reduced to telex format
G3 telefax Group3 telefax
G4 telefax Group4 telefax
Voice (i.e., conversion to speech)
ERMES European Radio Messaging System
Paging National Paging System
X.400 Any public X.400-based message handling system
E-Mail Internet Electronic Mail
2.
Use / to select the desired option, then press .
The screen returns to the Settings Menu.
OK
OK
Page 71

71Messages
Messages
Page 72

Call Meter
(This service will become available in the future.)
72 Call Meter
Last call
All calls
Charge limit
Currency
Currency
Display
Charge
Duration
OFF
Quit
Read Symbol
Change
Change Symbol
Change Currency
Quit
Quit
Charge
Duration
Quit
Total Charge
Charge
Duration
Reset
Total Time
Quit
Enter PIN2
Enter PIN2
Enter PIN2
Total Charge
Read limit
Change limit
Change limit
Quit
Settings
Clock
Messages
Call meter
Service
Security
Quit
Menu
Call meter
Last Call
Charge limit
Currency
Display
All calls
・・・Selection
range
・・・Selected
■ Call Meter Menu Map
Page 73

73Call Meter
Call Meter
Setting the Call Meter
("Call meter")
You can change the Call meter settings using the following procedure:
1.
Press .
The Main Menu is displayed on the screen.
2.
Use / to select "Call meter", then press .
The Call meter Menu is displayed, which provides the following functions:
1. Last call Displays the charge for the last call and its duration.
2. All calls Displays the cumulative charge for calls and their
cumulative duration.
3. Charge limit Sets the maximum cumulative call charge.
4. Currency Sets the charge per time-charge.
5. Display Allows real-time call charge/duration display during a call.
OK
Menu
1. Viewing the Last Call Charge and Duration
("Last call")
The "Last call" function displays the charge for the last call you made and
its duration.
1.
Use / to select "Last call", then press .
The Last Call Menu is displayed.
1. Charge Displays the charge for the last call.
2. Duration Displays the duration of the last call.
2.
Use / to select the desired option, then press .
The selected information is displayed on the screen.
The "Duration" display value can only show a maximum value of 99:59:59.
You must set the charge per time-charge and the currency unit (as
described on page 75) before you can view the last call charge.
3.
Press any key after checking the displayed call charge or duration.
The Last Call Menu is displayed.
CAUTION!
NOTE
OK
OK
Page 74

Call Meter (cont.)
74 Call Meter
2. Viewing the Cumulative Call Charge and Duration
("All calls")
The "All calls" function displays the cumulative charge for previous calls
and their cumulative duration.
1.
Use / to select "All calls", then press .
The All Calls Menu is displayed.
1. Charge Displays the cumulative call charge.
2. Duration Displays the cumulative call duration.
3. Reset Resets the cumulative call charge and duration records.
2.
Use / to select the desired option, then press .
The selected information is displayed on the screen.
• If you select "Reset", the screen prompts for your PIN2 code. Enter
the PIN2 code, then press .
• You must set the charge per time-charge and the currency unit (as
described on page 75) before you can view the cumulative call
charge.
The "Duration" display value can only show a maximum value of 99:59:59.
3.
Press any key after checking the displayed call charge or duration.
The All Calls Menu is displayed. Pressing after selecting "Reset"
displays the Call meter Menu.
OK
NOTE
OK
CAUTION!
OK
OK
3. Setting the Maximum Cumulative Call Charge`
("Charge limit")
The "Charge limit" sets the maximum cumulative time-charge for calls.
You can prevent your phone from calling or being called when the
cumulative call charge has reached or exceeded this maximum timecharge value.
1.
Use / to select "Charge limit", then press .
The Charge Limit Menu is displayed.
1. Read limit Displays the current setting of the maximum time-charge.
2. Change limit Allows you to change the maximum time-charge setting.
2.
Use / to select the desired option, then press .
The screen provides information according to the selected option.
• If you select "Change limit", the screen prompts for your PIN2 code.
Enter the valid PIN2 code, then press . You can use the numeric
keys to enter a new time-charge (1 to 1677215). After entering the
new value, press .
• If you specify "0" for "Change limit", there is no upper limit.
Pressing erases the last digit entered. Holding down for 1 second
or more erases all digits entered.
3.
Press any key after checking the setting you made.
The screen returns to the Change Limit Menu.
If the maximum cumulative time-charge has been set, the remaining timecharge is displayed during a call.
NOTE
NOTE
OK
OK
CAUTION!
OK
OK
Page 75

75Call Meter
Call Meter
4. Setting the Charge per Time-charge
("Currency")
The "Currency" function lets you set the charge per unit-time and the
currency unit, and stores the settings in your SIM card.
1.
Use / to select "Currency", then press .
The Currency Menu is displayed.
1. Read Displays the current currency unit setting.
2. Change Lets you change the charge which has been set.
■ Viewing the Currency Unit and Rate Settings
2.
Use / to select "Read", then press .
The current currency unit setting is displayed.
3.
Press .
The current charge setting is displayed.
4.
Press .
The screen returns to the Currency Menu.
■ Changing the Currency Unit and Rate Settings
2.
Use / to select "Change", then press .
The screen prompts for your PIN2 code.
• Pressing after entering your PIN2 code erases the last digit.
Holding down for 1 second or more erases all digits entered.
• See page 24 for information on how to enter your PIN2 code.
3.
Press .
You can change up to 3 characters of the currency unit which has been set.
OK
NOTE
OK
OK
OK
OK
OK
• See page 36 for information on how to enter text.
• Pressing after entering a currency unit erases the character at the
cursor position. Holding down for 1 second or more erases all
characters entered.
4.
After entering the currency unit, press .
You can change the charge per unit-time using the numeric keys (
to ). The entered value is displayed on the screen.
• Pressing erases the last digit entered. Holding down for 1
second or more erases all digits entered.
• The charge per unit-time can be up to 11 digits long: up to 7 digits after
the decimal point and up to 11 digits before the decimal point.
5.
After entering the charge, press .
The corrected value is displayed.
6.
Check the displayed value, then press .
The screen returns to the Currency Menu.
OK
OK
NOTE
OK
NOTE
Page 76

Call Meter (cont.)
76 Call Meter
5. Viewing the Call Duration and Charge during a Call
("Display")
The "Display" function can display the current call duration or charge
during a call.
1.
Use / to select "Display", then press .
The Display Menu is displayed.
1. Charge Displays the current call charge during a call.
2. Duration Displays the current call duration during a call.
2.
Use / to select the desired option, then press .
The current setting is indicated by ●.
3.
Press .
The screen returns to the Call meter Menu.
OK
OK
OK
Page 77

77Services
Call Meter Services
Services
Barring
Forwarding
Waiting
Caller Id
Quit
All calls
Enter Password
Enter Password
Status
Accessing..
Barring
Registering..
Registering..
Registration Success
Registering.. Registration Success
Barring
Registering..
Registration Success
Registration SuccessOFF
Status
Quit
Quit
Registering
Registration Success
Accessing..
Active
Not Active
Available Not Active
Quiescent
Registered
All calls Active
All calls Not Active
Available Not Active
Quiescent
Registered
All calls
Destination
Destination
Forwarding
Registering..
Registration Success
5 seconds
10 seconds
15 seconds
20 seconds
25 seconds
30 seconds
Quit
When busy
No Answer
Not found
AllCondition
OFF
Status
Outgoing
Incoming
Password
Old password
New password Repeat New
Quit
Far Id
Your Id
Status
Quit
Accessing..
Far Id Registering
Active
Not Active
Available Not Active
Quiescent
Registered
Active
Not Active
Available Not Active
Quiescent
Registered
Far Id Registration Success
Registering..
Registration Success
Status Registering
Settings
Clock
Messages
Call meter
Service
Security
Quit
ON
OFF
Status
Quit
Menu
Services
Barring
Forwarding
Waiting
Caller Id
Outgoing
All calls When busy Not found
No Answer AllCondition
AllCondition
No Answer
Incoming
ON
OFF
Quit
Far Id
ON
OFF
Quit
Your Id
ON
OFF
Quit
Registration
ON
OFF
Quit
・・・Selection
range
・・・Selected
■ Services Menu Map (The shaded services will become available in the future.)
Page 78

Services (cont.)
78 Services
Setting the Services
("Services")
You can change the Services settings using the following procedure:
1.
Press .
The Main Menu is displayed on the screen.
2.
Use / to select "Service", then press .
The Services Menu is displayed, which provides the following functions:
1. Barring Sets service features for outgoing and incoming calls.
2. Forwarding Sets Call Forwarding.
Waiting Sets Call Waiting.
Caller Id Sets called/calling line identification.
3. Registration Checks for registered location.
Extend the antenna before starting this procedure.
CAUTION!
OK
Menu
1. Setting Service Features for Outgoing and Incoming Calls
("Barring")
The "Barring" function lets you restrict outgoing and incoming calls and
set up your password for setting call barring services.
Use / to select "Barring", then press .
The Barring Menu is displayed, which provides the following functions:
1. Outgoing Sets outgoing call barring.
2. Incoming Sets incoming call barring.
3. Password Registers a new password.
OK
1-1. Registering a New Password
("Password")
You need a four-digit password to set outgoing/incoming call barring.
The "Password" function allows you to change the password.
Extend the antenna before starting this procedure.
1.
Use / to select "Password", then press .
When a password has already been registered, the screen prompts you to
enter the old password. When you set up a password for the first time, go
to step 3.
2.
Use the numeric keys ( to ) to enter the old (current)
password, then press .
The screen prompts you to enter a new password.
• The digits in the entered password are displayed as a string of asterisks
( ✻ ) as you enter them.
• The password must be 4 digits long. appears when you have
entered 4 digits.
3.
Use the numeric keys ( to ) to enter the new password, then
press .
The "Repeat new" prompt appears. Enter the new password again.
4.
Press .
Your phone saves the new password. If the phone cannot accept the new
password, it displays an error message. Check the message content and
try again.
5.
Press any key after checking the new password.
The screen returns to the Barring Menu.
OK
OK
OK
NOTE
OK
OK
CAUTION!
Page 79

79Services
Services
1-2. Setting Outgoing Call Barring
("Outgoing")
The "Outgoing" function lets you restrict outgoing calls from your phone.
Extend the antenna before starting this procedure.
1.
Use / to select "Outgoing", then press .
The Outgoing Menu is displayed, which provides the following functions:
1. All calls Inhibits all outgoing calls.
2. OFF Does not inhibit outgoing calls.
3. Status Checks the current outgoing call barring status with the
network.
2.
Use / key to select the desired option, then press .
If you select "All calls" or "OFF", the screen prompts you to enter the
password. Enter the registered password, then press . Your phone
saves the setting in the network. If you select "Status", your phone
accesses the network to display the current setting status on the screen.
After checking the setting, press any key to return to the Barring Menu.
• Pressing erases the last digit entered. Holding down for 1
second or more erases all digits entered.
• You can change your password at any time. (See "1-1. Registering a
New Password" on page 78.)
• The status is displayed as follows:
Active
Not Available
Available Not Active
Quiescent
Registered
3.
Press any key after checking the setting.
The screen returns to the Barring Menu.
NOTE
OK
OK
OK
CAUTION!
1-3. Setting Incoming Call Barring
("Incoming")
The "Incoming" function allows your phone to inhibit incoming calls.
Extend the antenna before starting this procedure.
1.
Use / to select "Incoming", then press .
The Incoming Menu is displayed.
1. All calls Inhibits all incoming calls.
2. OFF Does not inhibit incoming calls.
3. Status Checks the current incoming call barring status with the
network.
2.
Use / to select the desired option, then press .
If you select "All calls" or "OFF", the screen prompts you to enter the
password. Enter the password, then press . Your phone saves the
setting in the network. If you select "Status", your phone accesses the
network to display the current setting status on the screen. After checking
the setting, press any key to return to the Barring Menu.
• Pressing erases the last digit entered. Holding down for 1
second or more erases all digits entered.
• You can change your password at any time. (See "1-1. Registering a
New Password" on page 78.)
• To display the status, see "1-2. Setting Outgoing Call Barring".
3.
Press any key after checking the setting.
The screen returns to the Barring Menu.
NOTE
OK
OK
OK
CAUTION!
Page 80

Enter the phone number of the call forwarding destination to enable the
selected type of Call Forwarding.
Extend the antenna before starting this procedure.
1.
Use / to select the desired Call Forwarding option, then press
.
Turn on or off the selected Call Forwarding option.
1. ON Enables the selected type of Call Forwarding.
2. OFF Disables the selected type of Call Forwarding.
2.
Use / to select ON or OFF, then press .
If you select "OFF," your phone accesses the network to save the OFF
setting. If you select "ON," the "Destination" screen appears, prompting for
the phone number of a Call Forwarding destination. Enter the desired
phone number, starting with the country code, then press . Your
phone will access the network to save the entered phone number.
• Pressing erases the last digit entered. Holding down for 1
second or more erases all digits entered.
• If you select "No answer" and "AllCondition", enter the Call Forwarding
destination phone number. You can then specify the time interval to
elapse before the beginning of Call Forwarding. Use / to select
the desired time interval between 5 and 30 seconds (in increments of 5
seconds), then press .
• If you select "Status", your phone accesses the network and displays the
current setting status.
3.
Press any key after checking the setting.
The screen returns to the Forwarding Menu.
OK
NOTE
OK
OK
OK
CAUTION!
Services (cont.)
80 Services
2. Setting Call Forwarding
("Forwarding")
The "Forwarding" function allows you to set Call Forwarding to your
preferences.
Use / to select "Forwarding", then press .
The Forwarding Menu is displayed, which provides the following functions:
1. All calls Forwards all calls.
2. When busy Forwards calls when the line is busy.
3. No answer Forwards calls when the phone does not answer.
4. Not found Forwards calls when the phone is outside a service
area or when the power is off.
5. AllCondition Forwards calls when the line is busy, the phone does
not answer or is outside a service range, or when the
power is off.
6. OFF Disables Call Forwarding.
7. Status Checks the current Call Forwarding status with the
network.
If you select 1 to 5, you need to enter the phone number of the destination
of calls to be forwarded. Go to "2-1. Setting the Destination Phone
Number".
NOTE
OK
2-1. Setting the Destination Phone Number
Page 81

81Services
Services
3. Setting Call Waiting
("Waiting")
The "Waiting" function sets Call Waiting so that you can answer an
incoming call even with another call already in progress.
Extend the antenna before starting this procedure.
1.
Use / to select "Waiting", then press .
The Waiting Menu is displayed.
1. ON Enables Call Waiting.
2. OFF Disables Call Waiting.
3. Status Checks the current Call Waiting status with the network.
2.
Use / to select the desired option, then press .
Your phone saves the setting in the network and displays the result. If you
select "Status", your phone accesses the network and displays the current
setting status.
3.
Press any key after checking the setting.
The screen returns to the Services Menu.
OK
OK
CAUTION!
4. Setting Caller's Number Notification
("Caller Id")
The "Caller Id" function enables your phone to display the phone number
of a calling party, or allows a remote phone to display your phone number.
Use / to select "Caller Id", then press .
The Caller Id Menu is displayed, which provides the following functions:
1. Far Id Displays the phone number of the called party when you
dial that number.
2. Your Id Displays your phone number on the called phone.
3. Status Checks the called/calling line identification setting with
the network.
Extend the antenna before starting this procedure.
CAUTION!
OK
4-1. Displaying the Called Party's Number When Dialing
("Far Id")
The "Far Id" function controls the display of the phone number of a called
terminal when you dial that number.
1.
Use / to select "Far Id", then press .
The Far Id Menu is displayed.
1. ON Displays the phone number of the called terminal when
dialing that number.
2. OFF Does not display the phone number of the called
terminal when dialing that number.
2.
Use / to select the desired option, then press .
The selected setting is shown on the screen.
3.
Press any key after checking the setting.
The screen returns to the Caller Id Menu.
OK
OK
4-2 . Displaying Your Phone Number on the Called
Party's Phone
("Your Id")
The "Your Id" function controls the display of your phone number at a
called phone.
1.
Use / to select "Your Id", then press .
The Your Id Menu is displayed.
1. ON Displays your phone number at the called terminal.
2. OFF Does not display your phone number at the called
terminal.
2.
Use / to select the desired option, then press .
The selected setting is shown on the screen.
3.
Press any key after checking the setting.
The screen returns to the Caller Id Menu.
OK
OK
Page 82

Services (cont.)
82 Services
4-3. Checking the Current Setting for Caller's Number
Notification
("Status")
The "Status" function checks the current setting for called/calling line
identification with the network.
Extend the antenna before starting this procedure.
1.
Use / to select "Status", then press .
Your phone accesses the network and displays the current setting status
on the screen.
The status displayed is one of the following five types:
Active
Not Active
Available Not Active
Quiescent
Registered
2.
Press / .
Pressing the key toggles between "Far Id" and "Your Id".
3.
Press .
The screen returns to the Caller Id Menu.
OK
OK
CAUTION!
5. Setting Registration
("Registration")
The "Registration" function lets you manually re-register your location and
check the network quickly to see whether any messages have been
received for you.
Extend the antenna before starting this operation.
1.
Use / to select "Registration", then press .
If any messages are waiting for you, you can view them using the Messages
Menu described from page 64.
2.
Press any key after checking the Registration result.
The screen returns to the Service Menu.
OK
CAUTION!
Page 83

83Security
Services Security
Security
■ Security Menu Map
Quit
Keylock Keylock ON?
PIN1 ON/OFF
New PIN1
New PIN2
Fixed dial
ON
OFF
Quit
Enter Old PIN1 Enter New PIN1
Enter PIN1
Enter PIN1
Repeat new
Repeat new
Enter Old PIN2 Enter New PIN2
Enter PIN2
Settings
Clock
Messages
Call meter
Service
Security
Quit
Menu
Security
PIN1 ON/OFF
ON
OFF
Quit
Fixed dial
・・・Selection
range
・・・Selected
Page 84

Security (cont.)
84 Security
Setting the Security Functions
("Security")
You can change the Security settings using the following procedure:
1.
Press .
The Main Menu is displayed on the screen.
2.
Use / to select "Security", then press .
The Security Menu is displayed, which provides the following functions:
1. Keylock Locks key operations.
2. PIN1 ON/OFF Enables/disables the PIN1-based safeguard applied
when your phone is switched on.
3. New PIN1 Sets a new PIN1 code.
4. New PIN2 Sets a new PIN2 code.
5. Fixed dial Sets restriction on outgoing calls using the Fixed Dial
feature.
OK
Menu
1. Setting Keylock
("Keylock")
The "Keylock" function locks the keys on your phone to prevent
accidental operation when you are carrying it in a bag or pocket.
1.
Use / to select "Keylock", then press .
The Keylock confirmation message appears.
2.
Press .
The screen enters Standby mode in the Keylock state.
• Keylock cannot be set during a call.
• In the Keylock state, you cannot use any keys other than the
Power/Hang-up key.
• You can answer an incoming call even in the Keylock state.
3.
To cancel Keylock, press , , then .
This cancels Keylock and the screen returns to Standby mode.
When canceling Keylock, press the 3 keys in succession at intervals of
less than 3 seconds.
Even when Keylock has been set, you can answer an incoming call by
pressing .
NOTE
CAUTION!
CAUTION!
OK
OK
Page 85

85Security
Security
2. Disabling the PIN1 Code
("PIN1 ON/OFF")
The "PIN1 ON/OFF" function enables or disables the PIN1-based
safeguard applied when your phone is switched on. Setting PIN1 to OFF
disables the safeguard for the SIM card, eliminating the need to enter the
PIN1 code even when you switch on your phone.
1.
Use / to select "PIN1 ON/OFF", then press .
The available PIN1 ON/OFF settings are displayed. The current setting is
indicated by ●.
1. ON Enables the PIN1-based safeguard.
2. OFF Disables the PIN1-based safeguard.
2.
Use / to select the desired option, then press .
The screen prompts you to enter your PIN1 code.
3.
Use the numeric keys ( to ) to enter your PIN1 code.
The digits in the PIN1 code are displayed as a string of asterisks
( ✻ ) as you enter them. appears when you have entered 4 digits.
• Pressing erases the last digit you entered as part of the PIN1 code.
Holding down for 1 second or more erases all digits entered.
• See page 24 for information on how to enter the PIN1 code.
• Up to 8 digits can be entered.
• If you enter the PIN1 code incorrectly 3 times in succession, your
SIM card will be locked and you must enter the PUK1 code to unlock
the SIM card. (See page 24.)
4.
Press .
Your phone switches to the PIN1 ON/OFF setting you have made.
OK
CAUTION!
NOTE
OK
OK
OK
3. Setting New PIN1/PIN2 Codes
("New PIN1") / ("New PIN2")
The "New PIN1" and "New PIN2" functions let you set new PIN1 and PIN2
codes.
1.
Use / to select "New PIN1" or "New PIN2", then press .
The screen prompts you to enter the old (current) PIN code.
Even if you select "New PIN1," you cannot set your new PIN1 code if
you have disabled PIN1 code entry in "2. Disabling the PIN1 Code" on
the left of this page.
2.
Use the numeric keys ( to ) to enter your new PIN code, then
press .
The screen prompts you to enter your new PIN code.
• The digits in the entered PIN code are displayed as a string of asterisks
( ✻ ) as you enter them. appears when you have entered 4 digits.
• Pressing erases the last digit entered. Holding down for 1
second or more erases all digits entered.
• See page 24 for information on how to enter your PIN code.
• Up to 8 digits can be entered.
• If you enter the PIN1 or PIN2 code incorrectly 3 times in succession,
your SIM card will be locked and you must enter the PUK1 or PUK2
code to unlock the SIM card. (See page 24.)
3.
Use the numeric keys ( to ) to enter your new PIN code
correctly, then press .
The "Repeat new" prompt appears. Enter the new PIN code again.
4.
Press .
The screen returns to the Security Menu.
OK
OK
CAUTION!
OK
NOTE
OK
CAUTION!
OK
Page 86

Security (cont.)
86 Security
4. Restricting Outgoing Calls Using Fixed Dial
("Fixed dial")
If you set "Fixed dial" to ON, your phone can only dial the phone numbers
stored in the Fixed Dial Memory.
See page 39 for storing phone numbers in the Fixed Dial Memory.
1.
Use / to select "Fixed dial", then press .
You are prompted to enter your PIN2 code.
2.
Use the numeric keys ( to ) to enter your PIN2 code, then press
.
• The digits in the entered PIN2 code are displayed as a string of asterisks (
✻ ) as you enter them.
appears when you have entered 4 digits.
• Pressing with the PIN2 code displayed erases the last digit entered.
Holding down for 1 second or more erases all digits entered.
• See also page 24 for information on how to enter your PIN2 code.
• Up to 8 digits can be entered.
• If you enter the PIN2 code incorrectly 3 times in succession, your
SIM card will be locked and you must enter the PUK2 code to unlock
the SIM card. (See page 24.)
The available Fixed Dial ON/OFF settings are displayed. The current
setting is indicated by ●.
1. ON Restricts dialing only to the phone numbers registered in
the Fixed Dial Memory.
2. OFF Disables the above restriction.
CAUTION!
OK
NOTE
OK
OK
NOTE
You can make emergency calls regardless of the Fixed Dial ON/OFF
setting.
3.
Use / to select the desired option, then press .
The screen returns to the Security Menu.
OK
NOTE
Page 87

87Message Memo/Voice Memo Features
Security
Message Memo/
Voice Memo
Message Memo/Voice Memo Features
Msg memo
Voice memo
Select
Select XXX/XXX
Playback
Playback all
Erase all
Memo ON/OFF
Response
Erase all?
Select XXX/XXX
Playback
Quit
Voice memo Recording
Select
Erase all
Quit
Playback Erase?
Erase all?
Quit
Message 1
Message 2
Quit
Message 1
Message 2
Quit
Recording
Playback
Recording Message 1
Recording Message 2
Playback Message 1
Playback Message 2
Recording
Store Enter Name
Recall Calling
Erase Erase?
Quit
ON
OFF
Response Only
Quit
Memo menu
Message memo
Quit
Voice memo
Option Menu
Memo ON/OFF
Response
Recording
Playback
Msgmemo ON/OFF
Quit
Message 1
Message 2
Number of ring
・・・Selection
range
・・・Selected
7
8
9
4
5
6
0
1
2
3
The "Msg memo" feature plays your message to the calling party and records an incoming message when you cannot answer the phone. To set the "Msg
memo" feature, follow the procedure in "1-2. Turning the Message Memo Feature On/Off" on page 89. When the "Msg memo" feature is on, the [ ] icon
remains on. The icon blinks when any message has not yet been played; it remains on when there are no unplayed messages.
The "Voice memo" feature records your conversations during a call and provides a voice memo recording function in Standby mode.
Page 88

Message Memo/Voice Memo Features (cont.)
88 Message Memo/Voice Memo Features
Using the Message/Voice Memo Features
You can change the Memo settings using the following procedure:
Press .
The Memo Menu is displayed, which provides the following functions:
1. Msg memo Plays your answering message to the calling party
and records an incoming message when you cannot
answer the phone.
2. Voice memo Records your conversations during a call and
provides a voice memo recording function in Standby
mode.
1. Using the Message Memo Feature
("Msg memo")
Use / to select "Msg memo", then press .
The Message Memo Menu is displayed, which provides the following
functions:
1. Select Selects the message to be played.
2. Playback all Plays all messages which have not been played.
3. Erase all Deletes all messages.
4. Memo ON/OFF Turns on/off the "Msg memo" feature.
5. Response Records and replays an answer message.
OK
1-1. Recording/Replaying a Response Message
("Response")
The "Response" function records up to two outgoing messages (each up
to 20 seconds long) and replays either.
1.
Use / to select "Response", then press .
The Response Menu is displayed.
1. Recording Records a response message.
2. Playback Replays a response message.
■ Recording
2.
Use / to select "Recording", then press .
The screen prompts you to select a response message.
3.
Use / to select the response message to be recorded, then
press .
Your phone gives the recording start tone and starts recording the selected
response message. The recording time is up to 20 seconds per message.
4.
Press .
Your phone stops recording and gives the recording end tone. The screen
returns to the Response Menu.
You cannot enable the "Msg memo" feature just by recording a
response message. See "1-2. Turning the Message Memo Feature
On/Off" on page 89 to enable the "Msg memo" feature.
■ Replaying
2.
Use / to select "Playback", then press .
The screen prompts you to select a response message.
OK
CAUTION!
Stop
OK
OK
OK
Page 89

The "Memo ON/OFF" function enables or disables the "Msg memo"
feature. If you enable this feature, your phone plays your response
message and records an incoming message when you cannot answer an
incoming call.
1.
Use / to select "Memo ON/OFF", then press .
The Msg memo ON/OFF Menu is displayed. The current setting is
indicated by ●.
ON Enables the "Msg memo" feature.
OFF Disables the "Msg memo" feature.
Response Only Enables only the answer message replay function,
disabling the recording function.
2.
Use / to select the desired option.
• You need to record a response message for your phone to answer with
a message. When recording the response message, see "1-1.
Recording/Replaying a Response Message" on page 88.
• You can record up to two response messages. Select the message you
wish to use. The currently selected response message is indicated by ●
to the left.
3.
Press .
OK
NOTE
OK
89Message Memo/Voice Memo Features
Message Memo/
Voice Memo
3.
Use / to select the response message to be replayed, then
press .
Your phone starts replaying the selected response message. If you want
to stop replaying, press at any time. Upon completion of the replay,
the screen returns to the Response Menu.
If no response message has been recorded, a message appears. Check
the message and press any key to return to the Response Menu.
NOTE
Stop
OK
■ When the "Msg memo" feature is set to ON:
Use to to set the number of ringing tones that sound before playing
the response message after receiving an incoming call, then press .
If you have already recorded two response messages, you are prompted to
select the message to be used. Use / to select the desired one,
then press . The selected response message is enabled.
When you set the "Msg memo" feature to ON, the [ ] icon appears on
the screen and the selected response message will be played.
• If no response message has been recorded, the "Msg memo"
feature cannot be enabled. In this case, press any key to return to
the Message Memo Menu.
• If the total number of messages recorded with the "Msg memo" and
"Voice memo" features reaches 255 or if the remaining recording
time is less than 7 seconds, a message appears on the screen, and
no more messages can be recorded. Pressing any key returns the
screen to the Message Memo Menu. The total recording time is 7
minutes.
• Call Waiting is disabled when the "Msg memo" feature is enabled.
■ When the "Msg memo" feature is set to OFF:
The screen returns to the Message Memo Menu.
CAUTION!
OK
OK
1-2. Turning the Message Memo Feature On/Off
("Memo ON/OFF")
Page 90

Message Memo/Voice Memo Features (cont.)
90 Message Memo/Voice Memo Features
1-3. Playing a Selected Message
("Select")
The "Select" function plays a recorded message from a remote party.
1.
Use / to select "Select", then press .
The screen lists the recorded messages in chronological order.
Messages which have not been played are marked with an asterisk (✻).
2.
Use / to select the message you want to play, then press
.
Your phone starts playing the selected message. During the replay, the
[ ] icon is displayed. Pressing stops the replay and displays the
Option Menu. (See "Option Menu" below.)
Pressing / during playback controls the volume.
Option Menu
The Option Menu appears if you press when playing a message.
1. Store Registers the phone number in the Phone Book if your
phone has been notified of that number by calling line
identification (Caller ID).
2. Recall Dials the phone number if your phone has been notified
of that number by calling line identification.
3. Erase Deletes the selected message.
Opt
NOTE
Menu
OK
NOTE
OK
1-4. Playing All Unplayed Messages
("Playback all")
The "Playback all" function plays all of the recorded messages which
have not yet been played.
1.
Use / to select "Playback all", then press .
Your phone starts playing the recorded messages which have not been
played. During the replay, the [ ] icon is displayed.
• Pressing during a replay toggles the functions of / as follows.
When "▲/▼" is displayed on the screen, / are used to select
messages. When "±" is displayed, / are used to control the
volume.
• Pressing during a replay starts playing the next unplayed message.
If there is no next message, pressing the key replays the current
message again.
2.
Press .
The phone stops playing the messages and the screen returns to the
Message Memo Menu.
Quit
Next
NOTE
OK
1-5. Erasing All Messages
("Erase all")
The "Erase all" function deletes all recorded messages.
1.
Use / to select "Erase all", then press .
The confirmation message "Erase all?" appears.
2.
Press .
This deletes all recorded messages.
• To delete specific messages, use the "Erase" function on the Option
Menu described in "1-3. Playing a Selected Message".
• If there is no message to be deleted, "No message" appears. Check that
there is no message to be deleted, then press any key to return to the
Message Memo Menu.
NOTE
OK
OK
Page 91

91Message Memo/Voice Memo Features
Message Memo/
Voice Memo
2. Using the Voice Memo Feature
("Voice memo")
Use / to select "Voice memo", then press .
The Voice Memo Menu is displayed, which provides the following functions:
1. Recording Records a Voice memo.
2. Select Selects a message.
3. Erase all Deletes all messages.
OK
2-1. Recording a Voice Memo
("Recording")
In Standby Mode, the "Recording" function can record speech through
the phone's microphone. During a call, it can record speech both through
the microphone and receiver.
1.
Hold down for at least 2 seconds.
Your phone gives the recording start tone and starts recording. The
recording time is up to seven minutes.
• Voice recording is disabled when your phone is dialing, ringing, or
automatically answering with the "Msg memo" feature.
• If the total number of messages recorded with the "Msg memo"
and "Voice memo" features reaches 255 or if the remaining
recording time is less than 7 seconds, no more messages can be
recorded.
You can also perform voice recording by selecting "Recording" from the
Voice Memo Menu.
2.
Press .
Your phone stops recording and gives the recording end tone.
Stop
NOTE
CAUTION!
2-2. Replaying a Voice Memo
("Select")
The "Select" function replays a recorded Voice memo.
1.
Use / to select "Select", then press .
The screen lists the recorded Voice memos in chronological order.
2.
Use / to select the Voice memo you want to play, then press
.
Your phone starts playing the selected Voice memo. The Voice memo is
replayed repeatedly.
• Pressing / during a playback controls the volume.
• Pressing during a replay of a Voice memo deletes the Voice
memo.
3.
Press .
The screen returns to the list of Voice memos.
Quit
Erase
NOTE
OK
OK
2-3. Erasing All Voice Memos
("Erase all")
The "Erase all" function deletes all recorded Voice memos.
1.
Use / to select "Erase all", then press .
The confirmation message "Erase all?" appears.
2.
Press .
This deletes all recorded voice memo messages.
To delete a specific Voice memo, press when it is being replayed,
as described above in "2-2. Replaying a Voice Memo".
Erase
NOTE
OK
OK
Page 92

Quick Reference for Troubleshooting
92 Quick Reference for Troubleshooting
If you are having trouble with your phone, check the following list of symptoms. If you cannot solve the problem yourself, contact Service Information Window.
Symptom
No power
Battery does not recharge
SIM error
PIN error
PUK error
Cannot make any calls
Cannot make international calls
Cannot answer calls
Ringer muted
Cannot forward calls
Msg memo feature does not work
Cannot record messages
Cannot create new Phone Book entry
Possible cause
• Battery low
• Battery loaded incorrectly
• Battery not correctly connected to charger
• Battery expired
• SIM card inserted incorrectly
• SIM card dirty
• SIM card damaged
• PIN code entry failed 3 times in succession
• PUK code entry failed 10 times in succession
• Wrong number
• Antenna not extended
• Outgoing calls barred
• Maximum cumulative time-charge exceeded
• Weak signal
• Defective SIM card
• Phone number with no leading "+" and country
code
• Weak signal
• Incoming calls barred
• Ringer disabled
• No phone number entered as destination
• The total number of messages or the total recording
time exceeds the maximum limit
• Phone Book full
User response
• Charge battery immediately
• See page 17 to click battery into place
• See page 17 to connect battery correctly
• Replace with new battery
• Check your SIM card
• See page 24.
• See page 24.
• Dial correct phone number
• Extend antenna
• See page 79 to cancel outgoing call barring
• See page 74 to reset maximum cumulative
time-charge
• Check signal strength icon on LCD panel
• Check SIM card
•
Enter "+" and country code (See page 94).
•
Check signal strength icon on LCD panel
• See page 79 to cancel outgoing call barring
• See page 52 to enable ringer
• See page 80 to set destination phone number
• See page 90 to erase messages.
• Edit Phone Book, e.g., by deleting to free up more
entry space
Page 93

93Specifications
Specifications
SS-66K
Dimensions
Height (excluding the antenna) . . . . . . . . . . . . . . . . . . . . . . . . . . . . . . . . .146 mm
Width . . . . . . . . . . . . . . . . . . . . . . . . . . . . . . . . . . . . . . . . . . . . . . . . . . . .60 mm
Thickness . . . . . . . . . . . . . . . . . . . . . . . . . . . . . . . . . . . . . . . . . . . . . . . .52 mm
Weight (main unit) . . . . . . . . . . . . . . . . . . . . . . . . . . . . . . . . . . .390 g (approx.)
Power
Battery voltage . . . . . . . . . . . . . . . . . . . . . . . . . . . . . . . . . . .DC 7.4V 1500mAh
Connection time . . . . . . . . . . . . . . . . . . . . . . . . . . . . . . .150 minutes (approx.)
Standby time . . . . . . . . . . . . . . . . . . . . . . . . . . . . . . . . . . . . .16 hours (approx.)
(When in a service area)
Note: A spare battery is provided.
When you are not in a service area, standby time may be less.
AC Charger (AC-S100)
Dimensions
Height . . . . . . . . . . . . . . . . . . . . . . . . . . . . . . . . . . . . . . . . . . . . . . . . . . . . .33 mm
Width . . . . . . . . . . . . . . . . . . . . . . . . . . . . . . . . . . . . . . . . . . . . . . . . . . .127 mm
Depth . . . . . . . . . . . . . . . . . . . . . . . . . . . . . . . . . . . . . . . . . . . . . . . . . . . .60 mm
Weight . . . . . . . . . . . . . . . . . . . . . . . . . . . . . . . . . . . . . . . . . . . . . .220 g (approx.)
Input voltage, input frequency . . . . . . . . . . . . . . . . . . .AC 100V–240V, 50–60 Hz
Output voltage . . . . . . . . . . . . . . . . . . . . . . . . . . . . . . . . . . .DC 8.4V±0.05V 80mA
Charging time . . . . . . . . . . . . . . . . . . . . . . . . . . . . . . . . . . .180 minutes (approx.)
■ Design and specifications are subject to change without notice due to ongoing
product improvements.
Page 94

Country Codes for International Calls
94 Country Codes for International Calls
Alaska..........................................................+1
Albania.....................................................+355
Armenia, Republic of ...............................+374
Algeria......................................................+213
American Samoa.....................................+684
Andorra....................................................+376
Angola......................................................+244
Anguilla........................................................+1
Antigua and Barbuda...................................+1
Argentine Republic ....................................+54
Aruba.......................................................+297
Ascension Island......................................+247
Australia.....................................................+61
Austria........................................................+43
Azerbaijan................................................+994
Azores Islands.........................................+351
Bahamas......................................................+1
Bahrain ....................................................+973
Bangladesh..............................................+880
Barbados .....................................................+1
Belarus, Republic of.................................+375
Belgium......................................................+32
Belize.......................................................+501
Benin........................................................+229
Bermuda Islands..........................................+1
Bhutan .....................................................+975
Bolivia......................................................+591
Bosnia and Herzegovina..........................+387
Botswana.................................................+267
Brazil..........................................................+55
British Virgin Islands....................................+1
Brunei Darussalam..................................+673
Bulgaria....................................................+359
Burkina Faso............................................+226
Burundi ....................................................+257
Cabo Verde..............................................+238
Cameroon................................................+237
Canada........................................................+1
Canary Islands...........................................+34
Cayman Islands...........................................+1
Central African Republic..........................+236
Chad........................................................+235
Chile...........................................................+56
China .........................................................+86
Cocos Islands............................................+61
Colombia....................................................+57
Comoros..................................................+269
Congo......................................................+242
Congo (Rep.)...........................................+243
Cook Islands............................................+682
Costa Rica...............................................+506
Cote d'Ivoire.............................................+225
Christmas Island........................................+61
Croatia.....................................................+385
Cuba..........................................................+53
Cyprus .....................................................+357
Czech Republic........................................+420
Democratic Kampuchea ..........................+855
Democratic People's Republic of Korea..+850
Denmark....................................................+45
Diego Garcia............................................+246
Djibouti.....................................................+253
Dominica......................................................+1
Dominican Republic.....................................+1
Ecuador ...................................................+593
Egypt..........................................................+20
El Salvador ..............................................+503
Equatorial Guinea....................................+240
Eritrea......................................................+291
Estonia (Rep.)..........................................+372
Ethiopia....................................................+251
Faroe Islands...........................................+298
Fiji............................................................+679
Finland.....................................................+358
Falkland Islands.......................................+500
France........................................................+33
French Polynesia.....................................+689
Gabonese Republic.................................+241
Gambia....................................................+220
Georgia....................................................+995
Germany....................................................+49
Ghana......................................................+233
Gibraltar...................................................+350
Greece.......................................................+30
Greenland................................................+299
Grenada.......................................................+1
Guadeloupe Island...................................+590
Guam...........................................................+1
Guatemala...............................................+502
Guiana.....................................................+594
Guinea.....................................................+224
Guyana....................................................+592
Haiti..........................................................+509
Hawaii..........................................................+1
Honduras.................................................+504
Hong Kong...............................................+852
Hungarian People's Republic ....................+36
Iceland.....................................................+354
India...........................................................+91
Indonesia...................................................+62
Iran.............................................................+98
Iraq...........................................................+964
Ireland......................................................+353
Israel........................................................+972
Italy............................................................+39
Jamaica .......................................................+1
Japan.........................................................+81
Jordan......................................................+962
Kazakhstan..................................................+7
Kenya.......................................................+254
Kiribati......................................................+686
Korea.........................................................+82
Kuwait......................................................+965
Kyrgyzstan...............................................+996
Lao People's Democratic Republic..........+856
Latvia.......................................................+371
Lebanon...................................................+961
Lesotho....................................................+266
Liberia......................................................+231
Libya........................................................+218
Liechtenstein..............................................+41
Lithuania..................................................+370
Luxembourg.............................................+352
Page 95

95Country Codes for International Calls
Macao......................................................+853
Macedonia...............................................+389
Madagascar.............................................+261
Madeira Islands .......................................+351
Malawi......................................................+265
Malaysia.....................................................+60
Maldives...................................................+960
Mali..........................................................+223
Malta........................................................+356
Marshall Islands.......................................+692
Martinique Island .....................................+596
Mauritania................................................+222
Mauritius..................................................+230
Mexico .......................................................+52
Micronesia (Federated States of Micronesia)..
.................................................................+691
Moldova...................................................+373
Monaco....................................................+377
Mongolian People's Republic ..................+976
Montserrat....................................................+1
Morocco...................................................+212
Mozambique............................................+258
Myanmar (Union of the Myanmar).............+95
Namibia....................................................+264
Nauru.......................................................+674
Nepal .......................................................+977
Netherlands ...............................................+31
Netherlands Antilles.................................+599
New Caledonia and Dependencies .........+687
New Zealand..............................................+64
Nicaragua ................................................+505
Niger........................................................+227
Nigeria .....................................................+234
Niue .........................................................+683
Norfolk Island...........................................+672
Norway.......................................................+47
Oman.......................................................+968
Pakistan.....................................................+92
Palau........................................................+680
Panama ...................................................+507
Papua New Guinea..................................+675
Paraguay .................................................+595
Peru...........................................................+51
Philippines .................................................+63
Poland........................................................+48
Portugal ...................................................+351
Puerto Rico..................................................+1
Qatar........................................................+974
Reunion ...................................................+262
Romania ....................................................+40
Russian Federation......................................+7
Rwandese Republic.................................+250
Saint Christopher and Nevis........................+1
Saipan..........................................................+1
San Marino ..............................................+378
Sao Tome and Principe...........................+239
Saudi Arabia............................................+966
Senegal....................................................+221
Seychelles ...............................................+248
Sierra Leone............................................+232
Singapore ..................................................+65
Slovakia...................................................+421
Slovenia...................................................+386
Solomon Islands......................................+677
Somali Democratic Republic....................+252
South Africa...............................................+27
Spain..........................................................+34
Spanish North Africa..................................+34
Sri Lanka....................................................+94
St. Vincent and the Grenadines...................+1
St. Helena Island .....................................+290
St. Lucia.......................................................+1
St. Pierre and Miquelon Islands...............+508
Sudan ......................................................+249
Suriname .................................................+597
Swaziland ................................................+268
Sweden......................................................+46
Switzerland................................................+41
Syrian Arab Republic...............................+963
Tadzhikistan.................................................+7
Taiwan.....................................................+886
Tanzania..................................................+255
Thailand.....................................................+66
Togo.........................................................+228
Tonga.......................................................+676
Trinidad and Tobago....................................+1
Tunisia.....................................................+216
Turkey........................................................+90
Turkmenistan...........................................+993
Turks and Caicos Islands ............................+1
Tuvalu......................................................+688
Uganda....................................................+256
Ukraine ....................................................+380
United Arab Emirates...............................+971
United Kingdom of Great Britain and Northern
Ireland........................................................+44
United States of America.............................+1
Uruguay...................................................+598
Uzbekistan...................................................+7
Vanuatu ...................................................+678
Vatican.......................................................+39
Venezuela..................................................+58
Viet Nam....................................................+84
American Virgin Islands...............................+1
Western Samoa.......................................+685
Yemen .....................................................+967
Yugoslavia...............................................+381
Zambia.....................................................+260
Zimbabwe................................................+263
To prefix a plus sign "+" to a phone
number, hold down the 0 key.
"+" will appear on the screen.
Page 96

Index
96 Index
Abbreviated 28, 41, 43
Adjust clock 24, 60
Alarm select 61
All calls 76, 81, 82
AllCondition 82
Answer 32
AnyKeyAnswer 58
Auto answer 58
Auto change 65
Auto power OFF 63
Auto power ON 63
Back light 58
Barring 80
Box number 67
Call 67
Call missed 27
Call held 31
Call meter 74, 75
Call mpty 35
Caller Id 83
Change 77
Charge 31, 75, 78
Charge limit 76
Clear 48
Clock 59, 61
Clock mode 61
Compose 55
Create 42, 72
Currency 77
Custom 54
Call waiting 32, 83
Charge limit soon 76
Clear all memory? 48
Clear Fixed memory? 48
Clear last number? 48
Clear phone memory? 48
Clear received? 48
Clear scratch pad? 48
Clear SIM memory? 48
Delete 45, 56
Destination 64, 69
Display 61, 78
Drop 35
DTMF type 31, 36, 58
Delete UserMelody? 56
Edit 44, 69
Edit name 44
Edit number 44
E-Mail 73
Emergency 30
End 31
Enter ADN 43
Enter name 42, 43
Enter password 80
Enter PUK1 26
Erase 71
Erase all 72, 92, 93
ERMES 73
Every day 61, 63
Every SUN 61, 63
Exclude 35
Extract 70
Far Id 83
Fixed dial 41, 88
Forwarding 82
Four weeks 73
Hold 31
Hold all 35
I am busy 33
In call menu 32, 33, 34, 35, 36
Incoming 81
Information 73
Insert SIM 21, 24
INT’L 45
Join all 35
Key click 56
Keylock 86
Language 53
Last call 75
Last number 47
Low Battery 24
Medium 54
Melody 54
Memo menu 89
Memory clear 48
Memory menu 29, 46
Message memo 89, 90
Messages 66
Mpty held 35
Msg Centre 72
Msg memo 89, 90
Msg type 73
Msgmemo ON/OFF 91
Mute 31, 36
New PIN1 87
New password 80
No answer 82
Not found 82
Number of rings 58
Old password 80
Once 61, 62, 63
One day 73
One hour 73
One week 73
Other ADN 43, 44
Page 97

97Index
Outgoing 81
Overwrite 44
Own number 49
Paging 73
Password 80
Pattern 57
Phone book 40
PIN1 ON/OFF 87
Playback 56, 90
Playback all 92
Power off mode 63
Power on mode 63
Power on time 63
Private 35
Read 77
Read all 68
Read limit 76
Read new 68
Received 47
Recording 90, 93
Reference 65
Registration 84
Reject 33
Repeat new 80
Replace 32
Replace2 33
Reply 70
Reply path 73
Reset 76
Response 90
ResponseOnly 91
Retrieve 31
Ringer 53
Ringer Type 54
Ringer volume 54
Save 69, 70
Save & Send 69, 70
Scratch pad 48
Search 29
Security 85, 86
Select 92, 93
Select city 93
Select country 64
Select memory
Send 69, 70
Services 79, 80
Set alarm 61
Set alarm date 62
Set alarm time 62
Set city 60
Set clock 60
Set country 64
Set date 60, 64
Set ON/OFF 91
Set time 60
Set timer 62
Settings 50, 72
Short range 61, 62, 63
Sign call 54
Six months 73
SOS 49
Sound pattern 57
Sound volume 56
Status 81, 82, 84
Step 54
Store 27
Summer time 65
Swap 36
Talk volume 57
Telex 73
Text 68, 73
Tone off 36
Tones menu 36
Total charge 35
Two days 73
Two hours 73
UserMelody 54
Valid period 73
Voice 67, 73
Voice memo 91, 93
Volume 56
Waiting 83
When busy 82
World clock 64
X.400 73
Your Id 83
Page 98

1298DP
Iridium, and Iridium World Service are registered trade-mark of Iridium LLC.
0499DP
Printed in Japan
C
5KKTP29SEGXC
 Loading...