

Sorter
SO-60SO-60
Conventions
Throughout this manual, the following conventions are used:
Italic letters refer related chapters or sections or documentations.
This symbol followed by WARNING denotes that the following paragraph(s) includes
precautions which, if ignored, could result in personal injury, and/or irrevocable
damage to the sorter.
When followed by CAUTION this symbol denotes that the following paragraph(s)
include the precautions which, if ignored, could result in damage to the sorter.
SO-60

About the chapters
The manual is comprised of the following chapters:
Chapter 1: Product Information
Chapter 2: Installation
Chapter 3: Maintenance
Chapter 4: Operation Overview
Chapter 5: Disassembly
Chapter 6: Troubleshooting
Appendix A: Diagrams
Contents
Contents
Contents
SO-60
REVISION HISTORY
Version Date Replaced Pages Remarks
1.00 2-Apr-2001 -
TO OBTAIN THE LATEST PRINTER DRIVERS AND UTILITIES, VISIT US AT OUR INTERNET HOME
PAGE: http://www.kyocera.com/w2k
SO-60

Chapter 1
Product Information

Chapter 1 Contents
1-1 Specifications................................................................................................................................... 1-3
1-2 Names of parts ................................................................................................................................. 1-4
1-1 Specifications
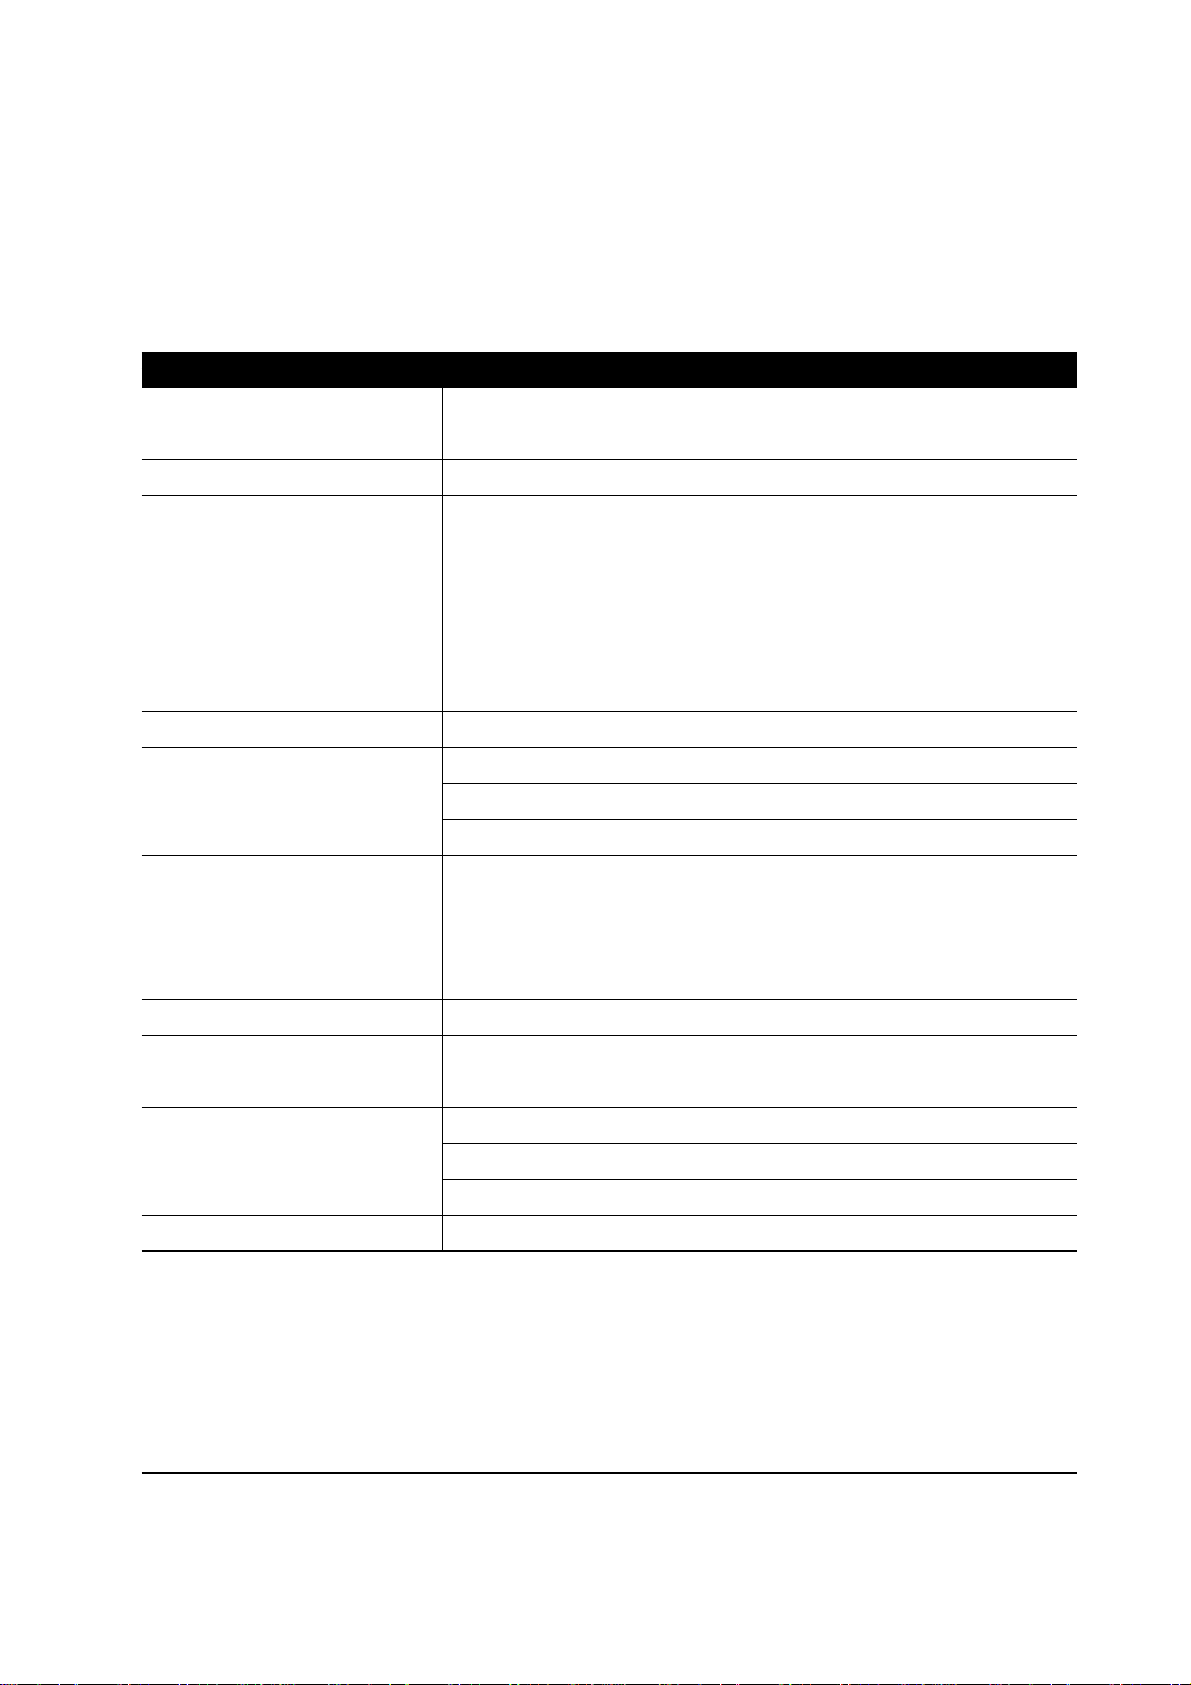
Table 1-1-1 Specifications
Item Description
Compatible printer Kyocera Mita Page Printers
FS-1800/1800N and FS-3800/3800N
Number of paper trays 5
Paper sizes A4 (21.0 × 29.7 cm)
Letter (8-1/2 × 11 inches)
JIS B5 (18.2 × 25.7 cm)
ISO A5 (14.8 × 21.0 cm)
Others: 14.8 to 21.0 cm × 21.6 to 29.7 cm
(5-13/16 to 8-1/2 × 8-1/4 to 11-11/16 inches)
Paper capacity Approximately 200 pages each of thickness 0.1 mm
Environmental requirements Temperature: 10 to 32.5°C (50 to 90.5°F)
Humidity: 20 to 80 % RH
Ideal conditions are 20°C/65 % RH, altitude under 2000 m.
Power requirements 120 V, 60 Hz, max. 0.3 A
220 - 240 V, 50/60 Hz, max. 0.2 A
Max. allowable voltage fluctuation: ±10 %
Max. allowable frequency fluctuation: ±2%
Power consumption Max. 67 W
Noise Max. 59 dB (A) (excl. peak values)
[Measured 1 m from the outside of the sorter]
Dimensions Width: 34.5 cm (13-9/16 inches)
Height: 31.5 cm (12-3/8 inches)
Depth: 17.0 cm (6-11/16 inches)
Weight 5.3 kg (11-11/16 lb.)
1-3
SO-60
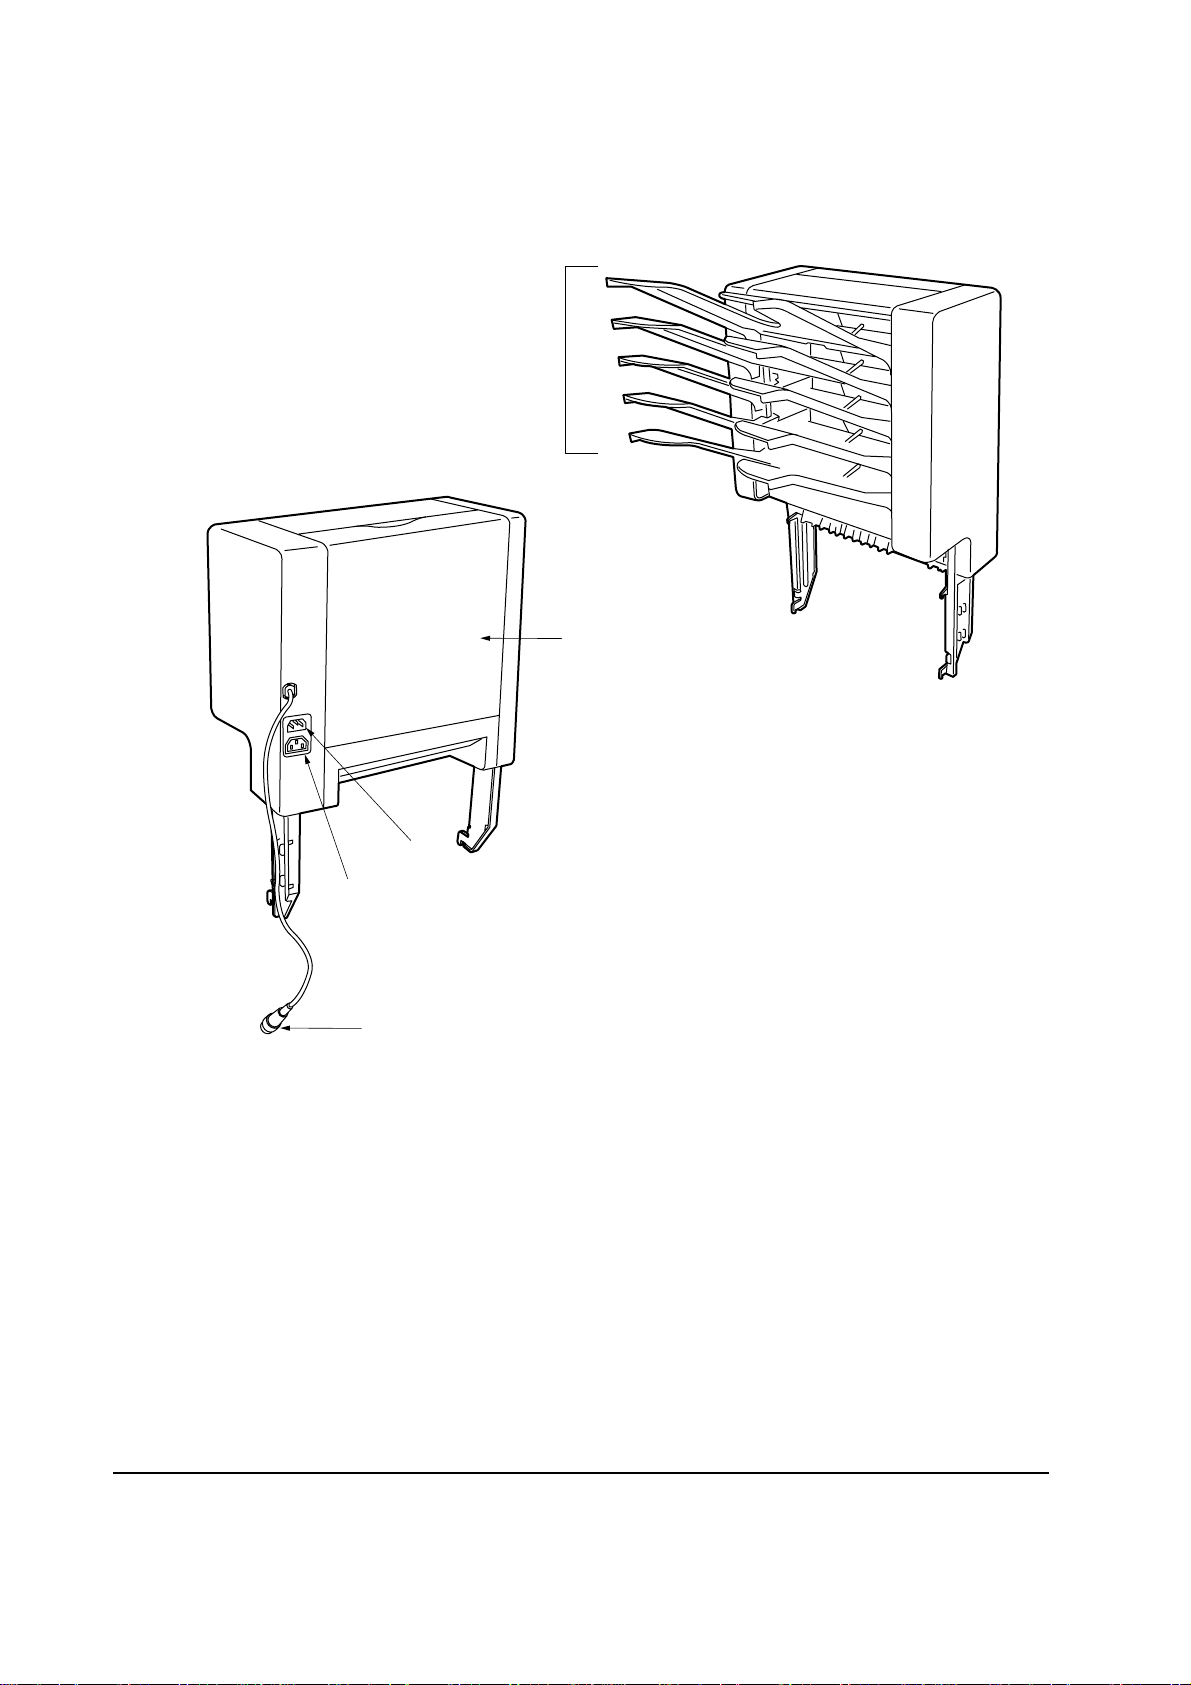
1-2 Names of parts
1
2
4
5
3
1 Sorter trays
2 Rear cover
3 Power cord connector (AC inlet)
4 Power cord connector (AC outlet)
5 Sorter cable
Figure 1-2-1 Names of parts
SO-60
1-4

Chapter 2
Installation

Chapter 2 Contents
2-1 Installing the duplexer..................................................................................................................... 2-3
2-1 Installing the duplexer
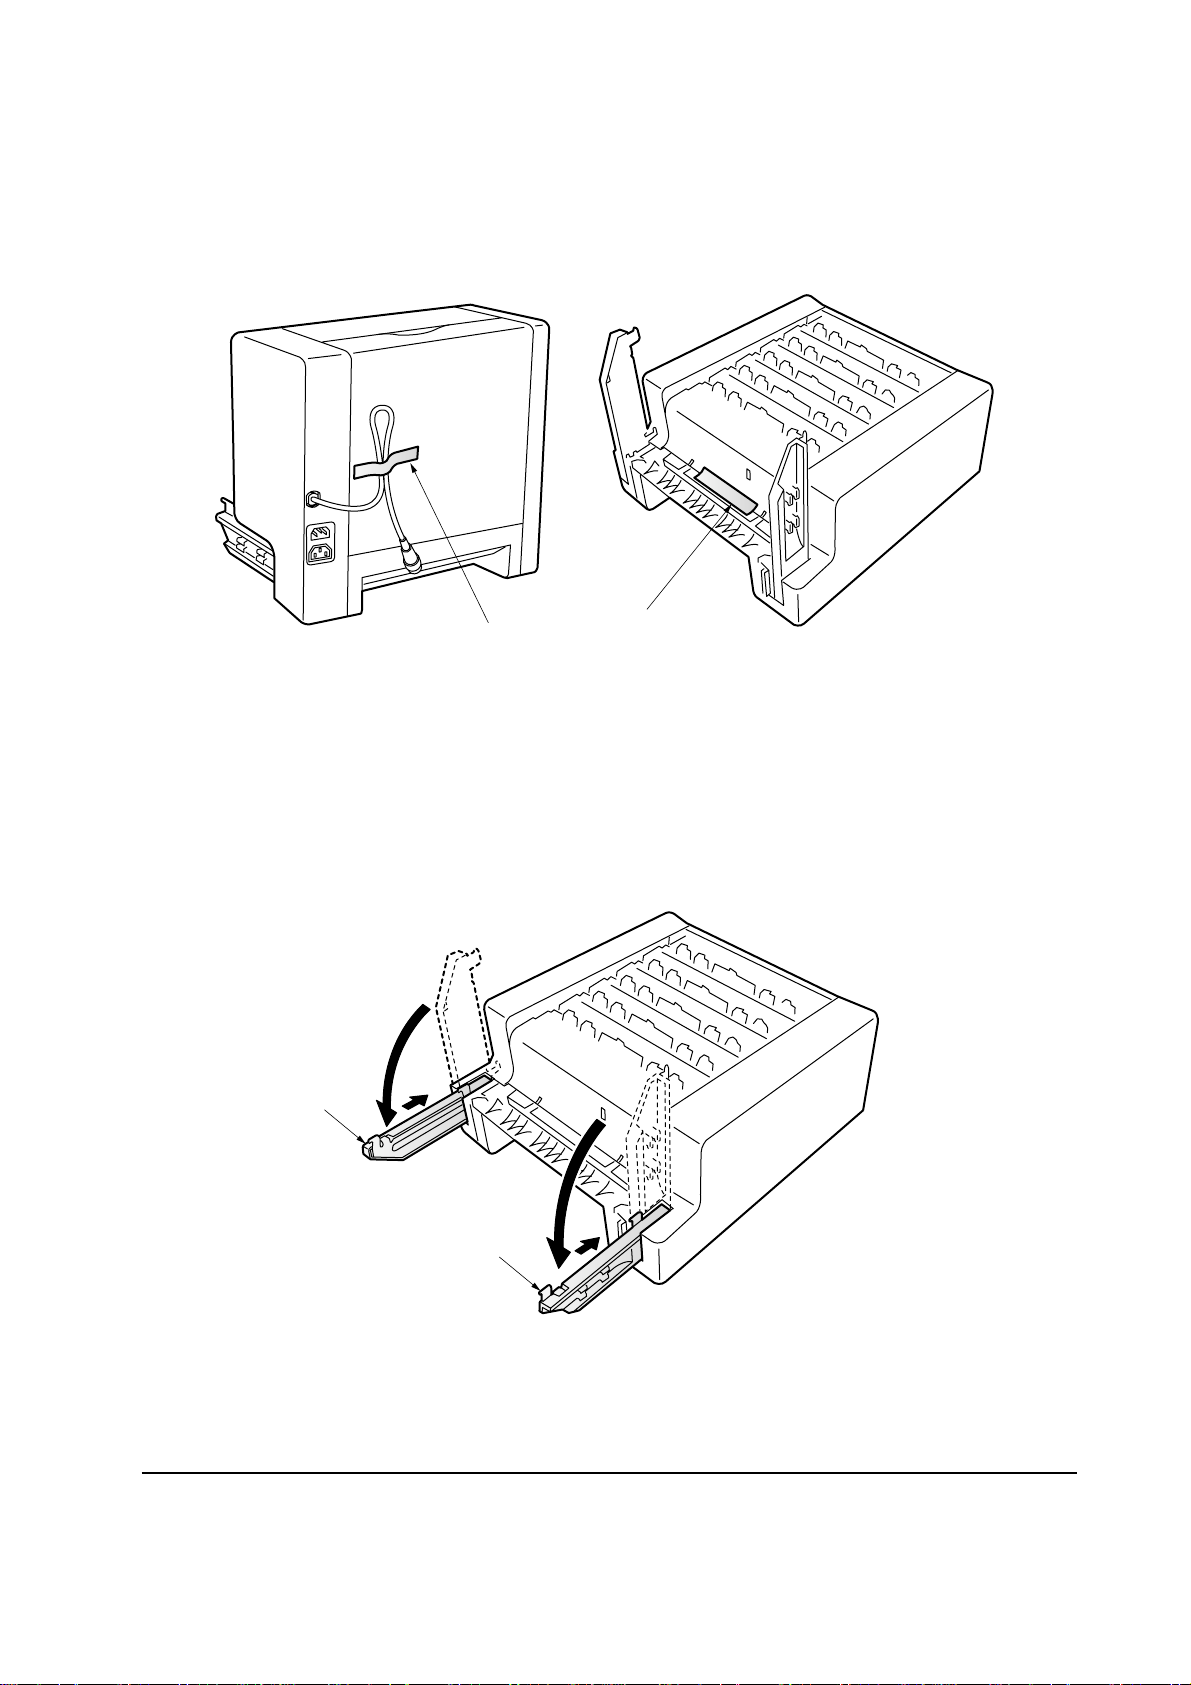
1. Unpack the sorter and place it on its side. Remove the tapes 1 from the sorter.
1
Figure 2-1-1 Remove the tapes
2. Unfold the two attachment legs 2 of the sorter.
2
1
2
Figure 2-1-2 Unfold the attachment legs
2-3
SO-60
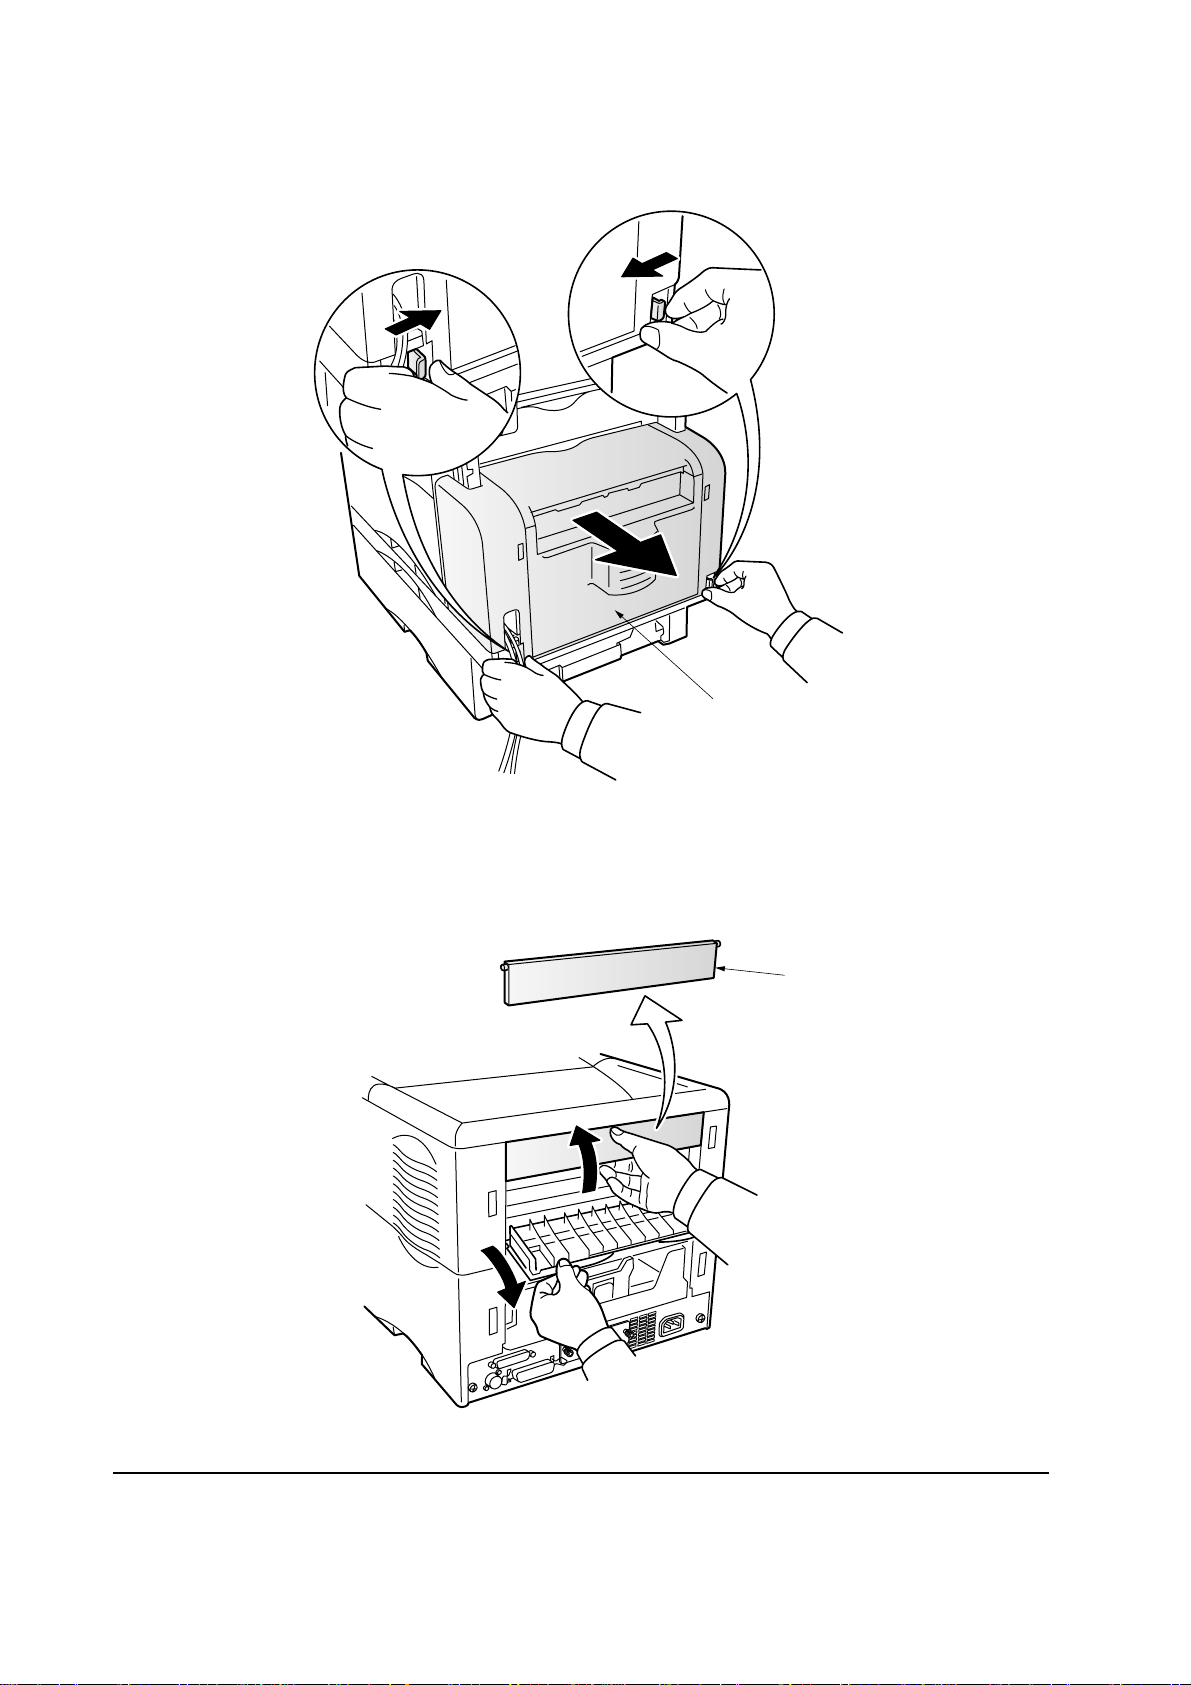
3. Turn off the printer and disconnect the power cord and printer cable. If the duplexer is installed,
remove the vertical path assembly 3, power cord, and printer cable.
3
Figure 2-1-3 Remove the vertical path assembly
4. Remove the sorter connection cover 4 from the printer. Store the removed cover in a safe place.
4
SO-60
Figure 2-1-4 Remove the sorter connection cover
2-4
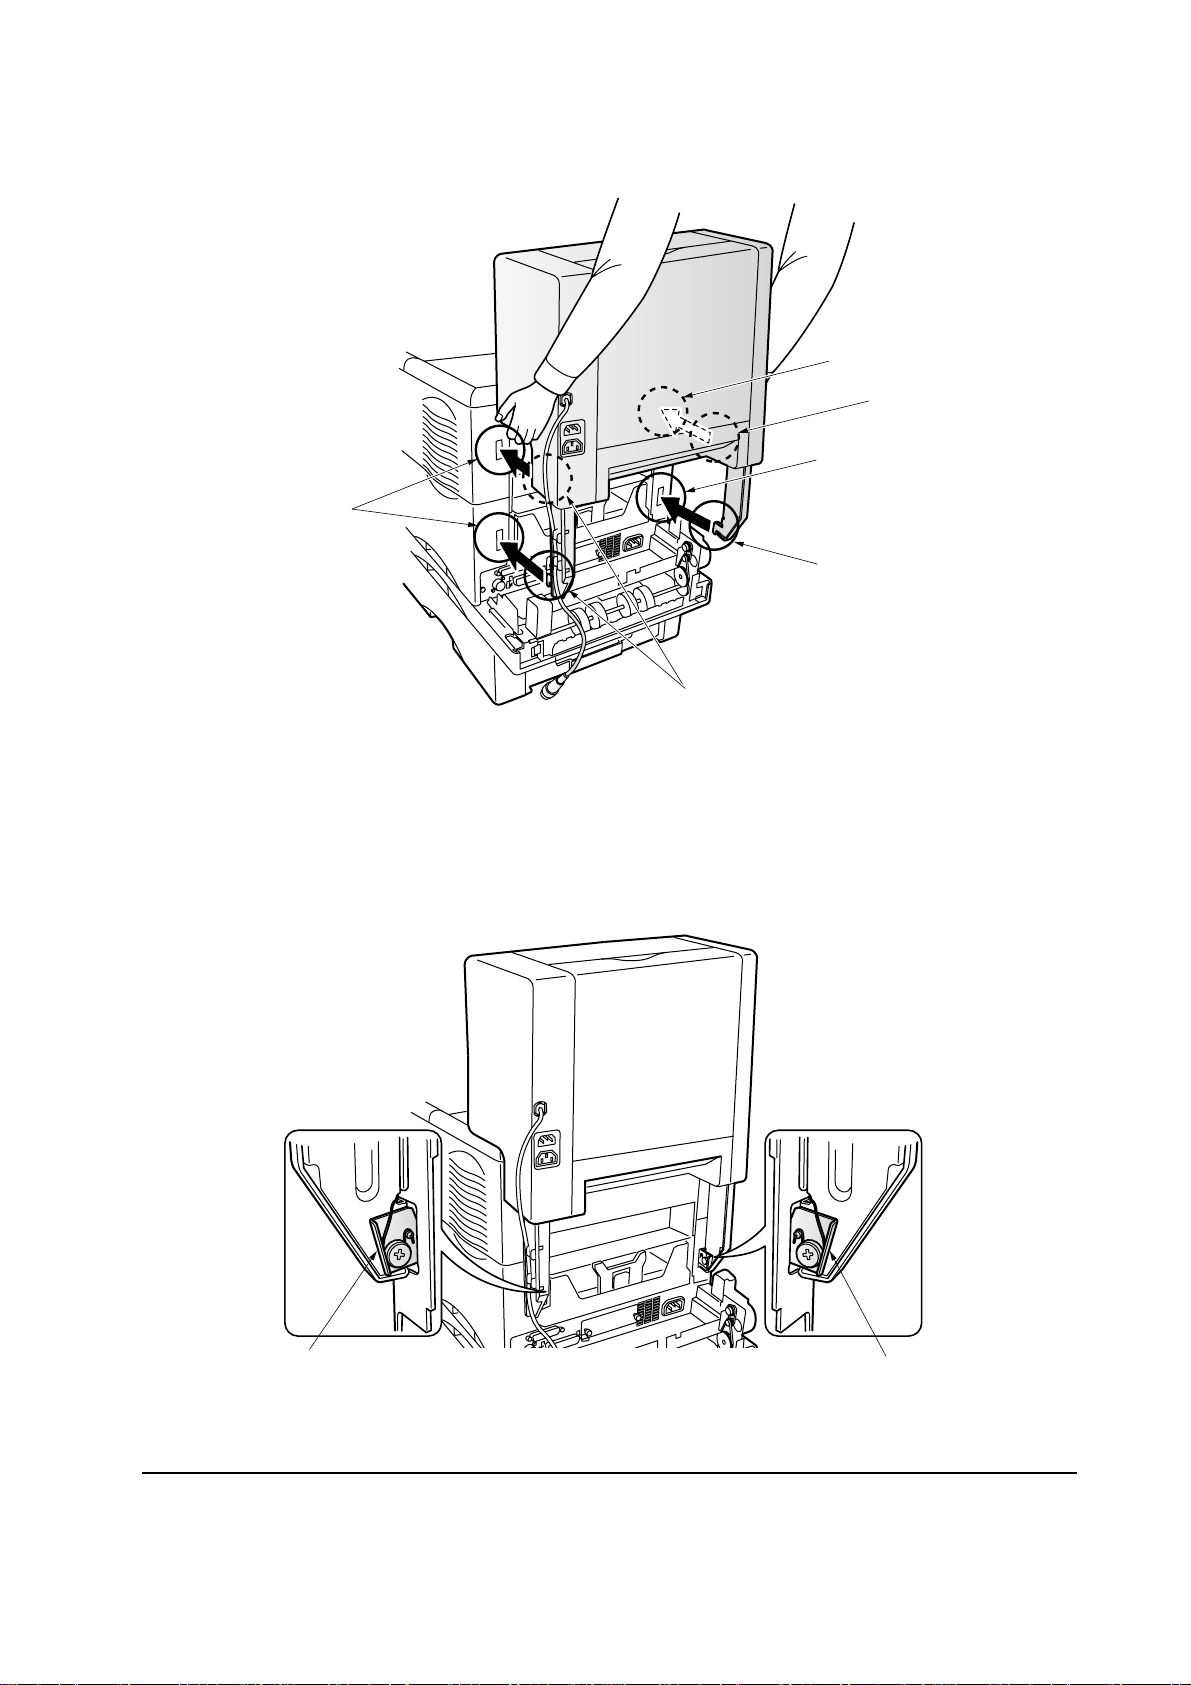
5. Install the sorter by inserting the four hooks 5 on its attachment legs into the notches 6 in the
printer.
6
5
6
6
5
5
Figure 2-1-5 Install the sorter
6. Push the sorter down. The levers 7 of the attachment legs are in the lock position.
7
7
Figure 2-1-6 Push the sorter
SO-60
2-5
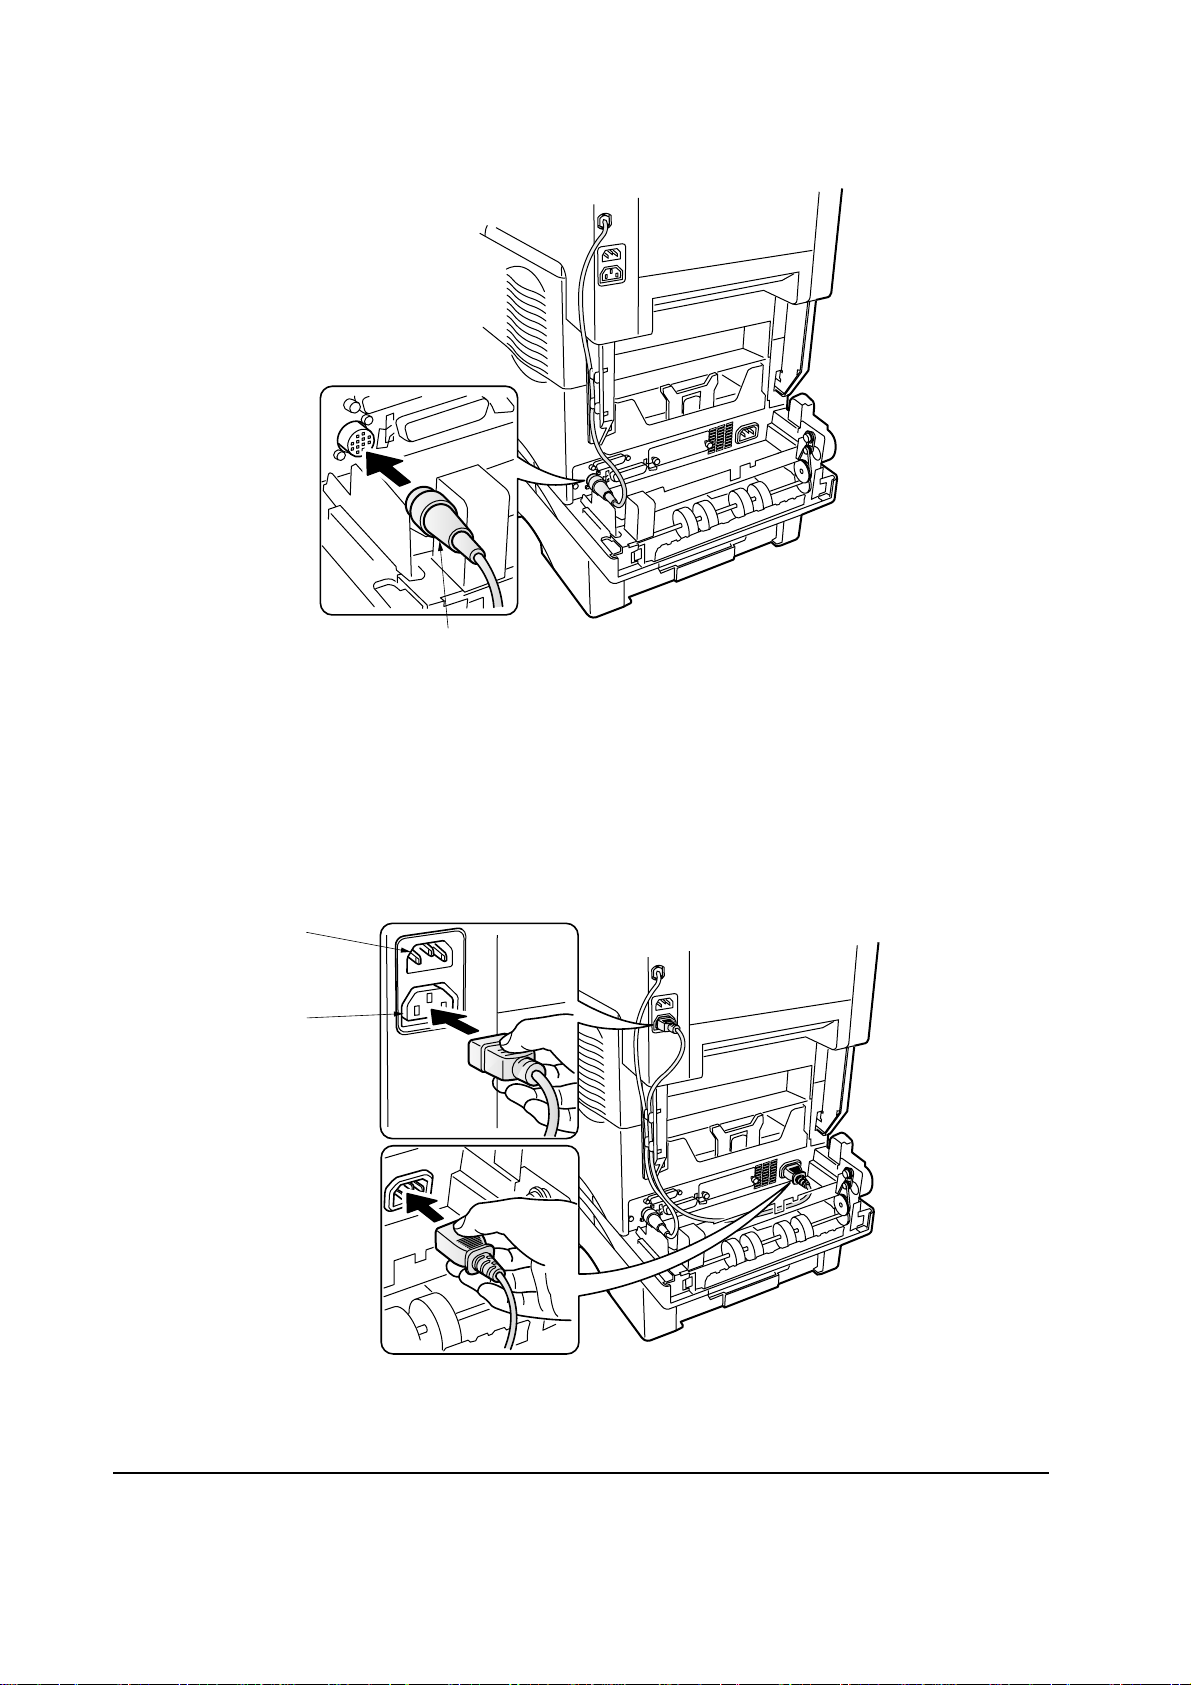
7. Connect the sorter cable 8 to the printer.
8
Figure 2-1-7 Connect the sorter cable
8. The sorter is equipped with two power cord sockets. The upper one 9 is to be connected to a AC
outlet and the lower one 0 is to be connected to the printer.
9
0
SO-60
Figure 2-1-8 Connect the power cord
2-6
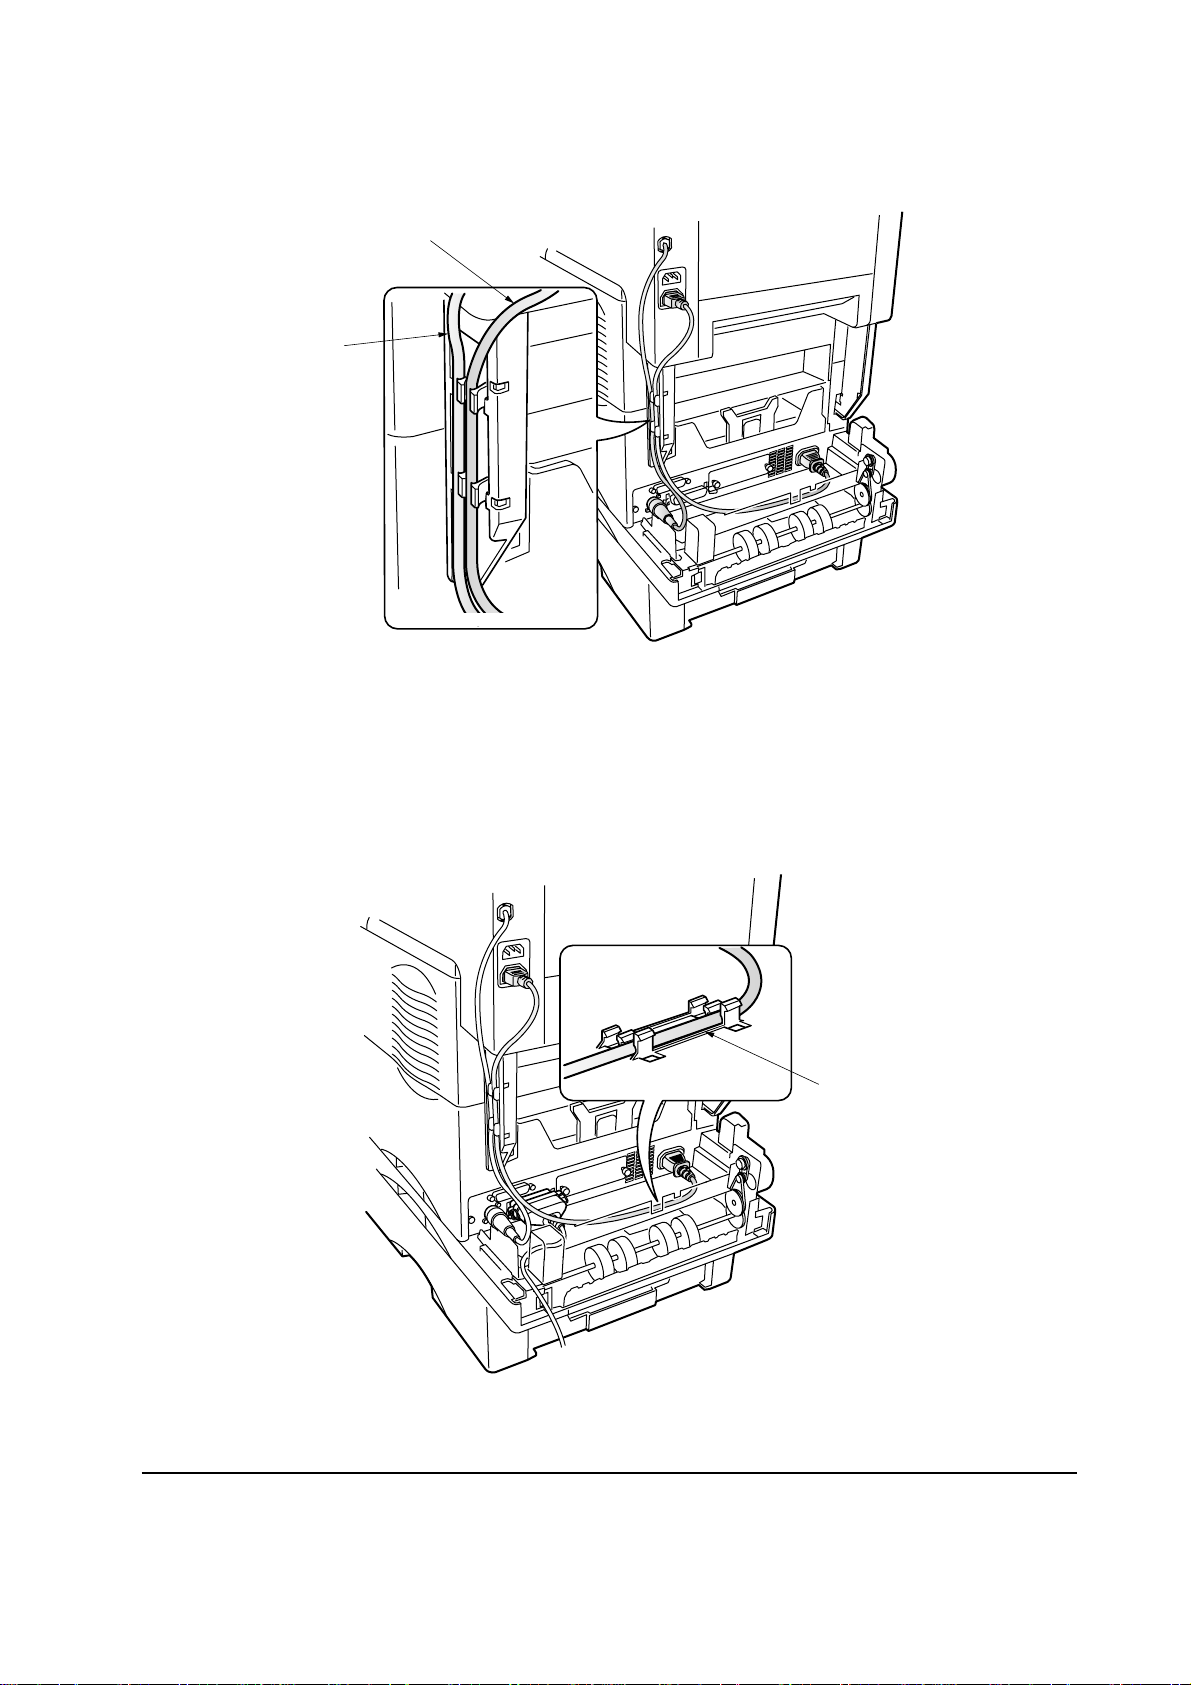
9. Secure the connected sorter cable ! and power cord @ to an attachment leg on the sorter.
@
!
Figure 2-1-9 Secure the sorter cable and power cord
10. If the duplexer installed, secure the power cord # to the duplexer.
#
Figure 2-1-10 Secure the power cord
2-7
SO-60
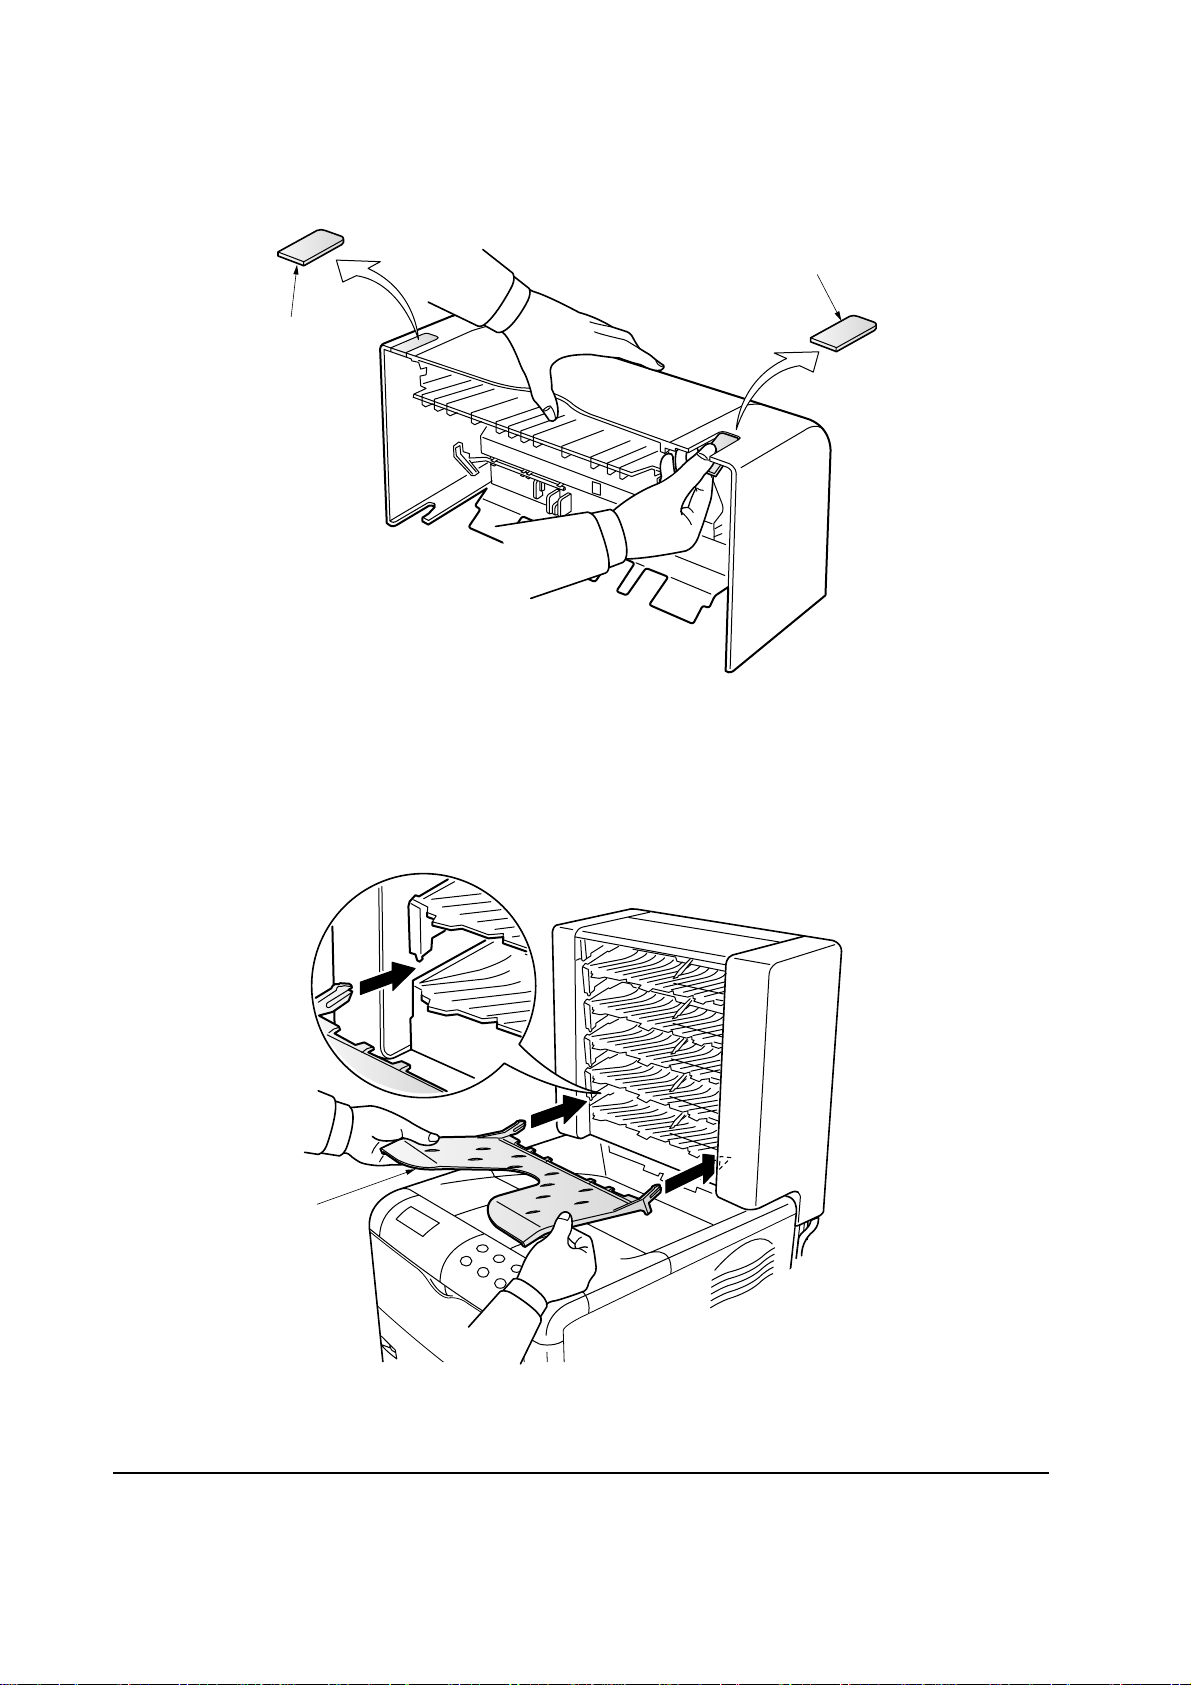
11. If the duplexer is installed, remove the two cut-out portions $ from the upper part of the
vertical path assembly removed in step 3. Reinstall the vertical path assembly.
$
$
Figure 2-1-11 Remove the portions
12. Install the five sorter trays % to the sorter.
%
SO-60
Figure 2-1-12 Install the sorter trays
2-8
 Loading...