

Kyocera IB-23 Supplementary Manual

Preface
Thank you for choosing the award winning Kyocera network printing products. We are sure you will appreciate the high
performance and low cost of ownership that are the hallmarks of Kyocera printing products.
The IB-23 is a Kyocera internal network interface card which may be easily installed without removing the printer main
board. The IB-23 enables Kyocera Mita printers and digital copiers to communicate over an Ethernet network with many
different network operating systems, including Windows, NetWare, Macintosh, and UNIX.
This manual provides full instructions on software configuration instructions allowing an experienced system administrator
to get the IB-23 up and running quickly. For more concise instructions, refer to the printed IB-2x Quick Configuration
Guide.
Trademarks
Kyocera® and Kyocera Mita® are registered trademarks of Kyocera Corporation. NetWare® is a registered trademark of
Novell, Incorporated. Windows® is a registered trademark of Microsoft Corporation. Macintosh® and AppleTalk are
registered trademarks of Apple Computer, Incorporated. PostScript® and Acrobat® are registered trademarks of Adobe
Systems, Incorporated. All other products referenced are trademarks or registered trademarks of their respective
companies.
FCC Notice
This equipment complies with Part 15 of FCC Rules. Operation is subject to the following two conditions:
1. this device may not cause harmful interference, and
2. this device must accept any interference received, including interference that may cause undesired operation.
WARNING:
This equipment has been tested and found to comply with the limits for a Class B digital device, pursuant to Part 15 of the
FCC Rules, and the Canadian Department of Communications Equipment Standards entitled, Digital Apparatus, ICES-
003. These limits are designed to provide reasonable protection against harmful interference in a residential installation.
This equipment generates, uses and can radiate radio frequency energy and, if not installed in accordance with the
instructions, may cause harmful interference to radio communications. However, there is no guarantee that interference
will not occur in a particular installation. If this equipment does cause harmful interference to radio or television reception,
which can be determined by turning the equipment off and on, the user is encouraged to try to correct the interference by
one of the following measures:
Reorient or relocate the receiving antenna.
IB-23
Network Card
User's Manual
Kyocera Mita Corporation
2-28, 1-Chome, Tamatsukuri, Chuo-ku
Osaka, Japan 540-8585
http://www.kyoceramita.com/
1/2 ページPreface
2006/05/26file://F:\USERMAN\EXPORT\Option\IB-23\P6以降用完了分\html\English\frontend.htm

Increase the separation between the equipment and receiver.
Connect the equipment into an outlet on a circuit different from the one which the receiver is connected to.
Consult the dealer or an experienced radio/TV technician for help.
The user may find the following booklet prepared by the Federal Communications Commission helpful:
The Interference Handbook
This booklet is available from the U.S. Government Printing Office, Washington, D.C. 20402. Stock No. 004-000-00345-4.
NOTE:
In order to maintain compliance with the limits of a Class B digital device, Kyocera Mita requires that you use
quality interface cables when connecting to this device. Changes or modifications not expressly approved by Kyocera
Mita could void the user's authority to operate this equipment. Refer to the manual for specifications on cabling types.
Top of page
2/2 ページPreface
2006/05/26file://F:\USERMAN\EXPORT\Option\IB-23\P6以降用完了分\html\English\frontend.htm

IB-23 User's Manual
GETTING STARTED
Preface
Product Specifications
INSTALLATION
IB-23 Network Card
IP Address Configuration
Utilities
Printer Drivers
PRINTING SETUP
Windows - TCP/IP
Windows - NetBEUI
Windows Printing via E-mail
NetWare
Macintosh
Unix
MANAGEMENT
Security
Using a Web Browser
E-mail Reports via SMTP
SNMP
Configuration Using ftp
Troubleshooting
About
1/1 ページIB-23 Configuration Guide
2006/05/26file://F:\USERMAN\EXPORT\Option\IB-23\P6以降用完了分\html\English\contents.htm

Product Specifications
The IB-23 may be used in any Kyocera Mita printer with a compatible slide-in interface (KUIO). Contact your dealer
regarding the supported printers and digital copiers.
Visit the following web site for the latest product information.
http://www.kyoceramita.com/
This section provides information about the features offered by the IB-23 as well as technical information and a
description of IB-23 physical characteristics.
What Does the IB-23 Offer?
Technical Specifications
Connector and Indicators
What Does the IB-23 Offer?
Technical Specifications
IB-23
Automatic IP address
configuration
The IB-23 incorporates the DHCP/BOOTP protocol. This enables automatic assignment of
TCP/IP parameters in environments running a DHCP or BOOTP server.
The IB-23 implements the DHCP protocol in accordance with RFC2131/2132 and is
compatible with the Windows NT 4.0/2000/Server2003 DHCP Server.
The IB-23 also incorporates the RARP protocol. This enables automatic assignment of an IP
address in environments running a RARP server.
Web browser
You can call device and status information at any time using a web browser such as the
Internet Explorer or the Netscape Navigator to access the interface card homepage.
Support for a variety of
protocols
The IB-23 supports SMTP, POP3, SSL, SNMP, IPv6, and NetBIOS over TCP/IP to assist in
printer administration and provide enhanced security.
Item IB-23
CPU 32-bit RISC
RAM 8 MBytes+2 MBytes flash
Connectors 10 Base-T/100 Base-TX
Printer interface Kyocera Mita Universal IO slot (KUIO-LV), 3.3V, DMA
Indicators See the diagram below.
Operating system Windows 98/Me, Windows NT 4.0/2000/XP/Server2003, NetWare 3.x./4.x./5.x./6.0,
MacOS 8.x/9.x/10.x, UNIX
Network protocols IPv6 (Phase-1): HTTP, HTTPS, LPD, FTP, IPP, RawPort, ICMPv6
IPv4: HTTP, HTTPS, LPD, FTP, IPP, RawPort, ICMP, DHCP, BOOTP, RARP, SMTP,
POP3, SNTP, DNS, WINS, NetBIOS over TCP/IP, SNMPv1/v2c/v3, ThinPrint, Apple
Bonjour Compatible
Other: IPX/SPX, NetWare (NDS/Bindery), AppleTalk, NetBEUI
Operating conditions 10 to 35°C, 20 to 80 % RH, no condensation
Storage conditions -10 to 50°C, 20 to 90 % RH, no condensation
EMI conformity FCC Class B (USA), CE (EU), VCCI Class B (Japan)
1/2 ページProduct Specifications
2006/05/26file://F:\USERMAN\EXPORT\Option\IB-23\P6以降用完了分\html\English\product_infor...

NOTE:
Specifications may change without notice.
Connector and Indicators
The IB-23 features the following ports and indicators.
1. 10BaseT/100BaseTX Connector
2. 10BaseT Indicator lights when connected to a 10 Mbps network.
3. 100BaseTX Indicator lights when connected to a 100 Mbps network.
4. Status Indicator lights while receiving and transmitting data.
Figure 1. Ports and Indicators
Top of page
2/2 ページProduct Specifications
2006/05/26file://F:\USERMAN\EXPORT\Option\IB-23\P6以降用完了分\html\English\product_infor...

Installing the IB-23 Interface Card in the Printer
This section guides you through installing the IB-23 network interface card. The IB-23 can easily be installed in the
printer.
! Note:
IB-23 installation is not necessary for many Kyocera Mita printer models that include a built-in IB-23 interface.
Installing the IB-23 in the Printer
WARNING: Be sure to turn off the printer before installation. Damage to both the printer and the IB-23 may result
if the following procedure is followed while the printer power is on.
The instructions below describe the installation of the IB-23 into a typical Kyocera Mita printer and are similar to all
Kyocera Mita printers and digital copiers that are incorporated with the standard KUIO (Kyocera Universal I/O) slide-in
interface.
1. Turn printer power off and unplug the AC power cable from the printer.
2. At the back of the printer, remove the cover by unscrewing the two screws. Retain this cover for future re-use.
3. Insert the IB-23 into the slot aligning both edges of the card with the guides in the slot. Push the IB-23 all the way
into the slot and secure it using the screws.
IMPORTANT:
To avoid damaging the IB-23 owing to static electricity, discharge your body before touching the
interface card. Hold the IB-23 only by the metal connector plate.
1/2 ページInstalling the IB-23 Interface Card in the Printer
2006/05/26file://F:\USERMAN\EXPORT\Option\IB-23\P6以降用完了分\html\English\install_NIC.htm

Figure 1. Inserting the IB-23
4. Connect the network cable to the interface card using a twisted pair cable for the 10/100baseT connector.
5. Plug the power cable to the printer inlet. Turn printer power on.
Top of page
2/2 ページInstalling the IB-23 Interface Card in the Printer
2006/05/26file://F:\USERMAN\EXPORT\Option\IB-23\P6以降用完了分\html\English\install_NIC.htm

IP Address Configuration
This section describes several methods for configuring the IP address information for the IB-23.
The method you use will depend on your particular network configuration as well as your personal preferences. For
example, if your network includes a DHCP server, then you will likely use DHCP for setting the IB-23 IP addresses.
Following are the possible methods for configuring the IP addresses:
Using DHCP
Using WINS
Using Quick Setup
Using RARP or BOOTP
Using ARP
Using the Printer's Operator Panel
A
fter following the procedures in this section to configure the IP address, it is recommended to verify the IP address
settings:
Verifying the IP Address Settings
Using DHCP
DHCP (Dynamic Host Configuration Protocol) provides a mechanism for delivering IP configuration parameters, including
IP address, subnet mask, etc. to devices on an IP network. DHCP alleviates the administrative burden of managing
individual IP addresses.
A
DHCP server processes IB-23 DHCP discovery broadcasts and returns an IP address to the IB-23. The DHCP server
may be set up to grant an IP address for a limited time (a temporary lease) or for an unlimited (an unlimited lease), or it
may be configured with a permanent address reservation for the IB-23.
! Note:
In a non-WINS environment (See
WINS Configuration,
below.), it is highly recommended to set up the DHCP
server to grant the IB-23 an unlimited lease or permanent address reservation.
Unlimited Lease or Address Reservation in Windows NT 4.0 and Windows 2000
In Windows NT 4.0 and 2000, lease duration is set for a particular scope, or group of addresses. Thus, lease duration
should be set to Unlimited for the scope to which the IB-23 belongs. If this is not desired, then the IB-23 should be defined
as a
Reserved Client
.
Use the following procedure in Windows DHCP Manager to add a reserved client.
1. Select the scope that the IB-23 will belong to, then select
Add Reservations
from the
Scope
menu. The
Add
Reserved Clients
window will open.
Fi
g
ure 1. Adding a Reserved Client
1/9 ページIP Address Configuration
2006/05/26file://F:\USERMAN\EXPORT\Option\IB-23\P6以降用完了分\html\English\tcpip_setting.h...
2. In
Figure 1
, enter the IB-23 MAC address (Do not enter the colons, e.g. '00:c0:ee:14:00:87.'), IP address, and
other information. The IB-23 MAC address may be obtained from the IB-23 Network Status Page.
3. Click
Add
.
4. Turn printer power on. The printer receives the IP address from the DHCP server. You can print the network status
page to confirm the IP address.
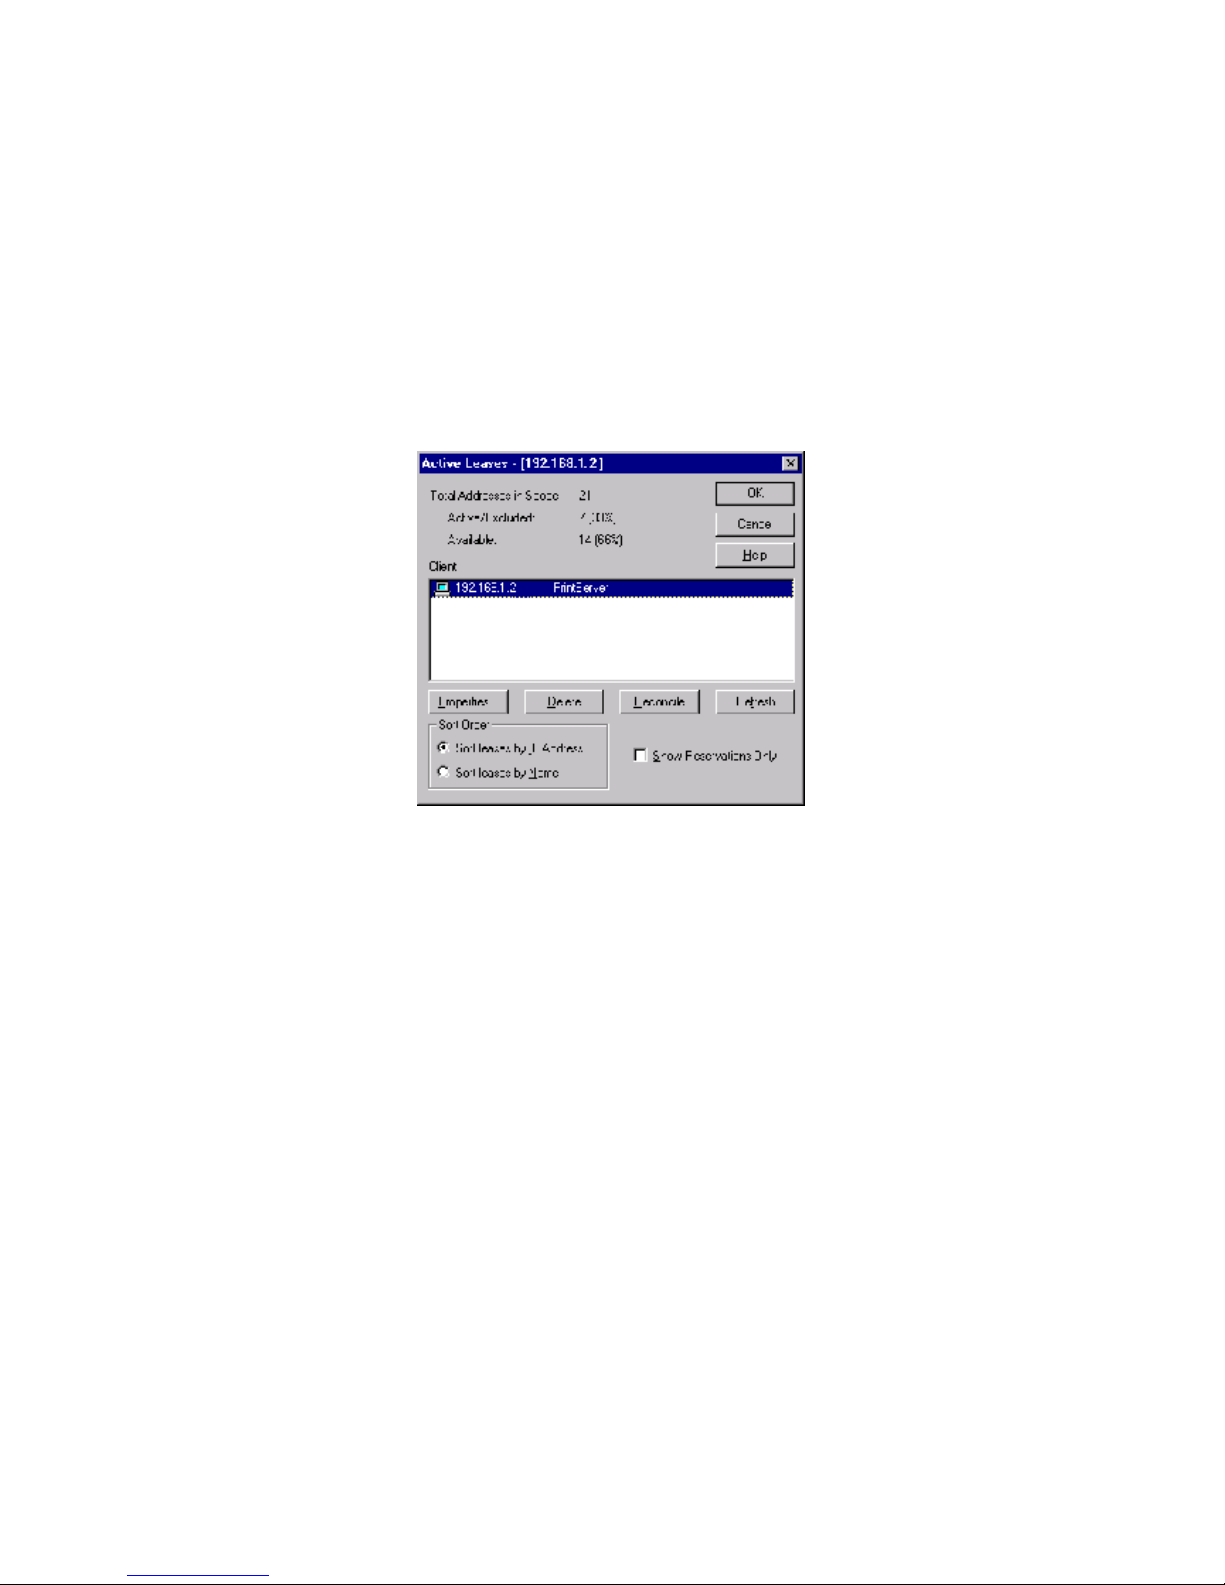
Verifying the Active Lease Status
You can verify active leases for a particular scope by opening the
Active Leases
windows:
From the
Scope
menu, select
Active Leases
. Reserved clients will display "Reservation" or "Reservation in use"
beside the client name.
Figure 2. Verifying Lease Status
Disabling DHCP
If IP address assignment with DHCP is not desired, it may be disabled using the IB-23 Quick Setup wizard, the printer
front panel, a web browser, or several other methods.
IMPORTANT:
Note, however, that DHCP IS AUTOMATICALLY DISABLED when the IP address is set using any other
method such as the Quick Setup wizard, printer front panel, etc.
IP Address Persistence
When the printer is turned off and back on will the IB-23 retain its IP address?
Using WINS
Temporary
If a temporary lease is obtained from a DHCP server, then the IP address is temporary.
That is, when the printer is turned off and back on, the IB-23 does not begin using its IP
address until it has negotiated with a DHCP server. Thus, if a DHCP server is not available,
the IB-23 will not have an IP address. This is necessary to prevent IP address conflicts in a
DHCP environment.
Permanent
If an unlimited lease or address reservation is obtained from a DHCP server, or if set by
any method other than DHCP, then the IP address is permanent. That is, when the printer
is turned off and back on, the IB-23 will begin using its assigned IP address.
2/9 ページIP Address Configuration
2006/05/26file://F:\USERMAN\EXPORT\Option\IB-23\P6以降用完了分\html\English\tcpip_setting.h...

WINS (Windows Internet Naming Service) is used by Windows NT to provide a mechanism for mapping the NetBIOS
name, commonly referred to as 'host name,' to an IP address. WINS requires a Windows NT 4.0/2000/Server2003 to be
configured as a WINS server.
WINS enables defining a printing configuration which references the printer by its name rather than by its IP address.
Thus, even if the printer IP address is changed via DHCP, the printing configuration will still be valid and printing will
continue uninterrupted. Another advantage of WINS is that a new IB-23 may seamlessly replace an old IB-23 simply by:
giving the new IB-23 the same host name as the old IB-23, or
modifying the Windows LPR port configuration for the old IB-23 with the host name of the new IB-23.
WINS Registration and Naming
The IB-23 must be given the address of the primary WINS server where it will register its host name. It may optionally be
given the address of a secondary WINS server. The DHCP server is often setup to provide the IB-23 with its host name
and the WINS server addresses. Refer to your DHCP server documentation for the proper setup procedures.
A
lternatively, the following web browser procedure may be used to configure the host name and WINS server addresses:
1. Launch a web browser.
2. In the address bar, enter the IP address assigned to the IB-23.
3. After the web browser displays the IB-23 COMMAND CENTER, click the Advanced tab.
4. The webpage for basic TCP/IP settings is displayed.
5. By
DHCP
, click ON to activate address discovery and assignment using DHCP.
6. Enter the WINS server information. You can usually obtain this information from the network administrator.
IP address of primary WINS server
IP address of secondary WINS server
Scope ID
3/9 ページIP Address Configuration
2006/05/26file://F:\USERMAN\EXPORT\Option\IB-23\P6以降用完了分\html\English\tcpip_setting.h...
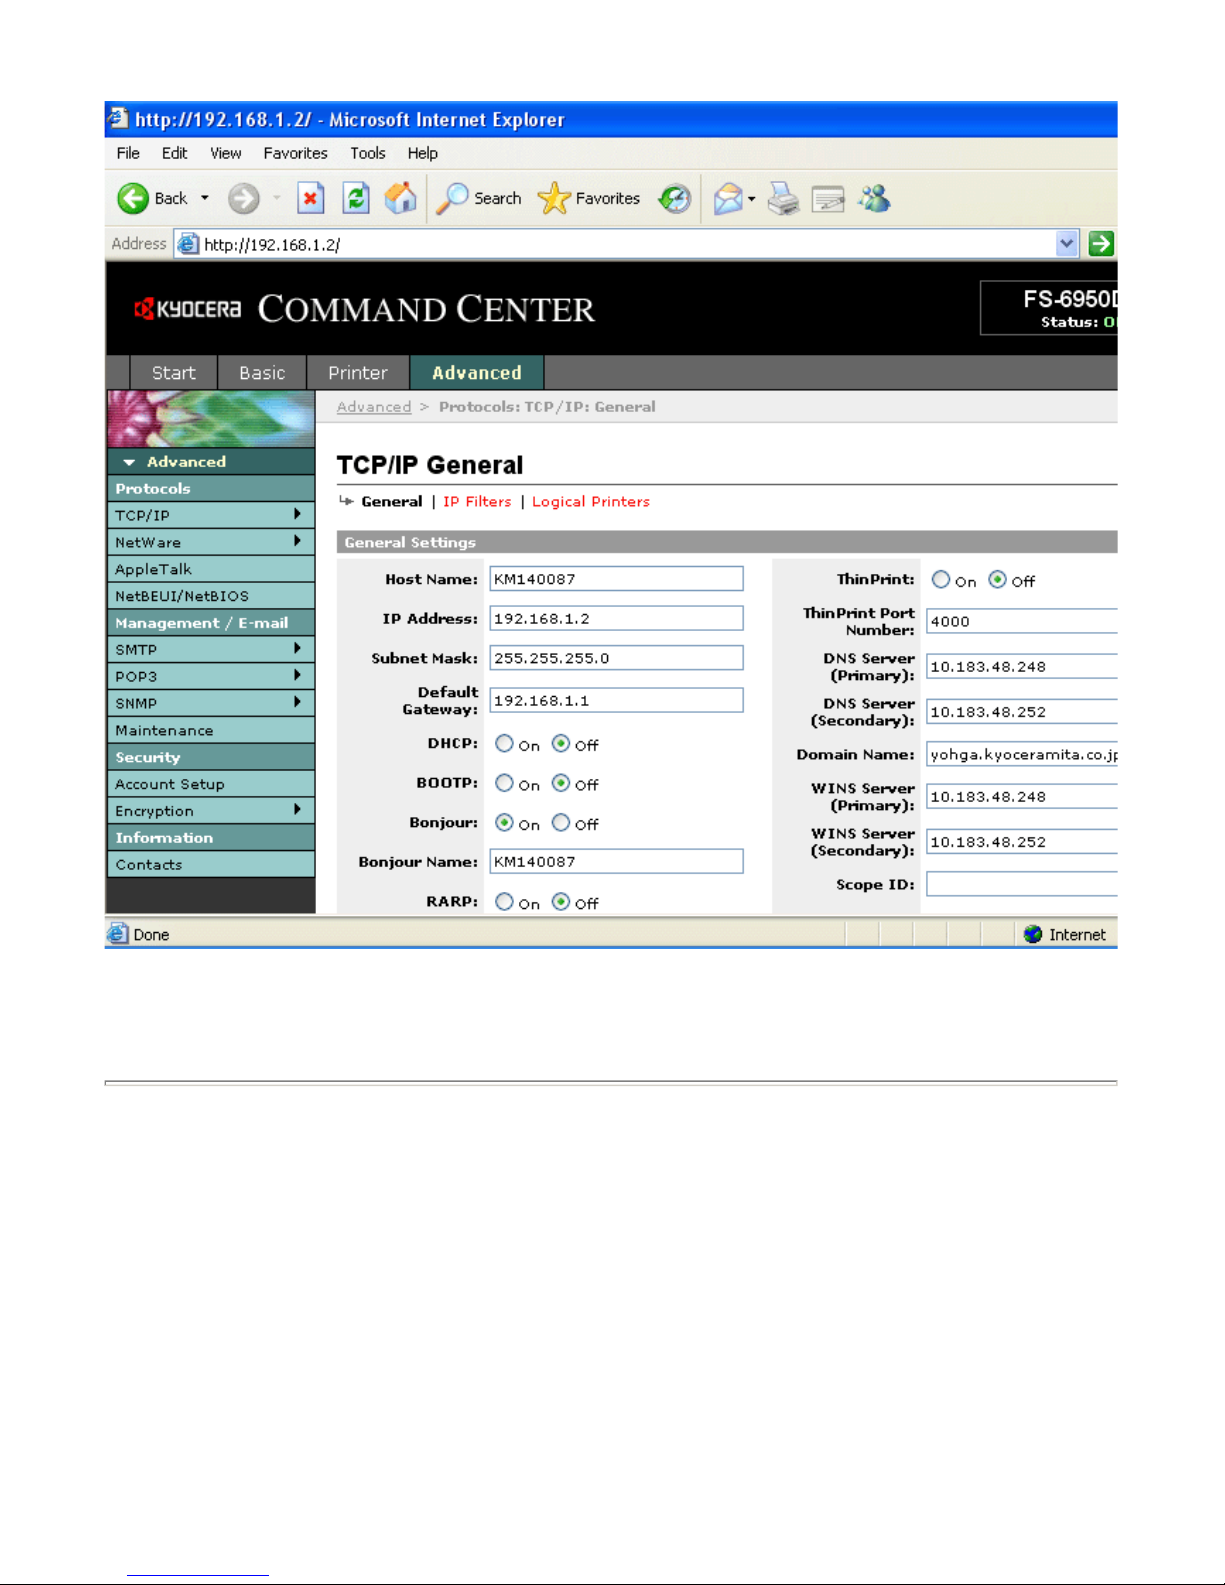
Figure 3. COMMAND CENTER TCP/IP General Settings Page
7. Click Submit. The WINS server information is stored, and the IB-23 restarts.
Using Quick Setup
Follow the steps below to use Quick Setup (bundled with the IB-23) to configure the IP address in the IB-23. Follow these
steps to set up a fixed IP address.
1. Launch Quick Setup.
For instructions on launching Quick Setup, refer to the section on installing the utilities.
2. From the Quick Setup list screen, select the IB-23 to configure and click
Next
.
4/9 ページIP Address Configuration
2006/05/26file://F:\USERMAN\EXPORT\Option\IB-23\P6以降用完了分\html\English\tcpip_setting.h...

Figure 4. Quick Setup List Screen
3. In
IP Address, Subnet mask
, and
Default gateway
, enter the information obtained from the network
administrator. Click
Next
.
Figure 5. Quick Setup TCP/IP Settings Screen
4. A confirmation screen is displayed. Confirm the settings and click
Next
. After the IB-23 automatically restarts,
address setting is complete. You can complete the advanced settings on the IB-23 as needed by accessing the IB23 with a web browser.
5/9 ページIP Address Configuration
2006/05/26file://F:\USERMAN\EXPORT\Option\IB-23\P6以降用完了分\html\English\tcpip_setting.h...
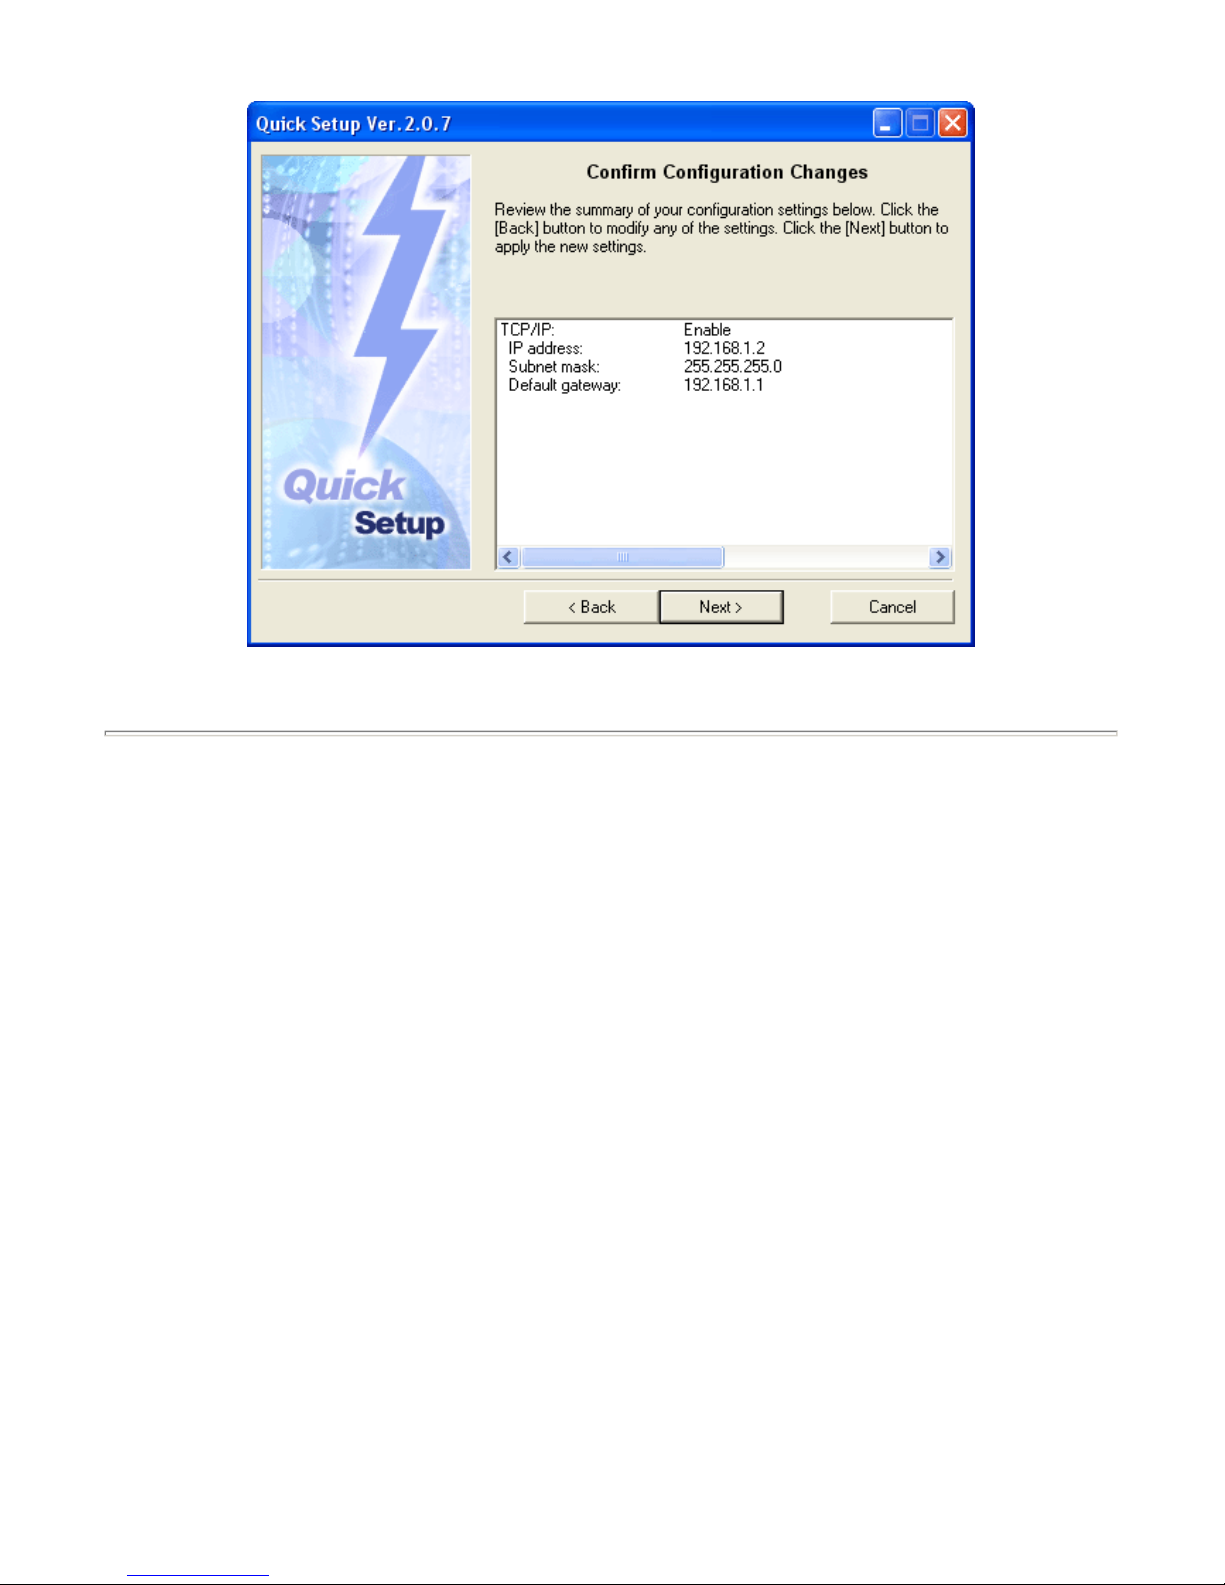
Figure 6. Quick Setup Confirmation Screen
Using RARP or BOOTP
You can resolve the IP address via RARP or BOOTP over the Ethernet connection. The host computer must support
either protocol as the boot server. The address information will be stored in a configuration file on the server as, for
example, ethers or bootptab file. The interface card issues each time the IB-23 is turned on RARP and BOOTP requests
and attempt to receive the configuration information returned by the server.
To prepare a configuration file for BOOTP
:
1. Properly connect the IB-23 to the network.
2. Create and store the configuration information in a
/etc/bootptab
file.
For example, to set '192.168.1.2' for IP address; the hardware address is '00:c0:ee:14:00:87,' enter as follows:
ht=ether:\ #Target hardware type
ha=00c0ee140087:\ #Target hardware address
ip=192.168.1.2:\
gw=192.168.1.1:\ #Default gateway address
sm=255.255.255.0:\ #Subnet mask
3. In
/etc/inetd.conf
, add:
bootps dgram, udp wait root /etc/bootpd bootpd
4. Reset inetd by:
kill -1 1
5. Turn IB-23 power off, then on.
6/9 ページIP Address Configuration
2006/05/26file://F:\USERMAN\EXPORT\Option\IB-23\P6以降用完了分\html\English\tcpip_setting.h...

The IB-23 automatically issues BOOTP requests to the server and receives the BOOTP response to obtain the
configuration information.
To prepare a configuration file for RARP:
1. Properly connect the IB-23 to the network.
2. Create and store the configuration information in a
/etc/ethers
file.
For example, to set '192.168.1.2' for IP address; the hardware address is '00:c0:ee:14:00:87,' enter as follows:
00:c0:ee:14:00:87 192.168.1.2
3. Start RARPD on the workstation. Enter:
rarpd -a
4. Turn IB-23 power off, then on.
The IB-23 automatically issues RARP requests to the server and receives the response to obtain the configuration
information.
The RARP information the server returns contains only the IP address. To configure the subnet mask, gateway address,
and other information, you must use a web browser.
Using ARP
A
RP is available for resolving IP addresses both in Windows and UNIX networks. The IP information can be set by
registering it in the ARP table.
! Note:
Using this address resolution method requires the IB-23 IP address to be 0.0.0.0.
Using the 'arp' Command and 'ping' command
1. Properly connect the IB-23 to the network and turn the power on.
2. In UNIX, define the interface card in the ARP table by using ARP as the following example:
arp -s 192.168.1.2 00:c0:ee:14:00:87 temp
In Windows, at the DOS prompt:
arp -s 192.168.1.2 00-c0-ee-14-00-87
This procedure only 'registers' the IP address in the ARP table and does not 'write' it in the IB-23. Perform
the following step.
3. Ping the IB-23 address by commanding at the DOS prompt:
ping 192.168.1.2
4. If the interface card successfully returns a reply, the setup is complete.
7/9 ページIP Address Configuration
2006/05/26file://F:\USERMAN\EXPORT\Option\IB-23\P6以降用完了分\html\English\tcpip_setting.h...

Using the Printer's Operator Panel
You can directly enter the IP address, gateway address, and subnet mask address using the menu system from the
operator panel. The following procedure is applicable to virtually all Kyocera Mita printers except those having no operator
panel. For digital copier operator panel setting instructions, refer to the operation manual.
To set the IP address information, proceed as follows:
1. Press
MENU (MODE
).
2. Press the ^ (+) key until the printer displays:
If the above does not show 'Option,' press
ENTER
. Press the ^ (+) key repeatedly until it shows
Option
. Then, press
ENTER
again.
3. Press the > key.
4. Press the ^ (+) key until the printer displays:
5. Press the > key.
6. Press the ^ (+) key until the printer displays:
7. To enter the IP address, press
ENTER
. A cursor (_) begins to blink at the rightmost 3-digit segment. Use the ^ (+)
key to increase and the v (-) key to decrease the figure. When the rightmost segment is done, use the < key to
move the cursor to the next segment. Again, use the ^ (+) key to increase and the v (-) key to decrease the figure
for the segment. Repeat this procedure for all the segments. When all segments are done, press
ENTER
.
8. Press the ^ (+) key. The printer will display:
Using the same manner as 7. above, complete the gateway address. Press
ENTER
.
9. Press the ^ (+) key. The printer will display:
Using the same manner as 7. above, complete the subnet mask address. Press
ENTER
.
10. Press
MENU (MODE
). Turn the printer off and on. IP address configuration is complete.
Verifying the IP Address Settings
Print a network status page to verify that the IP address information has been properly set.
The network status page will also be useful during diagnostics on network problems.
Interface >
Option
>TCP/IP
>
On
>>IP Address
000.000.000.000
>>Gateway
000.000.000.000
>>Subnet mask
000.000.000.000
8/9 ページIP Address Configuration
2006/05/26file://F:\USERMAN\EXPORT\Option\IB-23\P6以降用完了分\html\English\tcpip_setting.h...

To print a network status page, refer to the printer's manual.
Top of page
9/9 ページIP Address Configuration
2006/05/26file://F:\USERMAN\EXPORT\Option\IB-23\P6以降用完了分\html\English\tcpip_setting.h...

Installing the Software Utilities
The IB-23 Library CD-ROM bundled with the IB-23 includes handy utilities. Quick Setup is an administration utility for
accessing the IB-23 to configure the network settings. KPrint is a utility for creating a TCP/IP port in Windows. This
section gives instructions for using Quick Setup and KPrint.
The CD-ROM is for use in the following environments:
Windows 98/Me
Windows NT 4.0/2000/XP/Server2003
About the CD-ROM
Inserting the CD-ROM causes the
Main Menu
to be displayed automatically. If the
Main Menu
is not displayed
automatically, double click the
Setup.exe
file in the root directory of the CD-ROM.
The CD-ROM includes the following software utilities and documentation:
Figure 1. CD-ROM Main Menu
Quick Setup Wizard
A setup wizard for easy installation of the IB-23. The wizard runs directly from the CD-ROM,
without being installed on the hard disk. Simply follow this wizard for basic installation of the
IB-23.
Install KPrint Software
A utility for creating a TCP/IP port in Windows to enable printing via peer-to-peer
communication. This utility is installed on the hard disk.
View Operation Guide
Displays the operating guide (this manual) for the IB-23 and the utilities described above.
1/2 ページInstalling the Software Utilities
2006/05/26file://F:\USERMAN\EXPORT\Option\IB-23\P6以降用完了分\html\English\install_adminm...
Launching Quick Setup
Follow these steps to run Quick Setup.
1. Insert the IB-23 Library CD-ROM in the CD-ROM drive. The CD is played automatically, and the main menu is
displayed. See
Figure 1
.
2. Click
Quick Setup Wizard
.
3. Follow the wizard instructions to complete the installation.
Installing KPrint
Follow these steps to install KPrint.
1. Insert the IB-23 Library CD-ROM in the CD-ROM drive. The CD is played automatically, and the main menu is
displayed.
2. Click
Install KPrint Software
.
3. Follow the wizard instructions to complete the installation.
Launching KPrint
To run KPrint, from the Windows
Start menu
, go to
All Programs
>
Kyocera
. Click
KPrint Add Port
.
View Setup Guide
Displays a manual that describes the basic setup when you purchase the IB-23.
Top of page
2/2 ページInstalling the Software Utilities
2006/05/26file://F:\USERMAN\EXPORT\Option\IB-23\P6以降用完了分\html\English\install_adminm...
Installing the Printer Drivers
This page explains about the steps to install printer drivers. Printer drivers are installed in Windows so that print jobs are
printed using the printer port. Drivers also offer various printer settings. As your printer port, you can choose KPrint Port
for direct, "peer-to-peer" printing via TCP/IP.
Printer drivers can be installed from the Software Library CD-ROM bundled with your printer. You can also download and
install the latest printer drivers from www.kyoceramita.com
.
Installing Printer Drivers
1. Insert the Software Library CD-ROM in the CD-ROM drive.
After a while, the Main Menu screen is displayed. Click Exit to close the main menu.
2. From the Windows
Start
menu, go to
Control Panel
>
Printers and Other Hardware
>
Printers and Faxes
>
Add Printer
. The
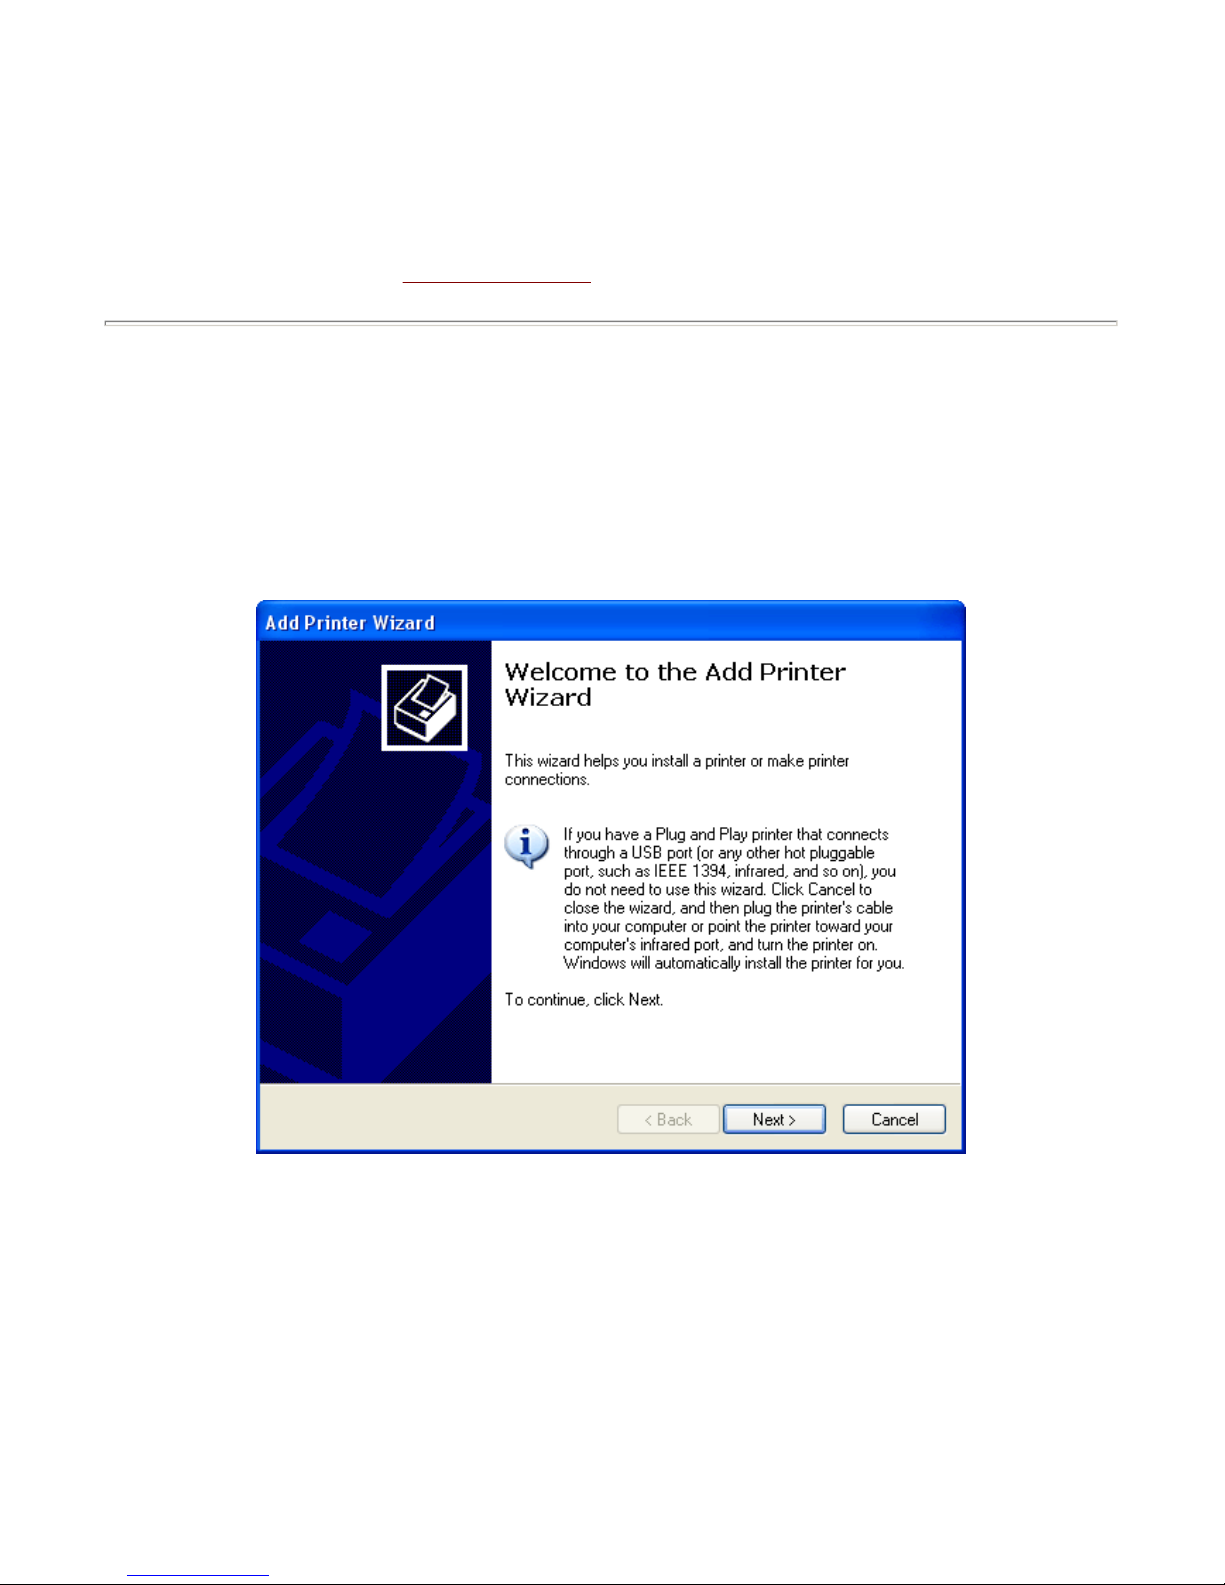
Add Printer Wizard
is displayed. Click
Next
.
Figure 1. Add Printer Wizard
3. The screen for selection of local or network printer is displayed. Choose
Local printer attached to this computer
.
Uncheck
Automatically detect and install my Plug and Play printer
and click
Next
.
1/6 ページInstalling the Printer Drivers
2006/05/26file://F:\USERMAN\EXPORT\Option\IB-23\P6以降用完了分\html\English\install_printer_...
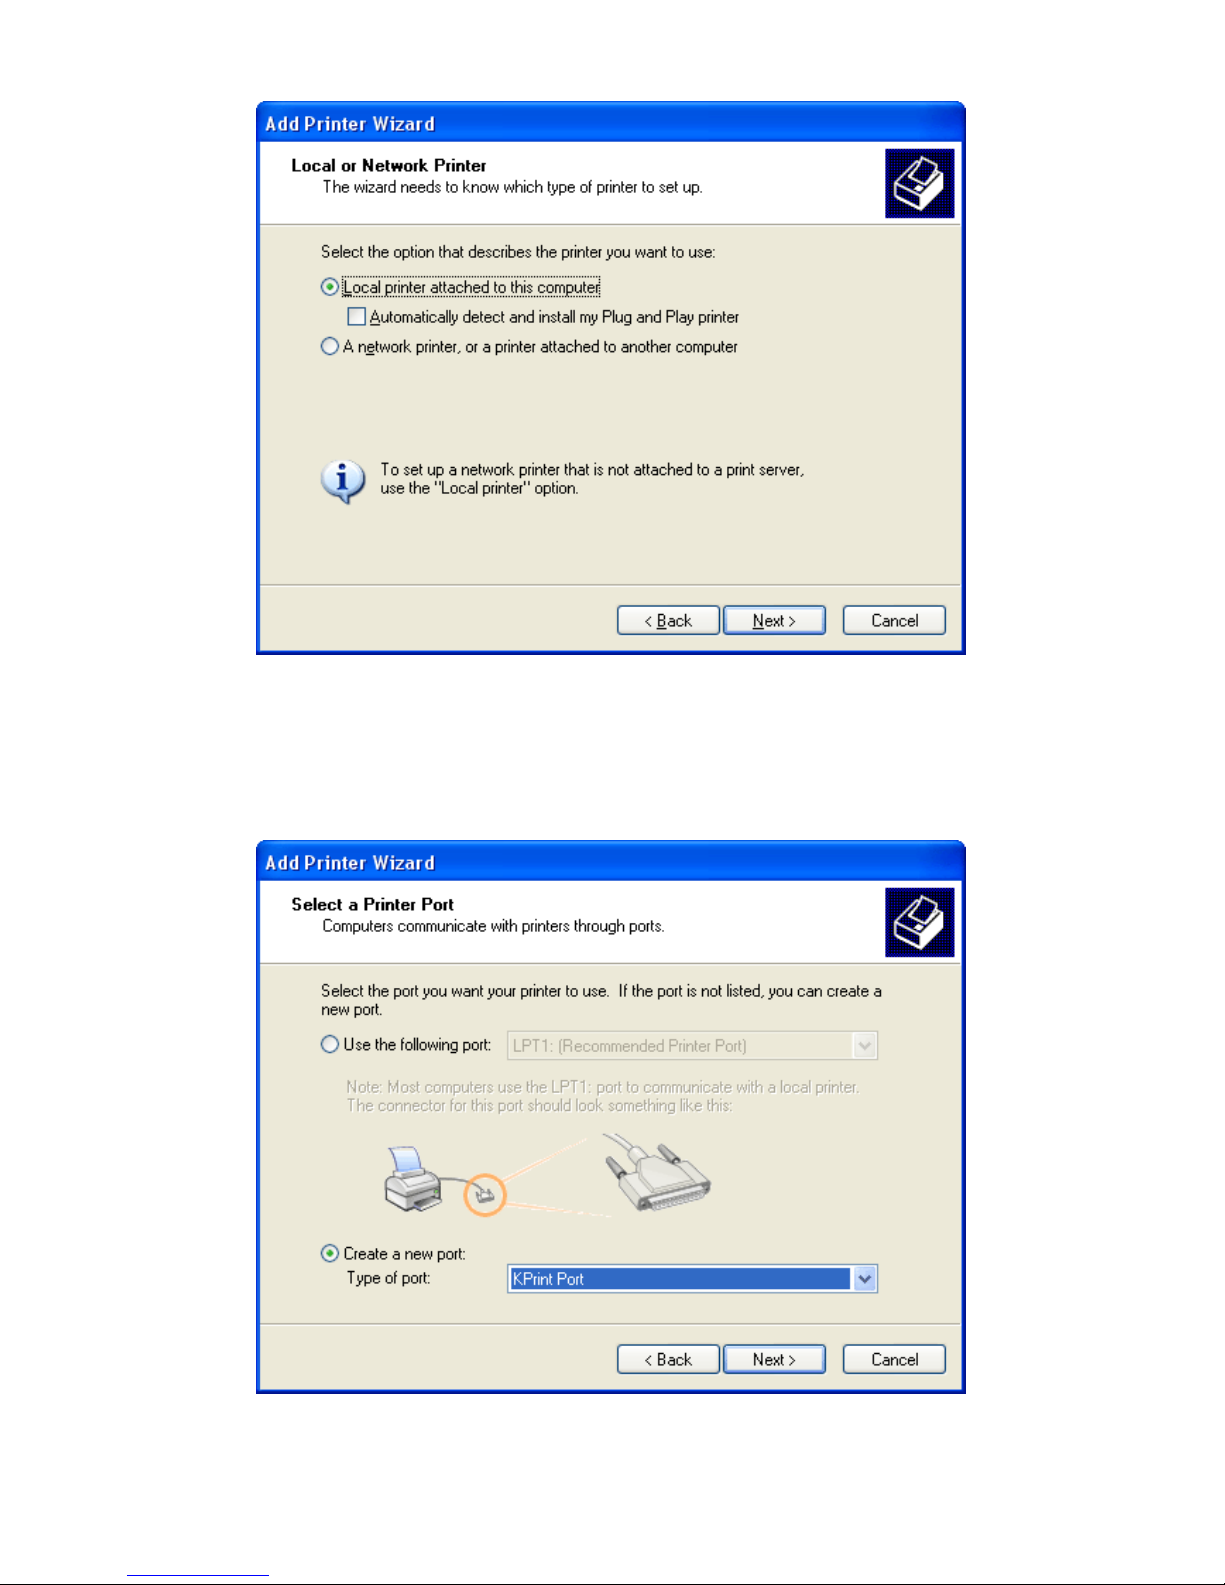
Figure 2. Selection of Local or Network Printer
4. The screen for printer port selection is displayed. Choose
Create a new port
. In
Type of port
, select
KPrint Port
from the dropdown menu and click
Next
.
Fi
g
ure 3. Printer Port Selection
2/6 ページInstalling the Printer Drivers
2006/05/26file://F:\USERMAN\EXPORT\Option\IB-23\P6以降用完了分\html\English\install_printer_...
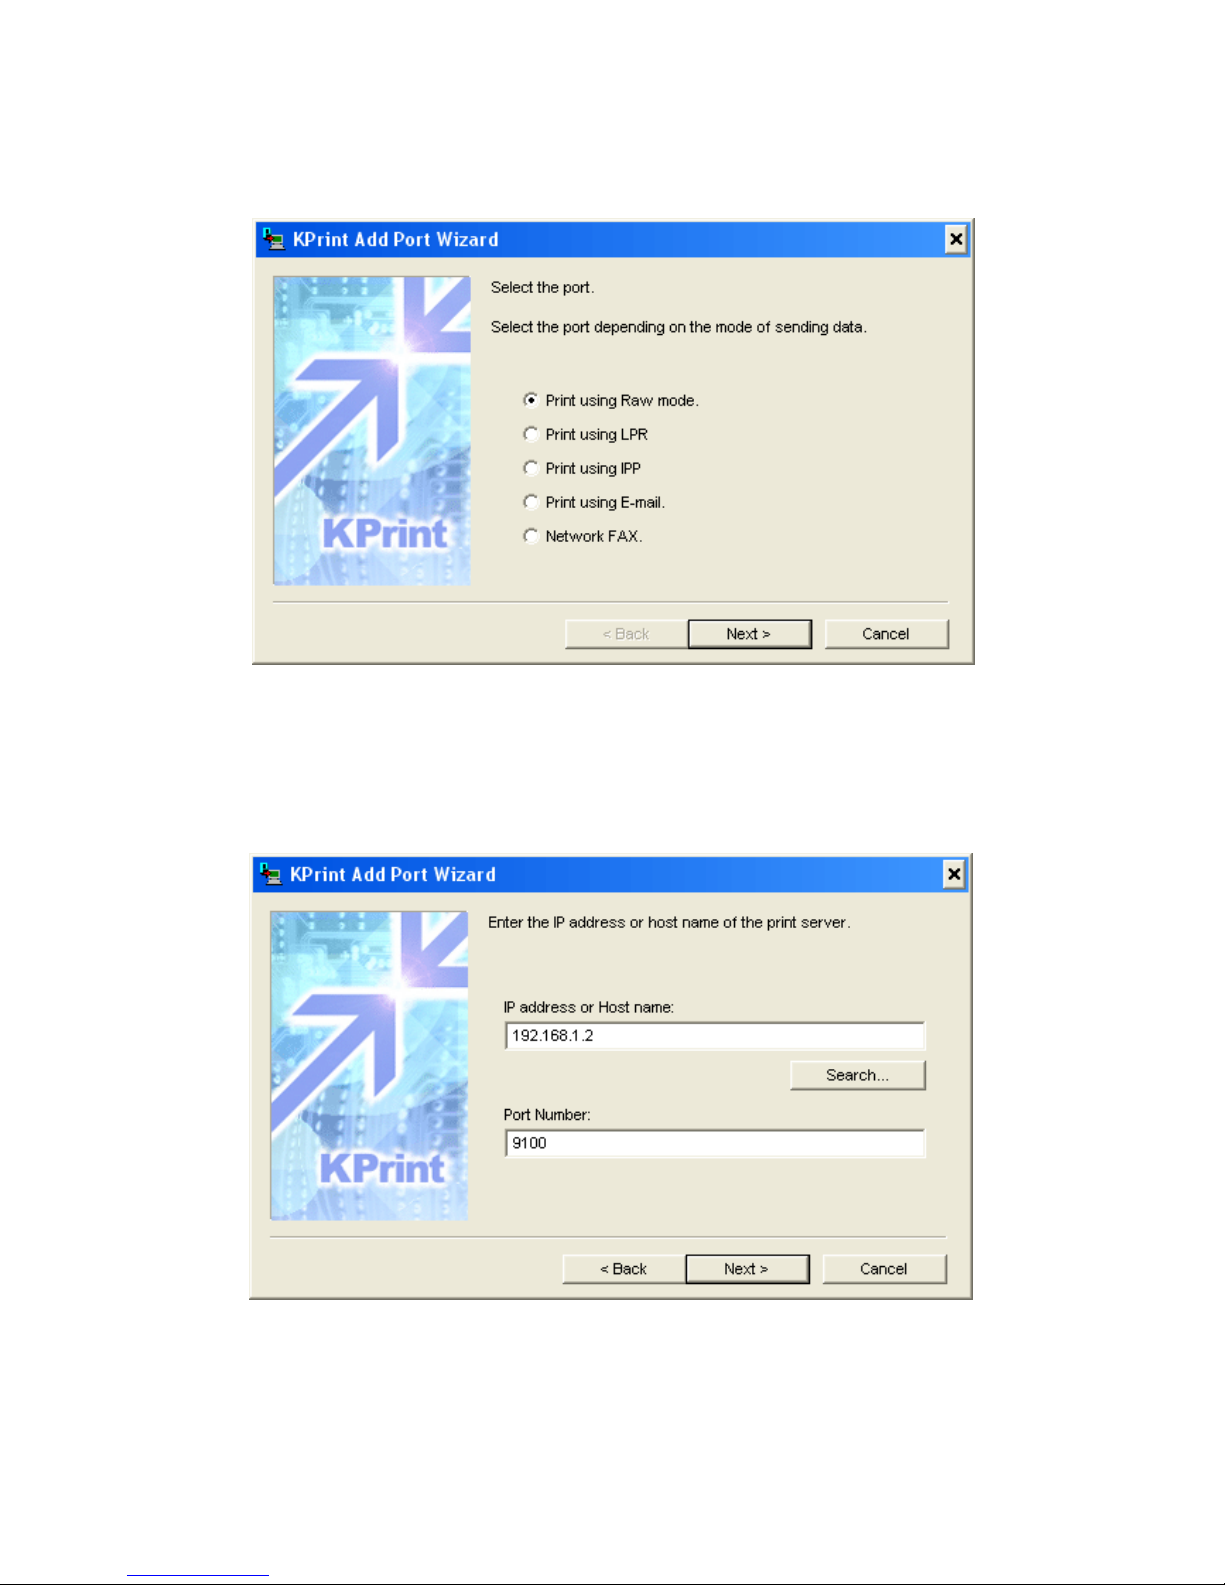
5. The
KPrint Add Port Wizard
is displayed. Select the mode to use and click
Next
. Check with your network
administrator regarding which mode you should use.
Figure 4. The Mode Selection Screen in the KPrint Add Port Wizard
6. Enter the IP address or host name of the IB-23 in the
IP Address or Host Name
field. Otherwise, you can click
Search
to display a list of the IB-23 on the network and select the IB-23 to connect. Click
Next
.
Figure 5. Address Input in the KPrint Add Port Wizard
7. The port name of the destination printer is displayed. Confirm the name and click
Next
.
3/6 ページInstalling the Printer Drivers
2006/05/26file://F:\USERMAN\EXPORT\Option\IB-23\P6以降用完了分\html\English\install_printer_...

Figure 6. The Destination Printer Port Screen in the KPrint Add Port Wizard
8. Confirm the information and click
Finish
.
Figure 7. Confirmation Screen in the KPrint Add Port Wizard
9. After the printer software installation screen is displayed, click
Have Disk
. The screen for installation from floppy
disk is displayed. Click
Browse
. After the file selection dialog is displayed, navigate to
My Computer
>
CD-ROM
Drive
>
Drivers
>
KXDriver
>
Win2k_XP
and click OK.
For
Win2K_XP
, choose the folder corresponding to your version of Windows.
4/6 ページInstalling the Printer Drivers
2006/05/26file://F:\USERMAN\EXPORT\Option\IB-23\P6以降用完了分\html\English\install_printer_...

Figure 8. Printer Software Installation Screen
10. After the printer drivers on the CD-ROM are listed, select the model of your printer and click
Next
.
11. In the screen for naming the printer, make sure the model name is displayed in the printer name field and click
Next
.
12. The printer sharing screen is displayed. Select whether or not to share the printer and click
Next
.
13. The Test Page printing screen allows you to print a test page after the driver is installed. Choose
Yes
or No and
click
Next
.
14. When the final screen of the
Add Printer Wizard
is displayed, confirm the settings and click
Finish
.
5/6 ページInstalling the Printer Drivers
2006/05/26file://F:\USERMAN\EXPORT\Option\IB-23\P6以降用完了分\html\English\install_printer_...

Figure 9. Completing the Add Printer Wizard
After the printer driver is installed, a message to restart your computer may be displayed depending on the
operating system. In this case, follow the instructions and restart your computer.
Top of page
6/6 ページInstalling the Printer Drivers
2006/05/26file://F:\USERMAN\EXPORT\Option\IB-23\P6以降用完了分\html\English\install_printer_...

Windows Printing: TCP/IP
This section explains how to install the IB-23 for the Windows 98/Me environment. This section covers the following
topics:
Which Print Method to Use?
Configuring the PC for TCP/IP
Creating a KPrint Port for TCP/IP Printing
Installing the Printer in Windows 98/Me
Microsoft Windows encompasses a wide range of client versions; from Windows 98 to Windows XP, and thus a wide
range of printing capabilities. The various versions of Windows in combination with the IB-23 offer the network printing
capabilities described below.
To prepare the IB-23 for TCP/IP communication, use Quick Setup, the bundled utility. Following the wizard offers an easy
way to configure the above network settings. For instructions on launching Quick Setup, refer to the section on Installing
the Software Utilities. You can also complete these settings by using a web browser to access the internal webpage of
the IB-23. For details, refer to the section on Using a Web Browser to Manage the IB
-23.
Which Print Method to Use?
The optimum Windows printing configuration for you depends upon your particular environment including user and
administrator experience and preferences.
Generally, NetWare print services will be utilized when a NetWare server is present.
In the absence of a NetWare server, LPR printing in combination with printer sharing is often utilized when TCP/IP
is already in use.
Select
Print by using Raw mode
when using a port other than 9100 in the logical printer mode you want use.
NetBEUI peer-to-peer printing is most often utilized when a centralized NetWare or Windows print server is not
present.
IPP is utilized when printing across the Internet or intranet is required.
Configuring the PC for TCP/IP
To see if your Windows PC has the TCP/IP protocol already installed, proceed as follows:
1. Select Windows
Start, Settin
g
s
, then
Control Panel
.
LPR (Line Printer Remote)
Printing to a Windows LPR spooler over TCP/IP connection.
RAW
Select
Print Using RAW Mode
if you are using Logical Printer Mode in a TCP/IP
environment and you are using a port number other than 9100.
IPP (Internet Printing Protocol)
Printing over the Internet or intranet using the Internet Printing Protocol.
E-mail printing
Sending e-mail to the mail server from which the IB-23 retrieves the e-mails (print
jobs).
Novell NetWare
Printing to a NetWare print queue when a NetWare server is present. For details on
NetWare printing, see NetWare Printing
.
NetBEUI
Peer to peer printing using the NetBEUI protocol. Printers are available in Windows
Network Neighborhood. NetBEUI printing is fully detailed in Windows Printing:
NetBEUI. For Windows XP, you must install the NetBEUI protocol from the Windows
XP installation CD-ROM.
Windows Printer Sharing
Printing to a shared network printer which is configured on another Windows PC.
1/4 ページWindows Printing: TCP/IP
2006/05/26file://F:\USERMAN\EXPORT\Option\IB-23\P6以降用完了分\html\English\windows_printi...

2. Double click
Network
.
3. Click the
Configuration
tab and locate
TCP/IP -> ....
.
Figure 1. TCP/IP Protocols in Network Protocols
If
TCP/IP ->
(Network adapter name)
is not in the list, click on
Add
to install it. For details on installing network
services and protocols in Windows, refer to the Windows documentation or Help.
You can verify the IP address, subnet mask, and gateway currently set for your PC by selecting
TCP/IP ->
(
Network adapter name
) and clicking
Properties
.
Creating a KPrint Port for TCP/IP Printing
The KPrint Port is a printer port you create in Windows to print from the printer driver to the network card's IP address.
This is why we include KPrint, a dedicated utility for the IB-23. KPrint enables you to create the TCP/IP port.
Once installed, you can use the KPrint utility to create the port in Windows for any IB-23 present in the network. If you
have not already done so, install the KPrint utility following the procedure in Installing the Software Utilities
.
Using TCP/IP Port:
1. Run the
KPrint Add Port wizard
by selecting Windows
Start, All Programs
, and
Kyocera
, and clicking
KPrint
Add Port
.
2. Select the mode to use and click
Next
. Check with your network administrator regarding which mode you should
use.
3. In
IP address or host name
below, enter the IP address of the IB-23 to connect. If you click
Search
, the
IB-23
Search
window opens. This will search and list all available IB-23 in the network. Select the IB-23 you want to
connect the TCP/IP port.
If you click
Configure
, you can modify the scope of the search by specifying one or more specific network
segment addresses. In the
Search Configuration
window, enter the network segment followed by '255,' e.g.
'171.62.186.255.' This causes the search to be conducted only in the '171.62.186.0' segment.
2/4 ページWindows Printing: TCP/IP
2006/05/26file://F:\USERMAN\EXPORT\Option\IB-23\P6以降用完了分\html\English\windows_printi...
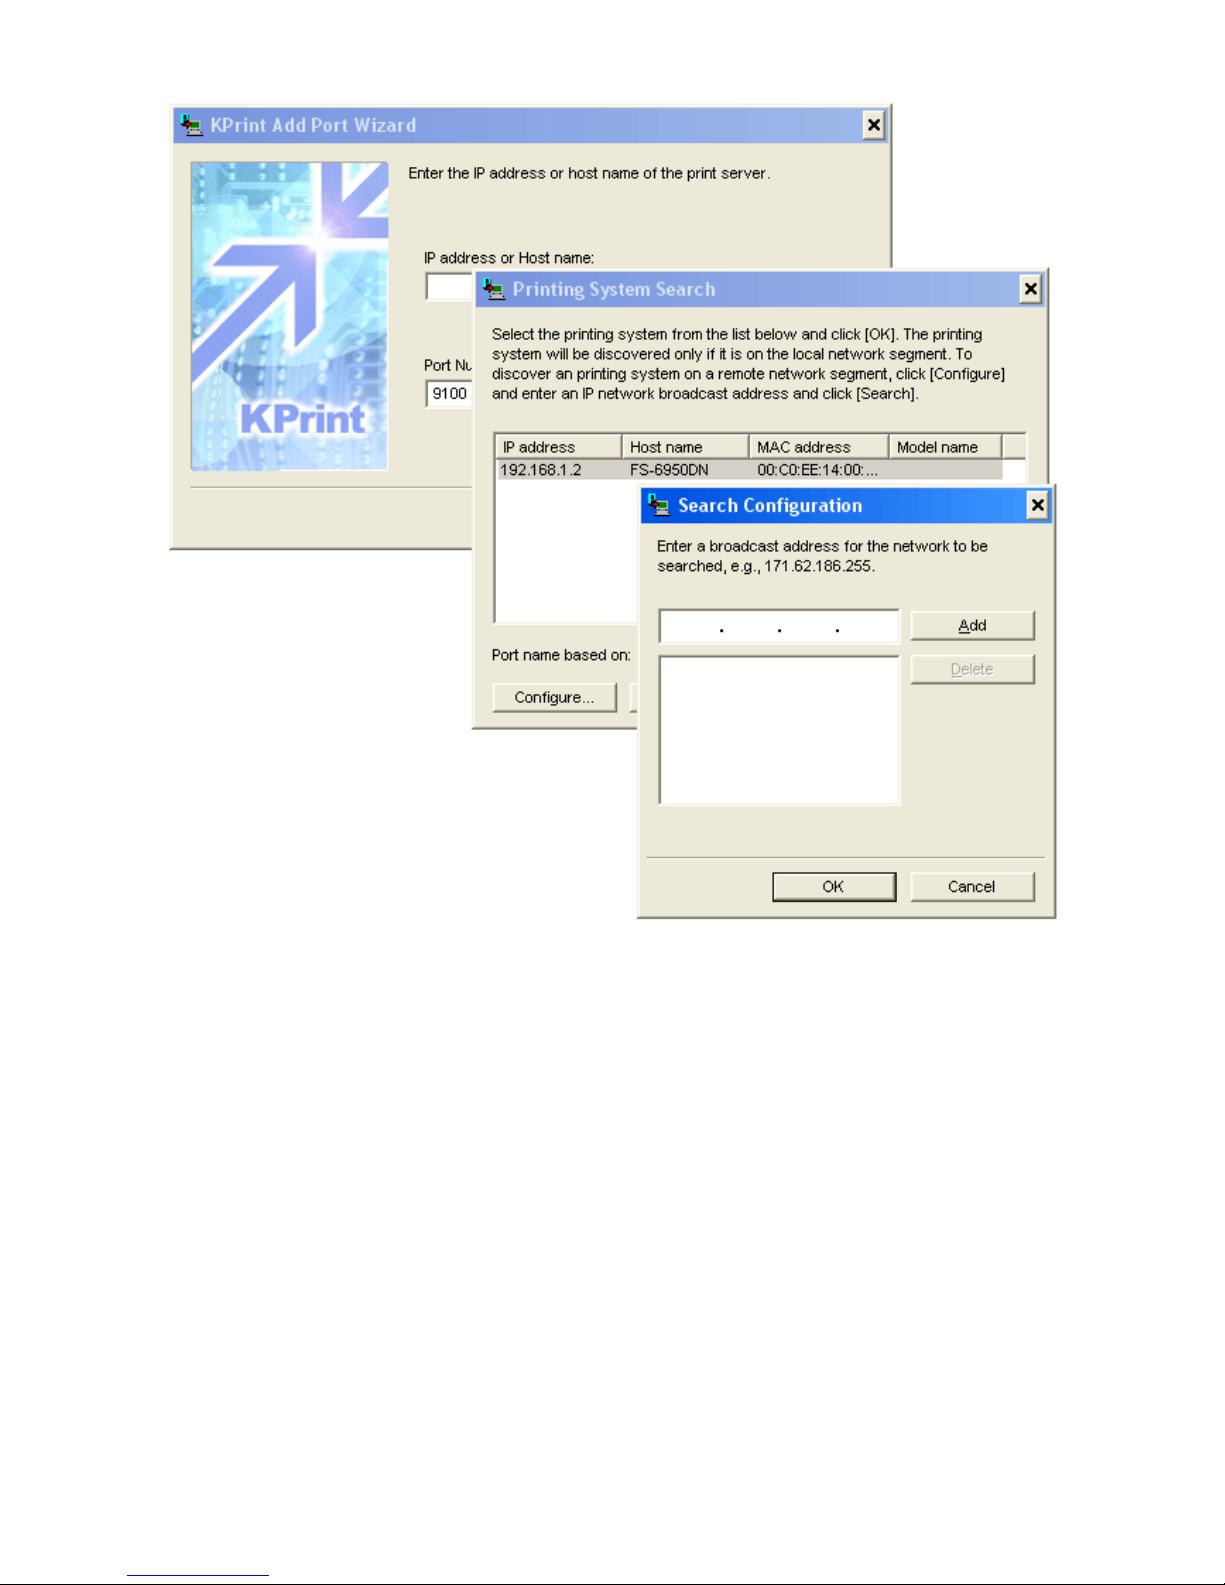
Figure 2. Specifying IP Address for the Port
4. Click
Next. Destination
p
rinter port name
is displayed.
3/4 ページWindows Printing: TCP/IP
2006/05/26file://F:\USERMAN\EXPORT\Option\IB-23\P6以降用完了分\html\English\windows_printi...
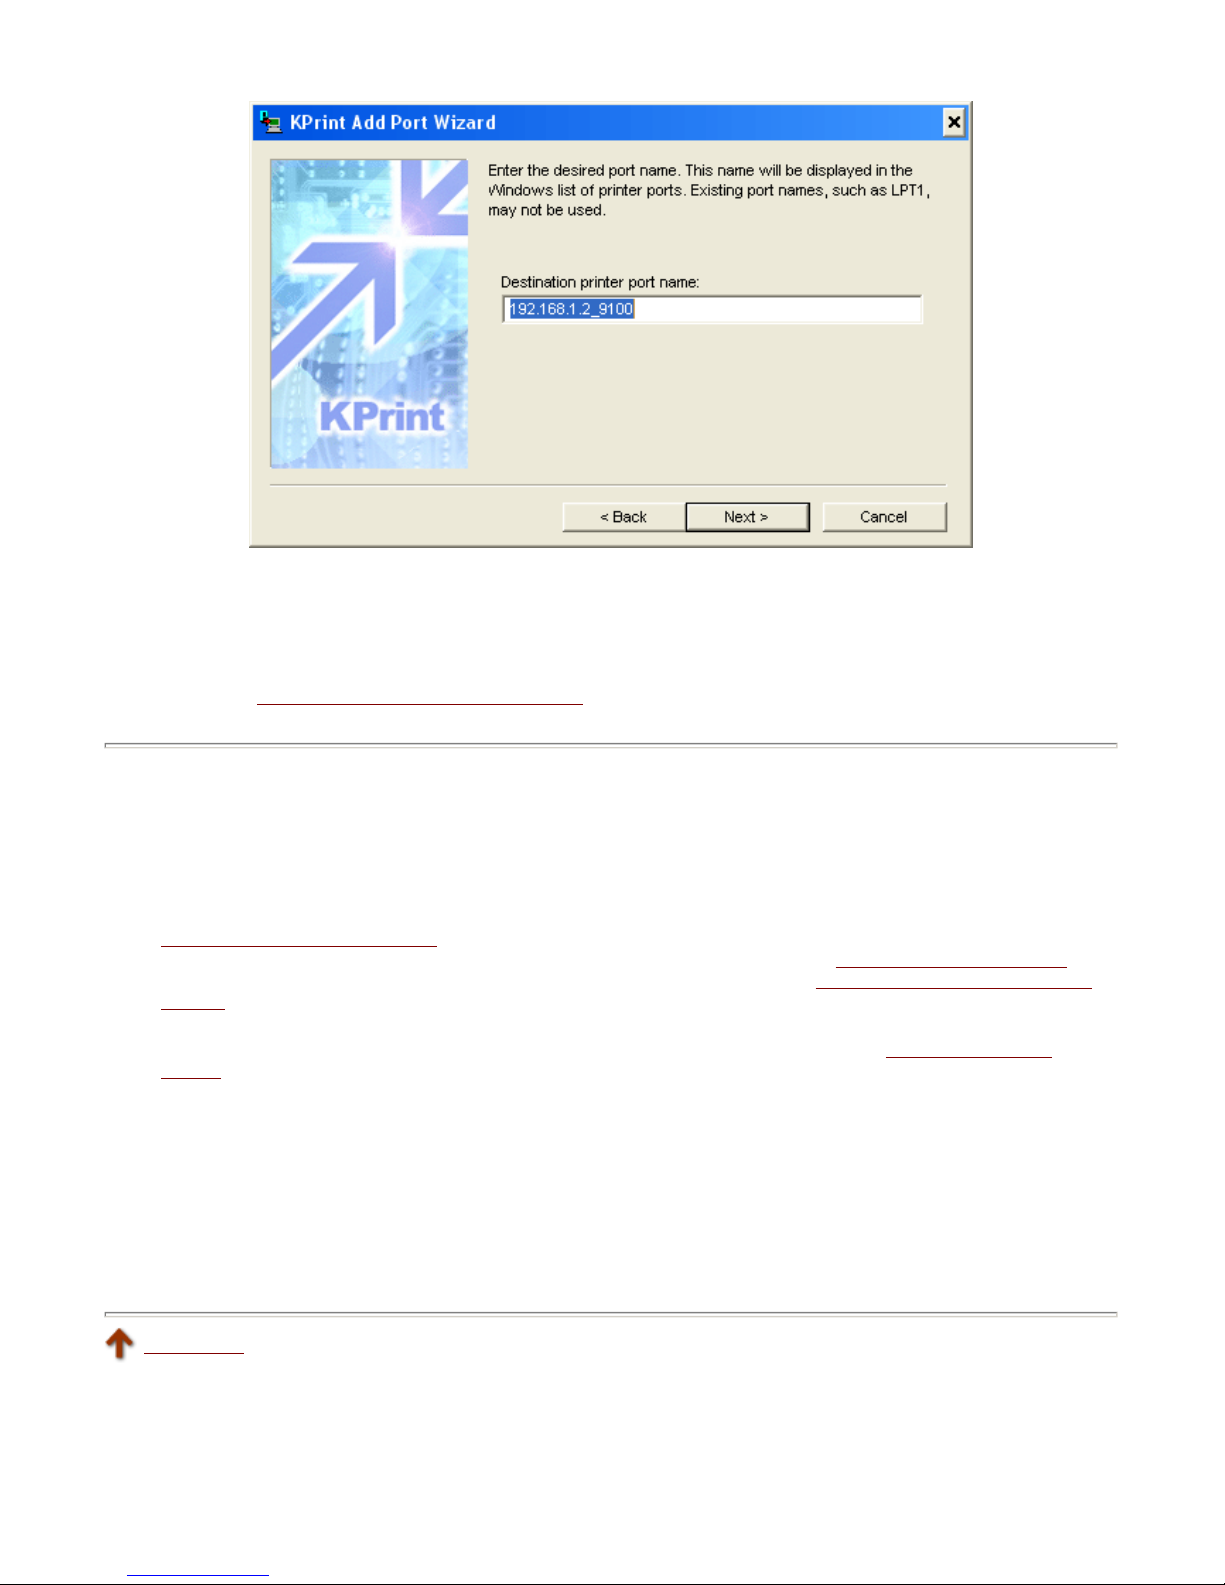
Figure 3. Destination Printer Port Name
5. Change the port name if desired. The default name given as the '
IP address
_9100'.
6. Click
Next
. Confirm the configuration.
7. Click
Finish
. The TCP/IP port is created in Windows and KPrint quits automatically.
8. Proceed to Installing the Printer in Windows 98/Me
.
Installing the Printer in Windows 98/Me
A
fter you have successfully created a KPrint port in Windows, you are ready to point the printer driver to print to the port.
Before proceeding, make sure that:
The IB-23 is installed in the printer properly and the printer is powered up. To install the interface card, see
Installing the IB
-23 Network Card.
The appropriate printer driver has been installed. To install the printer driver, see Installing the Printer Drivers.
The procedure for creating the KPrint port has been followed properly. Review Creating a KPrint Port for TCP/IP
Printing.
1. If you have not already done so, install the printer driver for the printer. For details, see Installing the Printer
Drivers.
2. Select Windows
Start, Settings
, and
Printers
.
3. In the
Printers
folder, right click the printer driver that will be used to print to the TCP/IP port and select
Properties
.
4. Click the
Details
tab. Click the pull-down menu for
Print to the following port
and select the TCP/IP port you
have created above.
5. Click OK.
To print from an application, select the printer driver in the application's
Print
menu. The printer driver
allows you to fully utilize the software and hardware features of the printer.
Top of page
4/4 ページWindows Printing: TCP/IP
2006/05/26file://F:\USERMAN\EXPORT\Option\IB-23\P6以降用完了分\html\English\windows_printi...

Windows Printing: NetBEUI
This section explains how to install the IB-23 in the Windows NetBEUI environment.
The IB-23 supports
master-browsing
in Windows
Network Neighborhood
.
Once the IB-23 is physically installed in the
printer and connected to the network, the IB-23 will create a Windows workgroup called
KM-NetPrinters
in Network
Neighborhood, or it will join in this workgroup if it already exists.
Note:
In order to utilize NetBEUI printing, your PC must be configured with the NetBEUI protocol and the Client for
Microsoft Networks service under Network Properties. See Setting Up the PC for NetBEUI
below. For Windows XP, you
must install the NetBEUI protocol from the Windows XP installation CD-ROM.
This section also covers the following topics:
Setting Up the PC for NetBEUI
Setting Up NetBEUI Printing
Configuring NetBEUI
Setting Up the PC for NetBEUI
To configure your Windows PC for NetBEUI printing, verify that all of the following Windows protocols and services are
installed on your PC:
Client for Microsoft Networks
service
NetBEUI
protocol
File and printer sharing for Microsoft Networks
service
To verify, proceed as follows:
1. In Windows 98/Me, select
Start, Settings
, and
Control Panel
; and double click
Network
.
In Windows NT 4.0, select
Start, Settings, Control Panel, Network
, and
Protocols
.
In Windows 2000, select
Start, Settings, Network and Dial-up Connections, Local Area Connection
,
and
Properties
.
2. If you have added a protocol or service, restart the PC.
Proceed to the following section to configure NetBEUI printing.
1/5 ページWindows Printing: NetBEUI
2006/05/26file://F:\USERMAN\EXPORT\Option\IB-23\P6以降用完了分\html\English\windows_printi...
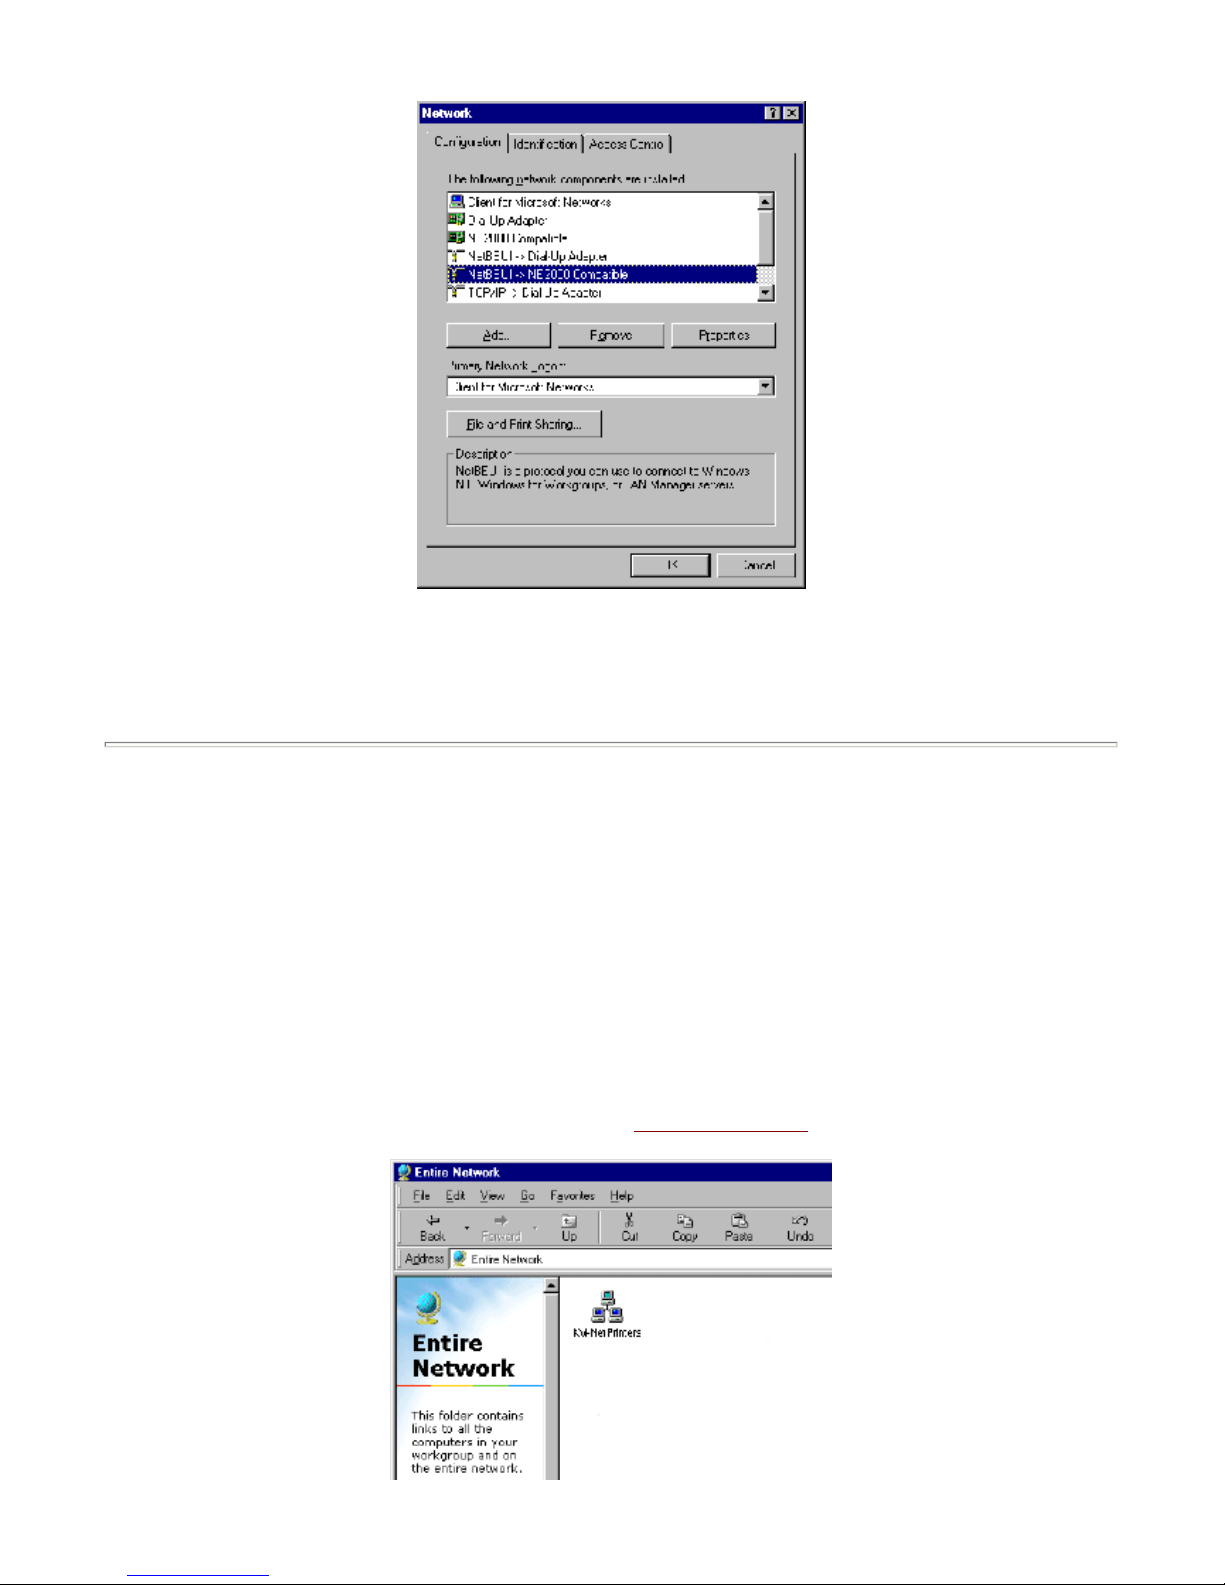
Figure 1. Verifying the NetBEUI Installation
If any of the above are missing, click
Add
to install the protocol or service. You will have to have the Microsoft
Windows installation CD.
Setting Up NetBEUI Printing
Once your PC has been configured to support the NetBEUI protocol, you are ready to connect the PC to the printer. This
is done by installing the printer driver for the NetBEUI printer in the manner described below.
1. Double click
Network Neighborhood
(or
My Network Places
) on the Windows desktop.
2. Double click
Entire Network
.
You will find computers and workgroups that are available on the network in this window. The printer
workgroup,
KM-NetPrinters
, which contains the IB-23 is also seen in this window.
'KM-NetPrinters' is the default workgroup name for the IB-23. Unless the workgroup name is
changed, all IB-23 on the network will appear in the KM-NetPrinters workgroup. If you want to change
the workgroup to which an IB-23 belongs, refer to Configuring NetBEUI
.
2/5 ページWindows Printing: NetBEUI
2006/05/26file://F:\USERMAN\EXPORT\Option\IB-23\P6以降用完了分\html\English\windows_printi...
 Loading...