

Page 1
ENGLISH
Hardware Installation
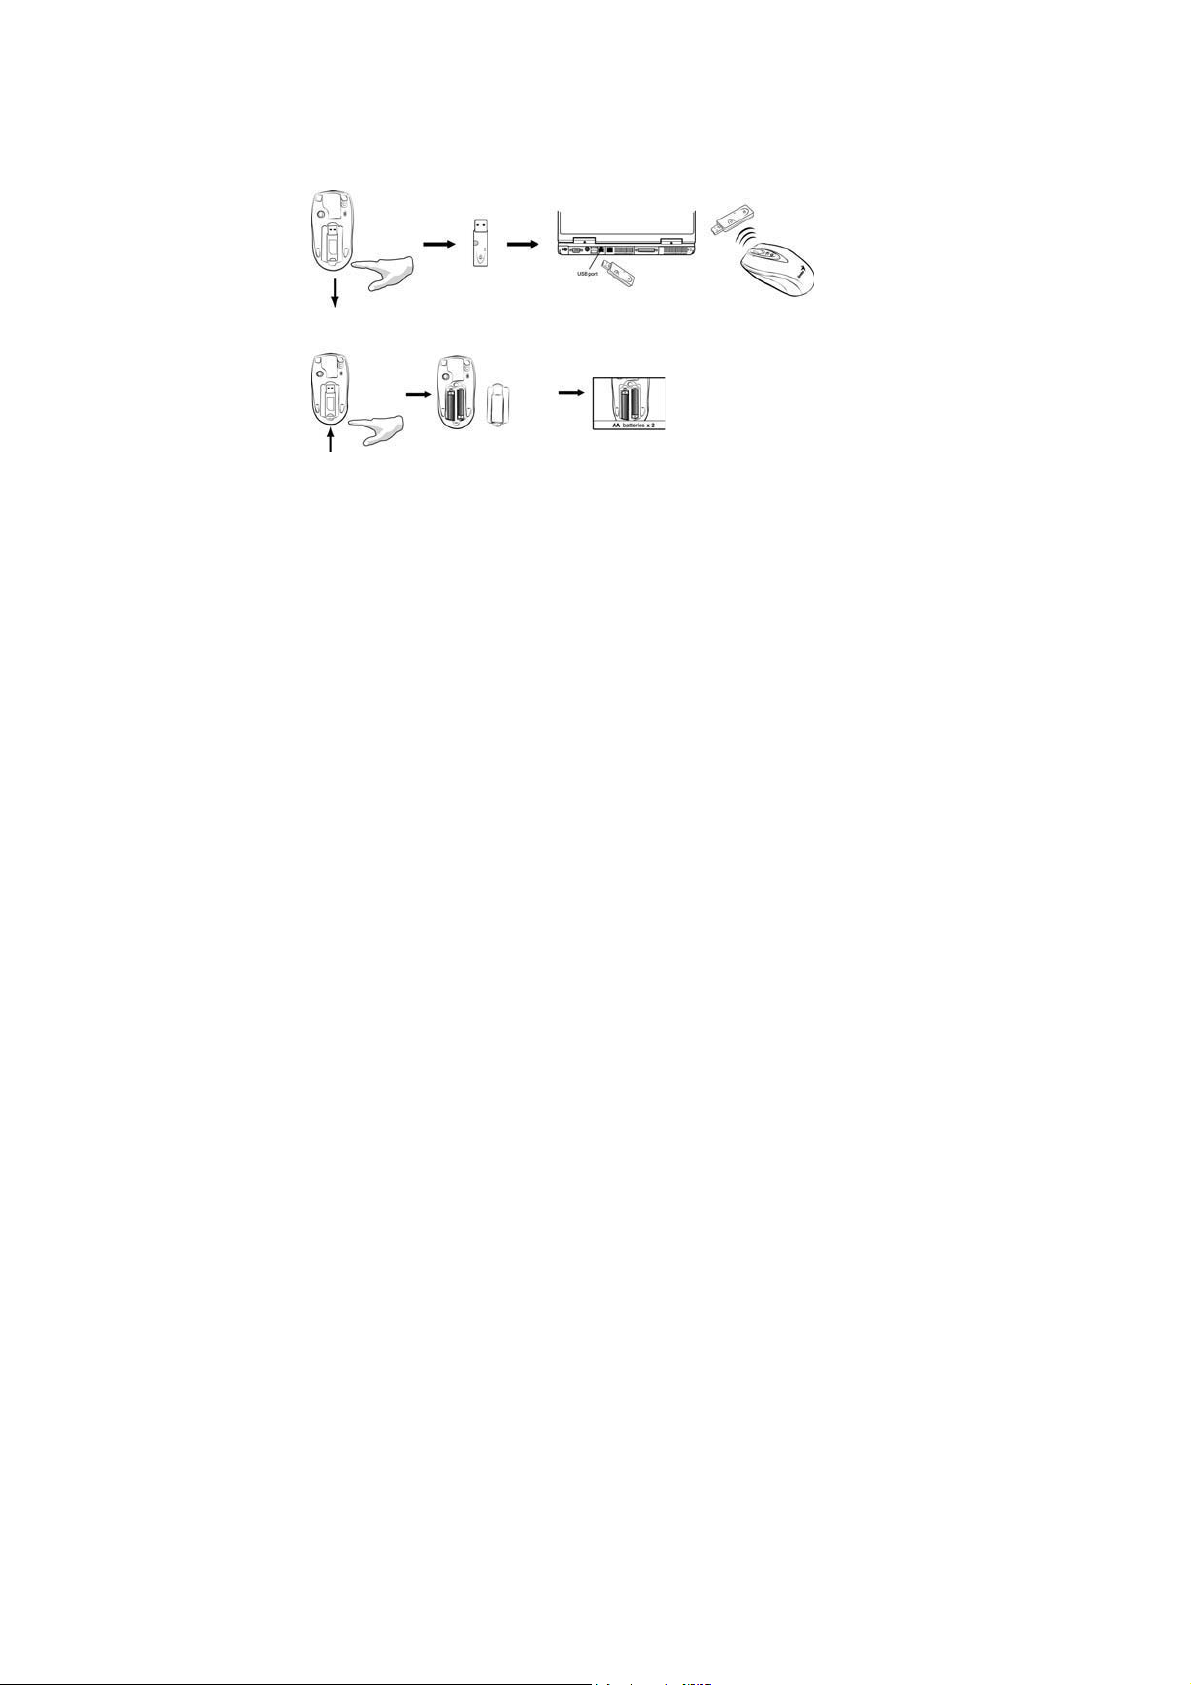
1. You can connect the receiver to a USB port of a PC
2. Install two AA batteries in the mouse.
3. Turn on your computer. The mouse can be worked.
Not˸ˍʳIf the mouse does not have connection to the receiver, press the button
on the receiver first and then press the button under the mouse for channel
setting again.
Important: Remember do not put the batteries in the wrong direction; use the
same types of batteries. Also, keep all drinks away! If any spill occurs on the
receiver, unplug the USB connector first and clean the receiver immediately.
Please switch the button to "off" under the mouse once you don't use it for a
long time, and remove the batteries if you do not use this device for at least
two weeks.
W
arning: (Troubleshooting)
1. Please do not use wireless laser mouse on a desk, which is made of glass
or mirror. Also, a flat surface is necessary or the laser sensor will error
easily. When you use wireless laser mouse on a desk that is made of
metal, try using a pad and reduce the receiving distance.
2. The wireless laser mouse channel provides 16 channels and 256 ID-codes,
and it automatically selects the ID # for your mouse. You can only set up
one wireless laser mouse at a time.
1
Page 2
ENGLISH
3. If the power indicator is on (see Button Assignments), then the
batteries have lost their charge, so you need to replace them.
Software Installation
1. Make sure the mouse is connected to the computer.
2. Put the CD driver into the CD drive.
3. Follow the instructions on the screen to finish the software installation.
Security Function Setting:
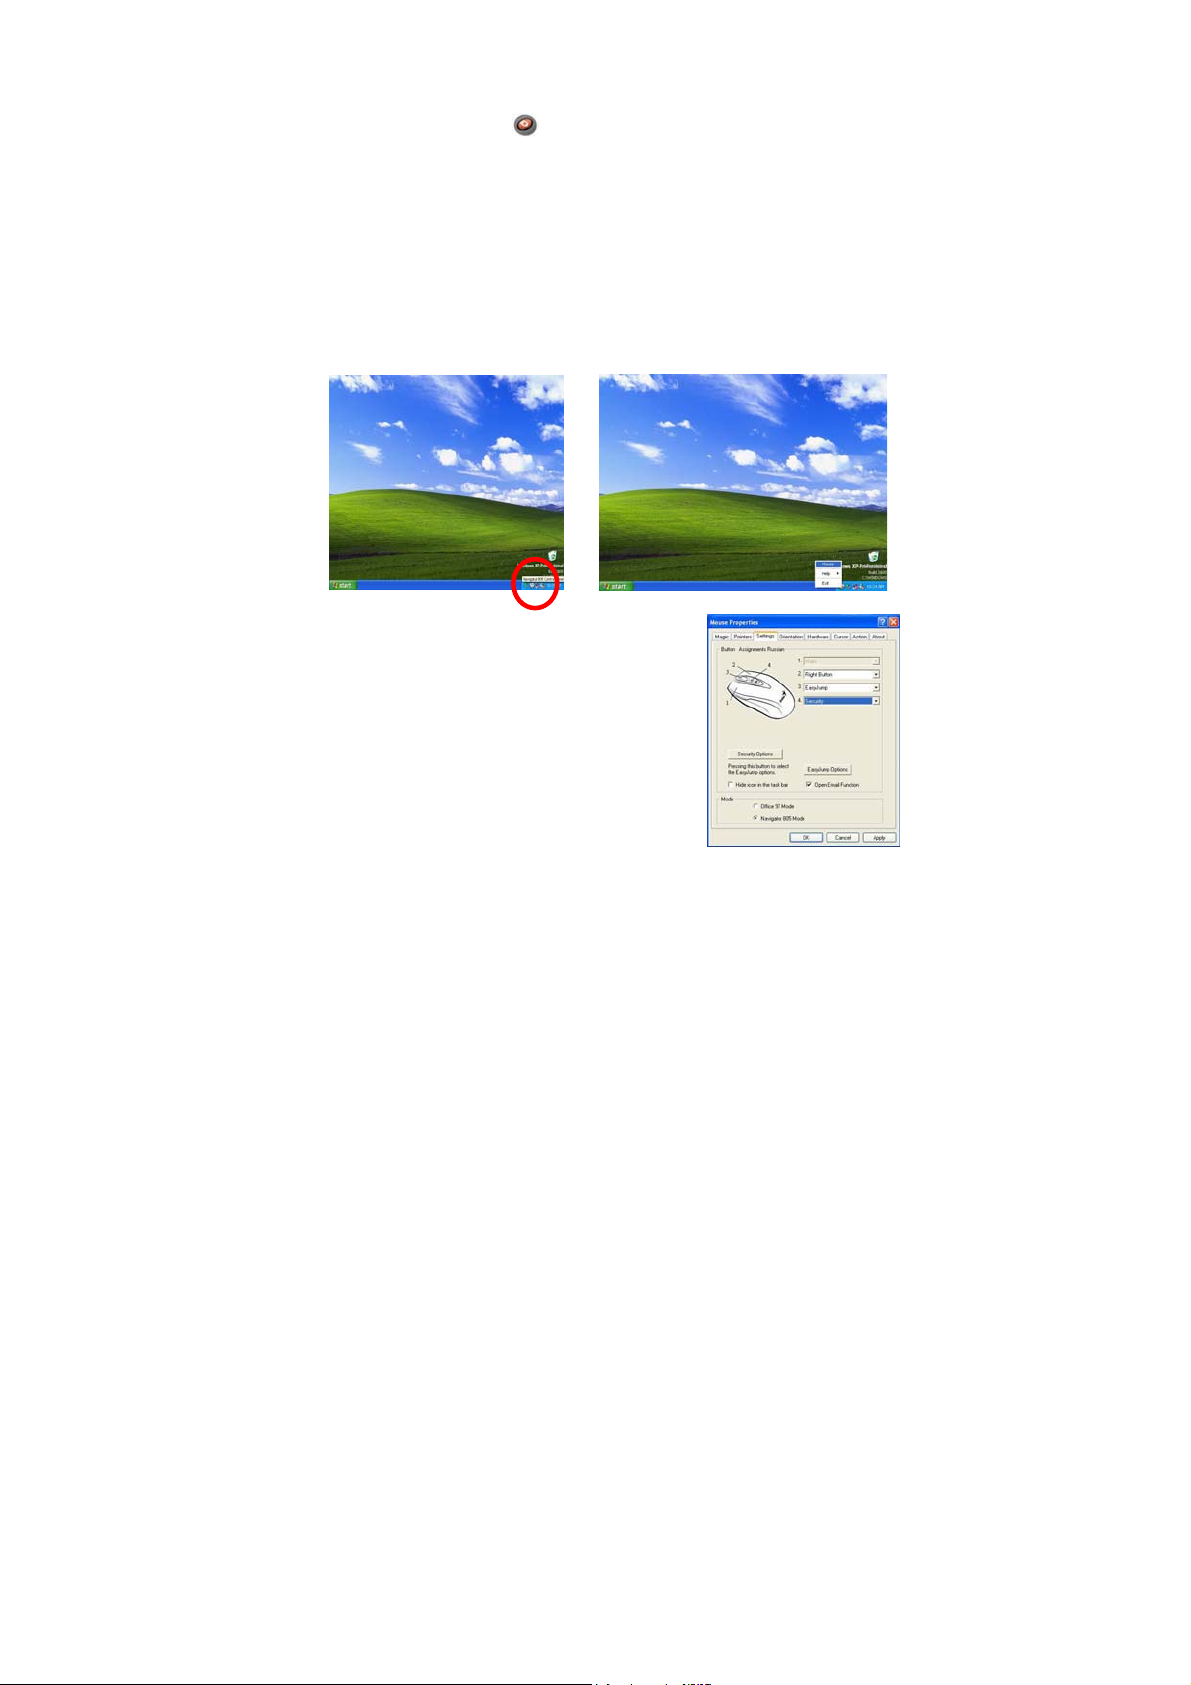
1. After you install software driver, please click the mouse icon on the task
bar and select “Mouse”.
2. Click “Settings” when the Mouse Properties
appears up and click “Security Options”.
3. Choose a picture from your images to display
when the computer is locked. Also set your
password for unlock computer. Then, press
“OK”, and the security setting will be finished.
2
Page 3

4. If you want to start the security function, just
ENGLISH
press “
to hide the screen. For security, the mouse and
keyboard won’t work.
5. If you want to unlock this function, just press
“
”, and the picture you set pop up
”again, and install your password.
Factory Setting
3
Page 4

ENGLISH
Button Assignments
1. Left Button: Provides traditional
mouse functions like click, double
click and drag.
2. Right Button: You can assign this
button to frequently used
keyboard and mouse functions in
addition to features like Easy
Jump, Auto-Panning, Zoom, etc.
3. Magic-Roller: Press the “Magic-Roller” to surf the Internet and
Windows documents.
Horizontal Scroll: Press the roller to the left and the cursor scrolls to the
left; press the roller to the right and the cursor scrolls to the right.
4. Security: Lock your screen, mouse and keyboard unless you install the
password.
5. Power indicator: If your battery power is low, the LED will brighten.
FCC RF Radiation Exposure Statement: This equipment
complies with FCC RF radiation exposure limits set forth
for an uncontrolled environment. This device and its
antenna must not be co-located or operating in conjunction
with any other antenna or transmitter.
This device complies with part 15 of the FCC rules.
Operation is subject to the following two conditions.
(1)This device may not cause harmful interference, and
(2)This device must accept any interference received,
including interference that may cause undesired operation.
Per FCC 15.21, you are cautioned that changes or modifications
not expressly approved by the part responsible for compliance
could void the user’s authority to operate the equipment.
This equipment has been tested and found to comply with the limits for a class B digital
device, pursuant to part 15 of the FCC Rules. These limits are designed to provide
4
reasonable protection against harmful interference in a residential installation.This
equipment generates, uses and can radiate radio frequency energy and, if not installed
and used in accordance with the instructions, may cause harmful interference to radio
communications. However, there is no guarantee that interference will not occur in a
particular installation. If this equipment does cause harmful interference to radio or
television reception, which can be determined by turning the equipment off and on, the
user is encouraged to try to correct the interference by one or more of the following
measures:---Reorient or relocate the receiving antenna.---Increase the separation
between the equipment and receiver.---Connect the equipment into an outlet on a circuit
different from that to which the receiver is connected.---Consult the dealer or an
experienced radio/TV technician for help.
4
 Loading...