

KYE SYSTEMS GKZGY User Manual
English
Introduction
SlimStar 820 Solargizer is a keyboard kit designed to comply with
green environment by transforming solar energy into wireless keyboard
operation and using power saving technology on the mouse to reduce
the frequent replacement of batteries.
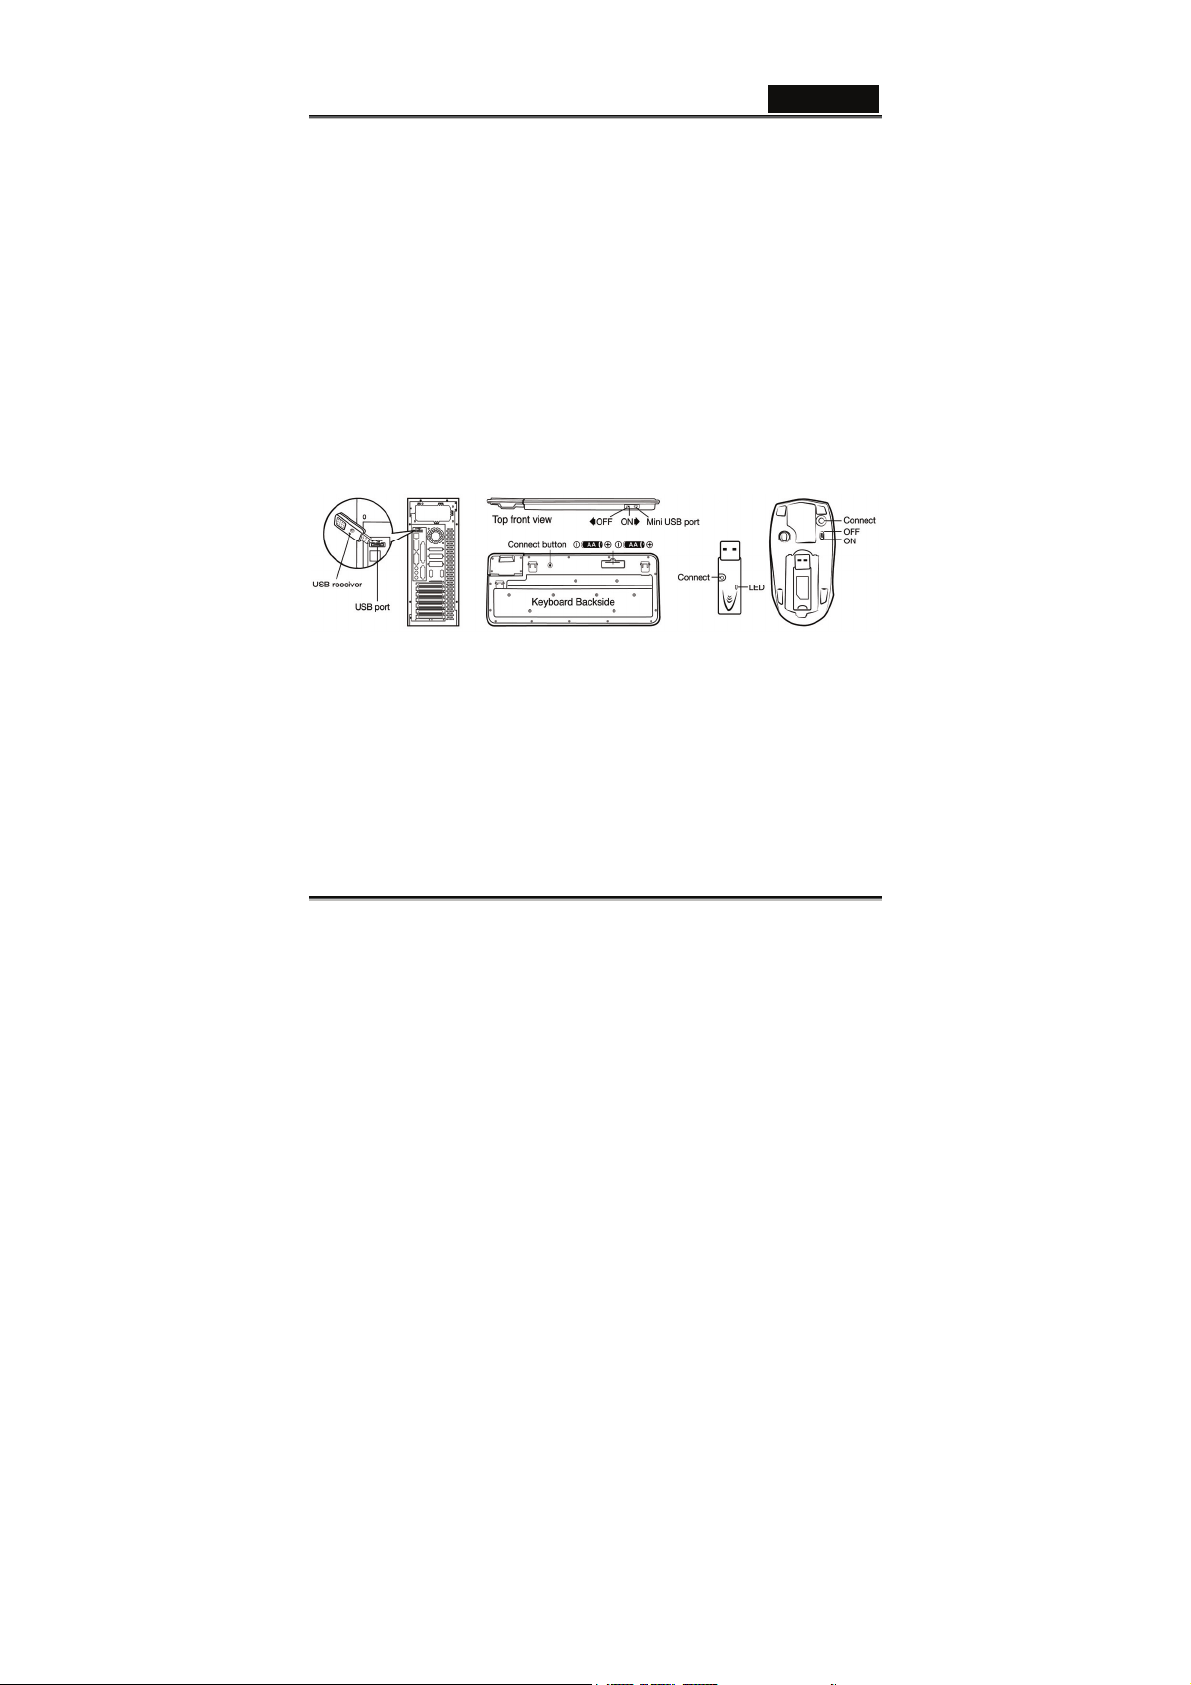
Hardware Installation
1. Connect the dongle receiver to a USB port of your PC.
2. Connect the enclosed USB cable charger to your PC and keyboard
to charge the keyboard before you begin operation.
3. Insert two AA batteries each into the keyboard (Optional when start
up with USB charger) and mouse; making sure that the polarity is
correct.
4. Make sure the power switch is set to ON.
Important:
1. Please start up the keyboard with the USB cable charger.
2. When fully charged and working under an environment with no
light absorption, the capacitors embedded within the keyboard will
supply enough power for continuous operation for approximately
five hours.
-1-

English
3. The batteries enclosed are used for back up power ONLY, when
working under a limited or no light source environment. (You can
auto switch to battery supply (ON/OFF switch) when capacitors are
do not have enough power)
4. When using the USB cable charger, the LED light on the keyboard
will be ON; and OFF when fully charged. It takes approximately 10
minutes to get the capacitors charged.
5. Although the mouse has been granted eye safety certification, we
strongly suggest you avoid direct eye contact with the laser lens.
Software Installation
1. Make sure that the mouse and keyboard are connected to the PC
properly
2. Put the CD driver into the disc drive
3. Follow the instructions on the screen to complete the software
installation
Replacing batteries
The mouse is equipped with a low battery indicator, batteries at low
charge result in a constant lit LED when using the mouse, so you need
to replace the batteries immediately.
-2-

English
ID Channel Setting
The channel ID is factory preset. The green LED (data transmission
indicator) will be lit constantly when the wireless device is in normal
operation. In case your wireless devices do not work, please reset the
ID channel by:
1. Press the connect button on the receiver and the LED will be
blinking for connection.
2. Press the connect button of the wireless device once within 20
seconds and observe if the LED light on the receiver has gone off.
If yes, it means the wireless device is ready for use.
Warning (Trouble shooting)
1. In case the wireless device was not connected when you set the ID
channel setting, check if you have installed the batteries with the
positive (+) and negative (-) polarity in the correct position, then
repeat the ID channel setting again.
2. For optimum performance, please make sure that the distance
between the wireless device and the dongle receiver does not
exceed 10M.
Cleaning on keyboard’s solar device
1. To clean the solar bezel, please use only silk or cotton materials
and gently wipe this area.
-3-
 Loading...