

Page 1
MM1.ⓖ.1-130605M
• Only use the pusher when pushing ingredients in.
• Do not adjust the lever during operation.
• While operating, do not try to pull ingredients out
with ngers, utensils, etc.
• Hard vegetables or fruits like carrots should be cut
into small pieces and fed slowly.
• Seeds should be removed from ingredients like
apples or lemons before inserting.
• Hard ingredients like nuts and seeds should be
avoided as they can cause damage.
• Grains like rice, beans, etc. should be boiled or
soaked overnight before use to prevent damage.
• Leafy greens are not suitable.
• Ice should not exceed 1 ½ inch cube size.
• Frozen fruits must be thawed before use (5 minutes
minimum).
CAUTION
Product Mincer
MINCER
FROZEN DESSERT MAKER
FOOD PROCESSOR
Enhance your cooking
variety with the Kuvings
Multi purpose Mincer!
MANUAL
This product is an attachment that works with Kuvings Silent Juicer’s base.
+
+
Page 2
Lid
Work Bowl
Juicing Screw
*same part from
Silent juicer
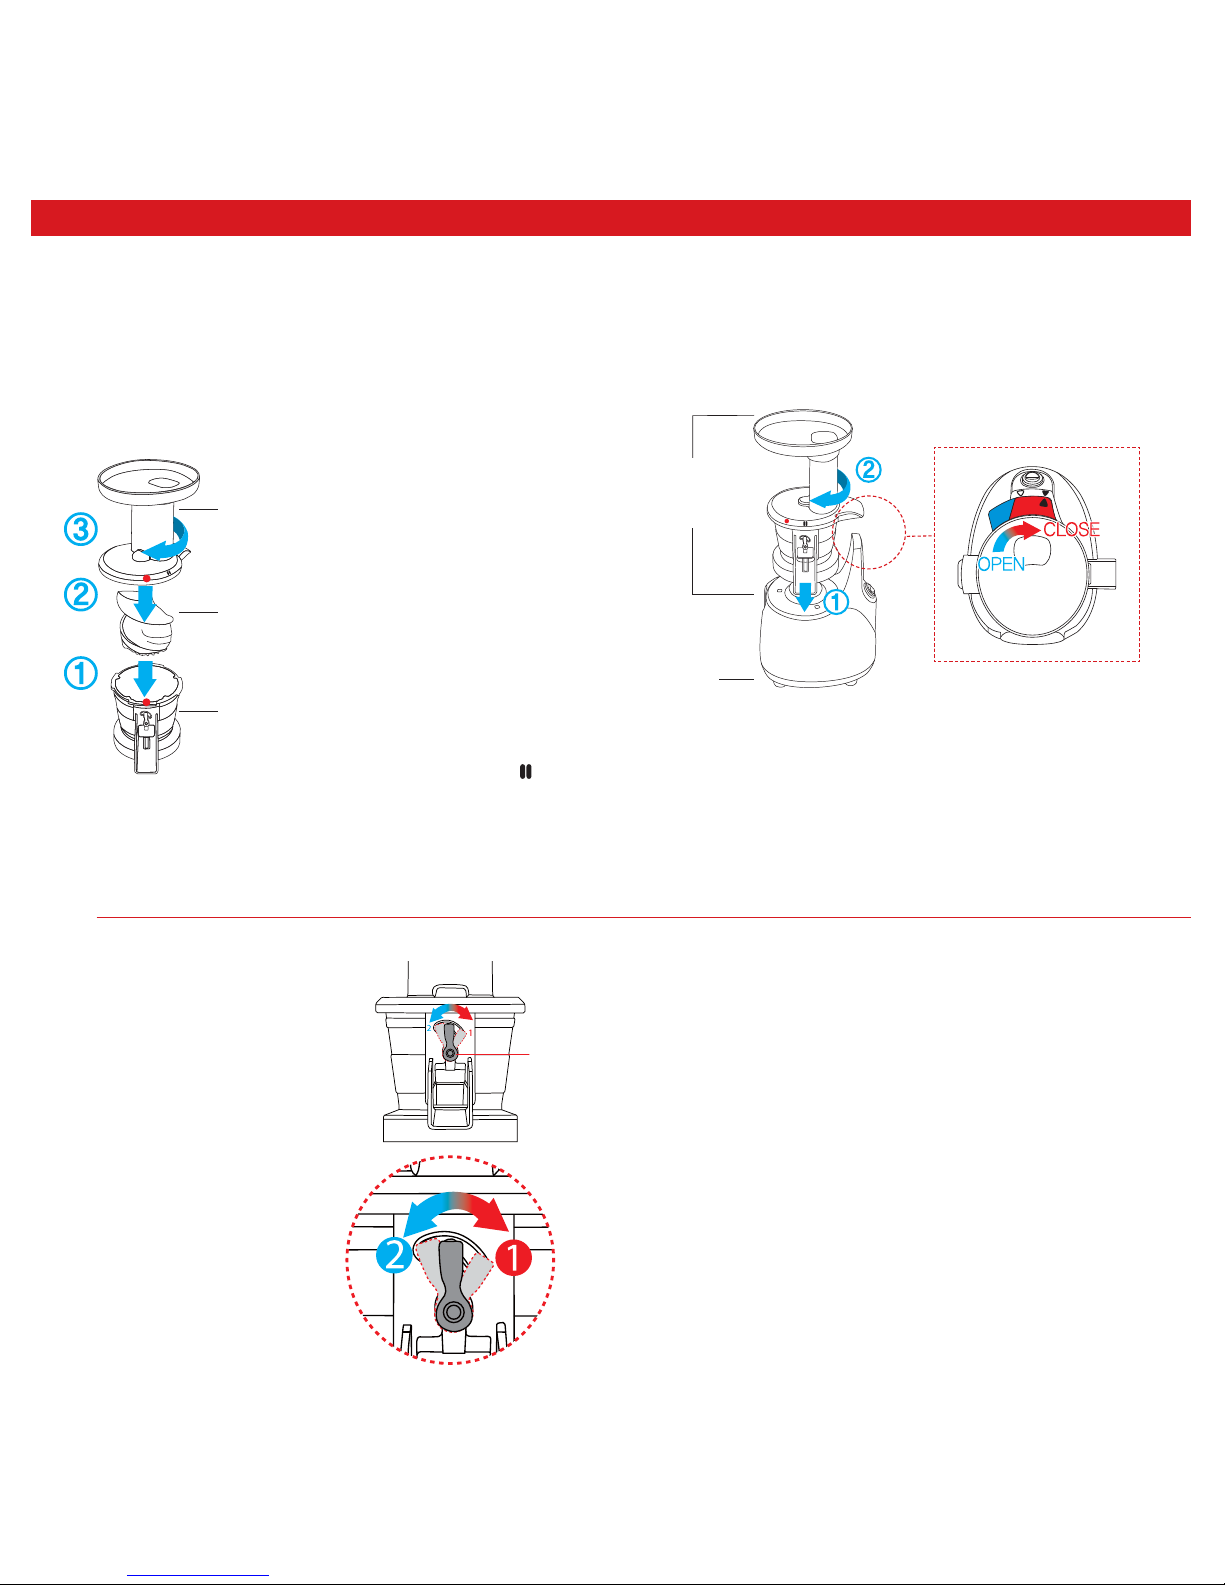
1. Insert and push down the
juicing screw into the work
bowl
2. Align the dots ●on the lid
and the work bowl. While
the dots ●are aligned,
place the lid on the work
bowl to combine the parts.
3. After the lid has been
correctly placed on the
work bowl, twist the lid
clockwise until it locks onto
the work bowl. (Align
symbol with●symbol)
Insert the juicing screw into the work bowl and
close the lid.
STEP 1 ▶
Attach the Mincer onto the base
STEP 2
▶
▼
• The lever unit can be disassembled for cleaning.
• After washing, please dry the lever before reassembly.
• Before using, make sure the lever is in the 1 or 2
position (depending on the ingredients used).
Tip |
1. Place the lever in between position 1 and 2 to be vertically upright.
2. Slide the lever unit down by pressing from the top, and then,
remove the lever unit by pushing inwards.
Disassembling the lever unit:
MANUAL
Switch the lever side to
side to adjust for di erent
ingredients.
Lever Position 1
Chopping into small pieces
Lever Position 2
Chopping into bigger
pieces (Moist ingredients)
STEP 3
Lever
1. Place the assembled attachment on the base ensuring the
down arrow ▼fon the lid is aligned with the up arrow △
on the base.
2. Turn clockwise aligning the down arrow ▼ on the lid with
the up arrow ▲ on the base.
MINCER
Base
Dissemble is opposite of Assemble
 Loading...