

Owner’s Manual
English/Arabic
CAUTION
SAVE AND READ THESE IMPORTANT INSTRUCTIONS
Read all instructions carefully before setting up and operating this unit. This manual was
designed to provide you with important information needed to setup, operate, maintain,
and trouble-shoot your cooler. Failure to follow these instructions may damage and/or
impair its operation and void the warranty.
1
Model PACKA54
and PACKA542205060
Port-A-Cool, LLC • 709 Southview Circle • Center, TX 75935
www.kuulaire.com • 1-888-999-6511

2
WARNINGS AND SAFETY RULES
WARNINGS AND SAFETY RULES
▲
!
LOCATION
Introduction
The PACKA54 and PACKA542205060 feature a 3-speed
fan and automatic timer that can be programmed for
10 to 990 minutes.
The automatic louver sweep function provides
directional control and the remote control
!
▲
(batteries
not included)
PACKA542205060 portable evaporative cooler is the latest
in evaporative cooling technology from Port-A-Cool, LLC,
manufacturer of world-class portable cooling units, for
industrial and commercial applications.
, provides convenience. The PACKA54 and
Basic safety precautions should always be followed when using any electrical appliance.
1. This unit is intended for indoor use. Any other use is
not recommended and may cause fire, electric hazard,
or injury to persons or property, and may void the
warranty.
2. Unplug the unit from power outlet when filling and
refilling water reservoir.
3. Unplug the unit from power outlet when moving the
unit.
4. Unplug the unit from power outlet when cleaning or
servicing.
5. Do not use the unit in areas where gasoline, paint or
any other flammable chemicals are stored.
6. Extreme caution should be taken when used near
children and the elderly. The unit should not be left
unattended for any extended period of time while in
operation.
7. Do not let children play with any packaging material.
8. Do not operate the unit with a damaged power cord.
9. Do not attempt to repair or adjust any electrical or
mechanical functions of the unit.
10. The PACKA54 unit should run on 110-120v 60 only and
PACKA542205060 on 220-240V 50/60Hz AC only.
11. Do not cover unit air inlet or air outlet openings.
12. This product is not intended for use in wet or damp
locations.
13. When not in use, drain the water from the tank and
store the unit in a dry location.
14. Do not run power cord under carpeting or cover with
rugs or runners. Arrange the cord away from areas
where it may be tripped over.
15. Do not use the unit with an extension cable.
16. Do not insert or allow objects to enter the air outlet
opening, as this may cause damage to the blower and
may void the warranty.
17. Use only fresh water to fill the water reservoir. The use
of air fresheners or cleaners is not recommended as it
may damage the unit and void the warranty.
18. Drain the reservoir once every week to reduce calcium
saturation.
19. 19. The unit is built with a direct drive pump. The ‘Cool’
function will stop when the water reservoir is not filled
with water.
20. Do not use this appliance with any solid-state speed
control device.
21. If the unit is damaged or malfunctioning, discontinue
operation and refer to the trouble-shooting section
and/or contact a service technician.
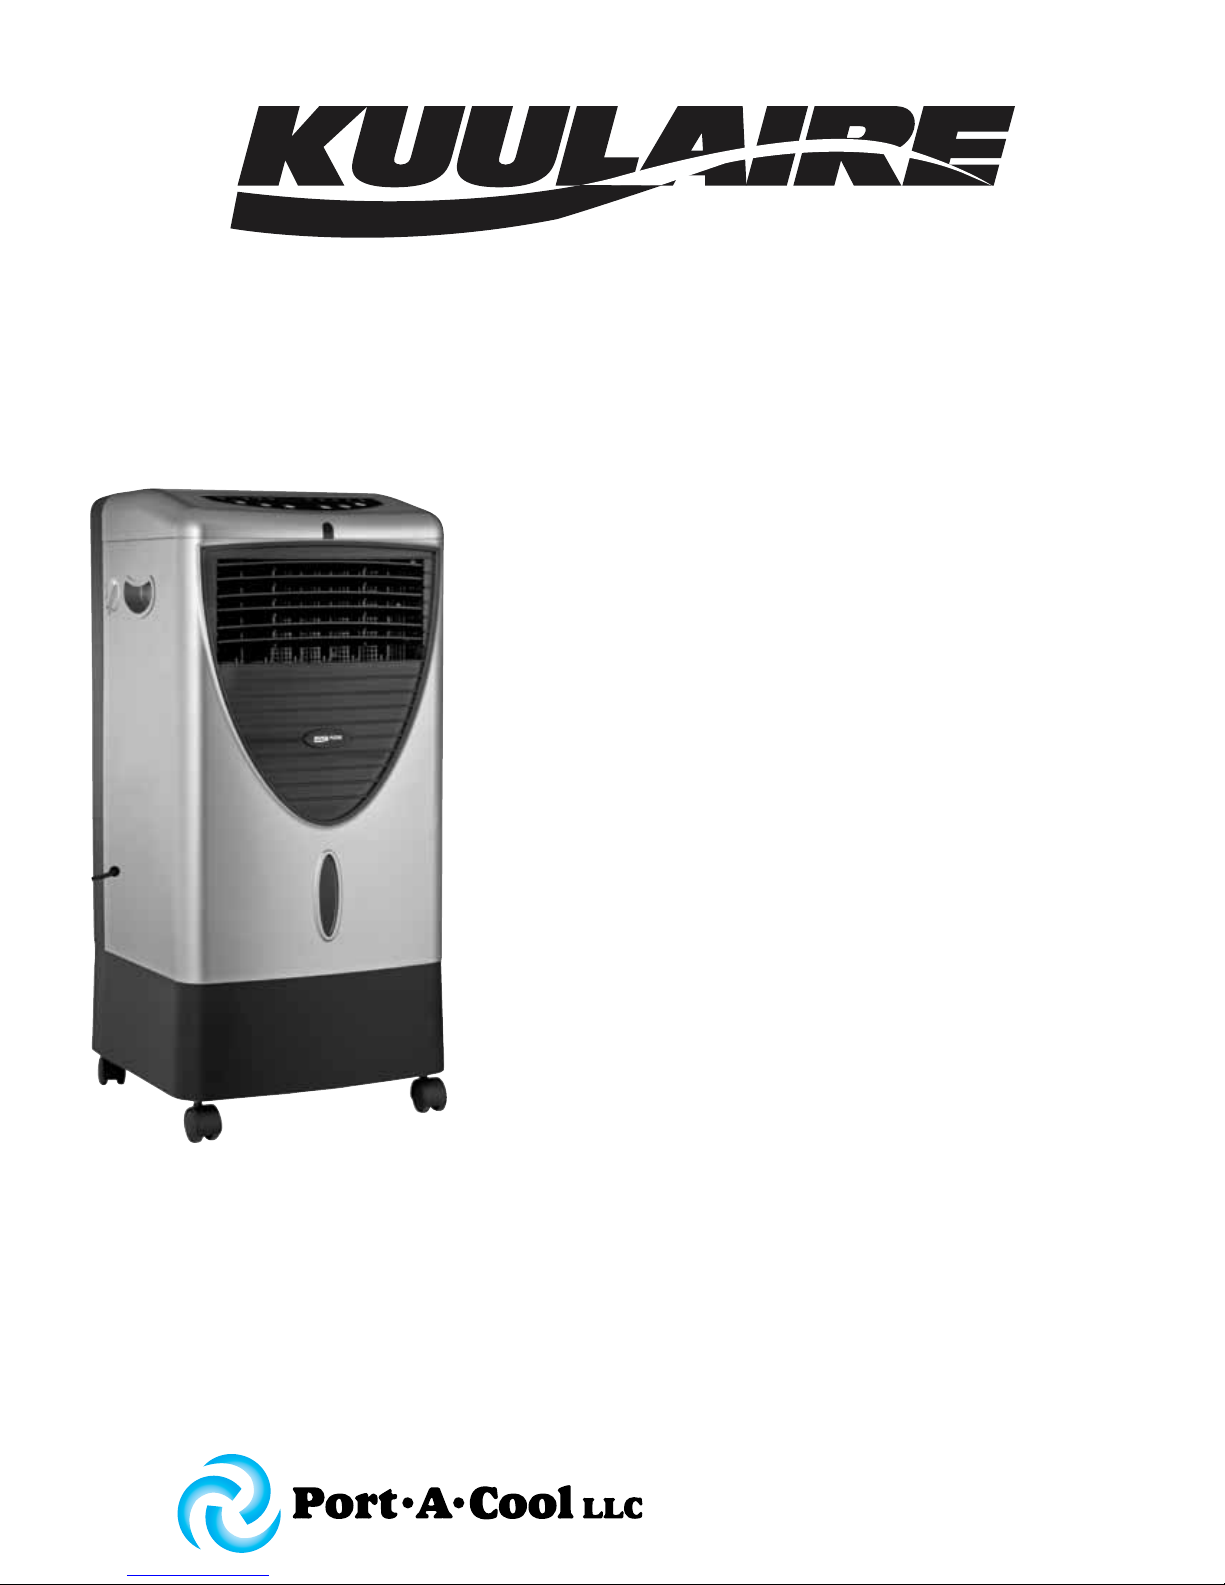
PARTS DESCRIPTION
Water Flow
4
5
6
1
1. Control Panel
2. Water Level Gauge
3. Base
4. Water Flow Control
5. Rear Cover
2
3
6. Casters
Port-A-Cool, LLC • 709 Southview Circle • Center, TX 75935
www.kuulaire.com • 1-888-999-6511
WARNINGS AND SAFETY RULES
▲
!
LOCATION
PARTS DESCRIPTION
ELECTRICAL
ASSEMBLY INSTRUCTIONS
WARRANTY
CLEANING AND MAINTENANCE
TECHNICAL SPECIFICATIONS
TROUBLESHOOTING
REMOTE CONTROL
WARNINGS AND SAFETY RULES
▲
!
LOCATION
PARTS DESCRIPTION
ELECTRICAL
ASSEMBLY INSTRUCTIONS
WARRANTY
CLEANING AND MAINTENANCE
TECHNICAL SPECIFICATIONS
TROUBLESHOOTING
USE AND OPERATION
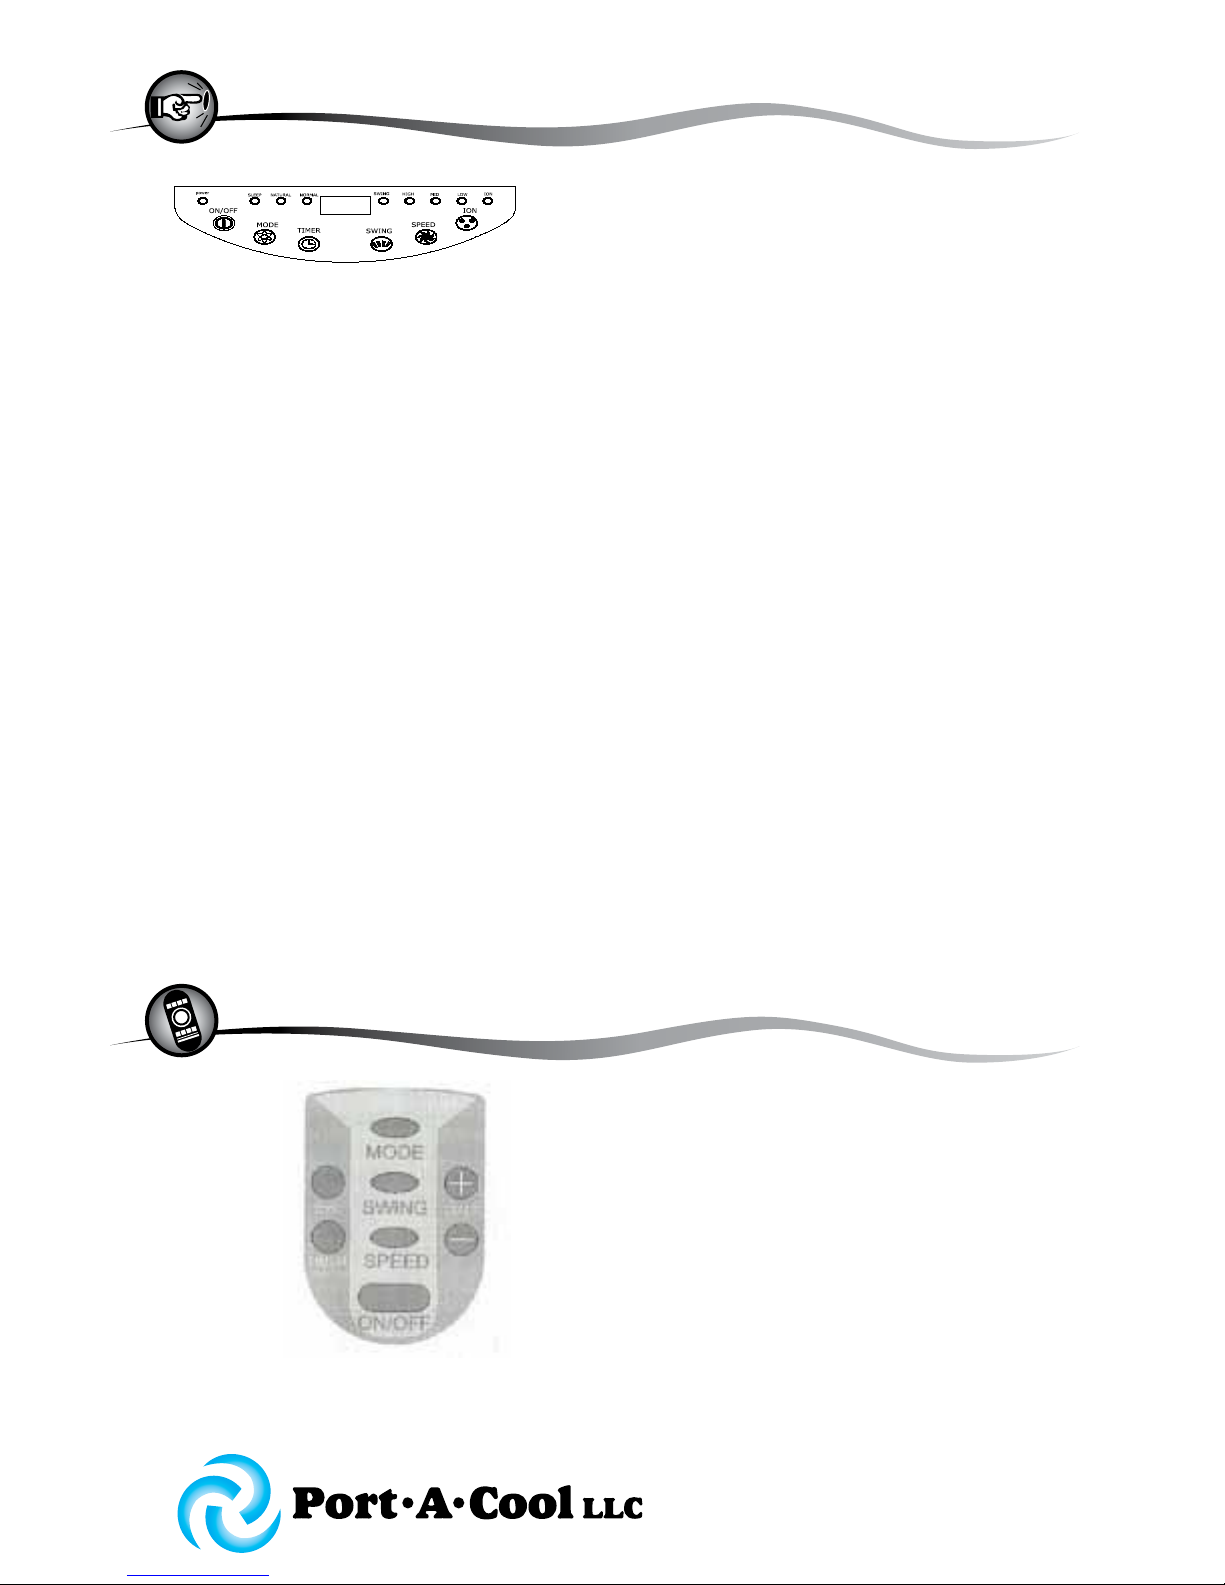
ON/OFF
1. Connect the cord to a power outlet. Alternating
amber/red pilot light will start flashing and the display
is animated. The unit is in STANDBY.
2. Press the ON/OFF button to turn the unit on. Indicator
light will illuminate. To turn off, press
the POWER button again.
When the ON/OFF button is pressed, the cooler will start
at level 2 speed (medium) then drops to level 1 speed
(Low)
SPEED
Press the SPEED button to select the desired fan speed.
The selected fan speed indicator LED light
will light up. Fan speed settings are 1( LOW) - 2
(MEDIUM) - 3 (HIGH).
MODE:
Press the MODE button to select the desired fan mode.
The selected fan mode indicator LED light
will light up. When SLEEP or NATURAL is selected, air
speed will randomly vary.
COOL
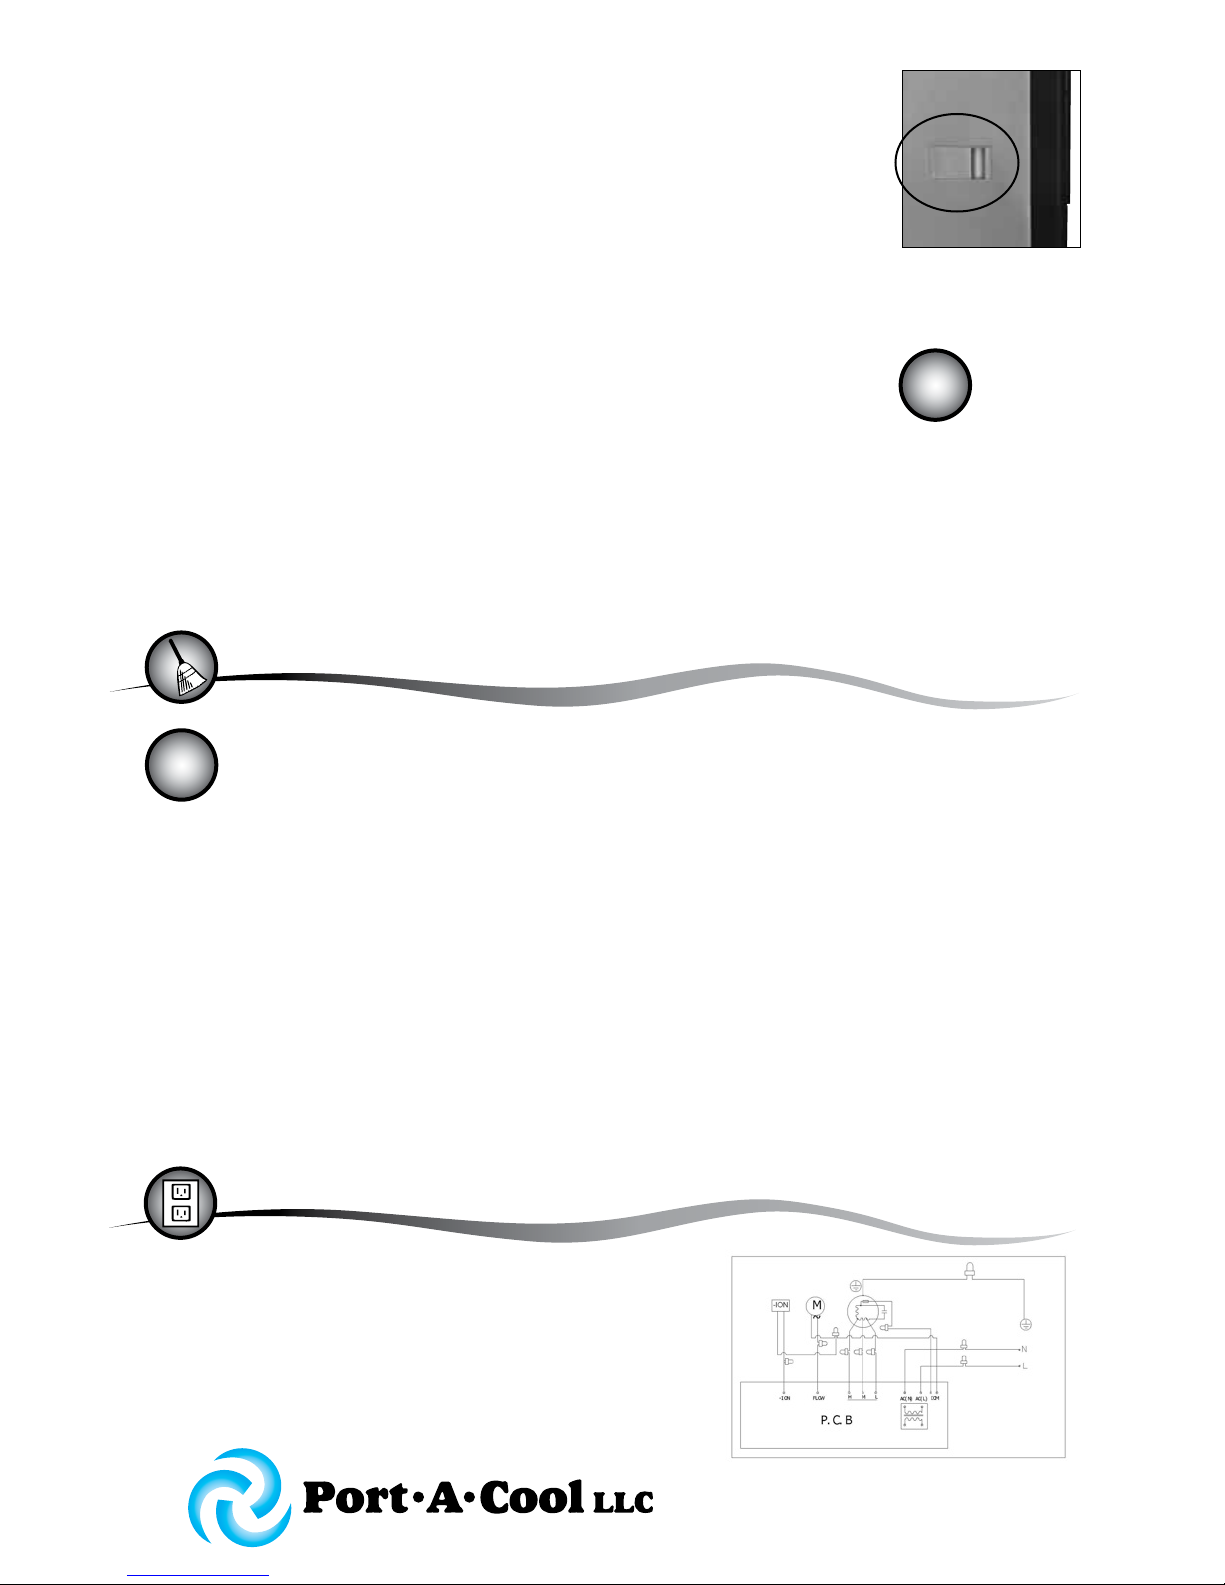
3
To use the unit as an evaporative cooler, adjust the
WATER FLOW CONTROL KNOB on the side
panel. Water will be pumped up to the water
distributor compartment and start wetting out the
cellulose cooling media in the rear of the unit. After
approximately three minutes, as the pad becomes
saturated, the air from the outlet should be cool. Turn
the knob to OFF position when ‘Cool’ function is not
desired.
SWING:
Press the SWING button to direct the air stream. The
vertical louvers will begin to move automatically
from side to side. The indicator LED will come on. To
adjust the vertical direction of air flow,
adjust the horizontal louvers manually.
TIMER
The unit comes with an 990 minutes timer. To set, press
the TIMER button to the desired operation
time. The selected time will be displayed. When the
pre-selected time has elapsed, the unit will
automatically shut off.
ION:
Press ION button once to start. LED light will
illuminate. Unit will release negative ions for air
purifying function. Press again to stop the function.
REMOTE CONTROL
ON/OFF – start or turn off the unit
Speed – 1 (Low)/2 (Medium)/3 (High)
Swing – automatic swing of louvers
Mode – Sleep/Natural/Normal
Timer – timer function up to 990 minutes
Port-A-Cool, LLC • 709 Southview Circle • Center, TX 75935
www.kuulaire.com • 1-888-999-6511
WARNINGS AND SAFETY RULES
▲
!
LOCATION
PARTS DESCRIPTION
ELECTRICAL
ASSEMBLY INSTRUCTIONS
WARRANTY
CLEANING AND MAINTENANCE
TECHNICAL SPECIFICATIONS
TROUBLESHOOTING
REMOTE CONTROL
USE AND OPERATION
WARNINGS AND SAFETY RULES
▲
!
LOCATION
PARTS DESCRIPTION
ELECTRICAL
ASSEMBLY INSTRUCTIONS
WARRANTY
CLEANING AND MAINTENANCE
TECHNICAL SPECIFICATIONS
TROUBLESHOOTING
REMOTE CONTROL
USE AND OPERATION
WARNINGS AND SAFETY RULES
▲
!
LOCATION
PARTS DESCRIPTION
ELECTRICAL
ASSEMBLY INSTRUCTIONS
WARRANTY
TROUBLESHOOTING
WARNINGS AND SAFETY RULES
▲
!
LOCATION
PARTS DESCRIPTION
4
Warning: Unplug the unit from power outlet prior to moving or servicing, or filling or
draining the water reservoir.
Filling the Reservoir with Water
The water fill door is located on the side of the unit. Open the water fill door and pour
water carefully into the reservoir. Pay attention to the water level indicator to avoid
overfilling the unit. The capacity of the reservoir is 20 liter. You can also fill water from
the top compartment.
Draining the Reservoir
Move the unit to a location where water can be disposed of safely. Remove the drain plug
which is located at the back of the unit to release water from the reservoir. Once it is
completely drained, replace the drain plug. The unit is ready to be filled with fresh water.
Adjusting Humidity Level at the Outlet
The unit is equipped with a water flow regulator which is located on the side of the unit.
You can adjust humidity and cooling level of the air coming out of the vent by turning the
regulator from OFF to MAX. MAX will allow for full flow of water to the pads and provide
maximum cooling. Turn to OFF position when ‘Cool’ function is not required.
Side Water Fill
WARNING:
!
▲
Unplug the unit
from power outlet prior
to moving or servicing,
or filling or draining the
water reservoir.
CLEANING AND MAINTENANCE
WARNING: Unplug the unit from power
!
▲
outlet prior to moving or servicing, or
filling or draining the water reservoir.
Dampen a clean cloth with water and use it on the
exterior of the unit to remove any dust or dirt.
Never use harsh detergents, solvents, and corrosive
cleaners to clean the unit. When not in use, drain
the water reservoir and store the unit in an area where
it is dry and out of sunlight.
Maintenance:
Regular draining, at least once each week, will
decrease the water mineral build up and extend the life
ELECTRICAL
of the rigid media pad. A damp cloth can be used to
remove calcium build-up inside and
outside of the unit. When operating the unit, turn
Water Flow Control Knob to OFF position to dry
out the pad. The dust filter/cover can be removed
easily and can be cleaned weekly. The inside of
the water reservoir can be cleaned once or twice in a
season to maintain air quality.
Deeper Clean:
Remove the screw holding the dust filter/cover. You
now can take out the cooling media for cleaning. Wash
the dust filer/cover and honey comb media pad in
clean water.
Model No. PACKA54
(110-120V 60Hz, 150W)
Model No. PACKA542205060
(220-240V 50/60Hz, 150W)
Water Tank Capacity 20 Liters
Dimensions
75cm H x 41cm W x 39cm D
Shipping Weight 12.0 kg
Port-A-Cool, LLC • 709 Southview Circle • Center, TX 75935
www.kuulaire.com • 1-888-999-6511

WARNINGS AND SAFETY RULES
▲
!
LOCATION
PARTS DESCRIPTION
ELECTRICAL
ASSEMBLY INSTRUCTIONS
TROUBLESHOOTING
Symptom Possible Cause Possible Solution
No discharge of air Cord is not plugged in Make sure cord is plugged in and try to turn the unit on pressing buttons
Power is not on on control panel and remote control. Check the circuit breaker or check
Circuit breaker/GFCI GFCI reset button.
Not cooling Water flow regulator at low setting Change the water regulator setting to MAX. Check the water level
and turn on the pump by pressing COOL button.
Low/No water Check Water
Odor emission Brand new unit Brand new media will initially have an odor which will dissipate within a
Old unit with algae week of initial use. If the unit is not new, there may be an algae issue
– replace the pad and maintain regularly.
Water droplets coming Calcium saturated water Drain water, deep clean and clean the media.
out of air outlet Clogged media Media may need to be replaced.
The unit will not respond Damaged PCB Try with remote control. If the unit responds, PCB board fasteners loose.
Moisture in PCB If neither control panel nor remote control command works, PCB board
Remote control batteries damaged - contact service technician.
5
Try using remote control to see if the unit responds. If the unit responds
briefly, likely cause is the moisture in the PCB. Turn off unit by unplugging
it from the power. Drain, clean and dry the unit, possibly replace the media.
Refill it with fresh water.
Check Batteries
Unit is making noise Calcium build up in blower Deep clean the unit -remove calcium debris. If the water level is near
Low or no water in the reservoir empty pump will make loud noise.
The unit will not Damaged PCB Try to use remote control to see if the unit responds
turn off Remote Control Batteries Check batteries
To obtain a current list of Replacement Parts, visit us
online at www.port-a-coolparts.com.
REPLACEMENT PARTS
Port-A-Cool, LLC • 709 Southview Circle • Center, TX 75935
www.kuulaire.com • 1-888-999-6511

ءاﻮـــــﻬﻟا دﺮﺒﻣﻞــــﻳدﻮﻣ :KA54
Contents:
ﻟا ﻞـــــﻴﻟدﻤﻌﺘﺴﻤﻞـــــــ
ﻪﻟﺎﻤﻌﺘﺳا ءﺎﻨﺛأ ﻚﻬﺟاﻮﺗ ﻲﺘﻟا ﻞآﺎﺸﻤﻟا ﻞﺣو ﻪﺘﻧﺎﻴﺻو ﻪﻟﺎﻤﻌﺘﺳا .ﻚﻣاﺰﺘﻟا مﺪﻋ ﻩﺬه عﺎﺒﺗﺈﺑ
A: Product Introduction ………….…………………………….…..… 1
B: Safety Information …………. ………………………………..…… 2
C: Parts …………………………..…………………………………… 2
D: Control Panel (Usage) …………………………………………..... 3
E: Remote Control ……………….…………………………..……… 4
F: Filling the Reservoir ……………………………………………….. 5
G: Cleaning and Maintenance ……. …………………..…………….. 6
H: Technical Specifications …………………………………………. 6
I: Trouble Shooting …………………………………………………. 7
A: PRODUCT INTRODUCTION
KA54 Air cooler is our latest design with microcomputer
control system. It can lower outlet temperature, freshen the air
with equipped ion, humidify the air through the principle of water
evaporation and melting ice. LED panel makes it luxurious and
easy to use. Also equipped with filter net and honeycomb pad to
remove odor and dust. This unit will provide you a comfortable
and healthy environment.
:
ﺮﻴﺨﺒﺘﻟﺎﺑ ﻞﻤﻌﻳ ءاﻮه دﺮﺒﻣ
ﻞــﻳدﻮﻣKA54
220-240 ﺖﻟﻮﭬ 50/60ﺰﺗﺮه
لﺎﻤﻌﺘﺳﻹا تادﺎﺷرإ
تﺎﻤﻴﻠﻌﺘﻟا ةءاﺮﻗ ءﺎﺟﺮﻟا ﺔﻳﺎﻨﻌﺑ ﺎﻬﻋﺎﺒﺗاوﺎﻬﻴﻠﻋ ﺔﻈﻓﺎﺤﻤﻟاو زﺎﻬﺠﻟا اﺬه لﺎﻤﻌﺘﺳا ﻞﺒﻗ .
ﻠﻌﻤﺑ كﺪﻳوﺰﺘﻟ ﺐﱢﻴﺘﻜﻟا اﺬه ﻢﻤﺻ ﺪﻘﻟ ﺔﻴﻔﻴآ ﻰﻠﻋ ﻚﺗﺪﻋﺎﺴﻤﻟ ﺔﻴﻤهﻷا ﻲﻓ ﺔﻳﺎﻏ تﺎﻣﻮ
ﺞﺘﻨﻤﻟا ﻒﻠﺗ ﻰﻟإ يدﺆﻳ ﺪﻗ تادﺎﺷرﻹاا ﻦﻣ ﻚﻧﺎﻣﺮﺣونﺎﻤﻀﻟ.
تﺎﻳﻮﺘﺤﻤﻟا:
ﺞﺘﻨﻤﻟﺎﺑ ﻒﻳﺮﻌﺘﻟا................... ............1
تادﺎﺷرإ ﺔﻣﻼﺴﻠﻟ .............................. 2
ءاﺰﺟﻷا ........................................2
ﻢﻜﺤﺘﻟا ﺔﺣﻮﻟ)لﺎﻤﻌﺘﺳﻻا (.............. ........3
ﺪﻌﺑ ﻦﻣ ﻢﻜﺤﺘﻟا زﺎﻬﺟ ..........................4
ناﺰﺨﻟا ﺔﺌﺒﻌﺗ ........................ ..........5
ﺔﻧﺎﻴﺼﻟاو ﺔﻓﺎﻈﻨﻟا .............................. 6
ﺔﻴﻨﻔﻟا تﺎﻔﺻاﻮﻤﻟا.................. ............6
ﺢﻴﻠﺼﺗ لﺎﻄﻋﻷا.. ............................7
ﺞﺘﻨﻤﻟﺎﺑ ﻒﻳﺮﻌﺘﻟا:
ﻞﻳدﻮﻣ ءاﻮﻬﻟا دﺮﺒﻣ نإKA54 ﺎﻨﺗﺎﻤﻴﻤﺼﺗ ثﺪﺣأ ﻮه ﻞﻤﻌﻳ
ﺮﻴﻐﺻ ﺮﺗﻮﻴﺒﻤآ ﺔﻄﺳاﻮﺑ ﻢﻜﺤﺗ مﺎﻈﻨﺑ . ﺔﺟرد ﺾﻴﻔﺨﺗ ﻪﻨﻜﻤﻳ
ﻪﺒﻴﻃﺮﺗو ﻦﻳﺄﺘﻟا مﺎﻈﻨﺑ ءاﻮﻬﻟا ﺪﻳﺪﺠﺗو ءﺎﺑﺮﻬﻜﻟا ﺬﺧﺄﻣ ةراﺮﺣ
ﺞﻠﺜﻟا ﺔﺑاذإو ءﺎﻤﻟا ﺮﻴﺨﺒﺘﺑ . ﺔﺣﻮﻟ ﻪﺑو ﻢﻜﺤﺗ دﻮﻳاﺪﻟا مﺎﻈﻨﺑ ﻞﻤﻌﺗ
ءﻮﻀﻠﻟ ﻞﺳﺮﻤﻟا
LED ﺴﻳ ﺎﻤﻣ ﻬ ﻞﻪﻟﺎﻤﻌﺘﺳا. دوﺰﻣ ﻚﻟﺬآ
ةدﺎﺳوو ﺔﻴﻘﻨﺗ ﺔﻜﺒﺸﺑﻠﻟﺮﻘصﻲﻠﺴﻌﻟا ﺢﺋاوﺮﻟاو رﺎﺒﻐﻟا ﺔﻟازﻹ
ﺔﻬﻳﺮﻜﻟا .ﺔﺤﻳﺮﻣو ﺔﻴﺤﺻ ﺔﺌﻴﺑ ﻚﻟ ﺮﻓﻮﻳو.
1

ﺷراﺎادﺔﻣﻼﺴﻠﻟ ﺔﻤﻬﻣ ت
ﺔﻣﻼﺴﻟا تﺎﻃﺎﻴﺘﺣا عﺎﺒﺗإ ﺎﻣود ﻲﻐﺒﻨﻳ ، ﺔﻴﺋﺎﺑﺮﻬﻜﻟا ةﺰﻬﺟﻸﻟ ﻚﻣاﺪﺨﺘﺳا ىﺪﻟﺔﻴﺳﺎﺳﻷا ﻲﻠﻳ ﺎﻣ ﻦﻤﻀﺘﺗ ﻲﺘﻟاو :
1 : ﻲﻠﺧاﺪﻟا لﺎﻤﻌﺘﺳﻼﻟ زﺎﻬﺠﻟا اﺬه)ﻲﻟﺰﻨﻤﻟا (ﻖﻳﺮﺤﻟا ﺐﺒﺴﻳ ﺪﻗ ﺮﺧﺁ لﺎﻤﻌﺘﺳا يأ ﻂﻘﻓ.
2 :ﻟا ﺔﺌﺒﻌﺗ ةدﺎﻋإو ﺔﺌﺒﻌﺗ ﺪﻨﻋ ﻲﺋﺎﺑﺮﻬﻜﻟا رﺎﻴﺘﻟا ﻦﻋ ﺲﺑﺎﻘﻟا ﻞﺼﻓأناﺰﺨ.
3 :زﺎﻬﺠﻟا ﻚﻳﺮﺤﺗ ﺪﻨﻋ ﻲﺋﺎﺑﺮﻬﻜﻟا رﺎﻴﺘﻟا ﻦﻋ ﺲﺑﺎﻘﻟا ﻞﺼﻓأ.
4 :ﺔﻧﺎﻴﺼﻟا وأ ﺔﻓﺎﻈﻨﻟا ﺪﻨﻋ ﻲﺋﺎﺑﺮﻬﻜﻟا رﺎﻴﺘﻟا ﻦﻋ ﺲﺑﺎﻘﻟا ﻞﺼﻓأ.
5 : ﻲﺘﻟا ﻦآ
ﺎﻣﻷا ﻲﻓ زﺎﻬﺠﻟا اﺬ
ه ﻞﻤﻌﺘﺴﺗ ﻻ ﻰﻠﻋ يﻮﺘﺤﺗلﺎﻌﺘﺷﻼﻟ ﺔﻠﺑﺎﻗ ةدﺎﻣ يأ وأ نﺎهد وأ ﻦﻴﻟوزﺎﺟ.
6 :ﺑ زﺎﻬﺠﻟا لﺎﻤﻌﺘﺳا ﺪﻨﻋ ﺪﻳﺪﺸﻟا رﺬﺤﻟا ﻲﺧﻮﺗ ﺐﺠﻳﻦﺴﻟا رﺎﺒآو لﺎﻔﻃﻷا ﻦﻣ بﺮﻘﻟﺎ . ﺔﺒﻗاﺮﻣ نوﺪﺑ ﻪآﺮﺗ ﻦﻣ رﺬﺤﻳو زﺎﻬﺠﻟا ﻰﻠﻋ فاﺮﺷﻹا ﺐﺠﻳ
ﻞﻴﻐﺸﺗ ﺔﻟﺎﺣ ﻲﻓ نﻮﻜﻳ ﺎﻣﺪﻨﻋ.
7 :ﻒﻴﻠﻐﺗ وأ ﺔﺌﺒﻌﺗ داﻮﻣ يﺄﺑ نﻮﺒﻌﻠﻳ لﺎﻔﻃﻷا كﺮﺘﺗ ﻻ.
8 :ﺎﻔﻟﺎﺗ ﻲﺋﺎﺑﺮﻬﻜﻟا ﻚﻠﺴﻟا نﺎآ اذإ زﺎﻬﺠﻟا ﻞﻴﻐﺸﺗ ﻰﻠﻋ ﻞﻤﻌﺗ ﻻ.
9 : ﻲﺋﺎﺑﺮﻬآ ءا
دأ يأ ﻂﺒﺿ وأ ﺔﻧﺎﻴﺻ لوﺎﺤﺗ ﻻزﺎﻬﺠﻟا اﺬه ﻲﻓ ﻲﻜﻴﻧﺎﻜﻴﻣ وأ.
10 : ﻰﻠﻋ زﺎﻬﺠﻟا اﺬه ﻞﻴﻐﺸﺗ ﺐﺠﻳ220 – 240 ،ﺖﻟﻮﻓ 50 / 60 ﻂﻘﻓ ﺰﺗﺮه )ﺮﺷ
ﺎﺒﻣ رﺎﻴﺗ.(
11 :زﺎﻬﺠﻟا اﺬﻬﺑ ﺔﺻﺎﺨﻟا ءاﻮﻬﻟا جرﺎﺨﻣو ﻞﺧاﺪﻣ ﺔﻴﻄﻐﺘﺑ ﻢﻘﺗ ﻻ.
12 :ﺔﺒﻃﺮﻟا وأ ﺔﻠﺘﺒﻤﻟا ﻦآﺎﻣﻷا ﻲﻓ زﺎﻬﺠﻟا اﺬه ﻞﻴﻐﺸﺘﺑ ﻢﻘﺗ ﻻ.
13 : ﻎﻳﺮﻔﺗ ﺐﺠﻳ ،زﺎﻬﺠﻟا ﻞﻴﻐ
ﺸﺗ مﺪﻋ ﺪﻨﻋفﺎﺟ نﺎﻜﻣ ﻲﻓ ﻪﻈﻔﺣو ءﺎﻤﻟا ﻦﻣ ناﺰﺨﻟا.
14
:ةﺮﻴﺼﺣ وأ ةدﺎﺠﺳ ﺖﺤﺗ ﻲﺋﺎﺑﺮﻬﻜﻟا ﻚﻠﺴﻟا ﻞﻴ
ﺻﻮﺘﺑ ﻢﻘﺗ ﻻ . ﺪﻗ نﺎﻜﻣ يأ ﻦﻋ ﻩدﺎﻌﺑﺈﺑ ﻢﻗﻪﻴﻓ ثﺪﺤﻳﺮﺜﻌﺘﻟا ﺔﻠﻗﺮﻌﻟا وأ .
15 :زﺎﻬﺠﻟا اﺬه ﻊﻣ تﻼﺻو ﻞﻤﻌﺘﺴﺗ ﻻ.
16 : خﺎﻔﻨﻣ ﻒﻠﺗ ﻰﻟإ يدﺆﻳ ﺪﻗ ﻚﻟذ نﻷ ءاﻮﻬﻟا ﺬﻓﺎﻨﻣ ﻰﻟإ ﻞﺧﺪﺗ ةدﺎﻣ يأ عﺪﺗ وأ ﻞﺧﺪﺗ ﻻنﺎﻤﻀﻟا ﻲﻐﻠﻴﻓ ءاﻮﻬﻟا.
17 :ءﺎﻤﻟا ناﺰﺧ ﺔﺌﺒﻌﺘﻟ ﻂﻘﻓ بﺬﻋ ءﺎﻣ ﻞﻤﻌﺘﺳا .نﺎﻤﻀﻟا ﻲﻐﻠﻴﻓ زﺎﻬﺠﻟا ﻒﻠﺗ ﻰﻟإ ﻚﻟذ يدﺆﻳ ﺪﻘﻓ ءاﻮﻬﻟا ﺮﻄﻌﻣ لﺎﻤﻌﺘﺳﺈﺑ ﻲﺻﻮﻳ ﻻ .
18 :مﻮﻴﺴﻟﺎﻜﻟﺎﺑ ﻊﺒﺸﺘﻟا ﻞﻴﻠﻘﺘﻟ عﻮﺒﺳﻹا ﻲﻓ ةﺮﻣ ناﺰﺨﻟا ﻦﻣ ءﺎﻤﻟا ﻒﻳﺮﺼﺘﺑ ﻢﻗ.
19 : اﺬﻟ كﺮﺤﻤﻟﺎﺑ ةﺮﺷﺎﺒﻣ ﺔﻠﺻﻮﻣ ﺔﺨﻀﻤﺑ دوﺰﻣ زﺎﻬﺠﻟا نإءﺎﻤﻟﺎﺑ ناﺰﺨﻟا ﺔﺌﺒﻌﺗ دﺎﻌﺗ ﻢﻟ اذ
إ ﻞﻤﻌﻳ ﻻ ﺪﻳﺮﺒﺘﻟا نﺈﻓ.
20 :زﺎﻬﺠﻟا اﺬ
ه ﺔﻋﺮﺳ ﻲﻓ ﻢﻜﺤﺘﻠﻟ ﺐﻠﺻ زﺎﻬﺟ يأ ﻞﻤﻌﺘﺴﺗ ﻻ.
21 :و لﺎﻄﻋﻷا حﻼﺻإ ﻢﺴﻗ ﻰﻟإ ﺮﻈﻧاو ﻪﻟﺎﻤﻌﺘﺳا ﻦﻋ ﻒﻗﻮﺗ ،ءادﻷا ﻒﻴﻌﺿ وأ ًﺎﻔﻟﺎﺗ زﺎﻬﺠﻟا نﺎآ اذإ/ﺔﻣﺪﺧ ﻲﻨﻓ ﻊﺟار وأ .
ءاﺰـﺟﻷا
1
11
2
10
9
3
8
7
4
6
5
1 :يﻮﻠﻌﻟا ءﺎﻄﻐﻟا 2 :ﻲﻓ ﻢﻜﺤﺘﻟا رزﻖﻓﺪﺗ ﻟا ﻤءﺎ 3 :ﻦﻤﻳﻷا حﻮﻠﻟا 4 :ﻲﻔﻠﺨﻟا ءﺎﻄﻐﻟا
5 :تﻼﺠﻌﻟا 6 :ةﺪﻋﺎﻘﻟا 7 :ءﺎﻤﻟا ىﻮ
ﺘﺴﻣ سﺎﻴﻘﻣ 8 :ﺮﺴﻳﻷا حﻮﻠﻟا
9 :ﺔﻠ
ﻳﻮﻃ ﻖﺋﺎﻗر 10 :ةﺮﻴﺼﻗ ﻖﺋﺎﻗر 11 :ﻢﻜﺤﺘﻟا ﺔﺣﻮﻟ
ﺣﻮﻟـﻜﺤﺘﻟا ﺔـﻢ) لﺎﻤﻌﺘﺳﻻا(
7 8 9 10 11 12 13 14 15
2

ﺷراﺎادﺔﻣﻼﺴﻠﻟ ﺔﻤﻬﻣ ت
ﺔﻣﻼﺴﻟا تﺎﻃﺎﻴﺘﺣا عﺎﺒﺗإ ﺎﻣود ﻲﻐﺒﻨﻳ ، ﺔﻴﺋﺎﺑﺮﻬﻜﻟا ةﺰﻬﺟﻸﻟ ﻚﻣاﺪﺨﺘﺳا ىﺪﻟﺔﻴﺳﺎﺳﻷا ﻲﻠﻳ ﺎﻣ ﻦﻤﻀﺘﺗ ﻲﺘﻟاو :
1 : ﻲﻠﺧاﺪﻟا لﺎﻤﻌﺘﺳﻼﻟ زﺎﻬﺠﻟا اﺬه)ﻲﻟﺰﻨﻤﻟا (ﻖﻳﺮﺤﻟا ﺐﺒﺴﻳ ﺪﻗ ﺮﺧﺁ لﺎﻤﻌﺘﺳا يأ ﻂﻘﻓ.
2 :ﻟا ﺔﺌﺒﻌﺗ ةدﺎﻋإو ﺔﺌﺒﻌﺗ ﺪﻨﻋ ﻲﺋﺎﺑﺮﻬﻜﻟا رﺎﻴﺘﻟا ﻦﻋ ﺲﺑﺎﻘﻟا ﻞﺼﻓأناﺰﺨ.
3 :زﺎﻬﺠﻟا ﻚﻳﺮﺤﺗ ﺪﻨﻋ ﻲﺋﺎﺑﺮﻬﻜﻟا رﺎﻴﺘﻟا ﻦﻋ ﺲﺑﺎﻘﻟا ﻞﺼﻓأ.
4 :ﺔﻧﺎﻴﺼﻟا وأ ﺔﻓﺎﻈﻨﻟا ﺪﻨﻋ ﻲﺋﺎﺑﺮﻬﻜﻟا رﺎﻴﺘﻟا ﻦﻋ ﺲﺑﺎﻘﻟا ﻞﺼﻓأ.
5 : ﻲﺘﻟا ﻦآ
ﺎﻣﻷا ﻲﻓ زﺎﻬﺠﻟا اﺬ
ه ﻞﻤﻌﺘﺴﺗ ﻻ ﻰﻠﻋ يﻮﺘﺤﺗلﺎﻌﺘﺷﻼﻟ ﺔﻠﺑﺎﻗ ةدﺎﻣ يأ وأ نﺎهد وأ ﻦﻴﻟوزﺎﺟ.
6 :ﺑ زﺎﻬﺠﻟا لﺎﻤﻌﺘﺳا ﺪﻨﻋ ﺪﻳﺪﺸﻟا رﺬﺤﻟا ﻲﺧﻮﺗ ﺐﺠﻳﻦﺴﻟا رﺎﺒآو لﺎﻔﻃﻷا ﻦﻣ بﺮﻘﻟﺎ . ﺔﺒﻗاﺮﻣ نوﺪﺑ ﻪآﺮﺗ ﻦﻣ رﺬﺤﻳو زﺎﻬﺠﻟا ﻰﻠﻋ فاﺮﺷﻹا ﺐﺠﻳ
ﻞﻴﻐﺸﺗ ﺔﻟﺎﺣ ﻲﻓ نﻮﻜﻳ ﺎﻣﺪﻨﻋ.
7 :ﻒﻴﻠﻐﺗ وأ ﺔﺌﺒﻌﺗ داﻮﻣ يﺄﺑ نﻮﺒﻌﻠﻳ لﺎﻔﻃﻷا كﺮﺘﺗ ﻻ.
8 :ﺎﻔﻟﺎﺗ ﻲﺋﺎﺑﺮﻬﻜﻟا ﻚﻠﺴﻟا نﺎآ اذإ زﺎﻬﺠﻟا ﻞﻴﻐﺸﺗ ﻰﻠﻋ ﻞﻤﻌﺗ ﻻ.
9 : ﻲﺋﺎﺑﺮﻬآ ءا
دأ يأ ﻂﺒﺿ وأ ﺔﻧﺎﻴﺻ لوﺎﺤﺗ ﻻزﺎﻬﺠﻟا اﺬه ﻲﻓ ﻲﻜﻴﻧﺎﻜﻴﻣ وأ.
10 : ﻰﻠﻋ زﺎﻬﺠﻟا اﺬه ﻞﻴﻐﺸﺗ ﺐﺠﻳ220 – 240 ،ﺖﻟﻮﻓ 50 / 60 ﻂﻘﻓ ﺰﺗﺮه )ﺮﺷ
ﺎﺒﻣ رﺎﻴﺗ.(
11 :زﺎﻬﺠﻟا اﺬﻬﺑ ﺔﺻﺎﺨﻟا ءاﻮﻬﻟا جرﺎﺨﻣو ﻞﺧاﺪﻣ ﺔﻴﻄﻐﺘﺑ ﻢﻘﺗ ﻻ.
12 :ﺔﺒﻃﺮﻟا وأ ﺔﻠﺘﺒﻤﻟا ﻦآﺎﻣﻷا ﻲﻓ زﺎﻬﺠﻟا اﺬه ﻞﻴﻐﺸﺘﺑ ﻢﻘﺗ ﻻ.
13 : ﻎﻳﺮﻔﺗ ﺐﺠﻳ ،زﺎﻬﺠﻟا ﻞﻴﻐ
ﺸﺗ مﺪﻋ ﺪﻨﻋفﺎﺟ نﺎﻜﻣ ﻲﻓ ﻪﻈﻔﺣو ءﺎﻤﻟا ﻦﻣ ناﺰﺨﻟا.
14
:ةﺮﻴﺼﺣ وأ ةدﺎﺠﺳ ﺖﺤﺗ ﻲﺋﺎﺑﺮﻬﻜﻟا ﻚﻠﺴﻟا ﻞﻴ
ﺻﻮﺘﺑ ﻢﻘﺗ ﻻ . ﺪﻗ نﺎﻜﻣ يأ ﻦﻋ ﻩدﺎﻌﺑﺈﺑ ﻢﻗﻪﻴﻓ ثﺪﺤﻳﺮﺜﻌﺘﻟا ﺔﻠﻗﺮﻌﻟا وأ .
15 :زﺎﻬﺠﻟا اﺬه ﻊﻣ تﻼﺻو ﻞﻤﻌﺘﺴﺗ ﻻ.
16 : خﺎﻔﻨﻣ ﻒﻠﺗ ﻰﻟإ يدﺆﻳ ﺪﻗ ﻚﻟذ نﻷ ءاﻮﻬﻟا ﺬﻓﺎﻨﻣ ﻰﻟإ ﻞﺧﺪﺗ ةدﺎﻣ يأ عﺪﺗ وأ ﻞﺧﺪﺗ ﻻنﺎﻤﻀﻟا ﻲﻐﻠﻴﻓ ءاﻮﻬﻟا.
17 :ءﺎﻤﻟا ناﺰﺧ ﺔﺌﺒﻌﺘﻟ ﻂﻘﻓ بﺬﻋ ءﺎﻣ ﻞﻤﻌﺘﺳا .نﺎﻤﻀﻟا ﻲﻐﻠﻴﻓ زﺎﻬﺠﻟا ﻒﻠﺗ ﻰﻟإ ﻚﻟذ يدﺆﻳ ﺪﻘﻓ ءاﻮﻬﻟا ﺮﻄﻌﻣ لﺎﻤﻌﺘﺳﺈﺑ ﻲﺻﻮﻳ ﻻ .
18 :مﻮﻴﺴﻟ
ﺎﻜﻟﺎﺑ ﻊﺒﺸﺘﻟا ﻞﻴﻠﻘﺘﻟ عﻮﺒﺳﻹا ﻲﻓ ةﺮﻣ ناﺰﺨﻟا ﻦﻣ ءﺎﻤﻟا ﻒﻳﺮﺼﺘﺑ ﻢﻗ.
19 : اﺬﻟ كﺮﺤﻤﻟﺎﺑ ةﺮﺷﺎﺒﻣ ﺔﻠﺻﻮﻣ ﺔﺨﻀﻤﺑ دوﺰﻣ زﺎﻬﺠﻟا نإءﺎﻤﻟﺎﺑ ناﺰﺨﻟا ﺔﺌﺒﻌﺗ دﺎﻌﺗ ﻢﻟ اذ
إ ﻞﻤﻌﻳ ﻻ ﺪﻳﺮﺒﺘﻟا نﺈﻓ.
20 :زﺎﻬﺠﻟا اﺬ
ه ﺔﻋﺮﺳ ﻲﻓ ﻢﻜﺤﺘﻠﻟ ﺐﻠﺻ زﺎﻬﺟ يأ ﻞﻤﻌﺘﺴﺗ ﻻ.
21 :و لﺎﻄﻋﻷا حﻼﺻإ ﻢﺴﻗ ﻰﻟإ ﺮﻈﻧاو ﻪﻟﺎﻤﻌﺘﺳا ﻦﻋ ﻒﻗﻮﺗ ،ءادﻷا ﻒﻴﻌﺿ وأ ًﺎﻔﻟﺎﺗ زﺎﻬﺠﻟا نﺎآ اذإ/ﺔﻣﺪﺧ ﻲﻨﻓ ﻊﺟار وأ .
ءاﺰـﺟﻷا
1
11
2
10
9
3
8
7
4
6
5
1 :يﻮﻠﻌﻟا ءﺎﻄﻐﻟا 2 :ﻲﻓ ﻢﻜﺤﺘﻟا رزﻖﻓﺪﺗ ﻟا ﻤءﺎ 3 :ﻦﻤﻳﻷا حﻮﻠﻟا 4 :ﻲﻔﻠﺨﻟا ءﺎﻄﻐﻟا
5 :تﻼﺠﻌﻟا 6 :ةﺪﻋﺎﻘﻟا 7 :ءﺎﻤﻟا ىﻮ
ﺘﺴﻣ سﺎﻴﻘﻣ 8 :ﺮﺴﻳﻷا حﻮﻠﻟا
9 :ﺔﻠ
ﻳﻮﻃ ﻖﺋﺎﻗر 10 :ةﺮﻴﺼﻗ ﻖﺋﺎﻗر
11 :ﻢﻜﺤﺘﻟا ﺔﺣﻮﻟ
ﺣﻮﻟـﻜﺤﺘﻟا ﺔـﻢ) لﺎﻤﻌﺘﺳﻻا(
2
7 8 9 10 11 12 13 14 15
1
1
6 1
5 2
4 3
ﻢﻜـــﺤﺘﻟا ﺔـــﺣﻮﻟ:
ﻳﻷا
ﺎﻋ
:
ﺳﻮﺘﻣ ﻊﺿﻮﻟا ﻲﻓ ﻞﻐﺘﺸﻳ دﺮﺒﻤﻟا نﺈﻓ ﻞﻴﻐﺸﺘﻟا ﻰﻠﻋ ﻂﻐﻀﻟا ﺪﻨﻋﺊﻄﺑ ﻢﺛ ﻂ.
1 :فﺎﻘﻳﻹاو ﻞﻴﻐﺸﺘﻟا رز 2:ﻂﻤﻨﻟا 3:ﺖﻗﺆﻤﻟا
4 :ﺢﺟرﺄﺘﻟا 5 :ﺔﻋﺮﺴﻟا 6 :نﻮ
7 :نﻮ
ﻳﻷا 8 :ﺾﻔﺨﻨﻣ 9 :ﻂﺳﻮﺘﻣ
10 :ﻲﻟﺎﻋ 11 :ﺢﺟرﺄﺘﻟا 12 :يد
ﻌﻴﺒﻃ 14 :دﻮﻤﺧ 15 : ﺬﺧﺄﻣﻲﺋﺎﺑﺮﻬﻜﻟا رﺎﻴﺘﻟا
13 :ﻲ
ﺤﺘﻟا رز ﻲﻓ ﻢﻜﻖﻓﺪﺗﻟا ﻤءﺎ
ﻞﻴﻐﺸﺘﻟافﺎﻘﻳﻹاو
1 :رﺎﻴﺘﻟا ﺬﺧﺄﻤﺑ ﻚﻠﺴﻟا ﻞﺻو.
2 : ﻂﻐﺿإاو فﺎﻘﻳﻹا رز ﻞﻴﻐﺸﺘﻟ ﻞﻴﻐﺸﺘﻟزﺎﻬﺠﻟا . نﺎﻴﺒﻟا ﺔﺒﻤﻟ ﺊﻴﻀﺘﺳ)ﺮﺷﺆﻤﻟا .(زﺎﻬﺠﻟا فﺎﻘﻳﻹإ ﻂﻐﺿىﺮﺧأ ةﺮﻣ رﺰﻟا .
3

ﺔﻋﺮﺴﻟا:
ﺔﺣوﺮﻤﻟا ﺔﻋﺮﺳ رﺎﻴﺘﺧﻹ ﻂﻐﺿإ :دﻮﻤﺧ وأ ﺔﻌﻳﺮﺳ وأ ﺔﻄﺳﻮﺘﻣ وأ ﺔﺌﻴﻄﺑ .ﺔﺑﻮﻠﻄﻤﻟا ﺔﻋﺮﺴﻟﺎﺑ صﺎﺨﻟا ﺮﺷﺆﻤﻟا ﺊﻴﻀﻴﺳ.
ﻂﻤﻨﻟا:
ﻂﻐﺿإبﻮﻠﻄﻤﻟا ﺔﺣوﺮﻤﻟا ﻂﻤﻧ رﺎﻴﺘﺧﻹ .ﻂﻤﻨﻟﺎﺑ صﺎﺨﻟا رﺰﻟا ﺊﻴﻀﻴﺳ .ﺎﻴﺋاﻮﺸﻋ ﺮﻴﻐﺘﺗ ءاﻮﻬﻟا ﺔﻋﺮﺳ نﺈﻓ ﻲﻌﻴﺒﻃ وأ دﻮﻤﺧ رﺎﻴﺘﺧإ ﺪﻨﻋ.
درﺎﺑ:
،درﺎﺒﻟا ﻰﻠﻋ ﻞﻴﻐﺸﺘﻟا تدرأ اذإءﺎﻤﻟا ﻢﺠﺣ ﻲﻓ ﻢﻜﺤﺘﻟا رز ﻂﺒﺿإﺔﺣﻮﻠﻟا ﺐﻧﺎﺟ ﻰﻠﻋ ، . ﻂﺳﻮﻟا ﺐﻴﻃﺮﺘﻟ ءﺎﻤﻟا ﻊﻳزﻮﺗ ﻲﻓ ﺔﺨﻀﻤﻟا أﺪﺒﺘﺳ
زﺎﻬﺠﻟا ﻦﻣ ﻲﻔﻠﺨﻟا ءﺰﺠﻟا ﻲﻓ يزﻮﻟﻮﻴﻠﺴﻟا . ﺪﻌﺑ3ءاﻮﻬﻟا جﺮﺨﻣ ﻦﻣ ًادرﺎﺑ ءاﻮﻬﻟا جﺮﺨﻴﻓ ﻞﺘﺒﺘﺳ ةدﺎﺳﻮﻟا نﺈﻓ ًﺎﺒﻳﺮﻘﺗ ﻖﺋﺎﻗد . ﻊﺿو ﻰﻠﻋ رﺰﻟا ردأ
ﺎﻣﺪﻨﻋ فﺎﻘﻳإدرﺎﺒﻟا ﻂﻤﻨﻠﻟ ﺔﺟﺎﺣ كﺎﻨه نﻮﻜﺗ ﻻ .
ﺢﺟرﺄﺘﻟا:
ﺟﻮﺘﻟ رﺰﻟا .ﻲﻓ ﺔﻴﺳأﺮﻟا ةﻮﻜﻟا أﺪﺒﺘﺳ ﺢﺟرﺄﺘﻟا ﺮﺧﻵ ﺐﻧﺎﺟ ﻦﻣ ًﺎﻴﺋﺎﻘﻠﺗ .ﺢﺟرﺄﺘﻟا ﺮﺷﺆﻣ ﺊﻴﻀﻴﺳ. ﺔﻴﻘﻓﻷا ةﻮﻜﻟا ﻂﺒﺿ ﻦﻜﻤﻳ
ﻂﻐﺿإءاﻮﻬﻟا رﺎﻴﺗ ﻪﻴ
ًﺎﻳوﺪﻳ.
ﺖﻗﺆﻤﻟا:
ﻰﺘﺣ ﺖﻗﺆﻤﻟا ﻂﺒﺿ ﻦﻜﻤﻳ990ﺔﻘﻴﻗد .ﻠﻄﻤﻟا ﺖﻗﻮﻟا ﺪﻳﺪﺤﺘﻟ رﺰﻟا ﻰﻠﻋ ﻂﻐﺿإ ﻂﺒﻀﻠﻟبﻮ .ﺔﺷﺎﺸﻟا ﻰﻠﻋ ﺖﻗﻮﻟا ﺮﻬﻈﻴﺳ . ﺖﻗﻮﻟا ﻲﻬﺘﻨﻳ ﺎﻣﺪﻨﻋ
ًﺎﻴﺋﺎﻘﻠﺗ زﺎﻬﺠﻟا ﻒﻗﻮﺘﻴﺳ دﺪﺤﻤﻟا.
ﻳﻷاﻮن:
أﺪﺒﺘﻟ نﻮﻳأ رز ﻰﻠﻋ ةﺪﺣاو ةﺮﻣ ﻂﻐﺿإ . ﻩﺬه ﻞﻤﻌﺘﻓ ءاﻮﻬﻟا ﻲﻓ ﺔﺒﻟﺎﺴﻟا تﺎﻧﻮﻳﻷا ﻦﻣ ةﺮﻴﺒآ داﺪﻋأ ﺮﻳﺮﺤﺘﺑ دﺮﺒﻤﻟا مﻮﻘﻴﺳ ،ﺮﺷﺆﻤﻟا ﺔﺒﻤﻟ ﺊﻴﻀﺘﺳ
ءاﻮﻬﻟا ﺪﻳﺪﺠﺗ ﻰﻠﻋ تﺎﻧﻮﻳﻷا . ةﺮﻣ رﺰﻟا ﻰﻠﻋ ﻂﻐﺿإﻞﻤﻌﻟا ﻦﻋ ﻊﺿﻮﻟا اﺬه ﻒﻗﻮﺘﻴﻓ ﺮﺷﺆﻤﻟا ﺔﺒﻤﻟ ﺊﻔﻄﻨﺘﺳ ،ىﺮﺧأ.
ﺪﻌﺑ ﻦﻣ ﻢﻜﺤﺘﻟا زﺎﻬﺟ) لوﺮﺘﻨآ تﻮﻤﻳﺮﻟا(:
ﻮهوﺖﻗﻮﻟا ﻢﺼﺧ ﺔﻔﻴﻇو ﻪﺑ ﺲﻴﻟ ﻪﻧأ اﺪﻋ ﺎﻣ ﻢﻜﺤﺘﻟا ﺔﺣﻮﻟ ﺲﻔﻧ .لوﺮﺘﻨآ تﻮﻤﻳﺮﻟاو زﺎﻬﺠﻟا ﻦﻴﺑ اﺰﺟﺎﺣ ﻚﻟﺎﻨه نﻮﻜﻳ ﻻأ ﺐﺠﻳ.
: فﺎﻘﻳإو ﻞﻴﻐﺸﺘﻟزﺎﻬﺠﻟا .
ﻞﻴﻐﺸﺘﻟافﺎﻘﻳﻹاو
ﻋﺮﺴﻟاﺔ: ﺔﻌﻳﺮﺳ وأ ﺔﻄﺳﻮﺘﻣ وأ ﺔﺌﻴﻄﺑ .
ﺢﺟرﺄﺘﻟا: ةﻮﻜﻠﻟ ﻲﺋﺎﻘﻠﺗ كﺮﺤﺗ.
يدﺎﻋ وأ ﻲﻌﻴﺒﻃ وأ دﻮﻤﺧ.
ﻂﻤﻨﻟا:
ﻰﺘﺣ ﺖﻗﺆﻤﻟا ﻂﺒﺿ ﻦﻜﻤﻳ990ﺔﻘﻴﻗد .
ﺖﻗﺆﻤﻟا:
ﺗﻌﺒناﺰﺨﻟا ﺔﺌءﺎﻤﻟﺎﺑ :
ﺮــﻳﺬﺤﺗ: ﻪﻨﻣ ﺎﻬﻐﻳﺮﻔﺗ وأ ءﺎﻤﻟﺎﺑ ناﺰﺨﻟا ﺔﺌﺒﻌﺗ وأ ﻪﺤﻴﻠﺼﺗ وأ زﺎﻬﺠﻟا ﻚﻳﺮﺤﺗ ﻞﺒﻗ زﺎﻬﺠﻟا ﻦﻋ رﺎﻴﺘﻟا ﻞﺼﻓإ .ﻳ ﺐﻧﺎﺟ ﻲﻓ ءﺎﻤﻟا ﺔﺌﺒﻌﺗ ﻞﺧﺪﻣ ﺪﺟﻮ
زﺎﻬﺠﻟا .ناﺰﺨﻟا ﻞﺧاد ﺔﻳﺎﻨﻌﺑ ءﺎﻤﻟا ﺐﺻ ﻢﺛ ﻞﺧﺪﻤﻟا ﺢﺘﻓإ .ءﺎﻤﻟا ﻖﻓﺪﺗ ىدﺎﻔﺘﺘﻟ ءﺎﻤﻟا ىﻮﺘﺴﻣ ﺮﺷﺆﻤﻟ ﻪﺒﺘﻧإ . ناﺰﺨﻟا ﺔﻌﺳ20ﺮﺘﻟ . ﺔﺌﺒﻌﺗ ًﺎﻀﻳأ ﻚﻨﻜﻤﻳ
ﺎﻴﻠﻌﻟا ةﺮﺠﺤﻟا ﻦﻣ ءﺎﻤﻟا .
4

ﻟا ﻦﻣ ءﺎﻤﻟا ﻎﻳﺮﻔﺗناﺰﺨ:
ﺮــﻳﺬﺤﺗ: ﻬﺠﻟا ﻦﻋ رﺎﻴﺘﻟا ﻞﺼﻓإﻪﻨﻣ ﺎﻬﻐﻳﺮﻔﺗ وأ ءﺎﻤﻟﺎﺑ ناﺰﺨﻟا ﺔﺌﺒﻌﺗ وأ ﻪﺤﻴﻠﺼﺗ وأ زﺎﻬﺠﻟا ﻚﻳﺮﺤﺗ ﻞﺒﻗ زﺎ.
ءﺎﺑﺮﻬﻜﻟا ﻚﻠﺳ ﻒﻟ نﺎﻜﻣ
ءﺎﻤﻟا ﻒﻳﺮﺼﺗ ةداﺪﺳ
ءﺎﻤﻟا ﻎﻳﺮﻔﺘﻟ ﻦﻣﺁ نﺎﻜﻣ ﻰﻟإ زﺎﻬﺠﻟا كﺮﺣ .دﻮﺟﻮﻤﻟا ءﺎﻤﻟا ﻒﻳﺮﺼﺗ ةداﺪﺳ ﻚﻓةناﺰﺨﻟا ﻎﻳﺮﻔﺘﻟ زﺎﻬﺠﻟا ﻒﻠﺧ ﻲﻓ . ﺪﻨﻋ ىﺮﺧأ ةﺮﻣ ةداﺪﺴﻟا ﺪﻋأ
ﻎﻳﺮﻔﺘﻟا ﺔﻴﻠﻤﻋ لﺎﻤﺘآا .
جﺮﺨﻤﻟا ﺪﻨﻋ ﺔﺑﻮﻃﺮﻟا لﺪﻌﻣ ﻂﺒﺿ:
ﻢﻜﺤﺘﻟا رزﻖﻓﺪﺗﻟا ﻤءﺎ
ﻲﻓ
ءﺎﻤﻟا ﻖﻓﺪﺘﻟ ﻢﻈﻨﻤﺑ ﻪﺒﻧﺎﺟ ﻲﻓ دوﺰﻣ زﺎﻬﺠﻟا نإ .ﻞﻴﻐﺸﺗ ﻰﺼﻗأ ﻂﻤﻧ ﻰﻠﻋ ﻢﻈﻨﻤﻟا ﻊﺿﻮﺑ ﺪﻳﺮﺒﺘﻟاو ﺔﺑﻮﻃﺮﻟا لﺪﻌﻣ ﻲﻓ ﻢﻜﺤﺘﻟا ﻚﻨﻜﻤﻳ . ﺢﻴﺘﻳ اﺬهو
ﺪﻳﺮﺒﺘﻟا ﻦﻣ ﺔﺟرد ﻰﺼﻗأ ﺮﻓﻮﻴﻓ ﺪﺋﺎﺳﻮﻟا ﻰﻠﻋ ءﺎﻤﻠﻟ ﻞﻣﺎآ ﻖﻓﺪﺗ .فﺎﻘﻳإ ﻰﻠﻋ ﻂﻐﻀﻟﺎﺑ ﻂﻤﻨﻟا اﺬه ﻒﻗﻮﻳ.
ﺎﻴﺼﻟاو ﺔﻓﺎـﻈﻨﻟاﺔـﻧ:
ﺮــﻳﺬﺤﺗ: ﻪﻨﻣ ﺎﻬﻐﻳﺮﻔﺗ وأ ءﺎﻤﻟﺎﺑ ناﺰﺨﻟا ﺔﺌﺒﻌﺗ وأ ﻪﺤﻴﻠﺼﺗ وأ زﺎﻬﺠﻟا ﻚﻳﺮﺤﺗ ﻞﺒﻗ زﺎﻬﺠﻟا ﻦﻋ رﺎﻴﺘﻟا ﻞﺼﻓإ.
ﺔﻓﺎـﻈﻨﻟا:
خﺎﺳوﻷاو رﺎﺒﻐﻟا ﻦﻣ زﺎﻬﺠﻠﻟ ﻲﺟرﺎﺨﻟا ءﺰﺠﻟا ﻒﻴﻈﻨﺘﻟ ءﺎﻤﻟﺎﺑ ﺔﻔﻴﻈﻧ ﺔﻌﻄﻗ ﻞﻠﺑ . ﻰﻠﻋ ﺔﻄﺷﺎآ ﻒﻴﻈﻨﺗ تاودأ ﻻو ﺔﻳﻮﻘﻟا تﺎﻔﻈﻨﻤﻟا ﻞﻤﻌﺘﺴﺗ ﻻ
قﻼﻃﻹا . مﺪﻋ ﺔﻟﺎﺣ ﻲﻓﺲﻤﺸﻟا ﺔﻌﺷأ ﻪﻴﻟإ ﻞﺼﺗ ﻻ فﺎﺟ نﺎﻜﻣ ﻲﻓ ﻪﻈﻔﺣو ءﺎﻤﻟا ﻦﻣ ناﺰﺨﻟا ﻎﻳﺮﻔﺗ ﺐﺠﻳ زﺎﻬﺠﻟا ﻞﻴﻐﺸﺗ.
5

ﺔـﻧﺎﻴﺼﻟا:
ﺔﻤﻈﺘﻨﻣ ةرﻮﺼﺑ ءﺎﻤﻟا ﻎﻳﺮﻔﺗ)عﻮﺒﺳﻹا ﻲﻓ ةﺮﻣ ﻞﻗﻷا ﻰﻠﻋ (ﻲﻠﺴﻌﻟا صﺮﻘﻠﻟ ﺔﻄﻴﺳﻮﻟا ﺪﺋﺎﺳﻮﻟا ﻰﻠﻋ ﻆﻓﺎﺤﻳو ﺔﻴﺋﺎﻤﻟا ندﺎﻌﻤﻟا ﻢآاﺮﺗ ﻦﻣ ﻞﻠﻘﻳ .
ﻟاو ﻞﺧاﺪﻟا ﻦﻣ زﺎﻬﺠﻟﺎﺑ ﻢ . ﻒﺠﺗ ﻰﺘﺣ فﺎﻘﻳإ ﻰﻠﻋ ءﺎﻤﻟا ﻖﻓﺪﺗ ﻲﻓ ﻢﻜﺤﺘﻟا رز ﻊﺿ ﻞﻴﻐﺸﺘﻟا ﺪﻨﻋ
ﺔﻴﻨﻔﻟا تﺎﻔﺻاﻮﻤﻟا
آاﺮﺘﻤﻟا مﻮﻴﺴﻟﺎﻜﻟا ﺔﻟازﻹ ﺔﺒﻃر ﺔﻌﻄﻗ ﻞﻤﻌﺘﺳاجرﺎﺨ
ﺔﻄﻴﺳﻮﻟا ﺪﺋﺎﺳﻮﻟا ﻦﻣ ءﺎﻤﻟا .ًﺎﻴﻋﻮﺒﺳإ ﻪﻔﻴﻈﻨﺗ ﻦﻜﻤﻳو ﺔﻟﻮﻬﺴﺑ رﺎﺒﻐﻟا ﺮﺘﻠﻓ ءﺎﻄﻏ ﻚﻓ ﻦﻜﻤﻳ . ﻲﻓ ﻦﻴﺗﺮﻣ وأ ةﺮﻣ ﻞﺧاﺪﻟا ﻦﻣ ءﺎﻤﻟا ناﺰﺧ ﻒﻴﻈﻨﺗ ﻦﻜﻤﻳ
ءاﻮﻬﻟا ةدﻮﺟ ﻰﻠﻋ ﺔﻈﻓﺎﺤﻤﻠﻟ ﻚﻟذو ﻢﺳﻮﻤﻟا.
ﻟاﺔـﻘﻴﻤﻌﻟا ﺔﻓﺎـﻈﻨ:
رﺎﺒﻐﻟا ﺮﺘﻠﻓ ءﺎﻄﻏ ﺖﺒﺜﻳ يﺬﻟا ﻲﻏﺮﺒﻟا ﻚﻓ .ﻲﻠﺴﻌﻟا صﺮﻘﻠﻟ ﺔﻄﻴﺳﻮﻟا ﺪﺋﺎﺳﻮﻟا جاﺮﺧإ نﻵا ﻚﻨﻜﻤﻳ . صﺮﻘﻟا ﺪﺋﺎﺳوو رﺎﺒﻐﻟا ﺮﺘﻠﻓ ءﺎﻄﻏ ﻞﺴﻏإ
ﻒﻴﻈﻧ ءﺎﻣ ﻲﻓ ﻲﻠﺴﻌﻟا.
طاو 150 ﺔﻗﺎﻄﻟا ﺮﻳﺪﻘﺗ
ﺬﺧﺄﻤﻟﺎﺑ رﺎﻴﺘﻟا ﺬﺧﺄﻤﺑ ﻞﺻﻮﻣ ﺮﻴﻏ ﻚﻠﺴﻟا. ﻚﻠﺴﻟا ﻞﻴﺻﻮﺗ ﻦﻣ ﺪآﺄﺗ. ءاﻮﻬﻠﻟ ﻎﻳﺮﻔﺗ ﻻ.
ﺪﻌﺑ ﻦﻣ ﺊﻔﻄﻨﻳ ﻻ زﺎﻬﺠﻟا. ﻢﻜﺤﺘﻟا زﺎﻬﺟ لﺎﻤﻌﺘﺳا لوﺎﺣ) تﻮﻤﻳﺮﻟا
Rating voltage 220V
Frequency 50/60Hz
Power Consumption 150W
Water Tank Capacity 20 Liters
Dimensions
Net weight 12Kg
KA54
220ﺖﻟﻮﻓ ﺪــﻬﺠﻟا ﺮـﻳﺪﻘﺗ
50 / 60ﺰﺗﺮه ددﺮﺘﻟا
20ﺮﺘﻟ ءﺎﻤﻟا ناﺰﺧ ﺔﻌﺳ
754139ﻢﺳ
12 ﻢـــــﺠآ )ﻲﻓﺎﺻ( نزﻮــــﻟا
Technical Specification
Model KA54A
ﻞﻤﺘﺤﻤﻟا ﺐﺒﺴﻟا ضاﺮﻋﻷا ﺢﻴﻠﺼﺘﻟا
ﻞﻴﻐﺸﺗ ﻊﺿو ﻲﻓ ﺖﺴﻴﻟ ءﺎﺑﺮﻬﻜﻟا. ءﺎﺑﺮﻬﻜﻟا ﻞﻐﺷ.
PCBﺎﺗ ﻒﻟ.
ةرﻮﻠﻜﻟا دﺪﻌﺘﻣ ﻞﻴﻨﻴﻔﻟا ﻲﺋﺎﻨﺛ
ﻞــــﻳدﻮﻤﻟا
دﺎﻌﺑﻷا
754139Cm
لﺎــﻄﻋﻷا ﺢﻴﻠﺼﺗ:
6

لوﺮﺘﻨآ (ﺔﺑﺎﺠﺘﺳﻻا ىﺪﻣ ىﺮﺘﻟ.
ﻞﻤﻌﺗ ﻻ لوﺮﺘﻨآ تﻮﻤﻳﺮﻟا ﺔﻳرﺎﻄﺑ. ﺔﻳرﺎﻄﺒﻟا ﺺﺤﻓإ.
خﺎﻔﻨﻤﻟا ﻰﻠﻋ مﻮﻴﺴﻟﺎﻜﻟا ﻢآاﺮﺗ. ًﺎﺗﻮﺻ رﺪﺼﻳ زﺎﻬﺠﻟا. مﻮﻴﺴﻟﺎﻜﻟا ﺎﻳﺎﻘﺑ ﻦﻣ ًﺎﻘﻴﻤﻋ ًﺎﻔﻴﻈﻨﺗ زﺎﻬﺠﻟا ﻒﻈﻧ.
ﻓ ءﺎﻤﻟا ﻲﻓ ﻢﻜﺤﺘﻟا رز ﻲﻟاﺾﻔﺨﻨﻣ ﻊﺿﻮ. ءﺎﻤﻟا ﻲﻓ ﻢﻜﺤﺘﻟا رز ﻊﺿو ﺮﻴﻏ.
ءﺎﻣ ﺪﺟﻮﻳ ﻻ وأ ﺾﻔﺨﻨﻣ ءﺎﻤﻟا ىﻮﺘﺴﻣ. ءﺎﻤﻟا ىﻮﺘﺴﻣ ﻦﻣ ﺪآﺄﺗ.
ﱢﺮﺒﻳ ﻻ زﺎﻬﺠﻟاد.
ءﺎﻤﻟا ﻲﻓ ﻢﻜﺤﺘﻟا رزفﺎﻘﻳإ ﻊﺿو ﻲﻓ . ءﺎﻤﻟا ﻲﻓ ﻢﻜﺤﺘﻟا رز ﻞﻐﺷ.
ﺪﻗ ﺔﻬﻳﺮ ﻟاًﺪﻳﺪﺟ زﺎﻬﺠ. آ ﺔﺤﺋار رﺪﺼﺗ ﺪﻳﺪﺠﻟا زﺎﻬﺠﻟا ﻲﻓ
ﻻا ﻦﻣ عﻮﺒﺳإ ةﺪﻣ ﻲﻓ ﻲﻔﺘﺨﺗلوﻷا لﺎﻤﻌﺘﺳ.
ﺔﻬﻳﺮآ ﺔﺤﺋار ثﺎﻌﺒﻧا.
ﺐﻟﺎﺤﻄﻟا ﺾﻌﺑ ﻪﺑ ﻢﻳﺪﻗ زﺎﻬﺟ. زﺎﻬﺠﻟا نﺎآ اذإ ﺐﻟﺎﺤﻄﻟا ﺾﻌﺑ كﺎﻨه نﻮﻜﺗ ﺪﻗ
ﺎﻤﻳﺪﻗ . ﺎﻬﻠﺴﻏأو ﻲﻠﺴﻌﻟا صﺮﻘﻟا ةدﺎﺳو ﺮﻴﻐﺘﺑ ﻢﻗ
مﺎﻈﺘﻧﺈﺑ.
مﻮﻴﺴﻟﺎﻜﻟﺎﺑ ﻊﺒﺸﻣ ءﺎﻤﻟا. ءﺎﻤﻟا ﻎﻳﺮﻔﺘﺑ ﻢﻗ. ءاﻮﻬﻟا جﺮﺨﻣ ﻦﻣ جﺮﺨﺗ ءﺎﻤﻟا تاﺮﻄﻗ ﺾﻌﺑ.
ﻠﻟ ﻖﻴﻤﻋ ﻒﻴﻈﻨﺘﺑ ﻢﻗﺪﺋﺎﺳﻮ . ﺔﻄﻴﺳﻮﻟا ﺪﺋﺎﺳﻮﻟا داﺪﺴﻧإ. ﺪﺋﺎﺳﻮﻟا جﺎﺘﺤﺗ ﺪﻗ
ﺮﻴﻴﻐﺘﻠﻟ.
ﺔـﻧﺎﻴﺼﻟا:
ﺔﻤﻈﺘﻨﻣ ةرﻮﺼﺑ ءﺎﻤﻟا ﻎﻳﺮﻔﺗ)عﻮﺒﺳﻹا ﻲﻓ ةﺮﻣ ﻞﻗﻷا ﻰﻠﻋ (ﻲﻠﺴﻌﻟا صﺮﻘﻠﻟ ﺔﻄﻴﺳﻮﻟا ﺪﺋﺎﺳﻮﻟا ﻰﻠﻋ ﻆﻓﺎﺤﻳو ﺔﻴﺋﺎﻤﻟا ندﺎﻌﻤﻟا ﻢآاﺮﺗ ﻦﻣ ﻞﻠﻘﻳ .
آاﺮﺘﻤﻟا مﻮﻴﺴﻟﺎﻜﻟا ﺔﻟازﻹ ﺔﺒﻃر ﺔﻌﻄﻗ ﻞﻤﻌﺘﺳاجرﺎﺨ
ﻟاو ﻞﺧاﺪﻟا ﻦﻣ زﺎﻬﺠﻟﺎﺑ ﻢ . ﻒﺠﺗ ﻰﺘﺣ فﺎﻘﻳإ ﻰﻠﻋ ءﺎﻤﻟا ﻖﻓﺪﺗ ﻲﻓ ﻢﻜﺤﺘﻟا رز ﻊﺿ ﻞﻴﻐﺸﺘﻟا ﺪﻨﻋ
ﺔﻄﻴﺳﻮﻟا ﺪﺋﺎﺳﻮﻟا ﻦﻣ ءﺎﻤﻟا .ًﺎﻴﻋﻮﺒﺳإ ﻪﻔﻴﻈﻨﺗ ﻦﻜﻤﻳو ﺔﻟﻮﻬﺴﺑ رﺎﺒﻐﻟا ﺮﺘﻠﻓ ءﺎﻄﻏ ﻚﻓ ﻦﻜﻤﻳ . ﻲﻓ ﻦﻴﺗﺮﻣ وأ ةﺮﻣ ﻞﺧاﺪﻟا ﻦﻣ ءﺎﻤﻟا ناﺰﺧ ﻒﻴﻈﻨﺗ ﻦﻜﻤﻳ
ءاﻮﻬﻟا ةدﻮﺟ ﻰﻠﻋ ﺔﻈﻓﺎﺤﻤﻠﻟ ﻚﻟذو ﻢﺳﻮﻤﻟا.
ﻟاﺔـﻘﻴﻤﻌﻟا ﺔﻓﺎـﻈﻨ:
رﺎﺒﻐﻟا ﺮﺘﻠﻓ ءﺎﻄﻏ ﺖﺒﺜﻳ يﺬﻟا ﻲﻏﺮﺒﻟا ﻚﻓ .ﻲﻠﺴﻌﻟا صﺮﻘﻠﻟ ﺔﻄﻴﺳﻮﻟا ﺪﺋﺎﺳﻮﻟا جاﺮﺧإ نﻵا ﻚﻨﻜﻤﻳ . صﺮﻘﻟا ﺪﺋﺎﺳوو رﺎﺒﻐﻟا ﺮﺘﻠﻓ ءﺎﻄﻏ ﻞﺴﻏإ
ﻒﻴﻈﻧ ءﺎﻣ ﻲﻓ ﻲﻠﺴﻌﻟا.
ﺔﻴﻨﻔﻟا تﺎﻔﺻاﻮﻤﻟا
KA54
ﻞــــﻳدﻮﻤﻟا
220ﺖﻟﻮﻓ ﺪــﻬﺠﻟا ﺮـﻳﺪﻘﺗ
50 / 60ﺰﺗﺮه ددﺮﺘﻟا
طاو 150 ﺔﻗﺎﻄﻟا ﺮﻳﺪﻘﺗ
20ﺮﺘﻟ ءﺎﻤﻟا ناﺰﺧ ﺔﻌﺳ
754139ﻢﺳ
دﺎﻌﺑﻷا
12 ﻢـــــﺠآ )ﻲﻓﺎﺻ( نزﻮــــﻟا
Technical Specification
Model KA54A
Rating voltage 220V
Frequency 50/60Hz
Power Consumption 150W
Water Tank Capacity 20 Liters
Dimensions
754139Cm
Net weight 12Kg
ﺬﺧﺄﻤﻟﺎﺑ رﺎﻴﺘﻟا ﺬﺧﺄﻤﺑ ﻞﺻﻮﻣ ﺮﻴﻏ ﻚﻠﺴﻟا. ﻚﻠﺴﻟا ﻞﻴﺻﻮﺗ ﻦﻣ ﺪآﺄﺗ. ءاﻮﻬﻠﻟ ﻎﻳﺮﻔﺗ ﻻ.
ﺪﻌﺑ ﻦﻣ ﺊﻔﻄﻨﻳ ﻻ زﺎﻬﺠﻟا. ﻢﻜﺤﺘﻟا زﺎﻬﺟ لﺎﻤﻌﺘﺳا لوﺎﺣ) تﻮﻤﻳﺮﻟا
ﺪﻗ ﺔﻬﻳﺮ ﻟاًﺪﻳﺪﺟ زﺎﻬﺠ. آ ﺔﺤﺋار رﺪﺼﺗ ﺪﻳﺪﺠﻟا زﺎﻬﺠﻟا ﻲﻓ
ﻻا ﻦﻣ عﻮﺒﺳإ ةﺪﻣ ﻲﻓ ﻲﻔﺘﺨﺗلوﻷا لﺎﻤﻌﺘﺳ.
ﺐﻟﺎﺤﻄﻟا ﺾﻌﺑ ﻪﺑ ﻢﻳﺪﻗ زﺎﻬﺟ. زﺎﻬﺠﻟا نﺎآ اذإ ﺐﻟﺎﺤﻄﻟا ﺾﻌﺑ كﺎﻨه نﻮﻜﺗ ﺪﻗ
ﻠﻟ ﻖﻴﻤﻋ ﻒﻴﻈﻨﺘﺑ ﻢﻗﺪﺋﺎﺳﻮ . ﺔﻄﻴﺳﻮﻟا ﺪﺋﺎﺳﻮﻟا داﺪﺴﻧإ. ﺪﺋﺎﺳﻮﻟا جﺎﺘﺤﺗ ﺪﻗ
لﺎــﻄﻋﻷا ﺢﻴﻠﺼﺗ:
ﻞﻤﺘﺤﻤﻟا ﺐﺒﺴﻟا ضاﺮﻋﻷا ﺢﻴﻠﺼﺘﻟا
ﻞﻴﻐﺸﺗ ﻊﺿو ﻲﻓ ﺖﺴﻴﻟ ءﺎﺑﺮﻬﻜﻟا. ءﺎﺑﺮﻬﻜﻟا ﻞﻐﺷ.
PCBﺎﺗ ﻒﻟ.
ةرﻮﻠﻜﻟا دﺪﻌﺘﻣ ﻞﻴﻨﻴﻔﻟا ﻲﺋﺎﻨﺛ
ﻞﻤﻌﺗ ﻻ لوﺮﺘﻨآ تﻮﻤﻳﺮﻟا ﺔﻳرﺎﻄﺑ. ﺔﻳرﺎﻄﺒﻟا ﺺﺤﻓإ.
لوﺮﺘﻨآ (ﺔﺑﺎﺠﺘﺳﻻا ىﺪﻣ ىﺮﺘﻟ.
خﺎﻔﻨﻤﻟا ﻰﻠﻋ مﻮﻴﺴﻟﺎﻜﻟا ﻢآاﺮﺗ. ًﺎﺗﻮﺻ رﺪﺼﻳ زﺎﻬﺠﻟا. مﻮﻴﺴﻟﺎﻜﻟا ﺎﻳﺎﻘﺑ ﻦﻣ ًﺎﻘﻴﻤﻋ ًﺎﻔﻴﻈﻨﺗ زﺎﻬﺠﻟا ﻒﻈﻧ.
ﻓ ءﺎﻤﻟا ﻲﻓ ﻢﻜﺤﺘﻟا رز ﻲﻟاﺾﻔﺨﻨﻣ ﻊﺿﻮ. ءﺎﻤﻟا ﻲﻓ ﻢﻜﺤﺘﻟا رز ﻊﺿو ﺮﻴﻏ.
ءﺎﻣ ﺪﺟﻮﻳ ﻻ وأ ﺾﻔﺨﻨﻣ ءﺎﻤﻟا ىﻮﺘﺴﻣ. ءﺎﻤﻟا ىﻮﺘﺴﻣ ﻦﻣ ﺪآﺄﺗ.
ءﺎﻤﻟا ﻲﻓ ﻢﻜﺤﺘﻟا رزفﺎﻘﻳإ ﻊﺿو ﻲﻓ . ءﺎﻤﻟا ﻲﻓ ﻢﻜﺤﺘﻟا رز ﻞﻐﺷ.
ﺔﻬﻳﺮآ ﺔﺤﺋار ثﺎﻌﺒﻧا.
ﺎﻤﻳﺪﻗ . ﺎﻬﻠﺴﻏأو ﻲﻠﺴﻌﻟا صﺮﻘﻟا ةدﺎﺳو ﺮﻴﻐﺘﺑ ﻢﻗ
مﺎﻈﺘﻧﺈﺑ.
ﺮﻴﻴﻐﺘﻠﻟ.
مﻮﻴﺴﻟﺎﻜﻟﺎﺑ ﻊﺒﺸﻣ ءﺎﻤﻟا. ءﺎﻤﻟا ﻎﻳﺮﻔﺘﺑ ﻢﻗ. ءاﻮﻬﻟا جﺮﺨﻣ ﻦﻣ جﺮﺨﺗ ءﺎﻤﻟا تاﺮﻄﻗ ﺾﻌﺑ.
ﱢﺮﺒﻳ ﻻ زﺎﻬﺠﻟاد.
7
 Loading...