

Page 1

Getting Started Guide
©2009 All rights reserved. Kurzweil ® is a product line of Young Chang Co., Ltd. Young Chang®, Kurzweil ®, V. A. S. T. ®, PC3®, X-Pro,
KDFX®, Pitcher®, and LaserVerb®, KSP8 ™, K2661™, K2600™, K2500™, and K2000™ are trademarks of Young Chang Co., Ltd. All other
products and brand names are trademarks or registered trademarks of their respective companies. Product features and specifications are
subject to change without notice.
You may legally print up to two (2) copies of this document for personal use. Commercial use of any copies of this document
is prohibited. Young Chang Co. retains ownership of all intellectual property represented by this document.
910516 – April 2009
Page 2
CAUTION
RISK OF ELECTRIC SHOCK
DO NOT OPEN
CAUTION: TO REDUCE THE RISK OF ELECTRIC SHOCK,
DO NOT REMOVE THE COVER
NO USER SERVICEABLE PARTS INSIDE
REFER SERVICING TO QUALIFIED SERVICE PERSONNEL
The lightning flash with the arrowhead symbol,
within an equilateral triangle, is intended to alert
the user to the presence of uninsulated
"dangerous voltage" within the product's
enclosure that may be of sufficient magnitude
to constitute a risk of electric shock to persons.
The exclamation point within an equilateral
triangle is intended to alert the user to the
presence of important operating and
maintenance (servicing) instructions in the
literature accompanying the product.
IMPORTANT SAFETY & INSTALLATION INSTRUCTIONS
INSTRUCTIONS PERTAINING TO THE RISK OF FIRE, ELECTRIC SHOCK, OR INJURY TO PERSONS
WARNING: When using electric products, basic precautions should
always be followed, including the following:
1. Read all of the Safety and Installation Instructions and Explanation
of Graphic Symbols before using the product.
2. This product must be grounded. If it should malfunction or break
down, grounding provides a path of least resistance for electric
current to reduce the risk of electric shock. This product is equipped
with a power supply cord having an equipment-grounding
conductor and a grounding plug. The plug must be plugged into an
appropriate outlet which is properly installed and grounded in
accordance with all local codes and ordinances.
DANGER: Improper connection of the equipment-grounding
conductor can result in a risk of electric shock. Do not modify the
plug provided with the product - if it will not fit the outlet, have a
proper outlet installed by a qualified electrician. Do not use an
adaptor which defeats the function of the equipment-grounding
conductor. If you are in doubt as to whether the product is properly
grounded, check with a qualified serviceman or electrician.
3. WARNING: This product is equipped with an AC input voltage
selector. The voltage selector has been factory set for the mains
supply voltage in the country where this unit was sold. Changing
the voltage selector may require the use of a different power supply
cord or attachment plug, or both. To reduce the risk of fire or electric
shock, refer servicing to qualified maintenance personnel.
4. Do not use this product near water - for example, near a bathtub,
washbowl, kitchen sink, in a wet basement, or near a swimming
pool, or the like.
5. This product should only be used with a stand or cart that is recommended by the manufacturer.
6. This product, either alone or in combination with an amplifier and
speakers or headphones, may be capable of producing sound
levels that could cause permanent hearing loss. Do not operate for
a long period of time at a high volume level or at a level that is
uncomfortable. If you experience any hearing loss or ringing in the
ears, you should consult an audiologist.
7. The product should be located so that its location or position does
not interfere with its proper ventilation.
8. The product should be located away from heat sources such as
radiators, heat registers, or other products that produce heat.
9. The product should be connected to a power supply only of the type
described in the operating instructions or as marked on the product.
10. This product may be equipped with a polarized line plug (one blade
wider than the other). This is a safety feature. If you are unable to
insert the plug into the outlet, contact an electrician to replace your
obsolete outlet. Do not defeat the safety purpose of the plug.
11. The power supply cord of the product should be unplugged from the
outlet when left unused for a long period of time. When unplugging
the power supply cord, do not pull on the cord, but grasp it by the
plug.
12. Care should be taken so that objects do not fall and liquids are not
spilled into the enclosure through openings.
13. The product should be serviced by qualified service personnel
when:
A. The power supply cord or the plug has been damaged;
B. Objects have fallen, or liquid has been spilled into the product;
C. The product has been exposed to rain;
D. The product does not appear to be operating normally or
exhibits a marked change in performance;
E. The product has been dropped, or the enclosure damaged.
14. Do not attempt to service the product beyond that described in the
user maintenance instructions. All other servicing should be
referred to qualified service personnel.
15. WARNING: Do not place objects on the product’s power supply
cord, or place the product in a position where anyone could trip
over, walk on, or roll anything over cords of any type. Do not allow
the product to rest on or be installed over cords of any type.
Improper installations of this type create the possibility of a fire
hazard and/or personal injury.
RADIO AND TELEVISION INTERFERENCE
WARNING: Changes or modifications to this instrument not expressly
approved by Young Chang could void your authority to operate the
instrument.
IMPORTANT: When connecting this product to accessories and/or other
equipment use only high quality shielded cables.
NOTE: This instrument has been tested and found to comply with the
limits for a Class B digital device, pursuant to Part 15 of the FCC Rules.
These limits are designed to provide reasonable protection against
harmful interference in a residential installation. This instrument
generates, uses, and can radiate radio frequency energy and, if not
installed and used in accordance with the instructions, may cause
harmful interference to radio communications. However, there is no
guarantee that interference will not occur in a particular installation. If
this instrument does cause harmful interference to radio or television
reception, which can be determined by turning the instrument off and on,
the user is encouraged to try to correct the interference by one or more
of the following measures:
SAVE THESE INSTRUCTIONS
ii
• Reorient or relocate the receiving antenna.
• Increase the separation between the instrument and the receiver.
• Connect the instrument into an outlet on a circuit other than the one
to which the receiver is connected.
• If necessary consult your dealer or an experienced radio/television
technician for additional suggestions.
NOTICE
This apparatus does not exceed the Class B limits for radio noise
emissions from digital apparatus set out in the Radio Interference
Regulations of the Canadian Department of Communications.
AVIS
Le present appareil numerique n’emet pas de bruits radioelectriques
depassant les limites applicables aux appareils numeriques de la
class B prescrites dans le Reglement sur le brouillage radioelectrique
edicte par le ministere des Communications du Canada.
Page 3

Important Safety Instructions
1) Read these instructions
2) Keep these instructions.
3) Heed all warnings.
4) Follow all instructions.
5) Do not use this apparatus near water.
6) Clean only with dry cloth.
7) Do not block any of the ventilation openings. Install in accordance with the manufacturer’s
instructions.
8) Do not install near any heat sources such as radiators, heat registers, stoves, or other apparatus (including amplifiers) that produce heat.
9) Do not defeat the safety purpose of the polarized or grounding-type plug. A polarized plug
has two blades with one wider than the other. A grounding type plug has two blades and a
third grounding prong. The wide blade or the third prong are provided for your safety. If the
provided plug does not fit into your outlet, consult an electrician for replacement of the obsolete outlet.
10) Protect the power cord from being walked on or pinched, particularly at plugs, convenience
receptacles, and the point where they exit from the apparatus.
11) Only use attachments/accessories specified by the manufacturer.
12) Use only with a cart, stand, tripod, bracket, or table specified by the manufacturer, or sold with the apparatus. When a cart is used, use caution when
moving the cart/apparatus combination to avoid injury from tip-over.
13) Unplug this apparatus during lightning storms or when unused for long
periods of time.
14) CAUTION: Danger of explosion if battery is incorrectly replaced. Replace only with the same
or equivalent type (CR2032).
15) Refer all servicing to qualified service personnel. Servicing is required when the apparatus
has been damaged in any way, such as power-supply cord or plug is damaged, liquid has
been spilled or objects have fallen into the apparatus, the apparatus has been exposed to rain
or moisture, does not operate normally, or has been dropped.
Warning - To reduce the risk of fire or electric shock, do not expose this apparatus to rain or mois-
ture. Do not expose this equipment to dripping or splashing and ensure that no objects filled with
liquids, such as vases, are placed on the equipment.
To completely disconnect this equipment from the AC Mains, disconnect the power supply cord
plug from the AC receptacle.
iii
Page 4

Kurzweil International Contacts
Contact the Kurzweil office listed below to locate your local Kurzweil representative.
Kurzweil Music Systems
19060 S. Dominguez Hills Dr.
Rancho Dominguez
California 90220 USA
telephone: (310)637-2000
fax: (310)637-2025
http://www.kurzweilmusicsystems.com
Kurzweil Co., LTD
iPark Building #102, Floor 9
Jeongja-Dong 9, Bundang-Gu
Soungnam-Shi, Gyeonggi-Do 463-859
South Korea
http://www.ycpiano.co.kr
http://www.youngchang.com
iv
Page 5

Kurzweil International Contacts .....................................................................................................................................iv
Chapter 1 Hello
Starting Up........................................................................................................................................................................1-1
Sounds and Features .......................................................................................................................................................1-2
Overview of the X-Pro.....................................................................................................................................................1-2
How to Use This Manual................................................................................................................................................1-2
Chapter 2 Operation Overview
Navigation Controls Overview......................................................................................................................................2-1
User Interface Basics........................................................................................................................................................2-2
Mode Selection..........................................................................................................................................................2-2
Mode Buttons ............................................................................................................................................................2-2
Bank Buttons .............................................................................................................................................................2-3
Sliders .........................................................................................................................................................................2-3
Program and Category Buttons..............................................................................................................................2-4
Picking favorites .......................................................................................................................................................2-4
Pitch-Mod Controller ...............................................................................................................................................2-5
The Arp And SW Buttons ........................................................................................................................................2-5
Navigation ........................................................................................................................................................................2-6
The Display................................................................................................................................................................2-6
Pages...........................................................................................................................................................................2-6
The Top Line..............................................................................................................................................................2-7
The Bottom Line........................................................................................................................................................2-7
The Soft Buttons........................................................................................................................................................2-7
The Cursor Buttons ..................................................................................................................................................2-7
The Chan/Layer Buttons.........................................................................................................................................2-8
The Edit Button .........................................................................................................................................................2-8
The Exit Button .........................................................................................................................................................2-8
Data Entry......................................................................................................................................................................... 2-8
The Alpha Wheel ......................................................................................................................................................2-8
The Plus/Minus Buttons .........................................................................................................................................2-9
The Alphanumeric Pad............................................................................................................................................2-9
Differences Between The X-Pro And The PC3...........................................................................................................2-10
Back Panel .......................................................................................................................................................................2-13
MIDI - In, Thru, Out...............................................................................................................................................2-13
Control Pedals EP1, EP2 ........................................................................................................................................2-14
SW Pedal ..................................................................................................................................................................2-14
Pro Audio Outputs.................................................................................................................................................2-14
Audio Out................................................................................................................................................................2-14
Audio In ..................................................................................................................................................................2-14
Digital Out ...............................................................................................................................................................2-14
Sync In......................................................................................................................................................................2-14
Chapter 3 Program Mode
Selecting Programs...................................................................................................................................................3-1
Easy Audition............................................................................................................................................................3-1
Program Mode Display............................................................................................................................................3-2
TOC-v
Page 6

VAST Programs.........................................................................................................................................................3-2
KB3 Programs............................................................................................................................................................3-3
Quick Access.....................................................................................................................................................................3-3
Effects.................................................................................................................................................................................3-4
Chapter 4 Setup Mode
The Setup Editor ..............................................................................................................................................................4-2
Using A Split Program Setup .........................................................................................................................................4-3
Using Setup Mode To Play Layers Of Instruments.....................................................................................................4-7
Adjusting The Volume And Pan Of Zones...................................................................................................................4-9
Creating A New Setup................................................................................................................................................... 4-11
Chapter 5 Song Mode
Part 1: Assign Instruments To Tracks.....................................................................................................................5-2
Part 2: Set The Tempo...............................................................................................................................................5-3
Part 3: Record Your First Track, Save The Song ...................................................................................................5-4
Part 4: Record Additional Tracks............................................................................................................................5-7
Part 5: Fixing Mistakes.............................................................................................................................................5-8
Part 6: Adjusting The Volume Of Each Instrument ...........................................................................................5-10
Part 7: Learning More About Song Mode...........................................................................................................5-15
Appendix A X-Pro Programs and Setups
Programs ..........................................................................................................................................................................A-1
Setups ...............................................................................................................................................................................A-9
Appendix B X-Pro Specifications
Specifications ................................................................................................................................................................... B-1
MIDI Implementation Chart ......................................................................................................................................... B-3
TOC-vi
Page 7
Chapter 1
Hello
Welcome to the exciting world of the X-Pro. This Getting Started Guide will tell you all you need
to know to play your instrument now.
There are three models of the X-Pro:
Operation of all three models is the same, however, and is described on the following pages.
• X-Pro MG (Mini Grand cabinet)
• X-Pro UP (Upright cabinet)
• X-Pro BG (Baby Grand cabinet with enhanced sound system)
Hello
Starting Up
Starting Up
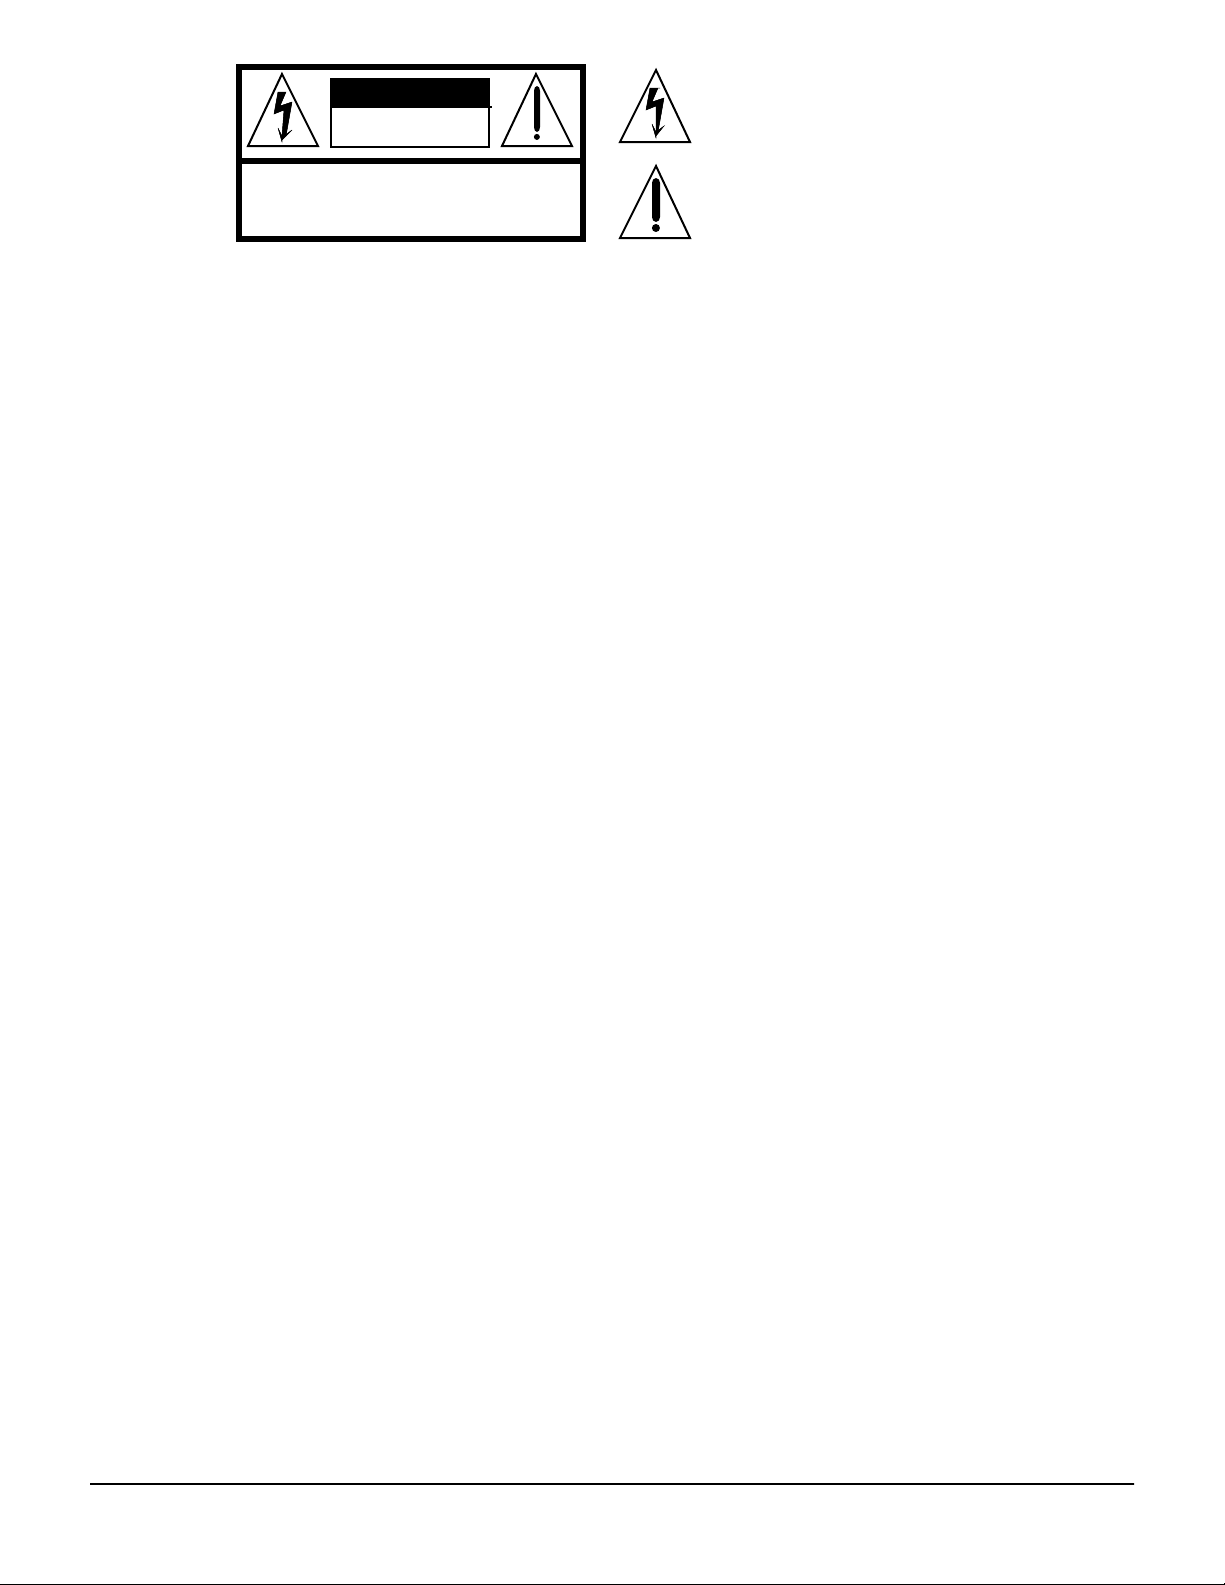
Once you’ve connected the power cable and plugged your X-Pro into a power outlet, simply
reach under the left side of the keyboard and turn the power switch to the On position. There are
also two headphone jacks next to the power switch for private listening.
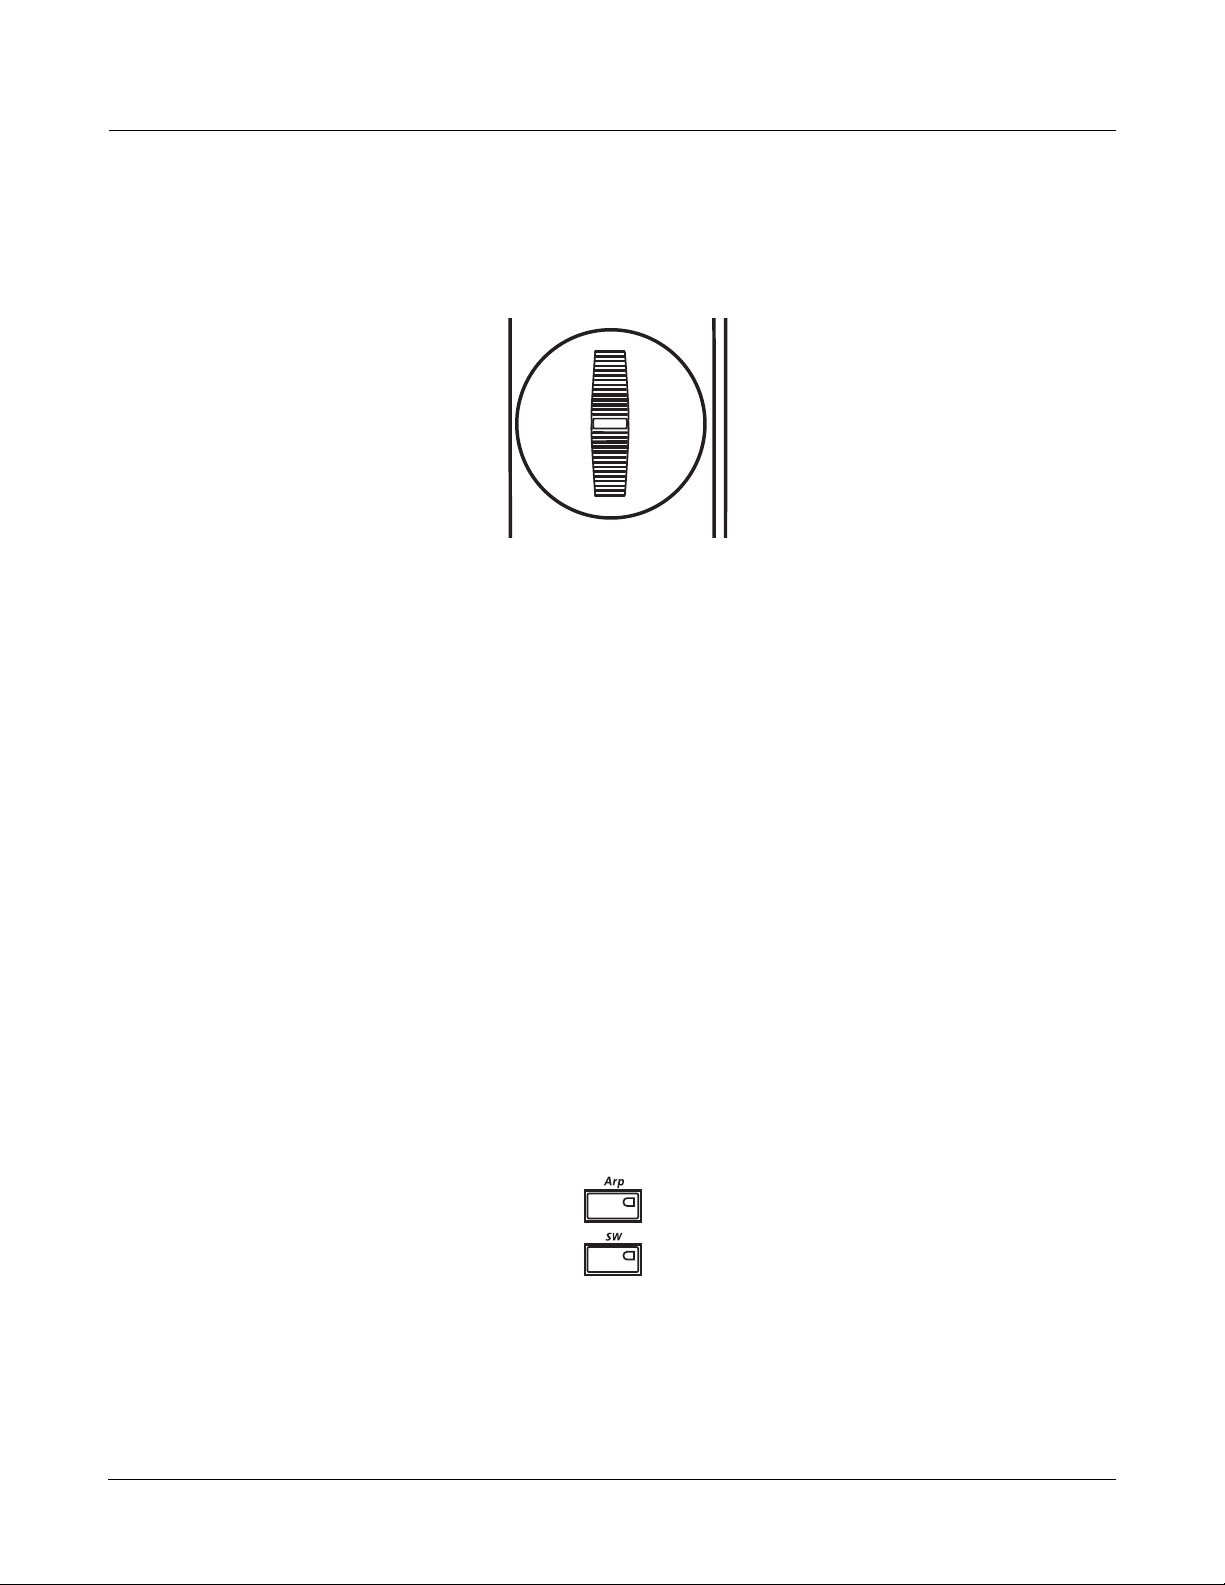
Adjust your X-Pro’s volume using the leftmost slider on the front panel.
Turn the alpha wheel (the large knob to the right of the screen) to try different programs.
(Complete details on selecting different programs are in Chapter 3.
Power Switch
1-1
Page 8

Hello
Sounds and Features
Sounds and Features
The X-Pro is packed with hundreds of amazing acoustic, electric, and synthesizer sounds. The
X-Pro is also equipped with all the performance controls and programming features of
Kurzweil’s popular PC3, although you do not need to do any programming to play your X-Pro.
Nine sliders let you accurately emulate the drawbars on a tone wheel organ such as a Hammond
B3™. And the X-Pro’s dedicated sound select buttons, along with its Quick Access banks will let
you instantly choose and change sounds whenever you like.
These, and other advanced features, are detailed in the PC3 Musician’s Guide , which you can
download from www.kurzweilmusicsystems.com. When new software is available for the X-
Pro, it will also be posted there. Instructions for the Boot Loader, the tool you’ll use to update the
X-Pro’s software or run diagnostic tests, are in the PC3 Musician’s Guide .
Overview of the X-Pro
The X-Pro’s 800+ programs include the Orchestral and Contemporary sound blocks, General
MIDI (GM), Stereo Triple Strike Piano, Classic Keys for realistic vintage electric piano sounds,
and new String Sections. Multi-zone performance setups are also provided; many of these
setups use note triggers to play factory-recorded songs that provide grooves and arpeggiation
that make great templates for performance or recording. An on-board sequencer (Song mode)
with front panel transport buttons lets you record your ideas any time inspiration strikes.
The X-Pro has 128-voice polyphony and is fully multi-timbral, so that different programs can be
played on each MIDI channel. There’s an on-board digital effects processor providing multiple
simultaneous effects, including real-time effects control, internally or via MIDI. In fact, the X-Pro
offers more effects processing power than Kurzweil’s much-lauded KSP8 studio effects
processor.
In addition to the standard stereo audio output pair, there are two consumer audio analog
outputs and inputs, as well as a digital output. For backup, storage, and moving files, there’s an
xD card slot on the front panel of the X-Pro. The provided USB port lets you connect the X-Pro to
a computer for file transfer and MIDI connectivity.
How to Use This Manual
This manual describes how to connect and power up your X-Pro, getting around the front panel,
and a brief description of the operating modes, as well as step-by-step tutorials for the functions
of Setup Mode and Song Mode.
The best way to read this manual is with your X-Pro in front of you. By trying the examples we
give to illustrate various functions, you can get a quick understanding of the basics. When
you’re ready to move on to the more advanced features download the PC3 Musician’s Guide from
www.kurzweilmusicsystems.com.
You may also want to purchase an xD memory card for storage (32MB – 256MB will work, Type
S or no type stated, formatted FAT16), and an xD card interface for your computer, if one is not
built in.
1-2
Page 9

Chapter 2
Operation Overview
Read this chapter to learn the basics of navigating the X-Pro. Afterwards, read the following
chapters to learn about the different modes of the X-Pro. The Setup Mode and Song Mode
chapters include step-by-step guides on how to use specific functions. When appropriate, steps
will include images from the X-Pro’s display, often with circled elements in order to direct your
attention to the current instruction.
Program Mode allows you to select, play or edit instrument sounds called programs. Hundreds
of programs are provided, and you can also create your own. See Chapter 3 for details.
Setup Mode lets you play multiple instrument sounds from the same group of keys, or split the
keyboard into zones so that, for example, each different octave of the keyboard plays a different
instrument sound. Chapter 4 provides the details.
Operation Overview
Navigation Controls Overview
Song Mode allows you to easily record and edit songs using the built in sequencer. Chapter 5
shows you how.
Throughout these chapters you will be referred to the PC3 Musician’s Guide for additional
information. You can download the PC3 Musician’s Guide in PDF format for free at
www.kurzweilmusicsystems.com, click on the tab for the Downloads page, then click the PC3
link. On the PC3 Downloads page click the User Manuals link to find a download link for the
latest version of the guide. The X-Pro uses the same powerful internal sound engine as the PC3
performance controller keyboard, and for the most part the X-Pro operates as the PC3 does,
aside from a few minor differences (see Differences Between The X-Pro And The PC3 below.)
Almost all of the information in the PC3 Musician’s Guide can be applied to the X-Pro, so consult
this guide when you are ready to learn more advanced features of the X-Pro.
Navigation Controls Overview
Main Volume
Chan/Layer Buttons
Mode Buttons
Cursor Buttons
The Display
The Alpha Wheel
The Alphanumeric Pad
Cancel, Enter
USB
Contrast
Card
Brightness
Storage
X-Pro
Record, Play/Pause, Stop
Edit
Soft Buttons
Exit
Plus/Minus Buttons
2-1
Page 10
Operation Overview
User Interface Basics
User Interface Basics
This section shows you how to get around the front panel of your X-Pro using mode selection,
navigation, and data entry. There is also an assignable control section.
Mode Selection
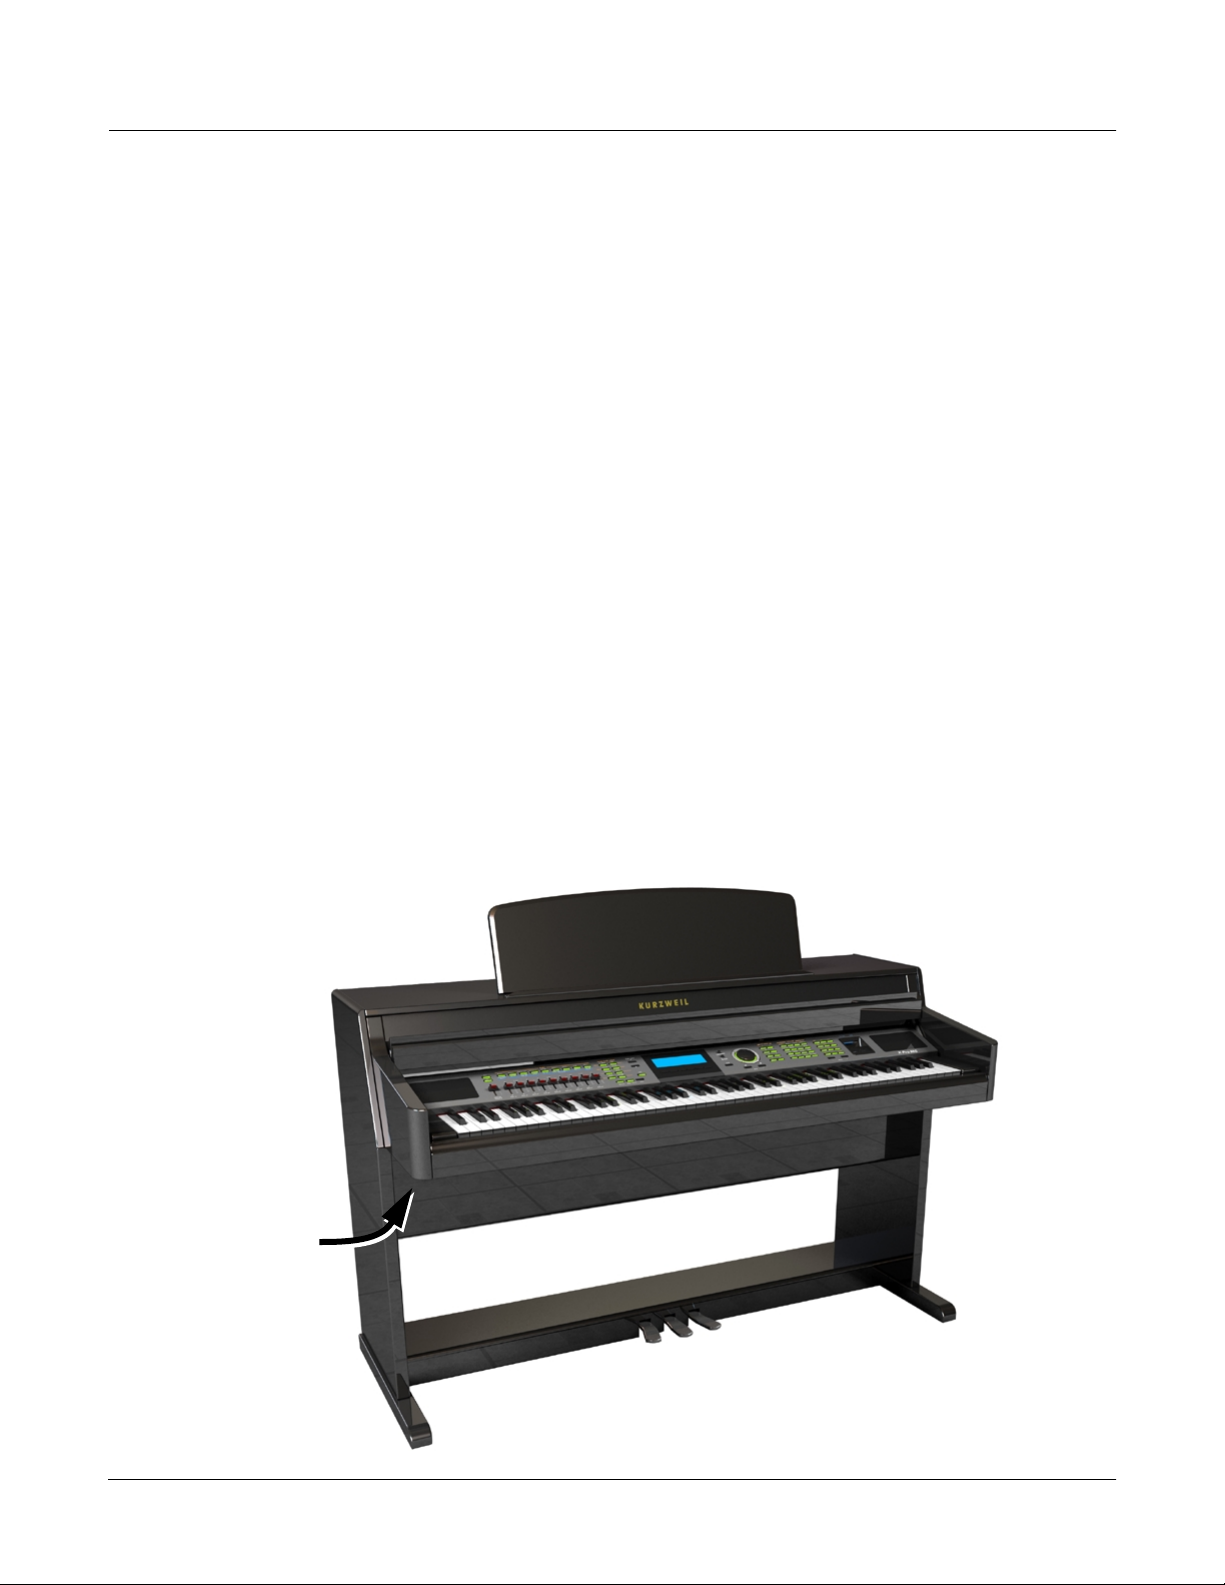
The X-Pro is always in one of eight primary operating modes. Select a mode by pressing one of
the mode buttons — they’re to the left of the display. Each mode button has an LED that lights to
indicate the current mode. Only one mode can be selected at a time.
Program mode
Setup mode
Quick Access mode Select from a list of preset banks, each containing ten programs and/or
Effects mode
MIDI mode
Master mode
Song mode
Storage mode
The X-Pro’s tone wheel organ emulation is called KB3 mode . You automatically enter this mode
when you select a KB3 program. The KB3 Bank button takes you there directly.
Mode Buttons
Select and play programs, and modify them with the Program Editor.
Select and play setups, and modify them with the Setup Editor.
setups that can be viewed in the display for easy selection. Modify the
preset banks and create your own with the Quick Access Editor.
Enable/disable effects or set Aux overrides.
Define how your X-Pro sends and receives MIDI information to other
devices.
Define performance and control characteristics for the entire X-Pro.
Use the X-Pro’s sequencer to record and play back your keyboard
performance, play Type 0 and Type 1 MIDI sequences, and record multitimbral sequences received via MIDI.
Interface with the X-Pro’s xD card reader or USB port to load and save
programs, setups, samples, and more.
2-2
When you press a mode button, its LED lights up to indicate that the mode has been selected. If
pressing a mode button does not light its LED, press the Exit button one or more times, then try
again. Additional labeling for each mode button indicates special functions that relate to some of
the X-Pro’s editors.
Page 11

Bank Buttons
The Bank buttons, situated in the top left corner of the X-Pro’s front panel, let you choose
different banks of programs (e.g., KB3 programs or Classic Keys programs). Within each bank,
you can use the Program and Category buttons (to the right of the display) to select individual
programs.
The Bank buttons have special functions in KB3 mode, indicated by labels beneath each button.
Sliders
In KB3 mode, the X-Pro’s nine sliders emulate an organ’s drawbars. For example, slider A
emulates an organ’s 16’ drawbar. In other modes, the sliders can be used to send values for
different MIDI controllers. In either case, you may have to move the slider past the current value
for its selected function before slider movement will have any effect.
Operation Overview
User Interface Basics
Most VAST programs use the sliders for these functions:
A Data Filter frequency, Brightness
B MIDI 13 Filter resonance, Tremolo rate control
C MIDI 22 Layer volume, Envelope control, Lo tonal balance
D MIDI 23 Layer volume, Envelope control, Hi tonal balance
E MIDI 24 Layer volume for thumps and release
F MIDI 25 Effects control 1
G MIDI 26 Effects distortion drive
H MIDI 27 Effects distortion warmth
I MIDI 28 Reverb / delay control
2-3
Page 12
Operation Overview
User Interface Basics
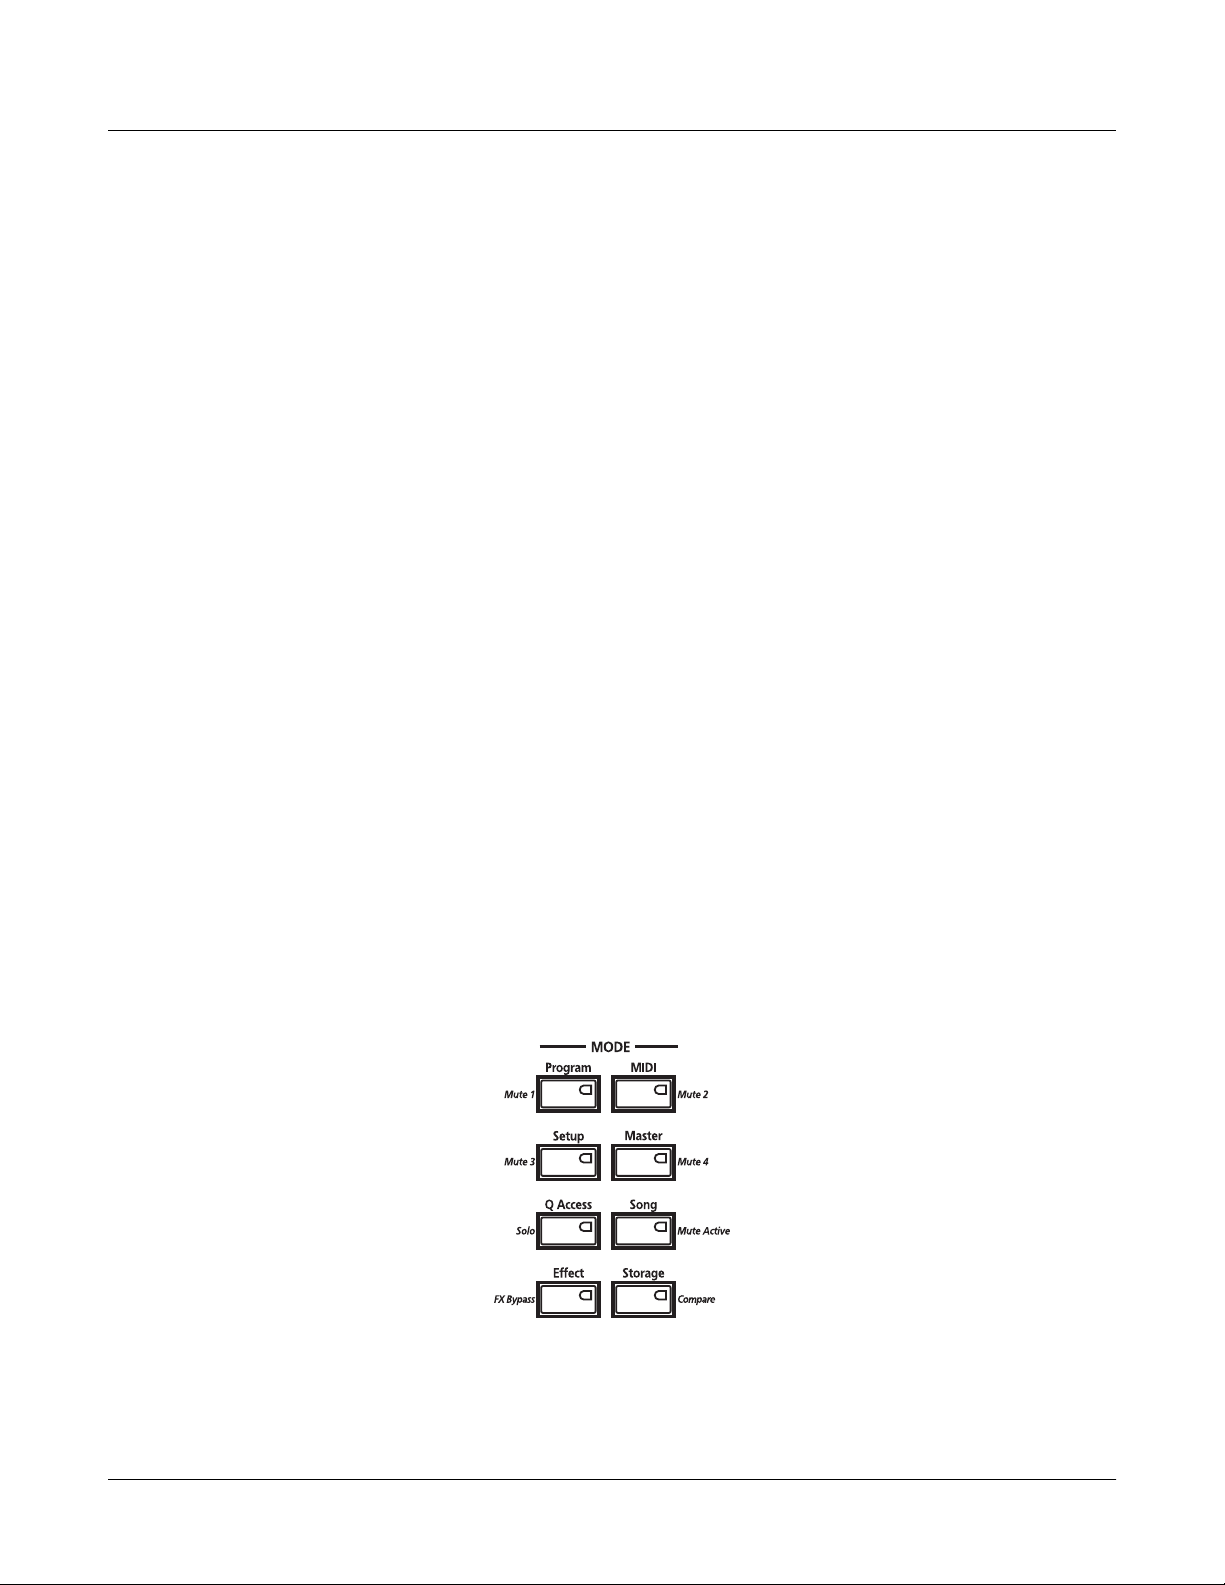
Program and Category Buttons
Use the Program and Category buttons, in conjunction with the Bank buttons (above the
sliders), to directly select X-Pro programs. Each of the 16 categories contains 8 programs, for a
total of 128 programs per bank.
Picking favorites
When you select a program within a category, your selection will be remembered. For example,
choose program 3 in the Organ category (press Category: Organ , then Program: 3 ). Now move
to the strings by pressing the Category: Strings button. If you press the Category: Organ button
again, you will be returned to program 3 in the Organ category. In this way, each category can
have a “favorite” program.
You can make program selections within each category ahead of time. This way, you’ll be able to
access the program you want in any category simply by pressing appropriate category button.
Important things to remember about your “favorites”:
• You must save your X-Pro’s Master Table to remember your selections when power is off.
See the PC3 Musician’s Guide for information about the Master Table.
• Your selections are bank-dependent. In other words, you can save one favorite in each
category of the Base 1 bank, one favorite in each category of the Base 2 bank, etc.
2-4
Page 13
Pitch-Mod Controller
To the left of the X-Pro’s keyboard is the Pitch-Mod Controller which usually controls pitch
bending and a control parameter.
The top part of the Pitch-Mod Controller is known as a Pitch Wheel , push it away from you to
raise the pitch of the note(s) you are playing. Pull it towards you to lower the pitch. Most
programs are set so that the pitch wheel will raise and lower pitch by a whole step, although
some programs use the pitch wheel to lower pitch by as much as an octave. The Pitch Wheel has
a spring so that it will snap back to place (i.e., back to the original pitch) when you release it.
Operation Overview
User Interface Basics
Left/right movement of the Pitch-Mod Controller provides parameter control which can
perform a variety of functions. Different programs may use it for filter sweeps, tremolo/vibrato,
wah, or layer volume.
Pushing the Pitch-Mod Controller to the right sets a fixed continuous controller value. When
you release the Pitch-Mod Controller from the right, the highest value that was reached remains
set. Once the value is set, push the Pitch-Mod Controller left of center and release to set the
controller value back to its lowest value. Set values are remembered when moving between
programs.
Pushing the Pitch-Mod Controller to the left allows you to continuously set the controller value,
and releasing the Pitch-Mod Controller from the right sets the controller value back to its lowest
value.
The Arp And SW Buttons
The Arp button turns on and off the X-Pro’s Arpeggiator.
The SW button (MIDI 29) can be programmed to do a variety of things. Often it is used for layer
enable or effect enable.
2-5
Page 14

Operation Overview
Navigation
Navigation
The navigation section of the front panel consists of the display and the buttons surrounding it.
These navigation buttons will take you to every one of the X-Pro’s programming parameters.
The Display
Your primary interface with the X-Pro is its backlit graphic display. As you press various
buttons, this fluorescent display reflects the commands you enter and the editing changes you
make. The ample size of the display (240-by-64 pixels) enables you to view lots of information at
one time.
Pages
Within each mode, the functions and parameters are organized into smaller, related groups that
appear together in the display. Each one of these groups of parameters is called a page. Each
mode has what we call an entry-level page; it’s the page that appears when you select that mode
with one of the mode buttons. Within each mode and its editor(s), the various pages are selected
with the navigation buttons. There are many pages, but there are a few features common to each
page.
The illustration below shows the entry-level page for Program mode.
2-6
Page 15

The Top Line
On the top line of most pages, there’s a reminder of which mode you’re in and which page
you’re on. Many pages display additional information in the top line, as well. The
Program-mode page above, for example, shows you the current amount of MIDI transposition
and the currently selected MIDI channel. The top line is almost always “reversed”—that is, it
has a white background with blue characters.
The Bottom Line
The bottom line is divided into six (sometimes fewer) sets of reversed characters that serve as
labels for the six buttons directly beneath the display. These labels—and the functions of the
buttons—change depending on the currently selected page. Consequently the buttons that
select these functions are called “soft” buttons.
The Soft Buttons
The soft buttons are called “soft” because their functions change depending on the currently
selected mode and page. Sometimes they perform specific functions, like changing MIDI
channels in Program mode. In the Program Editor and other editors, they’re also used to move
to different pages of programming parameters. If a soft button’s label is in all capital letters
(KEYMAP, for example), pressing the corresponding soft button takes you to a page of
parameters. If the soft button is labeled in lower-case or mixed-case letters (Save, for example),
the soft button performs some kind of function.
Operation Overview
Navigation
The Cursor Buttons
To the right of the display are four back-lit buttons arranged around the alpha wheel (see The
Alpha Wheel below.) These are called the cursor buttons. They move the cursor around the
currently selected page, in the direction indicated by their position, either up, down, left, or
right. The cursor usually appears as a highlighted (reversed) rectangle, but for some fields it’s an
underscore. It marks the value of the currently selected parameter.
Programming the X-Pro involves selecting various parameters and changing their values. Select
parameters by highlighting their values with the cursor. You can change the highlighted value
with any of the data entry methods described in the data entry section below.
2-7
Page 16

Operation Overview
Data Entry
The Chan/Layer Buttons
The Edit Button
To the left of the display are two buttons labeled Chan/Layer. Their function depends on the
current mode. In Program mode, for example, they shift through the MIDI channels, showing
the program assigned to each channel. This changes the MIDI channel the X-Pro uses internally,
as well as the channel you’re using to send information to other synths connected to the X-Pro’s
MIDI Out port (MIDI slaves). Changing the current MIDI channel also changes the
corresponding setting on the MIDI mode TRANSMIT page. When you press both Chan/Layer
buttons at the same time you will be returned to Channel 1. See the PC3 Musician’s Guide User
Interface Basics Chapter for more shortcuts you can make with double button presses.
When you’re in the Program Editor, the Chan/Layer buttons let you view each layer in the
program. You can see the corresponding parameters in each layer by scrolling through the layers
with these buttons. In the Setup Editor, the Chan/Layer buttons scroll through the zones in the
current setup. In Quick Access mode, they scroll through the Quick Access banks, and in Song
mode they scroll through recording tracks.
The Edit button is located to the left of the display. It activates each of the X-Pro’s editors, and
acts as a shortcut to many pages within the Program Editor. Pressing the Edit button tells the XPro that you want to change some aspect of the object marked by the cursor. For example, when
a program is selected and you press Edit, you enter the Program Editor. If a setup is selected,
you enter the Setup Editor.
There are editors accessible from just about every operating mode. To enter an editor, choose one
of the modes (mode selection), and press Edit. An editing page for that mode will appear. You
can then select parameters (navigation) and change their values (data entry). If the value of the
selected parameter has its own editing page, pressing the Edit button will take you to that page.
For example, in the Program Editor, on the PITCH page, you might see LFO1 assigned as the
value for Pitch Control Source 1. If you select this parameter (the cursor will highlight its
value—LFO1 in this case), then press the Edit button, you’ll jump to the page where you can
edit the parameters of LFO1. Naturally, you can find every page in the current editor by using
the soft buttons, but often it’s easier to use the Edit button shortcut.
The Exit Button
The Exit button is located to the right of the display. Press Exit to leave the current editor. If
you’ve changed the value of any parameter while in that editor, the X-Pro will ask you whether
you want to save your changes before you can leave the editor. See the PC3 Musician’s Guide,
Chapter 5 for information on saving and naming. The Exit button also takes you to Program
mode if you’re on the entry level page of one of the other modes. If at some point you can’t seem
to get where you want to go, press Exit one or more times to return to Program mode, then try
again.
Data Entry
The data entry section of the front panel includes the Alpha wheel, the Plus/Minus buttons, and
the 14-button alphanumeric pad.
2-8
The Alpha Wheel
The Alpha Wheel is especially useful because it can quickly enter large or small changes in
value. If you turn the Alpha Wheel one click to the right, you’ll increase the value of the
currently selected parameter by one increment. One click to the left decreases the value by one
Page 17

increment. If you turn it rapidly, you’ll jump by several increments. You can also use the Alpha
Wheel to enter names when you’re saving objects.
The Plus/Minus Buttons
These buttons are located just under the Alpha Wheel. The Plus button increases the value of the
currently selected parameter by one, and the Minus button decreases it by one. These buttons
are most useful when you’re scrolling through a short list of values, or when you want to be sure
you’re changing the value by one increment at a time. One press of the Plus or Minus button
corresponds to one click to the right or left with the Alpha Wheel. These buttons will continue
changing values if pressed and held.
Operation Overview
Data Entry
Pressing the Plus and Minus buttons simultaneously will move you through the current list of
values in large chunks instead of one by one. Don’t confuse these buttons with the +/- button on
the alphanumeric pad. That button is used primarily for entering negative numeric values and
switching from uppercase to lowercase letters (and vice versa).
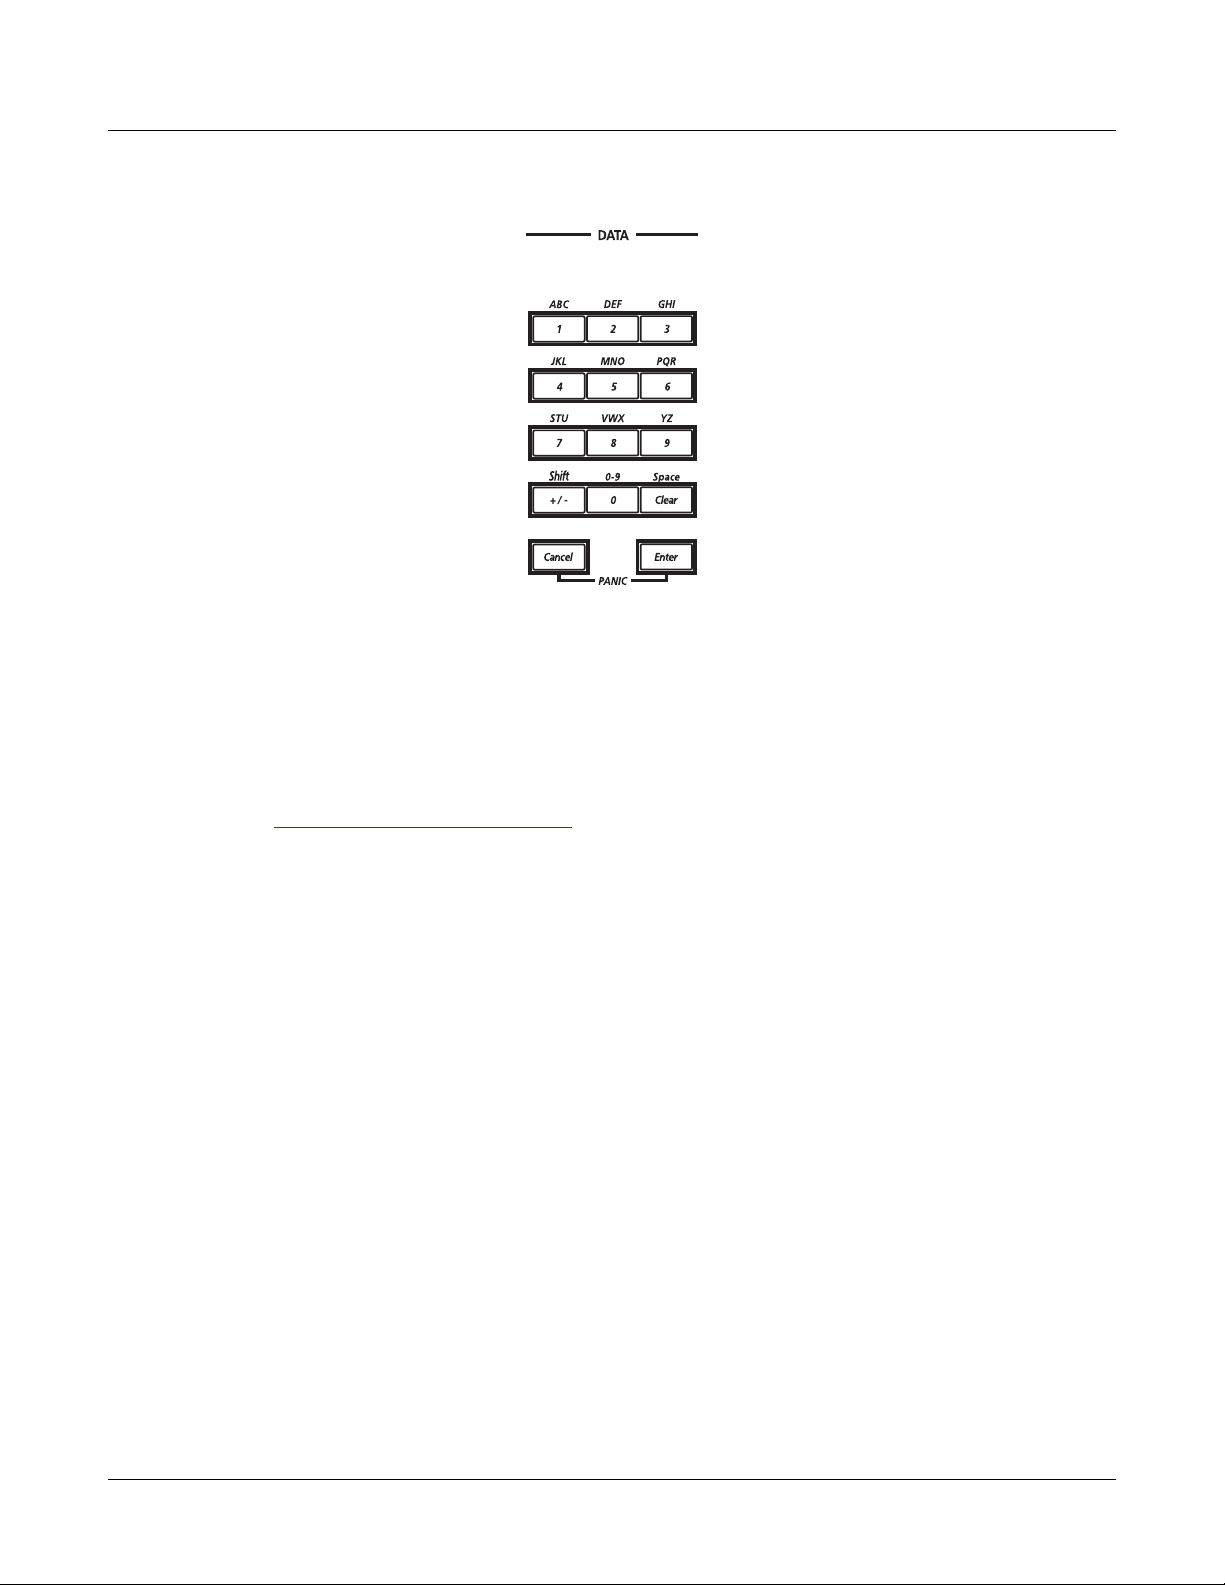
The Alphanumeric Pad
As its name implies, this set of 14 buttons lets you enter numeric values, and to enter names one
character at a time. Depending on where you are, the X-Pro automatically enters letters or
numerals as appropriate (you don’t have to select between alphabetic or numeric entry).
When you’re entering numeric values, press the corresponding numeric buttons, ignoring
decimal places if any (to enter 1.16, for example, press 1, 1, 6, Enter). The display will reflect
your entries, but the value won’t actually change until you press Enter. Before pressing Enter,
you can return to the original value by pressing Cancel. Pressing Clear is the same as pressing 0
without pressing Enter.
When entering names, you can use the Left/Right cursor buttons or the <<< / >>> soft buttons
to move the cursor to the character you want to change. Use the labels under the alphanumeric
buttons as a guide to character entry. Press the corresponding button one or more times to insert
the desired character above the cursor. The Cancel button is equivalent to the >>> soft button,
and Enter is the same as the OK soft button. The Clear button replaces the currently selected
character with a space. The +/- button toggles between uppercase and lowercase letters or
between entering positive or negative numbers.
2-9
Page 18
Operation Overview
Differences Between The X-Pro And The PC3
There’s also a convenient feature called keyboard naming, which lets you use the keyboard to
enter characters in names. For more details see the PC3 Musician’s Guide, Chapter 5 Keyboard
Naming.
Differences Between The X-Pro And The PC3
Throughout these guides you may be referred to the PC3 Musician’s Guide for additional
information. You can download the PC3 Musician’s Guide in PDF format for free at
www.kurzweilmusicsystems.com, click on the tab for the Downloads page, then click the PC3
link. The X-Pro uses the same powerful internal sound engine as the PC3 performance controller
keyboard, and for the most part the X-Pro operates as the PC3 does, aside from a few minor
differences (see below.) Almost all of the information in the PC3 Musician’s Guide can be applied
to the X-Pro, so consult this guide when you are ready to learn more advanced features of the XPro. When consulting the PC3 Musician’s Guide, keep these differences in mind:
Cursor Buttons
The X-Pro’s cursor buttons are positioned around the alpha wheel, unlike the PC3’s cursor
buttons which are arranged in a diamond shape to the right of the display. Whenever the PC3
Musician’s Guide refers to the cursor buttons, the corresponding buttons on the X-Pro are the
cursor buttons around the alpha-wheel:
2-10
Page 19

Operation Overview
Differences Between The X-Pro And The PC3
Program Buttons
These function just as on the PC3, but their layout is slightly different on the X-Pro:
Pitch-Mod Controller
The top part of the Pitch-Mod Controller is known as a Pitch Wheel, and functions just as the
PC3’s pitch wheel does. Whenever the PC3 Musician’s Guide refers to the Mod Wheel, the
corresponding control on the X-Pro is left/right movement of the Pitch-Mod Controller. The
Pitch-Mod Controller functions differently than the Mod Wheel, read on for specifics:
Moving the PC3’s Mod Wheel all the way up corresponds to moving the Pitch-Mod Controller
all the way to the left or right. Unlike the PC3’s Mod Wheel, the Pitch-Mod Controller springs
back to the center position when released. This is because the Pitch-Mod Controller has two
different modes, depending on which way you push it:
2-11
Page 20

Operation Overview
Differences Between The X-Pro And The PC3
Pushing the Pitch-Mod Controller to the right sets a fixed continuous controller value. When
you release the Pitch-Mod Controller from the right, the highest value that was reached remains
set. Once the value is set, push the Pitch-Mod Controller left of center and release to set the
controller value back to its lowest value. Set values are remembered when moving between
programs.
Pushing the Pitch-Mod Controller to the left allows you to continuously set the controller value,
and releasing the Pitch-Mod Controller from the right sets the controller value back to its lowest
value.
SW And ARP Buttons
The X-Pro has its SW and ARP buttons above the Main Volume fader, as opposed to the PC3’s
SW and ARP buttons, which are positioned to the left of the keyboard. These buttons function
the same as with the PC3.
xD Memory Card Slot And USB Port
The X-Pro has its xD Memory Card Slot and USB port on the front panel, to the right of the
alphanumeric pad, as opposed to the PC3, which has its xD Memory Card Slot and USB port on
the back of the instrument. These function the same as with the PC3.
Contrast And Brightness Knobs
These function just as on the PC3, but on the X-Pro they are located on the front panel to the
right of the display, as opposed to the PC3 where they are located on the rear panel.
Analog Audio Outputs And Inputs
The X-Pro’s Pro Audio Balanced Outputs Left and Right on the back of the unit correspond to
the PC3’s Balanced Analog Outputs Left and Right. Unlike the PC3, the X-Pro does not have
Balanced Analog Outputs Aux Left and Right.
Also unlike the PC3, the X-Pro has Consumer Audio L/R In and Out connections. Use the XPro’s Audio Balanced Outputs Left and Right when connecting the X-Pro to a mixing board or
PA system. Use the Consumer Audio L/R outputs when connecting the X-Pro to a home stereo
system or other consumer audio product. Unlike the PC3, the X-Pro also has Consumer Audio
L/R In connections. With the appropriate cables you can connect a CD player, MP3 player, or
other consumer audio device to use the X-Pro’s internal speakers. This is useful to play along
with a song, backing track, or instructional recording. Adjust the volume on your device to
balance the volume between the X-Pro and your device.
Headphones Output
The X-Pro has two headphones outputs, located underneath the keyboard on the left. This is
unlike the PC3, which has one headphones output on the rear panel.
EP1 And EP2 Inputs
The X-Pro’s EP1 and EP2 inputs on the rear of the unit correspond to the PC3’s CC Pedals 1
(volume) and 2 (wah) inputs. These function the same as with the PC3.
2-12
Page 21

Operation Overview
Back Panel
Foot Switch Pedals And SW Pedal input
The X-Pro comes with three piano pedals, unlike the PC3, which has three Switch Pedal inputs,
and which needs a separate pedal for each input. Whenever the PC3 Musician’s Guide mentions a
pedal connected to one of the three Switch Pedal inputs, these pedals correspond to the three
included piano pedals. The X-Pro’s rightmost pedal corresponds to footswitch 1, the middle is
footswitch 2, and the leftmost is footswitch 3.
MIDI Connections
The X-Pro’s middle MIDI connector is for MIDI Thru only. Aside from this difference, the XPro’s MIDI ports function the same as with the PC3.
Breath And Ribbon Controller Inputs
Unlike the PC3, the X-Pro does not include inputs for Breath or Ribbon controllers. Disregard
any reference to these controllers.
Internal Speakers
Unlike the PC3, the X-Pro has internal speakers. The PC3 Musician’s Guide will usually make
reference to monitoring the instrument via speakers connected to the Balanced Analog Outputs
Left and Right. In most cases, following instructions from the PC3 Musician’s Guide while
monitoring the X-Pro from the internal speakers will provide the same result. Plugging in
headphones (or a stereo jack) into one of the headphone connectors under the keyboard is the
only way to mute the speakers in the X-Pro.
Back Panel
The X-Pro features a number of connectors that let it work with external controllers and audio
systems. For upright units, these are on the rear panel. For grand units, these are underneath in
the left rear corner where the power cord connects. Here is a brief description of their usage.
Additional technical details may be found in the PC3 Musician's Guide.
MIDI - In, Thru, Out
You may connect your X-Pro directly to another digital piano, synthesizer, or portable keyboard
equipped with standard MIDI connectors. You may also connect to a computer equipped with
MIDI connectors or a MIDI interface.
Seethe PC3 Musician's Guide for a detailed description of MIDI connections.
2-13
Page 22

Operation Overview
Back Panel
Control Pedals EP1, EP2
SW Pedal
Pro Audio Outputs
Audio Out
You may plug one or two controller pedals (also known as "volume pedals") into these jacks. By
default, EP1 controls Volume, like an organ swell pedal. The function of EP2 varies according to
the program or setup and is often used as a "wah" effect control. The jacks accept Kurzweil
control pedals (model CC-1) and compatibles.
This connector is for the 3 piano pedals (Soft, Sostenuto, Sustain). There should already be a
cord from the X-Pro pedal assembly plugged into it.
These jacks are used to connect to a professional sound or recording system using balanced
signal 1/4" plugs and cables. These jacks provide a strong signal that is immune to electrical
noise. For a monophonic mix of the left and right stereo signals, plug one cable into the jack
marked "Left/Mono Out". For a full stereo signal, plug the left channel cable into that jack and
the right channel cable into the other jack. Plugging into these does not affect the speaker sound.
This pair of jacks is designed to connect to normal audio equipment such as a hi-fi system that
uses cords with RCA plugs. They provide a weaker signal that works better with consumer
equipment. Note that a full stereo signal is provided even if only the Left cable is plugged in.
Audio In
You can use this pair of jacks to connect a signal source, like an external tape player or MP3
player, to your X-Pro and use its powerful system for amplification. The external signal will be
mixed with the X-Pro's own sound.
The X-Pro's Volume control will NOT control the volume of the external source - you must use
its own volume control. The X-Pro's Volume control will control the volume of its own sound
however.
CAUTION: You should turn your X-Pro off while plugging or unplugging cables from the
Audio In jacks. Otherwise you may hear a very loud hum or buzz noise. Turning the volume
down will NOT prevent this.
Digital Out
This jack provides a digital version of the X-Pro's audio signal for direct digital connection into a
studio or computer. The default signal provided by this jack is: AES/EBU Professional coaxial
format; 24 bits; 48KHz sampling rate. Other common sampling rates, such as 44.1KHz and
96KHz are possible.
Refer to the PC3 Musician's Guide for instructions.
Sync In
This input jack allows your X-Pro to synchronize its Digital Out signal to a studio system. Refer
to the PC3 Musician's Guide for details.
2-14
Page 23

Chapter 3
Program Mode
This chapter will give you a brief overview of Program mode. For complete details, see the PC3
Musician’s Guide, Program Mode Chapter.
The X-Pro powers up in Program mode, where you can select and play programs (called
patches, presets, or voices on other instruments). Programs are preset or user edited sounds
composed of up to 32 layers of samples, waveforms, or oscillators.
Use Program mode when you wish to play a single instrument sound as you would with any
electronic keyboard. For example, to use the Standard Grand piano program, use one of the
methods below to select program 1. If you’ve left Program mode, just press the Program mode
button or the Exit button one or more times to return.
Selecting Programs
When you are in Program mode, there are four basic ways to select an X-Pro program:
Program Mode
• Scroll through the program list using the Alpha Wheel.
• Scroll through the program list using the Plus or Minus button under the Alpha Wheel, or
the cursor buttons (the arrow buttons around the Alpha Wheel).
• Type the program’s ID (number) on the alphanumeric pad, then press Enter. If you make a
mistake, press Clear, then start over.
• Press one of the Bank buttons (above the sliders on the left side of the front panel) to select a
bank, then press a Category button and a Program button to choose a program within the
bank. The Category and Program buttons are on the front panel to the right of the Alpha
Wheel. Each of the 9 banks can contain up to 128 programs. The programs in a bank are
organized into 16 categories, accessed by one of the Category buttons. Each Category gives
you access to a set of 8 programs, selected by one of the Program buttons.
Note: The name of each Category button corresponds to the program instrument for banks 1, 2, and most
of bank 3. For the banks after this, the Category buttons can still be used as a convenient way to move
through programs in groups of 8, but the Category names may not be accurate.
Easy Audition
Any time you want to hear what a program sounds like, highlight the program’s name (while in
Program mode) then press the Play/Pause button to play a brief sample. The Demo Button
parameter on the Master Mode II page must be on for Easy Audition to work; the parameter is
on by default. Master mode is described in the PC3 Musician’s Guide, Chapter 11.
3-1
Page 24

Program Mode
Program Mode Display
Take a minute to familiarize yourself with the Program mode display. It gives you some helpful
basic information, like the MIDI transposition, what MIDI channel you’re on, and which
program is currently selected.
Info Box
The box at the left side of the display is called the info box. The info box displays information
about the current program (there’s also an info box for Setup mode).
Soft buttons
On most X-Pro screens, the bottom line of the display identifies the function of each of the
buttons beneath the display. We call these buttons soft buttons, because they do different things
depending on what’s currently showing in the display.
In Program and Quick Access modes, you can change octaves with the Octav- and Octav+
buttons under the display. The Info soft button shows you relevant details about the current
item. The Xpose-/Xpose+ buttons are a shortcut for quick transposition in semitone (half step)
increments. You can use them to transpose the entire X-Pro as much as three octaves up or
down. The top line of the display shows the current amount of transposition (Xpose). Press both
Xpose buttons simultaneously to return transposition to zero.
VAST Programs
Most of the X-Pro’s factory programs are VAST programs, meaning they use Kurzweil’s Variable
Architecture Synthesis Technology. Typical VAST programs are made up of layers of keymaps
(keymaps are instrument sounds mapped across the keyboard.) On the Program mode main
page, the info box on the left contains details about the different layers in each program, usually
indicating the keymap used in each layer. The line under the keymap name indicates the layer’s
keyboard range (see below.) In this case, only the first two displayed layers extend across the
entire keyboard (A0 to C 8). The ∞ symbol to the right of each layer shows that the keymap is a
stereo keymap.
3-2
Page 25

KB3 Programs
KB3 (organ) programs differ from VAST programs in that they don’t have layers. Instead they
rely on oscillators that mimic the tone wheels used in many popular organs. Consequently, the
info box shows only the waveform used in the program.
Note: Press the KB3 bank button to access KB3 programs in Program mode. While a KB3 program is
selected, the bank buttons function as KB3 specific controls (listed below each bank button, see the PC3
Musician’s Guide, Program Mode Chapter for details.) To exit KB3 mode and return the bank buttons to
their normal function, press the KB3 bank button or use one of the program selection methods (see
Selecting Programs, above) to choose a VAST program.
Quick Access
A really convenient way to select programs and setups is to use Quick Access mode, where you
select a Quick Access bank from a list of factory preset or user-programmed banks. Each bank
contains ten memory slots, or entries, where you can store any combination of programs or
setups. While you’re in Quick Access mode, you can select any program or setup in the bank
with buttons 0 through 9 or the cursor keys.
The X-Pro comes with a few Quick Access banks already programmed so you can get an idea of
how they work. You’ll probably create your own Quick Access banks to help you select
programs and setups with a minimum of searching. Press the Quick Access mode button to the
left of the display. Its LED lights, to tell you you’re in Quick Access mode.
Program Mode
Quick Access
The top line of the display tells you which Quick Access bank is selected. Use the Chan/Layer
buttons (to the left of the display) to scroll through the banks. The names of each of the ten
entries in the bank are listed in the center of the display. Many of their names will be
abbreviated. The currently selected entry’s full name is shown near the bottom of the display.
The amount of transposition is displayed to the left of the entry name. If the current entry is a
program, you’ll see the current keyboard (MIDI) channel displayed to the right of the entry’s
name. If it’s a setup, you’ll see the word Setup.
The entries on the Quick Access page are arranged to correspond to the layout of the numeric
buttons on the alphanumeric pad.
When you’re ready to create your own Quick Access banks, see the PC3 Musician’s Guide,
Chapter 8 to learn about the Quick Access Editor.
3-3
Page 26

Program Mode
Effects
Effects
Many programs are saved with effects, such as reverb, distortion, or delay. In Program mode
you can adjust the level or intensity of these effects by using the X-Pro’s nine sliders. Below is a
list of the X-Pro’s sliders identified by letter. By default each slider will control a parameter as
listed below (if the parameter is in use in the current program.)
A Filter frequency, Brightness
B Filter resonance, Tremolo rate control
C Layer volume, Envelope control, Lo EQ
D Layer volume, Envelope control, Hi EQ
E Layer volume for thumps and release
F FX control 1
G FX distortion drive
H FX distortion warmth
I Reverb / delay control
In Program mode you can press the Info soft button to see controller assignment information for
each program. Pressing the Info soft button brings you to the Program Information page, which
will display any available controls for the current program’s effects or other aspects of the
program. On the Program Information page, sliders and buttons will be listed with their
function, if they have a function assigned to the current program. Some programs have more
controls than can fit in the display, in these cases there will be a scroll bar icon on the right of the
display. Use the alpha wheel to scroll through additional pages of controller assignments.
To learn more about the X-Pro’s effects and Effect mode, see the PC3 Musician’s Guide, Chapter 9.
To learn more about the assigning controllers to effects and other parameters, see the PC3
Musician’s Guide, Chapter 7, The Control Setup section. For information on assigning or editing a
program’s effects, see the PC3 Musician’s Guide, Chapter 6, The Program FX (PROGFX) Page.
3-4
Page 27

Chapter 4
Setup Mode
Use Setup mode to select, play, edit, and save setups. To enter Setup mode press the Setup mode
button, located with the mode buttons to the left of the display. This brings you to the Setup mode MAIN
page:
Setup Mode
A setup is made up of 1 to 16 zones, each of which uses a program (instrument sound) from
Program mode. With a setup you can play up to 16 different instrument sounds at once, either as
separate instruments from different key ranges (known as split setups,) as layers of instruments
from the same keys (known as layered setups,) or using a mix of both methods. The following
examples will explain how to use and edit each type of setup. These examples include
instructions to choose specific programs and choose specific key ranges. You can follow the
same guides to make your own custom setups by choosing any combination of programs and
key ranges.
The preset setups included with the X-Pro include split and layered setups, as well as some
setups that use more advanced features like riffs or programmable switches and sliders. To
learn more about these features see the PC3 Musician’s Guide, Setup Mode chapter.
A Note About Programs: Each zone in a setup contains a program from the X-Pro’s Program
mode. The X-Pro comes with over 800 programs, and you can also edit these programs or create
your own. When choosing a program for a setup, many users will be satisfied using one of the
included programs as is. Some users may also wish to alter the properties of a program beyond
the options given in Setup mode. In these cases, it is necessary to edit the program from
Program mode. See the PC3 Musician’s Guide, Program Mode chapter, Editing VAST programs
for more details.
4-1
Page 28

Setup Mode
The Setup Editor
The Setup Editor
In each of the following guides, you will be using the Setup Editor to make changes to the currently
selected setup. Open the Setup Editor from Setup mode by pressing the Edit button on the front panel.
Use the soft buttons at the bottom of the display to select the various Setup Editor pages. Use the more
soft buttons on the bottom of the display to scroll to through pages of soft buttons. The top line of the
display says “SetupMode:” with the name of the current Setup Editor page as well as the
number of the current zone. Use the Chan/Layer buttons to the left of the display to select the
current zone. The current and total number of zones can be viewed in the upper right corner of
each screen in the Setup Editor.
Press the Exit button on the front panel to exit the Setup Editor and return to the Setup mode main page.
If you have made any changes to the setup, you will be presented with the message “This setup has been
edited...” (see below.) You are given a choice of soft buttons: Press Rename to rename the setup before
saving, press No to return to the Setup mode main page without saving, press Yes to choose an
ID# and save the setup, press Cancel to return to the Setup Editor.
When saving, you must choose an ID#. An ID# gives you a way to locate a setup aside from its
name (you can store up to 2,048 unique ID#s for each object type: setups, programs, songs, etc.,
though many ID#s are already used for factory ROM objects.) ID#s also allow you to save
setups with the same name under different ID#s, and rename them at a later time if desired.
Choose an unused ID# to save a new setup. The next available unused ID# is automatically
selected when editing a factory ROM setup. When editing a setup that has been stored in user
memory (any originally unused ID#,) the edited setup’s ID# is automatically selected. This
assumes that you wish to replace the existing setup, but you can choose another ID# if desired
to save a new copy. Choose a used ID# to replace an existing saved setup. If you replace a
factory ROM setup, you can revert to the original setup by using the Delete soft button in the
Setup Editor. See the PC3 Musician’s Guide, Editing Conventions chapter for more details on
saving and naming.
4-2
Page 29

Using A Split Program Setup
One of the simplest uses of Setup mode is to create a split setup, in which different ranges of the
keyboard are assigned to play different instrument programs. The X-Pro can split the keyboard
into a maximum of 16 different instrument programs, though often a split of two programs is
most useful. Follow these steps to learn about using split program setups:
Part 1: Load The Example Setup
1. Press the Exit button until you reach the ProgramMode page. Next, press the Setup mode button,
located with the mode buttons to the left of the display. This will bring you to the Setup mode
MAIN page.
2. Use the plus/minus buttons or alpha wheel to select the setup 38 Jazz Bass/Piano or use the
alphanumeric pad to enter 38 and press Enter (see below.)
This setup contains a piano program on the upper octaves of the keyboard, and an upright bass
program on the lower octaves of the keyboard.
Setup Mode
Using A Split Program Setup
Note: The pre-set “split” setups included with the X-Pro all include the word “Split” or a slash (/) in
their names, such as 39 Fretless Bass Split, and 40 Zep KB3/Pianet.
This setup, 38 Jazz Bass/Piano has 2 zones, as we can see in the info box on the left of the Setup
mode main page (see above.) Each zone in a setup contains an instrument program. The
programs in this setup are AC Buzzer Bass and Grand "Evans". In the info box on the left of the
Setup mode main page we can see an overview of the keyrange of each zone. For example, the
line under the left of AC Buzzer Bass indicates that this zone covers the lower half of the
keyboard. The line under the right of Grand "Evans" indicates that this zone covers the upper
half of the keyboard.
Part 2: Changing The Split Point (Setting Zone Key Range)
You can use the Setup Editor to change the “split” point on the keyboard, the point where one
zone stops and the other begins. Do this by adjusting the key range for each zone. For example,
let’s change the split point of the setup 38 Jazz Bass/Piano to happen an octave lower. We will
have an octave less of high bass notes and an octave more of low piano notes:
4-3
Page 30

Setup Mode
Using A Split Program Setup
1. With the setup 38 Jazz Bass/Piano loaded, press the Edit button on the front panel. This will bring
2. On the CH/PROG page use the Chan/Layer buttons to the left of the display to select zone 1.
3. From the CH/PROG page, press the KEYVEL soft button on the bottom of the screen. This
you to the CH/PROG page of the setup editor (see below.)
Step 2
Step 3
You can view the number of the selected zone in the top right corner of screen. In the Program
field you can view the instrument Program for the current zone. We can see that the program for
zone 1 of this setup is 235 AC Buzzer Bass.
brings you to the KEY-VEL page where you can view the key range for the current zone. On the
KEY-VEL page we will adjust the key range for zone 1. You can see that zone 1 is still selected,
displayed in the top right corner of screen (see below.)
4-4
4. On the KEY-VEL page for zone 1, use the cursor buttons to highlight the HiKey field. This field
sets the upper limit of the key range for zone 1, which contains the bass program. Let’s make the
upper range of this zone end an octave lower by changing the HiKey field from D#3 to D#2. To do
this, select the HiKey field, hold the Enter button and play D#2 (two octaves below middle
C, which is C4) on the X-Pro’s keyboard (see below.)
Page 31

Setup Mode
Using A Split Program Setup
5. Next, use the Chan/Layer buttons to select zone 2 (viewable in the top right corner of screen.)
This will bring you to the KEY-VEL page for zone 2 (see below.)
6. On the KEY-VEL page for zone 2, use the cursor buttons to highlight the LoKey field. This field
sets the lower limit of the key range for zone 2, which contains the piano program. Let’s make the
lower end of this zone end an octave lower by changing the LoKey field from E3 to E2. To do this,
select the LoKey field, hold the Enter button and play E2 (the E note two octaves below
middle C). Using the piano keyboard to set high and low note ranges is an example of
intuitive entry. You can read more about intuitive entry in the PC3 Musician’s Guide.
Use the same methods to set the key range for any zone. See The Setup Editor above for details
on saving these changes when you exit the Setup Editor.
Part 3: Creating A New Split Setup From An Existing Split Setup
It is convenient to use an existing split setup as a template for a new split setup. This allows you
to easily create a new split setup by using the split point from an existing setup and using
different programs for each zone. For example, let’s use the setup 38 Jazz Bass/Piano, which uses
acoustic bass and piano programs, to create a split setup which uses electric bass and piano
programs:
1. If you are not already in Setup mode, press the Exit button until you reach the ProgramMode page,
then press the Setup mode button, located with the mode buttons to the left of the display. This
will bring you to the Setup mode MAIN page.
2. Use the plus/minus buttons or alpha wheel to select the setup 38 Jazz Bass/Piano or use the
alphanumeric pad to enter 38 and press Enter.
3. With the setup 38 Jazz Bass/Piano selected, press the Edit button on the front panel. This will
bring you to the CH/PROG page of the setup editor.
4-5
Page 32

Setup Mode
Using A Split Program Setup
4. Use the Chan/Layer buttons to the left of the display to select zone 1. You can view the number of
5. On the CH/PROG page for zone 1, select the Program field. Select the program 105 P-Bass by
6. Next, use the Chan/Layer buttons to the left of the display to select zone 2.
7. On the CH/PROG page for zone 2, select the Program field. Select the program 22 Sweet Loretta
the selected zone in the top right corner of screen.
entering 105 on the alpha numeric pad and pressing the Enter button on front panel (see below.)
EP by entering 22 on the alpha numeric pad and pressing the Enter button on front panel (see
below.)
4-6
Now the playing the lower half of the keyboard will produce electric bass, and playing the
upper half of the keyboard will produce electric piano. See The Setup Editor above for details
on saving these changes when you exit the Setup Editor.
Page 33

Using Setup Mode To Play Layers Of Instruments
Using Setup Mode To Play Layers Of Instruments
In a setup you can set zone key ranges that overlap. This creates layers of instrument programs
that are played from the same key range. As an example, let’s use the setup 38 Jazz Bass/Piano, a
split setup of bass and piano, and add a layer of strings to the piano section:
1. Press the Exit button until you reach the ProgramMode page. Next, press the Setup mode button,
located with the mode buttons to the left of the display. This will bring you to the Setup mode
MAIN page.
2. Use the plus/minus buttons or alpha wheel to select the setup 38 Jazz Bass/Piano or use the
alphanumeric pad to enter 38 and press Enter (see below.)
Setup Mode
3. With the setup 38 Jazz Bass/Piano selected, press the Edit button on the front panel. This will
bring you to the CH/PROG page of the setup editor (see below.)
4. On the CH/PROG page use the Chan/Layer buttons to the left of the display to select zone 2.
You can view the number of the selected zone in the top right corner of screen. In the Program
field you can view the instrument Program for the current zone. We can see that the program for
zone 2 of this setup is the piano program 8 Grand “Evans” (see below.)
4-7
Page 34

Setup Mode
Using Setup Mode To Play Layers Of Instruments
5. Use the more soft button on the bottom left of the display to scroll to the next page of soft buttons
and find the DupZn (duplicate zone) button. Press the DupZn button to duplicate zone 2 and create
zone 3. You will see the message “Zone duplicated,” and you will be brought to the CH/PROG page
for zone 3 (see below.)
6. On the CH/PROG page for zone 3, select the Program field. Select the program 198 Studio
Strings by entering 198 on the alpha numeric pad and pressing the Enter button on front panel (see
below.)
4-8
Now playing the upper half of the keyboard will produce piano and strings. See The Setup
Editor above for details on saving these changes when you exit the Setup Editor.
Alternatively you can create a layer by adjusting the key range of existing zones to match
another zone. You can also create a partial layer by adjusting a zone’s key range to only coincide
with some of another zone’s key range. There are many advanced uses of Setup mode to
manipulate layered zones. You can make a zone only respond to certain velocity ranges, so that
for example a layered zone is only heard when playing loudly. You can also mute and unmute a
layered zone with a programmable switch or footswitch, or adjust the volume of a layered zone
with a slider or expression pedal. See the PC3 Musician’s Guide, Setup Mode Chapter for details.
Page 35

Adjusting The Volume And Pan Of Zones
You will likely want to adjust the volume of zones in a setup. You can also adjust the pan (left/
right speaker position) of each zone. Each parameter is easily controlled in the setup editor. For
more details of the parameters on this page see the PC3 Musician’s Guide, Setup Mode Chapter,
The Pan/Volume (PAN/VOL) Page.
Let’s look at the setup 38 Jazz Bass/Piano and adjust the volume and pan of zone 2 which
contains the piano program 8 Grand “Evans“:
1. If you are not already in Setup mode, press the Exit button until you reach the ProgramMode page,
then press the Setup mode button, located with the mode buttons to the left of the display. This will
bring you to the Setup mode MAIN page. Next, with the setup 38 Jazz Bass/Piano selected in
setup mode, press the Edit button on the front panel. This will bring you to the CH/PROG page of
the setup editor (see below.)
Setup Mode
Adjusting The Volume And Pan Of Zones
Step 2
2. From the CH/PROG page, press the PANVOL soft button on the bottom of the screen (see above.)
This brings you to the PAN-VOL page where you can view key and velocity ranges for the current
zone (see below.)
4-9
Page 36

Setup Mode
Adjusting The Volume And Pan Of Zones
3. On the PAN-VOL page, use the Chan/Layer buttons to the left of the display to select zone 2. You
can view the number of the selected zone in the top right corner of screen (see below.)
4. Use the cursor to select the EntryVolume parameter. The volume for this zone is already at its
maximum value 127. Let’s use the alpha wheel to turn this parameter down to 90 (see below.) Now
the zone will play the piano program 8 Grand “Evans“ at a lower volume than zone 1.
Next, let’s adjust the Pan (left/right speaker position) of zone 2:
5. On the PAN-VOL page of zone 2, use the cursor to select the EntryPan parameter. Use the alpha
wheel to turn this parameter to 127 (see below.) Now the zone will play the piano program from
only the right speaker. (For the EntryPan parameter, a value of 64 plays the program at equal
volume from left and right speakers. A value of 0 plays the program from only the left speaker, and
a value of 127 plays the program from only the right speaker. Values in between make the sound
appear to come from a position between the left and right speakers.)
Use the same methods to adjust volume and pan for any zone. See The Setup Editor above for
details on saving these changes when you exit the Setup Editor.
4-10
Page 37

Creating A New Setup
Follow these steps if you would like to create a new setup from a blank template.
1. If you are not already in Setup mode, press the Exit button until you reach the ProgramMode page,
then press the Setup mode button, located with the mode buttons to the left of the display. This will
bring you to the Setup mode MAIN page (see below.)
2. Use the plus/minus buttons or alpha wheel to select the setup 128 Default Setup or use the
alphanumeric pad to enter 128 and press Enter (see below.)
Setup Mode
Creating A New Setup
3. With the setup 128 Default Setup selected, press the Edit button on the front panel. This will
bring you to the CH/PROG page of the setup editor (see below.)
4. On the CH/PROG page, select the Program field (see above.) Select a program for zone 1 using the
plus/minus buttons, the alpha wheel or the alpha numeric pad. You can also use a combination of
Bank, Category, and Program buttons to select a program.
4-11
Page 38

Setup Mode
Creating A New Setup
5. If you would like to add a new zone, use the more soft button on the bottom left of the display to
scroll to the next page of soft buttons and find the NewZn (new zone) button. Press the NewZn
button to create a new zone (see below.) You will see the message “New zone created,” and you will
be brought to the CH/PROG page for the new zone. You can view the number of the selected zone
in the top right corner of screen.
6. On the CH/PROG page for the new zone, select the Program field (see below.) Select a program
for the new zone using the plus/minus buttons, the alpha wheel or the alpha numeric pad. You can
also use a combination of Bank, Category, and Program buttons to select a program.
4-12
Repeat steps 5 and 6 to create up to 16 zones, each of which can have its own instrument
program and keyrange, as well as many other options. For more information see the PC3
Musician’s Guide, Setup Mode chapter.
Page 39

Setup Mode
Creating A New Setup
7. If you would like to adjust the keyrange of each zone, use the more soft buttons on the bottom of
the display to scroll to through pages of soft buttons and find and press the KEYVEL button. This
brings you to the KEY-VEL page where you can view the key range for the current zone (see
below.) You can view the number of the selected zone in the top right corner of screen. Use the
Chan/Layer buttons to the left of the display to select the current zone. On the KEY-VEL
page, the LoKey and HiKey fields set the lowest and highest keys that will trigger the current zone.
All keys in between the LoKey and HiKey will trigger the current zone, those outside of this range
will not trigger the current zone. To set a key value for the LoKey or HiKey field, select the field,
hold the Enter button and press the desired key.
8. When you are finished creating your setup, press the Exit button on the front panel to exit the Setup
Editor and return to the Setup mode main page. You will be presented with the message “This setup
has been edited...” Press Rename to save and name your setup, press No to return to the Setup
mode main page without saving, or press Cancel to return to the Setup Editor.
When saving, you must choose an ID#. An ID# gives you a way to locate a setup aside from its
name (you can store up to 2,048 unique ID#s for each object type: setups, programs, songs, etc.,
though many ID#s are already used for factory ROM objects.) ID#s also allow you to save
setups with the same name under different ID#s, and rename them at a later time if desired.
Choose an unused ID# to save a new setup. The next available unused ID# is automatically
selected when editing a factory ROM setup. When editing a setup that has been stored in user
memory (any originally unused ID#,) the edited setup’s ID# is automatically selected. This
assumes that you wish to replace the existing setup, but you can choose another ID# if desired
to save a new copy. Choose a used ID# to replace an existing saved setup. If you replace a
factory ROM setup, you can revert to the original setup by using the Delete soft button in the
Setup Editor. See the PC3 Musician’s Guide, Editing Conventions chapter for more details on
saving and naming.
4-13
Page 40

Setup Mode
Creating A New Setup
4-14
Page 41

Chapter 5
Song Mode
In Song mode, you can use the X-Pro’s sequencer to record songs using multiple instrument
sounds. You can easily change your song’s tempo, fix mistakes, and adjust the volume of each
instrument.
The following guide includes instructions to choose specific instrument sounds and track
numbers, simply as examples. When you are ready to make your own song, follow the same
methods and choose any instrument and track selection that you want.
The steps below explain the simplest way to record, in a linear, track-by-track fashion. There are
many methods for recording songs, and there are recording options that you may wish to
change once you become familiar with the process. See the Song mode chapter in the PC3
Musician’s Guide for more options.
Recording Overview
In this guide you will be instructed to record into tracks in a song. A track is like a layer in a song
containing the recorded part for one instrument program. You can record up to 16 tracks, and
each can be separately edited or adjusted in volume level (with many other options available as
well).
Song Mode
About MIDI
In Song mode the X-Pro functions as a MIDI sequencer. MIDI is a standardized system that
allows different electronic instruments to work together, among other musical uses. A MIDI
sequencer doesn’t record the sound of your performance, just messages that cause the
instrument to play notes. When you play back a song (a.k.a. a MIDI sequence) in Song mode, the
X-Pro triggers each of the notes that you have recorded, sort of like a player piano. MIDI is very
useful for recording songs with electronic instruments such as the X-Pro, because you can easily
make changes to recorded sequences. For example, you can change individual notes, transpose
parts, or change the instrumentation of tracks that have already been recorded. Since MIDI
sequences only play back messages that trigger notes, if you start recording or playing back
from the middle of your song, you will not hear the result of notes before that point (such as
notes sustaining from the previous bar.) In these cases, make sure to start playback or recording
before the notes that you want to hear.
About The Time Position Format
In this guide you will be instructed to select specific time positions in a song. In the X-Pro’s
sequencer, time positions are measured from the beginning of the song in Bars, Beats, and Ticks.
Dependent on the time signature, these units of measurements can have different values. In
these examples we will be using a 4/4 time signature in which a Bar contains 4 beats, and a
beat contains 960 ticks (from 0 to 959, see below for more about ticks.) The Song mode MAIN
page displays song time in the Locat field as Bars and Beats, for example a Locat position of 1
: 3 would correspond to Bar 1, Beat 3. The Song mode Big Time page displays song time in large
numbers on the top half of the screen as Bars, Beats, and Ticks. For example a Big Time
position of 1 :3 :480 would correspond to Bar 1, Beat 3, Tick 480 (in 4/4 Tick 480 would be the
second eighth-note of the beat.)
5-1
Page 42

Song Mode
Part 1: Assign Instruments To Tracks
Bars and beats should be familiar terms for musicians, but ticks are a term specific to MIDI
sequencers. Ticks provide fine resolution when recording and editing sequences. For example, if
you were to play along with the sequencer’s metronome to record one note on each beat of a bar,
upon reviewing the sequence you would most likely find that each note was not recorded
exactly on each beat, but that each was recorded a different small number of ticks away from the
beats. (See Part 7, The Event List, below for a way to view note time position.) Ticks allow for the
sequencer to record these tiny differences in timing, thus retaining the original timing nuances
of the performance. When locating note values smaller than 1 beat, divide the number of ticks in
a beat by the appropriate number (a quarter-note is always worth 960 ticks, no matter the time
signature.) For example, in a 4/4 time signature there are 960 ticks in a beat (since a beat is worth
a quarter-note in 4/4.) To find the value of an 8th note, divide 960 by 2, since there are two 8th
notes in a quarter-note. Divide 960 by 4 for 16th notes, by 6 for 16th note triplets, by 8 for 32nd
notes, and so on. You can also use record quantization which automatically moves recorded
notes to the nearest set time division, such as 8th or 16th notes. (See Part 7, Quantizing, below for
details.)
1. Press the Exit button until you reach the ProgramMode page. Next, press the Song mode button,
located with the mode buttons to the left of the display. This will bring you to the Song mode
MAIN page (see below.)
Step 1
Step 2
5-2
2. On the Song mode MAIN page choose 0*New Song* in the CurSng field (if not already selected).
This loads an empty song file (see above.)
3. Use the Chan/Layer buttons (to the left of the display) to Set the RecTrk parameter to 1. This sets
the track that you will be recording to (see below.)
4. Use the cursor buttons to navigate to the Prog field and choose a program with the plus/minus
buttons, alpha wheel, or by entering the desired program number with the alphanumeric pad. You
can also use a combination of Bank, Category, and Program buttons to select a program. This
sets the instrument sound for the current track. For example, choose program 1 Standard Grand to
Page 43

make the first track contain the piano part for this song (see below.) You can do this quickly by
entering 1 on the alphanumeric pad and pressing Enter.
Part 2: Set The Tempo
For this example, we will leave the song at its default time signature, 4/4 (see the Song mode
chapter in the PC3 Musician’s Guide for details on setting the time signature.) Follow the steps
below to set a tempo for your song. It is easiest to choose your tempo before recording any
tracks, but the tempo can be adjusted after recording as well (see the Song mode chapter in the PC3
Musician’s Guide for details on changing the tempo after recording.)
Song Mode
1. On the Song mode MAIN page, use the cursor buttons to navigate to the Tempo field and enter a
tempo. Entering the tempo with the alphanumeric pad is the easiest method if you know your
desired tempo. The plus/minus buttons and alpha wheel are useful for making smaller adjustments.
Tempo is set in beats per minute (BPM.) For this example, let’s set a medium tempo of 100 BPM.
In the Tempo field use the alphanumeric pad to enter 100 and press Enter (see below.)
Note: You can also set the tempo using the Tap Tempo function. Access the Tap Tempo page by pressing
the left and right cursor buttons simultaneously (see the Master mode chapter in the PC3 Musician’s
Guide for details.)
2. To hear the metronome play your tempo, press the BIG soft button. This brings you to the
Song:Big TIme page. On the Song:Big TIme page, set the Metron parameter to Always (see
5-3
Page 44

Song Mode
below.) Make sure the X-Pro’s main volume is set at a moderate level, then press the Play/Pause
button to hear the metronome play the selected tempo.
3. Press the BIG soft button again to return to the Song mode MAIN page (the MAIN soft button also
works for this, but using the BIG soft button is quicker.) Now you can adjust the Tempo parameter
and press the Play/Pause button to hear the metronome play the tempo. For this example we will
leave our previous Tempo setting of 100.0.
4. Once you are happy with the tempo, press the BIG soft button to return to the Song:Big TIme page.
Set the Metron parameter back to Rec so that you will only hear the metronome during recording
(see below.) When finished, press the BIG soft button again to return to the Song mode MAIN
page.
5-4
Part 3: Record Your First Track, Save The Song
1. On the Song mode MAIN page, use the Chan/Layer buttons (to the left of the display) to
choose the track you wish to record to. The track number is displayed in the RecTrk field
(see below.) Let’s begin by recording to track 1, to which we have assigned a piano program.
Page 45

Song Mode
2. Press the Record button located on the front panel. This prepares the X-Pro for recording on the
current RecTrk. The Record button lights, and on the Song mode MAIN page the right of the top
line will display REC. READY, which means that the sequencer will record when the Play/Pause
button is pressed (see below.)
3. Press the Play/Pause button located on the front panel. The metronome will play for 1 bar and then
recording will begin (see the Song mode chapter in the PC3 Musician’s Guide for details on
setting metronome count off options.)
4. Play your part for the current track, when finished, press the Stop button on the front panel to stop
recording. The Save Changes screen will be displayed where you can retry the last performance of
recording, save the song with the last recorded performance, or compare your new performance
with the last saved version of the song. For this example we will name the song My Song under
ID# 1025. See below for an explanation of this page:
Soft Button Functions On the Save Changes Page:
The PlyNew soft button allows you to play the song with your latest recorded performance.
You will likely want to hear this first.
Pressing PlyOld will play the current song, minus the performance that you just recorded. You
can toggle between Play Old and Play New without restarting the song by pressing either
button while the song is playing. This is useful to check if your last performance was better or
worse than what was previously saved (if anything was previously saved.)
The Locate field allows you choose a start time for the old or new playback. This is useful
when you just want to hear a certain part of the song without listening to the whole thing. The
Playing field displays whether to NEW or OLD data is playing.
Stop halts the playback of either the Old or the New version of the song you are currently
auditioning. This also resets the song’s start location to either the default Bar 1, Beat 1 value, or
to whatever location you defined in the Locate field.
5-5
Page 46

Song Mode
Pressing Retry restarts recording from the same point you last started recording from.
Yes saves the song with the performance you just recorded. Whatever was played back when
you pressed PlayNew will be the version of the song saved when you press Yes. The “save as”
dialog will be displayed:
Use the Alpha Wheel, -/+ buttons, or Alphanumeric Pad to choose a free ID# location to save the
song, or choose a used ID# location to overwrite a previously saved song with your new
version. For this example we will save the song under ID# 1025 (see above.) When overwriting a
song file, the “save as” dialog displays “Replace” followed by the name of the file being
replaced. Press Save to save the song with the current name, or Cancel to return to the previous
screen.
Press Rename if you would like to change the song’s name. This brings you to the
SongMode:name page. For this example we will rename the song My Song (see below.) For more
detailed instructions, see the PC3 Musician’s Guide: Editing Conventions chapter, “Saving and
Naming” section.
If you decide not to save or rename on the Song: Save Changes page, pressing the No soft button
returns you to the Song mode page in which you were last recording. Changes to the current
song are not saved, though the sequencer will remember changes to certain settings from the
MAIN and BIG pages. These settings are Tempo, Merge/Erase Mode, Locate, track mute status,
Time In, Time Out, Song End, Loop, Punch, and Metron. To permanently save these changes
with the song, make sure to choose Save from the soft button menu before powering off or
loading a new song. Alternatively, you will be prompted to save these changes upon loading a
new song if the MAIN page settings were changed while recording or with recording armed, or
if any of the BIG page settings were changed.
5-6
Page 47

About ID#s
When saving, you must choose an ID#. An ID# gives you a way to locate a song aside from its
name (you can store up to 2,048 unique ID#s for each object type: songs, setups, programs, etc.,
though many ID#s are already used for factory ROM objects.) ID#s also allow you to save songs
with the same name under different ID#s, and rename them at a later time if desired. Choose an
unused ID# to save a new song. The next available unused ID# is automatically selected when
editing a factory ROM song. When editing a song that has been stored in user memory (any
originally unused ID#,) the edited song’s ID# is automatically selected. This assumes that you
wish to replace the existing song, but you can choose another ID# if desired to save a new copy.
Choose a used ID# to replace an existing saved song. If you replace a factory ROM song, you
can revert to the original song by deleting the song using the Object soft button in Master Mode
(see the PC3 Musician’s Guide: Master Mode chapter.)
Part 4: Record Additional Tracks
When you are happy with your first track and you have saved your song so far, move on to
adding other instrument parts on other tracks. You can record up to 16 tracks.
1. On the Song mode MAIN page, use the Chan/Layer buttons (to the left of the display) to Set
the RecTrk parameter to an unused track number (for example, track 2.)
Song Mode
2. Set the instrument sound for the current track. Use the cursor buttons to navigate to the Prog field
and choose a program with the plus/minus buttons, alpha wheel, or by entering the desired program
number with the alphanumeric pad. You can also use a combination of Bank, Category, and
Program buttons to select a program. This sets the instrument sound for the current track. For
example, choose program 105 P-Bass to make the next track contain the bass part for this song (see
below.) This would be useful to play a bass part that matches the root notes of your left hand piano
part from track 1.
3. Follow the same steps in Part 3 above (starting on step 2) to start and stop recording, and review,
save or discard your performance. When saving the song with your new tracks recorded, press the
5-7
Page 48

Song Mode
Part 5: Fixing Mistakes
Save soft button on the SongMode:save as page in order to replace the currently saved song with
your new version.
4. Repeat the steps above with different track and program numbers to add additional instrument parts
to your song.
For each track in Song mode, you can fix mistakes in your performance without re-recording the
entire performance. Here we will describe the method that is easiest for fixing specific passages
in a track. (See the PC3 Musician’s Guide: Song mode chapter: The Event Page for a way to fix single
notes.)
1. On the Song mode MAIN page, use the Chan/Layer buttons (to the left of the display) to Set
the RecTrk parameter to the track that you want to fix. For example, let’s fix track 1 (see
below.)
2. Set the Mode parameter to Erase (see below.) This causes previously recorded notes to be erased
when a track is being recorded into.
3. Press the BIG soft button to go to the Big Time page.
5-8
Page 49

Song Mode
4. On the Big TIme page, set the Punch parameter to Punch. This causes recording to only take place
between the times set in the Time In and Time Out fields.
5. Set times for the Time In and Time Out fields to select the time to fix. For this example we will fix
bar 3 (see below.)
Note: If you need to fix a section which isn’t exactly within one bar or an even division of beats,
use the following method to find your Time In and Time Out points: Use the big time location
numbers on the top of the page to find a time where the first notes played (when you press play/
pause) are the notes that you wish to replace. Enter this location in the Time In field. Next, use
the big time location numbers on the top of the page to find a time where the first notes played
(when you press play/pause) are the first notes that you wish to keep after the notes that you
wish to replace. Enter this location in the Time Out field.
6. Use the big time location numbers on the top of the page and set a time before the area you want to
replace. This will be where you start playback of the song in order to re-record the desired section.
Leave enough time (usually a bar or two) so that you will have time to prepare before the section
you are replacing plays. For this example we will set our start time to 1 :1 :0, because it is two bars
before bar 3 (see below.)
5-9
Page 50

Song Mode
7. Press the Record button, then the Play/Pause button located on the front panel. Play your new part
when the song reaches the part you want to replace. This technique is called “punching in.” You will
often get more natural sounding results if you play along with the song before the part that you are
fixing. Doing this allows you to match your performance style (loudness, timing, phrasing) with
what has already been recorded. Because of your settings in steps 4, 5 and 6, no extra notes will be
recorded outside of the time that you want to replace.
8. Press the Stop button when you are done. You will be able to review and save your changes just as
in Step 4 of Part 3 (see above.)
9. Remember to switch off the Punch parameter when you are done if you wish to record in the
standard way again (as in Part 3, above.) This is done on the Big Time page (see below.)
Part 6: Adjusting The Volume Of Each Instrument
Adjust the volume of an instrument by adjusting the volume of the track containing that
instrument program. While your song is playing, you can use the Vol parameter on the Song
mode MAIN page to adjust the volume for the track currently set in the RecTrk parameter. To
permanently store your volume settings with the song, you must store an initial volume for each
track. Let’s use the song we created in the parts above as an example. Let’s adjust the volume of
track 1 and store the value as an initial volume setting:
1. On the Song mode MAIN page, use the Chan/Layer buttons (to the left of the display) to Set
the RecTrk parameter to track 1.
5-10
Page 51

Song Mode
2. Find the desired volume level by adjusting the Vol parameter during playback, then press stop. For
this example, let’s set the Vol parameter to 80.
3. Use the left and right more soft buttons at the bottom corners of the display to find the MIXER soft
button and press it (see below.) This brings you to the Song:MIXER page.
4. On the Song:MIXER page, press the Keep soft button to store initial values for all tracks (see
below.)
5. On the Song:MIXER page, press the Done soft button or the front panel Exit button. You will be
asked to save changes to your song, just as in Part 3, step 4 of this guide (see above.) Saving your
song completes the process of storing initial volume settings with your song.
Pressing the Keep soft button on the Song:MIXER page stores initial values of volume, pan, and
program number for each track. Initial values are the settings that will be used when your song
is played back from the beginning. Volume, pan, and program settings can change automatically
over the course of the song if you change them while recording, but pressing the Keep button
stores the current value for each setting to be recalled at the songs beginning.
5-11
Page 52

Song Mode
6. Follow the above procedure in steps 4 and 5 to store current values as initial values after changing
any volume, pan, or program parameters.
Note: Most users will want to store initial values as described above. Advanced users may not want to
store initial values for every track. See the PC3 Musician’s Guide, Chapter 12, Song Mode:The MAIN
Page, Program, Volume, and Pan sections for details on saving an initial value for a single track only.
Part 6 b: Recording Volume Automation
You can also record volume automation. Volume automation is the method of recording a series
of volume event messages that change a track’s Vo l parameter over the course of the song. This
is useful for fading instruments in or out of a song, or adjusting instrument volumes for only
specific sections of a song.
1. On the Song mode MAIN page, make sure the Mode parameter is set to Merge (see below.) (Also
make sure the Punch parameter has been turned off, as in Part 5, step 9, above.)
2. Press the Record button, then press Play/Pause.
3. Select the Vo l parameter and adjust it with the alpha wheel while the sequencer is recording. Any
changes to the Vol parameter will be recorded as data in the current track.
4. When you are finished, press the Stop button. You will be able to review and save your changes just
as in Step 4 of Part 3 (see above.)
Part 6 c: Erasing Volume Automation
If you’ve saved a song with volume automation and you wish to change or remove it
afterwords, follow the steps below to erase a selection of volume automation:
5-12
Page 53

Song Mode
1. In Song mode, press the Edit button with anything except the Prog parameter selected. This brings
you to the current song’s EditSong:COMMON page.
2. On the EditSong:COMMON page, press the TRACK soft button (see below.) This brings you to the
EditSong:TRACK page.
3. On the EditSong:TRACK page, set the Function parameter to Erase (see below.)
4. Use the Chan/Layer buttons (to the left of the display) to choose the track to erase volume
automation from. You can view the selected track number in the upper right corner of the screen.
5-13
Page 54

Song Mode
5. Set the Events parameter to Controllers (see below.)
6. Set the Controller parameter to Volume. You can do this quickly by selecting the Controller field,
entering 7 on the alphanumeric pad, and pressing Enter. Make sure the LoVal parameter is set to 0
and the Hi parameter is set to 127 (see below.)
7. Use the From and To parameters to set the range of time from which you want to remove your
volume automation. You can play the song and watch the Locate field to determine these times. For
this example, let’s say that we want to erase volume automation from bar 3 (see below.)
5-14
Page 55

Song Mode
8. Press the Go soft button to delete the selected volume automation. A screen will appear reading
“Erase Operation Completed!” Press the OK soft button to return to the EditSong:TRACK page
(see below.)
9. Once back on the EditSong:TRACK page, press the Play/Pause button to hear the result. Next,
press the Exit button twice to return to the Song mode MAIN page. You will be presented with the
Song: Save Changes page, where you can decide whether or not to save the changes you have
made.
10. To re-record volume automation, follow the steps in Part 6 b, above.
Part 7: Learning More About Song Mode
Factory ROM Songs
The X-Pro includes a number of pre-recorded songs stored in the factory ROM. Investigate these
songs to see the possibilities of Song mode. Feel free to edit or add to any of these songs in order
to learn more about song mode. You can save the demo songs you’ve experimented with under
new ID numbers so that you can compare between your version and the original. Also, if you
replace a factory ROM song, you can revert to the original song by deleting the song using the
Object soft button in Master Mode (see the PC3 Musician’s Guide: Master Mode chapter.)
Quantizing
Quantizing is a method of adjusting the timing of notes recorded into a sequence. It can be used
to adjust note timing in order to fix mistakes in a performance, or to make notes adhere to a
strict timing grid as a stylistic choice (as in much modern electronic music.) Quantized notes
have technically perfect timing but tend to sound less like a human performance. Quantization
can be applied automatically to each track as it is recorded, or it can be applied after recording to
only specific selections. For details see the PC3 Musician’s Guide: Song mode chapter: The MISC
Page, Quant parameter, and Song mode chapter: Song Editor: Track Functions, Quantize.
Creating Loops With The Big Time Page
On the Big Time page you can set the sequencer to loop a selection of bars. Set the Loop
parameter to Loop, and set a time for the Time In and Time Out parameters. Now, pressing
Play/Pause on the front panel will cause your selection to play repeatedly and seamlessly. You
will most commonly want to set your Time In and Time Out points to equal an even number of
bars such as 2, 4, 8, etc. Recording into a looped section of bars is a common technique for
recording sequence based music. For example, with a drum program selected for a track, you
could record a drum part by playing one drum sound each time through a 2 bar loop, until the
entire 2 bar drum “beat” sounds complete. Next, you could turn off the Loop parameter and
duplicate your drum beat several times to create the drum track for a longer song (see below for
5-15
Page 56

Song Mode
details on duplicating bars.) Keep in mind that you can loop any length of a song, and record
into a loop with multiple layers of instruments on different tracks. This is also a common
method for recording sequence based music, in which you created each section of your song
from looped sequences, and then arrange the loops into the desired order for your song’s
structure. Afterwards you can make variations to each section if you want the song to have less
of a “looped” sound.
Song Editing And Structure With Track Functions
In song mode you can easily copy part of a sequence to another time in the song, or from one
track to another. You can also copy a section of all tracks at once in order to duplicate or
structure entire sections of your song, such as verse and chorus sections. You can also choose
groups of notes to erase, or entire bars of time to delete. There are many basic and advanced
editing functions available. For details see the PC3 Musician’s Guide: Song mode chapter: Song
Editor: Track Functions.
Program Changes
If your song requires more that 16 instrument parts, one method of achieving this is with
program changes. For example, let’s say you’ve used all 16 tracks but desire a new instrument
for the next section of the song. If there is a track whose instrument is not needed in the new
section, this track’s program could change to a new instrument sound for the section, and then
change back to the original instrument sound after the section. To do this, simply press Record
and Play/Pause and then change the Prog parameter on the Song mode MAIN page to the new
program at the desired time. This can be done most precisely if you know the ID# of the program you wish
to change to. Enter the number with the alphanumeric pad and then press Enter when you want to make
the change. You won’t be able to see the numbers you’ve entered until you press Enter, but you can
press Cancel to start over if you’ve made a mistake or if you are unsure what you’ve entered.
Use the same method if you would like to change the program back to the original after the new section.
The Event List
Song mode is a powerful composition tool because just about anything that you do on the X-Pro
is recorded into a track as event messages. Once recorded, these events can be altered, copied or
removed. Each track has an event list, containing all of the events recorded into a track, from
which they can be viewed and edited. For details see the PC3 Musician’s Guide: Song mode
chapter: Song Editor: The EVENT page.
5-16
Page 57

X-Pro Programs and Setups
Appendix A
X-Pro Programs and Setups
Programs
Press the Info soft button for controller information.
ID Program ID Program ID Program
1 Standard Grand 27 Supertramp Wurly 53 Lord’s B3 Mwheel
2 Studio Grand 28 FlydDarkside/Wah 54 Ole Time Gospel
3 RubensteinSWComp 29 What'd I SayWrly 55 FooledAgnVox
4 Horowitz Grand 30 DeepFuzz Wurly 56 Boston Screamer
5 NYC Jazz Grand 31 No Quarter Pnt 57 Power Pop Horns
Programs
6 Pop Power Piano 32 MistyMountain EP 58 Sax/Trumpet Sctn
7 ColdPliano 33 UK Pop CP70 59 BigBand/AMradio
8 Grand "Evans" 34 AcidJazzVelFlute 60 MeanSalsaSection
9 Blues Piano 1974 35 TimbaSynth 61 R&B/Funk Section
10 Rock Piano 1974 36 Blue PVC Tubes 62 Bassie Orchestra
11 Lola Piano 37 SimpleHipHopLead 63 P*Funk Horns
12 TakeMeToThePilot 38 Stereo TouchKoto 64 70s Stones Horns
13 Deb's Ghost Pno 39 Modwheel DJ 65 Big LA Strings
14 Ken Brns Uprigt 40 Retro Sparkle 66 DarkNYCStudio
15 SMiLE/RkyRaccoon 41 RealSupasticious 67 Pop Tripper Str
16 Piano & String 42 Joe's Clav 68 LoFi Studio Str
17 Beaten in Rhds 43 Rufus/Marley WAH 69 Vienna Octaves
18 Stevie's Rhds 44 Black Cow Clav 70 London Spiccato
19 Gilpin'sSuitcase 45 Hiya Ground sw 71 Pizzicato
20 Duke's Dyno Rhds 46 TrampledUnder D6 72 Tremolando
21 MotorBootyMutron 47 Harpsichord 73 Choir Complete
22 Sweet Loretta EP 48 BriteHarpsichord 74 Haah Singers
23 Rhds/WahSW 49 Gregg’s B 75 Manhattan Voices
24 Hotrod Dyno Rhds 50 Real All Out B 76 Aaahlicious
25 WoodstockClunker 51 Clean Perc 77 NYC in LA
26 Stage Mix Wurly 52 The Ninth Bar 78 Crystal Voices
A-1
Page 58

X-Pro Programs and Setups
Programs
ID Program ID Program ID Program
79 Airy Pad 112 Levin/GabrlFrtls 145 XfadBelltoneRhds
80 Cathedral Vox 113 NYC Kits 146 Extreme Hardstrk
81 Classic Comp 114 LA Kits 147 Fagen Phaser
82 Fitty-Fitty Lead 115 Rock Kits 148 RoyalScam Rhds
83 Big Old Jupiter 116 Roots/Indie Kit 149 AustnCtyLmtsWrly
84 9Yards Bass 117 Kikz/Snarz MW 150 BrightDynamicWly
85 BowhSaw Bass 118 EarthKikz n Snrz 151 70sWahLeslieEP
86 ARPesque Bass 119 Anazlog Machine 152 3 Dog Pianet
87 DaywalkerBassMW 120 Produced Kit '08 153 Classic DX Rhds
88 Harpolicious 121 Natural Perc 154 Rich EP+Pad
89 Slo QuadraPad 122 Rhythm 4 Reel 155 90's FM Shimmer
90 Phase Shimmer 123 New Marimba 156 Bright HardstrEP
91 Le Pesque 124 2-HandSteelDrums 157 Crisp and Soft
92 Wispy One 125 Real Vibes 158 Soft Warm Ballad
93 Bladerunner ARP 126 SteamPunkMallets 159 TX Stack 1
94 Fairlight Pad 127 Magic Celeste 160 Tight Bright FM
95 Tronesque 128 Drums 'n Bells 161 PolyTechnobreath
96 So Lush Pad 129 Piano Stack 162 PianoSynth Stack
97 Boutique Six Str 130 Dark Grand 163 Elec Grand Stack
98 Boutique 12 Str 131 Grand Piano 440 164 BigSyn/HornStack
99 Emo Verser 132 Piano Recital 165 70s Arena Synth
100 Voxxed Elec 12 133 Ole Upright 1 166 80s Arena Synth
101 Real Nylon 134 WestCoastPno&Pad 167 90s Funk Stack
102 Dual Strat 135 Perfect PnoPad 168 Nexx Prog Stack
103 BurningTubes MW 136 Dreamy Piano 169 Crisp Clav
104 Rockin' Lead MW 137 Piano w DvStrgs 170 Stevie Fuzz
105 P-Bass 138 PnoAgtStrngs 171 HeartbreakerWAH
106 E-Bass 139 The Ancient 172 ChoclateSaltyClv
107 Beasties Bass 140 DancePnoEchplex 173 SailinShoes Clav
108 Flea/Bootsy 141 Ivory Harp 174 StopMakingSense
109 Big Dummy 142 Piano Lushness 175 Harpsi Rotovibe
110 Jaco Fretless 143 Piano & Wash 176 PhsyclGrafitiClv
111 Upright Growler 144 Piano & Vox Pad 177 ParisCmboAccordn
A-2
Page 59

X-Pro Programs and Setups
Programs
ID Program ID Program ID Program
178 Whiter Shade B3 211 ARP2500 Brass 244 DryPumpin'Drums
179 Doors Vox 212 SynBell Morph 245 60s Rock&Soul
180 Indagardenoveden 213 Perc>Morph>Bass 246 Headhunters Kit
181 Animals Vox 214 EvilOctaveWheel 247 FranticHouseDrms
182 Magic Wolf 215 TranceRiff 248 Dance/Marilyn
183 Farfisa 1 216 SickoSynco 249 Mellow Marimba
184 VASTBars1-3,8&9 217 Buzzy Strings 250 Skullophonic
185 1-Note PowerRiff 218 VA1Saw/Sqr/Pulse 251 Percussionist
186 Miami Pop Horns 219 Airy Impact 252 Shiny Sparkles
187 80sPopOctaveSax 220 Spider's Web 253 HybridTuned Perc
188 BuenaVista Brass 221 ARP Big Synth 254 Dynamic Perc
189 Tenor Express 222 Class Pad 255 Cage's Ensemble
190 Sgt.Pepper Brass 223 HarmonicEnvelops 256 Magic Mbira
191 Goldfinger Brass 224 Heaven & Earth 257 CP80 Enhanced
192 Bari/TenorSect 225 Bling 6 String 258 Gabriel's Melt
193 Studio A Strings 226 MediumCrunchLead 259 VideoKilledRadio
194 Studio B Octaves 227 DoubleCleanChrs 260 Brighter CP
195 NashvilleStrings 228 Comp'd Phaser 261 TouchRezSynthCP
196 Processed Strgs 229 TremBucker 262 Power CP
197 Owen's Strings 230 Cascade Sitar 263 Dark Chorus CP
198 Studio C Strings 231 Heavy Buckers 264 Inside Out CP
199 Tender Strings 232 Nasty'70s Guitar 265 Pianet Classic
200 Toxic Strings 233 Finger Bass 266 She's Not There
201 Mixed Choir 234 KneeDeepMinimoog 267 Walrus Pianet
202 Concert Choir 235 AC Buzzer Bass 268 Flaming Hohner
203 Aaah Vocals 236 Motown Bass 269 PowerChordPianet
204 Jazzy Ballad Vox 237 Squire'sHeavyPik 270 Sly Ballad
205 AntiqueAhhChorus 238 Lowdown Bass 271 Black Friday
206 Bright Syn Vox 239 Eberhardt Frtls 272 These Eyes
207 Vox Orgel 240 Sly Bass 273 VA1 Saw Lead
208 Vox & Strings 241 Maroon Drums 274 VA1 Sqr Lead
209 Press Lead 242 BourneRemixDrum 275 MaroonSynBass
210 ClassSquare 243 BeastieRetroDrum 276 VA1DistBassSolo!
A-3
Page 60

X-Pro Programs and Setups
Programs
ID Program ID Program ID Program
277 DownwardSpiralMW 310 Mono Trekkies 343 OrganMode Pn/Hrp
278 VA1DstPulseWheel 311 Disco Divebomb 344 Dr.John's RMI
279 NewOrderPulses 312 MutronTweetyPerc 345 Phase sw Organ
280 VA1 DetunedPulse 313 Disgusting Bass 346 Spaced Out Bach
281 VA1 Detuned Saws 314 VA1ShaperSweeper 347 Tobacco Road RMI
282 VA1 Detuned Sqrs 315 ElectroPercSynth 348 Traffic EP
283 VA1 Emerson Lead 316 MWhlMayhemBass 349 Tekno Tempo Echo
284 MwhlClubsweeper 317 ElectronicaSplit 350 Trick of th'Tail
285 Innervate 318 HiPassMWhlBlips 351 RMI Clav WAH
286 ChemBrosBassLead 319 Plasma Cannon 352 Dream On Session
287 UFO Pad 320 32 Layer Bass! 353 LightYearStrings
288 VA1SliderMorphSQ 321 Yesesis Tron Str 354 Funkensteinz ARP
289 Shoobie Model C 322 Moby TurntblTron 355 Murky Rez Pad
290 Stereo Pickups 323 Space Oditty 356 St PanPhase ARP
291 70sBubblegumClav 324 RocknRollSuicide 357 ARP Str+Oberheim
292 TreblClavWhlmute 325 Octave Tron Str 358 FX Sweep ARP
293 Mutron+Synth sw 326 Siberian Khatru 359 HotFilter ARP
294 Bi*Phaz Clav 327 Modwhl Remix Str 360 St.P PWM BASS
295 80s Flange Clav 328 Pdl PitchbendStr 361 SquareChirpLead
296 VAST Env SynClav 329 Silent Sorrow 362 My Old PPG*2.3
297 Charlemagne Clav 330 Bandpass Choir 363 Kashmir Str+Brs
298 Switch Pickups 331 Swept Tron Voice 364 Genesis Broadway
299 EvilWomanDeepFuz 332 Mellotron Flutes 365 GarthsLastWaltz
300 Headhunters WAH 333 SldrEQ Mltrn Vox 366 Synbrass Pillow
301 MorleyWAH Clav 334 StrawberryFlutes 367 Warszawa Layers
302 Dbl WAH Insanity 335 White Satin Splt 368 ELOStringSection
303 Psychedeliclav 336 3Way Split Mltrn 369 Outkast Drums
304 Preston SpaceWah 337 RMI Harpsi 370 PopRock'08 Kit
305 Analog/DigHybrid 338 Lamb Lies Down 371 Hello Brooklyn
306 Jump! Obx 339 RMI Piano&Harpsi 372 Snoop Kit
307 80s End Credits 340 BrightRMI Pn/Hrp 373 EpicRemixDrums
308 VA1Distlead CC 341 Dual Mode Harpsi 374 ZooYorkRemixDrms
309 Divider 342 RoyalKingWakeman 375 Roc-A-Fella Kit
A-4
Page 61

X-Pro Programs and Setups
Programs
ID Program ID Program ID Program
376 Breakestra Kit 409 Reeds & Bells 442 Woodwind Section
377 Cosmic Sus Pedal 410 Perc Atk Strings 443 Ensemble WWinds
378 DigitalMoonscape 411 William Tell A 444 BassClar/Clar/Fl
379 Falgor'sLament 412 William Tell B 445 Solo Fr Horn
380 BPM BionicStrngs 413 Orch w/ Bells On 446 Ensemble Fr Horn
381 Swell & Hold 414 Winds & Esp Str 447 Lead French Horn
382 Bowie/Heroes Pad 415 "Horns,Winds&Str" 448 Dyn Orch Fr Horns
383 MeanStereoSweep 416 TripleStrikeOrch 449 HornSect Layer
384 PulseVowel 417 Tutti Orchestra 450 Solo BrtTrumpet
385 Winds & Strings 418 StBaroque Harpsi 451 Hard Trumpet
386 "Winds, Horn & Str " 419 String Continuo 452 Lead Trumpet
387 More Brass & Str 420 VivaldiOrchestra 453 Soft Trumpet
388 LH Timp Roll Orch 421 Trumpet Voluntary 454 Slow Soft Trp
389 Gothic Climax 422 Fifes & Drums 455 Two Lead Trumpets
390 Denouement 423 Solo Flute 456 Lead MuteTrumpet
391 Poltergeist Trem 424 Tremolo Flute 457 Solo Tenor Sax
392 Many Characters 425 Fast Orch Flute 458 "Sax,Horns,MuteTrp"
393 Pizz w/PercUpTop 426 Piccolo 459 Solo Trombone
394 Fast Str & Perc 427 Solo Oboe 460 Ens Trombone
395 Fast Winds &Pizz 428 Slow Oboe 461 Trombone Section
396 Imperial Army 429 Fast Orch Oboe 462 Dyn Orch Bones
397 BattleSceneOrch 430 Lead Oboe 463 Bari Horn Section
398 Final Victory 431 Solo Eng Hrn prs 464 Dyn Bari Horns
399 SloLineInterlude 432 Fast Orch EngHrn 465 Solo Tuba
400 Winds&EspressStr 433 Slow EngHorn prs 466 Dyn Orch Tuba
401 Fast Winds & Str 434 Lead English Horn 467 Low Orch Brass
402 SugarPlumFairies 435 Solo Clarinet 468 Low Brass Chorale
403 AdagioPizz Split 436 Slo OrchClarinet 469 Fast Orch Brass
404 Pastoral Orch 437 Fast Orch Clar 470 Brass Fanfare
405 Pastoral Clr Flt 438 Lead Clarinet 471 Dyn Orch Trumpets
406 Pastoral DblRds 439 Solo Bassoon 472 Solo Violin fast
407 Pastoral w/ Pizz 440 Solo Bassoon vib 473 Folk Violin slow
408 Strings & Silver 441 Solo Dbl Reeds 474 Solo Viola fast
A-5
Page 62

X-Pro Programs and Setups
Programs
ID Program ID Program ID Program
475 Solo Viola slow 508 Chimes/Glock 541 PizzBass/ArcoLead
476 Solo Cello fast 509 Bells Across 542 Lead & Adagio
477 Solo Cello slow 510 CelesteGlockHarp 543 Adagio Split
478 Solo Basso 1 511 Chime Bell 544 Adagio Bs/Vln I
479 Solo Basso 2 slo 512 Carillon 545 TripleStrike Str
480 String Quartet 513 Adagio Strings 546 AdagioTutti 8ves
481 Solo Harp 514 Adagio Divisi Str 547 AdagioDiv 8ves
482 Orch Harp 1 515 Lead Strings 548 Adagio Octaves
483 Delicate Harp 516 Lead Divisi Str 549 Lead & 8vaAdagio
484 HarpArps & Gliss 517 Fast Strings 550 Dual Slow Split
485 Slo Orch Chorus 518 Fast Divisi Str 551 LeadTuttiMix B
486 Pipe Stops 519 Aggresso Strings 552 Lead Strings Split
487 Soft Stops 520 AggressDivisiStr 553 Lead MixOctvs
488 All Stops 521 Adagio Tutti Mix 554 Divisi Mix +solo
489 Chapel Organ 522 AdagioDivisi Mix 555 Lead Upper Range
490 AllStops AllVox 523 Lead Divisi Mix 556 Lead Div 8ves
491 Pipes & Voices 524 Lead Tutti Mix 557 Dual UpperDivisi
492 Orch Timpani 525 Fast Tutti Mix 558 Dual Upper tutti
493 Solo Timpani 526 Fast Divisi Mix 559 Dual Half Trem
494 Tam/Cym/BD/Timp 527 AggressTutti Mix 560 Fast Mix Octaves
495 Basic Orch Perc 528 AggressDivisiMix 561 Fast Divisi 8ves
496 Timp & Aux Perc 529 Agrs lo/Trem hi 562 Marcato divisi
497 Temple Blocks 530 AgresTrem 8ves 563 Marcato Mix 1
498 Modern Blockery 531 AgressoHalfTrem 564 Marcato Mix 2
499 Perc & Blocks 532 Fast Tremolandi 565 Marcato Mix 3
500 Stereo Tam-tam 533 SloStr Prs Trem 566 Slo Muted Strings
501 Cymbal Roll Tr 534 Marcato PrsTrem 567 Largo Mix
502 Xylophone 535 Sfz Prs Trem 568 Largo Mix 2
503 Solo Marimba 536 Poltergeist Pad 569 Largo conSordino
504 Orch Marimba 537 AdagioTremSplit 570 Largo 8ves
505 Vibraphone 538 Full Pizzicato 571 Espressivo Lead
506 Celeste 539 Touch Full Pizz 572 EspressivoViolas
507 Glockenspiel 540 Variable Pizz 573 Slow Thick Mix
A-6
Page 63

X-Pro Programs and Setups
ID Program ID Program ID Program
574 VerySloVeryThick 607 Fast Bassi div 640 Adagio Magic
575 Touch Thick Mix 608 Fast Tremolo 897 Ezra’s Burner
576 More Viola 609 Legato Violins I 898 HotTubeGospel
577 SloStr Prs Swell 610 Legato Violins II 899 B3 Midrange
578 Rite of Strings 611 Legato Violin div 900 Blues & Gospel
579 Adagio Violins I 612 Legato Violas 901 Prog B3 Perc 2
580 Adagio ViolinsII 613 Legato Viola div 902 Prog B3 Perc 3
581 AdagioViolin div 614 Legato Celli 903 Tube B3 Perc
582 Adagio Violas 615 Legato Celli div 904 Prog B3 Perc 4
583 AdagioViolas div 616 Legato Bassi 905 BrightTubeScream
584 Adagio Celli 617 Legato Bassi div 906 Zepelin Solo
585 Adagio Celli div 618 Legato Tremolo 907 Argent B3
586 Adagio Bassi 619 Aggresso Violin 908 MusselShoals B3
Programs
587 Adagio Bassi div 620 Aggresso Vln II 909 XtremeTubeB3Perc
588 Adagio Tremolo 621 Aggresso Violin d 910 ClassicTrafficB3
589 Lead Violins I 622 Aggresso Viola 911 Warm B3
590 Lead Violins II 623 Aggresso Viola d 912 Warmer B3
591 Lead Violins div 624 Aggresso Cello 913 ChorusEcho Organ
592 Lead Violas 625 Aggresso Cello d 914 SlowPhase Organ
593 Lead Violas div 626 Agresso Bassi 915 EchoRoom B
594 Lead Celli 627 Agresso Bassi d 916 Lord’s DirtBomb
595 Lead Celli div 628 Agresso Tremolo 917 Mellow Mitch
596 Lead Bassi 629 Rigby's Strings 918 Sly's Revenge
597 Lead Bassi div 630 Keyboard Strings 919 LateNighter
598 Lead Tremolo 631 StringMachine 920 Firebreathing C3
599 Fast Violin I 632 Lush Pad 921 Mr Smith
600 Fast Violin II 633 Add A Pad 1 922 Errol G.
601 Fast Violin div 634 Add a Pad 2 923 Testify
602 Fast Viola 635 Hi Res StringPad 924 Wah B3+Echoplx
603 Fast Viola div 636 LoFi Strings 925 Sweet n Nice
604 Fast Cello 637 Blue Resonance 926 Soft Chords
605 Fast Cello div 638 AutoRes StrPad 927 Sputteringing B3
606 Fast Bassi 639 Ethereal Joe 928 Melvin C.
A-7
Page 64

X-Pro Programs and Setups
Programs
ID Program ID Program ID Program
929 All Out 960 VAST1-3Ch/Perc2 1006 WheelGrowlMoogue
930 J’s Comper 961 Fisher’s VAST B3 1007 The Way It Is
931 Brother Jack 962 Ripply Six 1008 AlphaCentauri
932 Model One 963 Ripple Siner 1009 SynOrcWhaleCall
933 Thick Gospel 964 Ripple Thump 1010 Downes Lead
934 Growler B 965 Ripple RevDrum 1011 Minipulse 4Pole
935 Ready 2 Rock 966 Dark RevDrum 1012 BPM Lead
936 Thimmer 967 SpacerLead 1013 GatedSqrSweepBPM
937 The Real ABC 968 Ripple Sine2 1014 BPMEchplexPad
938 Gospel Special 969 Ripple Thump2 1015 GatedNoisweepBPM
939 In The Corner 970 Blues Harmonica 1016 Cars Square Lead
940 NightBaby 986 Hi Arp Delay 1017 Data Shape Saw
941 Gimme Some 987 Perc Arp Synth 1018 Saw+Mogue 4Pole
942 The Grinder 988 Candy*O SyncLead 1019 VA1NakedPWMPoly
943 Mean Bean 989 WheelSyncBlips 1020 VA1NakedPWMMono
944 Dew Dropper 990 12SAWMWheelLead 1021 VA1NakedSawPoly
945 Two Out 991 HotMalletMWheel 1022 VA1NakedSqrPoly
946 J’s All Out 992 ScreaminWhlBass 1023 VA1NakedSqrMono
947 My Sunday 993 SyncWheelLead 1024 VA1NakedSawMono
948 Good Starter 994 ModwheelKotoSyn
949 Sacrificer 995 VASprSaw
950 Lee Michaels B3 996 VASprSaw+Allpass
951 GM Standard Kit 997 Silent Program
952 GM Room Kit 998 Click Track
953 GM Power Kit 999 Default Program
954 GM Elec Kit 1000 Diagnostic Sine
955 GM Synth Kit 1001 Propht V Sync Ld
956 GM Jazz Kit 1002 Tempo SyncPulse
957 GM Brush Kit 1003 Slo Syn Orch
958 GM Orch Kit 1004 Anabrass
959 VAST1-3Ch/Perc 1005 Fat Syn Orch
A-8
Page 65

X-Pro Programs and Setups
Setups
ID SETUP ID SETUP ID SETUP
1 TeknoRiff Sw 1-8 32 Latin Danzhall 63 GrandPad & Magic
2 BluesJam in G 33 Metal 64 TinklySweepySpcy
3 Techno Substance 34 Growth Pad 65 Pulsing Anthem
4 Acoustic Split 35 Morricone's Fall 66 PedHold PnoSolo
5 Slap/EP Split 36 Strings Old&New 67 Rhythm Pad SW
6 Black Cow Split 37 MonoBass & ArpSt 68 The Wonders
7 Some Loving Splt 38 Jazz Bass/Piano 69 Drops of Jupiter
8 Piano & Pad 39 Bass + KB3 Split 70 No Complaints
9 PedalsModeW/Beat 40 Zep KB3/Pianet 71 Brighton Lush
10 AnaBanana 41 ElectricBass/EP 72 Nylon and Ivory
Setups
11 Sanctuary 42 ARP & Bass 73 Drawbr/Slidr SW
12 World Beneath 43 Fretless Split 74 Mini/E3/Clav
13 DeepBurn 44 Big Lead 75 LA Split
14 Sync Scene 45 SynBass/Lead 76 Bluman Live
15 MeanClav/Rhds 46 Play 77 Shwales
16 Bigband P Bttn1 47 MovieBuildup 78 Edenj’s Sky
17 MeanPianet/Piano 48 GuitarEnsemble 79 Marimbatronic
18 Oldtimey Blues 49 Big n Warm Pn/Gt 80 Tronotronic
19 OldR&B 50 Joni Split 81 Orch Fantasy
20 Old School Jam 51 StrangeLands 82 Stringotronic
21 Brooklyn Smoov 52 Perc Attack Orch 83 Harp Ensemble
22 Country 53 Disco Fanfare 84 MarimbasGoneWild
23 Rockroll in A 54 Pad w/Benefits 85 Ivory Ensemble
24 Hip Hop 55 AnaSoup 86 Spaces
25 Jazz 56 Blue Lights On 87 Bubble Pad
26 Reggae 57 Plucked Hammers 88 Fat Ana
27 World 58 Forbidden Planet 89 Frets o’ Lush
28 Dance 59 Childhood Magic 90 Dual Manual B3
29 Slow Rock 60 Autobeller 91 Dual Manual B3 2
30 Oldies 61 Square Arp'er 92 Dual Manual B3 3
31 Funk 62 PizzicatoBenefit 93 Dual Manual B3 4
A-9
Page 66

X-Pro Programs and Setups
Setups
ID SETUP ID SETUP
94 Mwhl Blips ARP 125 Hazel Jam
95 Mwheel DJ Arp 126 Internal Voices
96 Margarita Split 127 Clear Setup
97 Constant Gardener 128 Default Setup
98 Run Rago Run 129 Get Berni
99 Bionic Rock
100 Pea Soup
101 Walking Arps
102 Eminence in C
103 Vampire Nightclub
104 Kurz Jacinto
105 Music Bed
106 Octavia
107 Rosin Rhythm
108 Insanity
109 Bells
110 LowChunkerGroove
111 Hold Sum Notes
112 Reich Piano
113 AnaBouncer
114 The Factory
115 FattyFatFat
116 Brass Bouncer
117 Electric Dancer
118 Treso-Pulser
119 Mellow Tripper
120 SpacePulser
121 Mood Arp C2
A-10
122 Strum Thurmond
123 Drum n Bassr
124 funk setup
Page 67

Appendix B
X-Pro Specifications
Specifications
UP (upright): 145.2 cm (57.2 in) Wide
92.0 cm (36.2 in) High
63.6 cm (25 in) Deep
Weight 97 Kg (214 lbs) not including bench and accessories
MG (MiniGrand): 143.2 cm (56.4 in) Wide
91.3 cm (35.9 in) High
X-Pro Specifications
Specifications
93.0 cm (36.6 in) Deep
Weight 102 Kg (225 lbs) not including bench and accessories
BG (Baby Grand): 153 cm (60.25 in) Wide
101.6 cm (40 in) High
148.5 cm (58.5 in) Deep
Weight 197.5 Kg (435 lbs) not including bench and accessories
Power (UP and MG): 120V or 240V AC, 50-60Hz (Internal changeover, not user settable)
3.0A 1.5A maximum
275 watts at maximum rated output
Power (BG): 120V or 240V AC, 50-60Hz (Internal changeover, not user settable)
4.0A 2.0A maximum
350 watts at maximum rated output,
B-1
Page 68

X-Pro Specifications
Specifications
Audio Outputs (UP and MG):
Professional Balanced: 1/4: TRS jack, +21DBu maximum output, 400 ohms balanced source impedance
Consumer: RCA jacks, 3Vrms maximum output, 500 ohms source impedance
Headphones: 6Vrms maximum output, 47 ohms source impedance
Audio Inputs: RCA jacks, 1.2Vrms for rated output power at 250Hz
Speaker System: Woofers: 2X 6.5" (16.5 cm), tuned ports, 50 watt amplifier for each
Tweeters: 2X 2" (5 cm) cone type, 20 watt amplifier for each
Total system power: 140W rms
Audio Outputs (BG):
Professional Balanced: 1/4: TRS jack, +21DBu maximum output, 400 ohms balanced source impedance
Consumer: RCA jacks, 3Vrms maximum output, 500 ohms source impedance
Headphones: 6Vrms maximum output, 47 ohms source impedance
Audio Inputs (BG): RCA jacks, 1.2Vrms for rated output power at 250Hz
Speaker System (BG): Subwoofer: 12", 80 watt amplifier
Lower Midrange: 2X 6.5", 20 watt amplifier for each
Midrange: 2x 4", 20 watt amplifier for each
Tweeter: 2X 1" dome type, 20 watt amplifier for each
Total system power (BG): 200W rms
B-2
Page 69

MIDI Implementation Chart
MIDI Implementation Chart
Model: PC3, X-Pro
Manufacturer: Date: 12/01/07
Young Chang Version 1.0
Digital Synthesizers
Function Transmitted Recognized Remarks
Basic Channel
Mode
Note Number
Velocity
After Touch
Pitch Bender O O
Control Change
Program Change
System Exclusive O O*
System Common
System Real Time
Aux Messages
Notes *Manufacturer’s ID = 07
Default 1 1 Memorized
Changed 1 - 16 1 - 16
Default Mode 3 Mode 3 Use Multi mode for multi-
Messages
Altered
0 - 127 0–11 sets intonation key
True Voice 0 - 127 0 - 127
Note ON O O
Note OFF O O
Keys X O
Channels O O
O 0 - 31
32 - 63 (LSB)
64 - 127
O 1 - 999 O 1 - 999 Standard and custom
True # 0 - 127 0 - 127
Song Pos. O O
Song Sel. O O
TuneXX
Clock O O
Messages O O
Local Control O O
All Notes Off O O
Active Sense X X
Reset X X
Device ID: default = 0;
programmable 0–127
O 0 - 31
32 - 63 (LSB)
64 - 127
timbral applications
Controller assignments are
programmable
formats
X-Pro Specifications
Mode 1: Omni On, Poly Mode 2: Omni On, Mono O = yes
Mode 3: Omni Off, Poly Mode 4: Omni Off, Mono X =no
B-3
Page 70

X-Pro Specifications
MIDI Implementation Chart
B-4
Page 71

A
Alpha Wheel 2-8, 3-1
Alphabetic entry 2-9
Alphanumeric pad 2-9
Analog Audio Outputs And Inputs 2-12
Arp button 2-5
assigning controllers 3-4
Audio In 2-14
Audio Out 2-14
B
Back Panel 2-13
Bank Buttons 2-3
Banks 2-3
Boot Loader 1-2
Bottom line of display 2-7
C
Category buttons 2-4
Chan/Layer buttons 2-8
Cursor buttons 2-7
D
Data entry 2-8
Demo Button parameter 3-1
Demo Songs 5-15
Differences Between The X-Pro And The PC3 2-10
Digital Out 2-14
Display 2-6
Download PC3 Musician’s Guide 2-10
intuitive entry 4-5
K
KB3 programs 3-3
Key Range 4-3
keymaps 3-2
L
Layers Of Instruments 4-7
LCD 2-6
Loops 5-15
M
metronome 5-3
count off options 5-5
MIDI
About MIDI 5-1
MIDI Connections 2-13
MIDI Implementation Chart B-3
MIDI jacks
back panel 2-13
Mode buttons 2-2
Mode Overviews 2-2
Mode selection 2-2
N
Naming 5-6
Navigation 2-6
Navigation Controls Overview (diagram) 2-1
Numeric entry 2-9
E
Easy Audition 3-1
EDIT button 2-8
Effects 3-4
EP1 2-14
EP1 And EP2 Inputs 2-12
EP2 2-14
EXIT button 2-8
F
favorite programs
Category buttons 2-4
Front panel navigation 2-6
H
headphone jacks 1-1
I
ID#s 5-7
Info Box 3-2
Info soft button 3-2, 3-4
Inputs 2-12
O
Octav soft buttons 3-2
Octave switching 3-2
Outputs 2-12
P
Pages 2-6
PC3 Musician’s Guide Download 2-10
Pedal Inputs 2-12
Pitch-Mod Controller 2-5
Play/Pause button
with Easy Audition 3-1
Plus/Minus buttons 2-9
power switch 1-1
Pro Audio Outputs 2-14
Program buttons 2-4
Program Mode 3-1
Effects Controls 3-4
Program mode 3-1
Program Mode Display 3-2
Programs A-1
KB3 3-3
Selecting Programs 3-1
Index-i
Page 72

VAST 3-2
punching in 5-10
U
User Interface Basics 2-2
Q
Quantizing 5-15
Quick Access mode 3-3
R
Recording Overview 5-1
Rename 5-6
S
Saving
Naming 5-6
Rename 5-6
Setup Mode 4-2
Song Mode 5-5
Selecting modes 2-2
Selecting parameters 2-6
Selecting Programs 3-1
sequencer 5-1
Setup Editor 4-2
Setup Mode 4-1
Creating A New Setup 4-11
Layers Of Instruments 4-7
Saving 4-2
Split Program Setup 4-3
Volume And Pan Of Zones 4-9
Setups A-9
Silders
Effects Control 3-4
Sliders 2-3
Soft buttons 2-7
software updates 1-2
Song Mode 5-1
Demo Songs 5-15
Loops 5-15
Program Changes 5-16
Song Structure 5-16
The Event List 5-16
Specifications B-1
Split Point 4-3
Split Program Setup 4-3
SW button 2-5
SW Pedal 2-14
SW Pedal input 2-13
Sync In 2-14
V
Variable Architecture Synthesis 3-2
VAST 3-2
VAST programs 3-2
volume pedal 2-12
W
wah pedal 2-12
X
xD memory cards 1-2
Xpose (Transpose) 3-2
Z
zones 4-1
T
Tap Tempo 5-3
Tempo 5-3
Tap Tempo function 5-3
time signature 5-3
Top line of display 2-7
Transpose 3-2
Index-ii
 Loading...