How it Works
Log In / Sign Up
Buy Points
How it Works
FAQ
Contact Us
Questions and Suggestions
Users
Kuppersbusch
Loading...
E
EMA1008.0E
EMA800
EMD1000
EMD 700.0
EMG 457.0
EMGF 457.0
2
EMI1008.0VZ
EMI 850.0E
EMW 60.0 0M
EMW 60.0M
8
EMW60.0 OM
EMW 7505.0
10
EMW 7507.0 M
EMW 7605.0
11
EMW 7605.0 M
EMW8604.0
EMW 8604.0E
7
EMWG1030.0
EMWG1030.0E
EMWG1050.0
EMWG1050.0M
2
EMWG1050.1E
2
EMWG61.0 M
2
EMWG6260
Emwg 7606.0
EMWG7606.0M
EMWG8604.0
EMWG8604.0E
EMWG 8605.0
8
EMWG8605.0 OM
EMWG 8605.1E
8
EMWG 8605.2E
8
EMWG 9500.OM
11
EMWGC 800
EMWGL 3260
EMWGL/R 3260.0
EMWK1030.0
EMWK 1030.0E
3
EMWK 1050.0
2
EMWK 1050.1E
3
EMWK1050.1E-UL
EMWK 1050.1E-US
EMWK 1060.0
9
EMWK6260
EMWK6260.0
EMWK 6550.0 BC
8
EMWK 6551.0 J1
EMWK 870.1
2
EMWK 9500.OM
10
EMWK 9600.0
EMWK 9600.0J
EMWK 9600.0M
2
EMWK 9600.0M/J
3
EMWK 9700.0E
6
EMWK 98000
EMWK 9800.0M
6
ER 1424 U
ER 1933 I
ER 2336 I
ER 2534 I
ER 6424 U
ER 7534 I
ER 8138 I
ERN 29650
ERO 2070
ETIF 6740.0
ETS 3720. 0
ETS 457.0
ETS 457.0 M
ETV6800.1
2
EUN2243AOW
EWE 457.1
2
EWE457.1M
EWEF 457.1
EWI 456.0
EWI 457
EWI 457.0
EWI 457.1
2
EWIF456.0
EWIF457.1
2
EWK178002Z
EWK880-0-2Z
2
EWKL 1220Z2
6
F
FGK 58 Series
FGK 75 Series
FGKST 58
FGKST 58 Series
FGKST 75
FGKST 75 Series
FK 2500.0i
FK 4500.0i
FK 4505.0i
FK 8305.0 i
FK 8800.0 i
FKE 157-4
FKE 157-5
FKE 157-6
FKE 167-4
FKE 167-5
FKE 167-6
Loading...
Loading...
Nothing found
EMWK 9800.0M
Instruction Manual
87 pgs
3.78 Mb
0
Instruction Manual [de]
91 pgs
4.7 Mb
0
Instruction Manual [es]
91 pgs
3.81 Mb
0
Instruction Manual [it]
91 pgs
3.82 Mb
0
Instruction Manual [nl]
87 pgs
3.78 Mb
0
Instruction Manual [pt]
91 pgs
3.82 Mb
0
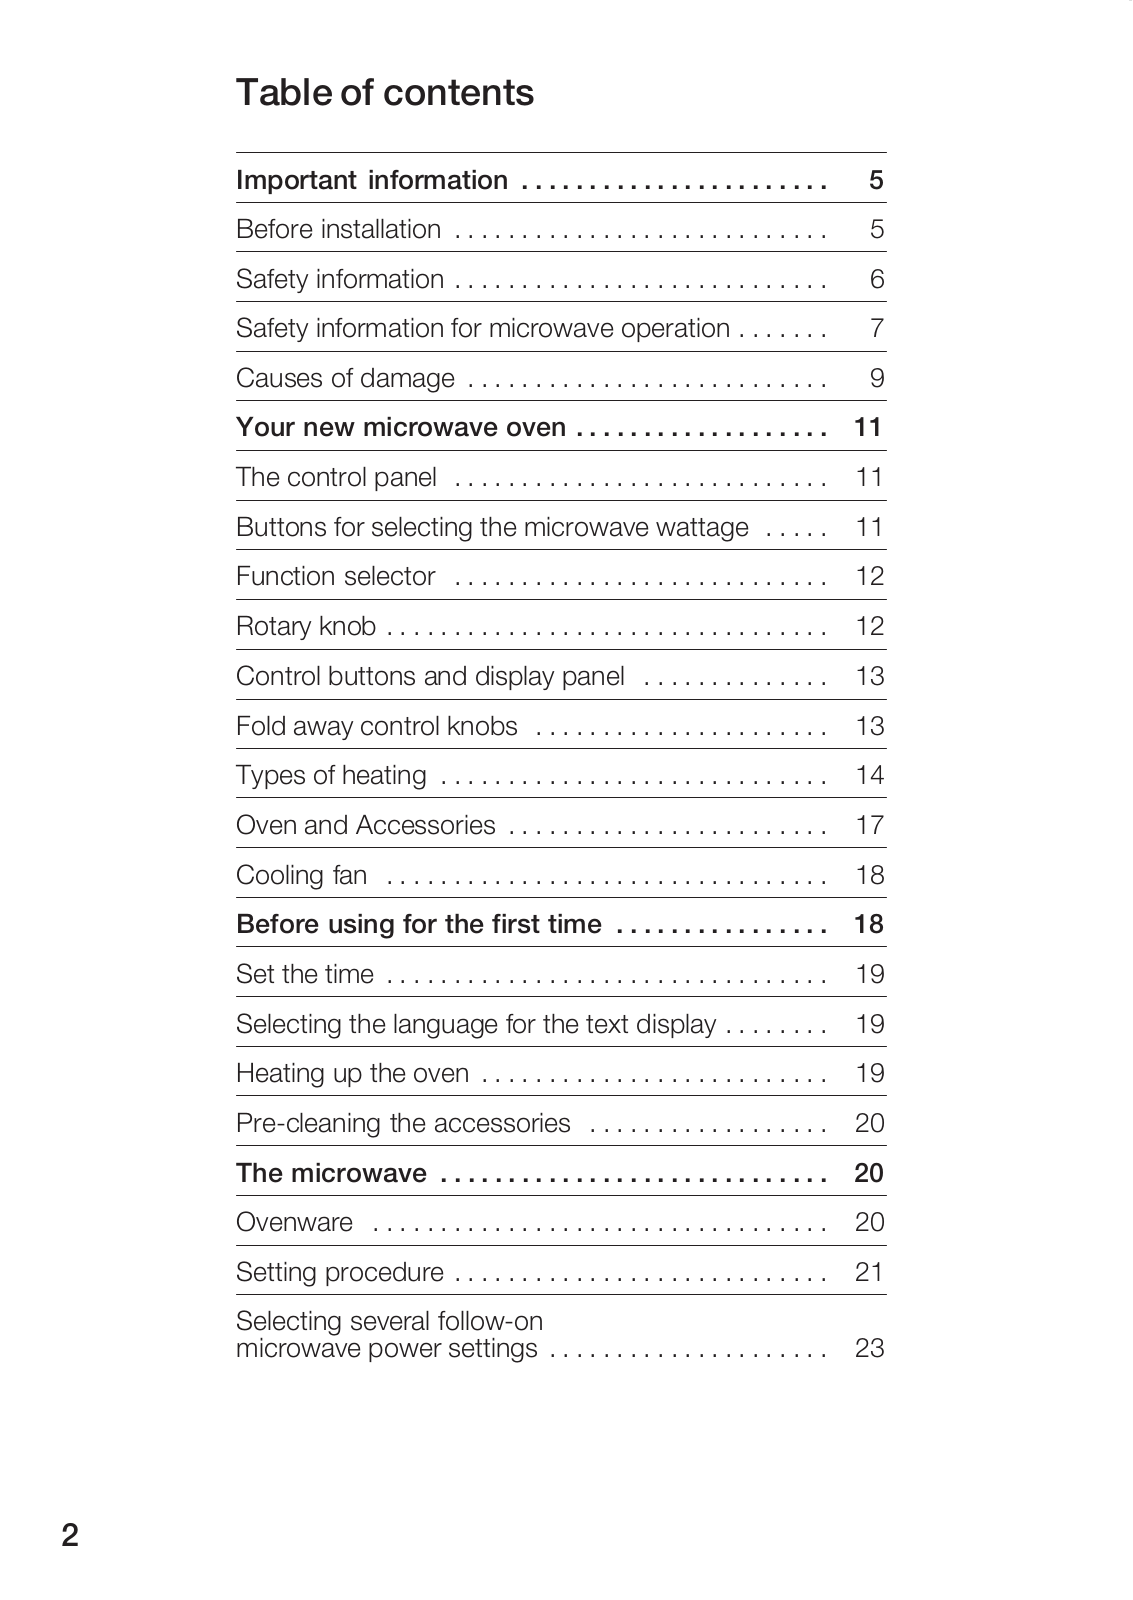
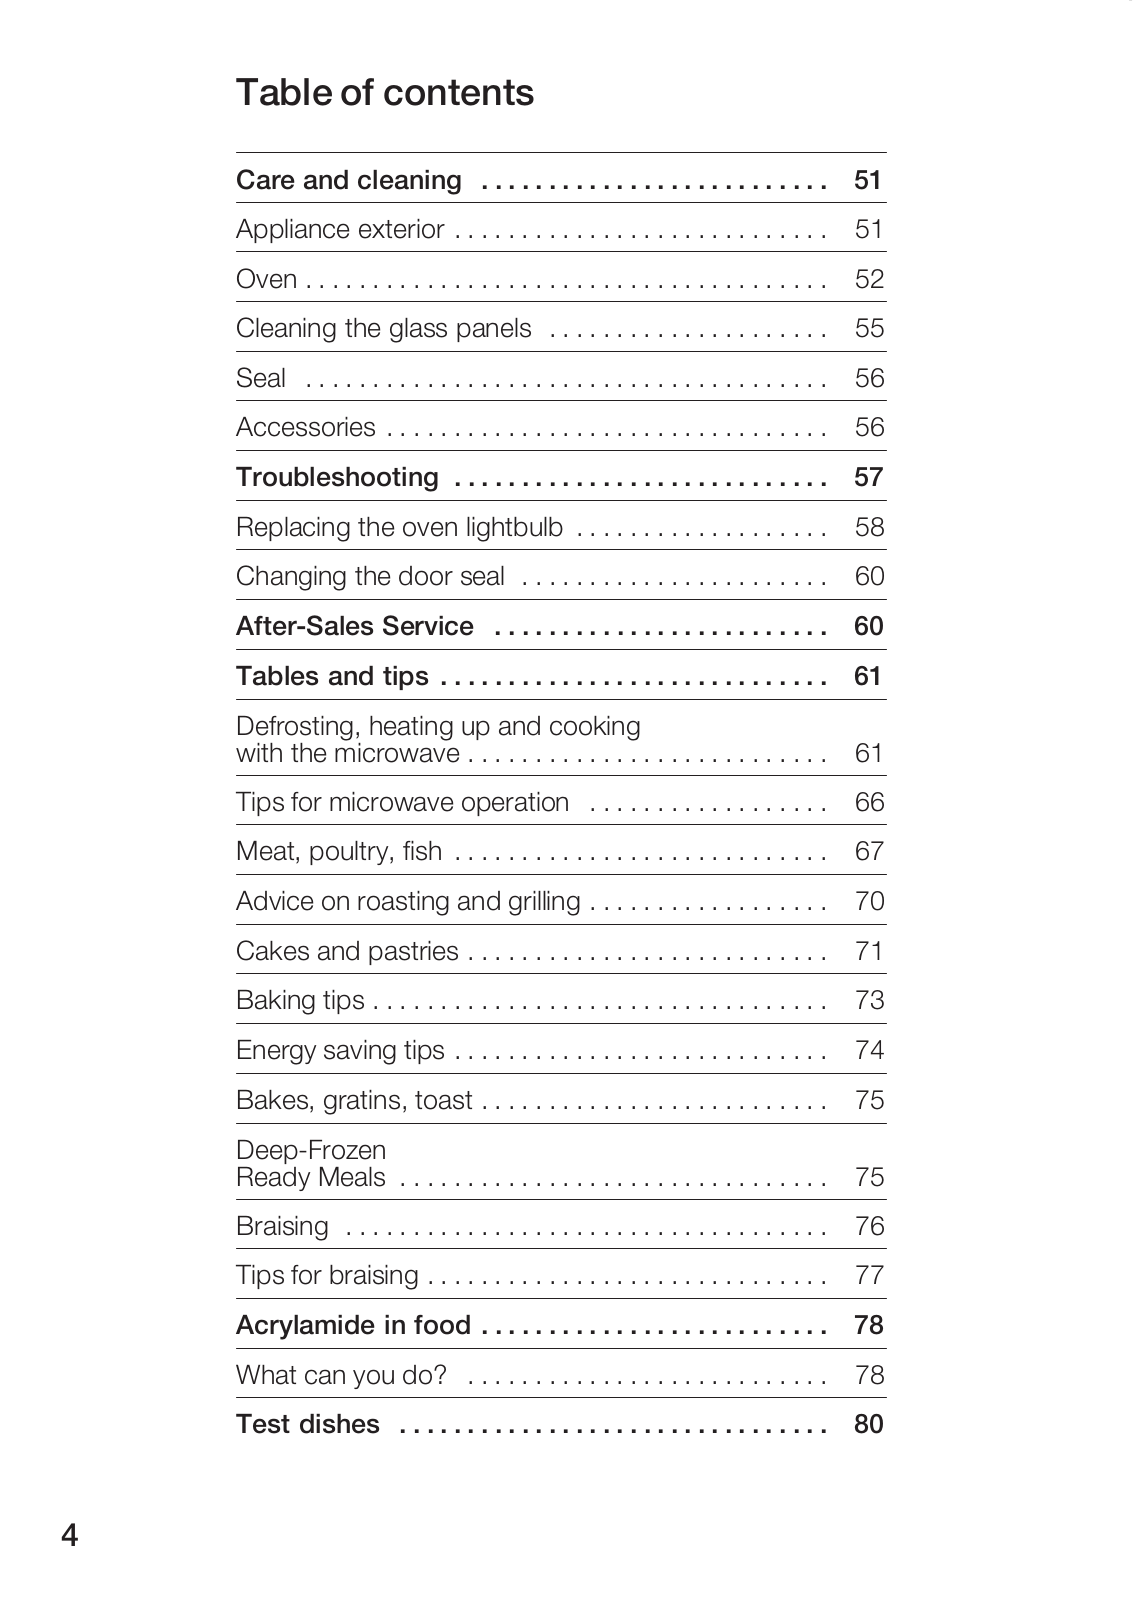
Table of contents
Loading...
Kuppersbusch EMWK 9800.0M Instruction Manual
...
Kuppersbusch Instruction Manual
Download
Specifications and Main Features
Frequently Asked Questions
User Manual
Download
Loading...
+
60
hidden pages
Unhide
You need points to download manuals.
1 point = 1 manual.
You can buy points or you can get point for every manual you upload.
Buy points
Upload your manuals