


Kuppersbusch EEBP 6400.8 MX Instruction Manual
Hoja de Características
Folha de Características
Technical Specifications
Fiche de caractéristiques
Datenblatt
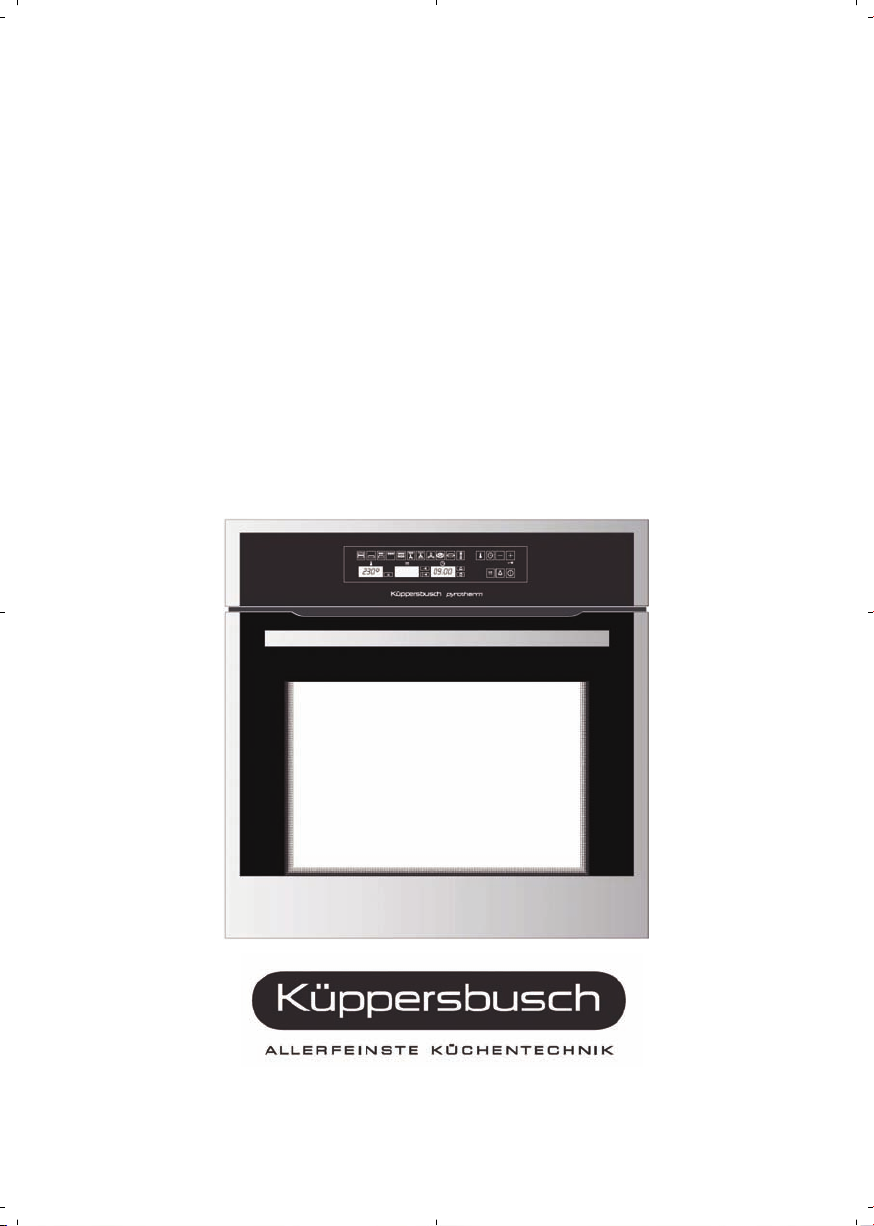
EEBP 6400.8 MX
EEBP 6400.8 MX
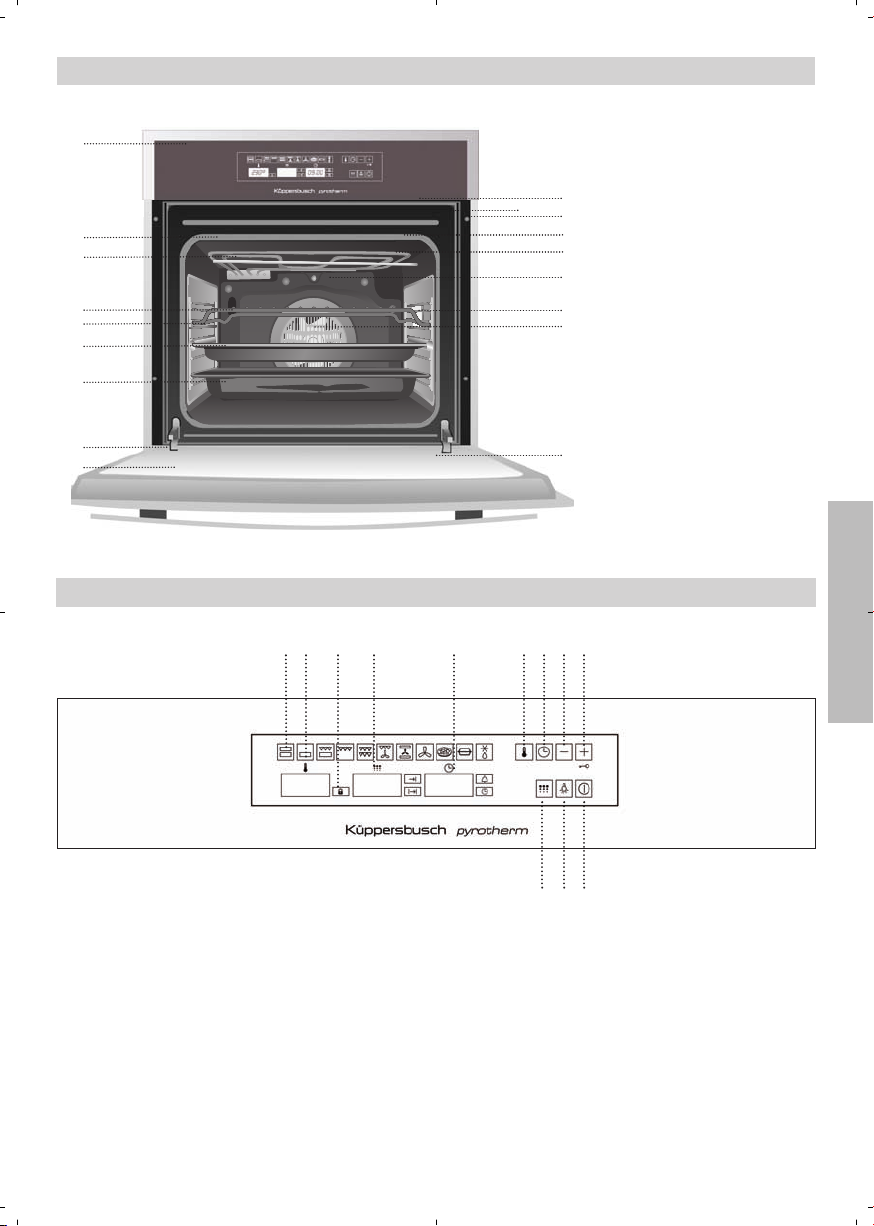
1 Control Panel
1
10
11
12
2
3
4
5
6
7
8
9
13
14
15
16
17
18
2 Oven Seal
3 Grill Element
4 Grid tray
5 Telescopic guides
6 Cake tray
7 Deep tray
8 Hinge
9 Door
10 Air outlet
11 Door switch-lock
12 Cabinet Mounting
13 Grill Screen
14 Smoke Outlet
15 Back Wall Panel
16 Side lights
17 Fan
18 Full size interior glass
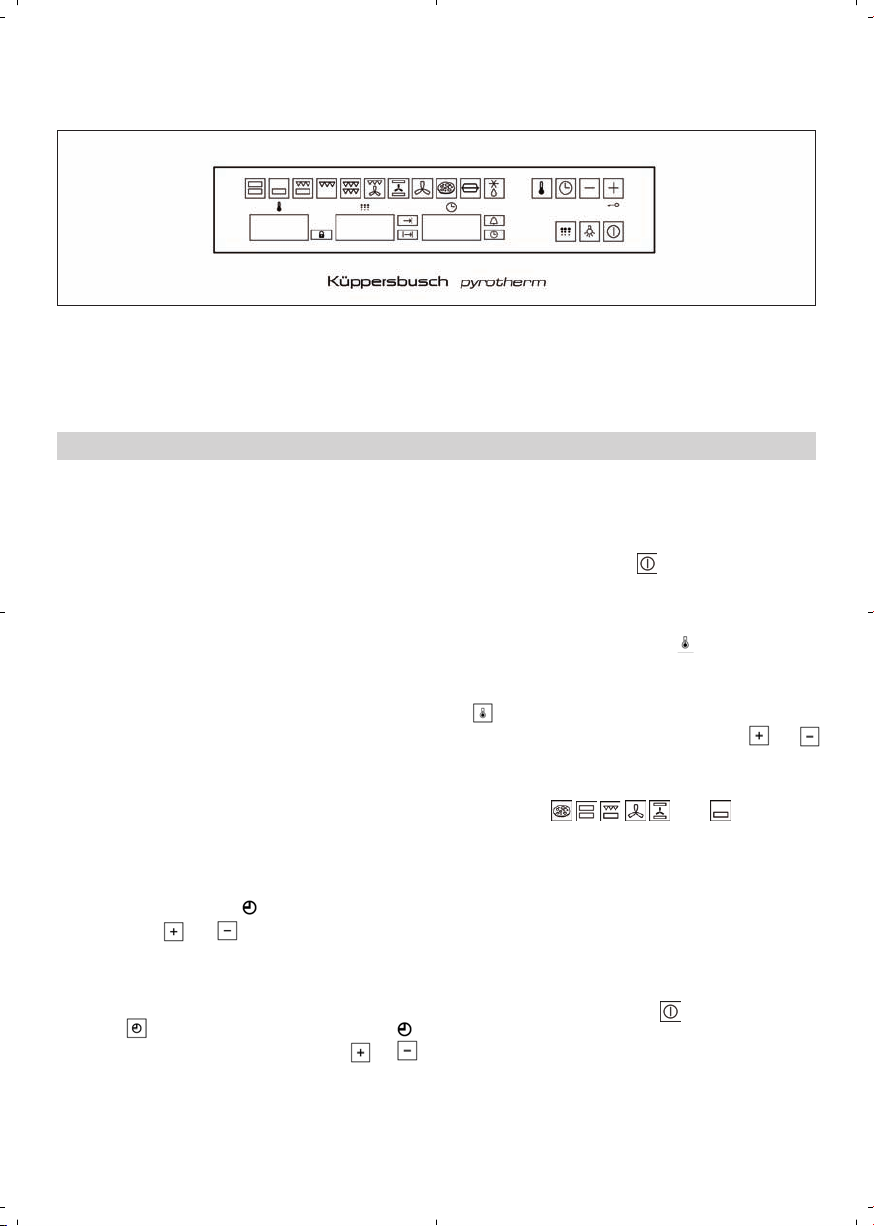
Control Panel
1 2 3 4 5 6 7 8 9
11 Cooking functions
12 Temperature display
13 Door lock indicator light
14 Pyrolytic function indicator display
15 Electronic timer
16 Temperature sensor
ENGLISH
1112 10
17 Electronic timer sensor
18 - Sensor
19 + Sensor / Child safety function
10 On / Off
11 Inside light
12 Pyrolytic function sensor
27

Oven Functions
Convencional
This function is for use when baking cakes,
where the heat should be even to give a
spongy texture.
Lower Element
Heat only comes from beneath. Suitable for
warming plates or letting dough rise.
Grill and Lower Element
Ideal for roasts. This function can be used with
any size joints of meat.
Grill
Toasting and browning. This function allows
the surface to be cooked without affecting the
inside of the food. Suitable for flat pieces such
as steaks, ribs, fish and toasts.
Maxigrill
For toasting larger surfaces than possible with
the Grill function, in addition to greater
toasting power for faster food browning.
Conventional with Fan
Suitable for roasts and cakes. The fan spreads
the heat evenly throughout the inside of the
oven to reduce cooking time and temperature.
Turbo
The fan spreads the heat coming from an
element located at the back of the oven. As a
result of the evenly distributed temperature,
food can be cooked on two levels at the same
time.
Pizza
Ideal for baking pizzas, pies, and fruit tarts or
sponges.
Slow cooker
Designed to cook casseroles, stews, etc, in
the traditional way, and for all recipes
specifying long cooking times and low heat.
For the best results, we recommend using
covered casserole pans with lids, first making
sure that they can be used in the oven.
MaxiGrill with Fan
For even roasting and simultaneous surface
browning. Ideal for mixed grills. Perfect for
bulky pieces such as poultry and game. The
meat should be placed on the oven grid with
the tray below to collect meat juices.
Caution
The door must be closed during use with Grill,
MaxiGrill or MaxiGrill with Fan.
28
Defrosting

Recommendations for Defrosting Food
The defrost function works by means of a
2-level system of hot air. HI is for meats in
general and LO is for fish, cakes, pastries and
bread. When selecting the defrost function,
select HI or LO on the temperature display by
pressing on the temperature sensor and
then the or sensors.
• Meat and fish do not need to be completely
thawed before cooking. Condiments can be
added once the surface is soft.
• Food should always be cooked after
defrosting.
• Do not refreeze defrosted food.
• Unpackaged food should be placed on the
oven tray or on a dish.
• Defrost large pieces of meat or fish by
placing them over the grid with a tray
underneath to collect any liquid.
See the following chart for defrosting times and temperature levels:
LO LEVEL
FOOD
Weight Time Weight Time
1
Bread
Cake
Fish
Fish
/
2
1
/
2
1
/
2
1Kg
Kg
Kg
Kg
35 mins
25 mins
30 mins
40 mins
HI LEVEL
ENGLISH
Chicken
Chicken
Rib steak
Minced meat
Minced meat
1Kg
1,5 Kg
1
/
Kg
2
1
/
Kg
2
1Kg
75 mins
90 mins
40 mins
60 mins
120 mins
The times shown in the chart are a guide. The time needed for defrosting will depend on the
temperature of the room, weight of the food and how frozen it is.
29
Oven Use
Use of the electronic timer
Caution
The electronic clock features Touch-Control
technology. To operate, simply touch the glass
control symbols with your fingertip.
The touch control sensitivity continuously
adapts to changing conditions. Ensure that
the glass front of the control panel is clean
and free of any obstacles when turning on the
oven.
If the clock does not respond correctly when
you touch the glass, you will need to turn off
the oven for a few seconds and then turn it
back on. By doing this, the sensors adjust
automatically and will react once more to
fingertip control.
Setting the Electronic Clock
When turning your oven on, you will see the
clock flashing 12:00 . Set the clock by
touching the or symbols on the glass.
You will hear 2 beeps confirming the time has
been set.
If you want to change the time, touch the clock
sensor
Change the time by touching the or
sensors. The two beeps you hear after that
will confirm the new time has been set.
(2) until the indicator flashes (1).
––
Manual Operation
After setting the clock, the oven is ready for
use:
1 Press the On sensor .
2 Press on the desired cooking function
symbol.
3 The temperature display will show the
preset temperature for that cooking
function. Press on the temperature sensor
(5) to change it. Select the desired
temperature by pressing on the
sensors.
4 The top oven cavity will start to heat up.
Functions
the fast preheating function for a few
minutes. The oven will beep when it reaches
the selected temperature.
Caution: this preheating function turns on the
turbo motor at the back of the top oven cavity.
5 During oven heating, the
to show that the food is being heated.
6 Press on the Off sensor to stop cooking.
Caution
When cooking has finished, you will notice that
oven cooling feature will work until the temperature inside the oven has been suitably lowered.
6), (7), (8), ( and), will start
o
display will flash
+ or –
30