

Page 1
Kuhnke Electronics
Instruction Manual
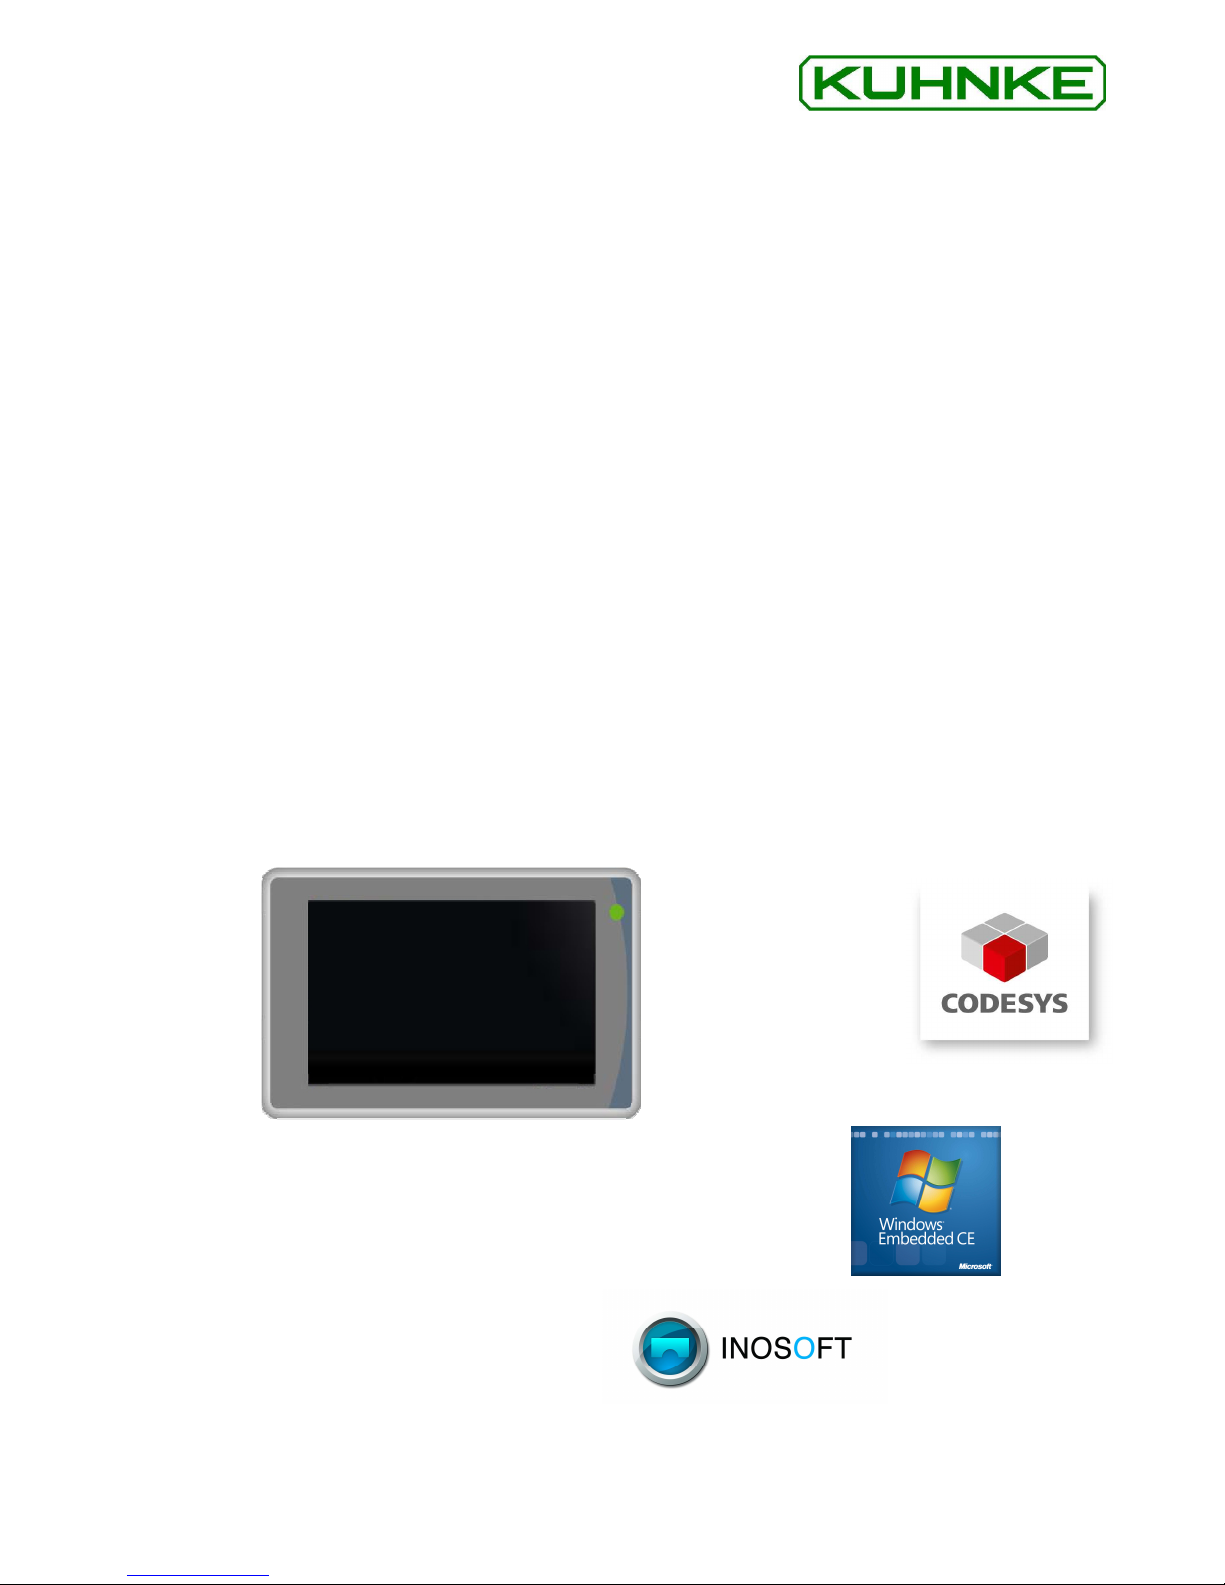
Ventura Vico / Scout 401
Toucht Terminal / Panel PLC
E 802 GB 10 December 2013
Page 2

2
This technical information is directed primarily to specialists involved in the conception, design and construction of machines. It does
not indicate any information about availability of products. The technical specifications stated herein are only of descriptive nature and
do not represent a guarantee as to the ability or usability of a product in a legal sense. Such specific assurances are subject to individual contractual agreements. We do not accept any claims for compensation of damages for whatever reason, unless substantial proof
of intention or gross negligence is provided. Complete or partial reproduction of this document requires the written consent of the author. All rights concerning changes, omissions and misconceptions are reserved. Ilustrations similar.
Microsoft® Windows® and the Windows logo are registered trademarks of Microsoft Corporation in the USA and other countries.
EtherCAT® is a registered trademark and patented technology, licensed by Beckhoff Automation GmbH, Germany.
Additional info
rmation on the PLCopen organization can be found at www.plcopen.org.
CiA® and CANopen® are registered community trade marks of CAN in Automation e.V.
All rights reserved by the individual copyright holders.
Reproduction even of extracts only with the editor's express and written prior consent.
Page 3

3
Table of Contents
1 Introduction ....................................................................................................................................5
2 Reliability, Safety ...........................................................................................................................6
2.1 Intended Use......................................................................................................................6
2.2 Target Group......................................................................................................................6
2.3 Reliability............................................................................................................................6
2.4 Symbols .............................................................................................................................6
2.4.1 Danger..............................................................................................................................7
2.4.2 Attention ...........................................................................................................................7
2.4.3 Note..................................................................................................................................7
2.4.4 Under Construction ..........................................................................................................7
2.4.5 Instruction.........................................................................................................................7
2.5 Safety .................................................................................................................................7
2.5.1 Project Planning and Installation......................................................................................8
2.5.2 Maintenance and Servicing ..............................................................................................8
2.6 Electromagnetic Compatibility............................................................................................9
2.6.1 Definition ..........................................................................................................................9
2.6.2 Interference Emission ......................................................................................................9
2.6.3 General Notes on Installation ...........................................................................................9
2.6.4 Electrical Immission Safeguard ......................................................................................10
2.6.5 Cable Routing and Wiring ..............................................................................................10
2.6.6 Location of Installation ...................................................................................................10
2.6.7 Particular Sources of Interference..................................................................................10
3 System Description......................................................................................................................12
3.1 Design ..............................................................................................................................12
3.2 Technical Properties ........................................................................................................13
Mechanical properties.................................................................................................................15
BIOS and operation systems ......................................................................................................15
3.3 Internal battery .................................................................................................................16
3.3.1 Replacement of the internal battery ...............................................................................16
4 Connectors ..................................................................................................................................17
4.1 Ethernet/PoE (X24) ..........................................................................................................17
4.2 Power (X1) .......................................................................................................................17
4.3 RS-232/RS-485 or CAN (X9) ...........................................................................................18
4.3.1 Option: RS-232/RS-485 .................................................................................................18
4.3.2 Option: RS-232/CAN ......................................................................................................18
4.4 USB - Host (X12) .............................................................................................................18
4.5 USB - OTG.......................................................................................................................19
External USB - OTG (X14) ......................................................................................................19
4.6 Speaker (X9/X10).............................................................................................................19
Keypad/SPI (X16) .......................................................................................................................19
Standard: Keypad/SPI.............................................................................................................19
Option: Keypad/SPI/I²C ...........................................................................................................20
4.7 Protective Earth Conductor ..............................................................................................21
5 Product geometry ........................................................................................................................27
5.1 Ventura VICO / Scout 401 ...............................................................................................27
6 Appendix......................................................................................................................................28
6.1 Safety instructions............................................................................................................28
6.2 Disposal ...........................................................................................................................29
Page 4

KUHNKE Automation
4
6.3
Trademarks and service marks........................................................................................30
6.4 Technical Data .................................................................................................................31
6.5 Specifications ...................................................................................................................31
6.5.1 Basic Units .....................................................................................................................31
6.5.2 Accessories ....................................................................................................................31
6.6 Index ...........................................................................Fehler! Textmarke nicht definiert.
6.7 Sales & Service................................................................................................................32
6.7.1 Malente Headquarters....................................................................................................32
6.7.2 Customer Service......................................................Fehler! Textmarke nicht definiert.
Page 5

5
1 Introduction
General functionality
The days of simple text displays and multi-functional control buttons
are gone. A modern and attractive design is required. But such investments into the future have often been rejected for commercial
reasons previously. However, with increasing functionality, the demands of the machine users rise in terms of handling, visualization
and diagnosis.
With the Ventura Vico KUHNKE Automation now offers a very cost effective way to use a comfortable operation panel which is directly fitted
on the machine. Your small machine or automatic system will immediately receive an added value. Other typical applications are a second
work station in conjunction with a panel or industrial PC in large or distributed machines and visualization of drive controllers programmed
with CODESYS. With its low depth, the Ventura Vico is particularly
suitable for control and display tasks in confined spaces.
A truly modern visualization system, consisting of a coordinated hardware and software package should not only master the basic functionality. It should also enable well-designed user interfaces with sophisticated ergonomics. Concept creator, operator and service technicians
should form a perfect team and work together with a tool that allows
them all opportunities. Customers always have good ideas, so change
management must be easy.
Such requirements place high demands on process visualization. It
must be intuitively usable, easy to learn and clearly structured. For
visualization of data from a CODESYS control unit the Ventura Vico is
optionally equipped with the software package CODESYS V3 HMI or
VisiWinNET. Ventura Vico offers an elegant and cost-effective solution
to match all these requirements
Page 6

KUHNKE Automation
6
2 Reliability, Safety
2.1 Intended Use
Ventura Vico/Scout is a HMI with for the control of operating and
monitoring actions in industrial areas.
For other applications, please consult us. KUHNKE is not liable for
any possible damages resulting from use in other than the designated
applications. The same applies to utilization in networks the user has
insufficiently secured against unauthorized access. Such risk lies entirely with the user.
Observance of the operation instructions is considered as part of the
units’ designated use.
2.2 Target Group
This instruction manual contains all information necessary for the use
of the described product (control device, control terminal, software,
etc.) according to instructions. It is written for design, project planning,
servicing and commissioning experts. For proper understanding and
error-free application of technical descriptions, instructions for use and
particularly of notes of danger and warning, extensive knowledge of
automation technology is compulsory.
2.3 Reliability
Reliability of Kuhnke products is brought to the highest possible standards by extensive and cost-effective means in their design and
manufacture.
These include:
• selecting high-quality components,
• quality agreements with our suppliers,
• actions to avoid static charges when handling MOS circuits,
• worst case planning and design of all circuits,
• visual inspections at various stages of fabrication,
• computer-aided tests of all assemblies and their interaction in
the circuit,
• statistical assessment of the quality of fabrication and of all re-
turned goods for the immediate taking of appropriate corrective actions.
2.4 Symbols
Despite the actions described in section 2.3, the occurrence of faults
or errors in electronic control units - even if most highly improbable must be taken into consideration.
Please pay particular attention to the additional notices which we have
marked by symbols throughout this instruction manual. While some of
these notices make you aware of possible dangers, others are intended as a means of orientation. They are described further down
below in descending order of importance.
Page 7
KUHNKE Automation
7
2.4.1 Danger
This symbol warns you of dangers which may cause death or grievous bodily
harm if operators fail to implement the precautions described.
2.4.2 Attention
This symbol draws your attention to information you must take a look at to
avoid malfunctions, possible material damage or dangerous states.
2.4.3 Note
This symbol draws your attention to additional information concerning the
use of the described product. This may include cross references to information found elsewhere (e.g. in other manuals).
2.4.4 Under Construction
This symbol tells you that the function described was not or not fully available at the time this document went to press.
2.4.5 Instruction
Wherever you see these symbols in the left margin, you will find a list of
steps instructing you to take the appropriate computer or hardware actions.
They are intended as a means of orientation wherever working steps and
background information alternate (e.g. in tutorials).
2.5 Safety
Our products normally become part of larger systems or installations.
The information below is intended to help you integrate the product
into its environment without dangers to humans or material/equipment.
To achieve a high degree of conceptual safety in planning and installing an
electronic controller, it is essential to exactly follow the instructions given in
the manual because wrong handling could lead to rendering measures
against dangers ineffective or to creating additional dangers.
Page 8

KUHNKE Automation
8
2.5.1 Project Planning and Installation
• 24 VDC power supply: generate as electrically safely sepa-
rated low voltage. Suitable devices include split-winding transformers built in compliance with European Standard EN 60742
(corresponds to VDE 0551).
• Power breakdowns or power fades: the program structure is to
ensure that a defined state at restart excludes all dangerous
states.
• Emergency-off installations must comply with EN 60204/IEC
204 (VDE 0113). They must be operative at any time.
• Safety and precautions regulations for qualified applications
have to be complied with.
• Please pay particular attention to the notices of warning
which, at relevant places, will make you aware of possible
sources of dangerous mistakes or faults.
• Relevant standards and VDE regulations are to be complied
with in every case.
• Control elements are to be installed in such a way as to ex-
clude unintended operation.
• Lay control cables such that interference (inductive or capaci-
tive) is excluded if this interference could influence controller
operation or its functionality.
2.5.2 Maintenance and Servicing
• Precautions regulation VBG 4.0 to be observed when measur-
ing or checking a controller after power-up. This applies to
section 8 (Admissible deviations when working on parts) in
particular.
• Repairs must be carried out by specially trained Kuhnke staff
only (usually in the main factory in Malente). Warranty expires
in every other case.
• Spare parts:
• Only use parts approved of by Kuhnke. Only genuine Kuhnke
modules must be used in modular controllers.
• Modular systems: always plug or unplug modules in a power-
down state. You may otherwise damage the modules or (possibly not immediately recognisably!) inhibit their functionality.
• Always dispose of (rechargeable) batteries as hazardous
waste.
Page 9

KUHNKE Automation
9
2.6 Electromagnetic Compatibility
2.6.1 Definition
Electromagnetic compatibility is the ability of a device to function satisfactorily in its electromagnetic environment without itself causing any
electromagnetic interference that would be intolerable to other devices
in this environment.
Of all known phenomena of electromagnetic noise, only a certain
range occurs at the location of a given device. These kinds of noise
are specified in the applicable standards.
Refer to IEC 61131-4, User's Guideline, for general installation instructions
to be complied with to ensure that hardware interface factors and the ensuing noise voltages are limited to tolerable levels.
2.6.2 Interference Emission
DIN EN 6100-6-4
2.6.3 General Notes on Installation
As component parts of machines, facilities and systems, electronic
control systems must comply with valid rules and regulations, depending on their field of application.
General requirements concerning the electrical equipment of machines and aiming at the safety of these machines are contained in
Part 1 of European Standard EN 60204 (corresponds to VDE 0113).
For safe installation of our control system please observe the information
contained in the next chapters ( 2.6.4 ff).
Page 10

KUHNKE Automation
10
2.6.4 Electrical Immission Safeguard
To bleed electromagnetic interference, connect the controller to operative earth and ensure best-practice wiring.
Susceptibility to noise
Electromagnetic Compatibility (EMC) - Part 6-2: Generic standards Immunity for industrial environments (IEC 61000-6-2:2005);
2.6.5 Cable Routing and Wiring
Keep power circuits separate from control circuits:
• DC voltages 60 V ... 400 V
• AC voltages 25 V ... 400 V
Joint laying of control circuits is allowed for:
• shielded data signals
• shielded analogue signals
• unshielded digital I/O lines
• unshielded DC voltages < 60 V
• unshielded AC voltages < 25 V
2.6.6 Location of Installation
Ensure that temperatures, contaminations, impact, vibration or electromagnetic interference are no impediment to the installation.
2.6.6.1 Temperature
Consider heat sources such as general heating of rooms, sunlight,
heat accumulation in assembly rooms or control cabinets.
2.6.6.2 Contamination
Use suitable casings to avoid possible negative influences due to humidity, corrosive gas, liquid or conducting dust.
2.6.6.3 Impact and Vibration
Consider possible influences caused by motors, compressors, transfer
lines, presses, ramming machines and vehicles.
2.6.6.4 Electromagnetic Interference
Consider electromagnetic interference from various local sources: motors, switching devices, switching thyristors, radio-controlled devices,
welding equipment, arcing, switched-mode power supplies, converters
/ inverters.
2.6.7 Particular Sources of Interference
2.6.7.1 Inductive Actuators
Switching off inductances (such as from relays, contactors, solenoids
or switching magnets) produces surge voltages. It is mandatory to
throttle these noise voltages to an admissible amount.
Throttling elements could be diodes, Z-diodes, varistors or RC ele-
Page 11

KUHNKE Automation
11
ments. Their rating should conform to the specifications provided by
the manufacturer or supplier of the actuators.
Page 12

System Description KUHNKE Automation
12
3 System Description
VENTURA VICO is an Embedded System used as human machine interface (HMI) in various applications. Please refer to Appendix for further information. The system is equipped with a large number of industrial interfaces. A wide variety of options is available as well.
3.1 Design
The following illustration shows the boxed version with 7” display and
is meant for your orientation.
MicroSD card slot
Aluminium frame
Front cover
Resistive touch
Back cover
Fixation for internal speaker
2x installation brackets
Ground tags for power/RS485
Fitting
Connectors and interfaces
Page 13

KUHNKE Automation System Description
13
3.2 Technical Properties
CPU
Type Freescale ARM926EJ-STM i.MX27
Clock/Frequency 400 MHz
Specifications 32 bit with MMU
Memory
ROM 256 MB NAND-Flash
RAM 128 MB DDR-SDRAM
Storage Card Slot 4 bit MMC/SDIO/SD/SDHC up to 4 GB
Graphics
Controller Programmable LCD controller
Resolution Up to 800 x 600 pixel
Colours 16 bit (65,536 colours)
Supported Orientation Horizontal/vertical
LCD
Display
and Resist
ive Touch
1
Size (inch / mm) 4.3 / 109.3
Width x Height (pixels) 480 x 272
Colours 24 bit (16.7 Mio. colours)
Backlight Unit LED
Luminance 350 cd/m²
Active Area W x H (mm) 95.04 x 53.86
Viewing Direction 6 o’clock
Viewing Angle (Typ.) 125° (V) / 140° (H)
Backlight t.b.d. Lifetime
Touch 1,000,000 (finger) touches
Properties Anti-glare Surface
Hardness 3H
Standard 4 wire resistive analogue Touch Technology
PCT Option Projective capacitive for open frame versions only
Interfaces
Network 1x 10/100 Mbit/s Ethernet (RJ45)
16-bit 48 kHz
External 1x S/PDIF (RCA jack)
1x Line-out (3.5 mm jack)
1x Speaker, 1 Watt RMS (8Ω)
Audio
Internal 1x Micro-In
1x Line-In
1x RS-232 (RX/TX/CTS/RTS)
1x RS-485
Serial Interfaces
RS485 Option 1x RS-485 instead of CAN
CAN Fieldbus CAN Option 1x CAN (ISO/DIS 119898) instead of RS-485
USB 2.0 1x 12 Mbit/s Full-Speed Host (Type A)
1x 480 Mbit/s High-Speed OTG (Type Micro-AB)
Max. output 500 mA
Standard
Multiplex mode 1
1x 8x8
1x 5x5 Keypad, 1x SPI
Keypad/SPI/I²C
I²C Option Multiplex mode 2 Multiplex
mode 3
1x 7x7 Keypad, 1x I²C
1x 4x4 Keypad, 1x I²C,
1x SPI
Page 14

System Description KUHNKE Automation
14
Digital I/O 1x Digital Out (0.7 A)
Power Supply and Consumption
Supply Nom. 12/42 V DC
t.b.d. t.b.d.
t.b.d. t.b.d.
Consumption
t.b.d. t.b.d.
Type 3 V Li-Ion Type CR1220
Internal Backup Battery
(RTC)
Lifetime >10 years, depending on application
1
Display specification may vary due to customization. For further questions, please contact technical
support.
Page 15

KUHNKE Automation System Description
15
Mechanical properties
Housing
Metal parts 1.4016 high quality steel
Thickness 0.75 mm
Surface treatment Polished
Front (boxed versions only)
Frame Material 4 mm AlMg3
Surface treatment Natural anodized, E6/EV1
Material Polyester film with antiglare coating
4C silk screen printing from behind
Structured front coating
Thickness 180 µ
Chemical Resistance Resistant to alcohols, dilute acids, dilute alkalis,
esters, hy
drocarbons, ketones, household cleaning
agents
Dielectric strength 125 µ: 125 kV/mm (15.6 kV) / 175 µ: 105 kV/mm
(18.4 kV)
Surface resistivity >1013 Ω/sq 500 Vd.c
Switch life >5 million flexes
Pencil hardness 3H
Maximum long term
use temperature
@ low humidity (<10% RH): 85° C
@ high humidity (10 ~ 95% RH): ≤60° C
Décor cover
Min. use temperature -40° C
Protection Class IP64 (according to supplier’s statement, not yet approved)
Environmental Conditions
Storage Temperature -20 ~ +70° C
Operating Temperature 0° ~ +60° C
Relative Humidity 95% (non condensating)
Dimensions
Width (mm) 130.2
Height (mm) 67.2
Depth (mm) 25.4
Weight (g) 320
For drawings, please refer to chapter 7 Product geometry.
BIOS and operation systems
Software
BIOS RedBoot BIOS
Operating System Windows Embedded CE 6.0
For more software information, please refer to Fehler! Verweis-
quelle konnte nicht gefunden werden. Fehler! Verweisquelle
konnte nicht gefunden werden..
Page 16

System Description KUHNKE Automation
16
3.3 Internal battery
The internal baseboard is equipped with a Lithium battery (CMOS battery, type CR2032), which has a typical lifetime longer than 10 years.
Danger of explosion when replaced with wrong type of battery.
Replace the battery only with a Lithium battery that has the same or
equivalent type recommended by KUHNKE Automation.
Do not dispose of used CMOS batteries in domestic waste.
Dispose of the battery according to the local regulations dealing with
the disposal of these special materials (e. g. to the collecting points
for disposal of batteries).
3.3.1 Replacement of the internal battery
• The internal battery is placed as per figure below.
• For replacement, the SD-card and the back cover have to be
removed.
• The device shall be opened by authorized and skilled person-
nel only.
Danger of electric hazard! First before opening, please make sure
that the unit is completely disconnected from any power supply, direct or indirect. In order to remove the back cover all other connectors must be removed as well. Please make sure that the SD-card
has been removed as it blocks the cover. Furthermore take care
about the socket and connectors. Especially the micro-USB connector might be damaged easily.
Position of the battery
2 screws for the back cover
Page 17

KUHNKE Automation System Description
17
4 Connectors
Pos. Description
Pos. Description
1 Ethernet (X8) 5 USB - OTG (X14)
2 Power/Digital out (X1) 6 Speaker (X5/X6)
3 RS-232/RS-485 or CAN (X9) 7 Line out (X20)
4 USB - Host (X12) 8 S/PDIF (X7)
4.1 Ethernet/PoE (X8)
Pin Name Description Level
1 Tx+
2 Tx-
3 Rx+
4 SPARE1 Power Supply (PoE)
5 SPARE1 Power Supply (PoE)
6 Rx-
7 SPARE2 Power Supply (PoE)
8 SPARE2 Power Supply (PoE)
Header: RJ45
4.2 Power (X1)
Pin Name Description Level
1 GND Ground
2 GND Ground
3 Vcc_In Input voltage 9-42V
4 DIO_OUT Digital Out Vcc_In
Header: Molex_43045-0400 Micro-Fit 4p
Plug: Molex_43025-0400 Micro-Fit 4p, crimp contact Molex 43030-0007
Only attach the unit to a 24 VDC power supply source if the source is guaranteed to meet safe extra low voltage requirements (SELV).
To make the phase fired controller work properly, pin L-
must have the same
potential as the neutral point of the power supply.
Page 18

System Description KUHNKE Automation
18
4.3 RS-232/RS-485 or CAN (X9)
4.3.1 Option: RS-232/RS-485
Pin Name Description Level
1 GND Ground
2 RS232_TXD1 Port#1: Transmit data (Output)
3 RS232_RXD1 Port#1: Receive data (Input)
4 RS232_RTS1 Port#1: Request-to-send (Output)
5 RS232_CTS1 Port#1: Clear-to-send (Input)
6 Vref Vref out 5V
7 GND Ground
8 RS485_Y TX+
9 RS485_Z TX-
10 RS485_A RX+
To enable Half-Duplex: bridge with RS485_Y
11 RS485_B RX-
To enable Half-Duplex: bridge with RS485_Z
12 RS485_TERM To enable RS485-Termination: bridge with
RS485_A
Header: Molex_43045-1200_Micro-Fit_12p
Plug: Molex_43025-1200_Micro-Fit_12p, crimp contact Molex 43030-0007
4.3.2 Option: RS-232/CAN
Pin Name Description Level
1-5 RS-232 Identical to RS-485 option (s. 4.3.1.)
6 Vref Vref out 5V
7 GND Ground
8 CAN1_H CAN bus 1 high
9 CAN1_L CAN bus 1 low
10 CAN1_TERM To enable CAN1-Termination, bridge with
CAN1_L
11 n.a.
12 n.a.
4.4 USB - Host (X12)
Pin Name Description Level
1 Vcc Power supply 5 V
2 D- Data minus
3 D+ Data plus
4 GND Ground
Page 19

KUHNKE Automation System Description
19
Header: USB Type A
4.5 USB - OTG
This interface can be used either as external OTG port or as second USB Host port for internal use.
External USB - OTG (X14)
Pin Name Description Level
1 Vcc Power supply 5 V
2 D- Data minus
3 D+ Data plus
4 ID Device ID
5 GND Ground
Header: Micro-USB Type AB
4.6 Speaker (X9/X10)
Pin Name Description Level
1 VO+ External speaker out +
external (X5)
2 VO- External speaker out -
Header: JST S2B-PH-SM3-TB, side entry, RM = 2.0, 2-pin
Plug: JST PHR-2, crimp contact BPH-002T-P0.5S
Pin Name Description Level
1 VO+ Internal speaker out +
internal (X6)
2 VO- Internal speaker out -
Header: JST B2B-ZR-SM4-TF, top entry, RM = 1.5, 2-pin
Plug: JST ZHR-2, crimp contact SZH-002T-P0.5
Keypad/SPI (X16)
Standard: Keypad/SPI
Description
Pin Name
Standard mode Multiplexed mode 1
Level
1 GND Ground Ground
2 GND Ground Ground
3 KP_ROW0 Keypad row 0 Keypad row 0
4 KP_COL0 Keypad column 0 Keypad column 0
5 KP_ROW1 Keypad row 1 Keypad row 1
6 KP_COL1 Keypad column 1 Keypad column 1
7 KP_ROW2 Keypad row 2 Keypad row 2
8 KP_COL2 Keypad column 2 Keypad column 2
9 KP_ROW3 Keypad row 3 Keypad row 3
10 KP_COL3 Keypad column 3 Keypad column 3
11 KP_ROW4 Keypad row 4 Keypad row 4
12 KP_COL4 Keypad column 4 Keypad column 4
13 KP_ROW5_DMA Keypad row 5 SPI Interrupt Request
14 KP_COL5_SS1 Keypad column 5 SPI Slave Select 1
15 KP_ROW6_MISO Keypad row 6 SPI Master in Slave out
16 KP_COL6_MOSI Keypad column 6 SPI Master out Slave in
Page 20

System Description KUHNKE Automation
20
17 KP_ROW7_SLK Keypad row 7 SPI Serial Clock
18 KP_COL7_SS0 Keypad column 7 SPI Slave Select 0
19 GND Ground Ground
20 GND Ground Ground
Header: JST SM20B-SRDS-G-TF, side entry, RM = 1.00
Plug: JST SHDR-20V-S-B, crimp contact: SSH-003GA-P0.2
Option: Keypad/SPI/I²C
Description
Pin Name
Multiplexed mode 2 Multiplexed mode 3
Level
1-10 Identical to standard (pls. see 4.9.1.)
11 KP_ROW4 I²C SDA I²C SDA
12 KP_COL4 I²C SCL I²C SCL
13 KP_ROW5_DMA Keypad row 5 SPI Interrupt Request
14 KP_COL5_SS1 Keypad column 5 SPI Slave Select 1
15 KP_ROW6_MISO Keypad row 6 SPI Master in Slave out
16 KP_COL6_MOSI Keypad column 6 SPI Master out Slave in
17 KP_ROW7_SLK Keypad row 7 SPI Serial Clock
18 KP_COL7_SS0 Keypad column 7 SPI Slave Select 0
19 GND Ground Ground
20 GND Ground Ground
Page 21

KUHNKE Automation System Description
21
4.7 Protective Earth Conductor
The Ventura Vico is designed for installation in a switching cabinet whose
IP 20 housing provides sufficient protection against direct contact.
Attach a protective earth conductor to provide for protection against indirect contact in case of a fault to frame. Connection is made to the 4 mm
bolt on top of the device. Be sure to use a matching eyelet connector with
an inside diameter of 4.3 mm to DIN 46234.
The cross-section of the PE conductor not to be less than:
• 2.5mm² Cu or 16mm² Al if protection against mechanical damage
is included,
• 4mm² Cu or 16mm² Al if protection against mechanical damage is
NOT included.
Try to keep the lead to the earthing terminal as short as possible.
Installation to conform to the protective earth connection regulations of EN
50178!
Do not plug, mount, unplug or touch the connectors during operation!
You may otherwise provoke destruction or malfunction. Turn off all power
sources before working on the modules. This also applies to any peripherals
connected such as encoders, programming devices with external power
source, etc.
Page 22

System Description KUHNKE Automation
22
5 Services and utilities
The standard OS image includes several useful services for flexible application handling. Some of them are just run-once services directly after the
OS has been started, others are available permanently.
5.1 Services
5.1.1 Autocopy
This service is executed after the OS has booted and when a storage medium has been inserted. This service provides a comfortable installation
and/or update functionality as well as copy mechanism for specific files
that are not included in the OS (e.g. for runtime libraries).
Subfolders and files within a folder named “autocopy” on a USB stick, SD
card or in the NAND flash will be copied to the root of the device resp. its
equivalent targets. Non-existing folders will be created automatically.
5.1.2 Autostart
This service is executed after the OS has booted and when a storage medium has been inserted. It checks the NAND flash partition as well as the
USB stick and SD-card for an existing autostart folder. All applications
found therein will be executed.
5.1.3 ResolveLNK
The service ResolveLNK in the Startup folder allows the OS to handle
links in the Autostart folder. A link is a special type of file that contains a
reference to another file or directory of the Vico/Scout.[
If you want to make a WINCE shortcut directly on the device, simply
highlight the file in Windows Explorer, select Edit->Copy, then browse the
desired target location, select Edit->Paste Shortcut.
5.2 Utilities
5.2.1 DisableSerialConsole.exe
By default, the serial interface is configured as debug console. This enables also the RedBoot functionality via terminal console. In this mode, it is
not available as serial interface. To switch between both modes, please
use the tool that is located in
My Device\Windows\DisableSerialconsole.exe
Page 23

KUHNKE Automation System Description
23
To disable the serial debug output means to operate the COM1 as serial
interface. After changing the mode, a reset is required. After that, the
COM1 is ready for use as serial interface. To turn on the debug messages
again, repeat the procedure with “No”.
5.2.2 VNC
Virtual Network Computing (VNC) is a graphical desktop sharing system to
remotely control another computer. It transmits the keyboard and mouse
events from one computer to another, relaying the graphical screen updates back in the other direction, over a network.
The EfonVNC server is an open source remote control tools, which is
based on RealVNC. It make the GUI based remote controling on Windows
CE family become more simple. It is freely available to download and use.
5.2.3 Additional serial ports via USB adapter
RS-232, RS485, RS 422
You can use the USB ports to add further serial interfaces to the unit. FTDI
chip set driver used by many USB-to-serial converters is integrated in the
unit's operating system.
A USB converter featuring FTDI's chip set FT232R is recognised automatically and can afterwards be addressed by the entry added to the registry.
To use a new interface in CODESYS
CODESYS provides a library called SysLibCom which allows you to use
the new serial interface. Before doing so, you must run the Library Manager to add the new library to your project.
SysLibCom library commands (subset)
Open port: SysComOpen
Write data: SyysComWrite
Read data: SysComRead
Page 24

System Description KUHNKE Automation
24
Close port: SysComClose
By default, the system assigns COM 5 to the first serial interface you add.
FTDI Chip has a range of various converters in a variety of designs.
Further information at:
http://www.ftdichip.com
6 CODESYS
CODESYS is a complete development environment for your PLC.
CODESYS puts a simple approach to the powerful IEC language at the
disposal of the PLC programmer. Use of the editors and debugging functions is based upon the proven development program environments of advanced programming languages (such as Visual C++).
6.1 Installing CODESYS on the Programming PC
To install the CODESYS software on your programming PC:
• Select CODESYS...exe either from Windows Explorer or via 'Run' from
the Windows Start menu.
• Run the program.
• The CODESYS installer runs to request your preferred settings and in-
stall the application in the target system.
6.1.1 Installing a CODESYS Target
Before you can run CODESYS to create a Ventura project you must first
install the Target Support Package (TSP) "Scout.tnf" by running the installer called InstallTarget.
A TSP contains all configuration and extension files required to use an application for operating a certain controller (target system).
A configuration includes the code generator, the memory layout, the set of
functions provided by the controller and the I/O modules.
The libraries, gateway drivers, error and ini files for the PLC browser etc.
are also installed.
• Run the target installer delivered with your CODESYS package.
• Go to the folder containing the TSP called "Scout" and choose
"Scout.tnf".
• Click to select "Scout_XXX_01.tnf" and "Install" it.
Page 25

KUHNKE Automation System Description
25
Following successful installation, "KUHNKE PC Control Ventura" appears
in column "Installed target systems. The programming system can now access the Ventura controller.
6.2 CODESYS Programming PC Setup
6.2.1 Ethernet Connections of Ventura IPC
• To directly connect the IPC with the programming PC, please use a
CAT5 crossover cable.
• To operate Ventura Scout in a network, please use a CAT5 patch cable.
• CODESYS communication should go through Ventura Scout's X2 port.
6.2.1.1 Programming PC's Ethernet Interface Setup
Network connection
No settings should have to be made or changed to program the IPC via a
network.
Windows XP, direct connection
• Go to Windows Start and choose
Start – Settings –
Network Connections: pick "LAN connection" from list,
then "Properties".
• Go to tab "General", find the list of elements, choose "Internet protocol
(TCP/IP)" and click on Properties.
• Still on tab "General" choose "Use this IP address" and enter any IP
address as appropriate,
e.g.: "172.25.224.10", subnet mask "255.255.255.0"
A direct connection requires the "File and printer release" to be ticked and a
firewall, if any, to be disabled at least for the time of this connection.
Page 26

System Description KUHNKE Automation
26
6.2.1.2 CODESYS Program Communication Parameter Setup
Use the 'Communication Parameters' dialog you access from the 'Online'
menu to select and configure the communication channel.
• Pick 'Online' from the menu to display the 'Communication Parameters'
dialog.
• Press New.
A dialog called 'Communication Parameters: New Channel' is displayed.
The box next to "Name" defaults to the name of the channel you entered
last. The name in the box can be edited. Channel names are for your information only. Whereas you are not obliged to assign unique names, you
are still advised to do so.
Check the table under 'Device' to find the device drivers registered with the
gateway computer. The contents of this list depends on your personal configuration and the device drivers it includes.
• To define an Ethernet link to Ventura Scout, pick "Tcp/Ip (Level 2 Rou-
te)" from the list.
• Enter Ventura Touch's IP address as the "Address". The address is
shown on the 'IP Config' Service Menu page.
• Disable the "Motorola byte order" by setting the option to "No"
Example of Ethernet communication parameter setup
Page 27

KUHNKE Automation System Description
27
7 Product geometry
The drawings on the following pages are non-binding and shall provide a
first impression of the original size and construction of the products. For all
products we provide 3D CAD models.
7.1 Ventura VICO / Scout 401
Page 28

KUHNKE Automation
28
8 Appendix
8.1 Safety instructions
Please read this section carefully and observe the instructions for your
own safety and correct use of the device. Observe the warnings and
instructions on the device and in the manual. Kuhnke Automation
GmbH Co. KG embedded system have been built and tested by us
and left the company in a perfectly safe condition. In order to maintain
this condition and ensure safe operation, the user must observe the
instructions and warnings contained in this manual.
General handling
• Don’t drop or strike the unit: The PCB, display and/or other
parts might be damaged.
• Keep away from water and other liquids, the unit is not pro-
tected against.
• Operate the unit under electrical and environmental conditions
according to the technical specification.
• The electrical installations in the room must correspond to the
requirements of the local(country-specific) regulations.
• Take care that there are no cables, particularly power cables,
in areas where persons can trip over them.
• Do not place the device in direct sunlight, near heat sources
or in a damp place.
• All plugs on the connection cables must be screwed or locked
to the housing.
• Repairs may only be carried out by qualified specialist per-
sonnel authorized by Kuhnke Automation GmbH Co. KG
GmbH or their local distributors.
• Maintenance or repair on the open device may only be carried
out by qualified personnel authorized by Kuhnke Automation
GmbH Co. KG GmbH which is aware of with the associated
dangers.
LCD handling
• Due to the soft surface of the resistive touch screen, don’t use
stencils and/or other devices fortouch operation. There are
special pens available in commercial shops.
• Protect the LCD/touch against scratches and sharp edges.
The warranty does not cover pixel failures resulting from noncompliant handling.
• Clean the LCD with a soft cotton cloth with alcohol. Don’t use
organic solvents, acid or alkali solutions.
• Water drops, finger fat or any similar fouling should be re-
moved immediately from the LCD and metal frame to avoid
any staining.
Electricity
• The embedded systems may only be opened in accordance
with the description in this user’s manual for replacing of the
Lithium battery and/or configuration of the RS-485 interface
• These procedures have to be carried-out only by qualified
specialist personnel.
• When accessing internal components the device must be
switched off and disconnected from the power source.
Page 29

KUHNKE Automation
29
• When purchased core or basic versions without protecting
back cover, don’t touch the PCB directly with your fingers. Especially these products need to be handled with very carefully.
• Don’t operate or handle the unit without typical ESD protection
measures, such as ground earthing.
• Operate the unit according to the technical specification only.
Damage or permanent malfunction
• It must be assumed that a safe operation is no longer possi-
ble, in case,the device has visible damage or the display is
dark or shows strange pattern for longer period the device
doesn’t react after a reset
• In these cases the device must be shut down and secured
against further use
8.2 Disposal
Disassembly
Disposal requires the device to be disassembled and entirely taken
apart. All metal components can be given to metal recycling.
Electronic scrap
Electronic components such as circuit boards etc. are kept and disposed of separately.
For details on proper disposal please check your national laws and
regulations making sure that your method of disposal complies with
them.
Page 30

KUHNKE Automation
30
8.3 Trademarks and service marks
There are a number of proprietary logos, service marks, trademarks,
slogans and product designations("Marks") used in this document. By
making the Marks available in this document, Kuhnke Automation
GmbH Co. KG is not granting you a license to use them in any fashion.
Product or service names may be the property of third parties. Marks
owned by third parties include those listed below. This list is not comprehensive; the absence of a Mark from the list does not constitute a
waiver of intellectual property rights established by the owner of a
Mark.
Freescale and the Freescale logo are trademarks of Freescale Semiconductor, Inc., Reg. U.S. Pat. & Tm. Off.
ARM is the registered trademark of ARM Limited. ARMWXYZ is the
trademark of ARM Limited.
Dolby Digital, Dolby Surround®, Pro Logic® and the double-D symbol
are registered trademarks of Dolby Laboratories; Dolby Digital is manufactured under license from Dolby Laboratories.
Java™ and all other Java-based marks are trademarks or registered
trademarks of Sun Microsystems, Inc. in the United States and/or
other countries.
eCosCentric and eCos are registered trademarks of eCosCentric Ltd.
Microsoft, Windows, Windows Embedded CE, Windows NT, Visual
Studio, Visual C++, Visual C#, MFC and Visual C++ are registered tra-
demarks, trademarks or products of Microsoft Corporation in the United States and/or other countries.
Sharp is a registered trademark of Sharp Electronics Europe GmbH.
RedBoot is a registered trademark of Red Hat Inc.
Linux is a registered trademark of Linus Torvalds.
Their use is subject to national and international laws and agreements. Every use of these names in this documentation occurs subject to the legal regulations. While trademark symbols may be omitted
for the purpose of simplification, they are implied when the names of
the trademarks are used in the remainder of this document and should
be interpreted as present.
Page 31

KUHNKE Automation
31
8.4 Technical Data
8.5 Specifications
8.5.1 Basic Units
Ventura
Ventura Vico 401 Visi
677 700 25
Web Terminal,
4,3" TFT Widescreen mit LED Backlight
Flash disk 256 MB, Micro SD (HC) up to 2GB
Windows CE, VisiWinNET mit 250 Tags
Ventura Vico 401 V3 HMI
677 700 04
Touch Terminal,
4,3" TFT Widescreen mit LED Backlight
Flash disk 256 MB, Micro SD (HC) up to 2GB
Windows CE, CODESYS V3 HMI
Ventura Scout 401 V2 TV
677 700 01
Panel PLC,
4,3" TFT Widescreen mit LED Backlight
Flash disk 256 MB, Micro SD (HC) up to 2GB
Windows CE, CODESYS V2 Target Visualisierung
Ventura Scout 401 V2 TV WV
677 700 01
Panel PLC,
4,3" TFT Widescreen mit LED Backlight
Flash disk 256 MB, Micro SD (HC) up to 2GB
Windows CE, CODESYS V2 Target Visualisierung, Web-Visualisierung
8.5.2 Accessories
Ventura Smart Solution
Page 32

8.6 Sales & Service
Please visit our Internet site to find a comprehensive overview of our
sales and service network including all the relevant addresses.
www.kuhnke.com
Feel free to also contact us at our headquarters in Malente/Germany:
8.6.1 Malente Headquarters
Kendrion Kuhnke Automation GmbH
Lütjenburger Straße 101
D - 23714 Malente
Tel. 04523 / 402 0
Fax 04523 / 402 201
 Loading...