

Page 1
TKS User’s manual
1
988924FeedMixer EN, V1.8X, 2018-04
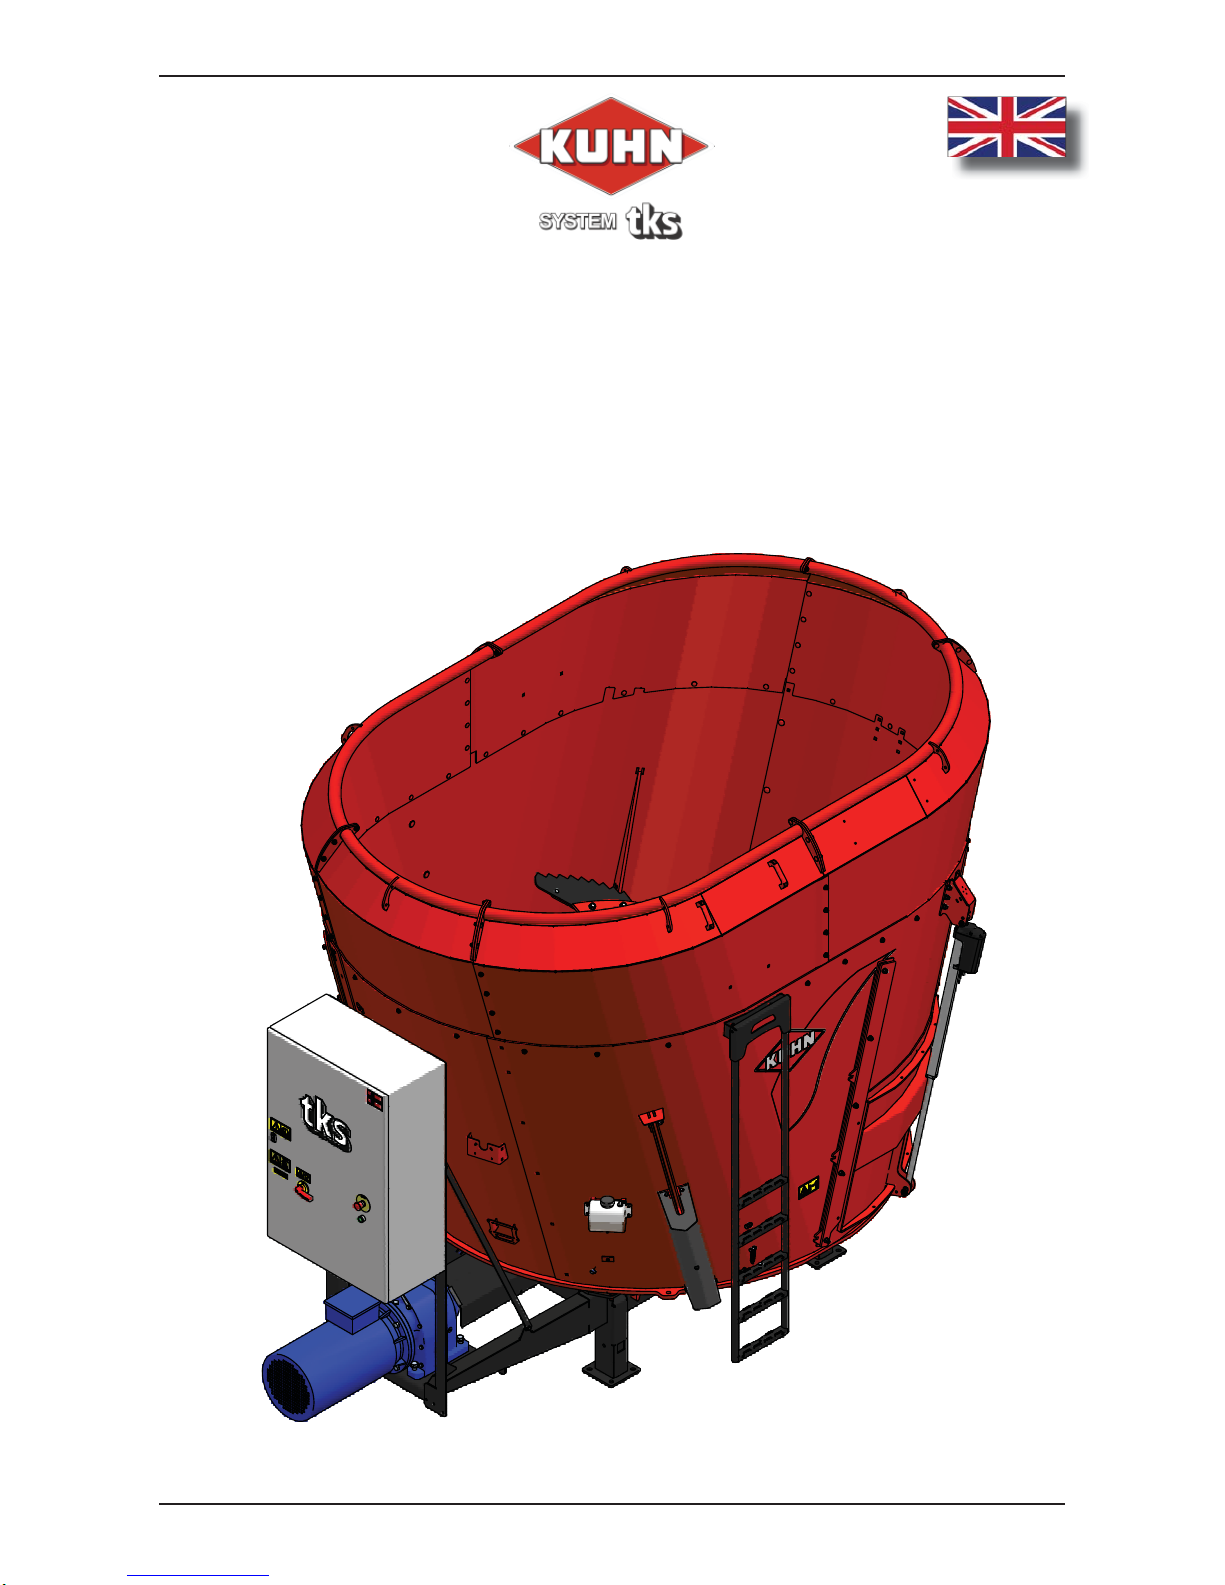
User’s manual
TKS
Controller
Program version: V1.8X
Page 2

TKS User’s manual
2
We,
T. Kverneland & Sønner AS,
Kvernelandsvegen 100
N-4355 Kverneland
Norway
declare that the product:
TKS Kuhn - FeedMixer
has been built in conformity with the Machine Directive and meets the relevant fundamental health
and safety requirements.
Kverneland, 2 May 2018
Tønnes Helge Kverneland
General Manager
Enter the serial number
of the machine here :
T. Kverneland & Sønner AS, manufacturer of agricultural products, reserves the right
to change the design and/ or specifi cation of its products without prior warning.
This does not imply any obligation to modify previously supplied machines.
1 General safety instructions
1.1 CE - Declaration of conformity
Page 3

TKS User’s manual
3
1.2 Guarantee
This TKS product is guaranteed against manufacturing and material defects for one year.
If the owner wishes a defect to be covered by the product guarantee, he or his representative must
inform the dealer of this when ordering parts and/ or repairs. Claims must be reported within the
guarantee period.
The dealer must complete a claims form for each case covered by a guarantee and send it to TKS
or TKS’s distributor/ importer within the 10th of the month following the one in which the defect was
reported.
The defective parts shall be marked with the claim number and be kept for up to 6 months so that
TKS or TKS’s distributor/ importer can inspect them.
Since TKS products are used outside the manufacturer’s control, we can only guarantee the
product quality, and not that it will perform its function, nor are we liable for any consequential
damage.
The guarantee is not valid if:
a) third party spare parts are used, or the product is repaired or altered without the
approval of TKS
b) the operating and servicing instructions have not been followed.
c) the machine has been used for other purposes than those for which it is designed.
The guarantee does not cover damage due to normal wear and tear.
Offi cial safety regulations specify requirements that apply to the users/ owners and manufacturers
of this machine, relating to the careful review of safety hazards that may arise when this type of
machine is used correctly. Therefore, TKS and our importer/ distributor are not responsible for the
functioning of components that are not shown in the spare parts catalogue for this product.
TKS reserves the right to change the design of the product without this implying any obligations in
relation to previously supplied machines.
NB! It must be possible to identify all enquiries relating to this product by the product’s serial
number; see page 7 on Machine identifi cation.
Page 4

TKS User’s manual
4
Content
1 GENERAL SAFETY INSTRUCTIONS. . . . . . . . . . . . . . . . . . . . . . . . . . . . . . . . . 2
2 USING THE SCREEN AND PLC. . . . . . . . . . . . . . . . . . . . . . . . . . . . . . . . . . . . 12
3 OPERATION . . . . . . . . . . . . . . . . . . . . . . . . . . . . . . . . . . . . . . . . . . . . . . . . . . . 14
4 TROUBLESHOOTING. . . . . . . . . . . . . . . . . . . . . . . . . . . . . . . . . . . . . . . . . . . . 33
1
General safety instructions . . . . . . . . . . . . . . . . . . . . . . . . . . . . . . . . . . . . . . . . 2
1.1 CE - Declaration of conformity. . . . . . . . . . . . . . . . . . . . . . . . . . . . . . . . . . . . . . . . . . . 2
1.2 Guarantee . . . . . . . . . . . . . . . . . . . . . . . . . . . . . . . . . . . . . . . . . . . . . . . . . . . . . . . . . . 3
1.3 Introduction . . . . . . . . . . . . . . . . . . . . . . . . . . . . . . . . . . . . . . . . . . . . . . . . . . . . . . . . . 6
1.4 Machine identifi cation . . . . . . . . . . . . . . . . . . . . . . . . . . . . . . . . . . . . . . . . . . . . . . . . . 7
1.5 Safety . . . . . . . . . . . . . . . . . . . . . . . . . . . . . . . . . . . . . . . . . . . . . . . . . . . . . . . . . . . . . 8
1.5.1 General safety instruction. . . . . . . . . . . . . . . . . . . . . . . . . . . . . . . . . . . . . . . . . . 8
1.5.2 Additional safety instructions . . . . . . . . . . . . . . . . . . . . . . . . . . . . . . . . . . . . . . 10
1.5.3 The control cabinet must be secured with padlock. . . . . . . . . . . . . . . . . . . . . . 11
2 Using the screen and PLC . . . . . . . . . . . . . . . . . . . . . . . . . . . . . . . . . . . . . . . . 12
2.1 Screen . . . . . . . . . . . . . . . . . . . . . . . . . . . . . . . . . . . . . . . . . . . . . . . . . . . . . . . . . . . . 12
2.2 Numeric keypad. . . . . . . . . . . . . . . . . . . . . . . . . . . . . . . . . . . . . . . . . . . . . . . . . . . . . 12
2.3 Selecting a value . . . . . . . . . . . . . . . . . . . . . . . . . . . . . . . . . . . . . . . . . . . . . . . . . . . .13
2.4 On / off key . . . . . . . . . . . . . . . . . . . . . . . . . . . . . . . . . . . . . . . . . . . . . . . . . . . . . . . . 13
Page 5

TKS User’s manual
5
3 Operation . . . . . . . . . . . . . . . . . . . . . . . . . . . . . . . . . . . . . . . . . . . . . . . . . . . . . . 14
3.1 Activate FeedMixer . . . . . . . . . . . . . . . . . . . . . . . . . . . . . . . . . . . . . . . . . . . . . . . . . . 14
3.2 Menus . . . . . . . . . . . . . . . . . . . . . . . . . . . . . . . . . . . . . . . . . . . . . . . . . . . . . . . . . . . . 14
3.2.1 Home . . . . . . . . . . . . . . . . . . . . . . . . . . . . . . . . . . . . . . . . . . . . . . . . . . . . . . . .14
3.2.2 Perform a mixing operation . . . . . . . . . . . . . . . . . . . . . . . . . . . . . . . . . . . . . . . 15
3.2.3 Perform a feedout operation. . . . . . . . . . . . . . . . . . . . . . . . . . . . . . . . . . . . . . . 15
3.2.4 Settings. . . . . . . . . . . . . . . . . . . . . . . . . . . . . . . . . . . . . . . . . . . . . . . . . . . . . . . 16
3.2.5 Manual control . . . . . . . . . . . . . . . . . . . . . . . . . . . . . . . . . . . . . . . . . . . . . . . . . 16
3.2.6 Recipe fi lling. . . . . . . . . . . . . . . . . . . . . . . . . . . . . . . . . . . . . . . . . . . . . . . . . . . 18
3.3 Settings . . . . . . . . . . . . . . . . . . . . . . . . . . . . . . . . . . . . . . . . . . . . . . . . . . . . . . . . . . . 21
3.3.1 Settings for mixing . . . . . . . . . . . . . . . . . . . . . . . . . . . . . . . . . . . . . . . . . . . . . .21
3.3.2 Settings for feedout . . . . . . . . . . . . . . . . . . . . . . . . . . . . . . . . . . . . . . . . . . . . . 21
3.3.3 Settings for activation . . . . . . . . . . . . . . . . . . . . . . . . . . . . . . . . . . . . . . . . . . . . 22
3.3.4 Settings for fi lling sources. . . . . . . . . . . . . . . . . . . . . . . . . . . . . . . . . . . . . . . . .24
3.3.5 Automatic fi lling. . . . . . . . . . . . . . . . . . . . . . . . . . . . . . . . . . . . . . . . . . . . . . . . . 25
3.3.6 Settings options . . . . . . . . . . . . . . . . . . . . . . . . . . . . . . . . . . . . . . . . . . . . . . . . 26
3.3.7 Door settings . . . . . . . . . . . . . . . . . . . . . . . . . . . . . . . . . . . . . . . . . . . . . . . . . . 27
3.3.8 Weigt settings. . . . . . . . . . . . . . . . . . . . . . . . . . . . . . . . . . . . . . . . . . . . . . . . . . 28
3.3.9 Maintenance / Energy. . . . . . . . . . . . . . . . . . . . . . . . . . . . . . . . . . . . . . . . . . . . 29
3.3.10 Feedout timer . . . . . . . . . . . . . . . . . . . . . . . . . . . . . . . . . . . . . . . . . . . . . . . . . 30
3.3.11 Language . . . . . . . . . . . . . . . . . . . . . . . . . . . . . . . . . . . . . . . . . . . . . . . . . . . . 30
3.4 Alarms . . . . . . . . . . . . . . . . . . . . . . . . . . . . . . . . . . . . . . . . . . . . . . . . . . . . . . . . . . . . 31
3.5 Doors 2 and 3 (Option) . . . . . . . . . . . . . . . . . . . . . . . . . . . . . . . . . . . . . . . . . . . . . . . 32
4 Troubleshooting . . . . . . . . . . . . . . . . . . . . . . . . . . . . . . . . . . . . . . . . . . . . . . . . 33
Notes . . . . . . . . . . . . . . . . . . . . . . . . . . . . . . . . . . . . . . . . . . . . . . . . . . . . . . . . . . . . . 35
Page 6

TKS User’s manual
6
1.3 Introduction
Congratulations on buying your new TKS product. You have chosen a functional, high quality
product. A network of helpful dealers will be able to advise you on its use, as well as provide
servicing and spare parts.
All TKS products are designed, tested and built in close cooperation with farmers and machine
workshops to ensure optimal effi ciency and reliability.
Please read this instruction manual carefully and familiarise yourself with the machine‘s manner
of operation before starting to use it. There are many conditions and variables that can aff ect the
machine’s functionality and manner of operation. It is therefore vital that you consider all known
conditions and adapt usage according to these. A good understanding of the machine‘s manner of
operation and performance, together with a high degree of knowledge with regard to feeding and
feed types/consistencies will ensure the best possible result. The machine is a highly advanced
feed robot that operates without the need for supervision and must be used in accordance with the
applicable instructions from the manufacturer and other regulations in force at any given time.
By being thorough and making the necessary adaptations to local conditions, you will ensure the
best possible results.
Yours faithfully
T. Kverneland & Sønner AS
T. Kverneland & Sønner AS,
Kvernelandsvegen 100
N-4355 Kverneland
Norway
www.tks-as.no
e-post : post@tks-as.no
Phone : + 47 51 77 05 00
Fax : + 47 51 48 72 28
Page 7
ICM_02
TKS User’s manual
7
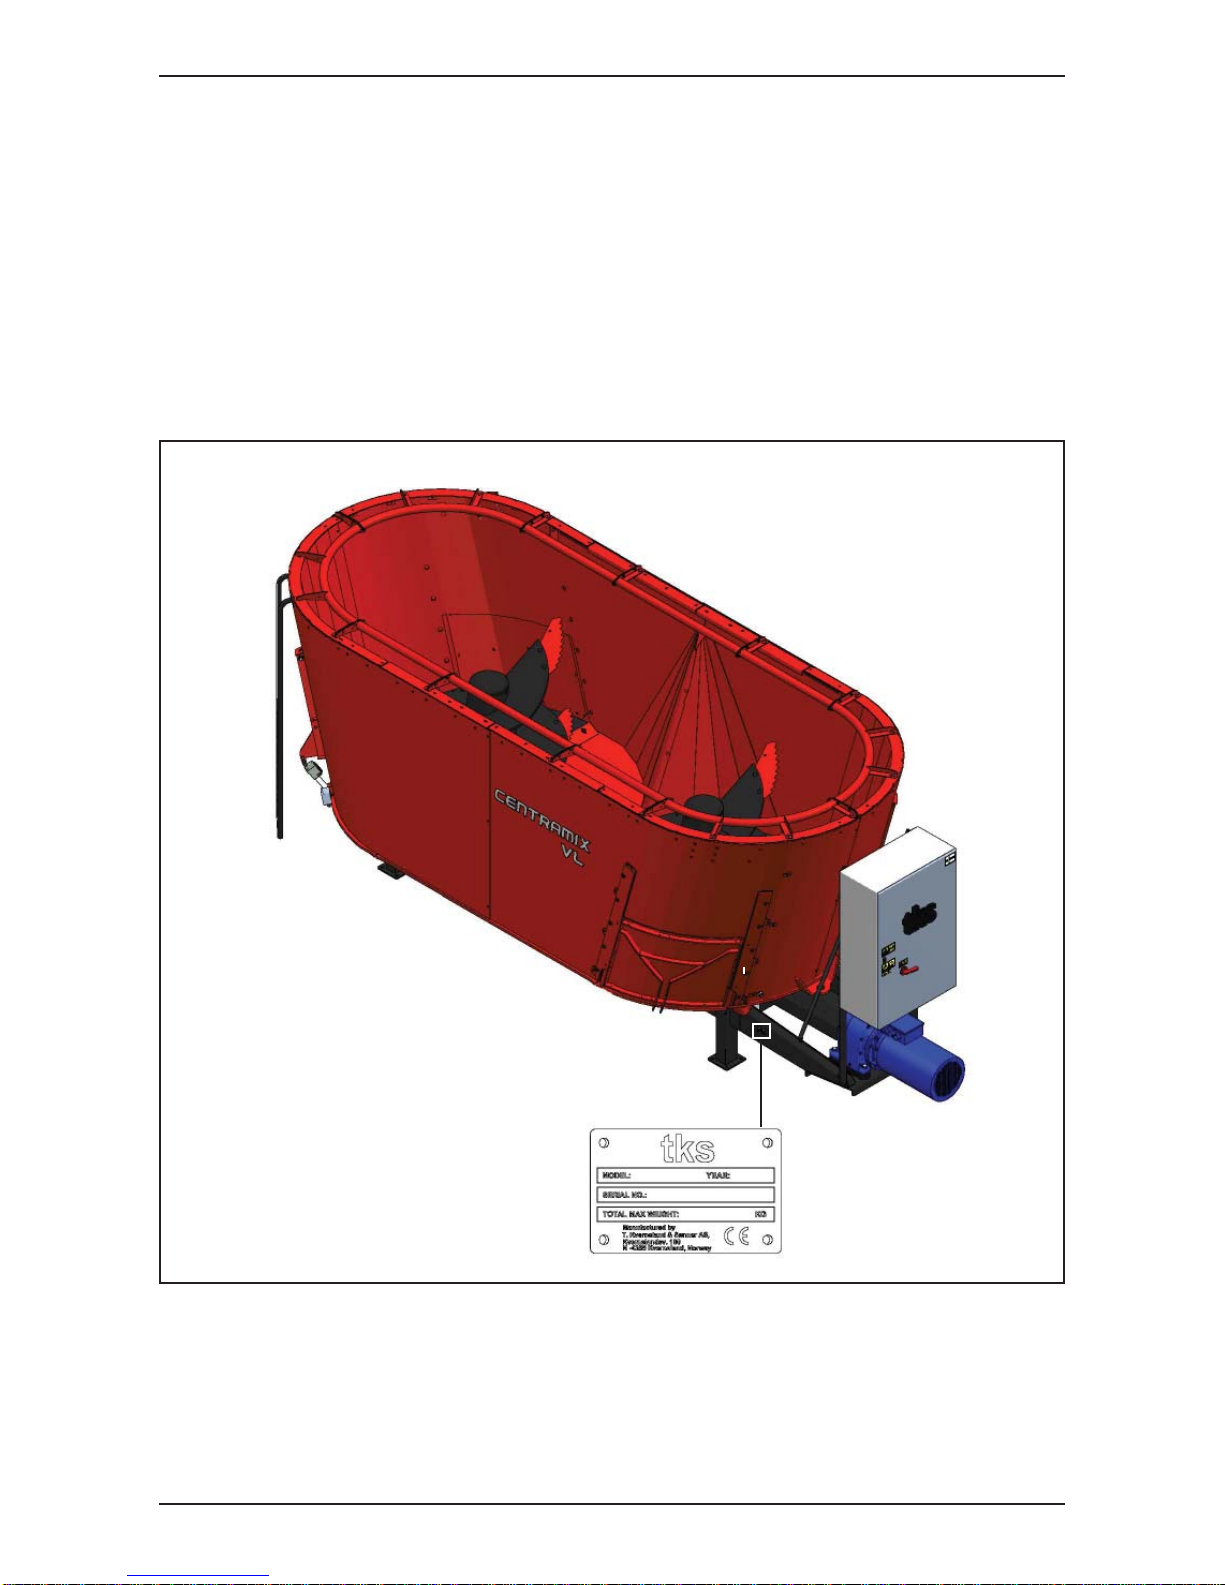
1.4 Machine identifi cation
The machine’s serial number and the address of the manufacturer are written on the machine.
See the illustration on this page.
Please use the information on the name plate when making any enquiries about spare parts or
servicing.
This product is CE marked. This mark, along with the associated written EU confi rmation, means
that the product fulfi ls current health and safety requirements, and complies with the following
directives.
Page 8
TKS User’s manual
8
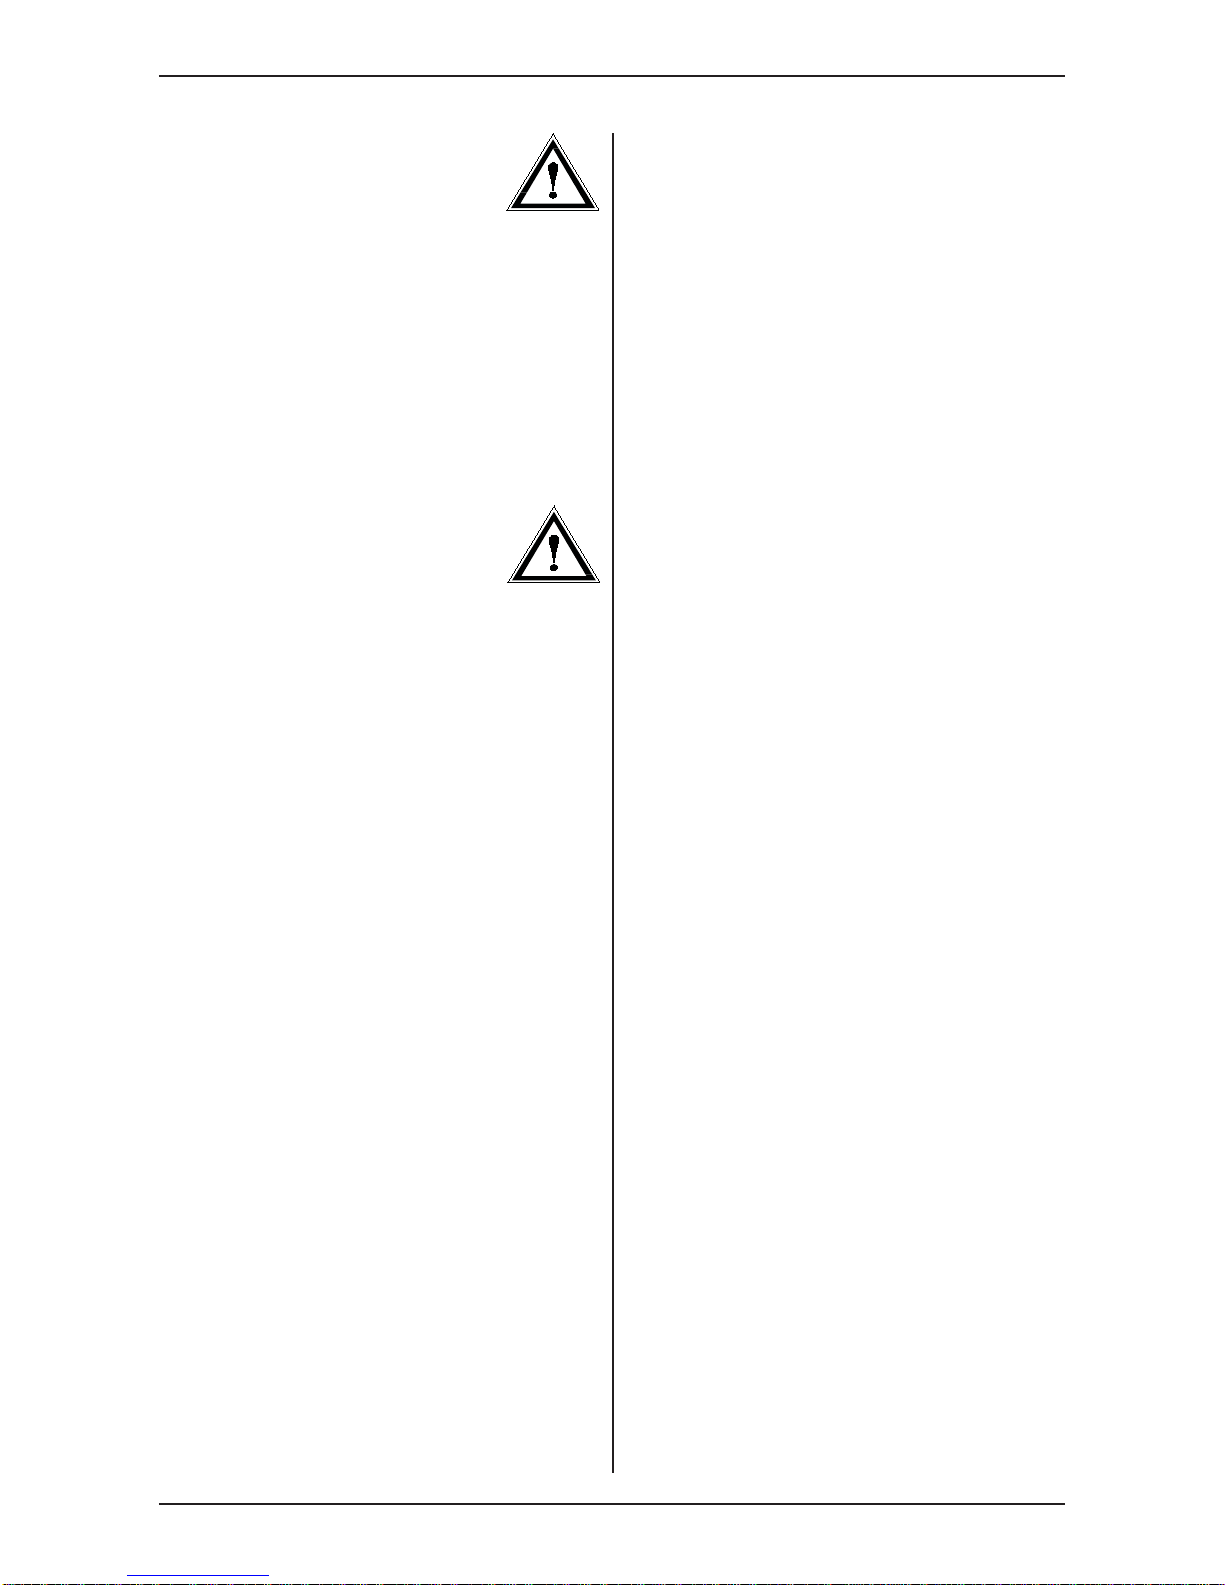
1.5
Safety
Please pay particular attention to this symbol. It
designates a safety risk, and describes
precautions that must be taken to avoid
accidents. The control cabinet must be powered
off and locked with padlock when maintenance
is performed.
Before operating, adjusting or repairing the
machine, the user, technician or owner should
familiarise himself with the safety instructions
contained in this installation manual.
Pay attention and be careful when handling
agricultural machinery. Read and take note of
the safety instructions in this manual.
Safety at work is your responsibility!
Please read and understand these general
safety instructions.
1.5.1
General safety
instructions
In order to be able to load the bale into the
hopper, the machine must be open.
This means that people may come into contact
with moving parts if they are standing in the
immediate vicinity of the machine while it is in
use.
Warning! Once the auger is running, never
lean over the top edge of FeedMixer or enter
the hopper when the machine is operating.
If the machine is placed in a sunken fl oor,
the distance from the fl oor to the top of
FeedMixer must not be less than 1.5 m.
It is a conditional requirement of using the
machine that no one must be in the immediate
vicinity of the machine during use.
In addition, in terms of machine type,
FeedMixer is of conventional agricultural design
and, from a safety perspective, the solutions
choosen are considered to be on a par with or
superior to existing products on the market.
Use of the machine
The machine must only be used for the purpose
for which it is designed.
Operating
The machine operator must remain at the end
of the machine where the control box and the
associated operating panel are mounted.
Supervision
The owner/operator must ensure that the area
is suffi ciently signposted and that there is no
unauthorised access.
Page 9

TKS User’s manual
9
Automation
The machine is equipped with devices to automate the entire operation or select parts of the
operation for this purpose. The machine can operate based on a preset schedule set in the
software by the operator, and start at certain times without human presence.
The area in which the machine is operating
Must be physically sealed off or locked to prevent danger to humans or animals.
The machine’s method of operation
The operator must familiarise himself with the machine’s method of operation and function so
that the machine can be used in a safe and appropriate manner.
Keep a safe distance
Humans and animals must be kept away from the machine when it is in operation.
Keep your distance from working, rotating and moving parts.
Think safety at work
Never climb on the machine while it is operating. When performing maintenance, the power supply
must be disconnected
Warning – audio and illuminated
indicator
The control system (software) has been updated for safe start-up. A built-in buzzer sounds for
30 seconds before start-up of the machine. This audio signal is accompanied by a light signal that
fl ashes during the entire period of operation.
Protective guards
Check that all guards are in place and installed correctly. Do not start the machine until this has
been done. Damaged guards must be repaired or replaced immediately.
Spare parts
For safety reasons we recommend that you only use original spare parts. The use of third-party
spares invalidates the product guarantee.
Maintenance
Ensure that the machine is properly maintained and is kept in good condition. Never attempt to
change the mechanical workings of the machine.
Control panel
The power supply must be cut off before opening the panel.
Page 10
TKS User’s manual
10
1.5.2
Additional safety
instructions
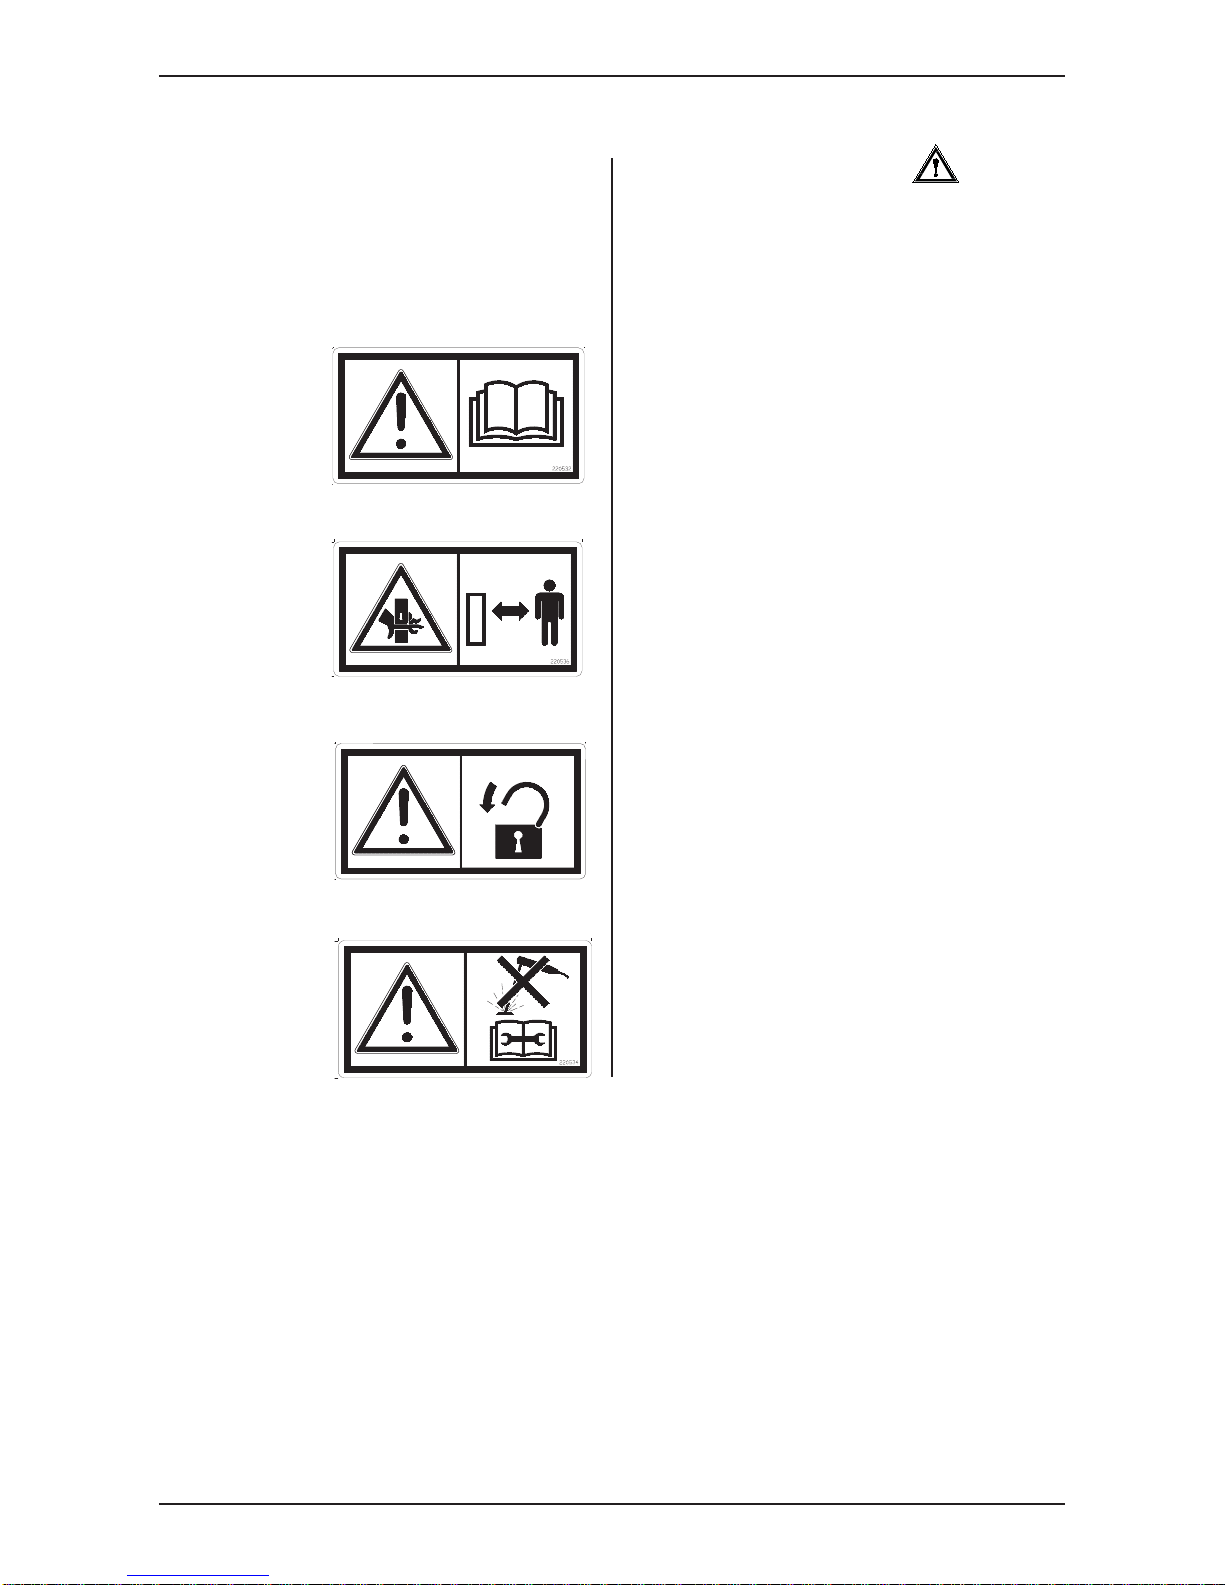
The machine is marked with a warning
signs. If these signs are damaged, they must
be replaced.
Warning sign UH220532 (Fig. 1)
Be careful! Ensure that you read and
understand the instruction manual before using
the machine, and before making any
adjustments or performing any maintenance.
Warning sign UH220536 (Fig. 2)
Risk of crushing hand.
Keep away from the counter knives.
Warning sign 988346 (Fig. 3)
The main power switch must be secured by a
padlock.
Work should only be performed by
authorised personnel.
Warning sign UH220534 (Fig. 4)
Disconnect all electrical connections before
carrying out welding work or maintenance.
Fig. 2
Fig. 1
Fig. 4
Fig. 3
Page 11
UH220536
TKS User’s manual
11
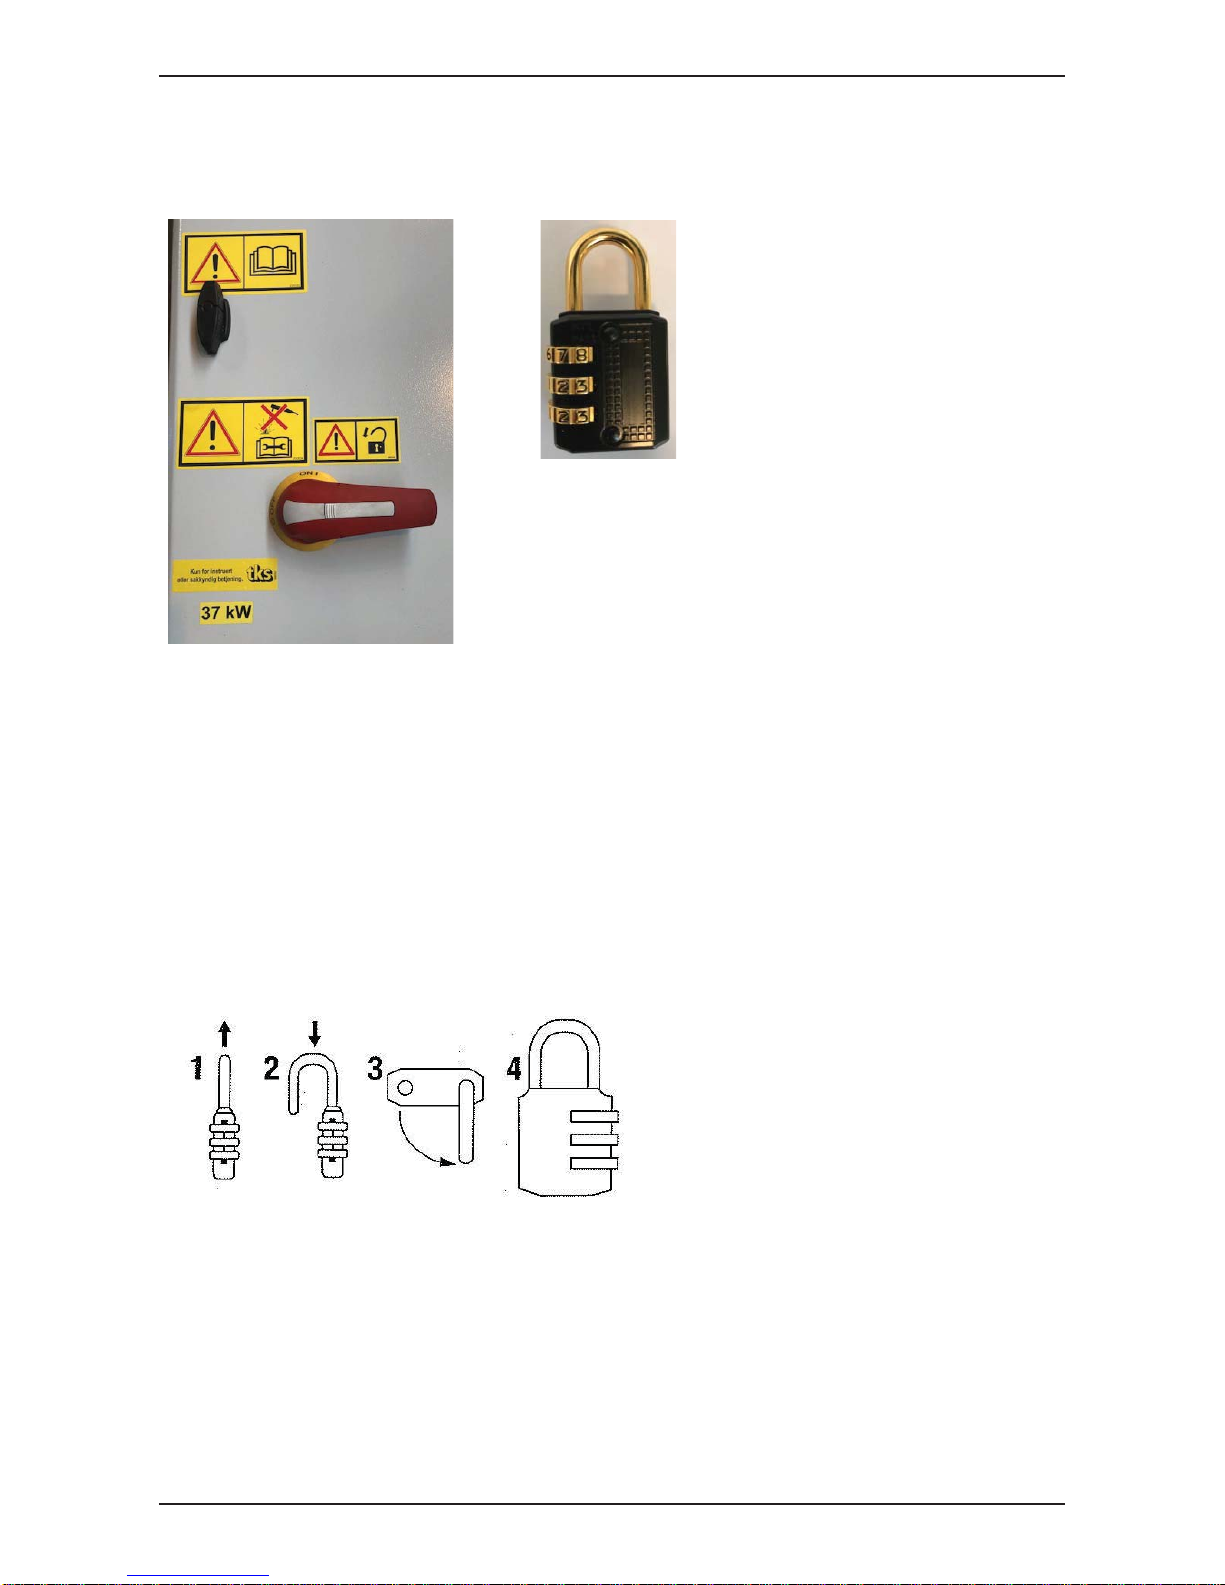
1.5.3 The control cabinet must be secured with padlock
Important!
The control cabinet must be powered off and locked with padlock when maintenance is performed,
especially when knives are sharpened or beeing replaced.
The padlock can be found inside the control cabinet.
Enter your personal code:
1. Set the three code pads so that 0-0-0 is set in the middle of the arrow marker on the short edge
of the padlock and raise the handlebar.
2. Turn the hoop 90O counterclockwise and push it down as far as it goes.
3. While holding the hoop down, enter your personal code using the three code discs.
4. Release the hoop and turn it back to its original position.
NB! The padlock are now ready for use with your personal code.
Page 12

TKS User’s manual
12
2 Using the screen and PLC
2.1 Screen
The control system has a touchscreen, meaning that you can control it by touching the
screen directly. Touch the screen with your fi ngers or use a soft-touch stylus located in the control
cabinet.
Do not press too hard, as this can damage the screen.
If the screen has not been active for a few minutes, it will enter screen saver mode.
The screen will be off in this mode. Touch any part of the screen in order to reactivate it.
The menu keys are displayed on the left-hand side of the screen. Close windows by pressing the X
in the upper right-hand corner to go to the Home screen.
NB! Clean the screen using a moist cloth.
2.2 Numeric keypad
Values in fi elds with blue borders can be
changed. Touch the number and a numeric
keypad will display on the screen.
The top of the screen shows the Max/Min value
that can be entered in this fi eld.
Enter a new value using the number keys.
If an incorrect value was entered, press the
<─ key and delete the most recently entered
number. Press CLR to delete everything.
To enter a negative value, press - before
entering the value.
Once you have selected a value, press the
ENTER button.
This will save the value and close the keypad
window.
To cancel, press X in the upper right-hand
corner. The old value will continue to be active.
To enter times in the feedout schedule
window, begin by entering the hours – then
press period. Then enter the minutes.
Make sure that the time is right.
For example, if you enter 12:65, this will be
ignored – enter 13:05 instead.
Picture 1
Page 13

TKS User’s manual
13
2.3 Selecting a value
Selecting pre-programmed values from a list.
• Open the list – Press the value or the down
arrow
• Select a value from the list
2.4 On / off key
Picture 2
Picture 3
Enable or disable a function using the on/off
key.
• Unchecked means off , disabled
• A checkmark means on, enabled
Page 14

TKS User’s manual
14
3.2 Menus
Picture 5
Picture 4
Picture 6
When FEEDMIXER is switched on, or when the
emergency stop button is pressed, screen
picture will display.
Read the instructions on the screen and make
sure that the machine can be used properly.
Release the emergency stop button if it has
been tripped.
Press “ACTIVATE FEEDMIXER” and hold it
down for three seconds before Home screen
appears.
3.2.1 Home
When FeedMixer is activated, the Home screen
displays. The following displays:
• Menu on the left
• Start keys for mixing and feeding on the right
• The load of the content in the mixer is shown
at the bottom
• The current menu selection is indicated by a
key highlighted in green
• The red line at the top shows FeedMixer
activity
• AUTO – shows when the Feedout timer is
activated.
Clock settings
Hold on the selected area up in the right corner
of the screen for 3 seconds for clock settings.
Time
Hours hh, minutes mm, seconds ss, adjusted
individually.
Date
• Day DD, month MM, year YY adjusted
individually.
• Day of the week chosen from the list
• Press Apply to save
3 Operation
3.1 Activate FeedMixer
Page 15

TKS User’s manual
15
3.2.2 Perform a mixing operation
• Load FeedMixer with feed
• Feed weight shows the number of kg loaded
• Adjust desired mixing time
• Tap the number on the
START MIXING key
• Enter the number of minutes and then press
Enter
• Press and hold the START MIXING key for
three seconds
• The motor goes through its start-up
sequence and mixing begins
Once mixing has commenced, the
START MIXING key changes to a
red STOP key.
Below the keys is a fi eld with a Mixing time left
It can be changed if desired.
The START FEEDOUT key is locked, but the
number of kilograms to be dispensed can be
changed. Once mixing is complete,
FeedMixer stops on its own and the screen
displays two green start keys.
3.2.3 Perform a feedout operation
After mixing, a feedout operation can be started
In the fi eld on the
• START FEEDOUT key, enter the Feedout
quantity in kg.
• Press and hold the START FEEDOUT key
for three seconds,
• FeedMixer begins the feedout sequence.
• The door opens, the counter knives retreats,
the conveyor starts and the feed discharges.
Once the feedout operation has commenced,
the START FEEDOUT key changes to a red
STOP key. Two fi elds display below the keys.
The fi rst fi eld shows the quantity discharged so
far in kg, and the second shows the quantity for
this feedout session in kg.
The START MIXING key is locked, but the
Mixing time can be changed.
Once the feedout operation is complete,
FeedMixer stops on its own and the screen
displays two green start keys.
To empty FeedMixer completely, enter 0 kg in
Feedout quantity before commencing the
feedout operation.
Picture 7
Picture 8
Page 16

TKS User’s manual
16
3.2.4 Settings
Open the settings using Settings in the menu.
Twelve sub-menus display for FeedMixer
settings:
• Mixing – settings for mixing
• Feedout – settings for feedout
• Manual control – control seperate functions
• Activation – settings for remote control
• Filling sources – settings for fi lling sources
• Automatic fi lling – automatic settings
• Options – settings for the motor and
equipment
• Door – door settings
• Weighting system – weight settings
• Maintenance/energy – shows maintenance
intervals, hour meters and energy
consumption
• Time schedule – schedule for automatic feed
dispensing
• Language - select display language
The program version of the
PLC is displayed at the bottom: PLC 1.XX and
screen: HMI v1.XX
3.2.5 Manual control
Open manual control by touching Manual in the
menu.
Operation of the door
• Open the door using the up arrow
• Close the door using the down arrow
• The door is operated when the arrow key is
pressed, and stops when the arrow key is
released
• The arrow key lights up green on activation
• The door stops once the end position is
reached
• The door also moves on the screen
Picture 9
Picture 10
Operation of counter knives
• Counter Knife 1 is moved in position using the right arrow key. (Plate 1)
• Counter Knife 1 is retracted using the left arrow key. (Plate 1)
• Counter Knife 2 is moved in position using the left arrow key. (Plate 2)
• Counter Knife 2 is retracted using the right arrow key. (Plate 2)
• The arrow key lights up green on activation
• The counter knives stops once the end position is reached.
• The bedknife also moves on the screen
Page 17

TKS User’s manual
17
Operation of motor
• In manual operation, the motor rotates in the
forward direction.
• Start motor at pre-defi ned speeds
• Lo = low speed
• M = medium speed
• Hi = high speed
• The motor runs for as long as the key is held
down, and stops when it is released.
• The key lights up green on activation.
Operation of conveyors
• Two conveyors can be operated
individually.
• 1 – operates conveyor 1
• 2 – operates conveyor 2
• The conveyors run for as long as the key is
held down, and stop when it is released.
Control of fi lling sources
• Open separate window using the double
chevrons at the top right.
• Displays fi lling sources 1–12
• Filling sources indicate whether they are
manual or automatic (PLC A3:) (Option)
• Test drive the fi lling source by holding in the
key
Picture 11
Page 18

TKS User’s manual
18
3.2.6 Recipe fi lling
Open Recipe fi lling in the menu
Recipe fi lling can be used manually or
automatically.
For manual use, this is a guide to help fi ll in the
correct quantity of each feed component based
on weight.
For automatic operation, the connected fi lling
sources start and fi ll the specifi ed quantity in
order from a recipe. For automatic fi lling,
electrical equipment must be installed in the
electrical cabinet.
Contact your dealer.
The recipes can consist of both manual and
automatic fi lling sources.
Selection of recipe
This window shows programmed and blank
recipes 1–23
The ingredients box shows the content in the
container now
Select a recipe.
To create a new recipe, press inside a blank
box.
After selection, a new screen will be shown.
To exit without changing, press the red cross.
Ingredients
The window shows the content in the container
now. Unspecifi ed consists of feed that is loaded
outside automatic fi lling, or residual feed from
previous feed dispensing.
Unspecifi ed loaded feed can be moved to a
diff erent ingredient manually.
• Press the blue fi gure to the desired
ingredient
• Enter the desired amount to be moved
All ingredients can be removed from the list.
The weight of these ingredients will be
transferred with unspecifi ed quantity.
Press – Reset all and HOLD for three seconds.
Picture 12
Picture 13
Picture 14
Page 19

TKS User’s manual
19
Recipe fi lling
• Write the name of the recipe.
• Enter the types of feed. Press on the fi elds.
Select from the list in the next window.
(Programming of fi lling sources must be
done in advance in Menu-> Settings->
Filling sources)
• To remove a ingredients, select 0 None.
• The lightest feed should be fi lled fi rst.
See chapter 3.2 about fi lling order.
• Intermediate mixing can be added between
feed ingredients using selection 13. Enter
number of minutes mixing time.
• Enter the amount
• Switch between kg and %. Press on the unit.
When loading bales, it is diffi cult to achieve
an exact number of kg gross feed so it is
useful to use % for quantity when fi lling with
grain feed.
All recipes can consist of up to 12 ingredience.
A specifi c feed ingredient can be repeated
several times to add diff erent layers.
Switch to the last six feed ingredient using the
Line 7–12 key
• When fi lling is fi nished, the mixer can
automatically start to mix and cut the feed.
• Enter the appropriate mixing time.
Mixing after fi lling
• If you do not want automatic mixing, enter 0
min.
• Perform a fi lling sequence
Press START FILLING
Picture 15
Picture 16
Page 20

TKS User’s manual
20
Recipe fi lling in progress
• This window shows the recipe fi lling in
progress.
• The current recipe is shown at the top.
• The status indicator shows in per cent how
much of the feed component has been fi lled.
• The weight of the fi lling loaded so far/how
much to be loaded is shown underneath.
• During fi lling an audible warning will be given
when 80% of the weight of the feed
component has been achieved.
• The audible signal becomes more intense up
to 100%.
• At 95% the indicator changes colour from
yellow to green.
• The fi lling is complete when the sound stops.
• In the event of overloading, the indicator will
turn red from 105%
• When fi lling from a fi lling source is complete,
the indicator changes to the next component
in the recipe within 10 seconds (plus any
additional pause time).
• It is important that the mixer does not move
unnecessarily after the feed component has
been loaded. This will result in a longer
waiting time before the next component
starts.
• When an intermediate mix is in progress, the
mixing process is shown in the status
window
At the bottom of the screen there are keys to
stop the process.
Stop this process
• Stops the ongoing feed component and
moves on to the next component in the
recipe.
• This key should be used if no more of this
component is to be loaded
• The key is used when loading whole bales
when the set weight has not been achieved.
• When the last feed component in the recipe
stops, the pre-programmed Mix after fi lling
will start.
Stop recipe fi lling
• Stops all fi lling and returns to the home
screen without starting mixing.
Picture 17
Picture 18
Picture 19
Page 21

TKS User’s manual
21
Picture 21
Picture 20
3.3 Settings
3.3.1 Settings for mixing
Choose mixing speed by setting a predefi ned
motor speed.
• Low – Low
• Med – Medium
• High – High
• Auto – Automatically adjusts the engine
speed between low and high. FeedMixer
always adjusts to the lowest load.
• Motor load target for auto speed -
the motor’s specifi ed load is entered here as
a percentage. This fi gure is converted to real
amperage (A).
• When new material is loaded into FeedMixer,
the load will increase. You can choose to
start the mixing process from the beginning.
A sound warning is given.
• Enable / disable – Automatically reset mixing
time after FeedMixer is loaded.
3.3.2 Settings for feedout
Choose a feedout speed by setting a
predefi ned engine speed.
• Low – Low
• Med – Medium
• High – High
• Auto – Automatically adjusts the engine
speed between low and high.
FeedMixer always adjusts to the lowest load.
When FeedMixer is used together with
FeedRobot or FeedBelt, the feedout speed
must be set to Medium or Low.
This is important in order to achieve an even
feeding process.
FeedMixer can automatically adjust the speed
to dispense feed evenly.
• Set desired feed quantity in kg per 10
seconds.
• Last calculated feed quantity gives an
indication of how much feed is expected to
come out.
• This function is reserved for FeedBelt and
other conveyors in the feed system.
Page 22

TKS User’s manual
22
Picture 23
Conveyor
It is possible to connect up to two conveyors
to FeedMixer. The conveyors start each time
discharging, and stop after the specifi ed length
of time when the auger has stopped.
• Specify stop delay (time for emptying the
conveyors)
Level of empty containers
• When the mixer is almost empty, it is
possible to set a function to clean the
container.
• This can be set for the function to start at a
fi xed or automatic level.
• Select level
• Set weight limit for level.
• With automatic level, the function will start
when weight reduction does not occur.
• Activate high speed clean. High speed clean
causes the motor to operate at a high speed
to eject any feed left on the screw
• Specify cleaning speed.
• Delay time – specify how long the screw
needs to rotate after the function is
complete.
3.3.3 Settings for activation
Settings for remote control of feed dispensing
on FeedMixer are confi gured here.
Activating the hold signal
FeedMixer can start dispensing feed in
response to external signals issued by feed
dispensing machines.
The start signal must be an active signal for the
entire time the feed is being dispensed A
so-called hold signal.
When the signal is interrupted, feed dispensing
stops.
Feeding and conveyors can be controlled
independently of one another.
• Feedout – enable/disable (circuit diagram
-X3:1)
• Conveyor 1 enable/disable (circuit diagram
-X3:3)
• Conveyor 2 enable/disable (circuit diagram
-X3:3)
Conveyors 1 and 2 start at the same time, but
may have diff erent stop times confi gured.
• Adjust stop delay.
Picture 22
Page 23

TKS User’s manual
23
Picture 24
Activation by pulse signal
FeedMixer can start the feedout process in
response to machines with a pulse signal.
This means that FeedMixer starts with one
signal and stops with another.
In order to prevent FeedMixer from starting in
response to the wrong signal, the signals must
have a minimum duration.
• Enable/disable pulse signal
• Shortest start signal – adjust signal length
(circuit diagram -X3:5)
• Shortest stop signal – adjust signal length
(circuit diagram -X3:6)
• Select desired door
Activation with photocells and switches
When FeedMixer is used together with an
external feed cart or mashine, such as a
FeedRobot or EasyFeed, FeedMixer can be
started using a photocell and switch.
• Enable/disable the function
• Photocell act/deact. delay
Photocell activating/diactivating delay –
how long the photocell must have a stable
signal before FeedMixer reacts.
• Photocell react. delay
Delay until reactivating of photocell
– period of time after the end of the feedout
process until the next feed may begin.
• Switch act. delay
Switch activation delay – how long
Feed Robot must be in the switch position
before the feedout process begins.
• Switch deact. delay
Switch deactivating delay – time to elapse
before FeedMixer stops the feeding
process if FeedRobot leaves the position.
• Select desired door
Picture 23
Page 24

TKS User’s manual
24
3.3.4 Settings for fi lling sources
The settings for the fi lling sources for recipe
fi lling are found here.
• This screen shows the programmed and
blank feed components/fi lling sources.
• Each feed component/fi lling source has its
own settings.
• Select a fi lling source.
• To create a new one, press an empty line.
• The settings window for this component will
open.
Filling source name
Enter the name of the fi lling source / feed
component.
Output
Select whether the fi lling source will be manual
or automatic (PLC A3:).
For automatic, separate electrical equipment
must be connected to the electrical cabinet.
A3:02 refers to the circuit diagram.
Contact TKS for installation and connection.
Picture 25
Picture 26
Page 25

TKS User’s manual
25
Picture 27
Maximum fi lling time
Specifi es how long the fi lling source will be
active before it stops and moves on to the next
fi lling source.
Weight timeout error
When the weight does not increase in this time,
the fi lling source will stop and move on to the
next fi lling source.
This parameter is only active for automatic
fi lling sources.
Stop fi lling source before
Stops the fi lling source before the desired
weight in the recipe is achieved. This is
useful when manually loading bales. If you do
not want overloading according to
the recipe, but still want the automatic fi lling to
move on to the next fi lling source without
pressing the screen, set the value to e.g. 400
kg.
Pause after complete
Any additional waiting time can be set here
before the next fi lling source is activated.
3.3.5 Automatic fi lling
The window shows settings for receptors
associated with automatic fi lling. The function
controls when the container will be fi lled.
• Activate
• Select recipe
• Specify weight limit for remaining feed in the
container before fi lling starts.
• Specify delay before fi lling starts when
weight limit is reached. The timer starts
counting when the mixer stops.
Picture 28
Page 26

TKS User’s manual
26
Picture 29
3.3.6 Settings options
Other settings and enabling/disabling of various
functions can be performed here.
• Door enabled/disabled
– Enable the door to allow FeedMixer to
automatically open/close the door when
feeding. If disabled, the door must be
controlled manually.
• Door 1 opening time
– Confi gure the desired opening height for
the door during automatic feedout. Enter
opening time in seconds it takes to open the
door to the level desired. Enter value 0 and
door opens completely.
• Plate 1 or 2 enabled (Counter knife 1 or 2)
– Enable counter knives to allow FeedMixer to automatically move counter knives in position
when mixing and retract them during the feedout process. When counter knives are disabled,
they are stationary, and can be moved manually to the desired position
• Motor reverse enabled/disabled
– When mixing and feedout, the auger will rotate in reverse approximately a quarter revolution
in order to loosen the feed before rotating in the working direction. This avoids overloading the
motor on start-up. This function must be used when FeedMixer is loaded to the limit.
• Freezing protection enabled/disabled
– During cold times of year, the feed may freeze to the auger and sides, and make it diffi cult for
the auger to turn. You can prevent feed from freezing to surfaces by setting the auger to turn at
defi ned intervals. Confi gure the desired interval.
• Maximum feedout time
– To avoid overloading, the maximum feedout time is limited to 60 minutes.
This time can be lowered as desired.
Blockage detection
If the weight of the content is not reduced during feedout, FeedMixer will stop after the set amount
of time and sound an alarm. It is useful to use this function during automatic feedout when a
connected machine may lead to blockages if it stops
• Activate with check box
• Confi gure the desired time before stop. The time should not be less than 60 seconds.
• Conveyor sensor
When a conveyor is connected, this can be secured with a guard to prevent feed piling up if the
conveyer stops.
• The function can be activated with connected sensor.
Shift to next screen with arrows to the right
Page 27

TKS User’s manual
27
Picture 30
• External alarm input Off / NO / NC
– Used when a connected machine may give
an error message. This signal causes
FeedMixer to stop. (Connected to -X3:4).
NO - normally open signal
NC - normally closed signal
• Motor overload alarm - activate / disable
– emits an audio alarm when the load on the
motor is too high. Do not load any feed until
the alarm stops sounding.
• Web app password
Set a password for access to the website
from a mobile phone.
• Group feed logging
Enables logging of data on feeding to
diff erent groups.
3.3.7 Door settings
The window shows door settings.
If there are several active doors, these are
displayed.
If a door is opened and closed automatically,
the door must be activated and an opening time
must be set for each individual door.
• Enable door
• Close door after feedout Activate / disable
• Door opening time
• Activate which conveyer, 1 or 2, will be
connected to the relevant door.
If you want feed to be dispensed evenly when
the container is emptied, set the function –
Reduce door opening gradually.
The door must be activated automatically.
Three steps can be set.
• Activate step.
• Specify weight at which the door will close
• Specify closing time
When high-speed cleaning is used, the door
can be closed before cleaning starts.
The weight limit for start is specifi ed in the
function
Level of empty containers in the settings
menu for feed dispensing
Picture 31
Picture 32
Page 28

TKS User’s manual
28
3.3.8 Weight settings
The window shows settings for the weighing
system.
• Automatically resets weight when the mixer
is empty. Activate/disable. The mixer is
empty when the motor stops after any
high-speed cleaning.
Any feed residue in the container is then
ignored.
• Now reset weight. Press HOLD for three
seconds.
• Set factory systems for the weighing system.
Press HOLD for three seconds. Transfers
factory data from PLS to the weighing cell
amplifi er.
If the weighing system does not function
correctly, the factory settings can be set, to
rectify any faults.
• Deactivate weight. Can be used in the event
there is a delay in repairing the weighing
system.
Calibrate weight
• Empty FeedMixer before doing the
calibration
• Tare weight system now
• After that the Feedmixer will show value 0 kg
• A known weight will be loaded in the
FeedMixer, for example 1000 kg.
• The weight will show the load
• If scale shows diff erent value than your
loaded weight – weight system needs to be
calibrated
• Adjust the weight of what is loaded.
• For rought adjustment use ++ / --
• Fine tuning with + / -
• When the load is removed, the weight should
show 0 kg
Weight signal forwarding
Settings for forwarding signals to other
systems.
Choose signal type
• Modbus
• Analogue
Set
• Node ID
• Max weight
Picture 34
Picture 33
Page 29

TKS User’s manual
29
Picture 35
3.3.9 Maintenance/Energy
The window has two tabs for information on
maintenance hours and energy consumption.
Maintenance
FeedMixer has a maintenance timer that
generates a message on the screen when
maintenance needs to be performed.
• Lubrication must be applied every month or
every 50 hours.
• Gear oil must be changed every year or
every 1,000 hours
• Maintenance must be carried out at the fi rst
possible opportunity.
• When maintenance is completed, the
maintenance timer must be reset.
• Press HOLD to reset.
Hour meter
• Motor operating time
• Number of times door is opened
• Number of counter knife (Plate) movements
in/out.
Energy consumtion
FeeMixer calculates the energy
consumption of the last mix, over the last
24 hours, the last seven days, and total
consumption.
• Enter the price of energy in EUR/kW.
FeedMixer calculates the cost of
consumption.
Picture 36
Page 30

TKS User’s manual
30
Picture 38
3.3.10 Feedout timer
FeedMixer can be set to dispense feed
automatically according to a time schedule.
Up to 16 diff erent times can be confi gured
individually. It is appropriate to use this function
if a feed dispensing machine does not have a
separate feedout timer.
• Time - set the desired feed dispensing time.
• Kg - specify the feed quantity for each time
• En - enable this feed dispensing with check
box.
• D - specify the door to be used.
• Press the fi gure to switch between
door 1, 2 or 3.
When at least one feedout session is enabled,
a green lamp with the text AUTO will be
displayed at the top of the Home screen.
When automatic feed dispensing is used, the
feed must still be mixed manually. Mixing must
be performed at a time between two automatic
feed dispensing sessions. If FeedMixer is
empty when dispensing, FeedMixer will stop
and an alert will appear on the screen.
3.3.11 Language
Select display language
Picture 37
Page 31

TKS User’s manual
31
Picture 39
3.4 Alarms
FeedMixer stops when an alarm is triggered.
The screen shows the alarm window and which
alarm was triggered.
The window can be closed by pressing the X in
the upper right-hand corner.
A yellow symbol displays on the Home screen.
Touch the symbol to open the alarm window
again.
• Reset the alarms using the
Reset alarm - key
• If the error has not been corrected, the alarm
will trigger again shortly
The following error messages may display:
• Frequency inverter fault
• Conveyor fault
• Door fault
• Limit switch fault, counter knife 1 (Plate 1)
• Limit switch fault, counter knife 2 (Plate 2)
• Feedout process fault
• External alarm input
• Error in feeding
• Perform maintenance
• Error on logging
Page 32

TKS User’s manual
32
3.5 Doors 2 and 3 (Option)
FeedMixer can be equipped with the
operation of up to three doors.
Dispensing with multiple doors is appropriate
where several feed dispensing machines are
connected. All the doors can be controlled
automatically from the connected machine or
they can be operated manually. Door settings,
see chap. 3.3.7
Feedout
Select the desired door before feedout. Press
the desired door: 1, 2, 3. Then start the feedout.
When feedout to another door is desired, the
door that was last activated closes
automatically and the desired door opens
before the feedout starts.
Manual control
First select the desired door on the screen.
The door in red is active.
Open and close the door using the up and
down arrow keys.
Picture 40
Picture 41
Page 33

TKS User’s manual
33
4 Troubleshooting
Fault Causes Procedure – error correction
Auger does not rotate
• The shear bolt in the boltconnection in front of the
planet gear has sheared.
• Replace the shear bolt.
Weight system, door or conveyor belt not working
•
Voltage too high.
•
Power cut.
• Check the fuses.
• Turn off the mains supply for 30
seconds. Motor, door and
counter knives will be reset
automatically.
Scales are showing incorrect
values
Scales are not working
• The settings on the
load cell amplifi er are
incorrect.
• The load cell amplifi er must be
confi gured correctly.
• Auger connections on the
scales’ components have
come loose.
• Retighten the augerconnections.
• The switch is moist.
• Insuffi cient contact in
cables.
• Clean and dry the switch
• (do not use contact spray).
Alarm!
Door fault
•
El. actuator does not reach
top or bottom endpointswithin 30 seconds.
•
Silage in channel to door.
• Clean the outlet.
• Check clearance in the slot of the
door.
Alarm!
Fault on limit switch for the
counter knifes
• Both of the limit switches
in the el. actuator give a
signal.
• Check the cables for faults.
Alarm!
Frequency inverter fault
• Power supply to the motor.
• Overload/overheating on
motor.
• Check the power supply.
• Wait until the engine has cooled.
• Press Reset alarms to reset the
Alarm!
Conveyor fault
• Power supply to the motor.
Overload on motor.
• Check the conveyor.
• Enable motor protection.
Alarm!
Feed feeding fault
• When there is no
reduction in weight during
the discharging process.
• Check the door outlet.
Alarm!
External alarm input
• Fault in connected
machine.
• Check connected machine.
Page 34

TKS User’s manual
34
Page 35

TKS User’s manual
35
Notes
Page 36

www.tks-as.no
TKS is a family owned company
with a strong brand name.
We are providing our customers with a
unique and complete range and high
quality products.
TKS User’s manual
36
www.tks-as.no
TKS is a family owned company
with a strong brand name.
We are providing our customers with a
unique and complete range and high
quality products.
 Loading...