

KTV Global LTM17AA Users manual

Test Report No.: GETEC-E3-05-018
FCC Class B Certification
APPENDIX H
: USER’S MANUAL
EUT Type: 17” LCD Monitor
FCC ID : BRFLTM17AA

TFT LCD TV
User’s Manual
MOBILE
APPLICATIONS
LSM-171

2

Important Safety Instructions
3
1) Read these instructions.
2) Keep these instructions.
3) Heed all warnings.
4) Follow all instructions.
5) Do not use this apparatus near water.
6) Clean only with dry cloth.
7)
Do not block any ventilation openings. Install in accordance with the manufacturer s
instructions.
8) Do not install near any heat sources such as radiators, heat registers, stoves, or
other apparatus (including amplifiers) that produce heat.
9)
Do not defeat the safety purpose of the polarized or grounding-type plug.
A polarized plug has two blades with one wider than the other. A grounding type
plug has two blades and a third grounding prong. The wide blade or the third
prong are provided for your safety. If the provided plug does not fit into your outlet.
Consult an electrician for replacement of the obsolete outlet.
10) Protect the power cord from being walked on or pinched particularly at plugs,
convenience receptacles, and the point where they exit from the apparatus.
11) Only use attachments/accessories specified by the manufacturer.
12)
Use only with the cart, stand, tripod, bracket, or table specified by the manufacturer,
or sold with the apparatus. When a cart is used, use caution when moving the
cart/apparatus combination to avoid injury from tip-over.
13) Unplug this apparatus during lightning storms or when unused for long periods of
time.
14) Refer all servicing to qualified service personnel. Servicing is required when the
apparatus has been damaged in any way, such as power-supply cord or plug is
damaged, liquid has been moisture, does not operate normally, or has been
dropped.
15) The apparatus shall not be exposed to dripping or splashing and that no objects
filled with liquids, such as vases, shall be placed on the apparatus.
Important Safety Instructions
Warning:
TO PREVENT FIRE OR SHOCK HAZARDS, DO NOT EXPOSE THIS PRODUCT TO RAIN OR MOISTURE.
NOTE TO CABLE/TV INSTALLER:
This reminder is provided to call the CATV system installer’s attention to Article 820-40 of the National Electric Code
(U.S.A.). The code provides guidelines for proper grounding and, in particular, specifies that the cable ground shall be
connected to the grounding system of the building, as close to the point of the cable entry as prac-tical.
REGULATORY INFORMATION
CAUTION:
Warning:
TO REDUCE THE RISK OF ELECTRIC SHOCK DO NOT REMOVE COVER (OR BACK). NO
USER SERVICEABLE PARTS INSIDE. REFER TO QUALIFIED SERVICE PERSONNEL.
The lightning flash with arrowhead symbol, within an equilateral triangle, is intended to alert
the user to the presence of uninsulated “dangerous voltage” within the product’s enclosure
that may be of suffi-cient magnitude to constitute a risk of electric shock to persons.
The exclamation point within an equilateral triangle is intended to alert the user to the presence of important operating and maintenance (servicing) instructions in the literature accompanying the appli-ance.
CAUTION
RISK OF ELECTRIC SHOCK
DO NOT OPEN
This equipment has been tested and found to comply with the limits for a Class B digital device, pursuant to Part 15 of
the FCC Rules. These limits are designed to provide reasonable protection against harmful interference in a residential
installation. This equipment generates, uses and can radiate radio frequency energy and, if not installed and used in
accordance with the instructions, may cause harmful interference to radio communications.
However, there is no guarantee that interference will not occur in a particular installation. If this equipment does cause
harmful interference to radio or television reception, which can be determined by turning the equipment off and on, the
user is encouraged to try to correct the interference by one or more of the following measures:
- Reorient or relocate the receiving antenna.
- Increase the separation between the equipment and receiver.
- Connect the equipment into an outlet on a circuit different from that to which the receiver is connected.
- Consult the dealer or an experienced radio/TV technician for help.
Any changes or modifications not expressly approved by the party responsible for compliance could void the
user’s authority to operate the equipment.
4
Regulatory Information
5

General safety precautions
6
Thank you for purchasing our product.
Before using it, please read this user's manual carefully and apply it correctly and safely.
Please keep this manual close to you so you can refer to it anytime after reading it.
Also, for the transportation of the product, please attach this manual without fail.
Please observe the notes below.
1. Use at the rated power voltage.
Use of non-rated voltage may cause fire, electric shock and breakdown.
2. Do not open the cabinet and external cover.
The high voltage inside of this product may cause the electric shock.
3. Do not remodel or disassemble this product.
Remodeling or disassembling in wrong method may cause fire, electric shock or breakdown.
4. Do not insert or drop any foreign substance such as metals or flammable object inside from the air hole.
It may cause fire, electric shock or breakdown.
If any foreign substance is inserted inside of this product, turn off the power, pull the plug out of the socket and contact
the sales department. Do not use the product with the foreign substance in.
5. Do not place any vase, potted plant, cup, medicine and any container with water on this product.
If the liquid is spilt, it may cause the fire, electric shock or breakdown.
6. Do not place this product with water nor moisten it.
If water flows in it, it may cause the fire, electric shock or breakdown.
If there is water inside of the product, turn off the power immediately, pull the plug out of the socket and contact the
sales department.
Do not use the product with water in it.
7. Never touch the antenna lie or power plug if it stars to thunder.
It may cause the electric shock.
8. If any impact is applied, the parts inside of the product may be fallen out or broken to be the cause of fire, electric shock or
breakdown.
9. Clean the dust on the power plug periodically.
The dusty power plug may cause the poor insulation due to the moisture to be the reason of fire.
10. Do not destroy, process, make closer to heating device, bend or twist forcibly, place any heavy object on nor bind the
power cord or power plug. If it is used in the broken condition, it may cause fire or electric shock.
11. Do not touch the power plug with wet hands.
If you pull in or out the power plug with wet hands, it may cause electric shocks.
12. Put the power plug in firmly.
Putting the plug incompletely may cause the electric shock or fire by the generation of heat.
13. Do not use any non-rated power socket with numerous devices jointed on one power socket or cable device.
The wire of non-designated capacity may cause the fire due to the generation of heat.
14. In case of malfunction, turn off the power switch immediately and pull out the power plug.
If this product is used in the abnormal condition such as damage to it, foreign substance inside of the product, generation of joints, smelling, smoking, overheating and non production of signal, it may cause fire, electric shock or breakdown.
Turn off the power switch immediately, pull the power plug out of the socket and contact to the sales store..
15. Leave space 10 cm or more from the wall for the installation of the device.
Do not install it close to the wall nor block the ventilation of the air.
Insufficient ventilation or accumulated heat inside of the product may cause the fire.
16. Do not install it at the unstable location such as on the bouncing prop or tilted place.
It may be tipped over as it loses balance or damaged as it is fallen down.

General safety precautions
7
17. Do not install at the place with moisture or dust.
It may cause the fire or the electric shock
18. Do not install it at the place with poisonous gas.
It may cause the fire.
19. Do not install it at the location with continuous vibration.
It may be tipped over as it loses balance or damaged as it is fallen down.
20. Do not install it at the place on the strong magnetic field or current field.
It may cause fire, electric shock or break down.
This equipment may be observed deterioration of the picture by electromagnetic radiation in electromagnetic
environment.
21. Fasten the wheel of the product or shelf with wheels when installing this product.
If it moves or is tipped over, it may be damaged.
22. Do not leave it in the car under the burning sun for a long time.
The high temperature may distort the cabinet or the parts inside may be broken down or heated.
If you use this product in this condition, it may cause the fire, electric shock or breakdown due to the short circuit
or poor insulation.
23. Do not place any fire source such as candlelight close to this product or place it on this product.
If it is tipped over or fallen down, it may cause damage or fire.
24. Do not sprinkle water drops or water on this product.
It may cause the fire, the electric shock or breakdown.
25. Do not place heavy objects on this product.
It may be tipped over as it loses balance or damaged as it is fallen down.
26. Do not transport it with the power cord or the connection cable connected.
If you move this product with the power cord or the connection cable connected, the damaged power cord,
connection cable or connection terminal may cause the fire, the electric shock or breakdown.
27. Pull the power cord out while holding the plug portion.
If you pull the power cord out by force, the cord may the fire or the electric shock.
28. Do not use it outdoor.
Dust or rainstorm may cause the fire, electric shock or breakdown.
29. Do not climb on this product.
If you climb on it, it may damage or hurt it.
30. 2 persons or more shall transport the device, which is heavier than 18 kg.
If you drop or tip over the device, it may damage it.
The weight is indicated on the user's manual.
31. Use the attached power cord and connection cable, or those, which are indicated on the user's manual.
If you do not use the designated power cord and connection cable, it may cause the electric shock or breakdown.
32. Turn off the power switch when connecting the power cord or connection cable.
If you not turn off when connecting it, it may cause the electric shock or breakdown.
33. Do not use any chemical such as the paint thinner or benzine to clean the cabinet.
It may scratch the surface or disappear the indication to cause wrong operation, whch can be the reason for disorder.
34. Clean the cabinet with 5~6 time diluted neutral detergent water on smooth cloth as stirring to remove the
contamination.
After that, clean it with dry cloth to remove any stain.

8
Contents
I
mportant Safety Instructions . . . . . . . . . . . . . . . . . . . . . . . . .3
R
egulatory Information . . . . . . . . . . . . . . . . . . . . . . . . . . . . . .5
G
eneral Safety Precautions . . . . . . . . . . . . . . . . . . . . . . . . . .6
F
ront Panel . . . . . . . . . . . . . . . . . . . . . . . . . . . . . . . . . . . . . . .10
R
ear Panel . . . . . . . . . . . . . . . . . . . . . . . . . . . . . . . . . . . . . . .11
A
ccessory . . . . . . . . . . . . . . . . . . . . . . . . . . . . . . . . . . . . . . . .12
R
emote Control Unit . . . . . . . . . . . . . . . . . . . . . . . . . . . . . . . .13
G
uidance of Basic Operation . . . . . . . . . . . . . . . . . . . . . . . . .14
O
n Screen Language Selection . . . . . . . . . . . . . . . . . . . . . . .16
B
asis of "Menu" Operation Method . . . . . . . . . . . . . . . . . . . . .17
C
hannel Memory (Set up) . . . . . . . . . . . . . . . . . . . . . . . . . . . .18
P
icture Adjustment . . . . . . . . . . . . . . . . . . . . . . . . . . . . . . . . .22
S
ound Adjustment . . . . . . . . . . . . . . . . . . . . . . . . . . . . . . . . . .25
T
ime Setting . . . . . . . . . . . . . . . . . . . . . . . . . . . . . . . . . . . . . .31
F
unction . . . . . . . . . . . . . . . . . . . . . . . . . . . . . . . . . . . . . . . . .36
O
ther Useful Functions . . . . . . . . . . . . . . . . . . . . . . . . . . . . . .38
V
-chip Operations . . . . . . . . . . . . . . . . . . . . . . . . . . . . . . . . . .40
I
nterference causes . . . . . . . . . . . . . . . . . . . . . . . . . . . . . . . .52
C
are and Maintenance . . . . . . . . . . . . . . . . . . . . . . . . . . . . . .52

9
Contents
C
onnecting a PC . . . . . . . . . . . . . . . . . . . . . . . . . . . . . . . . . . .53
I
nitial set PC mode . . . . . . . . . . . . . . . . . . . . . . . . . . . . . . . . .53
A
uto Adjust . . . . . . . . . . . . . . . . . . . . . . . . . . . . . . . . . . . . . . .54
P
icture . . . . . . . . . . . . . . . . . . . . . . . . . . . . . . . . . . . . . . . . . . .54
B
asis of Menu Operation Method In PC Mode . . . . . . . . . . . .55
P
c Stable Adjustment . . . . . . . . . . . . . . . . . . . . . . . . . . . . . . .56
W
hen using as desk-top type . . . . . . . . . . . . . . . . . . . . . . . . .57
W
hen using VESA standard wall-mounting devices . . . . . . .58
A
ppendix A: Display modes . . . . . . . . . . . . . . . . . . . . . . . . . .59
A
ppendix B: Troubleshooting . . . . . . . . . . . . . . . . . . . . . . . . .60
A
ppendix C: Specification . . . . . . . . . . . . . . . . . . . . . . . . . . . .62

10
Front Panel
1 TV/VIDEO Displays a menu of the available input sources.
(TV, Monitor)
2 MENU Display the main on-screen menu. Exit from sub-menu.
3-VOL
+
Press the increase or decrease the volume. Also used to increase or reduce
the value of a menu option.
4 CH Press CH or CH to change channels. Also used to highlight selections on
the on-screen menus.
5 STANDBY
The color of LED is changed into RED.
6ON
The color of LED is changed into GREEN.
7 Remote Control LED
8 POWER Turns ON/OFF the LCD TV/Monitor.

11
Rear Panel
1 VHF/UHF ANTENNA JACK Connect to an antenna or a cable TV system.
2 HEAD PHONE JACK
3 DVD VIDEO (COMPONENT; Y,C
b
,Cr)
Video signals from a DVD player
4 DVD AUDIO Audio signals from DVD player when using the component
video input jacks.
5 A/V IN Video & Audio signals from VCR or similar device.
6 A/V OUT Out A/V signal from TFT LCD TV
7 PC AUDIO INPUT Connects to the sound-output port of a personal computer.
8 PC VIDEO INPUT Used to connect a video signal from a personal computer.
9 DC 12V IN To input DC power from power outlet.
10 SPEAKER TERMINAL
12
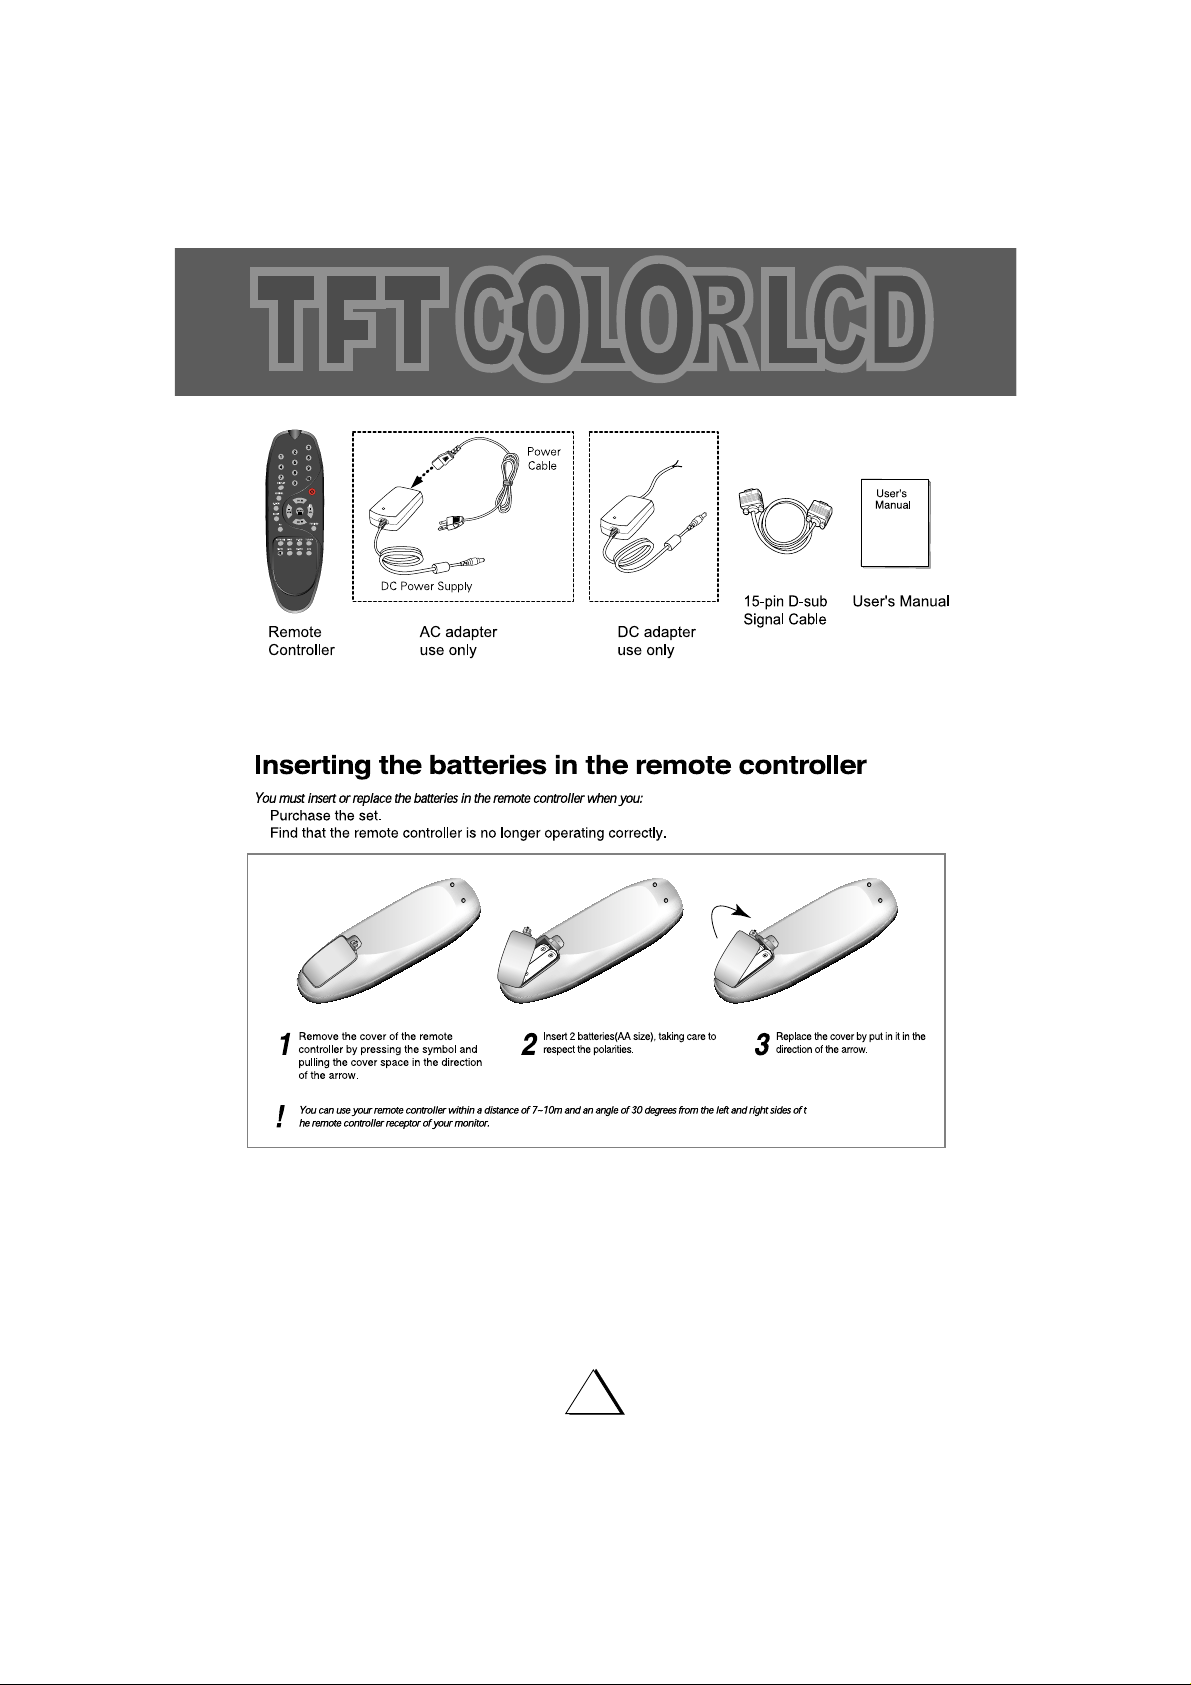
Accessory
13
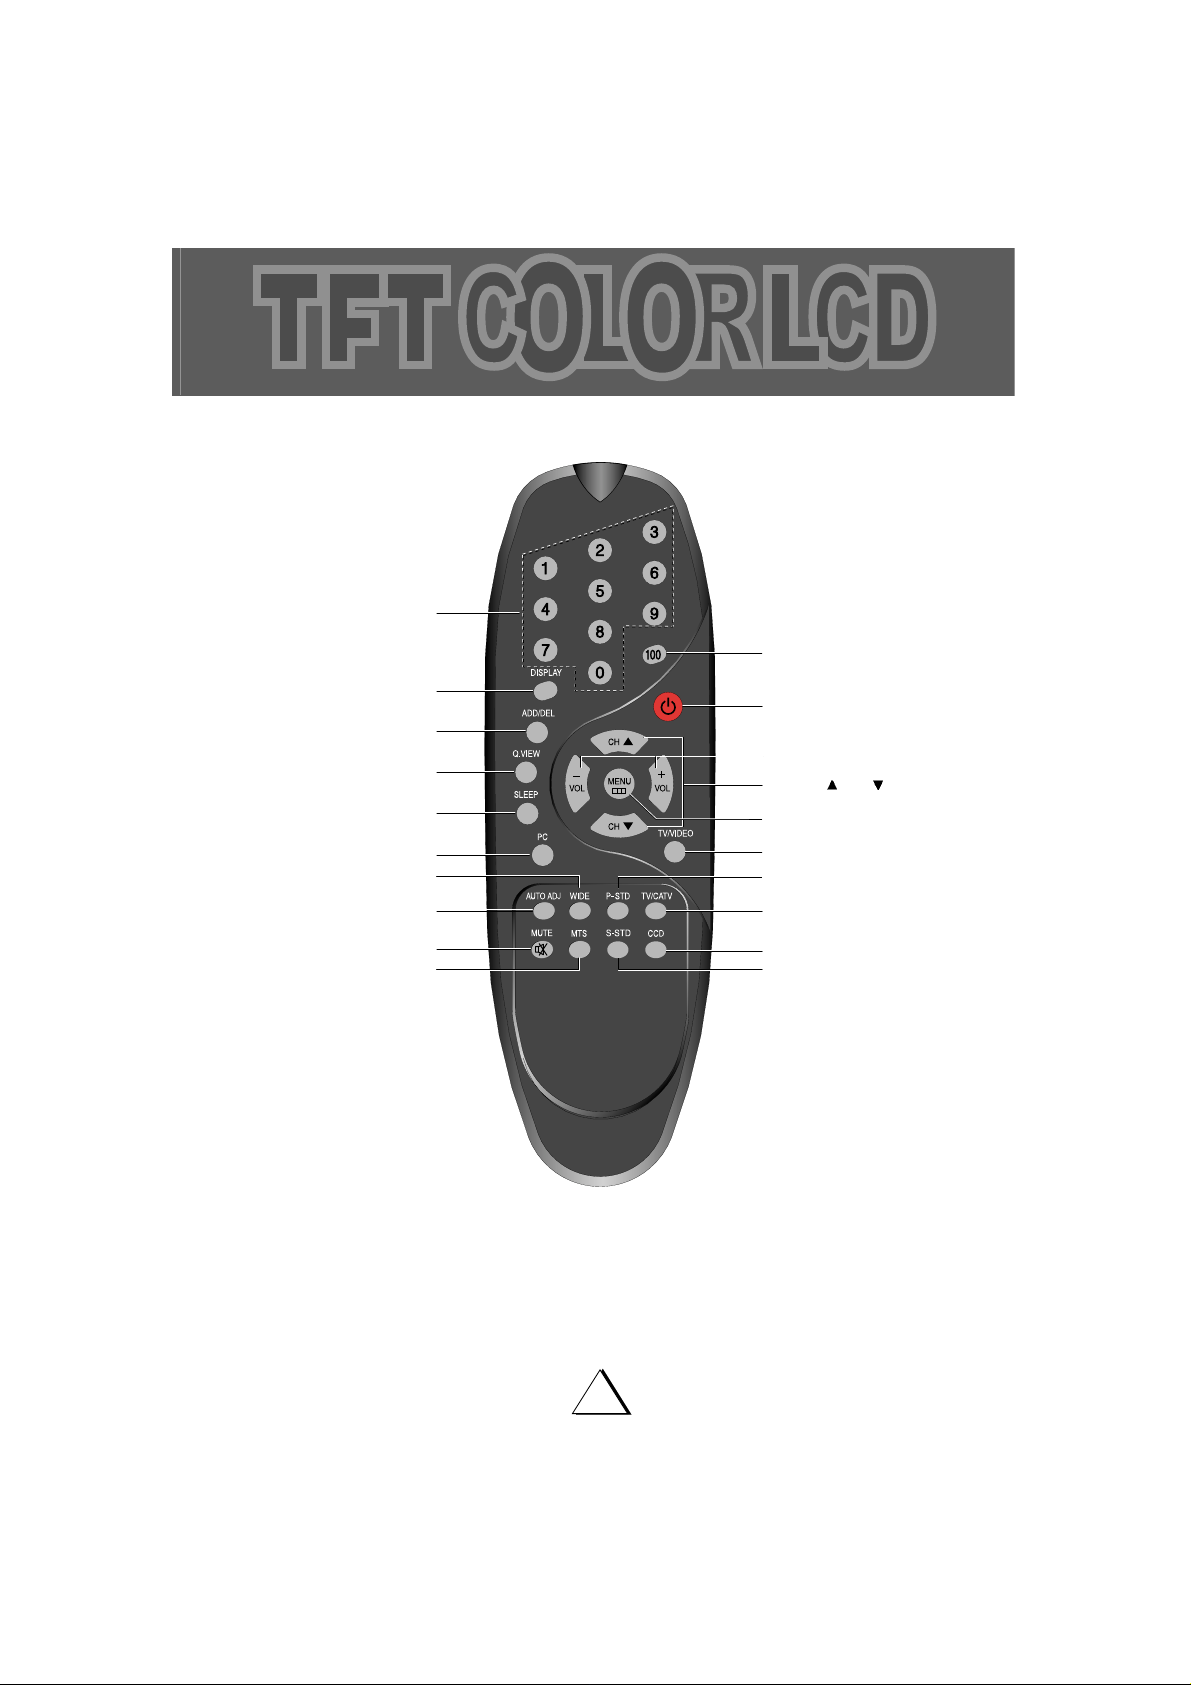
Remote Control Unit
Number Button
100 Button
Sleep Button
Volume Up(+)/Down(-) Button
Menu Button
Wide Button
P-STD Button
Power Button
Quick view button
Display Button
Channel Up( )/down( ) Button
Add/Delete Button
TV/VIDEO Button
MTS Button
CCD Button
Auto Adjust Button
PC Button
TV/CATV Button
S-STD Button
Mute Button
14
Guidance of Basic Operation
Insert batteries into the Remote Control unit according to "REMOTE CONTROL USE"
instruction on page 13.
Connect the power cord to AC outlet.
– Voltage is between 90 and 250 Volts.
– Frequency is compatible (50/60Hz)
TURN ON/OFF THE TV
1. Press the "POWER" button on the front panel
or Press the "POWER" button on the Remote
Control.
2.Press these buttons again to turn the
television off.
CHANNEL SELECTION
Use CHANNEL ( ) buttons on the Remote Control (or CHANNEL ( ) buttons on the
front panel).
Pressing the (
) button to advances for the higher channels, and press the ( ) button to go
down for the lower channels.
Channels can be selected directly by using 10-Digit Keypad on the Remote Control.
For example, if you select channel 5, press "0" first, then press "5". (Be sure to press "0" first,
before pressing "5" for channel 5.)
For channel 120, press the 100 button first, then press "2", "0". Also refer to the CABLE
CHANNEL CONVERSION CHART below.
or
(Front panel)
POWER
POWER
(Remote control)
NOTE : Certain channels have been preset at the factory. It may be necessary to add or
erase some channels in your areas. See "AUTO PROGRAM" on page 19 for presetting channels.
At stand-by mode, the LED stand-by indicator is in RED color.
Connect the cord to cigar jack voltage is
between DC12V and DC14V
or

15
CABLE TV CHANNEL CONVERSION CHART
In addition to the normal TV reception from an antenna for VHF (Channels 2-13) and UHF
(Channel 14-69), your TV set is equipped to receive non-scrambled cable TV channels.
SubMid band (A-8, A-5-A-1), Mid band (A-I) Super band (J-W) Hyper band (W
1 - W 28)
and Ultra band (W
29 - W 84) can be received by using the channel selections as shown in
the following chart.
Regular cable channel designations.
Your TV set's corresponding on-screen CABLE channel numbers.
Press VOLUME buttons on either the
Remote Control or(
) front panel to adjust volume to your
desired listening level.
Pressing the
button will increase sound volume, the
button will decrease sound volume.
The volume level is indicated on the screen by reference number (0-50)and by bar scale as shown.
NOTE TO CATV SYSTEM INSTALLER
This reminder is provided to call the CATV system installer’s attention to article 820-40 of the
NEC that provides guidelines for proper grounding and, in particular, specifies that cable ground
shall be connected to the grounding system of the building, as close to the point of cable entry as
practical.
NOTES The volume level can be muted instantly by pressing MUTE button on the Remote
Control. See "MUTE Button" on page 39.
Your TV set can receive the normal TV channel(2-13) including the CABLE TV
channel
A-8 A-4
01
28
47 48 49 50 51 52 53 54 55 56 57 58 59 60 61 62 63 64 65
66 67 68 69 70 71 72 73 74 75 76 77 78 79 80 81 82 83 84
29 30 31 32 33 34 35 36 37 38 39 40 41 42 43 44 45 46
96 97 98 99 14 15 16 17 18 19 20 21 22 23 24 25
26
27
A-3 A-2 A-1 A B C
OPQRS T UVW
W
1W2
W 11 W 12 W 13 W 14 W 15 W 16 W 17 W 18 W 19 W 20 W 21 W 22 W 23 W 24 W 25 W 26 W 27 W 28 W 29
W
30 W 31 W 32 W 33 W 34 W 35 W 36 W 37 W 38 W 39 W 40 W 41 W 42 W 43 W 44 W 45 W 46 W 47 W 48
85 86 87 88 89 90 91 92 93 94 100 101 102 103 104 105 106 107 108
W 49 W 50 W 51 W 52 W 53 W 54 W 55 W 56 W 57 W 58 W 59 W 60 W 61 W 62 W 63 W 64 W 65 W 66 W 67
109 110 111 112 113 114 115 116 117 118 119 120 121 122 123 124 125
W 68 W 69 W 70 W 71 W 72 W 73 W 74 W 75 W 76 W 77 W 78 W 79 W 80 W 81 W 82 W 83 W 84
W
3W4W 5W6W 7W8W9
W 10
DE FGHI JKLM N
A-5
95
Volume
25
: Adj.
16
On Screen Language Selection
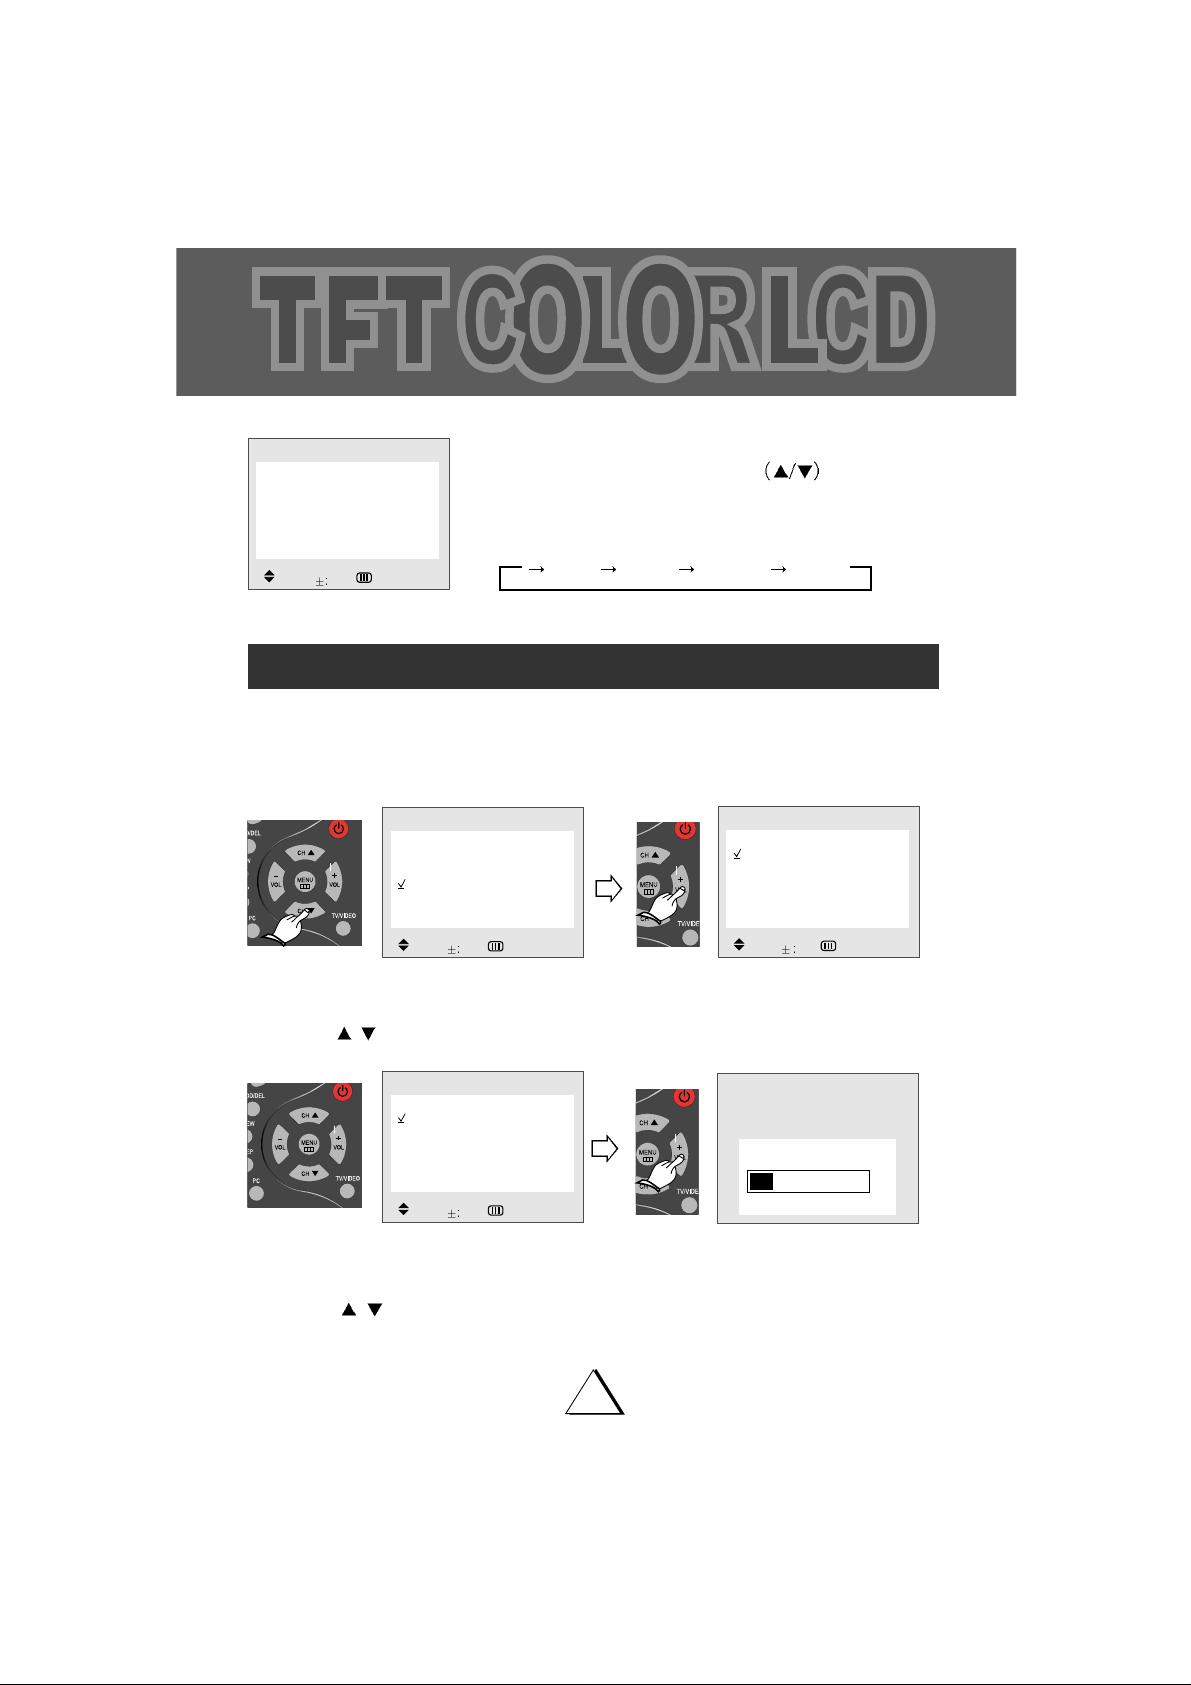
1. Press POWER button to turn the TV on.
2.
Press MENU button and move the cursor to " SET UP " option and press
VOLUME+
button,
then the "SET UP" menu is displayed.
3. Press VOLUME+button to Select ANTENNA option.(TV or CATV)
4.
Press CH / buttons to place cursor on the "Auto program " option and press VOL + button.
5. When you have finished "Auto programming", press MENU button repeatedly until the menu
disappears.
6. Press CH
/ buttons to Select the channel you want.
7. Press VOL + or VOL - buttons to adjust volume to your desired listening level.
Basic Operation
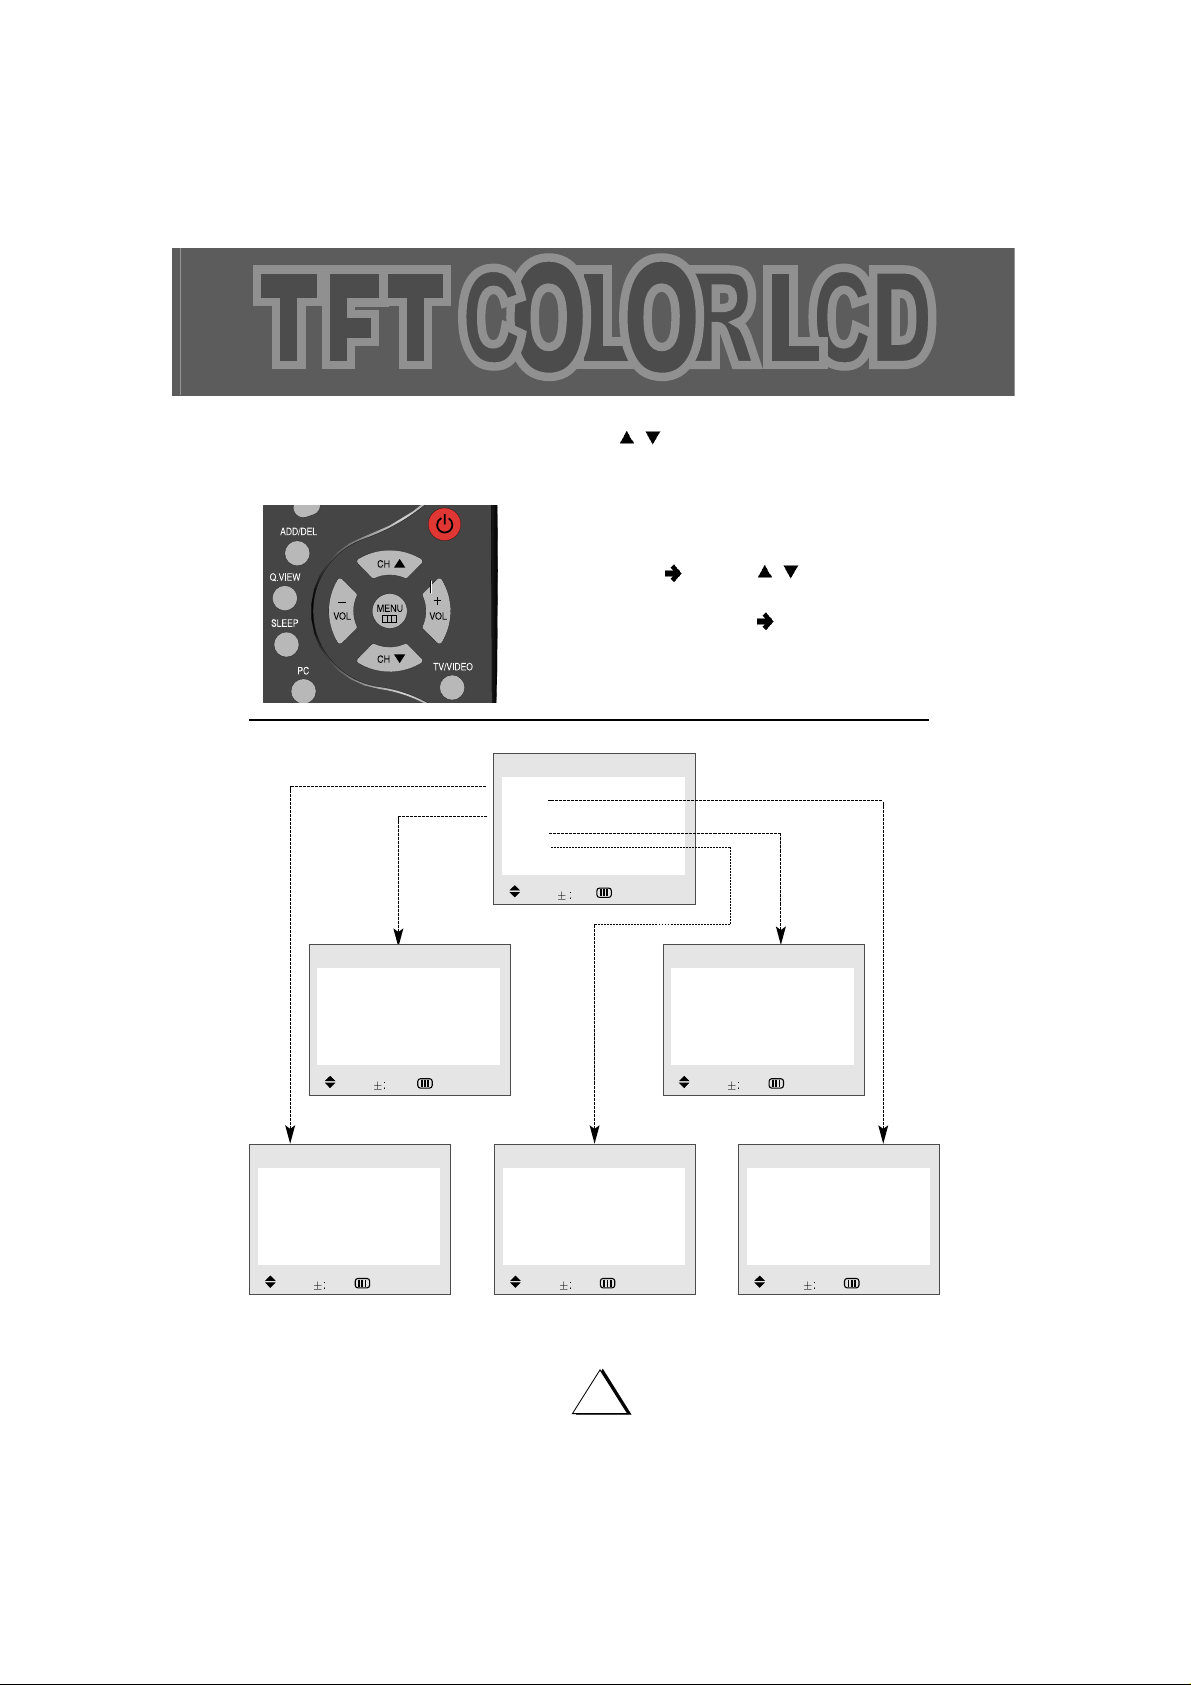
1) Press the MENU button.
2) Press the CHANNEL UP/DOWN
button to reach
LANGUAGE mode in FUNCTION.
3)
Press the VOLUME+ button to select the desired language.
4) It will appear on the screen like below;
5) Press the TV MENU button to exit.
LANGUAGE English
OSD Position Mode 1
OSD Color Mode 1
Melody On
CCD Off
Blocking
FUNCTION
Move Sel. :Prev.
Picture
Sound
Time
Setup
Function
MENU
Move
Sel. :Exit
Antenna CATV2
Auto program
Fine tune 0
SETUP
Move Sel. :Prev.
Antenna CATV 2
Auto program
Fine tune 0
SETUP
Move Sel. :Prev.
Auto programming
20
+ : Stop
English Español Português Français
17
Basis of "MENU" Operation Method
You can execute every operation by pressing CH / buttons and VOL +/- buttons alternately.
If you learn one method, You can easily operate another function by viewing picture.
1. Pressing these buttons alternately makes
every operation easy.
2. MOVE
Press CH / buttons to place
cursor.
3. PICTURE CHANGE
Press VOL +/-
buttons to change picture by inputting selected function.
Contrast 32
Brightness 25
Sharpness 25
Color 25
Tint 0
PICTURE
Move Adj. :Prev.
Equalizer
Balance 0
Surround Off
SOUND
Move Adj. :Prev.
Clock AM12:00
Timer Off
On time AM12:00
Off time AM12:00
On channel 2
TIME
Move Sel. :Prev.
Antenna CATV2
Auto program
Fine tune 0
SETUP
Move Sel. :Prev.
Picture
Sound
Time
Setup
Function
MENU
Move Sel. :Exit
Language English
OSD Position Model 1
OSD Color Model 1
Melody On
CCD Off
Blocking
FUNCTION
Move Sel. :Prev.
18
Channel Memory (Set Up)
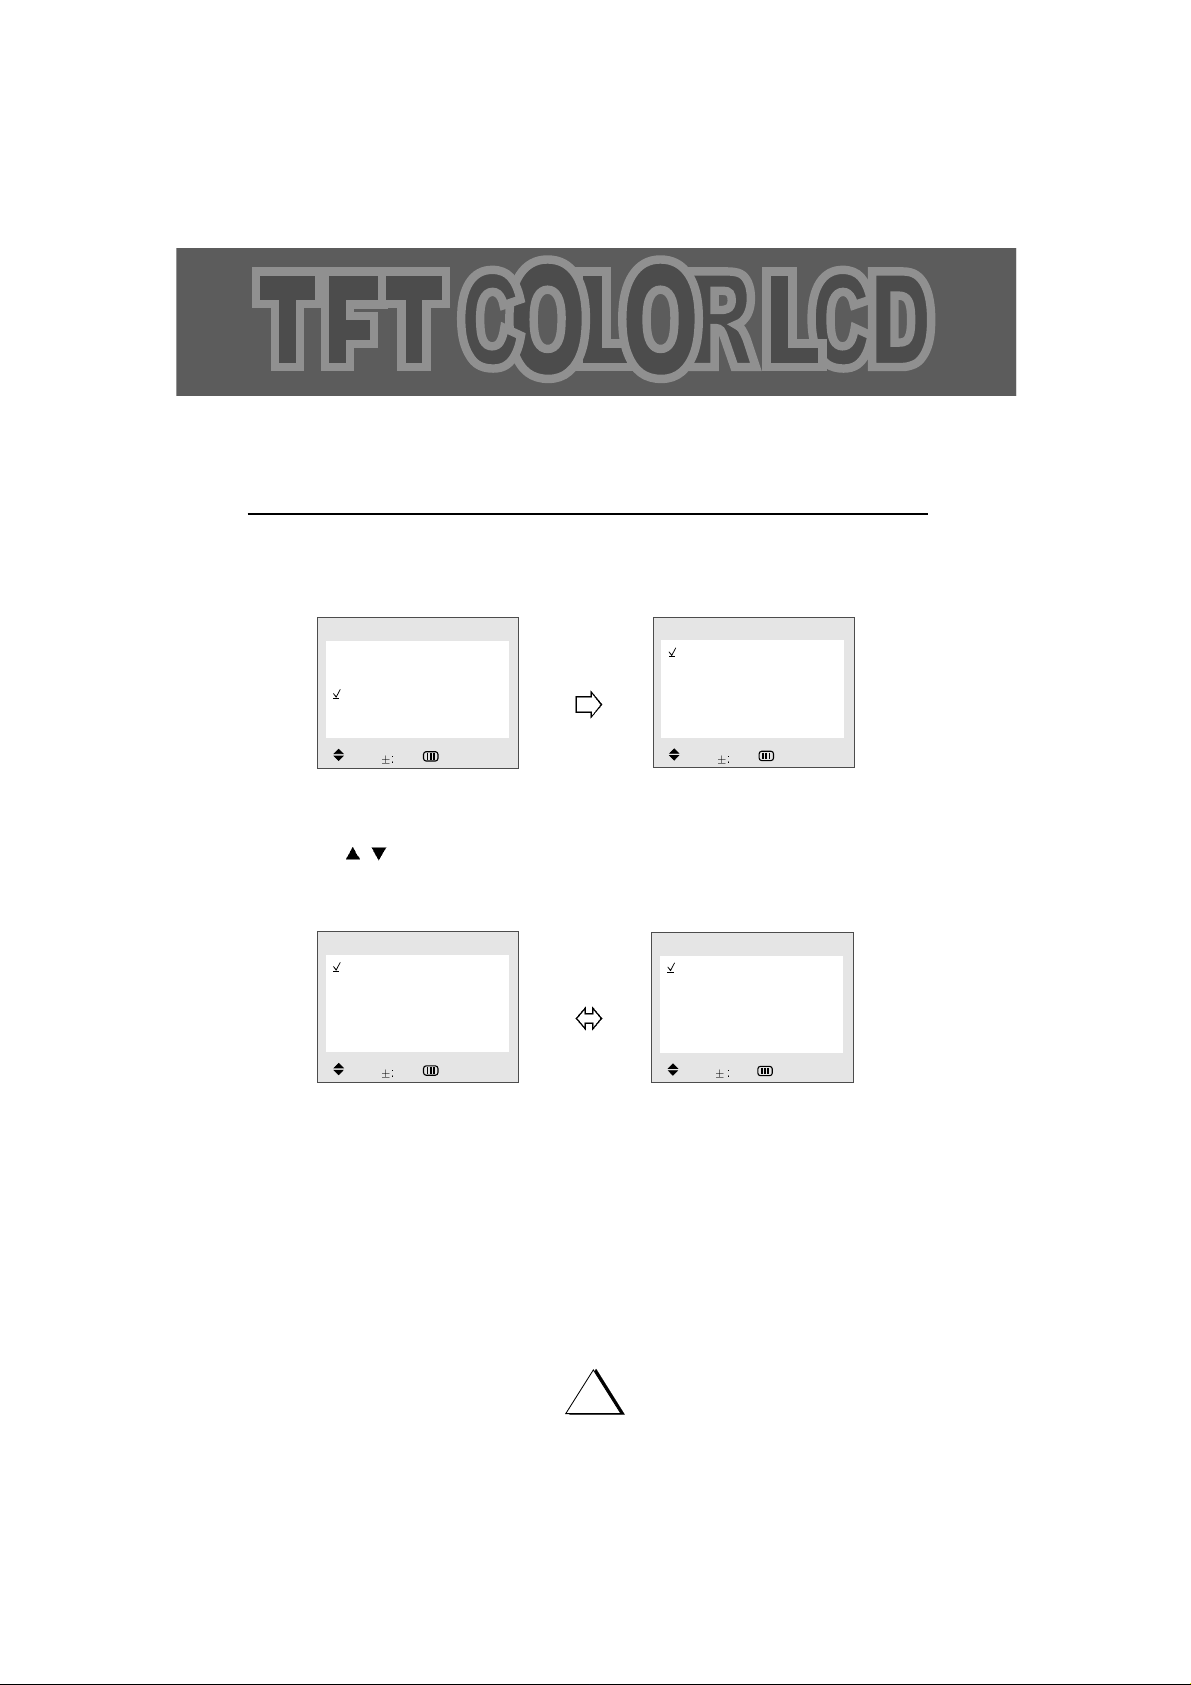
ANTENNA SELECTION
In this mode, you can change the broadcast mode between
" TV " (for regular VHF/UHF chan-
nels) and " CATV " (for cable channels).
1. Press MENU button and move the cursor to " SET UP" option and press VOL + button then
the "SET UP" menu is displayed.
2. Press CH
/ buttons to place the cursor on the " ANTENNA" option and press VOL +
button. You can select "TV"(on-air) or "CATV"(cable TV) broadcast mode.
3. After you have finished selecting "ANTENNA" mode, press MENU button repeatedly until the
menu disappears.
Picture
Sound
Time
Setup
Function
MENU
Move Sel. :Exit
Antenna CATV2
Auto program
Fine tune 0
SETUP
Move
Sel. :Prev.
Antenna CATV 2
Auto program
Fine tune 0
SETUP
Move Sel. :Prev.
Antenna TV 2
Auto program
Fine tune 0
SETUP
Move Sel. :Prev.
19
Channel Memory (Set Up)
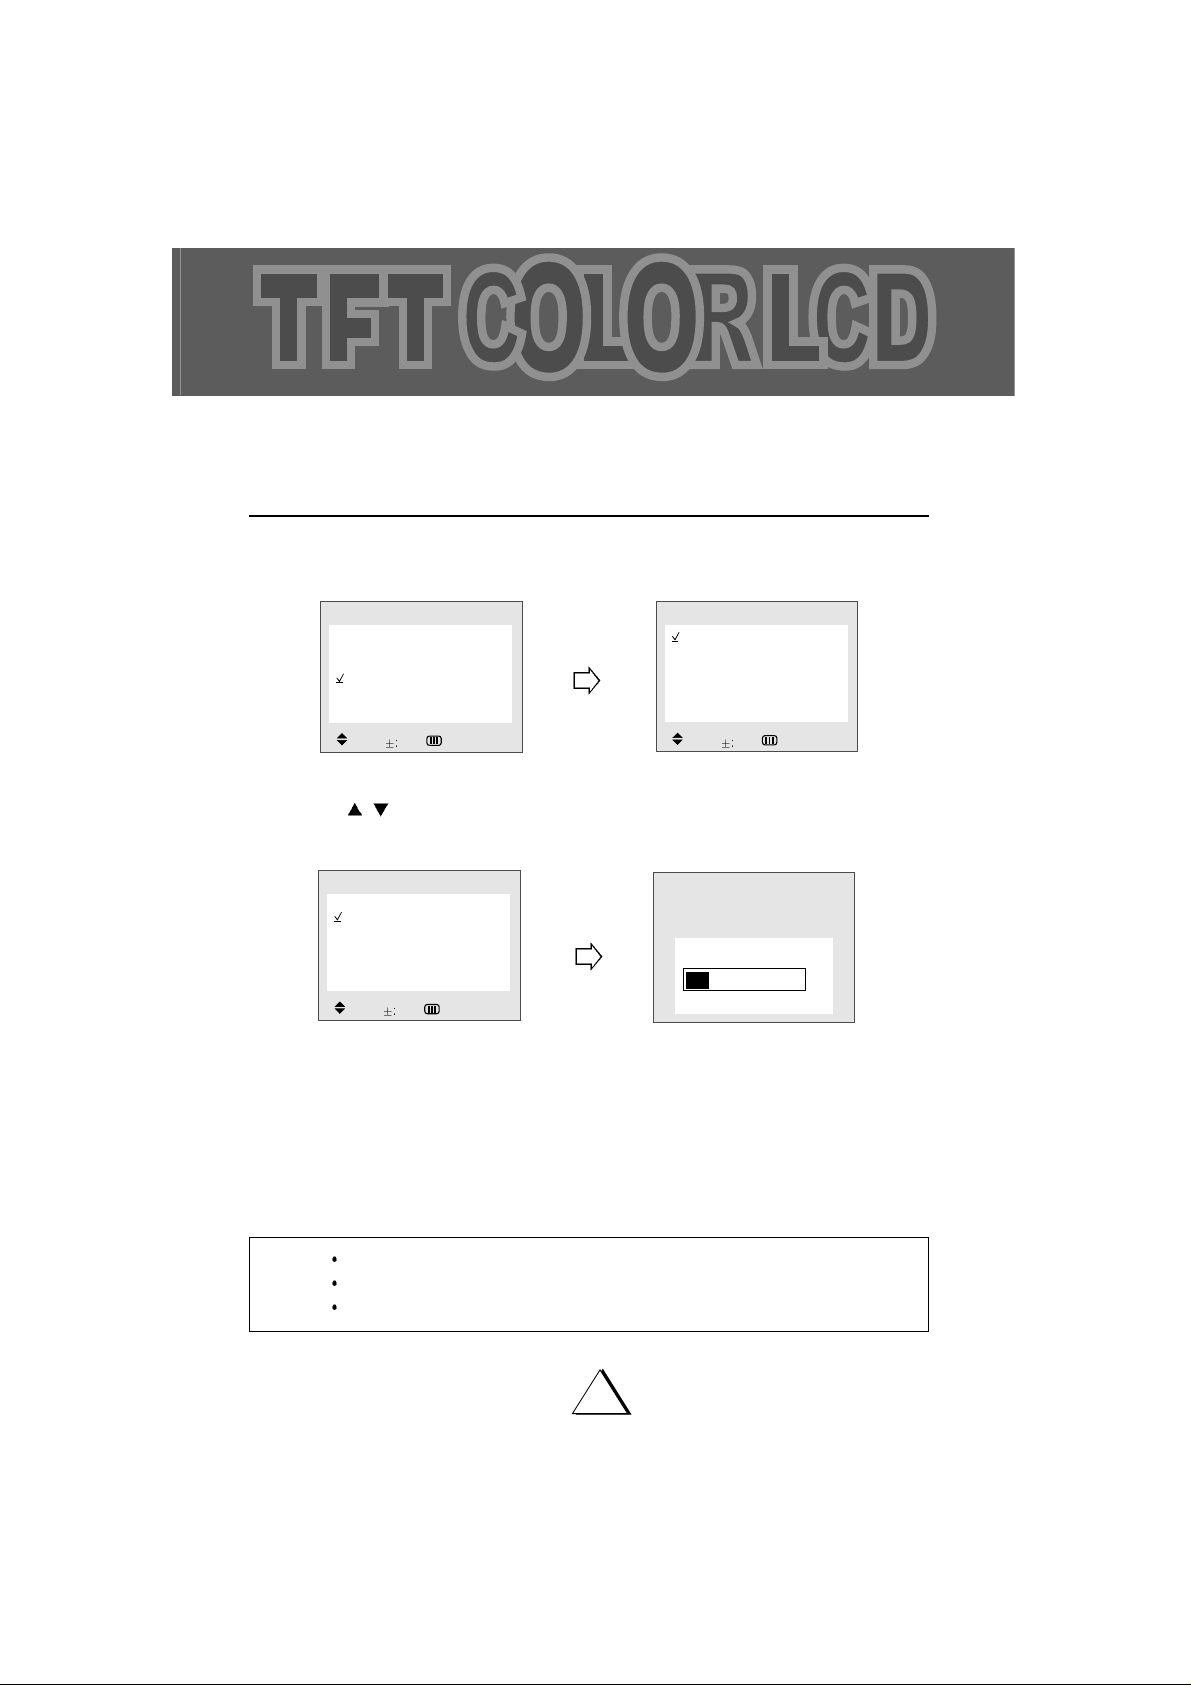
AUTO PROGRAM
This function allows the channels to be memorized automatically to match the TV broadcasts
and cable channels in your area.
1. Press MENU button and move the cursor to "SET UP" option and press VOL + button, then
the "SET UP" menu is displayed.
2. Press CH
/ buttons to place cursor on the "AUTO PROGRAM" option and press VOL +
button.
When tuned to a channel in which TV program is broadcasted, this channel is memorized and
the color changes from magenta to green.
After every channels were memorized, "SET UP" menu is displayed.
3. When you have finished "AUTO PROGRAMMING", press MENU button repeatedly until the
menus disappear.
NOTES If the broadcast signal is weak, the channel will not be memorized.
In this case, perform the MANUAL MEMORY procedure.(Refer to the next page)
If you wish to stop this procedure during the operation, Press VOL + button.
Picture
Sound
Time
Setup
Function
MENU
Move Sel. :Exit
Antenna CATV2
Auto program
Fine tune 0
SETUP
Move Sel. :Prev.
Antenna CATV 2
Auto program
Fine tune 0
SETUP
Move Sel. :Prev.
Auto programming
20
+ : Stop
 Loading...