

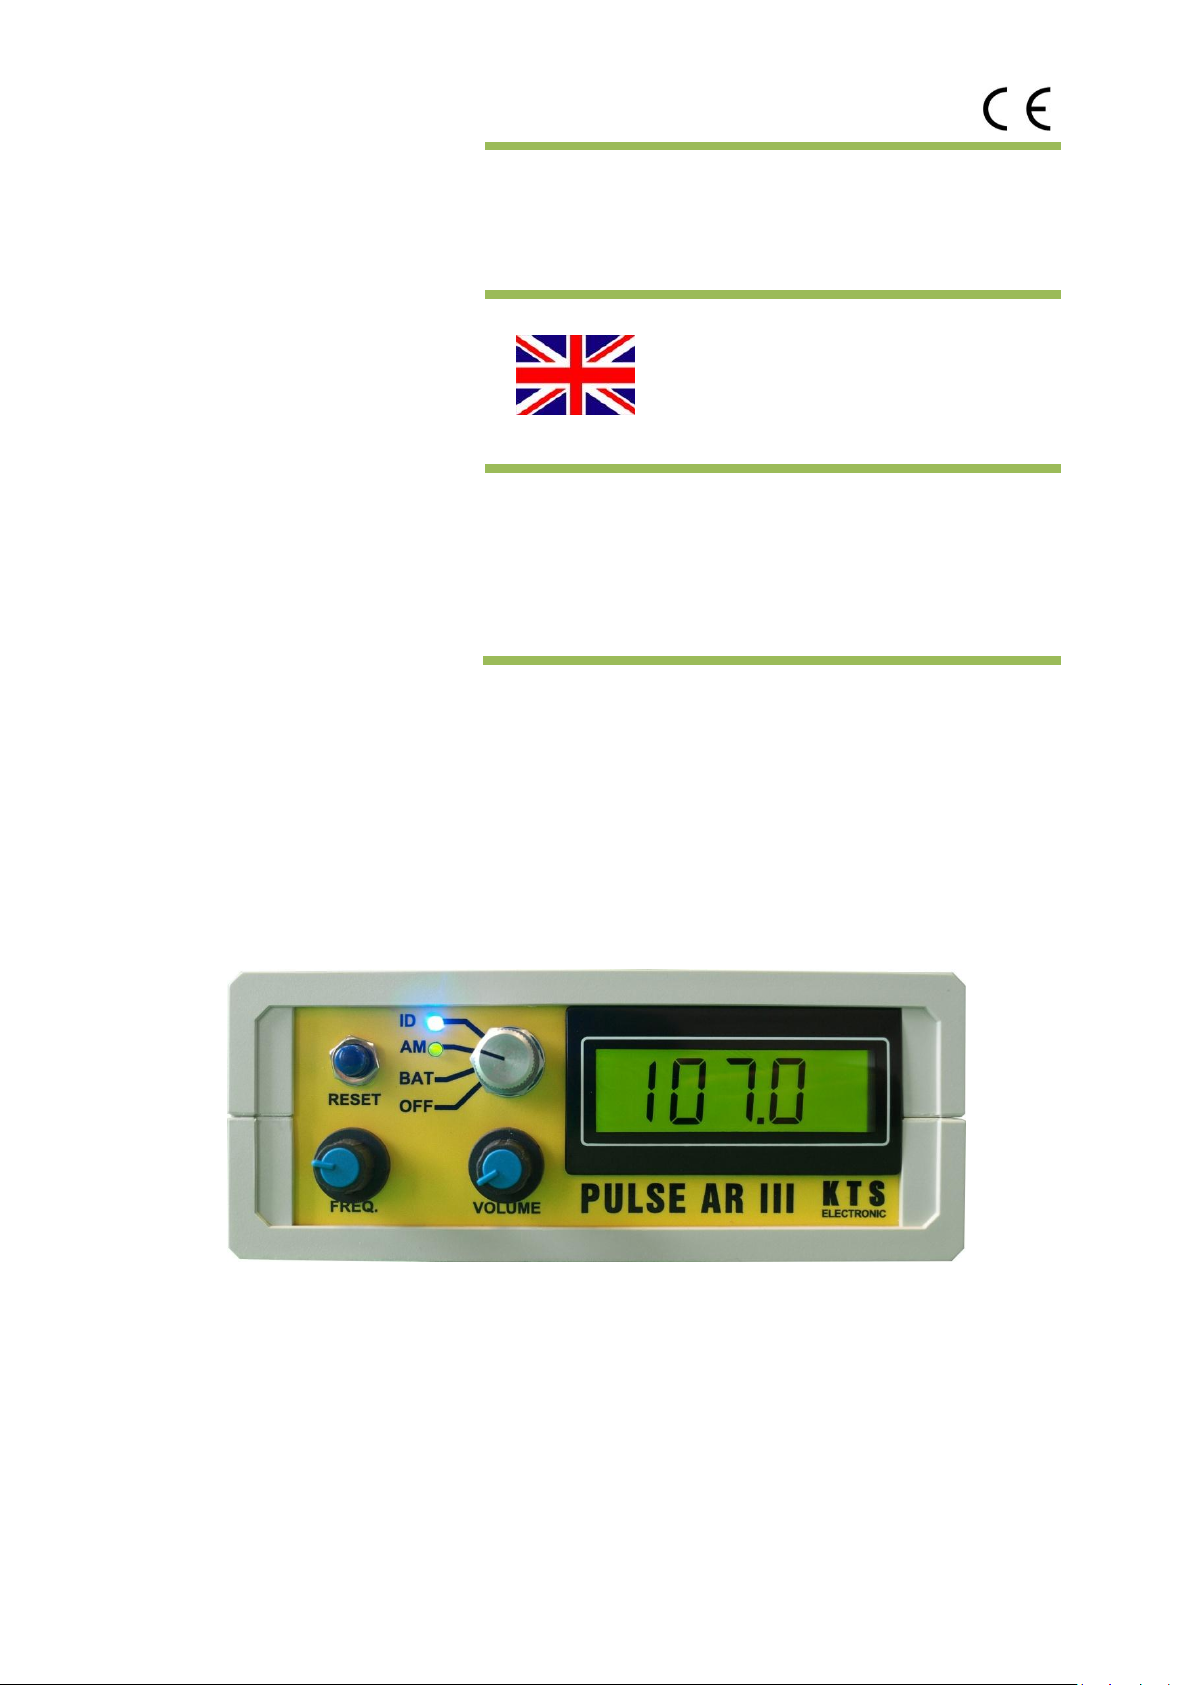
PULSE AR III
Pulse Induction-based
Metal Detector
Instruction Manual
KTS-Electronic GmbH & Co. KG
Germany

Table of Content
1. Introduction .................................................................................................... 3
2. Volume of delivery ......................................................................................... 3
3. Electronic unit ................................................................................................ 4
4. Search process .............................................................................................. 6
5. Installation ...................................................................................................... 8
6. Appropriate handling ..................................................................................... 8
7. Adjustment ................................................................ ..................................... 9
8. Application of the RESET-button ................ Fehler! Textmarke nicht definiert.
9. Indication of metal ......................................................................................... 9
10. Usage of appropriate search coils ................................................................ 9
11. Rechargeable battery and charger ............................................................. 11
12. Error signals ................................................................................................. 12
13. Care ............................................................................................................... 13
14. Legal notice .................................................................................................. 13
15. Warranty ....................................................................................................... 13
16. Contact .......................................................................................................... 14
KTS-Electronic GmbH & Co. KG – PULSE AR III
3
1. Introduction
Dear customer,
Congratulations to your purchase of PULSE AR III, a professionally-built metal
detector.
To avoid possible operating errors please read this instruction manual with due care.
We wish you lots of success with your new PULSE AR III and will be at your disposal,
if any questions should arise.
Your KTS Electronic Team
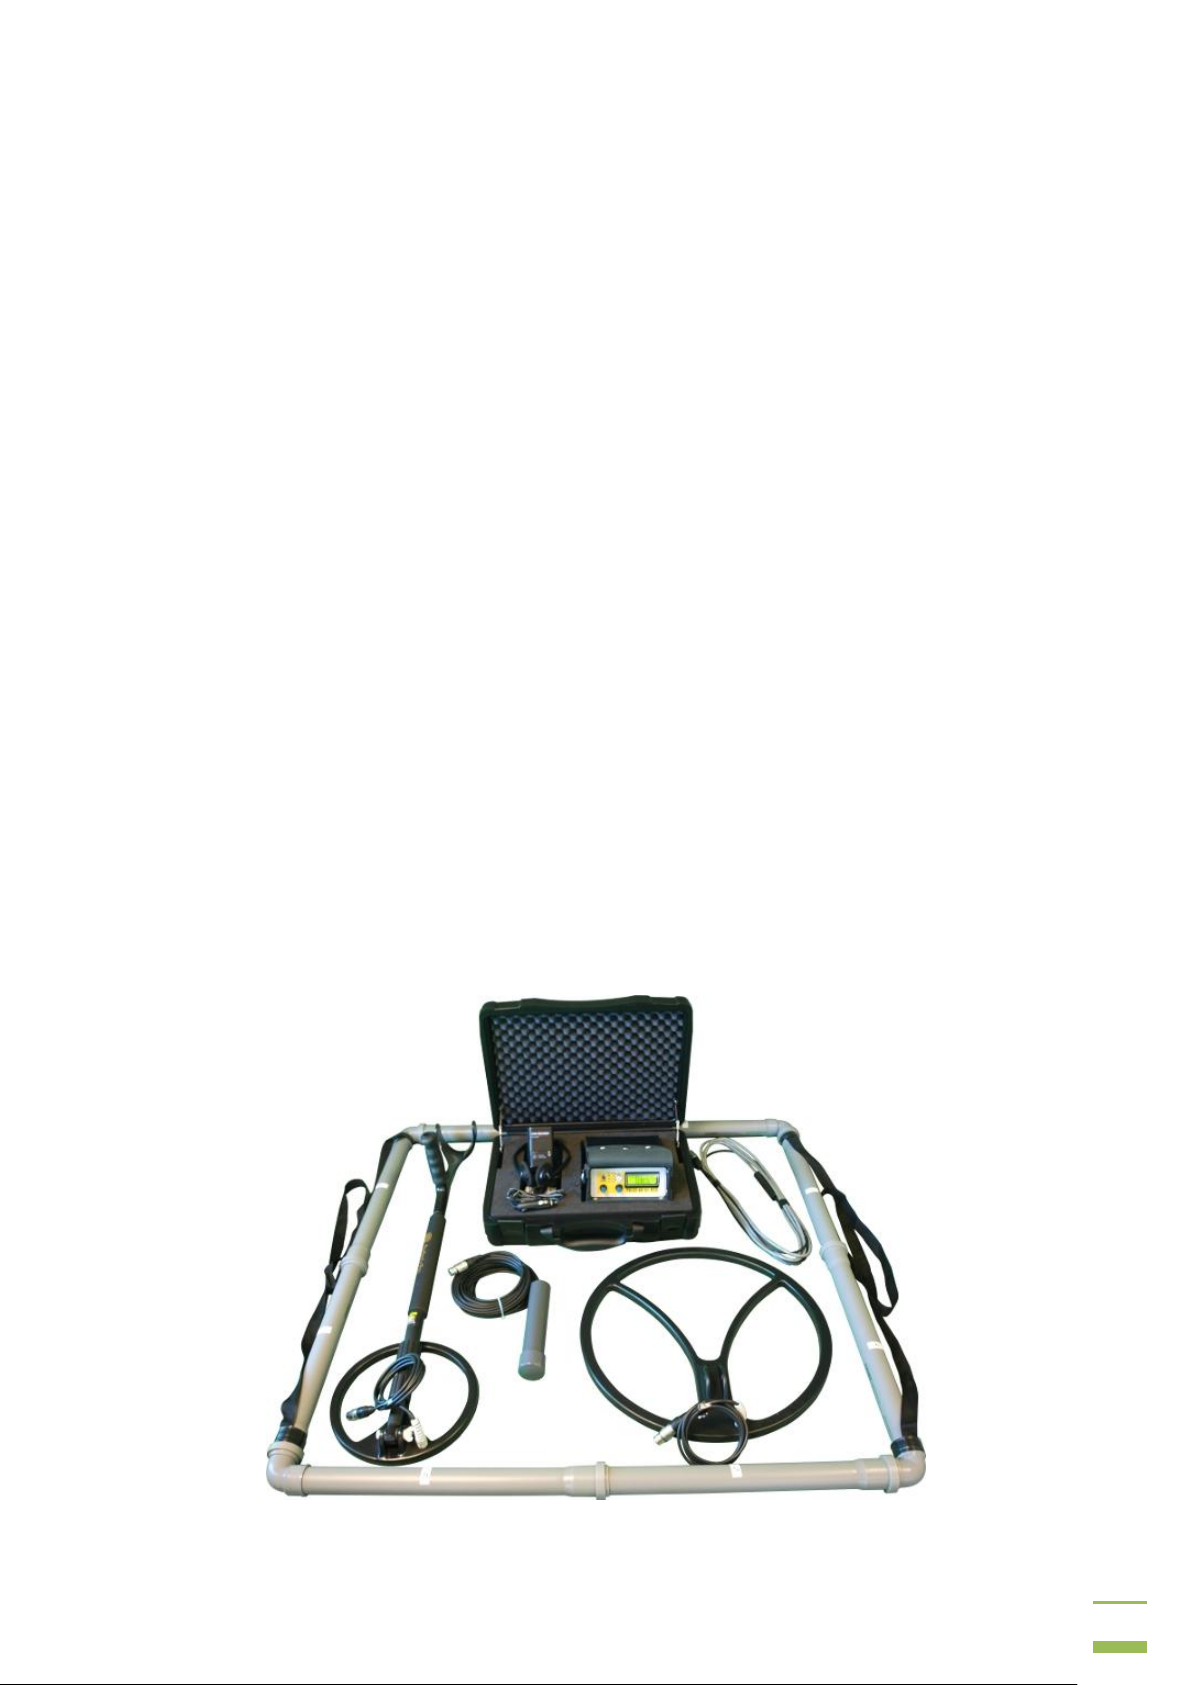
2. Volume of delivery
PULSE AR III Combi (depending on scope of delivery in set included)
Electronic unit with integrated rechargeable high performance Li-Ion battery, leather bag
with shoulder straps
25 cm (10") and 45 cm (18") search coil and telescope pole
Cylindrical coil, 5 cm Ø
1 x 1 m (3.28 x 3.28 ft) search frame, 8-fold demountable (incl. cable coil and backpack
mobile quick-charger and additional inverter with car charger cable
facile stereo headphones
case
instruction
KTS-Electronic GmbH & Co. KG – PULSE AR III
4
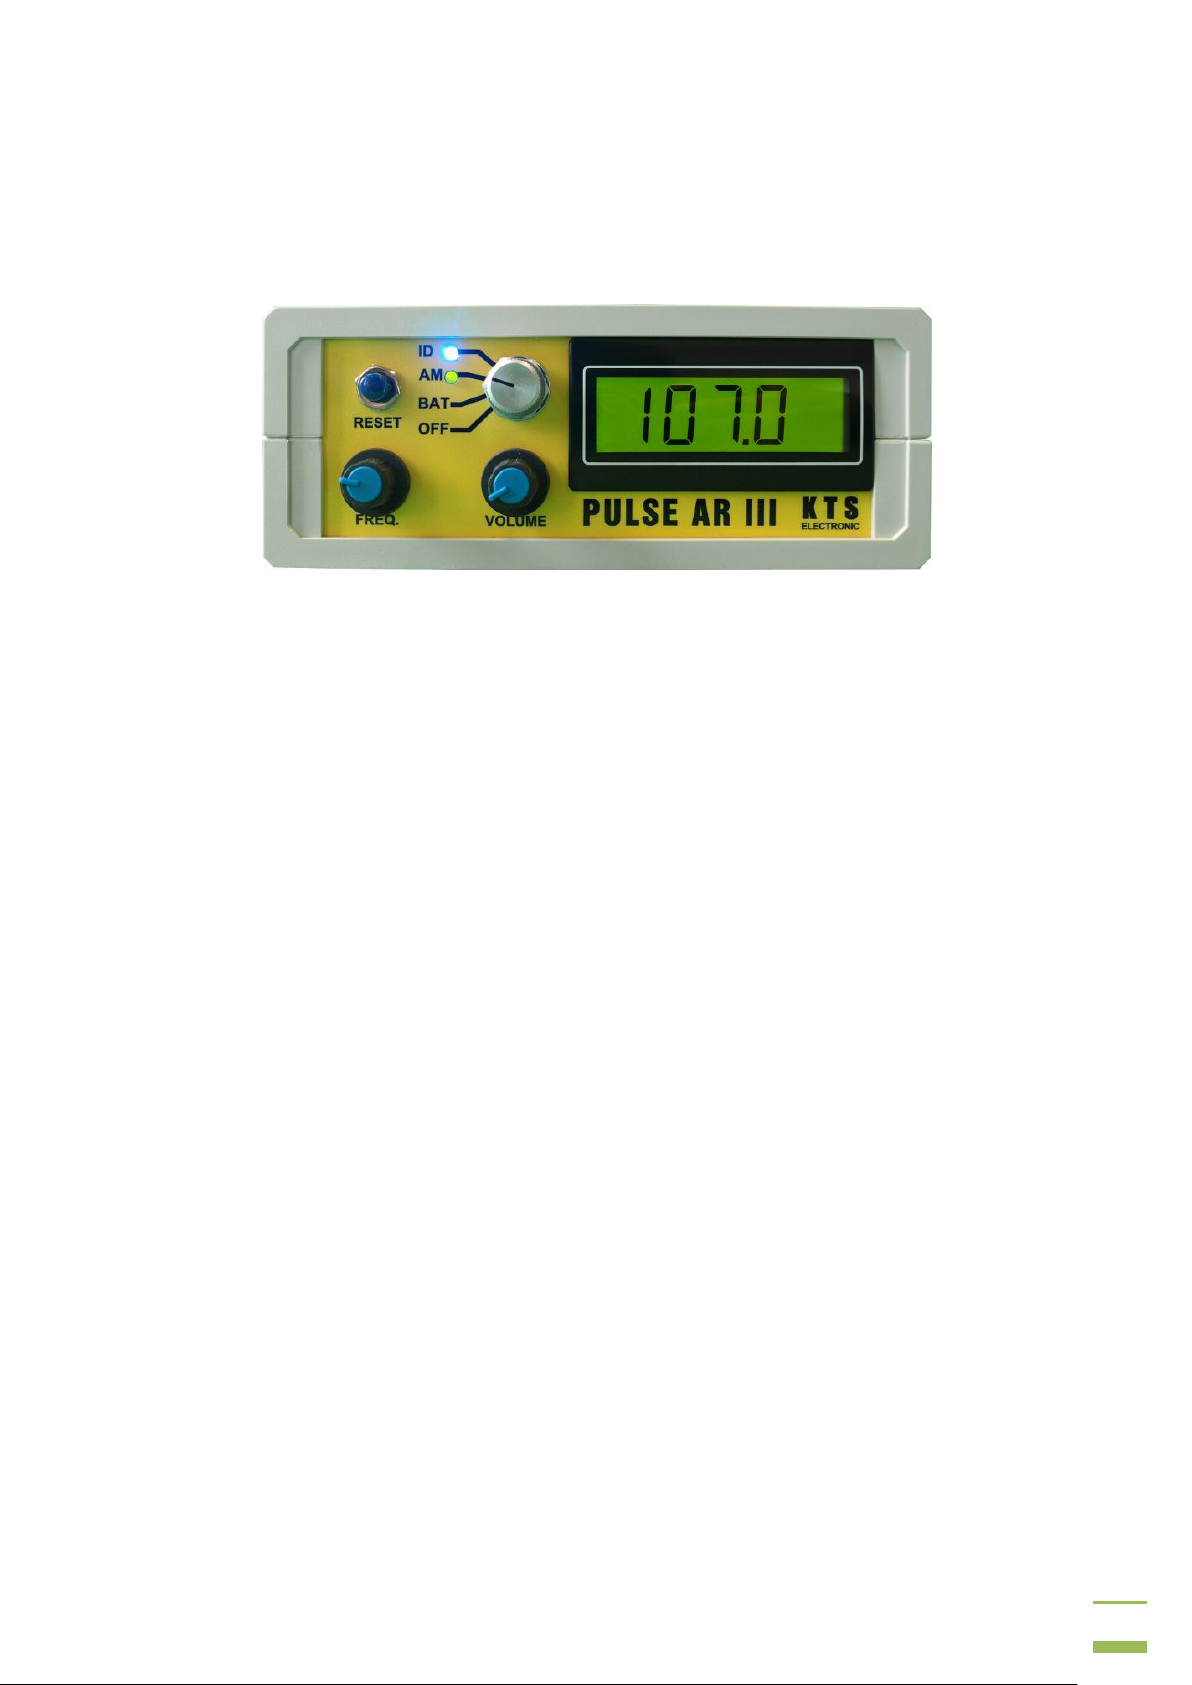
3. Electronic unit
The electronic unit is stored in a high-quality box. Besides the display there are 4
control elements attached to the front side.
The menu knob can be turned to 4 positions:
ID:
In this search mode the discriminator comes into operation. Thereby an optical and
acoustical discrimination takes place. The various metals will be signaled through
differing tones and conductivity values.
AM.:
All metals will be visualized without discrimination acoustically and optically through
the value number (the metals will not be tested for their conductivity).
This position has the advantage, that you can detect with highest sensibility; through
the value number one can evaluate the depth of the object. The lower the value
number, the deeper the metal object is hidden. The shape of the object can be
identified as well.
BAT.:
Scale to control the battery condition. The device is fully charged when display shows
a value of approx. 100.
OFF: Inoperative
RESET:
Automatic zero balance. By pressing the RESET-button the device will be adjusted
unto the respective ground.
FREQ.:
Frequency setting controller – the smaller the item you are searching for, the
smoother the adjustment must be.
VOLUME:
Volume control.
KTS-Electronic GmbH & Co. KG – PULSE AR III
5
LED:
The visual display of metal indication in the AM and ID mode is shown through the
blue LED. The green LED reflects the frequency pulse.
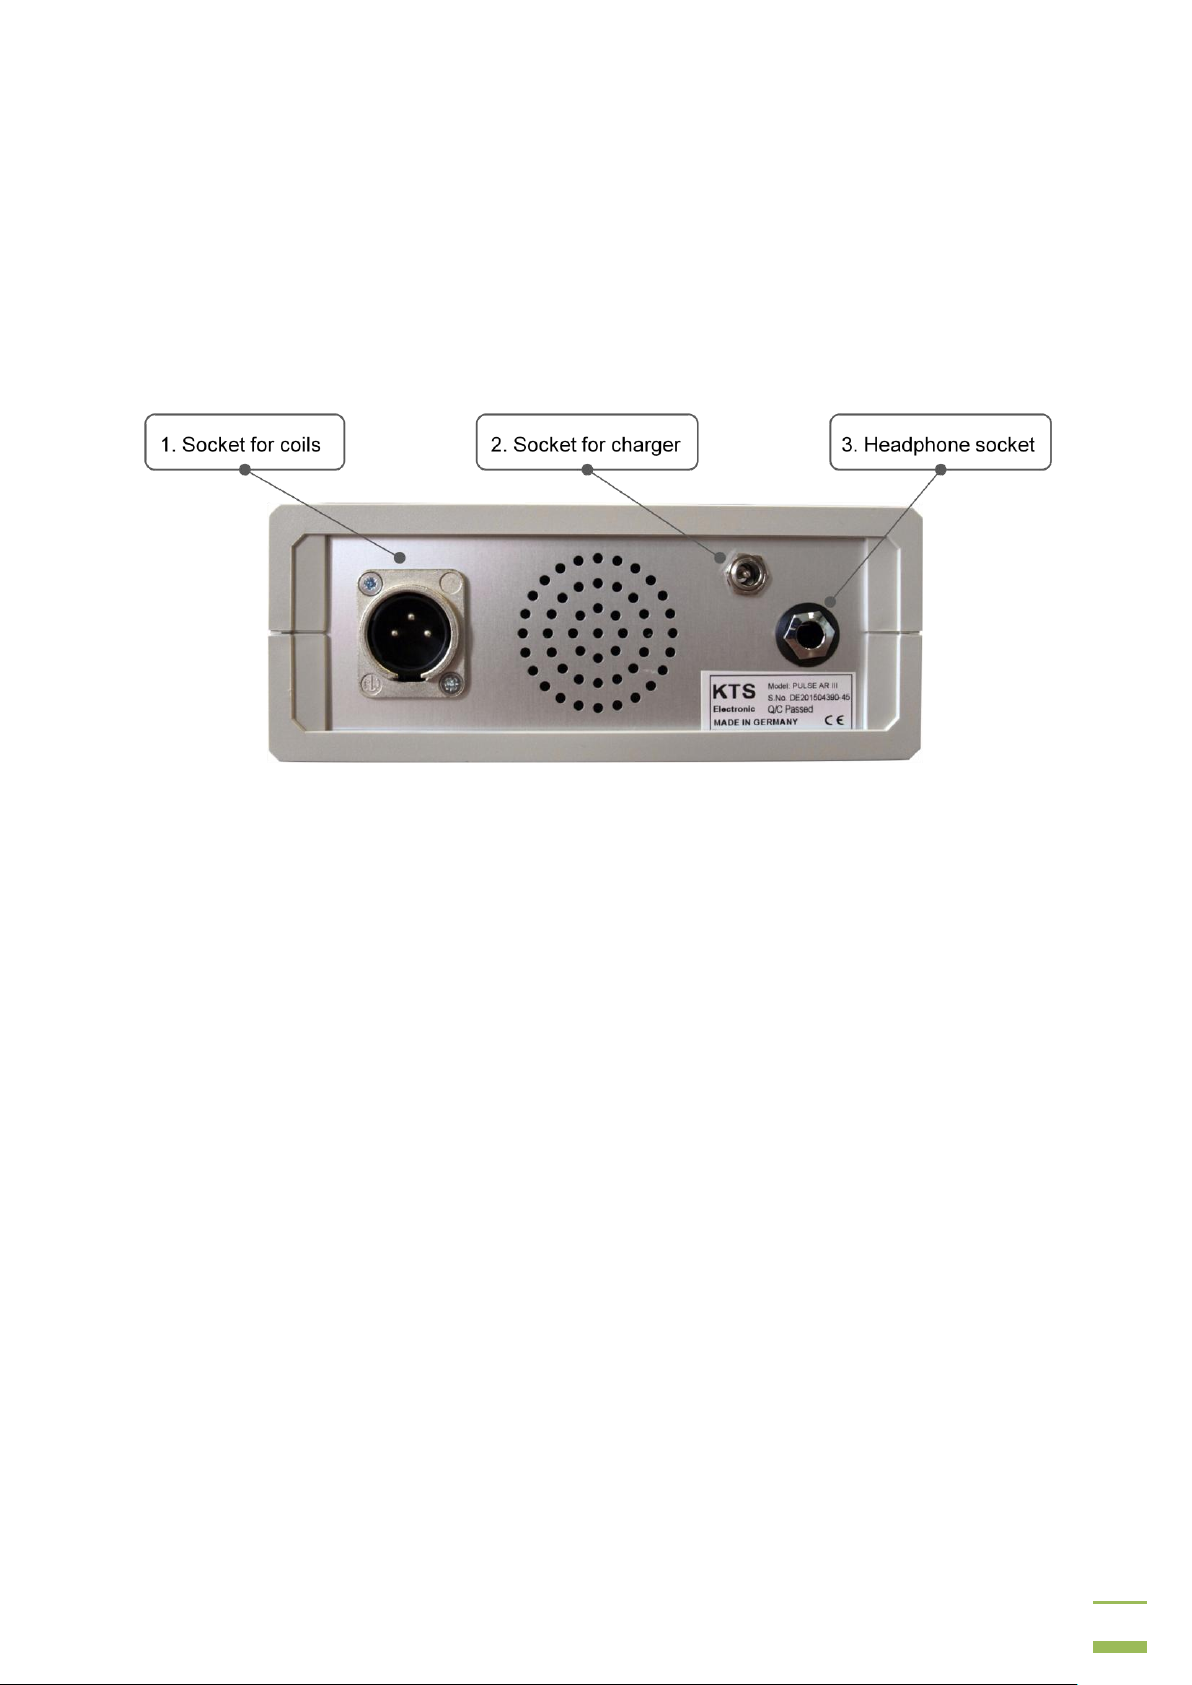
Back Side:
At the back there are 3 connection sockets:
1. Socket for coils: The connector for the coil is on the left-hand side. The plug of
the search coil has to be plugged into the socket. Before removing the plug, the
jack must be pressed, then the plug can be pulled out. The connector is
compatible with all search coils.
2. Socket for charger
3. Headphone socket: Any commercial headphones with 6.3mm jack can be
plugged. If you use the headphones, the speaker is turned off. Matching, lightweight headphones are provided.
KTS-Electronic GmbH & Co. KG – PULSE AR III

6
4. Search process
Please note the following:
Avoid conducting overhead lines
Do not use cell phone during operation
Do not process any measurement during thunderstorms
Protect device from wetness and high humidity
Accurate operation is only guaranteed with a fully charged battery
For operation or charging only use the components enclosed or released by KTS
GmbH & Co. KG.
To make the search more result-oriented and for this reason successful, the following
facts should be kept in mind:
modification of the tone (frequency)
intensity of the tone
continuity of the tone
level of value (display)
The sound modification is the first sign for the location of a metal object. The more
intensive the tone, the larger the metal object and the nearer it is located to earth’s
surface. While the tone is hearable, the search coil should be moved in the near
vicinity to detect the possible shape of the metal object.
The concurrent observation of sound and display value leads to a better analysis of
the discovered object.
Search recommendations and hints for Reset operation
During the search process be sure that you do not carry items of metal with you. This
could cause a wrong adjustment when pressing the Reset key and can produce false
indicator effects. In addition, this can lead to a false metal discrimination. While
searching be ensured, that the sound remains constant, otherwise a wrong
adjustment caused by magnetic fields may occur. In this case, the search coil is held
above the ground and the display has to be observed after renewed actuation of the
Reset-button and the adjustment of the frequency.
1. Activate the metal detector with the menu knob. The respective search coil
should be cable-connected to the electronic unit in advance.
2. Hold the search coil to the ground and press the Reset-button for a brief
moment. You herewith attain a zero balance, which is necessary for a troublefree search.
During zero balance look to it that there are no metallic objects near the search
coil. This could cause a wrong adjustment of the metal detector and produce
unwanted indicator effects (as the case may be repeat the RESET-procedure
on another, metal-free spot).
KTS-Electronic GmbH & Co. KG – PULSE AR III

7
3. In the beginning please set the frequency to the lowest level (turn the Freq.-
modulator clockwise). The volume should be set hearable with the help of the
Audio control. Generally we recommend to start with the lowest frequency
adjustment to acquaint yourself with the handling of the device. With advancing
experience it is expedient, to increase the frequency gradually, what will have a
positive effect on the search performance.
The Reset-button should be pressed after each of the following changes.
1. After every activation of the metal detector.
2. After each change of search coils.
3. During the search, if sound becomes instable due to bad ground conditions
or geomagnetism.
To create the search more target-oriented and therefore more successful – especially
before excavation – please draw your attention to the following:
1. Change of sound (frequency)
2. Intensity of sound
3. Continuity of sound
4. Extent of value (digital display)
The change of sound is the first sign for the detection of a metal object. Before
excavation, however, further details should be taken into account and the own search
experience should be used for help:
The more intense the sound, the larger the metal object and the nearer the position
to the surface. While the high search tone is audible, the search coil should be
moved in the close surrounding to determine the shape of the metal object.
Note: It also must be ensured that during zero balance no metal objects are located in
the immediate vicinity of the metal detector. This can produce a false calibration and
unwanted indication effects.
5. ID Metal Discrimination
Examples for different conductivity values:
light metals (e.g. aluminum) 20-50
copper 50-80
gold, silver, platinum 80 and over.
Please bear in mind that – depending on soil conditions and size and shape of the
located objects the measured values will diversify. The indicated values are guide
values, which can be complemented with your own search routine
Also consider explanations to error signals on page 12.
KTS-Electronic GmbH & Co. KG – PULSE AR III

8
Note: To avoid incorrect conductivity values it is absolutely necessary to repeat the
adjustment of the soil balance. When pressing the Reset-button make sure, that the
soil contains no metal.
6. Installation
The assembly is uncomplicated and done without lots of effort.
1. Install the telescope bar by pushing the adjustable carbon tube into the armrest.
2. Then connect the telescope bar with the search coil and wrap the cable of the
coil around the bar.
3. The electronic unit is placed in a bag; insert the plug of the search coil through
the lower opening of the bag in the intended mounting socket.
7. Appropriate handling
Hold the search coil approx. 2 to 5cm parallel to the soil. Due to the pulse induction
method a slewing of the search coil is not necessary.
Dictate your own speed during the search. To search a large area without a great
expenditure of time we recommend a speedy pace (no jogging).
KTS-Electronic GmbH & Co. KG – PULSE AR III

9
25 cm search coil
The 25 cm search coil is the standard
tube of PULSE AR III and particularly
suitable for the search after small metal
objects.
8. Adjustment
The metal detector PULSE AR III can be adjusted within a short time.
1. With the menu knob you activate the metal detector. Choose the desired sound
volume.
2. Briefly press the RESET-button in order to obtain a zero balance which is
necessary for a failure-free search.
9. Indication of metal
Your device has a sound location system. With the approach of the search coil at a
metal object the tone frequency will rise. Once the coil is positioned exactly over the
object, the highest tone is reached.
This method not only helps to locate the exact spot of discovery but it also detects –
based on the duration of the sound –the object’s shape.
Examples:
A long-lasting high tone in longitudinal direction stands for a slim item (e.g. a tube),
a high tone in any direction calls for a circular object.
During the search side noises often prove to be a disturbing factor. Therefore we
recommend the use of the provided headphones, which are switched to Mono, so
that surrounding sounds (for instance traffic or dangerous animals) can easier be
recognized.
10. Usage of appropriate search coils
According to the purpose PULSE AR III is applicable with various search coils.
KTS-Electronic GmbH & Co. KG – PULSE AR III

10
45 cm search coil
Very convenient for the search after
small, medium-sized and large metal
objects. Furthermore it has the benefit of
a speedy uninterrupted search process.
Cylindrical coil:
Through its dimensions of 5x20cm
appropriate for the search in wells,
narrow excavations and underwater. At
the same time it can be helpful to find
micro-objects.
1x1m search frame
Preferably used for the deep sounding after medium-sized and large metal objects.
Furthermore large areas can be scanned fast and comfortable.
During the search you should hold the search frame between 20 to 50cm over the
ground. The higher the distance to the soil the less small and medium-sized metal
objects can be displayed.
KTS-Electronic GmbH & Co. KG – PULSE AR III

11
Through the mobile Li-Ion quick-charger the
metal detector is fully charged within a very
short time. Due to the connectivity to the
cigarette lighter this is also possible while
you are underway. The charged battery
allows a operating time of approx. 4-8
hours.
In addition, we deliver an inverter module
which enables the charging in the car.
Assembly of the 1x1m search frame
1. Connect the pipes (8 pieces) in numeric order. Please note that the numbers should be
readable on the upper side.
2. Arrange the search frame on a flat surface and be sure that the frame is straight.
3. Afterwards the cable has to be placed on the pipe and fixed at the corners by the
provided tape. Please make sure that cable and search frame are firmly connected to
each other.
Note: Turn off the metal detector in case you want to change the search coil, then
connect the selected search coil. Please press the RESET-button after you have
started the detector again.
11. Rechargeable battery and charger
KTS-Electronic GmbH & Co. KG – PULSE AR III

12
Charging process:
1. Attach the battery charger to the connection socket at the backside of the
electronic housing.
2. The red LED displays the charging process. Please note that this LED has to be
active during the whole charging time.
3. The maximum charging time amounts to 90 minutes.
4. After the charging process is completed, remove the charging cable plug.The
plug should be pulled out after every charging.
Note: PULSE AR III is equipped with a quick-charger. To prevent damages at the
rechargeable battery always pay absolute attention to the maximum charging time of
90 minutes. Stop the charging process immediately after the battery is fully charged.
Never charge the metal detector without attendance or overnight, resp. over 90
minutes, because an overcharging can induce damages (e.g. overheating), which
leads to the loss of guaranty.
12. Error signals
In line with the development of your PULSE AR III great emphasis was placed on
stability and the avoidance of incidences.
Despite the multiplicity of filters and modulators it is – to our regret - possible that
certain soil conditions cause disturbances, which can effect your measured values.
Apart from a wrong soil balance adjustment incorrect signals can arise from following
effects.
1. Ferric oxide: Through magnetic ferric oxide soils the conductance of the located
metal can comprehend falsified data.
2. Adverse effects lead to the fact that large iron metals are indicated as precious
metal.
3. Small parts of bronce partially may be indicated as iron, the definition of the
measured values therefore is only guaranteed starting from 5x5cm in dimension.
4. The measured values can be falsified because of other metal parts in the
proximity.
5. Strong magnetic interference fields within residential areas and in the proximity of
ground cables can influence the measured values, especially during utilization of
the search frame.
6. Disturbances often occur in the peripherals of radio stations.
7. Strong magnetic fields, particularly in the proximity of high voltage masts, can
cause disfunctions.
KTS-Electronic GmbH & Co. KG – PULSE AR III

13
13. Care
Your PULSE AR III is easy to clean, yet there are some aspects, which you should
consider, in order to receive the optimal readiness for operation.
Protect the electronic housing with a plastic bag in case you should get caught in
the rain, fog or sandstorm.
Always keep your equipment clean and dry and wipe off sand and dirt.
Note: Avoid extreme temperatures, since it is possible, that electronic units
are damaged through this circumstances.
Metal detectors produce magnetic fields in the search coil and can possibly
be hindered in their operational capability while applied in the closer
environment of certain industrial plants or electronic devices.
14. Legal notice
Before you start searching please note that the monument protection as well as other
legal standards are relevant. KTS-Electronic GmbH & Co. KG assumes no
responsibility for possible legal violations.
In case of doubts we recommend a comprehensive consultation with an attorney or
national monument offices.
15. Warranty
According to the following conditions (see below) we remedy deficiencies free of
charge, if they are evidently based on manufacturing errors or defects and are
reported to us immediately after assessment of damage within 24 months after
delivery to the ultimate buyer.
Defective parts will be repaired gratuitous or will be replaced by efficient parts of our
choice. KTS GmbH & Co. KG reserves the right to exchange a device by an equal
valued replacement unit in case the returned product cannot be required in an
appropriate budget time frame.
On-site repairs cannot be demanded. Replaced, resp. exchanged parts will merge
into our property.
The guarantee claim expires in cases of improper handling, gross carelessness or
when repairs, modifications, additionally installed parts or extentions are carried out
from persons which are not authorized on our part to do so.
Guarantee claims will neither effect an extention of the term nor they will implement a
new time limit.
KTS-Electronic GmbH & Co. KG – PULSE AR III

14
Further requirements, in particular such through extraneous causes resulting
damages are excluded, unless a commitment is not necessarily the case.
We therefore are not liable for any accidential, indirect or other subsequent damages
of any kind, which lead to limited use, data loss, profit setbacks or operating failures.
After expiry of warranty
KTS GmbH & Co. KG can agree upon a service after expiry of guarantee. In this
case repairing and shipment will be charged.
16. Contact
KTS-Electronic GmbH & Co. KG
Kurhessen Strasse 1
D-64546 Moerfelden-Walldorf
Germany
Tel: +49-(0)6105 9111-50
Fax: +49-(0)6105 9111-55
www.kts-electronic.com
eMail: mail@kts-electronic.com
Office hours:
Mondays– Thursdays: 9:00 am to 4:30 pm
Fridays: 9:00 am to 4:00 pm
Copyright by KTS-Electronic GmbH & Co. KG, Moerfelden-Walldorf/Germany, 2015.
A duplication or usage of visual and textual content of this publication is not allowed
without explicit consent.
KTS-Electronic GmbH & Co. KG – PULSE AR III
 Loading...