

Page 1

Managed Switch
User's Manual
KS-2601
DOC.061214
1
Page 2

We make no warranties with respect to this documentation and disclaim any
implied warranties of merchantability, quality, or fitness for any particular
purpose. The information in this document is subject to change without notice.
We reserve the right to make revisions to this publication without obligation to
notify any person or entity of any such changes.
Trademarks or brand names mentioned herein are trademarks or registered
trademarks of their respective companies.
2
Page 3
About this manual …
This manual is a general user’s manual for the managed switch:
24+2G fully-modularized model
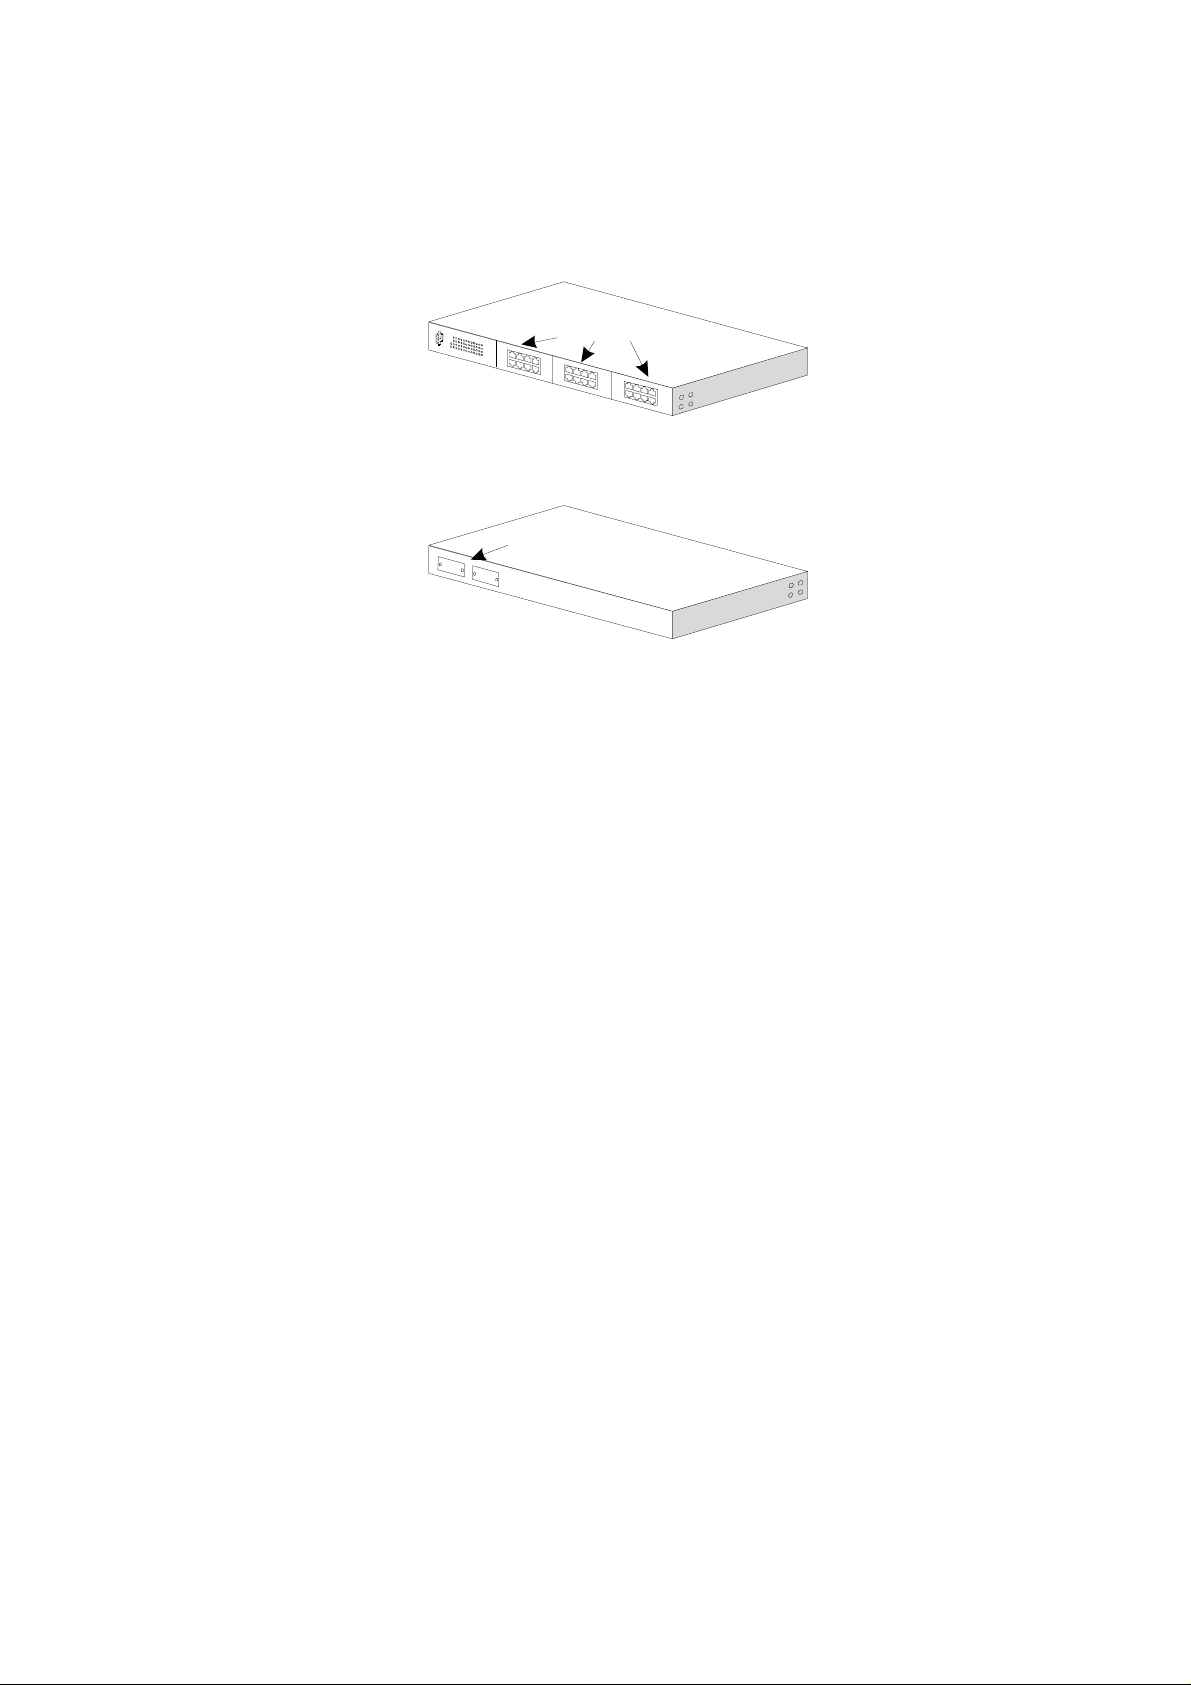
It has three 8-port module slots at front panel. These 8-port modules can be 8*
10/100M TX ports or 8* 100M FX ports. It has flexible design for hardware
configuration.
Modules (8-port )
Front Side
There are two Gigabit module slots at rear panel for gigabit extension.
Module Slot
Rear Side
3
Page 4

Contents
1. INTRODUCTION---------------------------------------------------------1
1.1 PACKAG E CONTENTS------------------------------------------------------------1
2. WHERE TO PLACE THE MANAGED SWITCH -----------------1
3. CONFIGURE NETWORK CONNECTION ------------------------- 2
3.1 CONNECTING DEVICES TO THE INTELLIGENT SWITCH ------------2
3.2 CONNECTING TO ANOTHER ETHERNET SWITCH/HUB---------------2
3.3 APPLICATION------------------------------------------------------------------------3
4. ADD/REMOVE MODULE ----------------------------------------------4
4.1 ADD/REMOVE M ODULE----------------------------------------------------------4
5. LEDS CONDITIONS DEFINITION----------------------------------- 6
5.1 LEDS DEFINED ---------------------------------------------------------------------- 6
6. MANAGE / CONFIGURE THE SWITCH----------------------------7
6.1 INTRODUCTION OF THE MANAGEMENT FUNCTIONS ----------------7
6.2 MANAGEMENT WITH CONSOLE CONNECTION ----------------------- 10
6.3 MANAGEMENT WITH HTTP CONNECTION------------------------------ 39
6.4 ABOUT TELNET INTERFACE ------------------------------------------------- 70
6.5 ABOUT SNMP INTERFACE----------------------------------------------------- 70
7. SOFTWARE UPDATE AND BACKUP---------------------------- 71
A. PRODUCT SPECIFICATIONS------------------------------------- 72
B. COMPLIANCES------------------------------------------------------- 73
Page 5

1. Introduction
This managed switch is a Layer2 management switch with lots of advanced
network functions including VLAN, trunking, spanning tree, mirror port, IP
multicast, rate limit and port configuration. It supports console, telnet, http and
SNMP interface for switch management. IEEE 802.1x is supported for port
security application. These functions can meet most of the management request
for current network.
1.1 Package Contents
One Intelligent Switch
One AC power cord (* for AC power model)
One console cable
Two rack-mount kits and screws (* for 24+2G model only)
This user's manual
2. Where To Place the Managed Switch
This switch can be placed on a flat surface (your desk, shelf or table).
Place the Intelligent Switch at a location with these connection considerations in
mind:
The switch configuration does not break the rules as specified in Section 3.
The switch is accessible and cables can be connected easily to it.
The cables connected to the switch are away from sources of electrical
interference such as radio, computer monitor, and light fixtures.
There is sufficient space surrounding the switch to allow for proper ventilation.
You can also install the 24+2G models Intelligent switch on a 19" rack with the
rack-mount kits.
1
Page 6

3. Configure Network Connection
3.1 Connecting Devices to the Intelligent Switch
[ Connection Guidelines: ]
For 10BaseT connection: Category 3 or 5 twisted-pair Ethernet cable
For 100BaseTX connection: Category 5 twisted-pair Ethernet cable
For 1000BaseTX connection: Category 5e or 6 twisted-pair Ethernet cable
For UTP cable connection, always limit the cable distance to 100 meters (328
ft) as defined by IEEE specification
If your switch has 100BaseFX/1000BaseSX/1000BaseLX ports, you can
connect long distance fiber optic cable to the switch.
Because this switch supports Auto MDI/MDI-X detection on each UTP port,
you can use normal straight through cable for both workstation connection
and hub/switch cascading.
3.2 Connecting to Another Ethernet Switch/Hub
This Intelligent Switch can be connected to existing 10Mbps / 100Mbps /
1000Mbps hubs/switches. Because all UTP ports on the Intelligent Switch
support Auto MDI/MDI-X function, you can connect from any UTP port of the
Intelligent Switch to the MDI or MDI-X port of another hub/switch with Straight
Through or Crossover cables. If the switches have fiber-optic ports, you can
cascade them with fiber optic cable.
2
Page 7

3.3 Application
A switch can be used to overcome the hub-to-hub connectivity limitations as well
as improve overall network performance. Switches make intelligent decisions
about where to send network traffic based on the destination address of the
packet. As a result, the switch can significantly reduce unnecessary traffic.
The example below demonstrates the switch ability to segment the network. The
number of nodes on each segment is reduced thereby minimizing network
contention (collisions) and boosting the available bandwidth per port.
With management function of the switch, network administrator is easy to
monitor network status and configure for different applications.
3
Page 8
4. Add/Remove Module
4.1 Add/Remove Module
[ For 24+2G Fully Modulized Model ]
This model supports three 8-port 10/100Mbps TX/FX modules at front panel and
two 1-port gigabit TX/SX/LX modules at rear panel.
Note: This switch does not support hot-swap function. Turn off the switch
first before adding or removing module. Otherwise, the switch and module
could be damaged.
-- Modules at Front Side --
Modules (8-port )
Front Side
[ Adding Modules to the Switch at Front Panel ]
1. Power OFF the switch first.
2. If the switch is rack-mounted, you have to remove the switch from rack first.
3. Loosen the screws of the cover on the module slot with screwdriver. Two at
the front side, one at bottom side.
4. Remove the cover of the module slot.
5. Follow the rails on both sides of the module slot to slide in the module
slowly.
6. Push the module firmly to make the module connecting well with the
connector in the switch.
7. Drive the screws to fix the module to the switch firmly with screwdriver. Two
at the front side, one at bottom side.
8. If the switch is rack-mounted, you can put the switch back to rack.
9. Power ON the switch.
10. If 100FX module is added, please configure these FX ports to 100/Full with
“set port” command.
11. Connect network cables to the connectors on the module. If the connected
devices are working, the Link/Act LED will be ON.
Note
: We suggest you to keep these removed module slot covers. It can be use
when these modules are removed in the future.
[ Remove Modules from the Switch at Front Panel ]
1. Power OFF the switch first.
4
Page 9

2. If the switch is rack-mounted, you have to remove the switch from rack first.
3. Loosen the screws of the module with screwdriver. Two at the front side, one
at bottom side.
4. Remove the module slowly from the module slot.
5. Put on the module cover and fix it to the switch by driving its screws with
screwdriver. Two at the front side, one at bottom side.
6. If the switch is rack-mounted, you can put the switch back to rack.
7. Power ON the switch.
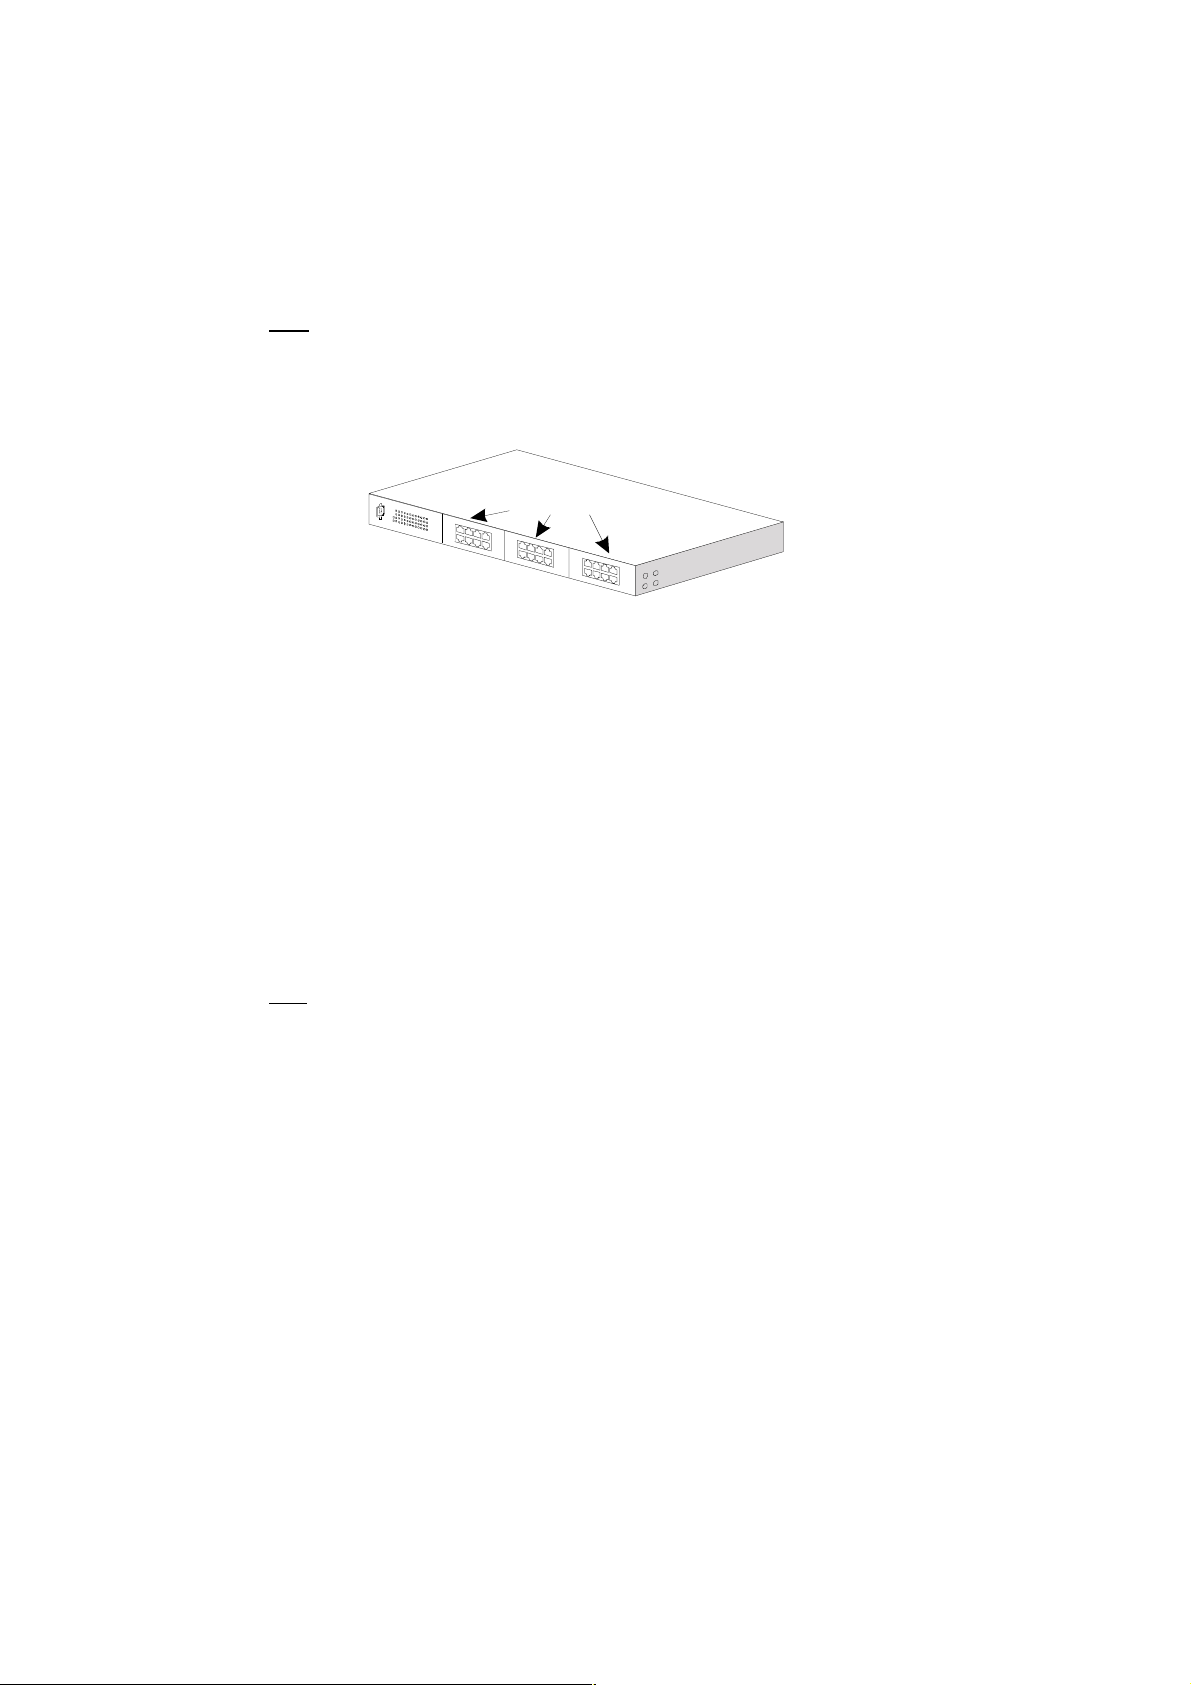
-- Modules at Rear Side --
Module Slot
Rear Side
[ Adding Module to the Switch at Rear Panel ]
1. Power OFF the switch first.
2. Loosen the screws of the cover on the module slot.
3. Remove the cover of the module slot.
4. Follow the rails on both sides of the module slot to slide in the module slowly.
5. Push the module firmly to make the module connecting well with the
connector in the switch.
6. Drive the screws to fix the module to the switch firmly.
7. Power ON the switch.
8. Connect network cables to the connectors on the module. If the connected
devices are working, the Link/Act LED will be ON.
Note
: We suggest you to keep these removed module slot covers. It can be use
when these modules are removed in the future.
[ Remove Module from the Switch at Rear Panel ]
1. Power OFF the switch first.
2. Loosen the screws of the module.
3. Remove the module slowly from the module slot.
4. Put on the module cover and fix it to the switch by driving its screws.
5. Power ON the switch.
5
Page 10

5. LEDs Conditions Definition
5.1 LEDs Defined
The LEDs provide useful information about the switch and the stat us of all individual ports.
[ For 24+2G fully modulized model ]
LED STATUS CONDITION
Power
Link / Act
FDX / Col
ON Switch is receiving power.
ON Port has established a vali d l i n k.
Flashing Data packets being received or sent.
ON The connection is Full Duplex.
OFF The connection is Half Duplex.
Flashing Collisions happen for half duplex connection
6
Page 11

6. Manage / Configure the switch
6.1 Introduction of the management functions
This switch is a L2 management switch. It supports in-band management
function from SNMP, Http and Telnet interface. It also supports out-band
management function from RS232 console interface. Besides, it supports
network configuration functions, like VLAN, Trunking, Port Mirror, QoS, spanning
tree and software backup/update. Users can configure these functions for
different network applications. The following is a brief introduction about these
functions before the detail operation sections.
1. VLAN (Virtual LAN)
VLAN can divide the switch to several broadcast domains to prevent network
traffic between different user groups. This switch supports 802.1Q tag-based
VLAN and port-based VLAN. Users in the same VLAN can transfer data to
each other. The network traffic will be blocked if they are in different VLAN.
2. Trunk
If two switches are cascaded together, the bottleneck will happen at the
cascading connection. If more cables could be used for the cascading
connection, it will reduce the bottleneck problem. In normal case, switches
will become unstable because of traffic looping when more than one cable is
connected between them. If the switches support trunk function, they can treat
these cables as one connection between them. The traffic looping will not
happen between these cables and the switches will work stable with bigger
bandwidth between them.
This switch supports trunk function and users can configure it with the following
steps.
a. Enable trunk function.
b. Assign ports to a trunk. For example, assign Port 1,2,3 for Trunk 1.
Notes:
About redundant application
The trunk connection supports redundant function. If any trunk cable is broken,
the traffic going through that cable will be transferred to another trunk cable
automatically. For example, if user port Port 6 is assigned to Port 1 in a Trunk
and Port 1 connection breaks, Port 2 will take over the traffic for Port 6
automatically. (It could be used for redundant application.)
3. Spanning Tree Protocol
Spanning tree is a protocol to prevent network loop in network topology. If
network loop happens, it will cause switches in the network unstable because
more and more traffic will loop in the network. If network loop happens,
spanning tree protocol will block one connection in the loop automatically. But
it will also cause a 30 seconds delay if any network connection is changed
because of the network topology detection operation of the protocol.
Because there could be more than one switch in the network, users can
configure this function for their network spanning tree application.
7
Page 12

4. Port Mirror
This switch operates in store-and-forward algorithm so it is not possible to
monitor network traffic from another connection port. But the port mirror
function could copy packets from some monitored port to another port for
network monitor. This switch also provides DA/SA filtering function for
monitoring the traffic to/from some user.
5. QoS
For Quality of Service request in a network, packets could be classified to
different forwarding priorities. For real-time network traffic (like video, audio), it
needs higher priority than normal network traffic. With the definition of packet
priority, it could have 8 priority levels (from 0 to 7). This switch supports four
priority level queues on each port. It could be configured for port-based or
802.1P tagged based. User can define the mapping (0 – 7) to the four priority
queues.
6. Static Mac ID in ARL table
The switch can learn the Mac address from user’s packets and keep these Mac
address in the ARL table for store-and-forward table lookup operation. But
these Mac addresses will be deleted from ARL table after some time when
users do not send any packets to the switch. This operation is called aging
and the time is called aging time. It is 5 minutes normally (it could be changed
by users.) If users want to keep a Mac address always in ARL table for some
port, they can assign the Mac address to ARL table. These Mac ID are called
Static Mac address. This switch supports static Mac address assignment.
The static Mac address assignment will also limit the Mac address could be
used or rejected on the assigned port only with the port security configuration
function. For example, assigning “00-00-01-11-22-33” to Port 5 will always
keep this Mac ID alive on Port 5 but also limit this Mac address could work on
Port 5 only or rejected from Port 5 - depending on the setting of its port security
mode.
Note
There is a “Mac Security Configuration” function for port security mode. If it is
set to Accept mode, only these static Mac addresses can access network
through the assigned port. The other Mac addresses will be forbidden for
network access through that port. This function can be used for port binding
security application. Please refer to Section 6.2 / 6.3 for the details of the Mac
address filter-in operation of the switch.
7. IEEE 802.1x Port Security Function
If the 802.1x function is enabled, the switch will act as an authenticator for
users accessing network through the switch. It will need a RADIUS server for
the authentication function. Users will be asked for username and password
before network access. If the RADIUS server authenticates it, the switch will
enable the port for network access. This function is very useful for network
security application to prevent illegal users access network through the switch.
This switch supports MD5, TLS and PEAP authentication types.
: About Static Mac Address Filter-in (port binding) function
8
Page 13

8. Rate Control
This function can limit the burst traffic rate for physical ports. The traffic could
be ingress traffic or egress traffic. This function can protect the network
bandwidth usage by different users.
9. IP Multicast with IGMP Snooping
IP multicast function can forward packets to a group of users connected on
different ports. The user group is learned by the switch from the packets from
IGMP active router with IGMP snooping function. It is often used for video
applications.
10. Protected Port
This function can protect a port from communicating with some other ports.
Even these ports are in the same VLAN. This protection is still valid. For
example, Port 1,2,3,4 are marked as protected ports. Port 1,2,3,4 cannot
communicate with each other, but they can communicate with the other ports.
This is for port isolation application though they are in the same VLAN.
11. Software Backup/Update
This switch supports backup and update functions for its internal software and
its network configuration. It could be done in three ways.
a. From console when booting: doing by Xmodem protocol and by terminal
program for boot code and run-time code updating.
b. From console/Telnet when running: doing by TFTP protocol and it will need a
TFTP server in network for run-time code and configuration backup/update.
c. From web browser: doing by http protocol and by web browser for run-time
code and configuration backup/update.
9
Page 14

6.2 Management with Console Connection
Please follow the steps to complete the console hardware connection first.
1. Connect from the console port of the switch to COM port of PC with the
console cable.
2. Start the terminal program. Create a new connection and select COM port of
PC used for the console. Set the configuration of the terminal as
[38400,8,N,1]. (With Windows, you can find the terminal program in [Start] ->
[Programs] -> [Accessory Programs] -> [Communication] -> [Terminal]. If you
cannot find it, please install it from your Windows Installation Disk. Please
refer to your Windows user manual for the installation.)
3. Power on the switch.
If everything is correct, the booting screen will appear in the terminal program
when the switch is powered on. It will stop at the following screen after some
initializing messages.
-------------------------------------------------------------------------------------------------------
Booting Program Version 1. 05.00, built at 14:44:03, Jul 29 2005
RAM: 0x00000000-0x00800000, 0x0000cc78-0x007f3000 available
FLASH: 0x05800000 - 0x05900000, 16 blocks of 0x00010000 bytes each.
==> enter ^C to abort booting within 3 seconds ..... .
Start to run system initialization task
[System Configuration]
Company Name :
Model Name : Intelligent Switch
MAC Address : 00:00:01:23:45:67
Firmware Version : 3.02.02 < Mar 13 2006 15:13:36 >
Press <ENTER> key to start.
UCD-SNMP version 4.1.2
-------------------------------------------------------------------------------------------------------
Press Enter key, user name and password will be requested. The default user
name and password is "admin" / ”123456”.
After login the switch, a prompt will be shown. Because this switch supports
command-line operation for console interface, you can press “?” or “help” to
check the command list first.
Note:
Management with Telnet connection has the same interface as console
connection.
10
Page 15

With help command, you can find the command list as follow.
-------------------------------------------------------------------------------------------------------
>help
[Command List]
?.............. Help commands
help........ ... Help commands
set....... ..... Set commands
show........... Show commands
default........ Restore to factory default setting
del........ . ... Del commands
find........ . .. Find commands
whoami....... . . Display current login user nam e
reset.......... Reset system
ping........... Ping a specified host with IP address
backup......... backup run-time fi rmware or configuration file
upgrade........ Upgrade run-time firmware or configuration file
exit......... . . Logout
logout......... Logout
-------------------------------------------------------------------------------------------------------
Here is the detail about these commands.
1. ? and help command
This is help command and the switch will prompt command list for this
command.
2. set command
This command can be used to configure most functions of the switch. Lots of
sub-commands are for this command.
Enter “set” at the prompt, the sub-command list will be shown.
>set
[Command List]
?.............. Help commands
help........ ... Help commands
1qvlan......... Set 802.1q VLAN Configuration
admin...... .... Set administrator name and password
age............ Set aging time of switch
arl........ .... Add a static MAC addres s in ARL table
automode....... Set Auto Negotiation or Aut o Detect mode of port
dot1x.......... Set 802.1x configuration
guest.......... Set name and password for Guest
gvrp......... .. Set GVRP Protocol enable or disable
http........... Set HTTP Protocol enable or di sable
idle........... Set idle time for Console.
igmp........... Set IGMP configuration
loopback....... Set Loopback Detection of port
mirror...... ... Set mirror confi gurat i on
net............ Set network IP configuration
port........... Set switch port configuration
protect........ Set protected port set ting
pvlan........ .. Set members of Port-based VLAN groups
11
Page 16

qos............ Set QoS configuration
ratecontrol.... S et Rate Control configuration
rmon........... Set RMON Function configuration
security....... Set port security mode for Static MAC address
snmp........... Set snmp configuration
sta............ Set Spanning Tree configuration
stormcontrol... Set Storm Control c onf i guration
trunk.......... Set Trunk function configuration
2.1 set ? and set help command
These two commands will show the sub-command list for set command.
2.2 set 1qvlan command
This command is used to configure 802.1Q VLAN of the switch.
Its syntax is . . .
>set 1qvlan
[Argument List]
enable......... Set 802.1Q VLAN enabled.
disable........ Set 802.1Q VLAN disabled.
ingressfilter.. Set ingress filter Enable or Disable.
create......... Create new 802.1Q vlan with specified VLAN I D and V LAN Name.
modify......... Modify the setting of a 802. 1Q V LAN.
pvid........... Set the Port VLANID of specified port.
mgrpvid........ Set the Port VLANID of management port.
priority....... Set the priority for tag of speci f i ed port.
mode........... Set the VLAN Mode.
enable and disable sub-commands are used to enable/disable 802.1Q
VLAN function of the switch.
ingressfilter sub-command is used to enable/disable VLAN filtering executed
at ingress port.
Enable: the VLAN filtering function will be executed when packet is received
at ingress port. If the ingress port is in the same VLAN of the received packet,
this packet will go to forwarding stage. Otherwise, the packet will be
discarded by VLAN filtering at ingress port.
Disable: the VLAN filtering function will be executed when packet is
forwarded to egress port.
create sub-command is used to create a static 802.1Q VLAN. For example,
“set 1qvlan create 20 ABC” will create a static 802.1Q VLAN with ID 20 and
name “ABC”.
modify sub-command is used to modify a static 802.1Q VLAN setting.
Its syntax is . . .
>set 1qvlan modify
Syntax : set 1qvlan modify [+|-] [port#] VLANID [1:<tagged>|0: <untagged>]
Examples : Set 1qvlan +1+5-7 2 1
Description: Add port 1,5 to VLAN 2 as tagged port and remove port 7 from VLAN 2
pvid sub-command is used to set Port VLAN ID. The Port VLAN ID is used
as the VLAN ID for tag adding when untagged packet is translated to tagged
packet. For example, “set 1qvlan pvid 3 10” will set the PVID of Port 3 as 10.
mgrpvid sub-command is used to select the VLAN group that is allowed to
management the switch. Only the users in the selected VLAN can manage
12
Page 17

the switch by Http, Telnet and SNMP. For example, “set 1qvlan mgrpvid 5”
will allow the users in the VLAN with VLAN ID 5 to manage the switch
remotely.
priority sub-command is used to set port priority for tag adding when
untagged packet is translated to tagged packet. For example, “set 1qvlan
priority 3 2” will set the port priority of Port 3 as 2. The priority information in
tag will be filled with 2 when the untagged packet coming to Port 3 is
translated to tagged packet.
mode sub-command is used to select the VLAN mode for 802.1Q VLAN
operation. There are three modes for VLAN function –SVL (Shared VLAN),
IVL (Individual VLAN) and SVL/IVL.
Syntax : set 1qvlan mode [0:S VL|1:IVL]
Examples : Set 1qvlan m ode 0
Description: Set c u rrent vl an mode as SVL
0: SVL mode
1: IVL mode
2: SVL/IVL mode
SVL mode – the switch will do packet forwarding according to its Mac
address directly. It is the normal VLAN operation of switch.
IVL mode – the switch will do packet forwarding according to its Mac address
and VLAN ID both. It is for some special VLAN applications.
SVL/IVL mode – its operation is the same as IVL mode but for untagged port
is used as the uplink port in MDU/MTU application.
For most VLAN applications, SVL mode is suggested.
2.3 set admin command
This command is used to modify the user name and password for
administrator.
2.4 set age command
This command is used to change the aging time of the switch.
Its syntax is . . .
>set age
Syntax: set age [time]
[time]: 0: disable aging operation
1~65535: aging time in seconds, default is 300.
The aging time is 300 seconds default and its valid range is 0 ~ 65535. If
[time] is set to 0, the aging function will be disabled.
(Notes: Disable aging is different from static Mac ID in ARL table. The
connection port is fix for a static Mac ID, but the connection port could be
changed for a Mac ID with no aging.)
2.5 set arl command
This command is for adding static Mac ID to ARL table of the switch.
Its syntax is . . .
>set arl
Set ARL [xx-xx-xx-xx-xx-xx] [port #]
13
Page 18

For example, “set ARL 00-00-01-11-22-33 5” will add a static Mac ID “00-0001-11-22-33” to ARL table for Port 5 and this Mac ID will never be aged out
from Port 5.
Note
: Because the static Mac address is fixed on the assigned port by the
switch, the static Mac address can access network through the assigned port
only. It will fail to access network through other ports of the switch.
2.6 set automode command
This command is used to set the auto mode function of connection port when
it is forced to some special setting instead of fully auto-negotiation. There are
two modes for it – an(auto negotiation) and ad(auto detection).
an mode – if the auto. function of a port is disabled in port configuration, the
switch will disable its auto-negotiation function and the Auto-MDIX function of
the port is also disabled. That is the real force-mode setting of the port.
ad mode – if the auto. function of a port is disabled in port configuration, the
switch will not disable its auto-negotiation function but just modify its autonegotiation attribute for the speed/duplex mode setting. And the Auto-MDIX
function of the port is still enabled.
Its syntax is …
>set automode
Valid mode [an:Auto Negotiation|ad:Auto Detect]
[Application]
If the connected device is auto-negotiation enabled and you want to force the
speed of the connection (for example, 10M/Half), you can select ad mode.
If the connected device is in forced mode (for example, 10M/Half) and it is
auto-negotiation disabled, you can use an mode and set the port to the same
configuration as the device in port configuration function.
You can select an mode or ad mode depending on your applications. In most
of connection cases, ad mode is suggested. But for 100FX connection, you
should select an mode and disable Auto. Set the port to 100/Full.
2.7 set dot1x command
This command is used to configure 802.1x function of the switch.
Its syntax is . . .
>set dot1x
[Argument List]
enable......... Set 802.1x enable
disable........ Set 802.1x disable
authmode....... Set 802.1x Auth Mode of a specified port
authport....... Set Authenticate Port of Radius Server
quiettime...... Set 802.1x Quiet Timeout Period
re_au......... . Set 802.1x Re-authentication
reauthcnt...... Set 802.1x Re-authentication Max Count
14
Page 19

reauthtime.... . Set 802.1x Re-authentication Timeout P eri od
reqcnt......... Set 802.1x Max Request Count
rsip........... Set Radius Server Address
shkey.......... Set 802.1x Shared Key
supptime....... Set 802.1x Supplicant Timeout Period
svrtime........ Set 802.1x Server Timeout Period
transparent.... Set 802.1x as transparent mode
txtime......... Set 802.1x Tx Timeout Period
enable sub-commands is used to enable 802.1x authentication function.
disable sub-command is used to disable 802.1x function.
authmode sub-command is used to set the authentication mode for a
physical port. Its syntax is . . .
set dot1x authmode [port#] [ auto|fa|fu|no]
- auto: the authentication mode of the port depending on the authentication
result of the port
- fa (force-authenticated): will force the port always being authentication
successful in 802.1x process and the real authentication result will be
ignored.
- fu (force-unauthenticated): will force the port always being authentication
unsuccessful in 802.1x process and the real authentication result will be
ignored.
- none: 802.1x function will not be executed on the port, i.e. disabled on the
port.
authport sub-command is used to set the handshaking port number between
the switch and RADIUS server. It could be different for different RADIUS
servers.
quiettime sub-command is used to set the quiet time value between the
switch and the user before next authentication process when authentication
fail.
re_au sub-command is used to enable the re-authentication function of the
switch. When the re-authentication time is up, the switch will start the reauthentication process.
reauthcnt sub-command is used to set max count for re-authentication
request in the re-authentication process. If the max count is met, it will
become un-authentication state. The valid value is 1~10.
reauthtime sub-command is used to set the timeout period of the reauthentication process.
reqcnt sub-command is used to set max request timeout count between the
switch and RADIUS server before authentication fail. The valid value is 1~10.
rsip sub-command is used to set the IP address of RADIUS server.
shkey sub-command is used to set the security key between the switch and
RADIUS server.
supptime sub-command is used to set the timeout value between the switch
and users (called “supplicant” in 802.1x) after first identification. The valid
value is 0~65535.
svrtime sub-command is used to set the request timeout value between the
switch and RADIUS server. The valid value is 0~65535.
15
Page 20

transparent sub-command is used to set the operation of 802.1x function to
transparent mode. In this mode, the switch will forward the 802.1x packets
only.
txtime sub-command is used to set the timeout value for the identification
request from the switch to users. The request will be re-tried until the
reauthcnt is met. After that, authentication fail message will be sent. The
valid value is 0~65535.
Note
: This switch supports MD5, TLS and PEAP authentication types.
2.8 set guest command
This command is used to modify the user name and password for guest.
(The “guest” account is allowed to see the configuration/setting of the switch.
But the “guest” is not allowed to make any modification.)
2.9 set gvrp command
This command is used to enable/disable the GVRP function for 802.1Q
VLAN. If this function is enabled, this switch will learn the 802.1Q VLAN from
another 802.1Q network devices if it receives their packets. The learned
remote 802.1Q VLAN will be shown in the dynamic 802.1Q VLAN table.
Its syntax is . . .
>set gvrp
Syntax: set gvrp [1|0] <1:enable,0: di sable>
2.10 set http command
This command is used to enable/disable the http function of the switch.
Because hacker or worm/virus (like ColdRed) often attacks http server, this
command is provided to disable http to prevent it. (If this switch is installed in
public Internet without any firewall protection, we suggest users to disable the
http interface and use Telnet or SNMP instead.)
Its syntax is . . .
>set http
Syntax : Set http enable
Description: Enable htt p protocol function.
Syntax : Set http disable
Description: Disable ht tp protocol function.
2.11
set idle command
This command is used to set idle time for console connection. If no any key
operation in this idle time, the switch logout automatically for security.
Its syntax is . . .
Syntax: Set idle [time]
[time]: 30~3600 sec onds
For example, “set idle 300” will change the idle time to 300 seconds. It is 10
minutes default. Its valid range is 30 ~ 3600 seconds.
16
Page 21

2.12 set igmp command
This command is used to enable/disable IGMP snooping function for IP
multicast operation.
Its syntax is . . .
>set igmp
[Command List]
enable......... Enable igmp snooping functi on
disable........ Disable igmp snooping function
2.13
set loopback command
This command is used to set the loopback detection function of the switch. If
loopback condition happens at some connection port, all the transmitted
packets will come back to the switch and cause packet storm in the switch.
That may cause the switch unstable. If this function is enabled and
loopback condition is found at some port, that port will be disabled by the
switch. You can use “release” sub-command to enable the port after its
loopback condition is removed.
Its syntax is …
Syntax: set loopback [enable|disable|release].
[enable] : enable loopback detection on port
[disable]: disable loopback detection on port
[release]: release the ports that loopback are detected
2.14
set mirror command
This command is used to configure mirror function of the switch. The
following is the sub-command for it.
>set mirror
[Command List]
?.............. Help commands
help........... Help commands
enable........ . Enable mirror function
disable........ Disable mirror function
ingress........ Set mirror ingress setting
egress...... . .. Set mirror egress setting
port........... Set mirror capture port setting
2.14.1 set mirror ? and set mirror help command
This command can show the sub-command list for “set mirror” command.
2.14.2 set mirror enable command
This command is used to enable the mirror operation.
2.14.3 set mirror disable command
This command is used to disable the mirror operation.
2.14.4 set mirror ingress command
17
Page 22

This command is used to configure the mirror operation for ingress traffic.
Its syntax is . . .
>set mirror ingress
[Argument List]
div............ Set mirror ingress/egress [div=%d]
mode........... Set mirror ingress/egress [mode=ALL/ S A/DA]
mac............ Set mirror ingress/egress [mac=xx-xx-xx-xx-xx-xx]
monitor........ Set mirror ingress/egress [monitor=xx,xx,xx]
set mirror ingress div x : every x packets, capture one for mirror. For
example, “set mirror ingress div 10” will capture one packet from every ten
packets from ingress traffic.
set mirror ingress mode xx : mirror all packets or mirror packets with
some DA or SA only. For example, “set mirror ingress mode all” will mirror
all packets.
set mirror ingress mac xx-xx-xx-xx-xx-xx : if the mirror mode is for the
packets with some DA/SA, users can assign the DA/SA here.
set mirror ingress monitor xx,xx,xx : set the monitored ports here. For
example, “set mirror ingress monitor 1,2,5” will mirror the ingress traffic
from Port 1,2,5. (Notes: If the monitored traffic exceeds the maximum
bandwidth of capture port, flow control function will work on these
monitored ports.)
2.14.5 set mirror egress command
This command is used to configure the mirror operation for egress traffic.
Its syntax is similar to the mirror operation for ingress traffic. Please refer
to “set mirror ingress command” section.
2.14.6 se t mirror port command
This command is used to set the capture port for mirror operation. For
example, “set mirror port 3” will capture the mirror traffic to Port 3.
2.15 set net command
This command is used to configure IP settings of the switch.
Its syntax is . . .
>set net
[Argument List]
dhcp........... Set DHCP client
ip............. Set IP Address
netmask........ Set netmask
gateway........ S et gateway IP address
This switch supports static IP setting or dynamic DHCP IP assignment. If
DHCP function is enable, this switch will try to get IP configuration from
DHCP server. If DHCP server is not found, the switch will use its default IP
configuration. You can check the IP conf iguration got from DHCP server by
“show net” command.
For static IP setting, you can set the IP configuration of the switch with ip,
netmask and gateway commands. For example, “set net ip 192.168.1.250
18
Page 23

netmask 255.255.255.0 gateway 192.168.1.154” will set these parameters as
the IP address configuration of the switch. After the command, you can use
“show net” to verify the setting.
2.16
set port command
This command is used to change the connection configuration of ports.
Its syntax is . . .
>set port 2
[Argument List]
name........... Set port # name [string]
admin...... .... Set port # admin [enabl e|di sable]
speed.......... Set port # speed [auto|10|100|1000]
duplex......... Set port # duplex [full|half]
flowctrl....... Set port # flowctrl [ON|OFF]
User can configure the following items for each port.
a. Name of a port with “name” sub-command.
b. Enable/Disable a port with “admin” sub-command.
c. Operation speed of a port with “speed” sub-command.
d. Duplex mode of a port with “duplex” sub-command.
e. Flow Control function of a port with “flowctrl” sub-command.
For exampe, “set port 1 name YYY admin enable speed 10 duplex half”
command will enable Port 1 and set it to 10Mbps/Half Duplex and name it as
“YYY”.
Note
: For 100FX port, the port setting is allowed for 100/Full (100Mbps, Full
duplex) only.
2.17 set protected command
This command can set protection enabled/disabled for each connection port.
If a port is set as protected port, it cannot communicate with other protected
ports. But it still can communicate with other unprotected ports if they are in
the same VLAN.
For example, Port 1,2,3 are set as protected ports. Port 1,2,3 cannot
communicate with each other, but they can communicate with other unprotected ports – e.g. Port 4,5,6. This function is often used to isolated ports
in the same VLAN.
Its syntax is …
>set protect
[Argument List]
enable......... Set protect enable
disable........ Set protect disable
port........... Set protect port [port#] [1|0]
enable: enable this function
disable: disable this function
port: set a port as protected or un-protected
2.18 set pvlan command
19
Page 24

This command is used to set the configuration for port-based VLAN. This
switch supports both 802.1Q VLAN and port-based VLAN. If you want to
apply port-based VLAN for the switch, you can use this command to
configure it.
Its syntax is …
>set pvlan
Syntax : Set pvlan [1:enable|0:dis abl e]
Examples : Set pvlan enable
Description: Enable the P ort-based VLAN function.
Syntax : Set pvlan name [vlan#] [ vlan name]
Examples : Set pvlan nam e 1 vl an_1
Description: Set name of vlan 1 as "vlan_1".
Syntax : Set pvlan [+/-] [port #] [vlan#]
Examples : Set pvlan +1+2+3+4+5-7 1
Description: Add port 1,2,3,4,5 to VLAN 1 and
remove port 7 from VLAN 1
Note
: If a port does not belong to any VLAN, that port will be isolated from
other ports – including the internal management interface of the switch.
2.19
set qos command
This command is used to configure QoS function of the switch.
Its syntax is . . .
>set qos
[Argument List]
enable......... Set QoS enabled.
disable........ Set QoS disabled.
priority....... Set QoS priority of specified port.
dot1p.......... Set 802.1p enabled of specified port.
mapping...... .. Set 802.1p priority to priority queue mapping.
This switch supports four priority queues on each port – P0, P1, P2 and P3.
And both port-based priority and 802.1P tag priority are supported. This
command can be used to configure the QoS setting of the switch. Here are
the details about these sub-commands.
2.19.1 set qos enable command
This command is used to enable QoS operation.
2.19.2 set qos disable command
This command is used to disable QoS operation.
2.19.3 set qos priority command
This command is used to configure port-based priority. All packets coming
from high priority port will always be forwarded to highest priority queue P3.
All packets coming from low priority port will always be forwarded to lowest
priority queue P0. For example, “set qos priority 3 high” command will set
Port 3 as a high priority port.
20
Page 25

2.19.4 set qos dot1p command
This sub-command is used to enable/disable the 802.1P QoS operation for
each connection port. For example, “set qos dot1p 3 on” will enable the
802.1P QoS operation at Port 3. If any tagged packet comes to Port 3, it
will be forwarded with the priority setting in its tag.
2.19.5 set qos mapping command
This command is used to map the 802.1P priority 0~7 to the four priority
queues. For example, “set qos mapping 3 1” command will map the
802.1P tag priority 3 to priority queue P1 and packets with tag priority 3 will
be forwarded to priority queue P1 of egress port.
2.20
set ratecontrol command
This command is used to set the maximum traffic rate to/from connection
ports of the switch.
Its syntax is . . .
>set ratecontrol
Syntax 1 : Set ratecontrol drop [0:di sable|1:enable]
Examples : Set ratecontrol drop 1
Description: Set P acket Drop for Ingress Limi t.
Syntax 2 : Set ratecontrol [ingress|egress] [port#] [N:0-240]
Examples : Set ratecontrol ingress 1 10
Description: Set port 1 i ngress rate control with 10*64K=640K
No Limit of rate control, with N=0.
Rate = N*64 Kb, with N=1~28.
Rate = (N-27)*1Mb, with N=29~127.
Rate = (N-115)*8Mb, with N=128~240 (only for Gigabit port).
set ratecontrol drop [0|1] : this subcommand is used to enable/disable the
packet dropping operation when ingress traffic exceeds the maximum ingress
rate. If it is set to “disable”, flow control operation will be used instead of
packet dropping when traffic rate is exceeded.
set ratecontrol [ingress|egress] [port#] [0-240] : this subcommand is used
to set the maximum traffic rate for ingress/egress traffic through connection
ports of the switch. The rate control could be from 64Kbps to 1000Mbps.
N=0: rate control is disable, rate = No Limit.
N=1~28: rate = Nx64Kbps, for 64K, 128K, …, 1792Kbps rate control
N=29~127: rate = (N-27)x1Mbps, for 2M, 3M, …, 100Mbps rate control
N=128~240: rate = (N-115)x8Mbps, for 104M, 112M, …, 1000Mbps
Note
: N=128~240 is for Port 25, 26 gigabit ports only.
2.21
set security command
This command is used to set the security mode for static Mac address of
connection port.
Its syntax is . . .
>set security
Syntax : Set security [port#] [mode#]
21
Page 26

Examples : Set securi ty 1 1
Description: Set Security mode of port 1 to Acc ept mode for Static Mac addresses.
mode 0 = No Security
mode 1 = Accept function
mode 2 = Reject functi on
For examples, “set security 1 1” will set Port 1 to accept the users with the
static Mac addresses configured on Port 1. Please refer to “set arl”
command for static address setting. Or, you can set static address from the
“Dynamic Mac Address Table” in web interface. The table will show the
learned Mac addresses and you just need to select from the learned address
list and add it to static address table.
Note: Here is an Application Note for Mac address filter-in function.
It needs two conditions for Mac address filter-in function working.
1. The port security mode is set to “Accept”.
2. Static Mac address is assigned on Port (for example, Mac 1 on Port 1).
In this case, only Mac 1 can access network through Port 1. But there is also
a limitation for Mac 1 - it can access network through Port 1 only because it is
a static fixed address on Port 1.
2.22
set rmon command
This command is used to configure the RMON function of the switch.
Its syntax is …
>set rmon
Syntax: set rmon [1|0] <1:enabl e, 0:disable>
You can enable/disable RMON function here.
2.23 set snmp command
This command is used to configure SNMP function of the switch.
Its syntax is . . .
set snmp
[Argument List]
name........... Set system name
location....... Set system location
contact........ Set system contact name
getcommunity.. . Set GET community
setcommunity... Set SET community
trapcommunity.. Set TRAP community
trapip......... Set TRAP IP address
txtrap......... Send Trap for test
User can use the command to configure the following items for SNMP
operation.
a. Name of the switch with “name” sub-command.
b. Location of the switch with “location” sub-command.
c. Contact for the switch with “contact” sub-command.
d. GET Community string with “getcommunity” sub-command
e. SET Community string with “setcommunity” sub-command.
22
Page 27

f. TRAP Community string with “trapcommunity” sub-command.
g. TRAP IP Address with “tapip” sub-command.
h. Test TRAP Operation with “txtrp” sub-command
For example, “set snmp name ABC location AAA-1F contact Jack” command
will set these SNMP information to switch.
2.24
set sta command
This command is used to configure spanning tree protocol of the switch.
Its syntax is . . .
>set sta
[Command List]
?.............. Help commands
help........... Help commands
enable......... Enable Spanning Tree function
disable........ Disable Spanning Tree function
bridge......... Set Spanning Tree bridge configuration
port........ ... Set Spanning Tree port configurat i on
a. set sta ? and set sta help commands will show the sub-command list
b. set sta enable and set sta disable commands will enable/disable
spanning tree function of the switch.
c. set sta bridge command is used to configure for the switch.
Its syntax is . . .
>set sta bridge
[Argument List]
priority....... Set bridge priority.
hello.......... Set bridge hello time
age............ Set bridge maximum age
delay........ .. Set bridge forward delay time
priority (0~65535) : Bridge priority is for selecting the root device, root
port, and designated port. The device with the highest priority (lowest
value) becomes the STA root device. If all devices have the same
priority, the device with the lowest MAC address will then become the
root device.
hello (0~65535) : the period to send the spanning tree maintenance
packet if the switch is the root of the spanning tree. Default is 2 seconds.
age (6~40) : the spanning tree aging time if no spanning tree
maintenance packet is received. It will cause the spanning tree to recreate. Default is 20 seconds.
delay (4~30): the maximum waiting time before changing states (i.e.,
listening to learning to forwarding). This delay is required because every
device must receive information about topology changes before it starts
to forward frames. In addition, each port needs time to listen for
conflicting information that would make it return to a blocking state;
otherwise, temporary data loops might result.
d. set sta port command is used to configure for ports of the switch.
Its syntax is . . .
23
Page 28

>set sta port
Port number is mi ssing!
Synt ax: set sta port [ port#] [cost=xxxx] [priority= xxxx]
cost (1~65535) : It is used to determine the best path between devices if
looping happens. Lower values will be forwarded and should be
assigned to ports with fast connections. Higher values will be blocked
and should be assigned to ports with slow connections. The suggestion
values are 100(50~600) for 10M, 19(10~60) for 100M and 4(3~10) for
1000M connections.
priority (0~255) : If the path cost for all ports on a switch are the same,
the port with the highest priority (lowest value) will be forwarded when
looping happens. If more than one ports have the same highest priority,
the port with lowest port number will be forwarded.
2.25
set stormcontrol command
This switch supports broadcast and flooding storm control functions. With
this command, you can configure the storm control function of the switch.
Its syntax is …
>set stormcont rol
[Argument List]
rate........... Set Suppression rat e for Storm control.
bc............. Set Broadcas t Control for each Port.
fd........ ..... Set Flooding Control for eac h Port.
set stormcontrol rate : this subcommand is used to set the maximum storm
rate that is allowed for the control.
Its syntax is …
>set stormcont rol rat e
Syntax : set stormc ontrol rate [rate value]
Examples 1 : Set stormcontrol rate 10
Description: Set s uppression rate for Storm Control function as 640Kb.
Rate = No Limit, with N=0.
Rate = N*64 Kb, with N=1~28.
Rate = (N-27)*1Mb, with N=29~127.
set stormcontrol bc : this subcommand is for broadcast storm control.
set stormcontrol fd : this subcommand is for flooding storm control.
Their syntax are …
>set stormcont rol bc
Syntax : set stormc ontrol [bc|fd] [all|none|byport|port#] [ 1|0]
Examples 1 : Set stormcontrol bc all
Description: Set s torm control to suppress broadcast packet for all port.
Examples 2 : Set stormcontrol fd none
Description: Set s torm control not to suppress flooding packet for all port.
Examples 3 : Set stormcontrol bc byport
Description: Set storm control to suppress broadcast packet according to each port
setting.
Examples 4 : Set stormcontrol fd 1 1
Description: Set s torm control to suppress flooding packet for port 1.
24
Page 29

2.26 set trunk command
This switch supports three trunk groups (Trunk 1~3) maximum. They are
disabled and null trunk groups default. Users can use this command to
configure trunk function of the switch.
Its syntax is . . .
>set trunk
Syntax : Set trunk [enable|disabl e]
Description: Enable/Di sable trunk function.
Syntax : Set trunk [1|2|3] [1: enabl e|0:disable]
Examples : set trunk 1 1
Description: Enable trunk 1.
Syntax : Set trunk [+/-] [ port #] [trunk#]
Examples : Set trunk +1+5-7 1
Description: Add port 1,5 to trunk group 1 and
remove port 7 from trunk group 1
a. enable and disable sub-commands are used to enable/disable trunk
function of the switch.
b. set trunk [1|2|3] [1|0] is sub-command to enable/disable each trunk
connection.
c. set trunk [+/-] [port#] [trunk#] is sub-command to add/remove ports to/
from trunk groups. Only Port 1~8 is available for trunk operation.
3. show command
This command is used to show configurations of the switch. Here is the subcommand for showing different configuration.
>show
[Command List]
?.............. Help commands
help........ ... Help commands
1qvlan......... Show 802.1q VLAN configuration
age............ Show aging tim
arl............ Show ARL table
automode....... Show Auto mode setting
cfg............ Show system information
dot1x.......... Show 802.1x Protocol status
guest.......... Show name and password for Guest
gvrp........... Show GVRP Protocol setting
http........... Show HTTP Protocol setting
idle........... Show idle time for Console.
igmp........... Show IGMP configuration
loopback...... . Show Loopback Detection setting
mirror...... ... Show mirror function conf i guration
net............ Show network IP configuration
port........ ... Show switch port configuration
protect........ Show protected port setting
pvlan........ .. Show Port-based VLAN configuration
qos........ .... Show QoS configuration
ratecontrol.... Show Rate Control configuration
25
Page 30

rmon........... Show RMON Function configuration
security..... .. Show port security mode for s t atic MAC address
snmp........... Show snmp configuration
sta............ Show Spanning Tree setting
stormcontrol... Show Storm Control configurati on
trunk.......... Show Trunk function configuration
3.1 show ? and show help commands will show the sub-command list.
3.2 show 1qvlan command will show current 802.1Q VLAN status and
settings.
Its syntax is . . .
>show 1qvlan
Syntax: show 1qvlan [status|st at i c|table|port]
status : show 802.1q, Ingres s Filter and GVRP protocol status
static : show STATI C VLAN table content
table : show ALL VLAN table content
port : show the PVID and Priority f or tag of ports
For example,
>show 1qvlan status
802.1Q VLAN : Enable
Ingress Filter: Enable
VLAN Mode : SVL
>show 1qvlan static
=================== Static 802.1Q VLAN Table ====================
VLAN ID : 1(0x001) , VLAN Name: Def aul t VLAN
Tagged Member Port :
Untagged Member Port : 1 2 3 4 5 6 7 8 9 10 11 12 13 14
15 16 17 18 19 20 21 22 23 24 25 26
============================ Finish =============================
>show 1qvlan table
===================== All 802.1Q VLAN Table =====================
VLAN Type: STATIC
VLAN ID : 1(0x001) , VLAN Name: Def aul t VLAN
Tagged Member Port :
Untagged Member Port : 1 2 3 4 5 6 7 8 9 10 11 12 13 14
15 16 17 18 19 20 21 22 23 24 25 26
============================ Finish =============================
>show 1qvlan port
PORT PVID PRIORITY
=============================
1 1(0x001) 0
2 1(0x001) 0
3 1(0x001) 0
4 1(0x001) 0
5 1(0x001) 0
26
Page 31

6 1(0x001) 0
7 1(0x001) 0
8 1(0x001) 0
9 1(0x001) 0
10 1(0x001) 0
11 1(0x001) 0
12 1(0x001) 0
13 1(0x001) 0
14 1(0x001) 0
15 1(0x001) 0
…………………
=======================
Management Port : 1
=======================
Note
: The PVID of Management Port is for the management interface of the
switch. Only the users in the VLAN with VLAN ID equal to the PVID of
Management Port can manage the switch from network because they are in
the same VLAN.
3.3 show age command can show current aging time of switch.
For example,
>show age
Aging function: Enabled
Aging time : 300
3.4 show arl command can show static Mac address set in ARL table and
dynamic Mac address learned in ARL table.
Its syntax is …
>show arl
Syntax: show arl [static|dynamic].
static: show static Mac address set in ARL table
dynamic: show dynamic Mac address learned in ARL table
For example,
>show arl dynamic
[Dynamic Address Learni ng Tabl e]
Item Port Mac Address VID
==============================================
1) CPU 00-00-01-64-64-64 1(0x001)
2) 8 00-00-e2-82-8c-e6 1(0x001)
3) 4 00-20-14-95-0a-32 1(0x001)
==============================================
3.5 show automode command will show current auto mode setting for port
configuration. It could be Auto Negotiation and Auto Detect.
For Auto Negotiation mode, the switch will do auto-negotiation ON/OFF when
the auto mode of port is enabled/disabled. But the Auto-MDIX function will
also be disabled when the auto-negotiation function of port is OFF.
27
Page 32

For Auto Detect mode, the switch will always keep auto-negotiation function
ON but just modify its attribution if the auto mode of port is disabled. The
Auto-MDIX function will be always enabled in this mode.
For applications, you should select Auto Detect mode if the connected device
is auto-negotiation enabled. And you can select Auto Negotiation mode if
the connected device is auto-negotiation disabled.
For most applications, Auto Detect mode is OK. But for 100FX connection,
you should select Auto Negotiation mode and disable Auto. Set the port to
100/Full.
3.6 show cfg command will show Model Name, Mac ID of the switch and
Firmware version. For example,
>show cfg
[System Configuration]
Company Name :
Model Name : Intelligent Switch
MAC Address : 00:00:01:23:45:67
Firmware Version : 3.02.02 < Mar 13 2006 15:13:36 >
3.7 show dot1x command will show current 802.1x status and settings.
Its syntax is . . .
>show dot1x
Syntax: show dot1x [config|radius|port]
config : show 802.1x protocol setti ngs
radius : show settings for radi us server
port : show ALL ports status
For example,
>show dot1x config
[802.1x Protocol Configuration]
============================================
802.1x Protocol : Disabled
Re-authentication : Disabl ed
Re-authentication Timeout Period: 3600
Re-authentication Max Count : 2
Max Request Count : 2
Server Timeout Period : 30
Supplicant Timeout Peri od : 30
Quiet Timeout Period : 60
Tx Timeout Period : 30
============================================
>show dot1x radius
[Redius Server Configuration]
====================================================
Redius Server IP Address : 192.168.1.222
Redius Server Port Number: 1812
Shared Key : 12345678
====================================================
>show dot1x port
[802.1X Port Authentication Conf i guration]
=================================
28
Page 33

PORT Status Auth.Mode
=================================
1 Yes FA
2 Yes FA
3 Yes FA
4 Yes FA
5 Yes FA
6 Yes FA
7 Yes FA
8 Yes FA
9 Yes FA
10 Yes FA
11 Yes FA
12 Yes FA
13 Yes FA
14 Yes FA
15 Yes FA
………………………
=================================
The Auth. Mode could be Auto, FA(Forced Authenticated), FU(Forced
Unauthenticated) and No(No 802.1x function).
3.8 show guest will show current username and password for guest account.
For example,
>show guest
[Guest configuration]
Username: guest
Password:
3.9 show gvrp command will show current GVRP function status for 802.1Q
VLAN operation.
For example,
>show gvrp
GVRP Protocol : Disabl e
3.10 show http command will show http enable/disable state. If it is disabled,
the web management interface of the switch will be OFF.
For example,
>show http
[HTTP Protocol Setting]
HTTP Setting: Enabled
3.11 show idle command will show the idle time for console to logout
automatically. If no any keystroke in this time, the console and telnet
interface will logout automatically for security.
For example,
>show idle
Current idle time: 600(Second)
29
Page 34

3.12 show igmp command will show current IGMP snooping function
enable/disable status and the IP multicast groups that learned by the switch.
For example,
>show igmp
[IGMP Configuration]
IGMP Switch : Enabled
Total Groups : 3
========================================================
[Group 1] IP Address : 224.0.0.9
Member Port : 1
[Group 2] IP Address : 224.0.0.2
Member Port : 1
[Group 3] IP Address : 224.2.188.136
Member Port : 4,5
========================================================
3.13 show loopback command will show current loopback function setting.
(Loopback function can detect packet loopback problem happening at
connection port. If loopback is found, the connection port will be disabled.)
For example,
>show loopback
[Loopback Detection]: Disable
3.14 show mirror command will show mirror function configuration of the
switch. For example,
>show mirror
[Mirror Configuration]
Mirror Switch:Disabled
Capture port :1
Ingress DIV=3 Mode=SA MAC=00-00-01-11-22-33
Port List: 2
Egress DIV=1 Mode=ALL MAC=00-00-00-00-00-00
Port List:
This setting will mirror those packets that with source Mac address 00-00-0111-22-33 ingress to Port 2 to Port 1 for every three matched packets.
3.15 show net command will show current IP address configuration of the
switch. If DHCP is enabled, this command will show the IP configuration got
from DHCP server. For example,
>show net
[net] Network Configuration:
DHCP : DISABLE
IP Address: 192.168.1.5
Netmask : 255.255. 255. 0
Gateway : 192.168.1.120
3.16 show port command will show status and configuration of each
connection port.
For example,
>show port
[Port Configuration]
30
Page 35

Port Name Status Di sable Auto. Speed Duplex Flow Control
==============================================================
1 10/100M base-T DOWN NO ON 10 Half OFF
2 10/100M base-T DOWN NO ON 10 Half OFF
3 10/100M base-T DOWN NO ON 10 Half OFF
4 10/100M base-T UP NO ON 100 Full OFF
5 10/100M base-T DOWN NO ON 10 Half OFF
6 10/100M base-T DOWN NO ON 10 Half OFF
7 10/100M base-T DOWN NO ON 10 Half OFF
8 10/100M base-T UP NO ON 100 Full OFF
9 10/100M base-T DOWN NO ON 10 Half OFF
10 10/100M base-T DOWN NO ON 10 Half OFF
11 10/100M base-T DOWN NO ON 10 Half OFF
12 10/100M base-T DOWN NO ON 10 Half OFF
13 10/100M base-T DOWN NO ON 10 Half OFF
14 10/100M base-T DOWN NO ON 10 Half OFF
15 10/100M base-T DOWN NO ON 10 Half OFF
Press any key to conti nue ...
==============================================================
3.17 show protect command will show current protected port setting.
(Protected ports cannot communicate with each other.)
For example,
>show protect
[Protected Port Setting]
Protected Function: Disabled
===================================
Port No. Protected
===================================
1 Disabled
2 Disabled
3 Disabled
4 Disabled
5 Disabled
6 Disabled
7 Disabled
8 Disabled
9 Disabled
10 Disabled
11 Disabled
12 Disabled
13 Disabled
14 Disabled
15 Disabled
Press any key to conti nue ...
===================================
3.18 show pvlan command will show current port-based VLAN setting of the
switch.
For example,
>show pvlan
[Port-based VLAN Configurati on]
Port-based VLAN : Enabled
========================================================
31
Page 36

[ID] [Vlan Name] [Port List]
==== ============== ==================================
[ 1] 1 2 3 4 5 6 7 8 9 10 11 12 13
14 15 16 17 18 19 20 21 22 23 24 25 26
[ 2]
[ 3]
[ 4]
[ 5]
[ 6]
[ 7]
[ 8]
[ 9]
[10]
[11]
[12]
[13]
[14]
[15]
Press any key to conti nue ...
========================================================
3.19 show qos command will show QoS configuration of the switch. For
example,
[QoS Configuration]
Qos Function : Disabled
================================
802.1p Priority 7 ==> P3
802.1p Priority 6 ==> P3
802.1p Priority 5 ==> P2
802.1p Priority 4 ==> P2
802.1p Priority 3 ==> P1
802.1p Priority 2 ==> P1
802.1p Priority 1 ==> P0
802.1p Priority 0 ==> P0
==============================================================
Port Priority Port Priority Port Priority Port Priority
==============================================================
[ 1] Low [ 2] Low [ 3] Low [ 4] Low
[ 5] Low [ 6] Low [ 7] Low [ 8] Low
[ 9] Low [10] Low [11] Low [12] Low
[13] Low [14] Low [15] Low [16] Low
[17] Low [18] Low [19] Low [20] Low
[21] Low [22] Low [23] Low [24] Low
[25] Low [26] Low
==============================================================
Port 802.1p Port 802.1p Port 802. 1p Port 802.1p
==============================================================
[ 1] OFF [ 2] OFF [ 3] OFF [ 4] OFF
[ 5] OFF [ 6] OFF [ 7] OFF [ 8] OFF
[ 9] OFF [10] OFF [11] OFF [12] OFF
[13] OFF [14] OFF [15] OFF [16] OFF
[17] OFF [18] OFF [19] OFF [20] OFF
[21] OFF [22] OFF [23] OFF [24] OFF
[25] OFF [26] OFF
32
Page 37

==============================================================
The first part is the mapping of 802.1P priority values 0~7 to the four priority
queues of the switch.
The second part is the port-based priority setting.
The third part is the 802.1P priority function status for each port.
3.20 show ratecontrol command will show current rate control setting for
each port. For example,
>show ratecontrol
[Rate Control Configuration]
Packet Drop for Ingress Li mit: Disable
==========================================
Port Ingress Egress
==========================================
1 No Limit No Limit
2 No Limit No Limit
3 No Limit No Limit
4 No Limit No Limit
5 20Mb No Limit
6 No Limit No Limit
7 No Limit No Limit
8 No Limit No Limit
9 No Limit No Limit
10 No Limit No Limit
11 No Limit No Limit
12 No Limit No Limit
13 No Limit No Limit
14 No Limit 70Mb
15 No Limit No Limit
Press any key to conti nue ...
==========================================
3.21 show rmon command will show current RMON setting (enable/disable)
of the switch.
Its syntax is …
>show rmon
RMON Funciton: Disabled
3.22 show security command will show current Mac address security mode
for port.
Its syntax is . . .
>show security
[MAC Security Configuration]
==================================================================
Port Static MAC Number Security Control
==================================================================
1 0 No Security
2 0 No Security
3 0 No Security
4 0 No Security
5 0 No Security
6 0 No Security
33
Page 38

7 0 No Security
8 0 No Security
9 0 No Security
10 0 No Security
11 0 No Security
12 0 No Security
13 0 No Security
14 0 No Security
15 0 No Security
Press any key to conti nue ...
=========================================================
The “Security Control” could be No, Accept, Reject modes. “No” is for no
Mac address security. “Accept” is for only the static Mac address can access.
“Reject” is for only the static Mac address cannot access.
3.23 show snmp command will show SNMP configuration of the switch.
For example,
>show snmp
[SNMP Configuration]
System Name :
Location :
Contact name :
Get Community : public
Set Community : pri vat e
=========================================================
Trap IP Address Community
=========================================================
1 0.0.0.0 public
2 0.0.0.0 public
3 0.0.0.0 public
4 0.0.0.0 public
5 0.0.0.0 public
=========================================================
3.24 show sta command will show spanning tree configuration of the switch.
For example,
>show sta
[Spanning Tree Configuration]
Spanning Tree Function: Disabled
Bridge Priority : 32768
Bridge Hello Time : 2
Bridge Max Age : 20
Bridge Forward Delay : 15
================================================================
Port Priority Path Cost State Designated Root
================================================================
1 128 19 None 00:00:00:00:00:00 [0]
2 128 19 None 00:00:00:00:00:00 [0]
3 128 19 None 00:00:00:00:00:00 [0]
4 128 19 None 00:00:00:00:00:00 [0]
5 128 19 None 00:00:00:00:00:00 [0]
6 128 19 None 00:00:00:00:00:00 [0]
7 128 19 None 00:00:00:00:00:00 [0]
34
Page 39

8 128 19 None 00:00:00:00:00:00 [0]
9 128 19 None 00:00:00:00:00:00 [0]
10 128 19 None 00:00:00:00:00:00 [0]
Press any key to conti nue ...
================================================================
It shows the Bridge and Port spanning tree configuration.
3.25 show stormcontrol command will show current packet storm control
settings. This switch supports broadcast and flooding storm control functions.
With this command, you can find the maximum storm rate setting and the
port list doing the storm control.
For example,
>show stormcontrol
[Storm Control Configuration]
=============================
Suppression Rate : No Lim i t
Broadcast Control: By Port
Flooding Control : By Port
Port Broadcast Flooding
============================================
1 - 2 - 3 - 4 - 5 - 6 - 7 - 8 - 9 - 10 - 11 - 12 - 13 - 14 - 15 - Press any key to conti nue ...
============================================
3.26 show trunk command will show trunk configuration of the switch. For
example,
>show trunk
[Trunk Group Setting]
Trunk Function : Disabled
Trunk 1(in port 1~24): Disabled
Trunk 2(in port 1~24): Disabled
Trunk 3(port 25,26) : Disabled
[TRUNK] [Port List]
======= =======================================
[1]
[2]
======= =======================================
35
Page 40

Note: Trunk 3 is the trunk for gigabit ports. For 8*FX+2G model, they are
Port 9 and 10 for Trunk 3.
4. default command
This command will restore all the settings of switch to factory default.
>default
All current setting will be lost after restoring default!
Are you sure to restore default setting now?(Y/N)
5. del command
The “del” command can delete static entries in ARL table, delete a VLAN
group, and delete a trunk connection.
Enter “del” at the prompt, the command syntax will be shown.
>del
[Command List]
?.............. Help commands
help........ ... Help commands
1qvlan......... Delete a 802.1q VLAN group
arl........ .... Delete a MAC address from ARL table
pvlan........ .. Delete a Port-based VLAN group
trunk.......... Destroy a trunk connection
1qvlan: this sub-command can delete an 802.1Q VLAN.
Its syntax is …
>del 1qvlan
Syntax: del 1qvlan [Vid]
For example, “del 1qvlan 5” will delete the 802.1Q VLAN with VLAN ID 5.
arl: this sub-command can delete a static Mac address in ARL table.
Its syntax is …
>del arl
Del A RL [xx-xx-xx-xx-xx-xx] [ port#]
For example, “del arl 00-11-22-33-44-55 3” will delete the static Mac ID “00-1122-33-44-55” for Port 3 from ARL table.
pvlan: this sub-command can clear a port-based VLAN.
Its syntax is …
>del pvlan
Syntax: del pvlan [vlan#]
Valid vlan#: <1~26>
For example, “del pvlan 5” will clear the port-based VLAN with VLAN ID 5.
trunk: this sub-command can clear a trunk connection.
Its syntax is …
>del trunk
Syntax: Del TRUNK [trunk#]
For example, “del trunk 2” will clear the Trunk 2 connection
6. find command
The “find” command can find a Mac address in the ARL table.
Enter “find” at the prompt, the command syntax will be shown.
>find
36
Page 41

[Command List]
?.............. Help commands
help........ ... Help commands
arl........ .... Search a specified MAC address in ARL table
The syntax is as follow.
>find arl
Find ARL [xx- xx-xx-xx-xx-xx]
If the Mac address is in ARL table, it will be shown as follow.
>find arl 00-00-01-11-22-33
This MAC [00-c0-f6-11-22-33] is DYNAMIC in port [2]!
If the Mac address is not in ARL table, it will be shown as follow.
>find arl 00-00-01-77-88-99
This MAC is not existed!
Note
: “Dynamic” means the Mac address is dynamic learned and could be
aged out by the switch. “Static” means the Mac address is fixed in ARL table.
7. whoami command
This command can show current login user name. It could be username for
administrator or guest.
For example,
>whoami
Current USER: admin
8. reset command
This command can be used to reset switch. Enter “reset” at the prompt, you
will be asked to confirm the reset operation.
>reset
Are you sure to reset switch now?(Y/N)
9. ping command
User can use this command to ping another network device to verify the
network connection and activity.
Enter “ping” at the prompt, the command syntax will be shown.
>ping
Syntax: ping [-n count] [-l length] [-t] [-w timeout] ip
-n count : Number of echo reques ts to send.
-l length : Send buffer size, and l ength is between 64~8148
-t : Ping the specifi ed host until stopped by <ESC> key.
-w : Timeout in milliseconds to wait for each reply.
ip : IP address (xxx.xxx.xxx.xxx)
For example, “ping 192.168.1.80”. “Ctrl-C” can be used to break continuous
ping operation.
10. backup command
37
Page 42

This switch supports TFTP protocol for firmware and configuration update and
backup. You should select backup firmware or configuration first. And provide
the IP address of the TFTP server and the backup file name for the backup
operation.
Enter “backup” at the prompt, the command syntax will be shown.
>backup
Syntax: backup [firmware | config] ip filename
For example, “backup config 192.168.1.80 abcd” will backup the configuration
to TFTP server 192.168.1.80 and its file name is “abcd”.
11. upgrade command
This switch supports firmware or configuration upgrade with TFTP protocol.
This command is used to upgrade firmware or configuration to the switch.
Its syntax is . . .
>upgrade
Syntax: upgrade [firmware | config] ip filename
ip is the IP address of TFTP server.
filename is the upgrade file name in the TFTP server.
For example, “upgrade config 192.168.1.80 abcd” command will load file
“abcd” from TFTP server 192.168.1.80 as its configuration setting.
12. exit command
This is a logout command – the same as Logout command.
13. logout command
This is a logout command – the same as Exit command.
38
Page 43

6.3 Management with Http Connection
You can manage the switch with Http Web Browser connection. Before http
connection, IP address configuration of the switch should be done first.
Please follow the instruction in Section 6.2 to complete the console connection
and use “show net” command to check IP address of the switch first. If users
want to change the IP address of the switch, use “set net ip xxx.xxx.xxx.xxx
netmask xxx.xxx.xxx.xxx gateway xxx.xxx.xxx.xxx” command to modify the
IP address of the switch. The default IP configuration is 192.168.1.5 and mask
255.255.255.0.
After IP address configuration done and the switch is connected to network, you
can start Http connection by entering IP address of the switch to the web address
line in Web Browser. A login screen will be prompted for user name and
password. The default user name and password is "admin" / ”123456”. Then
the management homepage will appear.
Left part of the homepage is a function list. You can select one of them for
status monitoring or switch configuration.
Upper part of the homepage is the link status of the switch. Three different
colors are used to show different status of ports – Link Up, Link Down and Port
Disable.
Middle part of homepage is the main operation area for each function.
39
Page 44

1. System Configuration
40
Page 45

“System Configuration” is the homepage of the switch.
You can find firmware version and Mac address of the switch in this page. And
you can configure the following items in this page.
a. ARL Aging Time: You can enable/disable the aging operation of the switch
and modify the aging time here. (Default is 300 seconds.)
b. DHCP / IP Address / Network Mask / Gateway: You can set IP address
configuration of the switch he re . (By DHCP or static settings)
c. Administrator Configuration: This is for network administrator to change
his/her username and password. (Default is admin/123456.)
d. Guest Configuration: This is for you to change the username and password
for Guest account. (Default is guest/123456.) The Guest account can see
the settings of switch only. He/she cannot modify anything.
If any modification, click [Apply] to activate the new setting.
41
Page 46

2. Port Configuration
You can configure the operation of ports and find their status here.
1. Auto Mode
You can select the auto function for port forced setting here. (Port forced setting
means forcing it to some special setting, e.g. 10M/Half, instead of fully autonegotiation.)
For Auto Negotiation mode, the switch will do auto-negotiation ON/OFF when the
auto mode of port is enabled/disabled. But the Auto-MDIX function will also be
disabled when the auto-negotiation function of port is OFF.
42
Page 47

For Auto Detect mode, the switch will always keep auto-negotiation function ON
but just modify its attribution if the auto mode of port is disabled. The AutoMDIX function will be always enabled in this mode.
For applications, you should select Auto Detect mode if the connected device is
auto-negotiation enabled. And you can select Auto Negotiation mode if the
connected device is auto-negotiation disabled.
For most applications, Auto Detect mode is OK. But for 100FX connection, you
should select Auto Negotiation mode and disable Auto. Set the port to 100/Full.
2. Loopback Detection
This switch can detect loopback condition happening on ports if this function is
enabled. If loopback condition is found, the loopback port will be disabled.
You can click [Release] button to release the disabled port when the loopback
condition is removed.
3. Port Setting
You can set the port configuration here. Follow the steps to do it.
1). Select the port in “Port Number” first.
2). Modify the settings.
3). Click [Apply].
About these items …
Name: It is the name of the port. That will help users to identify the connection.
Admin: You can enable/disable a port here.
Auto: You can enable/disable the auto mode of ports here. If auto is disabled,
the Speed and Duplex setting will become active. The auto mode could be autonegotiation or auto-detect. You can select in “Auto Mode”.
Speed: You can select the operation speed here when Auto. is disabled.
Duplex: You can select the operation duplex mode when Auto. is disabled.
Flow Control: You can enable/disable flow control function here to prevent
packet lost.
4. Current Configuration
You can find current port status here.
About these items …
Name: It is the name of ports.
Link: It shows the link status of ports.
Admin: It shows the enable/disable status of ports.
Auto: It shows the auto-negotiation enable/disable status of ports.
Speed: It shows current operation speed if the ports are link up.
Duplex: It shows current operation duplex mode if the ports are link up.
Flow Control: It shows current flow control status.
43
Page 48

3. Spanning Tree
In the page, users can enable/disable spanning tree function and configure the
bridge parameters. Please refer to 2.24 of Section 6.2 for the details of these
parameters. Press [Apply] after any modification.
Configuring port parameters for spanning tree, press [Configuration STA Port]
and the configuration page will appear.
Users can select a port number and check its spanning tree status. Users can
also modify these parameters. Please refer to 2.24 of Section 6.2 for the details
of these parameters. Press [Apply] after any modification.
44
Page 49

4. Dynamic Mac Address Table
This web page will show the Mac address table content of the switch for
connection ports. Select the port first and the Mac address learned by the
switch on the port will be shown. Up to 128 Mac addresses will be shown.
You can select the Mac addresses that you want to assign them as static Mac
addresses for the port. Click [Add to Static Address Table] after the selection.
Then you can click “Static Address Table” at left side of the web page to check
the static address assignment.
For the details about Static Address, please refer to Section for “Static Address
Table”.
Note
: Because of aging time operation of switch, wrong Mac addresses could be
found in the Mac Address Table sometimes. These wrong Mac addresses are
the machines that had ever accessed to the port and the switch learns them into
the learning table. The switch will clear them when the aging time is up. Users
can shorten the aging time and refresh the web page when they want to get the
correct Mac address table content. Then, recover the aging time when the
correct Mac address table content is got.
45
Page 50

5. Static Mac Address Table
This switch supports static Mac address assignment. You can assign static Mac
addresses by two methods.
a. Select from the Mac address list in “Dynamic Mac Address Table” page.
b. Assign manual. Enter a Mac address and select the port, then add this entry
to the static Mac address table.
The switch will not age out these static Mac addresses. But there is a limitation
for these static Mac addresses - they are allowed to work on the assigned port
only because they are static fixed on the assignment port.
If you want to delete an entry in the static Mac address table, click [Delete] button
of the entry and the static Mac address will be removed from the table.
About Port Security function . . .
You can configure “Mac Security Configuration” function for port access security
with Mac address. There are “Accept” and “Reject” modes for it.
“Accept” mode: Only the static address can access network via the port.
“Reject” mode: Only the static address cannot access network via the port.
46
Page 51

6. Mac Security Configuration
This function is used to set the security modes for static Mac address on the port.
There could be three options for this function.
1. No Security: No any Mac address access limitation for the port, i.e. every
Mac address could access network through the port.
2. Accept function: The port can accept the static Mac address only, i.e. only
the user with the static Mac address can access network through the port.
3. Reject function: Only the static address will be rejected by the port, i.e. other
Mac address except the static Mac address can access network through the
port.
47
Page 52

7. Port-based VLAN
This switch supports both 802.1Q VLAN and Port-based VLAN function. This
web page is for you to configure port-based VLAN.
There are three parts in the page.
1. VLAN Mode Selecting:
With “VLAN Function”, you can change the VLAN mode as 802.1Q VLAN,
Port-based VLAN and Disabled.
2. VLAN Creating/Modifying
You can create/modify a Port-based VLAN with the following steps.
a. Select the VLAN ID number.
b. Enter the Name for the VLAN.
c. Select the ports for the VLAN. (You can click [Select All] to select all
ports or click [Remove All] to remove all ports from the VLAN.)
48
Page 53

d. Click [Apply] to activate it.
3. Current Port-based VLAN Table
You can see current Port-based VLAN settings in the table.
49
Page 54

8. 802.1Q VLAN Configuration
This function is used to configure 802.1Q VLAN function.
VLAN Function: This function is used to select VLAN mode – 802.1Q VLAN,
Port-based VLAN and Disabled.
GVRP Protocol: The GVRP protocol can learn remote 802.1Q VLAN on other
devices and add to dynamic 802.1Q VLAN table. You can enable/disable the
operation of this protocol.
50
Page 55

Ingress Filter: The ingress-filter function is for doing VLAN filtering at ingress
port. If the packet and its ingress port are in the same VLAN, it will go to
forwarding process. Otherwise, it will be discarded.
VLAN Mode: This function can select different VLAN modes of 802.1Q VLAN
operation. There are three modes for 802.1Q VLAN function – SVL (Shared
VLAN), IVL (Individual VLAN) and SVL/IVL.
SVL mode – the switch will do packet forwarding according to its Mac address
only.
IVL mode – the switch will do packet forwarding according to its Mac address and
its VLAN ID.
SVL/IVL mode – its operation is the same as IVL mode, but for untagged port is
used as the uplink port in MDU/MTU application.
For most VLAN applications, SVL mode is OK.
Management Port VID: This is the VLAN ID for the switch management
interface. Only users in the same VLAN can manage the switch by network.
That could be applied for security of switch management.
Port VID: This setting is for untagged packet translated to tagged packet. The
Port VID and Priority Setting will be used for tag adding in the translation. When
untagged packet is forwarded to tagged port, tag will be added and the Port VID
and Priority Setting will be applied to the tag.
Select the Port Number and set its “Port VID” and “Priority for Tag”. Then click
[Apply] to activate it.
51
Page 56

9. Static 802.1Q VLAN
Create an 802.1Q VLAN
1. Input the VLAN ID and VLAN Name in “Create New Static VLAN”. Click
[Create] to create the VLAN. The valid VLAN ID is 1 ~ 4094.
2. Select the VLAN in “Show Static VLAN Table”. The new VLAN is empty by
default. You can select the ports for the VLAN and tagged/untagged for
them. After that, click [Apply] to complete the VLAN configuration.
Modify an 802.1Q VLAN
1. Select the VLAN in “Show Static VLAN Table”.
2. Modify its setting and click [Apply] to activate the new setting.
Delete an 802.1Q VLAN
1. Select the VLAN in “Show Static VLAN Table”.
2. Click [Delete] to delete the 802.1Q VLAN.
About Tagged/Untagged
The tagged port will always send out packets with tag. If untagged packet is
received, tag will be added with the PVID setting of ingress port before forwarded
to tagged port. The 802.1Q VLAN information will be carried in the tag.
The untagged port will always send out packets without tag. If tagged packet is
received, tag will be removed from the packet before forwarded to untagged port.
Note
: Most network adapters or devices are untagged devices. If they are
connected to tagged port, they will fail to access network because of the tag in
packet.
:
:
:
52
Page 57

About Switch Management from Users
Only the users in the same VLAN as Management Port PVID (set in “802.1Q
VLAN Configuration” page) can manage the switch via Web/Telnet/SNMP. The
users in other VLAN cannot manage the switch from network.
53
Page 58

10. 802.1Q VLAN Table
This table will show the activity of 802.1Q VLAN. Both static and dynamic
802.1Q VLAN will be shown in the table.
Follow the steps to show the 802.1Q VLAN.
1. Select a VLAN in “Show VLAN Table”.
2. The 802.1Q VLAN activity status will be shown for the selected VLAN.
If GVRP protocol is enabled, this table will also show the learned remote 802.1Q
VLAN.
54
Page 59

11. 802.1x Configuration
The 802.1x function can limit the port access for authentication users only. It
needs a RADIUS server for the authentication process and the switch acts as an
authenticator.
The function here is for 802.1x function configuration.
1. 802.1x Authentication Status: [Enable/Disable/Transparent]
Enable: enable 802.1x function in authentication mode
Disable: disable 802.1x function
Transparent: only forwarding 802.1x packets
2. Re-authentication (enable/disable), Timeout Period and Max Count:
The re-authentication function will re-authenticate users after the timeout
period. The Max Count is the maximum re-try count between the switch and
users before authentication fail.
3. Max Request Count and Server Timeout Period:
The Server Timeout Period is the timeout period for the request between the
switch and RADIUS server.
The Max Request Count is the maximum re-try count between the switch
and RADIUS server before authentication fail.
4. Supplicant Timeout Period:
55
Page 60

This is the timeout value between the switch and users (called “supplicant” in
802.1x) after first identification. The valid value is 0~65535.
5. Quiet Timeout Period:
This is the quiet time value between the switch and the user before next
authentication process when authentication fails.
6. Tx Timeout Period:
This is the timeout value for the identification request from the switch to
users. The request will be re-tried until the Re-authentication Max Count is
met. After that, authentication fail message will be sent. The valid value is
0~65535.
7. Radius Server Configuration:
This function is for configuration between switch and RADIUS server.
56
Page 61

The Port Authentication Configuration is used to select the authentication
mode for each port of the switch.
1. Auto: This is the normal 802.1x operation mode. The authentication
status (authenticated or unauthenticated) depends on the authentication
result of port.
2. Force-Authorized: This mode will force the port always being
authentication successful in 802.1x process and the real authentication
result will be ignored.
3. Force-Unauthorized: This mode will force the port always being
authentication fail in 802.1x process and the real authentication result
will be ignored.
4. None: This mode will disable 802.1x operation on this port.
57
Page 62

12. Protected Port Setting
The Protected Port function can isolate the traffic between these protected ports.
For example, Port 1,2,3 are marked as protected. So the traffic between Port
1,2,3 will be blocked, even they are in the same VLAN. But they still can
communicate with other ports in the same VLAN. This function is for security
application of switch.
Follow the steps to enable this function and complete the setting.
1. Select “Enable” and click [Apply] in “Protected Function”.
2. Select the ports that will be isolated from each other and click [Apply]. (You
can click [Select All] to select all ports and click [Remove All] to remove all
the selections.)
58
Page 63

13. Trunk
This switch supports three trunk connections and they are null by default. If
users want to use trunk function, follow the steps to configure it.
1. Select Enable in “Trunk Function” and click [Apply] to enable the function.
2. If you will create the trunk connection by 10/100M ports, you can enable
Trunk 1 or Trunk 2.
If you will create the trunk connection by gigabit ports, you can enable Trunk
3 and the gigabit ports will be in a trunk.
3. If Trunk 1 or Trunk 2 is selected, you can select the ports for them. And click
[Apply] to activate it.
If you want to disable trunk function, select “Disable” and click [Apply] button.
The switch will clear the Trunk configuration.
About redundant application . . .
The trunk connection supports redundant function. If any trunk cable is broken,
the traffic going through that cable will be transferred to another trunk cable in the
trunk connection automatically.
59
Page 64

14. Mirror
Follow the steps to configure Mirror function.
1. Select Enable in “Mirroring” and click [Apply] to enable the function.
2. Select the capture port. (The monitored traffic will be forwarded to this port.)
3. Select the monitored port from Ingress or Egress table – depending on the
traffic direction.
4. Select the capture mode – All packets or for some special DA/SA address.
If DA/SA is selected, enter the special Mac address in “xx-xx-xx-xx-xx-xx”
format.
5. Enter the capture frequency.
6. Click [Apply] button.
If you want to disable Mirror function, select Disable and click [Apply].
60
Page 65

15. QoS
This switch supports four priority queues on each port for QoS operation.
Follow the steps to configure QoS function.
1. Select Enable in “QoS Function” and click [Apply] to enable the function.
2. If port-based priority is used, select ports for High and Low priorities. The
packets from High priority port will be forwarded to highest priority queue on
egress port. And the packets from Low priority port will be forwarded to
lowest priority queue on egress port.
3. For 802.1P tagged packet, its priority value is 0 ~ 7. Select the ports that
enable the 802.1P priority function, i.e. it will forward packet with the priority
information in tag. Then you can configure the 802.1P priority mapping to
priority queue of port.
4. Click [Apply] to activate the setting after configuration.
If you want to disable QoS operation, select Disable and click [Apply] button.
61
Page 66

16.
Rate Control
The rate control function can limit the maximum traffic rate for each physical port.
The traffic could be ingress traffic or egress traffic.
62
Page 67

The rate control range is 64Kbps ~ 1000Mbps. Here is the rule for the setting.
Maximum Rate Rate Control Number (N) Rule
No Limit 0 0 means no limit.
64K,128K,192K,…,1792Kbps 1 ~ 28 Rate = N x 64Kbps
2M,3M,4M, …,100Mbps 29 ~ 127 Rate = (N-27) x 1Mbps
104M,112M,…,1000Mbps 128 ~ 240 Rate = (N-115) x 8Mbps
For example, if you want to limit the download traffic rate of Port 2 to 512Kbps,
you should set the Egress Rate Control of Port 2 to 8 (8=512/64 and egress is for
download operation and ingress is for upload operation).
The Packet Drop for Ingress Limit is for packet dropping operation when
ingress traffic rate exceeds the Ingress Rate Control. If it is enabled, the extra
packets will be dropped to limit the ingress traffic rate. If it is disabled, flow
control function will be used to pause the ingress traffic.
63
Page 68

17. Storm Control
The storm control function can limit the maximum traffic rate for packet storm.
There are two traffic storms could be limited – broadcast storm and flooding
64
Page 69

packet storm. You can enable the storm control by port. Follow the steps to do
the storm control settings.
1. Set the suppression rate.
2. Select which storm will be controlled and which ports will be applied – all of
the ports, none of the ports or selected by port in the table.
3. If “By Port” is selected, select the ports that will apply the storm control.
Note
:
Broadcast – it is ”one to all” traffic. Every port will receive the packets.
Flooding - it is “one to all” traffic caused by Mac address not found in the switch.
Every port will receive the packets.
65
Page 70

18. SNMP
In this page, you can enable/disable RMON function; configure GET/SET/Trap
Community Name and the IP address for trap operation. Then you can manage
this switch with these settings from SNMP management program.
66
Page 71

19. IGMP
The IGMP function is for IP multicast operation in network. This switch can do
IGMP Snooping function to get the IP multicast group information from IGMP
active device. The learned IP multicast member group will be shown in the
IGMP web page. This switch will forward IP multicast traffic to these member
ports that it learned in the group information.
The IGMP snooping function can be enabled/disabled in this page.
67
Page 72

20. Statistics
Users can find the traffic statistics here. Select port number to get the counters
for different port.
Users can modify the refresh interval to get different counter updating period.
Click “Refresh” button can update the counter immediately.
Users can reset counters to zero with the “Reset Statistics” button.
68
Page 73

21. Tools
Four functions are supported as the system maintenance tools.
a. System Reset
This function will reset the switch.
b. System Restore Factory Default Settings
This function will restore the switch configuration to factory default setting.
c. System Backup/Restore
[Backup Setting] will backup the configuration of the switch to the web
management PC.
[Restore Setting] will get the configuration backup file from the web management
PC and restore it to the switch.
d. System Upgrade
This function will upgrade the system operation software from the web
management PC.
69
Page 74

6.4 About Telnet Interface
If you want to use Telnet to management the switch from remote site, you have
to set the IP/Mask/Gateway address to the switch first from console. Then use
"telnet <IP>" command in DOS. Its operation interface is the same as console
interface.
6.5 About SNMP Interface
If you want to use NMS to management the switch from remote site, you have to
set the IP/Mask/Gateway address to the switch and configure the SNMP setting
of the switch from console first. Then you can use SNMP management program
to manage this switch.
This switch supports SNMP Version 1 agent function and MIB II(Interface),
Bridge MIB, Etherlike MIB and Private MIB. The default GET community name
is “public” and SET community name is “private”.
This switch supports up to five trap receivers with different trap community
names.
70
Page 75

7. Software Update and Backup
This switch supports software/configuration backup and update/restore functions.
It could be done in three ways.
1. From console when booting: by Xmodem protocol and doing by terminal
program. This function can be used for run-time code and boot code
updating. (Boot code works only at boot time - before the main program starts.)
Press Ctrl-C when the switch is booting, the following message will be shown.
Boot Menu
===========================
0: Start the Run-tim e code
1: Upgrade Run-time code
2: Upgrade Boot Code
=> Select:
a. Start the Run-time code : This option will continue the booting process.
b. Upgrade Run-time code: This option will try to update run-time code (main
code) from terminal program with Xmodem protocol. If this option is
selected, the following message will be shown.
“Waiting to receive file by Xmodem ....”
Then you can select “Send File” function of terminal program and select
Xmodem protocol and the update file, then start the file upgrade.
c. Upgrade Boot Code: This option will try to update boot code from terminal
program with Xmodem protocol. You can select “Send File” function of
terminal program and select Xmodem protocol and the update file, then start
the file upgrade.
2. From console/Telnet when running: Doing by TFTP protocol and it will need
a TFTP server in network. Please refer to the description of “Upgrade”
function in console operation in Section 6.2.
3. From web browser: Doing by http protocol and by web browser. Please refer
to the description of “Tools” function in Section 6.3.
71
Page 76

A. Product Specifications
[ 24+2G fully-modularized model ]
Access Method Ethernet, CSMA/CD
Standards Conformance IEEE 802.3 10BASE-T, IEEE 802.3u 100BASE
IEEE 802.3z, IEEE 802.3ab (1000Base)
Communication Rate 10/100/1000Mbps,
Full / Half duplex (auto-negotiation)
Indicator Panel LEDs - each unit : Power / each port : Link/Act,
Full/Col
Number of Ports 3* 8-port modules, 2* gigabit modules ports
Dimensions 440W x 254D x 44H mm
Certification CE Mark, FCC Class A
Input Power Full range: 100 to 240V, 50 to 60 Hz
Temperature Standard Operating: 0 to 50
Humidity 10% to 90% (Non-condensing)
Bridging Function Filtering, forwarding and learning
Switching Method Store-and-forward
Address Table 8K entries
Filtering/Forwarding Rate Line speed
Maximum Packet Size 1536 Bytes (tagged packet)
Flow Control 802.3x for full duplex, backpressure for half duplex
VLAN 802.1Q VLAN, Port-based VLAN
QoS 4 priority queues per ports, for port-based/802.1P
tagged-based priority operation
Spanning Tree Support IEEE 802.1D protocol
Trunking 3 groups max.
Mirror Port 1 capture port for Ingress/Egress traffic, DA/SA
filtering function is supported
SNMP Ver. 1, Supports MIB II(Interface), Bridge MIB,
Etherlike MIB, Private MIB
Static Mac ID Access Limit Static Mac address access limit on port
802.1x Yes, support Authentication and Transparent modes
Protected Port Yes
Rate Control Yes, from 64Kbps to 1000Mbps for both ingress and
egress traffic
IGMP Yes, IGMP snooping function
Out-band Management Console
In-band Management Telnet, http, SNMP
Software Update/Backup by TFTP protocol, Xmodem, for firmware /
configuration
o
C
72
Page 77

B. Compliances
EMI Certification
FCC Class A Certification (USA)
Warning: This equipment generates, uses, and can radiate radio frequency
energy and, if not installed and used in accordance with the instruction manual,
may cause interference to radio communications. It has been tested and found
to comply with the limits for a Class A digital device pursuant to Subpart B of Part
15 of FCC Rules, which are designed to provide reasonable protection against
such interference when operated in a commercial environment. Operation of this
equipment in a residential area is likely to cause interference, in which case the
user, at his own expense, will be required to take whatever measures are
required to correct the interference.
CE Mark Declaration of Conformance for EMI and Safety
This is to certify that this product complies with ISO/IEC Guide 22 and EN45014.
It conforms to the following specifications:
EMC: EN55022(1988)/CISPR-22(1985) class A
EN60555-2(1995) class A
EN60555-3
IEC1000-4-2(1995) 4kV CD, 8kV AD
IEC1000-4-3(1995) 3V/m
IEC1000-4-4(1995) 1kV - (power line), 0.5kV - (signal line)
73
 Loading...