

Page 1
~OO[1JJ~
"
Instruction for use I Warranty I KRUPSGuarantee of Performance
~
ProCafe Ti"me
KRUPS
; ;..-
Model # 212
>,,,",,
Page 2
.
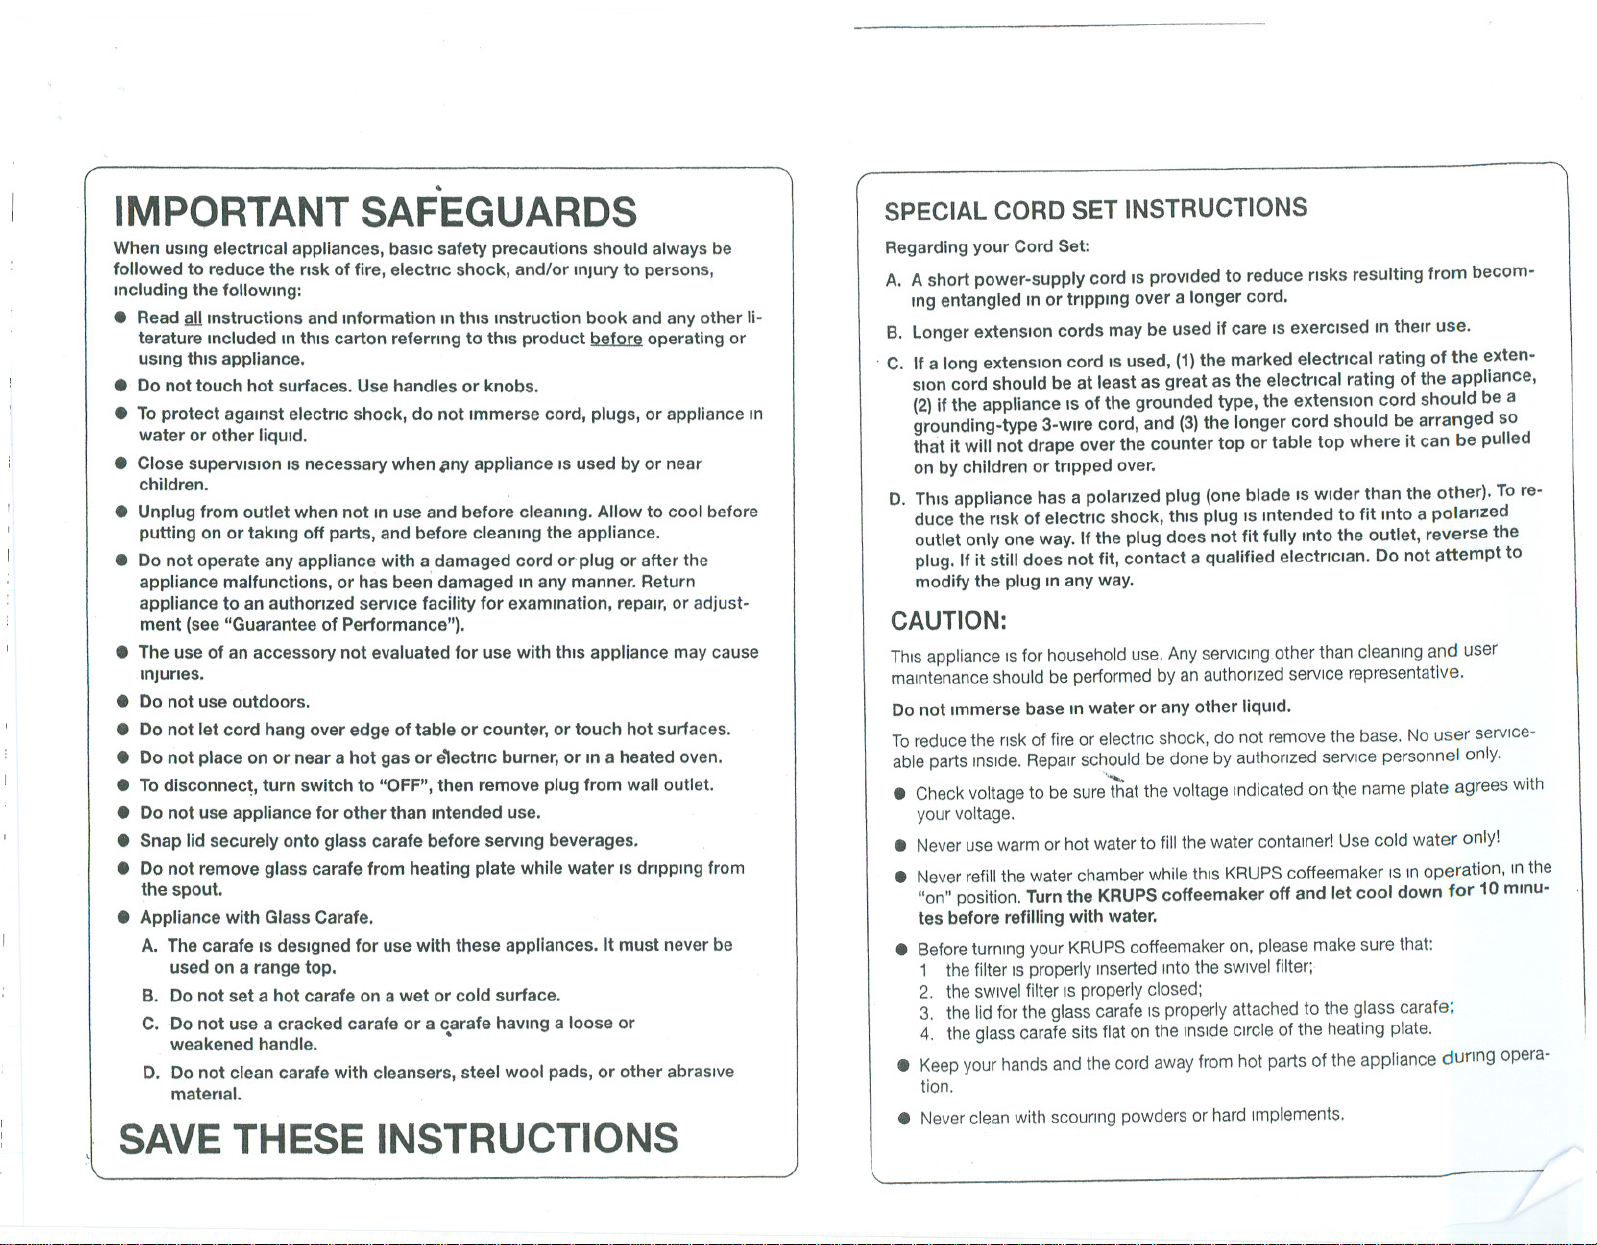
IMPORTANT SAFEGUARDS
When uSingelectrical appliances, basIc safety precautions should always be
followed to reduce the risk of fire, electric shock, and/or injury to persons,
Including thefollowing:
. Read a.LIlnstructions and Information In this Instruction book and any other li-
terature Included In this carton referring to this product
uSingthis appliance.
. Do not touch hot surfaces. Use handles or knobs.
~ operating or
. Toprotectagainstelectnc shock, do not Immerse cord, plugs, or appliance In
water or other liqUid.
. Close supervIsion ISnecessarywhen lIny appliance ISused by or near
children.
. Unplug from outlet when not In use and before cleaning. Allow to cool before
putting on or taking off parts, and before cleaning the appliance.
. Do not operate any appliance with a damaged cord or-plug or after the
appliance malfunctions, or has been damaged In anymanner. Return
appliance to an authonzed service facility for examInation, repair, or adjust-
ment (see "Guarantee of Performance").
. The use of an accessory not evaluated for use with this appliance may cause
.inJuries.
. Do not use outdoors.
. Donotletcordhangoveredge of table or counter, or touch hot surfaces.
. Do not place on or near a hot gas or e~ectrlcburner, or In a heated oven.
. Todisconnec~,turn switch to "OFF", then remove plug from wall outlet.
. Do not use appliance for other than Intended use.
. Snap lid securely onto glass carafe before serving beverages.
. DonotremoveglasscarafefromheatingplatewhilewaterISdnpplng from
the spout.
. Appliance with Glass Carafe.
A. The carafe ISdesigned for use with these appliances. It must never be
used on a range top.
B. Do not set a hot carafe on a wet or cold surface.
C. Do not use a cracked carafe or a carafe having a loose or
weakened handle. .
D. Donot clean carafe with cleansers, steel wool pads, or other abrasive
materIal.
SAVE THESE INSTRUCTIONS
SPECIAL CORD SET INSTRUCTIONS
Regarding your Cord Set:
A. A short power-supply cord ISprovided to reduce nsks resulting from becom-
Ing entangled In or tripping over a longer cord.
B. longer extension cords may be used If care IS exercised In their use.
. C. If a long extension cord IS used, (1)the marked electrical rating of the exten-
sion cord should be at least as great as the electrical rating of the appliance,
(2) if the appliance ISof the grounded type, the extension cord should be a
grounding-type 3-wlre cord, and (3) the longer cord should be arranged so
that It will not drape over the counter top or table top where it can be pulled
on by children or tripped over.
D. This appliance has a polanzed plug (one blade IS wider than the other). To re-
duce the risk of electnc shock, this plug ISIntended to fit Into a polarized
outlet only one way. If the plug does not fit fully Into the outlet, reverse the
plug. If it still does not fit, contact a qualified electnclan. Do not attempt to
modify the plug In any way.
CAUTION:
This appliance ISfor household use. Any servicing. other than cleaning and user
maintenance should be performed by an authorized service representative.
Do not Immerse base In water or any other liquid.
To reduce the risk of fire or electnc shock, do not remove the base. No user service-
able parts Inside. Repair schould be done by authonzed service personnel only.
""
. Check voltage to be sure that the voltage Indicated on t/:1ename plate agrees with
your voltage.
. Never use warm or hot water to fill the water contamer! Use cold water only!
. Never refill the water chamber while this KRUPS coffeemaker ISIn operation, m the
"on" position. Turn the KRUPS coffeemaker off and let cool down for 10 minu-
tes before refilling with water.
. BeforeturningyourKRUPS coffeemaker on, please make sure that:
1 the filter ISproperly Inserted Into the sWivel filter;
2. the sWivel filter ISproperly closed;
3. the lid for the glass carafe ISproperly attached to the glass carafe;
4. the glass carafe sits flat on the mSlde circle of the heating plate.
. Keep your hands and the cord away from hot parts of the appliance dunng opera-
tion.
. Never clean with scouring powders or hard Implements.
\. -
Page 3

.
a I I
b
I () R-I-- c I I
a
d I I
.
KRUPS
011
,,'.
progr..<9
Iauto;. tJ,
lO 60nJ
e
b
f
a =hinged lid
b
=sWingawayfilterholder
c
=magnifiedwater levelIndicator
d
=glass carafe
e
=non-stick warmingplate
f
=hidden cord storage
9 =electroniC digital display
-
.
-1°..I:f
-9
-8-
-7- -
-6
-5-
-4
h =selector switch
0 =Off
ON =Switch on without
pre-programming
e =Set the time
progr =pre-set the time
auto =activate pre-programmed time
c
0
d
e
"
0
-
h mlO
0 0
progr. <9
auto~
~
~,
~I
' on
0
(U)
-.-
Page 4

,,,.
,
GUARANTEEOFPERFORMANCE
ThIS fine KRUPS product ISmanufactured according to a rigid code of quality
standards, and, with minimum care, should gIVe years of satisfying service.
However, should the need anse for repairs or for replacement parts within or
after the warfantv eenod, please call our CONSUMER SERVICE DEPARTMENT:
(800)526-5377
24-hours a day,7 days a week
You will be provided with specific Instruction on how to get your product
repaired.
The department will also be able to answer any general product questions you
may have.
Before calling the Consumer Service Department, please have the type number
of your Krup5 appliance availa-ble. You must have this Information before calling
our Consumer. Service Deparment 50 that we may better answer your questions.
The type i'IUntber can be located by looking on the bottom of your appliance.
This product ISTYee # 212.
Any
general correspondance can be addressed to:
KRUPS North Amenca, Inc.
P O. Box 3900
Peoria, IL 61612
'.....
,
,
Page 5
AI'
.-
ftIt . '....
progr. (9 progr.
auto., ,
0 6on
e
~
h mln
0 0
auto.,,"
0 6on
.
(9
KRUPS
"PROCAFE TIME"
Yournew KRUPS "ProCafe
Time" has the following
features:
.Exclusive KRUPSdeep-
brew technology with
special filtenng action for
maximum flavor.
.24hourprogrammabletimer
letsyouprogramthecoffee-
makerforconvenient
. "wake-up"coffeeInthe
morning.
. Programmableautoshut-off
letscoffeestaynotfrom
-5 hoursbeforeturning
1
itselfoff.
. OnepieceremovableSWivel
filterISconvenientto use
andeasyto clean.
. "Stop'nServe"-featurelets
youpouracuportwowhile
brewing.Theautomaticfilter
sealwillallowyouto remove
thecarafefor20seconds
withoutcoffeednpplngonto
thewarmingplate.
. AromaSaverSystemlid
locksInflavorandaromaby
creatinga sealonthe c13cr<afe
lid.
. Hingedwatercontainerlid
willprotectthewater
containerfromdustanddirt.
. MagnifiedwaterlevelIndica-
tor ISeasytoread.
. Automaticwarmingplate
hasnon-stickcoatingfor
easycleaning.Raisededges
keepcarafefirmlyInplace.
. KRUPSspeciallydesigned
heatingandtubingsystem
minimiZeScalcificationand
leavesno residualwaterIn
thesystemwhenbrewingIS
finished.
. Hiddencordstorageallows
youto setthecordlength
youneed.
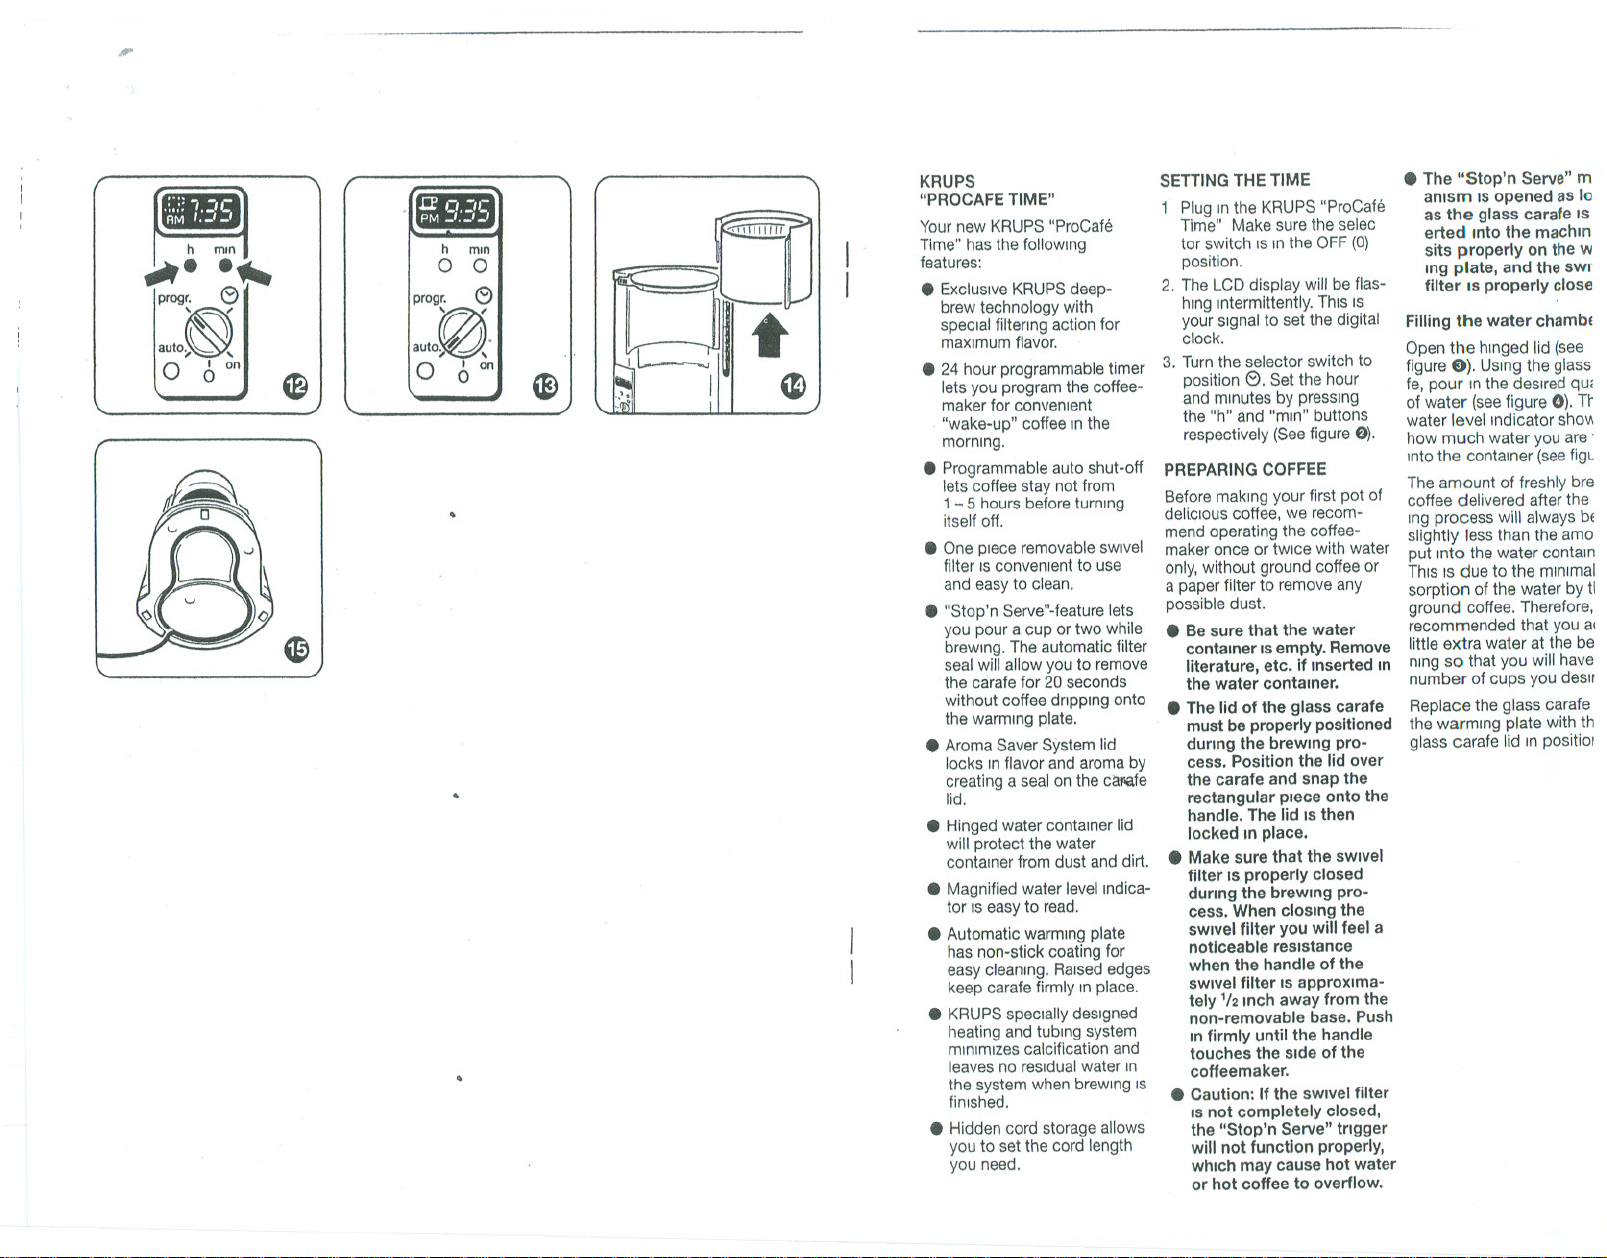
SETTINGTHETIME
1 PlugInthe KRUPS"ProCafe
Time" Makesuretheselec
tor switchISInthe OFF(0)
position.
2. TheLCDdisplaywillbeflas-
hingIntermittently.ThisIS
yoursignaltosetthedigital
clock.
3. Turntheselectorswitchto
position
andminutesbypressing
the"h" and"mln" buttons
respectively
PREPARING COFFEE
Before making your first pot of
delicIous coffee, we recom-
mend operating the coffee-
maker once or tWicewith water
only, without ground coffee or
a paper filter to remove any
possible dust.
e.Setthehour
(Seefiguref.)).
. Besure that the water
container ISempty. Remove
literature, etc. If Inserted In
the water container.
.The lid of the glass carafe
must be properly positioned
dUring the brewing pro-
cess. Position the lid over
the carafe and snap the
rectangular piece onto the
handle. The lid ISthen
locked In place.
. Make sure that the sWivel
filter IS.properly closed
during the brewing pro-
cess. When closing the
sWivel filter you will feel a
noticeable resistance
when the handle of the
sWivel filter 15approxima-
tely '/2 Inch away from the
non-removable base. Push
In firmly until the handle
touches the side of the
coffeemaker.
. Caution: If the sWivel filter
ISnot completely closed,
the "Stop'n Serve" trigger
will not function properly,
which may cause hot water
or hot coffee to overflow.
.The "Stop'n Serve" m
anlsm ISopened as 10
as the glass carafe IS
erted Into the machln
sits properly on the w
109plate, and the SWI
filter 15properly close
Filling the water chambE
Open the hinged lid (see
figure 0). USingthe glass
fe, pour In the desired que
of water (seefigure 0). Tt"
water level Indicator sho",
how much water you are.
Intothe container (seefigL
The amount of freshly bre
coffee delivered after the
Ing process will always bE
slightly less than the amo
put Into the water contain
This ISdue to the minimal
sorption of the water by tl
ground coffee. Therefore,
recommended that you al
little extra water at the be
nlng so that you will have
number of cups you desn
Replace the glass carafe
the warming plate with th
glass carafe lid In positiol
Page 6

~
Putting In the ground coffee
SWing the sWivel filter to your
nght (see figure 0). Insert a pa-
per filter (we recommend
KRUPS size 4) with the seam
pOinting towards the handle of
the filter holder (see figure 0).
We suggest uSing one level
KRUPS measunng scoop of
ground coffee for each cup of
robust coffee (see figure 0).
After uSing your KRUPS
coffeemaker several times you
can adjust the measure to suit
your own taste.
Close the sWivel filter (see
figure 0) and make sure that it
IS completely closed.
Attention: Make sure that the
filter paper does not tip over
when closing the sWivel filter. If
this happens, the water might
run between the filter paper
and the filter holder producing
a very weak cup of coffee.
Turn the selector switch to the
"on" position. The red Indicator
light In the switch will illuminate,
Indicating that the brewing pro-
cess has begun (see figure Cli».
"STOP'N SERVE" FEATURE
The "Stop'n Serve" feature IS
KRUPS' answer to the Impati-
ent coffee dnnker's clamor for
"a qUick cup of coffee!" This
dEwlce automatically stops the
flow of brewed coffee through
the filter cone if the glass cara-
fe IS removed from the warm-
Ing plate dunng the brewing
cycle. You have about 20 sec
onds between the removal of
the carafe and Its being reins-
erted to allow the service of
one or two cups of coffee.
The "Stop'n Serve" device closes
off the filter cone so effectively
that there ISvirtually no coffee-
dnp onto the warming plate
(one drop, at most!), Once the
carafe ISreplaced, the brewing
cycle and the flow of coffee
Into the carafe are resumed.
CAUTION
Ifcoffee does dnp onto the
warming plate after removal of
the carafe, it IS usually an In-
diction that too much ground
cotfee has been placed Into
the paper filter. This causes the
water that Jets Into the filter
cone to overflow between the
paper filter and the sides of the
filter cone. The overflow carnes
coffee grounds that Interfere
with the snap-shut action of
the filter holder, thus allowing
brewed coffee to continue to
dnp through. If this blockage
and subsequent dnpplng do
occur, replace the glass
carafe Immediately and allow
the full brewing cycle to run
its course. Do not swmg out
the sWIVel filter until the
brewing cycle IS completed.
SETTING "WAKE.UP" TIME
This feature enablesyou to
enJoyfreshly brewed coffee at
any pre-selected time within' a
24-hour pen~d. Tousethis fea-
ture, you must first set the digi-
tal clock (see"Setting the
Time").
1. Turn the selector swith to
.the "prog" setting. The U
symbol will flash intermit-
tently In the display area.
2. Set the hour and minutes In
which you would like the
brewing process to com-
mence by pressing the "h"
and "mln" buttons respec
tively (seefigure 0).
"Wake-Up" ti!T1eIS now set.
PREPARING
"WAKE.UP"COFFEE
To
enJoydelicIous"wake-up"
coffeethatISfreshlybrewed
andhot,firstsetthe "wake-up"
time(see"Setting"Wake-Up"
Time).
1. PutIngroundcoffee.
2. Fillthewaterchamberto the
desirednumberofcups.
3. Placethe carafe back on the
warming plate.
4. Turn the selector switch to
the "auto" setting (seefigure
~. The U symbol will re-
main constant Inthe display,
Indicating that the coffee-
maker has been program-
med. .
5. At the pre-programmed
time, the Indicator light will
illuminate, Indicating that
the brewing process has be-
gun.
NOTE: If the selector switch IS
left Inthe "auto" position,
the coffeemaker will turn its-
elf on everydayat the pre-
programmed time. If you do
not wish for this to occur,
turn the coffeemaker to the
"OFF" position ("0") after
each use.
PROGRAMMING
AUTO SHUT.OFF
The programmable auto shut-
off feature allows you to keep
coffee hot for up to 5 hours,
and then shut off automatically,
to suit your needs.The auto
shut-off will Initially be set to
shut-off after 1 hour,unless
otherwise programmed. Auto
shut-offwillbeeffectivenot
only when you aremanually
prepare coffee, but also when
used with the wake-up timer.
When youfirst plug Inthe cof.
;eemaker,the auto shut-off will
be programmed for 1 hour.To
adjust the keep warm time:
. Turn the switch to "0" (off)
position.
. Pressthe"mln"button.The
blinkingcupwillappearIn
the display and auto shut-
off will be set at 1 hour.
. YoucanIncreasethe keep-
warm time In Incrementsof
1 hour,up to 5 hours by
keeping the "mln" button
pressed and additionally
pressing the "hours" button.
. Once you have programmed
the keepwarm time, It will be
stored In memory until ma-
nually changed.
. If no keepwarm time ISset,
the coffee maker will auto-
matically shut itself off after
1 hour.
CLEANING
.Always unplug the coffee-
maker before cleaning.
. Remove the filter holder (see
figure ID) and clean the filter
holder, the carafe and carafe
lid In a solution of hot water
and mild liquid soap. These
parts can also be placed in
the upper level of your dish-
washer for safe effective
cleaning.
. Never use scounng agents.
. Never Immerse the appli.
anceitself In water or any
other liquid. To clean, simply
wipe off with a soft, damp
cloth.
. Never use a cloth to clean
inside of thewater
the
chamber,asthismightleave
fuzzy deposits In the chan:),-
ber. Just nnse with cold wa"'"
ter, penodically.
For best results ...
... always use fresh, cold
water (warm water might
be stale and have minerai
deposits which would Im-
pair the flavor of the cof.
fee).
... we recommend that
you gnnd your own beans.
Freshly ground beans deli-
ver more aroma and flavor.
Use one KRUPS measuring
scoop of beans per cup.
... serve coffee Immedia.
tely after brewing.
... never reheat coffee.
Hidden cord storage
The power cord can be tailored
to the length reqUired by utili-
sing the hidden cord storage
located underneath the coffee-
maker (seefigure (9).
DECALCIFYING
Although your KRUPS coffee-
maker has the most advanced
water heating and pumping
system, it will penodically need
cleaning with a decalcifying
agent.
.This ISdue to the calcium
(limestone) found In drinking
water.
. In some areas where the
waterIShard,youwillneed
to decalcify morefrequently
than In areaswith softwater.
. Itwillalso depend upon how
often you use your coffee-
maker.
WHEN TO DECALCIFY
You will know when such a
cleaning IS necessary by an
obvIous slowdown In the
brewing time of your coffee.
This extended time Indicates
that there IS a calcium deposit
coffeemaker. Decalcifier
In your
IS widely available. and can be
purchased from the KRUPS
Consumer Service Depart.
ment.
CAUTION
Decalcifying agent ISa citric
aCid which ISharmless.
However, we recommend
keepmg it out of the reach of
children. Do not take Inter-
nally. If swallowed accidently,
drink several glasses of wa.
ter or milk and consult your
doctor.
Limited One Year Warrant:
Your KRUPS # 212 IS coven
by the following warranty
(glass carafes are excluded
from warranty):
If from date of purchase witl
one year
fails to function because of
fects In matenals or workmf
ShiP,
will, at its option, repair or n
place the unit without charg
provided the owner has a pr
of date
ranty will be vOid if malfunct
was caused by damage to t
product by accident, miSUSE
use on frequency or voltage
other than marked on the pr
duct and/or described In thE
Instructions, abuse Includin!
tampenng, damage In transl
or use for commercial pur-
poses. This warranty gives)
specific legal nghts, and YOl
may also have other rights
which vary from state to sta
this KRUPS produ,
KRUPS North Amenca
of purchase. This Wf
 Loading...