

Page 1
0"
,. .. -" .:' '-.'
_.;.. '0- -"00 '.'
::::' :< :::<: <~: .:::.:;>: :::":: '\.:-i::::;::-::::::,:
.' . -
. 0- _0 :; -::".::::{}';:.;-;;:
~oocw~QualitybyDesign
Instruction BookIWanantylKRUPSGuarantee of Per10rmance
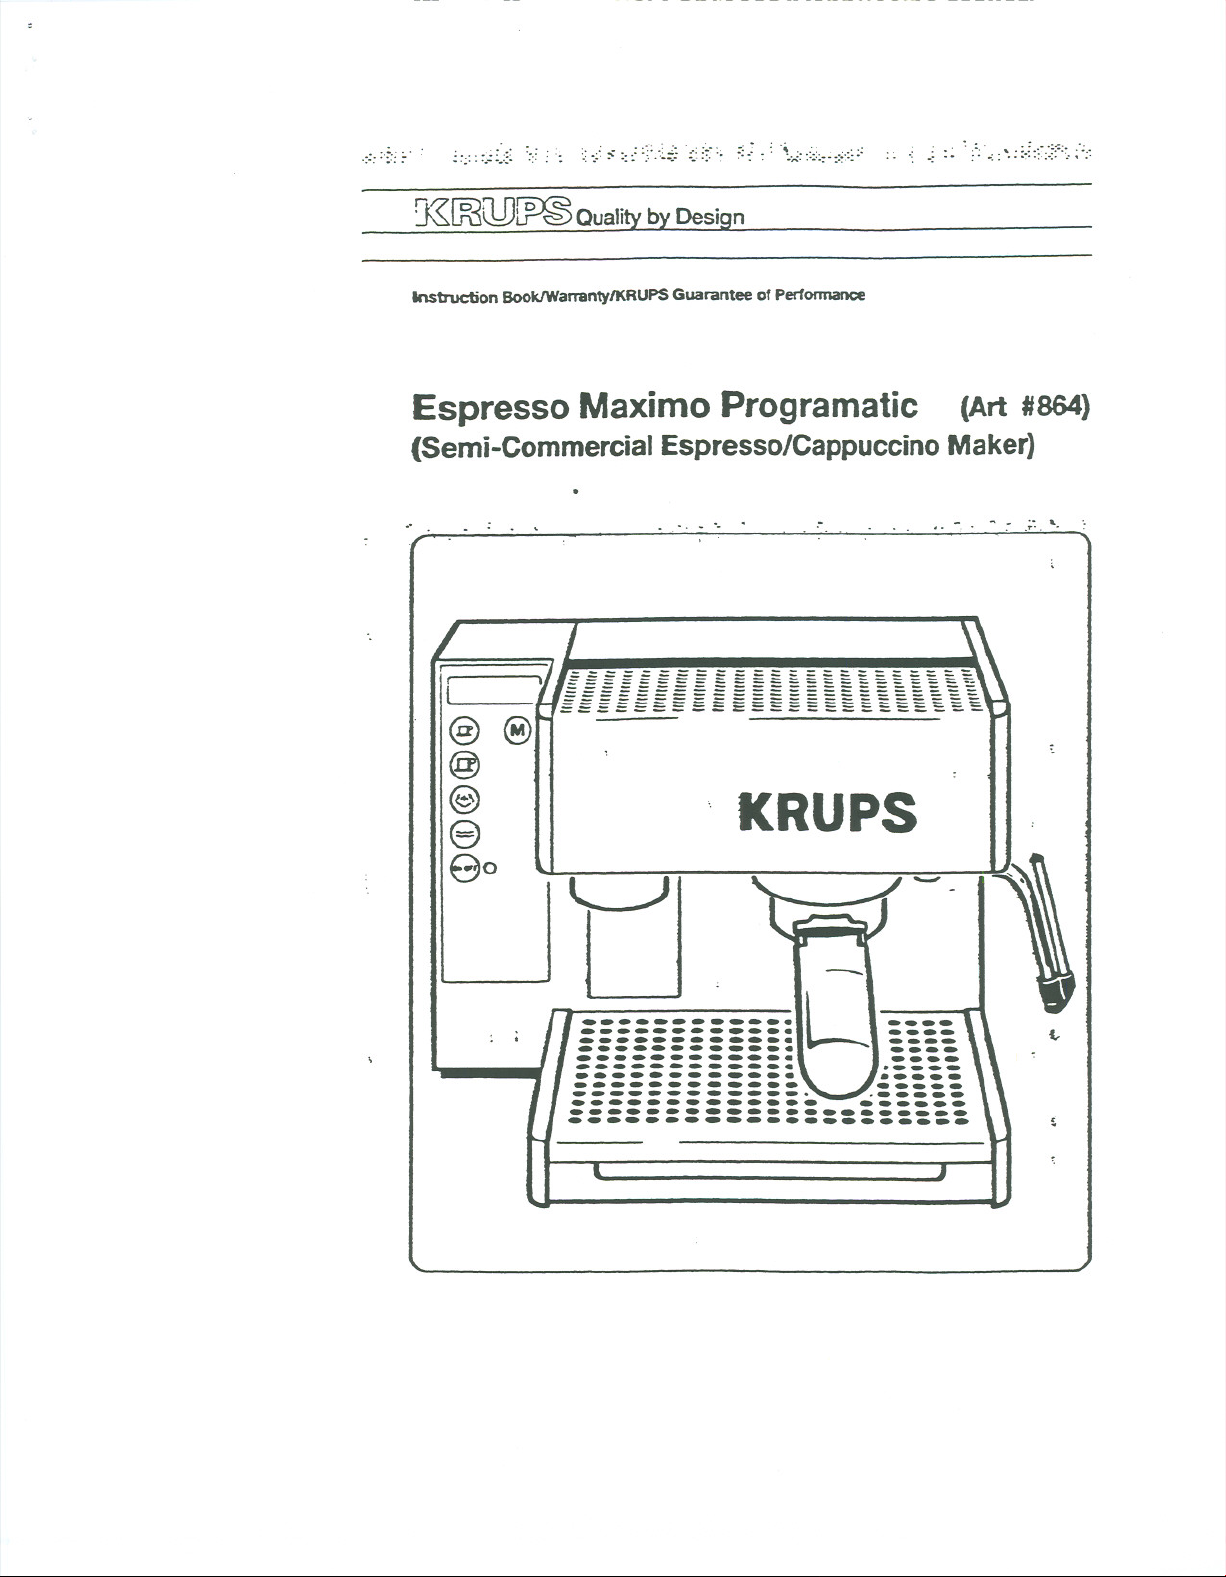
Espresso Maxima Programatic (Art#864)
(Semi-CommercialEspresso/Cappuccino Maker)
r
l
@
@
@
e
80
- -
11/"/"'11111;"\\\\\\\
@
KRUPS
-
u.
---------------------
---------------------
~
----
----
----
----
-----
-----
-----
------
------
.~~.'-
I
l.-
Page 2

IMPORTANT SAFEGUARDS
When using electrical appliances, basic safety precautions should always
be followed, Including the following:
. Read allInstructions carefully.
. Donot touch hot surfaces. Use handles or knobs.
. 1bprotect against fire,electricshock and personal InJurydo not Immerse
cord,plugs,orapplianceInwaterorotherliquid. .
. Close supervisionIsnecessary whenanyappliance Isused by or near
children. '
. Unplugfromoutletwhen not Inuse and before cleaning.Allowto cool
before puttingon ortaking offparts, and before cleaningthe appliance.
. Donot operate anyappliance witha damaged cord or'plugor afterthe
appliance malfunctions,or has been damaged Inany manner.Return
appliance to an authorizedservice facilityforexamination,repair,or
adjustment.
"
',-
. -"'"
. -"'-.-'-
.
l
I
.
\
" I
.f
'\
.,
..
SPECIALCORD SET INSTRUCTIONS
Regarding your Cord Set:
10.Ashort power-supply cord (or detachable power-supply cord) Is to be
provided to reduce risks resulting from becoming entangled In or trip-
ping over 8 longer cord.
B. Longer detachable power-supply cords or extension cords are available
and may be used Ifcare Is exercised Intheir use.
O. Ifa long detachable power-supply cord or extension cord Is used, (1)the
marked electrical rating of the detachable power-supply cord or exten-
sion cord should b8 at least as great as the electrical rating of the appli-
ance, (2)Ifthe appliance Is of the grounded type, the extension cord
should be a grounding type 3-wlre card, and (3)the longer cord should
be arranged so that Itwill not drape over the counter top or table top
where Itcan be pulled on by children or tripped over.
CAUTION:
. The use ofaccessory attachments not recommendedbythe appliance
manufacturer mayresult Infire,electric shock orpersonal InJury,
. Donot use outdoors.
. Donot let cord hang overedge of table orcounter, or touch hot surfaces.
. Donot place on or near a hot gas or electric burner,or In8 heated oven.
. Alwaysattach plugto appliancefirst,then plug cord Intothe walloutlet.
1bdisconnect, turn any controlto "off",then removeplugfromwall
outlet.
. Donot use appliance for other than Intendeduse.
. Useextreme cautionwhen disposing hot steam.
SAVE THESE INSTRUCTIONS
'0.. '
<,~:: ,
, :' ,',"::,::",
',::':, :
':,::'<,::', ::.,:;
This appliance Is ,or household use. Anyservicing other than cleaning and
user malntenan08.,should be performed by an authorized service represen-
tative.
. Do not Immerse base Inwater or try to disassemble.
"
. 'R:)reduce the' risk of fire or electric shock, do not remove the base. No
user serviceable parts Inside. Repair should be done by authorized
service personnel only.
. Oheckvoltageto be sure that the voltage Indicatedon the nameplate
,
If
!i
agrees withyourvoltage.
. Neveruse warmor hot water to fillthe water contalnerl
Usecoldweteronlyl
. Keepyourhends end the cord awayfromhot parts ofthe appliance
duringoperetlon.
(
.
. Neverclean withscouring powders orhard Implements.
0',f
".
. .
"
, ';,~':
Page 3

. , . ..
..,.. .
. , . ..
, . ','.' '.'
',' - . "..
. r<O""i<"'<"""";'"
..
<: .
, ,
'.',:,,::,:,,: ,::';: ,::,:::;;.::{;:::_,~:,:-,::~-,,::::)S;:L::~:;;~~.:::::):::~,~i;iL:;~::,.::::::,::;;;:..:::c':"'.:,'::::. .?;:tD~:~::;{::::::: ,~,', ~.'::\:~~:';, ::}H~~t,;;:,;: ,:'
, -
;, " .:;:- ,,=, .
. .,..
" '.,", ,.
, ,,' '" ",
':, .,,",'.
., . ',.'
.'~, ~:: ","
" ',' , ' -
".,.. ..' - ,; " ' .'
a
e
~II"
f
9
0
c
k
a -Removable WaterReservoir
b - Storage Compartment For Filter
Baskets
c - Waterlevel Indicator
d -Warming Plate ForCups
- Message Display
e
-FunctionKeys
f
- 8" MemoryButton
-@" SmallCup
-@"large Cup
-e" Steam Button
-@" HotWaterButton
0
!!!IJllnm~!\\\\
-,
~p
~@-:
9 - ON/OFF Switch With Red
Indicator Light
h -SwivellingSteam Nozzle For
SteamandHotWater
i-Perfect FrothAttachment
j - FilterHolder
k - Removable OverflowGrid
- DripTraywlbaffle
I
-One CupFilterBasket
m
n -Two Cup Filter Basket
0 - Built-InTamper
p - Measuring Spoon
b
d
, -,
j
h
,i'-'~"7;i;7:::::-';"
, , ,
i
, ';:-, - :
.. ,
. '.
'.~': , .c:,::"-
... '. '
,.'{::;;~~j~....
. .'-
..
'.
"
, '. - '.
. ".',:':,:.~' ::::.'-: ' :
..
..'~~{!~~~~70~~'~"
-
. < '-::'~~~c':};~:J:?f,'::::.;'~'~ :;,
'J~~c:;.~;~i~~K~~"
,-
..
'.
Page 4

1
,"
I
I
!
;. 10
~. ..
~I i
-. III
'-
e
.
..'
C
'
III
.: -
f9
.: 10
'
..
,; ::I
I
,', R
=. III
! :'- :
,
=
Bi
".
,-,-' .
.~
'~"',.I
=- ~-=- ",,'.I
'--- ':,"
~
.
@ ,I,
I.., -e-
i
'~ @@@(D(i)
-.
)(
C'i
en
..; a.
:
::»
1
: II:
~
" ~!!.
, ,", ,
Ej
..,
@@@<Dm-
I@ ,I,
.
@ ,I,
<:> -e-
I @@@(D(i)
.
'.. ,.. '.
"".,.
'-
@ ,I,
... -e-
~
§ @@@Q)CD
..
.(9) ,( .,. .
, "
)a
\ I;
...
.....-;
.
".'. .
'. - . '.'
,.:
G
~ ~ e
or-
C'I
81
18
.
ft ~
or-
C'I
@ I,
... -.-
6:' a:, '"
::0@@CDJ:,
.
.
..
e
-, .' .-
Page 5

j~~ f'<',
':'~
i . '~.h
(~
,
I
'" ''':,:'' .','
,-':
,' .
FEATURES
.Thermoblock Heating
System features a 47"
tube which heatsup
water to the precise
bewing temperature for
brewing espresso.When
espresso making is
completed, any excess
water In the system is
then flushed from the
system Into the drip tray.
Thus no stale water
remains In the system
and there isno bacteria
build-up, ensuring a
fresher, tasting cup of
espresso.
.Microchip Monitored
Steam Pump Control
delivers a constant flow
of "dry" steam. The uni-
que dryness of the
steam and Its regulated
pressure froth milk for
perfect cappuccino.
Programmable
Fully
System with LED dis-
play panel Instructs user
how to operate machine
In three different langua-
ges (English, German,
and French).
Programmable Flow
Control automatlcaly
dispenses pre-measured
cups of espresso.
.Sensor 1buch Control
Panel allows you to sel-
ect a mode of operation
for making small and
large cups of espresso,
hot water, or steaming
for frothing milk for cap-
puccino.
.' Automatic Pre-Heating
Mode heats water
to
the proper temperature
for frothing milk.
.60 oz.l1.8 liter Water
Reservoir
Large capacity, easy to
fill water container.
Produces a continuous
number of cups of
espresso
cappuccino.
and
24 demitasse cups
(2.5oz.)
12cappuccino cups
(5.0oz.)
. Warming Plate enables
you to preheat your
espresso and cappucci-
no cups to maintain pro-
per drinking tempera-
ture.
.Perfect Froth Attach-
ment produces effort-
less froth for perfect
cappucclno~
. SteamNozzle for fro-
thing, steaming, and pre-
paring hot water for
other beverages (Tea.
hot cocoa. and other
Instant beverages).
.Water Level Indicator
easy to see how much
water is in the water
reservoir.
Built-In Storage Com-
partment for storing fil-
ter baskets and measu-
ring spoons.
.One & 1Wo Cup Filter
Baskets allow you to
choose the desired
amount of espresso that
you wish to brew.
. Removable Drip Tray
and Grid-largecapacity
and easyto removeand
clean.
.Built-In 'lbmper tamps
coffee to the proper
consistency.
INTRODUCTION
The KRUPS "Espresso
Maxlmo Programatlc" Is a
semi-commercial espreso/
cappuccino machine that
features a fully automatic
mode of operation and has
been constructed like no
other espresso maker In the
world and combines this
with fully automatic modes
of operation. This machine
combines many of the fine
features and technology
that you would find In a
restaurant quality espresso
maker. including pro-
,grammable features. This Is
one of Krups' finest espres-
so makers now available for
your home use.
GENUINE ESPRESSO
Espresso Is a far richer and
stronger brew than regular
coffee. It should be deep,
dark and delicious. Most
people find they enjoy it in
smail quantities because of
Its richness and, for that
reason, espresso Is usually
served in small 2 - 2.5oz.
demitasse cups.
'\
The mark of real espresso
Is its wonderful Inviting
fragrance and a light brown
"crema", found on top of
the surface of the coffee.
Your "Espresso Maxlmo
Programatlc", properly'
used, will always produce
espresso that Is deep, dark,
and delicious. Just follow
the instructions and use
. fresh, wellroasted espres-
80 beans.
GRINDING ESPRESSO
BEANS
If you choose to grind your
own beans we recommend
using either the KRUP$
Fast-Touch grinder #203 or
Touch-Top grinder #208.
Remember espresso requi-
res a much finer grind than
regular coffee which Is..
ground for conventional
Automatic Drip Coffeema-
kers. We recommend grin-
ding your espresso beans
for approximately 60 .
seconds, or until It has a
talcum powder appearance
and texture.
TURNING OFF THE
APPLIANCEUSINGTHE
ON/OFF BUTTON
When turning "Off" the'
[
appliance usethe "On/Off"
(g)which is located on the
left side of machine. You
will notice when turnln~ off
the machinethat even,
though you havedepressed
this button, the red
tor light remains iIIuml-,
Indica-
natad. This indicator light
once pressed will remain
iIIuninated, until all residual
water has been flushed out
of the system. Once the
appliance has sensed that
this has been done, the red
indicator light will go out,
and an "OFF" message will
appear In the display.
PROGRAMMINGFUNC-
TIONS
Changing The Display Lan-
. guage
Your "Espre~so Maximo
Programatic" has been pre-
set at the factory to display
Information in English.
Please also note that this
machine can also display
Information In German as
well as French.
If you wish to change the
language that the machine
is presently displaying.
please do the following:
Press the" @" button 1
time to display in French.
Pressthe"@II button3
times to display in German.
Pressthe"@II button2
times to display in English.
IMPORTANT NOTE:
Anytime you wish to Inter-
rupt a function key("@",
"@","@",..e", "8").
Simply press the "On/Off"
button and this will clear
the mode of operation.
CHANGING THE CUP
SIZE CAPACITY
Your"Espresso Maximo
Programmatic" has been
preset from the factory to I
brew espresso in 2.5 oun- I
ces "@,, and also 5 ounces I
"@". If you wish to change
the quantity that is brewed
in your cup, follow the
Instructions listed below:
Turnthe appliance "On"
using the "On/Off" but-
ton.
Press the" @" button.
Then press the (small)
"@,,button.Thiswill I
interrupt the preset quan- I
tity and when the desired
levelof coffee you are
brewing Is reached. sim-
ply depress the "@,,
button to confirm the
quantity that you have
selected.
The new quantity that
you havechosen will be
stored in memory. (This
will override the one set
by the factory.)
Note:
The same process should
be followed for either the
"@,, (small)or "@,, (large)
cup.
POWER SUPPLY
RUPTION WHEN PRO-
GRAMMING FUNCTIONS
If the power Is Interrupted
or the machine is unplug-
ged when programming, all
functions being pre-pro-
grammed at that time will
be erased.
INTER-
... ,"
'.."': '
:.. .., "
.' .,.. :~'
:;:' ":;,' .,',
:::., :'
I .,
,..
Page 6

WATERLEVEL
HARDNESS
This espresso/cappuccino
machine has been de-
signed insuch a waythat
you can pre-program the
levelof hardness of your
water so that Itlets you
know when yourmachine
needs to be decalcified.
The water hardness level
can be obtained fromyour
local water department.
This special feature will
help prolong the lifeof your
machine by identifying
when your machine needs
to be decalcified.
Your"Espresso Maximo
Programatlc" has been pre-
set at the factory to be at
"level 3".
Please use the table provi-
ded below that matches the
water levelhardness Inyour
area.
Hardness LeveI1-(Soft)
Hardness LeveI2-(Medlum)
Hardness LeveI3-(Hard)
Hardness leveI4-(Very
Hard&Over)
Press the "8" button
until the proper water
hardness level appears in
the display.
Then press the "On/Off'
button to store It In
memory. A "WAIT" mes-
willthen appear in
sage
the display.
Note:
Pressing the"On/Off" but-
ton will cause the system to
heat up and the red Indica-
tor light to illuminate.
The pre-programmed water
level hardness that you
now programmed will
have
determine the decalcifying
cycle. When the appliance
needs to be decalcified, a
"DECALC" message will
appear in the display.
The water hardness level
that has been stored in
memory can be changed at
anytime, as long as your
"Espresso Maximo Progra-
matic" Is in the "Off"
position.
and perfect froth attach-
ment with a damp cloth to
make sure all dust particles
from transport are removed.
Wash all loose parts in
warm, soapy water, rinse
thoroughly and dry.
When using your "Espresso
Maximo Programatlc" for
the first time we recom-
mend running water throug
the machine to remove any
dus.t particles which may
have settled during ship-
ping.
Make sure before you
.start that the removable
overflow grid (k) Is pro-
perly.ln place and that the
drip tray (I) and baffle are
properly Inserted. The
baffle Is the plastic piece
which can be found In the
drip tray. This piece
should always be In place
when the machine Is In
operation.
Before plugging your
KRUPS"Espresso Maxlmo
Programatlc" Into an elec-
trical outlet, make sure that
the appliance Is inthe "off"
position (@). (SeeSection
Turning
Using The "On/Off" button).
OffThe Appliance
.':,:~..
': !' '
" ,
with fresh, coldwater to
"
the maximum mark
which is Imprinted on
the water reservoir (See
r
flgureO).
. Insertthe water con- .
tainer back Into the.
,,'.
appliance, making sure
that it Is In place (See
figure e). Making sure
that It sits in properly so
the valve on the base of
the water reservoir Is
activated.
.Insertfilter holder with
either the two or four
cup filter basket. Do this
by raising the filter hol-
der up Into the machine
at a 45 degree angle,
(See figuree). Turn the
filter holder to the right
until it Is in the center of
I'
"
the machine(See .
figure e). This will lock
the filter holder Into
place. Now you are.
ready to warm up your:
"Espresso Maxima Pro-
. gramatlc".
l~ee tigureU).
. A message In the display
will read "WAIT" (See
figure G). At this time,
the thermostat is regu-
lating temperature. When
the machine reaches the
proper temperature, a
"READY" message will
appear on the display
panel (See figure G).
. At this time, select the
"@,, button. "Espresso
Maximo Programatic"
will cycle on and auto-
matically fill your cup
with 5 oz. of water.
Repeat this process until
the water in the water
container has been emp-
tied (See figureG). THIS
WILL REQUIRE YOU TO
STAY WITH THE MACHI-
. NETO EMPTY EACH
CUPAS IT BECOMES
FULL.
Step 3
.Takea frothing pitcher
and hold it underneath
the steam nozzle with tip
Inserted into the
(See flgure4D).This can
be done with/without the
perfect froht attached to
the steam nozzle.
pitcher
First
when doing this, steap',
Is very hot.
EVERYDAY USE FOR
PREPARING ESPRESO
Step 1
.Fill the water container
with fresh, cold water
(See figure.-". While
making espresso, water
can be added to the
reservoir by lifting up on
the water chamber lid
and adding water to the
water reservoir, using
another receptacle to fill
the container. Otherwise,
the water reservoir can
be removed and taken to
the faucet.
Caution
If the water reservoir Is
empty and the pump Is run-
ning, you will hear a very
distict noise, louder than
the normal operating
sound. Ifthis happens, turn
"Off" the machine. Check
water reservoir and refill as
needed.
If water needs to be added
when making espresso,
simply add water to the
,~::':,
Into filter holder (See
figure8).
Depending upon which
filterbasket you have
chosen add one measur-
ing spoon of espresso
coffee for each cup of
espresso that youare
preparing (See
figure8&4P).
, ::.,::}\(":
Step 4
. Insert filter holder Into
the machine by raising It
up at a 45 degree angle
andturning Itto the
right. Turn the filter hol-
der until It Isfirmly
locked Into place. (See
figure.).
.Place a cupwhichhasat
least a 2/2.5 oz. or 5 oz.
:' , ,
.' ,
vlng'the filter holder from
the machine. This can be
done by grasping the
filter holder and turning
IHo the left, until It dis-
lodges from the
machine.
Usethe thumb guard on
the filter holder to keep
the filter basket from
falling out when empty-
Inggrinds out of the
basket (SeeflgureO).
"
;.,' .', :, ,
,.' ",:"
::t~1~;:
ure ,.
..
Step2
.To make hot water, simp-
ly depress the "8" but-
ton and hot water will.
automatically be dispen-
sed form the steam/hot
water nozzle.As soon as
there Issufficient water
Inthe cup, press "S"
button to stop dispen-
sing water.
'.',.' ./"
,
,-
As long as your "Espresso
Maximo" is turned "On"
and the water reservoir Is
properly filled, you can use
the steaming feature. There
Is no need to prepare
espresso before using the
steaming feature.
Forbest results, you should
use the "Perfect Froth
Attachment"
place at this time, attach It
(I).Ifit isnot In
"
:". .,
.,
, .
....
" .'l~"o
.'.
tov;Tui,-vilth-fresh;coid
milk and set aside.
.Werecommendusing
skim or 2% milk if you
prefer a stiff, dense
froth. Use regular milk If
you prefer a more liquid
type of froth.
Whenyou start frothing
milk, there
Ingsound which occurs
during the hot water/steam
willbea thump-
.', '''.
;, ',,'
"P".'
,:':('
Page 7

preparation. This is aresult
form the interval-controlled
water pump condensing
water into steam. As the
thumping sound begins a
few drops of water will
come out of the steam
nozzle before entirely chan-
ging over to steam.
Step 3
.Tobegin, press "6" but-
ton (See figuree), A
message will appear on
the display,
"Push/Steam" .
. At this time, take your
pitcher of milk and insert
steam nozzle half way
into the milkand press
the ",, button (See
figure
e). Leave the
steam nozzle in the milk
for approximately 45-60
seconds depending on
how much froth you
want and the type of
milk you are using.
Note:
. Donotbring milkto a
boil (this will happen if
large bubbles start
forming at the surface of
the milk).
.Do not let the "Perfect
Froth Attachment" touch
the bottom of the pitcher.
Step 4
. After the milk is frothed,
keep the "Perfect Froth"
in the milk until you have
pressed the "6" button.
This willstop the steam-
ing and prevent any
splattering from occur-
ring.
. After milk Is frothed, set
aside. If you like very
stiff froth, let the pitcher
sit for a few seconds.
.Now you are readyto
add the frothed milk to
the waiting espresso.
Pour the milk into the
cup by holding back the
froth with your spoon.
Fill the remainderof the
cup with the milk and
then spoon on the fro-
thed milk. In Italy it Is
normally one part
espresso to two parts To lower the thermostat
milk plus froth.
If you are making more than
one or two cups
cino It Is recommended
that you place the waiting
espresso on top of the
warming plate. You may
want to place a cloth or
saucer overtl,1ecups to FROTH ATTACHMENT
help keep the espresso hot. It is strongly advised that
of cappuc- decalcify your machine:
Froth" will not work pro-
perly.Therefore,never
immerse the top closure In
milk or froth.
If youwish to prepare ,.
espresso immediately after
using the steam nozzle the
machine must be cooled
down to the proper brewing
temperature. (Wherf1ro-
thing milk the temperature
of the water is much hotter particles.
than when you are brewing
espresso).Toavoid burning
the espresso, it Is neces-
sary to perform the pro-
decure listed below:
temperature, insert the filter
holder Into the machineand
allow one cup of water
without espresso to run
through the machine.
CLEANING THE PERFECT
Onceyouarefinished .youwipeoffthemilk
making the required residue which may have
amount of espresso, then collected on the "Pefect
you can beg,infrothi milk Froth" and steaming nozzle
for cappuccino.
the pitcher with milk 1/3to completed.
1/2full will yield enough
Byfilling after the frothing processis
'
r the steam/hot water
'J'
,,\(
nozzle and clean It In
warm, soapy water. screw that is holding the
:' Use Caution when
I
removing the "Perfect
Froth" from the steam- under the faucet with
Ing nozzle as it may
atlll be hot.
.Using a damp cloth,
, clean the steam/hot
waternozzle.
Use Caution when
cleaning removing the
f'
ateamlng nozzle, It may
ItIIibe hot.
!
CLEANING IMPORTANT
.After use, empty the
waterreservoir and drip each time after you have
tray (See figureQl, e,
8). :
..,-
.After preparing espresso
,.
ten times drip tray may
,:
need to be emptied and
cleaned.
.The water reservoir, drip
tray,baffle, grid, filter
holderand perfect froth
attachment should be "Perfect Froth".
washedand rinsed in With a flat blade screw
warm, soapy water on a
regular basis.
frothfortwocupsofcap- Forathoroughcleaningof .Before replacing the drip
pucclno. Ifyou need more the "Perfect Froth-Attach-
froth, repeat steps 1-4. ment", removethe separate
Attention' figureCl».Allpartsshould
The top closure of the "Per- water.If he small section of
feet Froth-Attachment" part A is clogged It canbe
(SeefigureCl>part
very fine hole
. be rinsed In warm, soapy
A)has a opened using a fie sewing
whichdraws needle.
parts A, 8, & C (See
air Into the milk. If this tiny
hole gets clogged, "Perfect. Removethe "Perfect
Froth-Attachment" from
;,'--+:
trayand grid make sure
the baffle has been
placed Inthe drip tray
properly(Seefigure e).
. Rememberto clean the
steam/hot water nozzle
with adamp cloth Imme-
diatelyafter frothing
milk.
. If the steam nozzle
becomes clogged for decalcified you will see a
any reason, remove the message In the display
steam nozzle In position
(Seefigure). Rinse
warm, water. If it is still
clogged take a sewing
needle and Insert it into
the tip of the steam
nozzleto free any milk
DO NOTPLACEANY
LOOSEPIECESIN THE
DISHWASHER.
Clean the steam nozzle
immersed it in milk, other-
wise the Inside of the
nozzle becomes clogged
with milk particles. Allow
the steam to escape into a decalcifying.
wet cloth for one or two
seconds after frothing milk.
Any milk residuewill be
flushed out. See special
cleaning instructions for
CAUTION
DO NOT TRYTO DISAS-
SEMBLE THE MAIN
BODY OF THE MACHINE.
panel that reads
"DECALC". When this
message appears you can
still use the appliance but It
will continually remind you
that your machine needs
decalcifying.
Note:
Decalclfier can be purcha-
sed from KRUPS
Consumer Service Depart-
ment.
HOW TO DECALCIFY
Please
follow the proce-
dure listed below to
.Turnmachine "Off" and
unplug the appliance.
Allow it to cool before
. Removefilter holder,drip
tray, baffle, removable
grid, and water reservoir.
.Turn the machine
completely upside down.
driver,remove the
brewing sieve by turning
it clockwise until the
sievecan be removed
from the machine (See
figuree &fJD).
DECALCIFYING
This appliance has been
designed with a built-in
monitoring system that will
alert you when the
appliance needs to be
decalcified. When the
appliance needs to be
.Turnmachine upright
again and reinsert the
drip tray, baffle, remov-
able grid and water
reservoirback into the
machine.
.Remove the water reser-
voir and fill it to the
.'
.,
.. '''.:,''. ", I" "':K.1'
;!,::::~J1" ' ."i "; , ~~('~;~;:,,:,:';',i
' ..,'." "'...' "''''~' "-~r""'''' ~t.'''.)
I
,I',i:} t" .,i~,;...,',',"~' . " c. >,
Page 8

-.
.. '
maximum mark (which is
indicated on the water
reservoir) with luke warm
water, and reinsert back
into the machine.
. Dissolve one packet of
decalcifier (thiscan be
purchased through the
KRUPS Consumer
Department) in the water
reservoir.
.Place a cup underneath
the brewing spout.
. Plug machine into elec-
trical outlet.
.Turn on the machine
using the "On/Off"
button.
.When the message
"READY" appears in the
display, press the"@"
cup button as if you
were preparing
espresso.
. Allow consecutive cups
of water/decalcifying
solution to run through
the machine.
.Refill water reservoir with
clean, fresh water. Allow
machine to cool before
reinserting stainless
steel brewing sieve back
into the machine.
.Once machine has
properly cooled down
remove the water reser-
drip tray, baffle and
voir,
removable overflow grid.
. Turnover the machine
and install the brewing
sieve using a flat headed
screw dirver and turn
counter clockwise until it
is secure.
.Once the water reservoir
is empty, rinse water
reservoir out thoroughly
and refill with fresh, cold
water. Repeat the same
procedure as above until
the water reservoir is
completely emptied.
LCD DISPLAY MESSAGE
DEFINITIONS
CLEAN WATER
The drip tray /s full and
must be emptied.
DECALC
The appliance must be
decalcifying (See decal-
cifying instructions)
WATER
Fill or reinsert the water
reservoir
COOL
The system has become
too hot, cooling will
automatically occur, and
then you :can resume
your mode of operation.
SERVICE
The appliance Is not
working accordingly and
should be sent back to
KRUPS North America
for repair. See last page
of Instruction booklet for
"Guarantee of Perfor-
mance".
ADDITIONAL INFORMATION TO "SERVICE"
Self-diagnosis
disconnect plug from supply source and walt 10 8econds. Thtn
reconnect the appliance.lf.SERVICE" appsars again, send sppU.
ance In original picture-carton to the neareet service station.
system: When .SERVICE. appears on display.
PROBLEMS AND
.CAUSES
Problem:
Coffee Leaking
Filter Holder
Cause:
From
.Filter holder not properly
, inserted In the machine.
.Filter holder not pushed
, in asfar as It will go.
. No elasticity In the
brewing head seal.
.' (This may happen after a
long period of use). The
.part can be ordered
through KRUPS
Customer Service
. Department.
.If the seal has lost Its
. elasticity, it must be
replaced with a "New"
one. Allow the appliance
to cool down and then
unscrew the sieve from
. the brewing head.
. Remove the seal careful-
ly from the brewing head
'. using a screw driver.
.Place the new seal back
. onto the machine and
then place the flattened
'. side of sieve back Into
: the brewing head.
Problem:
f
,; Pump Makes Loud Noise
r
..Cause:
.Nowater in the water
. reservoir. .
Old or dry coffee being
used, water cannot.
properly flow through
thecoffee.
Problem:
Coffee Does Not Come
OutOf Filter Holder
, Cluse:
.Nowater inthe water
reservoir.
. Waterreservoir not.
Insertedcorrectly.
.Filterblocked because
thecoffee mixture Is'too
fineor has been pressed
down too hard.
.Mach/neneeds to be
decalcified
Problem:
E8presso~es No"Creme"
Cause:
.Oldor dried out coffee
being used.
.Coffee not suitable for
espresso.
. Coffeeground too,
coarsely. .
.Toolittle coffee in the
filteror not properly,
tamped.
Problem:
Not Enough Froth When
Frothing Milk
Cause:
.Steam nozzle Isclogged.
.Milk is not fresh.
.The pitcher that you are
using is not suitable. (It
is recommended that
you use a stainless steel
frothing pitcher). Cold
conducts better to metal
than to glass or plastic.
.The type of milk is not
suitable. We recommend
using 2% or skim milk.
Whole milk is okay, but
due to the fat molecules,
it will not have as dense
a froth, as if you were to
use 2% or skim milk.
LIMITED ONE YEAR
WARRANTY
Your KRUPS product Is
covered by the following
warranty: If, within one year
from the date of purchase,
this KRUPS product fails to
function because of defects
In materials or workman-
ship, KRUPS North
America, Inc., will, at Its
option, repair or replace the
unit without charge,
provided the owner returns:
.The KRUPSproduct
(securely packed) and
. proofof dateof
purchase to:
KRUPS Customer Service
KRUPS North America, Inc.
7 Reuten Drive
CLOSTER, N.J. 07624
To assure prompt service,
please include a letter indi-
cating the specific cause
for returning your KRUPS
product. Do not return any
loose parts or any acces-
sories which are not
defective with your appli-
ances to avoid damage
and 108S in transit.
This warranty will be void if
malfunction was caused by
damage to the
accident, misuse, use on
frequency or voltage other
than marked on the product
and/or described in the
instructions, abuse inclu-
ding tampering, damage in
transit, or usefor commer-
cial purposes. This period
warranty gives you specific
legal rights, and you may
also have other rights
which vary from state to
state.
product by
, ~'
~;"9.':
;.,
.' ~ ~-''''-I'''1'
:,\!:..;t.". ,,'
' .
i
t~;~ '< .,1/"";."'-":~HJ'.''''7,~~
Page 9

~ .. ..,
- - - - un --- --- -- _m -- - -- -- - --- n-
, , ,
~',::;:'i:;r~~~~~~~,:~~:'~::':.-.'::~.>.~:'~,;;:;:)L\'-
. ,', .. , "
".. ' " . ,-
" ",' "'"
- .,'--', .:, ,',
.~~~';~:~::;.~;S~:.
. " .
, '"
'. '.',',','",',
"
..".>...:;<,,,£:;>:,::;,,;:;,;jti;;g;iL.:::;;j;~::t:...:
- -. '.".',
KRUPS GUARANTEE OF PERFORMANCE
Forservice, repair,orwan-antyplease see instructionsbelow.
Ifyou have any otherquestions concerning your"Espresso Maximo
Programatic"machine #864 callthe KRUPSCustomerService Department
toll free (Mondaythrough Friday[except holiday]from9 AMuntil4 PM
Eastern StandardTime)1-800-526-5377(inNew Jersey call (201)767-5600).
. "This' fine KRUPS pioduct is'manufactured accoiding'to a'rigid cOde Of,- '- : '~:.- '
qualitystandards, and witha minimumof care,should give you years of
satisfying service. However,should the need arisefor repairsor for
replacement parts(withinorafterthe wammty period,please do as follows'
for the most convenient, fastest service).
Ifyour product needs to be repairedplease send itto the address listed
below:
KRUPS Customer Service
KRUPS North America, Inc.
7 Reuten Drive
CLOSTER, New Jersey 07624
" . " ',-
. ..., ,
. '. ...
'::~iL::(;;::;.{,::,,::;:,
',: ',' ~' ': '..'
, , , .
,,' ':-, ,-,:' "",, :", :'," '
"... -
'" '
. , , ,
,.,~ ',' ,",'. ,. ,', ',', , " .'
.': :",," ',':: ' ",.,;, ..
',' ,'" "" '," ,
.. ',.'... ,',' ,
;, ,; .'" . , " ,-
:' ~",,:_,~ ' "'''''",-, - .
" '.',' ',."
" . , ,
.. -
"
..
"
,-,
',':: .-:.,"
Pack up your appliance carefullyto avoiddamage inshippingand be sure
to provide us withthe followinginformation:
A. Yourname and address andtype numberof the appliance on the outside
wrapping of the packaging.
B. "ilpe a brief note to the body of the machine indicating:
1. How long you owned it.
2. The nature of the problem.
IMPORTANT: ONLYSEND THE DEFECTIVEAPPUANCE.
KEEPALLREMOVABLEPARTS ATHOMETO AVOIDFURTHER
DAMAGEINTRANSPOR11
I
We willrepairor replace yourKRUPSproductwithoutdelay and send It
back to you with no charge forshipping.
Ifyou send us a receipt forthe regularUPSor ParcelPost Charges, we wli
even reimburseyoufor the shippingcharges, withinorafterthe warranty
period.
On all repairworkto be doneafterthe warrantyperiod,our Customer
Service Departmentwillbillyou formaterial and laboronly.
Do not returnyourapplianceto the store. The KRUPSGuaranteeof
Performance programhas been designed to provideyouwith the' best
possible service using genuine KRUPSparts.
AllrepairworkandreplacedpartsWillcany anextended9O-day-warranty.
,- , ,. '
- , ~::::'.~' '
,.
, ,
..' .
- ," . "
,'".~: ::';;:.,;.,,;; ::::. ..,'
, " ,
::':'~",: "':,-;.. ::':~, , '.
".
"
,'"
..-,'..
.
~,.~>~,,~j;~~i~f
,-,
.
 Loading...