


Ultra high brightness mirror monitor
User manual
AK-035LA AK-043LA EK-035LABK-043LA DK-043LA EK-043LA
HK-043LA
RK-035LA RK-043LA SK-043LA TK-043LA
ECE R 10
Approval No.: 10R-03 12762
ECE R 46
Approval No.: 46R-04 0019
Des igned i n Grand R apids M I, US A Asse mble d in China

Des igne
Product in
Installation and wire
Basic functionsoptional functions
Table of contents
Chapter One: Product intr . . . . . . . . . . . . . . . . . . . . . . . 2
1.1 Package . . . . . . . . . . . . . . . . . . . . . . . . . . . . . . . . . . . . . . . . . 2
1.2 Features . . . . . . . . . . . . . . . . . . . . . . . . . . . . . . . . . . . . . . . . . 2
1.3 Specifica
. . . . . . . . . . . . . . . . . . . . . . . . . . . . . . . . . . . . . 2
1.4 Keyboard . . . . . . . . . . . . . . . . . . . . . . . . . . . . . . . . . . . . . . . . 3
Chapter two: Installa
e. . . . . . . . . . . . . . . . . . . . . . . . . . . 5
2.1 How to install high brightness mirror monitor . . . . . . . . . . . 5
2.2 Special bracket. . . . . . . . . . . . . . . . . . . . . . . . . . . . . . . . . . . . 6
2.3 How to install reverse camera . . . . . . . . . . . . . . . . . . . . . . . . 6
2.4 How to wire . . . . . . . . . . . . . . . . . . . . . . . .
. . . . . . . . . . . . . . 7
Chapter thr
. . . . . . . . . . . . . . . . . . . . . . . . . . . . . . 9
3.1 High-reflectance mirror . . . . . . . . . . . . . . . . . . . . . . . . . . . . 9
3.2 Back up camera display . . . . . . . . . . . . . . . . . . . . . . . . . . . . . 9
3.3 The brightness of screen automa
ally adjusts. . . . . . . . . . . 9
3.4 Glass and bracket. . . . . . . . . . . . . . . . . . . . . . . . . . . . . . . . . 10
Chapter f
. . . . . . . . . . . . . . . . . . . . . . . . . . . . 11
4.1 Parking sensor . . . .. . . . . . . . . . . . . . . . . . . . . . . . . . . . 11
. . . . . . . . . . . . . . . . . . . . . . . . . . . . . . . . . . . . . . . 13

2
1
Product in
Installation and wire
Basic functionsoptional functions
Introduction
Chapter one: Product Introduction
4.3”
TFTLCD
480(H)
×272(V)
Screen
Size
16 : 9 DC 12V
VIDEO-IN to GPS
/DVD (default )
CAMERA to
backup camera .
PAL/
AUTO/
NSTC
Model number
Color
Depth
Working
Voltage
Video
Input
Signal
System
Display
Screen
Aspect
Resolution
AK/EK-035LA
AK/EK-043LA
BK- 043LA
3.5”
4.3”
TFTLCD
TFTLCD
320(H)
×240(V)
480(H)
×272(V)
4: 3
16 : 9
DC 12V
DC 12V
VIDEO-IN to GPS
/DVD (default )
CAMERA to
backup camera .
VIDEO-IN to GPS
/DVD (default )
CAMERA to
backup camera .
PAL/
AUTO/
NSTC
PAL/
AUTO/
NSTC
4.3”
TF TLCD
480(H)
×272(V)
16 : 9 DC 12V
VI DEO -IN to GPS
/DV D (default)
CA MER A to
backup camera .
PAL/
AUT O/
NST C
DK -043L A
1.3 Specifica
User's Manual
Welcome to use our ultra high brightness Rearview mirror monitor.
We reserve the final explana
t on this User's Manual.
Specifica
e subject to chang or any inconvenience
caused!
Please make a copy of the important data. We assume no responsibility for the
data loss.
This manual has been carefully checked. Please contact our service center when
any typing mistake is found.
Please read the opera
arefully and use the accessories only
provided by the original factory to avoid any unexpected damage. No warranty will
be executed if you are not following the ins
incompa e assume no responsibility for any loss and damage
caused hereby.
Users can update and upgr
are from website a
Any discrepancy between the pictures with real products hereina er, the real one
prevails.
The packing box contains the following accessories, please confirm:
Rearview mirror monitor
wire harness
User's manual
wire cover
Remote contr
For the items listed above, please check with your package box. If any damage,
Please contact with the distributor or the agent as soon as possible.
1.1 Package
Back up camera display
Automa
ally brightness adjustment
4.0mm glass and 23mm car factory OEM bracket
Adjust
Compass and temperatur
P
Aut
1.2 Features
φ

4
3
The V1/V2 button can switch the 2 video signal input, Press
it can switch back and forth between the two video signals.
Up
1.Press the menu, which can adjust the brightness, contrast,
color satura een. All the default parameters is
50, you can adjust the parameters through the up and down
buttons according to your preference.
2.Con
o press the MENU button, it can set the
ANGLE(Every country has a specific number),
o
o
CALIBRATION(AUTO/OFF), TEMP UNIT ( C/ F),
SCALE(ON/OFF: it can use remote control to adjust),
LANGUAGE(You can choose the language you prefer : English,
Spanish, Portuguese, Italian, French, German, Dutch, etc.)
3.Select the “RESET” and press UP/DOWN can be back to
factory default set
Dow n
Turn o n/o ff the screen
The menu tabs will automa ally be hidden in 10seconds and lighted up again as
soon as you press the touch buttons
5
7
6
8
9
No.
Descr ip
on
1
2
3.5/4 .3 ultr a high br ightn es s displ ay scre en
Light sensor
4
Mirror without aut
een
turned off or doesn't have video signal, the indicator light will
light up, conversely, it turns off .
Mirror with aut
o-dimming
ates, the indicator light will become light; conversely,
it will turn off.
3
Product in
Installation and wire
Basic functionsoptional functions
Keyboard
1.4 Keyboard
9
Short press: switch video. Long press: turn on / off the screen
AK-035LA / EK-035LA
AK-043LA / EK-043LA
SK-043LA / TK-043LA
1
2 3 4

2.1.1 Remove the original mirror
1
Different cars have different brackets. It depends on your vehicle maker and
manufacturer.
There are many methods to remove the original rear-view mirror, however ,please
don’t force the mirror off the bracket.
The manufacturer will not be responsible for damage caused to your car by wrong
installa
or
1
5
3
4 6
2
2.1.2 Install high brightness mirror monitor on the plate
6
5
Product in
Installation and wire
Basic functionsoptional functions
Installation
2.1 How to install high brightness mirror monitor
1
We have many kinds of brackets. one of them must suit for your car, and we are
not going to go through anymore examples, because the space is limited.
If you don’t find the same bracket here as your car, please contact us.
Rearview mirror monitor
1BAM 2XX
camera
License Plate
General installa
a
When a camera needs to be installed at the rear of vehicle, a g
usually at the top of the License plate where there is an under ledge.
2.2 Special bracket
2.3 How to Install Reverse Camera ( Option – Not included )
2
Chapter two: Installation and wire

er the mirror is mounted, you need to run the cable along the roof lining and
down the pillar so you can connect to Power and the rear view camera
1
3
5
7
8
2
4
6
Video in
Green to back up light
5
6
7
8
9
3
Camera(Not Included)
8
9
2
3
4
6
8
5
7
7
3
rearview mirror monitor
mirror monitor cable
Car camera extension cable
3
1
5
9
camera (not included)
9
3
4
6
8
7
Product in
Installation and wire
Basic functionsoptional functions
Installation
8
5 5 55
7
8
2.4 How to wire

When the car is in reverse, the monitor will automa cally display backup camera.
in re verse
not i n reverse
autom a cally di splay
9
The thickness of our mirror’s glass is 4mm. It is strong enough to bear impact
and reach every country’s safety standards on rearview mirror
4.0mm
OEM bracket for special rearview mirror monitor with 23mm-thickness pipe.
23mm
φ
The bri ghtne ss of screen var ies with am bient l ig ht, t he reb y, to ma ke dr iver
get a c lear an d comfo rta bl e image w hen revers ing.
Product in
Installation and wire
Basic functionsoptional functions
10
Basic functions
Clear b ack up vi ew displayed o n high-refle ctanc e mi rro r.
high-reflectance mirror normal-reflectance mirror
Chapter Three: Basic functions
3.1 High-reflectance mirror
3.2 Back up camera dispaly
3.3 The brightness of screen automatically adjusts
3.4 Glass and bracket
A perfect re flec ve mir ror
Top grade Mirror
Budget grade Mirrors
Strong lightWeak light
Strong lightWeak light

optio
1211
4.1.1 How to wire
5
3
rearview mirror monitor
mirror monitor cable
extension cable
3
1
1
3
5
7
11
2
4
6
10
5
9
9
10
8
8
11
parking sensor
10
11
4.1.2 Two display st yles
Top view display style
LMR display style
Product in
Installation and wire
Basic functionsoptional functions
Parking sensor (optional)
The bu on
4.1 Parking sensor
camera (not included)
If the mirror without auto-dimming
ollowing:
Video input mode: turn on/off the screen
Camera input mode: short press adjust the brightness of the screen
long press to turn on/off the voice Bi...
If the mirror with auto-dimming
ollowing:
Video input: short press to turn on/off auto-dimming
long press to turn on/off the screen.
Camera input: short press adjust the brightness of the screen
long press to turn on/off the voice Bi...
1413
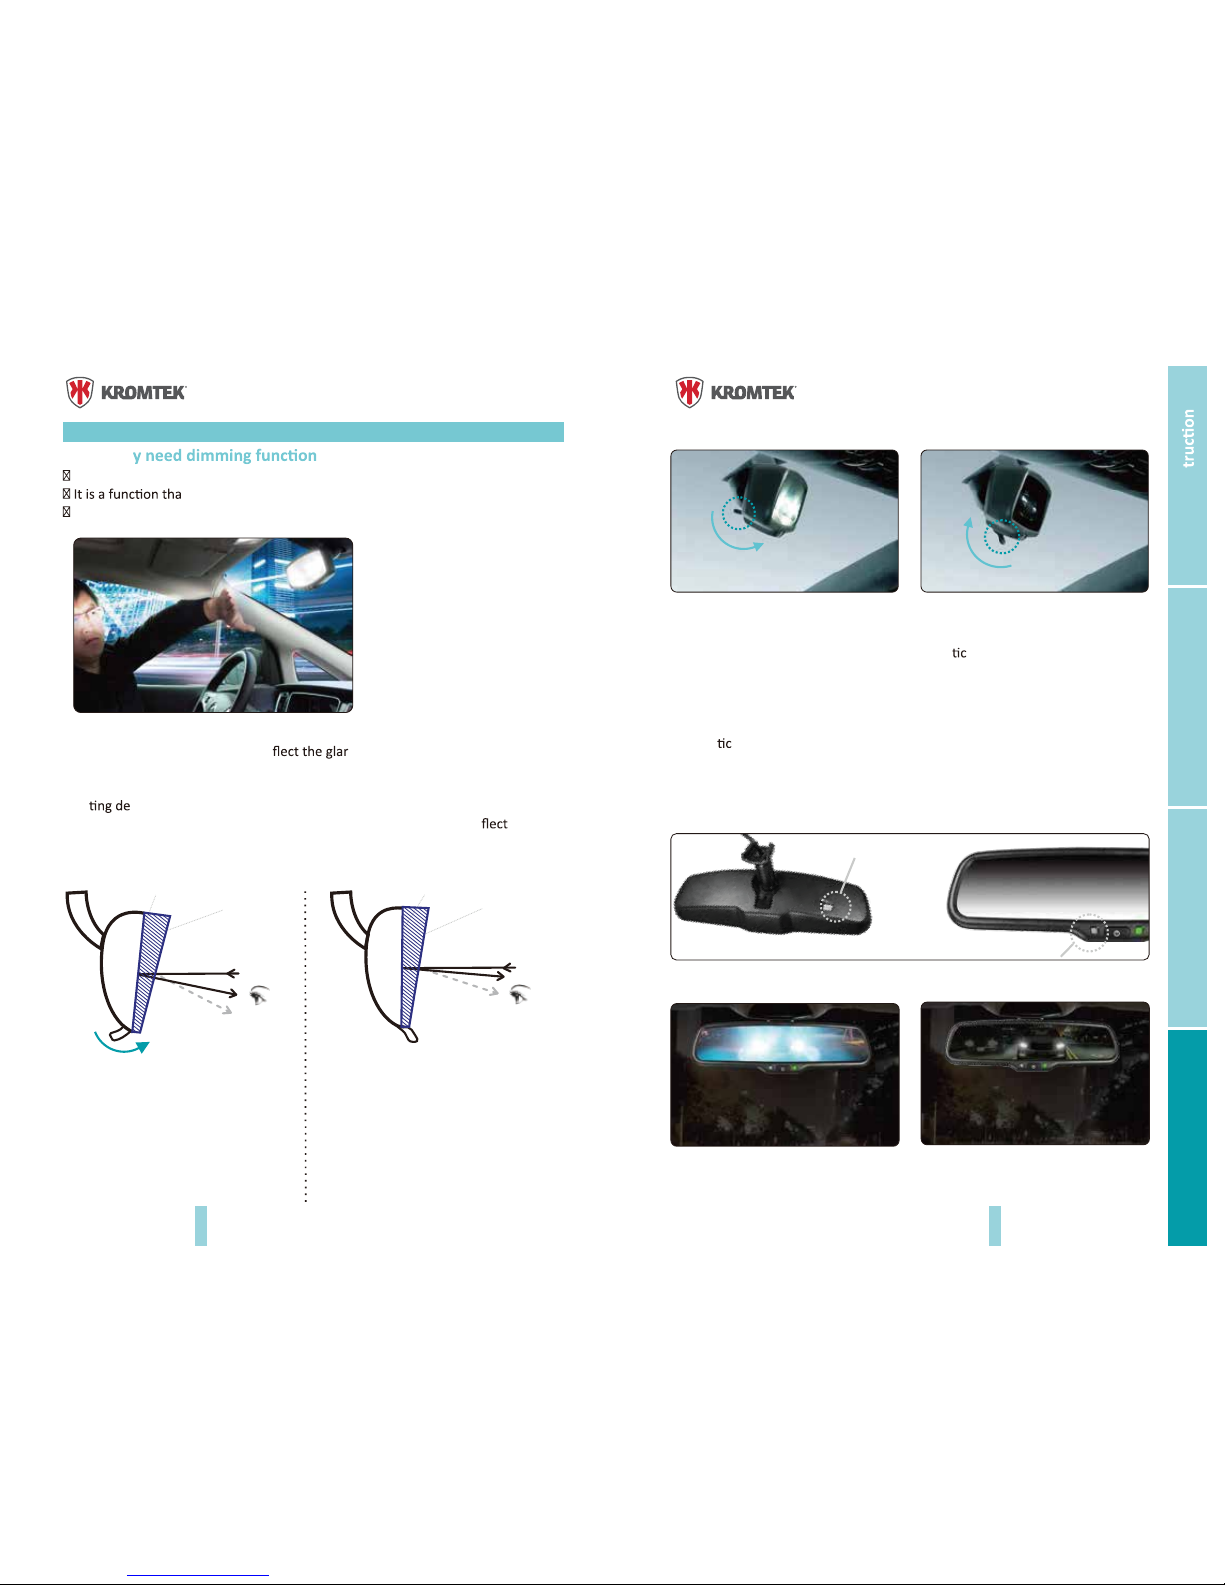
4.2.1 Wh
To protect drivers from night glare of headlight.
t can improve the car safety level.
It may cause a series of legal disputes once removed by car dealers or sellers
4.2.2 manual dimming
The interior rearview mirror will re e of rearward-approaching vehicles
and it shines to driver's eyes when driving at night, which would cause a serious
crisis. While the manual dimming rearview mirror comes with special glass and
rota
vice, when the strong light comes from the back of the car, the driver
only needs to rotate it to another angle, that is, strong light will be re
ed to
another area which ensures the safe driving at night.
mirror plane (high reflectance)
glass surface(low reflectance)
the reflec tance of gl ass sur face is m uc h lower t han mir ror plane
4.2.3 Auto dimming
The auto-dimming of our mirror works automa ally when you start the
engine, and the indicator will light up . The light sensor in the back of the
rearview mirror will always detect the ambient light. The auto-dimming
doesn't work in the broad day for the adequate daylight. However, when night
falls and the ambient light is weak, the auto-dimming starts to work and
automa
ally dims to eliminate the glare of rearward-approaching vehicles.
Furthermore, the degree of brightness of the auto-dimming glass depends on
the level of the light. The stronger the light from the back of the car is, the
darker the glass is. Hence it protects drivers from becoming dizzy and avoiding
car accident.
Auto-dimmi ng bleach ing state
mirror plane (high reflectance)
glass surface(low reflectance)
when dr iving c ar at day time.
the ima ge from the back side
car i s the ref lect im age of th e
mirror , whi ch i s the sam e
princ iple of cos metic m irror.
when dr iving a t night , th ere i s stron g
light from rearwa rd- ap pro ac hing
veh icles, th e drive r can rotate the
manua l shank to another a ngle, tha t is,
strong lig ht will b e ref le cted to
anoth er area . At thi s moment, t he
image from b acksi de car is t he
ref lecta nce of gl ass surface.
the light sensor from the back of
mirror detects the ambient light
front light sensor detects the light
from rearward-approaching vehicles.
manua l-dimmi ng work ing state
manua l-dim mi ng blea ch ing state
Product in
Installation and wire
Basic functionsoptional functions
Dimming (optional)
Auto-dimmi ng work in g state
4.2 Dimming Functions
 Loading...