

Kriptonite KROSSING, BOX KROSSING Instructions Manual
KROSSING
Istruzioni / Instructions
COSA HAI BISOGNO / REQUIRED TOOLS
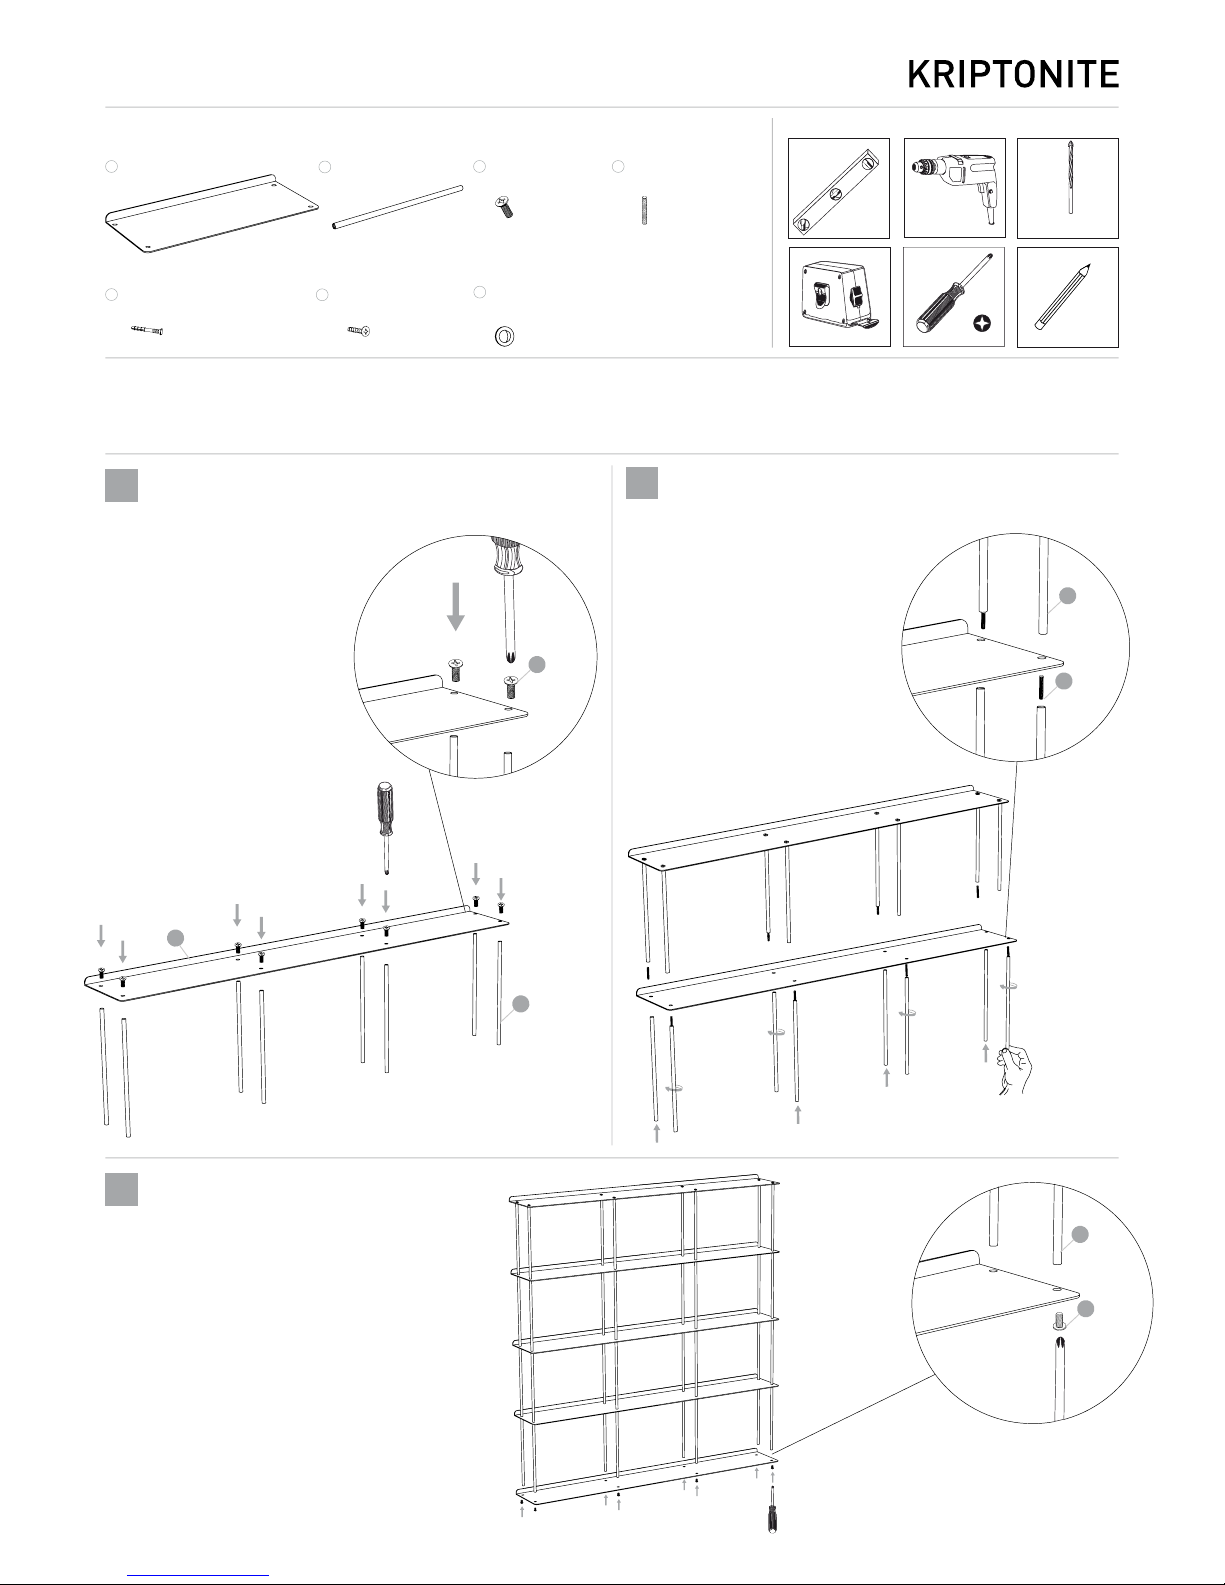
Fissare i tubi al primo ripiano, utilizzando le viti a stella.
Fix tubes to the first shelf using philips screws.
Queste istruzioni prendono come esempio una struttura 100x100 cm, ma il procedimento di montaggio è uguale per qualsiasi
composizione abbiate acquistato.
These instructions take as an example a structure 100x100 cm, but the assembly process is the same for any composition you
have purchased.
Fissare l’ultimo ripiano con le viti a stella
Fix last shelf using philips screws
Aggiungere i ripiani successivi fissandoli tra di loro
attraverso i tubi e le viti senza testa
Add the next shelves fixing them to each other
through the tubes and the grub screws
A
COMPONENTI / COMPONENTS
Pianetti
Shelves
Viti senza testa
Headless screws
D
Tasselli da muro
Wall plugs
E
Viti da muro
Wall screws
F
1
NB
NB
3
2
www.kriptonite.comiK201301
B
Tubi
Tubes
C
Viti a stella
Philips screws
Distanziali
Spacers
G
Ø6
B
C
A
B
B
C
D

www.kriptonite.com
Determinare la posizione sulla parete, segnando l’esatta
posizone del primo foro in alto a sinistra (fig. 4.1).
Decide the spot of the bookshelf on the wall and mark
with a pencil the exact position of the highest hole on
the left (pic. 4.1)
Forare la parete, e inserire il tassello (fig. 4.2)
Drill the wall, where marked, and insert the wall plug (pic 5.2)
Avvitare la vite senza serrare e segnare i successivi fori (fig. 4.4).
Staccare la libreria dalla parete, forare e inserire i tasselli
restanti (fig. 4.2). Appendere la libreria serrando tutte le viti,
ripetere l’operazione dopo aver riempito la libreria.
Nel caso di pareti non a piombo utilizzare i distanziali per
compensare i dislivelli (fig. 4.5)
Screw the bookshelf softly to the wall and then mark the next
holes (pic 5.2). Take off the bookshelf from the wall and drill all
holes. Hang the bookshelf tightening all screws, repeat the last
step when the bookshelf is full. Use spacer rings in case of non
perpendicular walls (pic. 5.5)
IMPORTANTE:
Kriptonite non garantisce la tenuta su cartongesso, tuttavia,
nel caso si decida di sfruttare tale supporto si consiglia di:
aumentare i punti di fissaggio, applicare viti e tasselli
specifici e controllare la tenuta di tanto in tanto.
IMPORTANT
Kriptonite does not guarantee the firmness on plasterboard, but if you decide to apply the bookshelf on plasterboard
we reccomend you to increase the number of fixed holes
using specific plasterboard-screws and inserts, and check
it sometimes.
Appendere la libreria con la vite senza serrare,
prendere il riferimento del foro in alto a destra
aiutandosi con la livella (fig. 4.3), forare e inserire il
tassello (fig. 4.2).
Hang the bookshelf with the screw without screwing
tightly, then helping yourself with a spirit level (pic. 5.3),
mark and drill the wall in the place of the highest hole on
the right, later insert the wall plugs.
4
4.1
4.2
E
4.3
F
4.4 4.5
Panno umido, sapone neutro.
Damp cloth, mild soap.
Singolo modulo contiene:
Single module contains:
32 Cds
22 Dvds
16 Libri / Books
4 Bottiglie / Bottles
PREDISPOSIZIONE DEI FORI:
Non è necessario utilizzare tutti i buchi della struttura
per fissarla a muro.
E’ indispensabile fissare tutti i fori del primo ripiano e
successivamente ogni tre ripiani.
WALL FIXING:
It’s not necessary to use every hole of the structure to fix
it to the wall.
It is necessary fix with the screws all the holes of the first
shelve and each 3h shelves.
G
 Loading...