

MANUAL DE INSTRUCCIONES PARA LA PUESTA EN
MARCHA
de los Filtros de Arena para Piscinas Privadas.
HANDBOOK FOR STARTING
of Sand Filters for Residential Pools.
MANUEL D´INSTRUCTIONS POUR LA MISE EN
MARCHE
des Filtres à Sable pour Piscines Privées
.
BETRIEBS-UND WARTUNGSANWEISUNG
für Sandfilter für Privatschwimmbecken.
MANUALE D´ISTRUZIONI PER L´AVVIAMENTO
dei Filtri di Sabbia per Piscine Private.
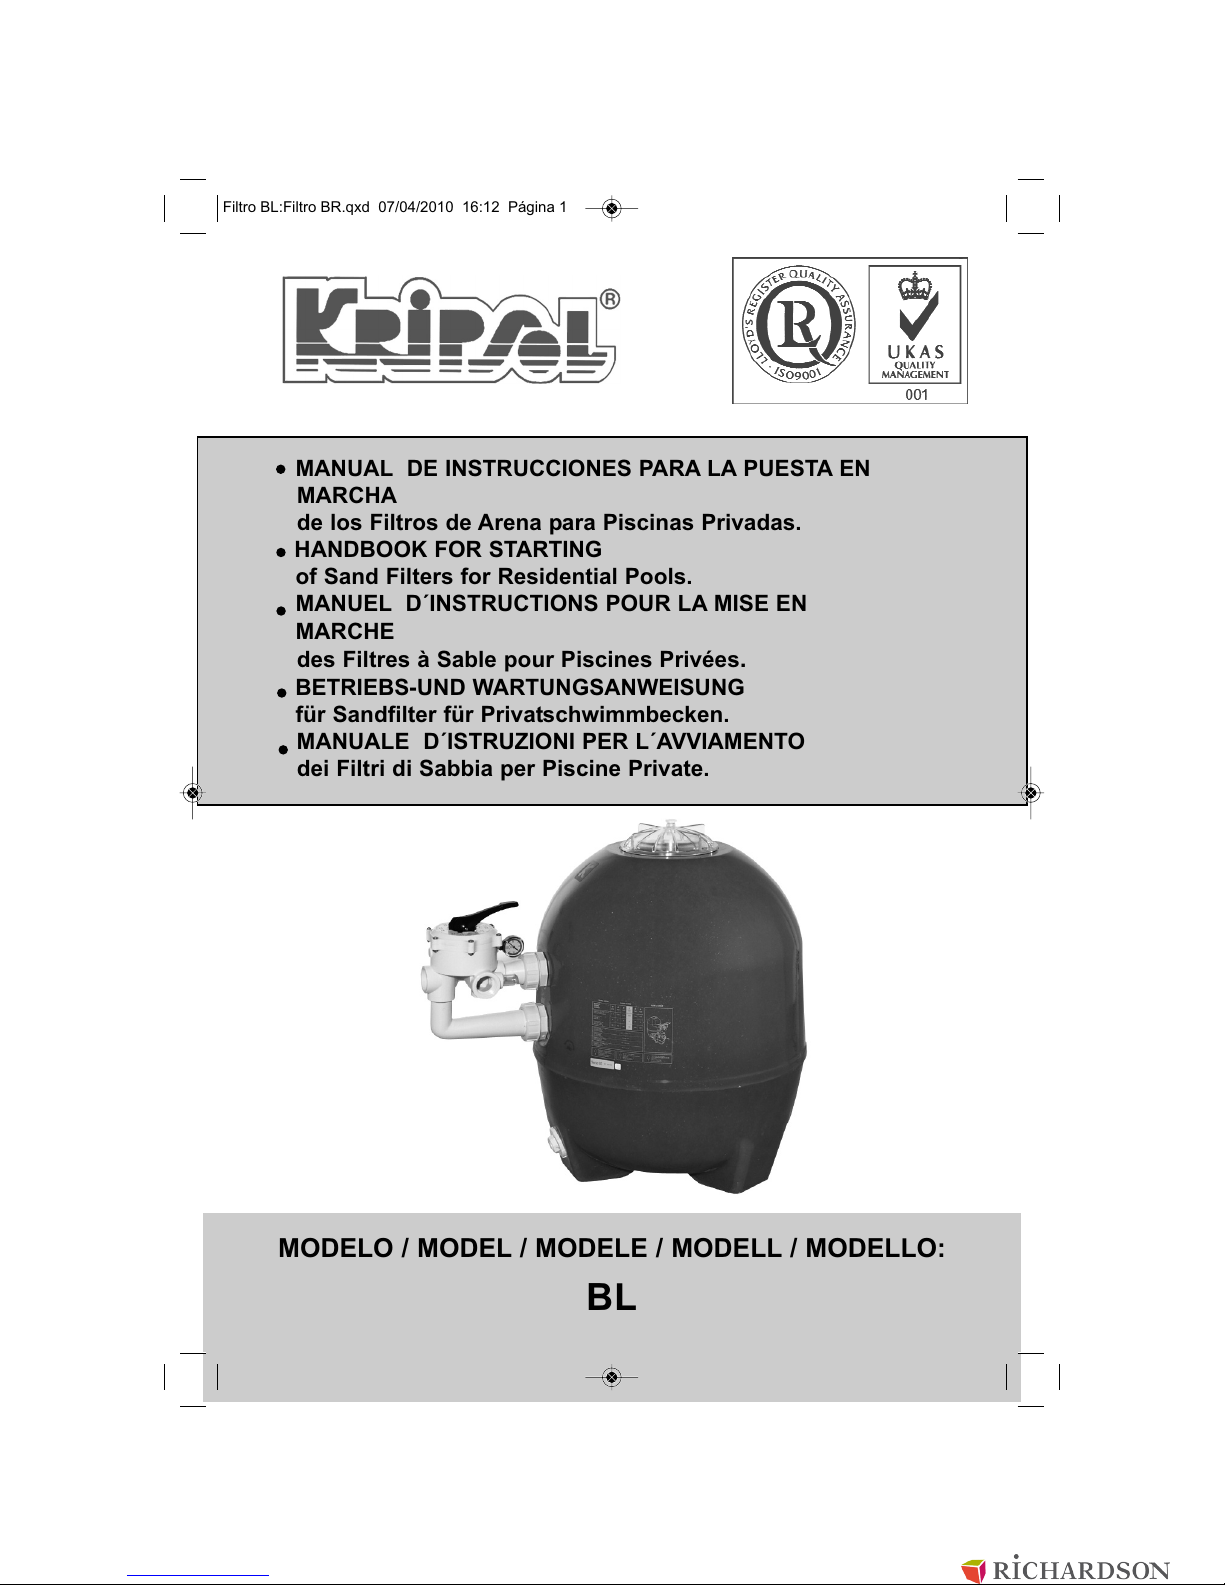
MODELO / MODEL / MODELE / MODELL / MODELLO:
BL
Filtro BL:Filtro BR.qxd 07/04/2010 16:12 Página 1
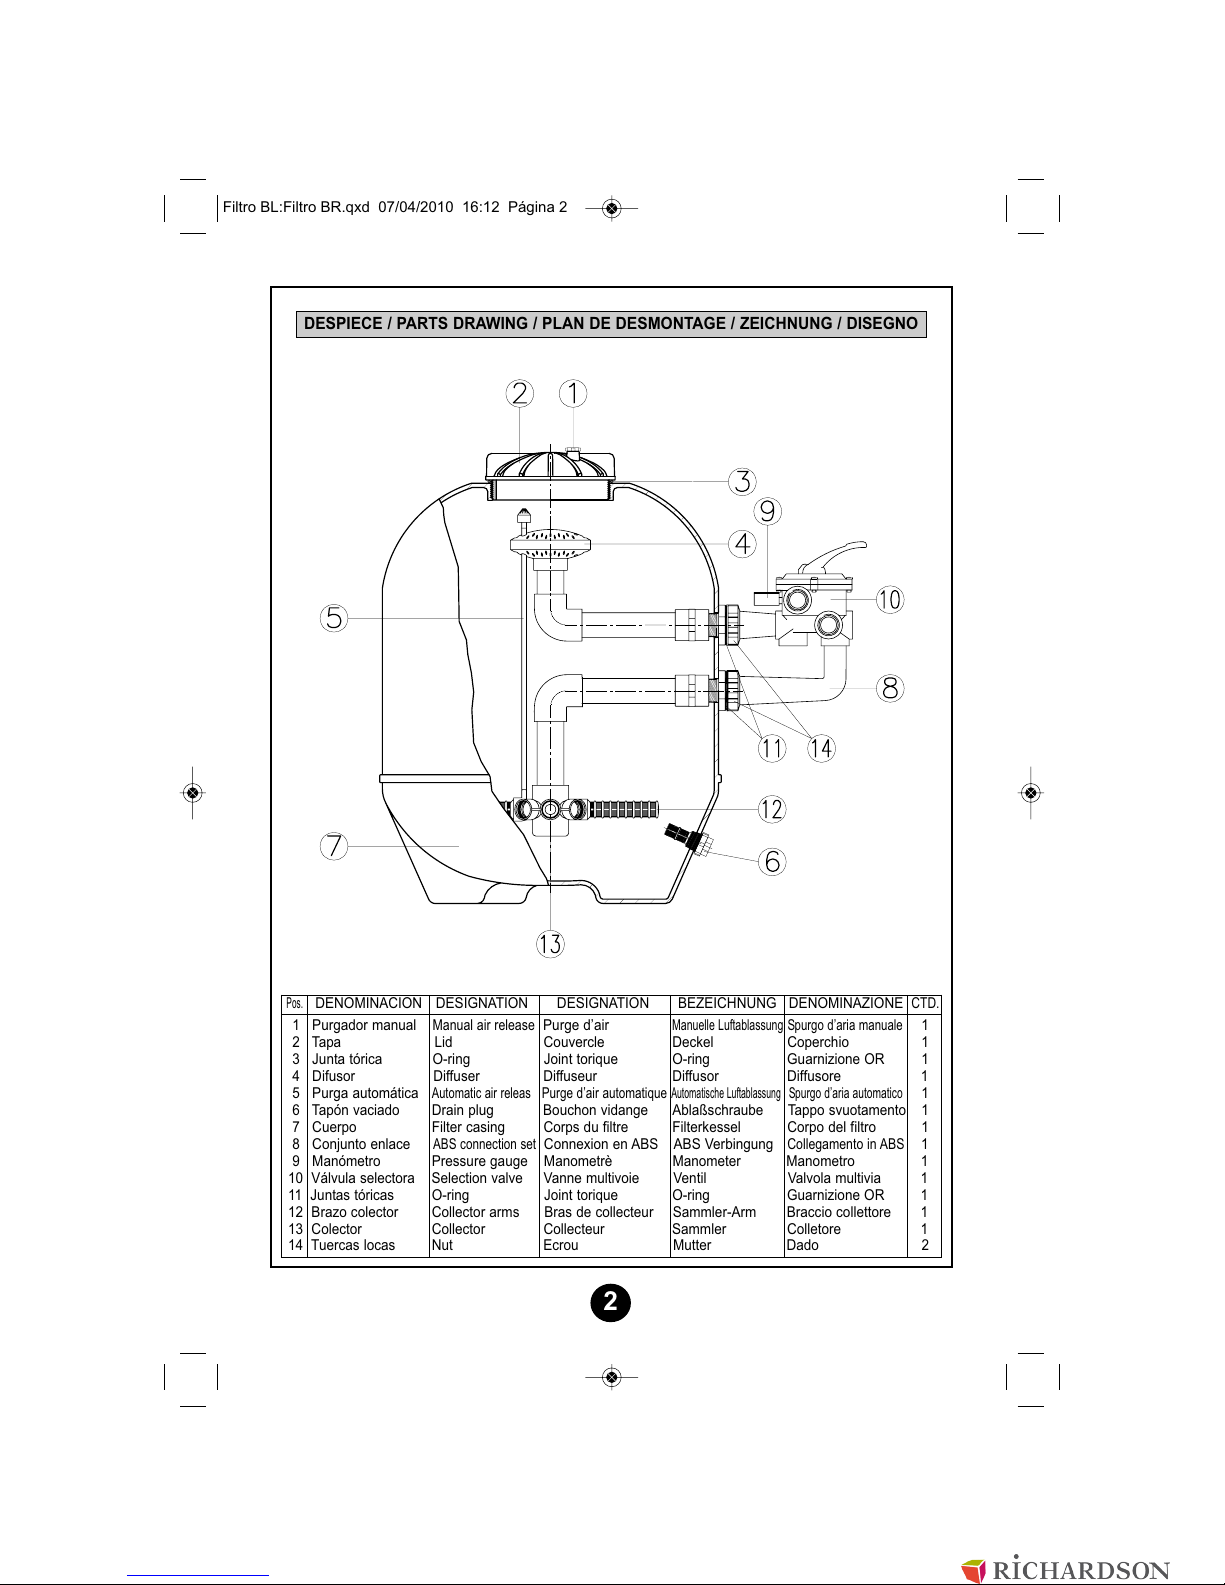
DESPIECE / PARTS DRAWING / PLAN DE DESMONTAGE / ZEICHNUNG / DISEGNO
2
Pos.
DENOMINACION DESIGNATION DESIGNATION BEZEICHNUNG DENOMINAZIONE
CTD.
1 Purgador manual
Manual air release
Purge d’air
Manuelle Luftablassung
Spurgo d’aria manuale
1
2 Tapa Lid Couvercle Deckel Coperchio 1
3 Junta tórica O-ring Joint torique O-ring Guarnizione OR 1
4 Difusor Diffuser Diffuseur Diffusor Diffusore 1
5 Purga automática
Automatic air releas
Purge d’air automatique
Automatische Luftablassung
Spurgo d’aria automatico
1
6 Tapón vaciado Drain plug Bouchon vidange Ablaßschraube Tappo svuotamento 1
7 Cuerpo Filter casing Corps du filtre Filterkessel Corpo del filtro 1
8 Conjunto enlace
ABS connection set
Connexion en ABS ABS Verbingung
Collegamento in ABS
1
9 Manómetro Pressure gauge Manometrè Manometer Manometro 1
10 Válvula selectora Selection valve Vanne multivoie Ventil Valvola multivia 1
11 Juntas tóricas O-ring Joint torique O-ring Guarnizione OR 1
12 Brazo colector Collector arms Bras de collecteur Sammler-Arm Braccio collettore 1
13 Colector Collector Collecteur Sammler Colletore 1
14 Tuercas locas Nut Ecrou Mutter Dado 2
Filtro BL:Filtro BR.qxd 07/04/2010 16:12 Página 2
Instalar la válvula (10), cuidando que las juntas tóricas
(11) queden alojadas correctamente, y roscar
manualmente las tuercas locas (14) hasta cerrar
herméticamente. Quitar la tapa (2), llenar con agua
una tercera parte del filtro. Para evitar la entrada de
arena por el difusor (4), girar éste o taparlo. Llenar
ahora el filtro con la cantidad de arena indicada, y
colocar el difusor (4) en su posición inicial, descubierto.
Roscar manualmente la tapa (2), cuidando que las
roscas del filtro y tapa estén completamente limpias.
Conectar los conductos, poner la válvula en
posición LAVADO contracorriente y hacer funcionar la
bomba durante un minuto.
NUNCA MODIFIQUE LA POSICION DE LA
VALVULA CUANDO LA BOMBA ESTE EN
FUNCIONAMIENTO. NUNCA DESMONTE LA
VALVULA CUANDO EL FILTRO ESTE BAJO
PRESION.
Place the valve (10), making sure that the O-rings
(11) are correctly placed, and screw the nuts (14)
manually until hermetic closing is reached. Remove
lid (2) and fill the filter up to 1/3 level with water. To
avoid sand entering through the diffuser (4), turn it
or cover it. Now fill the filter with specified quantity
of sand, and place the diffuser (4) into its initial
position, uncovered.
Thread the lid (2) by hand, ensuring that the thread
on the filter and the lid are fully clean.
Connect pipes, turn valve into BACKWASH position
and start the pump for at least one minute.
NEVER SHIFT VALVE HANDLE POSITION
WHILE PUMP IS RUNNING. NEVER
DISASSEMBLE VALVE WHILE FILTER IS
UNDER PRESSURE.
Installez la vanne (10), faisant attention à que les
joints toriques (11) soient placés correctement,
et tournez manuellement les écrous (14) jusqu’á
fermer hermétiquement. Enlevez le couvercle (2),
remplissez le filtre 1/3 avec de l’eau. Pour éviter
que du sable n’entre dans le diffuseur (4), tournez-le
ou couvrez-le. Remplissez maintenant le filtre
de sable dans la quantité indiquée, et placez le
diffuseur (4) dans sa position initiale, découvert.
Visser manuellement le couvercle (2), en veillant
à ce que les filets du filtre et du couvercle soient
bien propres.
Raccordez les canalisations, placez la vanne en
position LAVAGE canalisation et
faites touner la
pompe pendant une minute.
NE JAMAIS MODIFIER LA POSITION DE LA VANNE
PENDANT QUE LA POMPE FONCTIONNE. NE
JAMAIS DEMONTER LA VANNE QUAND LE
FILTRE EST SOUS PRESSION.
Installier Sie das Ventil (10), wobei aufgepasst
werden muss, dass sich die torischen Dichtringe
(11) genau an der richtigen Stelle befinden und
nun
werden die Muttern (14) mit der Hand fest
aufgeschraubt, bis sie hermetisch schliessen.
Nehmen Sie den Deckel (2) ab und füllen Sie
den Filter bis zu einem Drittel mit Wasser auf.
Ummdas Eindringen von Sand durch die
Ausflussdüse (4), zu vermeiden, wird diese gedreht
ober abgedeckt. Nun wird der Filter mit der
angegebenen Menge Sand gefüllt und die
Ausflussdüse (4) wird freigelegt in ihre ursprüngliche
Stellung zurückgebracht.
Der Deckel (2) wird von Hand aufgeschraubt,
wobei aufgepaßt werden muß, daß das Gewinde
des Filters und der Deckel einwandfrei sauber
sind.
Schließen Sie die Leitungen an, stellen Sie das
Ventil auf Gegenstromspülung RÜCKSPULEN
und lassen Sie die Pumpe eine Minute lang
laufen.
NIEMALS DIE POSITION DES VENTILHELBELS
UMSTELLEN WENN DIE PUMPE LAÜFT.
NIEMALS DEN VENTIL DEMONTIEREN WENN
DER FILTER UNTER DRUCK IST.
ESPAÑOL
3
ENGLISH
FRANÇAIS
DEUTSCH
ATENCION
CAUTION
ATTENTION
ACHTUNG
Filtro BL:Filtro BR.qxd 07/04/2010 16:12 Página 3

Installare la valvola (10), controllando che le
guarnizioni o-ring (11) siano alloggiate correttamente,
e avvitare manualmenti i dadi (14) fino a ottenere
la chiusura ermetica. Togliere il coperchio (2) e
riempire d’acqua un terzo del filtro. Onde evitare
che entri sabbia attraverso il diffusore (4), girarlo
o coprirlo. Riempire ora il filtro con la quantità di
sabbia indicata, e collocare il diffusore (4) nella
posizione iniziale, avendo provveduto a scoprirlo.
Avvitare manualmente il coperchio (2), facendo
attenzione che la filettatura del filtro e il copechio
siano completamente puliti.
Collegare le tubazioni, girare la valvola in posizione
LAVAGGIO e far girare la pompa per almeno un minuto.
NON SPOSTARE MAI LA MANIGLIA DELLA
VALVOLA MENTIRE LA POMPA E’ IN FUNZIONE.
NON SMONTARE MAI LA VALVOLA MENTRE IL
FILTRO E’ ANCORA SOTTO PRESSIONE.
ITALIANO
4
ATTENZIONE
CARACTERISTICAS Y DIMENSIONES / CHARACTERISTICS AND DIMENSIONS
CARACTÉRISTIQUES ET DIMENSIONS / KENNZEICHEN UND MASSEN
CARATTERISTICHE E DIMENSIONI
D
A
B
C
PRESION DE TRABAJO
WORKING PRESSURE
PRESSION TRAVAIL
ARBEITSDRUCK
PRESIONE DI ESERCIZIO
0,5 - 1,6 Kg / cm²
PRESION DE PRUEBA
TESTING PRESSURE
PRESSION PREUVE
PRÜFDRUCK
PRESIONE DI TEST
2,5 Kg / cm²
TEMP. DE TRABAJO
OPERATING TEMP.
TEMP. DE FONCTION
ARBEITSTEMPERATUR
TEMPERATURA MAX.
Min.1º C ÷ Max. 5º C
GRANULOMETRIA ARENA
SAND GRADING
GRANULATION SABLE
SANDKÖRNUNG
GRANULOMETRIA SABBIA
0,4 ÷ 0,8 mm.
ARENA
SAND
SABLE
SAND
SABBIA
(Kg)
MODELO
MODEL
MODELE
MODELL
TIPO
BL400
BL450
BL520
BL640
BL680
BL760
BL900
DIMENSIONES
DIMENSIONS
DIMENSIONS/MAßE
DIMENSIONI
255
315
355
405
425
460
470
CAUDAL
FLOW / DEBIT
FILTER-LEISTUNG
PO RTATA
m³/h/m² m³/h/m²
40 50
SUP. FILTRANTE
FILTRATION AREA
SURFACE FILTRATION
FILTER-FLÄCHE
SUP. FILTRANTE
CONEXION
CONNECTION
CONNEXION
ANSCHLÜSSE
COLLEGAMENTO
A
B
C D
VOLUMEN
VOLUME
VOLUME
VOLUMEN
VOLUMEN
(m³)
380
440
480
530
550
600
610
555
690
780
850
895
1010
1025
400
450
520
640
680
760
900
1 1/2” - 50
1 1/2” - 50
1 1/2” - 50
1 1/2” - 50
2” - 63
2” - 63
2” - 63
0,13
0,16
0,21
0,32
0,36
0,45
0,63
0,12
0,15
0,24
0,36
0,42
0,60
0,90
5,2
6,4
8,4
12,8
14,4
18,0
25,2
6,5
8,0
10,5
16,0
18,0
22,5
31,5
50
75
100
150
175
225
325
FILTRO VACIO
EMPTY FILTER
VIDE
LEERGEWICHT FILTER
FILTRO VOUTO
(Kg)
11,5
14
17
23
26
34
45
Filtro BL:Filtro BR.qxd 07/04/2010 16:12 Página 4

5
VALVULA SELECTORA 6 VIAS / 6 WAYS BACKWASH VALVE / VANNE 6 VOIES
6 WEGE-RÜCKSPÜLENVENTIL / VALVOLA SELETTRICE 6 VIE
Filtro BL:Filtro BR.qxd 07/04/2010 16:12 Página 5

6
ARENA
SAND
SABLE
SABBIA
NIVEL DE ARENA
SAND LEVEL
NIVEAU DE SABLE
SAND-NIVEAU
LIVELLO DI SABBIA
H2O
B = MINIMO 3,5 M. / MINIMUM 3,5 M.
B
A
A = MAXIMO 5 M; MINIMO 0,4 M.
MAXIMUM 5 M; MINIMUM 0,4 M.
Filtro BL:Filtro BR.qxd 07/04/2010 16:12 Página 6

7
PLANO DESPIECE / DETAIL DRAWING / PLAN DE DEMONTAGE
EXPLOSIONZEICHNUNG / DISEGNO ESPLOSO
Filtro BL:Filtro BR.qxd 07/04/2010 16:12 Página 7

OFICINAS Y FABRICA:
Pol. Ind. La Frontera. C/ Dos, 91; y C/ Seis, 89. 45217 UGENA (Toledo) ESPAÑA.
Telf.: 925 53 30 25*. Fax: 925 53 30 14. Phone: +34 925 53 30 25. Fax: +34 925 53 30 14.
E - mail Nacional: iberica@kripsol.com
E - mail Export: export@kripsol.com
REF.: 031. 04/10 UGENA 10000
Filtro BL:Filtro BR.qxd 07/04/2010 16:12 Página 8
 Loading...