

Kreisen DVR 530C User Manual

Precautions
IMPORTANT
The lightning flash with arrowhead symbol, within
an equilateral triangle, is intended to alert the user
to the presence of uninsulated dangerous voltage
within the product's enclosure that may be of
sufficient magnitude to constitute a risk of electric
shock to persons.
CAUTION : TO PREVENT THE RISK OF
ELECTRIC SHOCK, DO NOT REMOVE
COVER (OR BACK). NO USER
SERVICEABLE PARTS INSIDE. REFER
SERVICING TO QUALIFIED SERVICE
PERSONNEL.
These labels can be found on the unit's rear panel. Ces étiquelttes se trousent sur le fond de Pappareil.
Note : This equipment has been tested and found to comply with the limits for a Class
B digital device, pursuant to Part 15 of the FCC Rules. These limits are designed to
provide reasonable protection against harmful interference in a residential installation.
This equipment generates, uses and can radiate radio frequency energy and, if not
installed and used in accordance with the instructions, may cause harmful interference
to radio communications. However, there is no guarantee that interference will not
occur in a particular installation. If this equipment does cause harmful interference to
radio or television reception, which can be determined by turning the equipment off and
on, the user is encouraged to try to correct the interference by one or more of the
following measures:
- Reorient or relocate the receiving antenna.
- Increase the separation between the equipment and receiver.
- Connect the equipment into an outlet on a circuit different from that to which the
receiver is connected.
- Consult the dealer or an experienced radio/TV technician for help.
TO PREVENT FIRE OR SHOCK HAZARD, DO NOT EXPOSE THIS APPLIANCE TO RAIN OR MOISTURE.
WARNING
APPARATUS SHALL NOT BE EXPOSED TO DRIPPING OR SPLASHING AND NO OBJECTS FILLED WITH
LIQUIDS, SUCH AS VASES, SHALL BE PLACED ON THE APPARATUS.
The exclamation point within an
equilateral triangle is intended to alert
the user to the presence fo importantoperating and maintenance(servicing)
instructions in the literature
accompanying the appliance.
CAUTION
This product satisfies FCC regulations when shielded cables
and connectors are used to connect the unit to other
equipment. To prevent electromagnetic interference with
electric appliances such as radios and televisions, use
shielded cables and connectors for connections.
CAUTION
• Use of controls or adjustments or performance of procedures
other than those specified here may result in hazardous
radiation exposure.
• The use of Optical instruments with this product will
increase eye hazard.
CAUTION
This product contains a laser diode of higher class than 1. To ensure continued safety,
do not remove any covers or attempt to repair. Refer all servicing to qualified
personnel.
The following caution appears on rear of the unit.
CAUTION
This product incorporates copyright protection technology that is protected by method claims of certain U.S Patents and other intellectual property
rights owned by Macrovision Corporation and other rights owners. Use of this copyright protection technology must be Authorized by Macrovision
Corporation, and is intended for home and other limited viewing uses only unless otherwise authorized by Macrovision Corporation. Reverse
engineering or disassembly is prohibited.
Manufactured under license from Dolby Laboratories. "Dolby" and the double-D symbol are trademarks of Dolby Laboratories.
"DTS" and "DTS Digital Surround" are trademarks of Digital Theater Systems, Inc.
Precautions
2
VISIBLE AND INVISIBLE LASER RADIATION WHEN OPEN. AVOID EXPOSURE TO BEAM (WARNING LOCATION: INSIDE ON LASER
COVERSHIELD)
CAUTION : LASER RADIATION WHEN OPEN.
AVOID EXPOSURE TO BEAM.
VORSICHT : LASERS TRAHLUNG, WENN ABDECKUNG
GEÖFFENT NIICHT DEM STRALHL
AUSSETZEN!
ADVARSEL : LASERSTRÄLING VED ÃBNING UNDGÃ
UDSÆ TTEL SE FOR STRÃLING.
VARNING : LASERSTRÃL NING NÃR DENNA DEL ÃR
ÖPPNAD BETRAKTA EJ STRÃLEN.
VARO! : AVATTAESSA ALTISTUT LASERSÃTBL
YLLE ÃLÃ KATSO SÃTEESEN

Important Safety
Instructions
• READ THESE INSTRUCTIONS - All the safety
and operating instructions should be read before
the product is operated.
• KEEP THESE INSTRUCTIONS - The safety and
operating instructions should be retained for
future reference.
• HEED ALL WARNINGS - All warnings on the
product and in the operating instructions should
be adhered to.
• FOLLOW ALL INSTRUCTIONS - All operating
and use instructions should be followed.
• CLEAN ONLY WITH A DAMP CLOTH - Unplug
this product from the wall outlet before cleaning.
The product should be cleaned only with a
polishing cloth or a soft dry cloth. Never clean with
furniture wax, benzene secticides or other volatile
liquids since they may corrode the cabinet.
• DO NOT USE THIS APPRATUS NEAR WATER
-
Do not use this product near water - for
example, near a bathtub, wash bowl, kitchen sink,
or laundry tub; in a wet basement; or near a
swimming pool; and the like.
• ACCESSORIES - Only use the
attachments/accessories specified by the
manufacturer.
• CART - Use only with a cart, stand,
bracket, or table specified by the
manufacturer, or sold with the
apparatus. When a cart is used,
use caution when moving the
cart/apparatus combination to avoid
injury from tip-over.
• VENTILATION - Do not block any of the
ventilation openings. Install in accordance with the
manufacturer's instructions.
• GROUNDING OR POLARIZATION - Do not
defeat the safety purpose of the polarized or
grounding type plug. A polarized plug has two
blades with one wider than the other. A grounding
type plug has two blades and a third grounding
prong. The wide blade or the third prong is
provided for your safety. When the provided plug
does not fit into your oulet, consult an electrician
for replacement of the obsolete outlet.
• POWER-CORD PROTECTION - Protect the
power cord from being walked on or pinched
particularly at plugs, convenience receptacles,
and the point where they exit from the apparatus.
• LIGHTNING - Unplug this apparatus during
lightning storms or when unused for long periods
of time.
• SERVICING - Refer all servicing to qualified
service personnel. Servicing is required when the
apparatus has been damaged in any way, such
as power supply cord or plug is damaged, liquid
has been spilled over, objects have fallen into the
apparatus, the apparatus has been exposed to
rain or moisture, does not operate normally, or
has been dropped.
• HEAT - Do not install near any heat sources such
as radiators, heat registers, stoves, or other
apparatus(including amplifiers) that produce heat.
Important Safety Instructions
3

Table of Contents
Before You Start
What's in the box
Putting the batteries in the remote control
Using the remote control
Compatible Discs
...................................................
.....................................
..................................................
Controls & Display
Front Panel
Display
Rear Panel
Remote Controller Unit
.............................................................
......................................................................
..............................................................
........................................
Connection
Connection for Video Output Terminals
Connection for Audio Output Terminals
Connection for A/V Input Terminals
Connection for DV IN and USB jack
Basic Playback
Playing a DVD or VCD disc
Playing a DVD+RW or DVD+R disc
Playing an Audio CD or MP3 disc
Playing a Picture CD
Playing JPEG files from USB memory
...............................
....................
............................................
Advanced Playback
Fast Forward/Backward
Skip Forward/Backward
Slow Forward (DVD/VCD)
Frame by Frame Playback (DVD/VCD)
Program Playback (Audio CD/MP3)
OSD (On Screen Display)
Selecting Subtitles (DVD only)
Selecting Audio Languages (DVD only)
Repeating a Title, Chapter
A-B Repeat (DVD only)
ZOOM Screen
Switching the Camera Angle (DVD only)
Direct Search (DVD/VCD)
........................................................
......................................
......................................
..................................
..................................
..........................
.................................
.......................................
..................................
.....
.........
.........
................
...............
................
...........
.........
...............
.........
.......
5
5
5
6
7
8
9
10
13
14
14
14
15
15
15
16
16
17
17
17
17
18
19
19
20
20
21
21
22
22
Recording
Simple recording
OTR (One touch Timer Recording)
Timer Recording
Timer review - changing and erasing
record settings
Recording from a digital camcorder
...................................................
....................................................
....................................................
Editing
Editing a DVD+RW or DVD+R disc
Play disc (DVD+RW/DVD+R)
Rename disc (DVD+RW/DVD+R)
Erase disc (DVD+RW only)
Record a new title (DVD+RW/DVD+R)
Overwrite disc (DVD+RW only)
Lock disc (DVD+RW only)
Finalize disc (DVD+R only)
Editing a title of DVD+RW or DVD+R
Play title (DVD+RW/DVD+R)
Edit title (DVD+RW/DVD+R)
Rename title (DVD+RW/DVD+R)
Erase title (DVD+RW only)
Overwrite title (DVD+RW only)
......................
...........................
...............................
........................
.................................
................................
............................
.............................
....................
................................
.........................
Using the Setup Menu
Basic Operations
General
Playback
Record
Language
Channel Scan
Clock
....................................................................
..................................................................
......................................................................
.........................................................................
...................................................
................................................................
........................................................
Additional Information
Specifications
Troubleshooting
.........................................................
.....................................................
.................
................
...................
..........
...................
23
23
24
25
25
26
26
26
27
27
28
28
29
29
30
30
31
31
32
33
33
34
36
36
37
38
39
40
Table of Contents
4
Before You Start
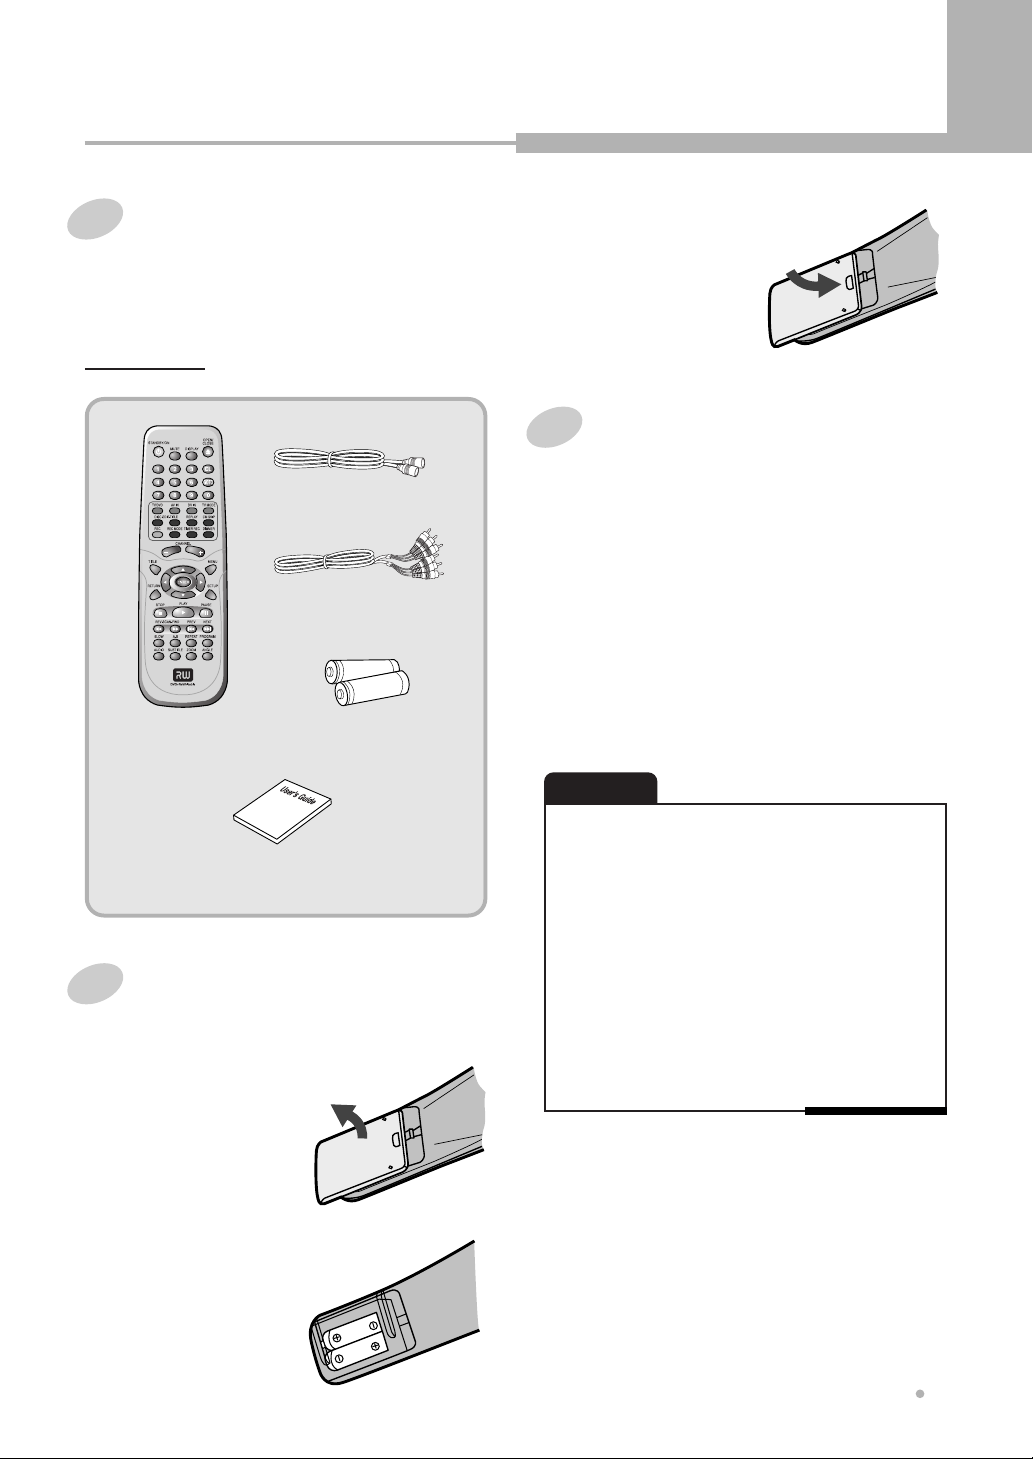
What's in the box
Thank you for buying this product. Please confirm
that the following accessories are in the box when
you open it.
Accessories
RF cable
Audio/Video cable
Remote control
AA dry cell batteries x 2
Close the cover.
3
Using the remote control
Keep in mind the following when using the
remote control :
• Make sure that there are no obstacles between
the remote and the remote sensor on the unit.
• Remote operation may become unreliable if
strong sunlight or fluorescent light is shining on
the unit's remote sensor.
• Remote controllers for different devices can
interfere with each other. Avoid using remotes for
other equipment located close to this unit.
• Replace the batteries when you notice a fall off in
the operating range of the remote.
NOTE
Operating instruction
(this manual)
Putting the batteries in the remote
control
Open the battery compartment
cover on the back of
1
the remote control.
Insert two AA/R03 batteries into
the battery compartment
2
following the indications
(+, -) inside the
compartment.
Incorrect use of batteries can result in hazards such
as leakage and bursting. Please observe the following:
• Don't mix new and old batteries together.
• Don't use different kinds of battery together-although they
may look similar, different batteries may have different
voltages.
• Make sure that the plus and minus ends of each battery
match the indications in the battery compartment.
• Remove batteries from equipment that isn't going to be
used for a month or more.
• When disposing of used batteries, please comply with
governmental regulations or environmental public
instruction's rules that apply in your country or area.
Before You Start
5
Before You Start
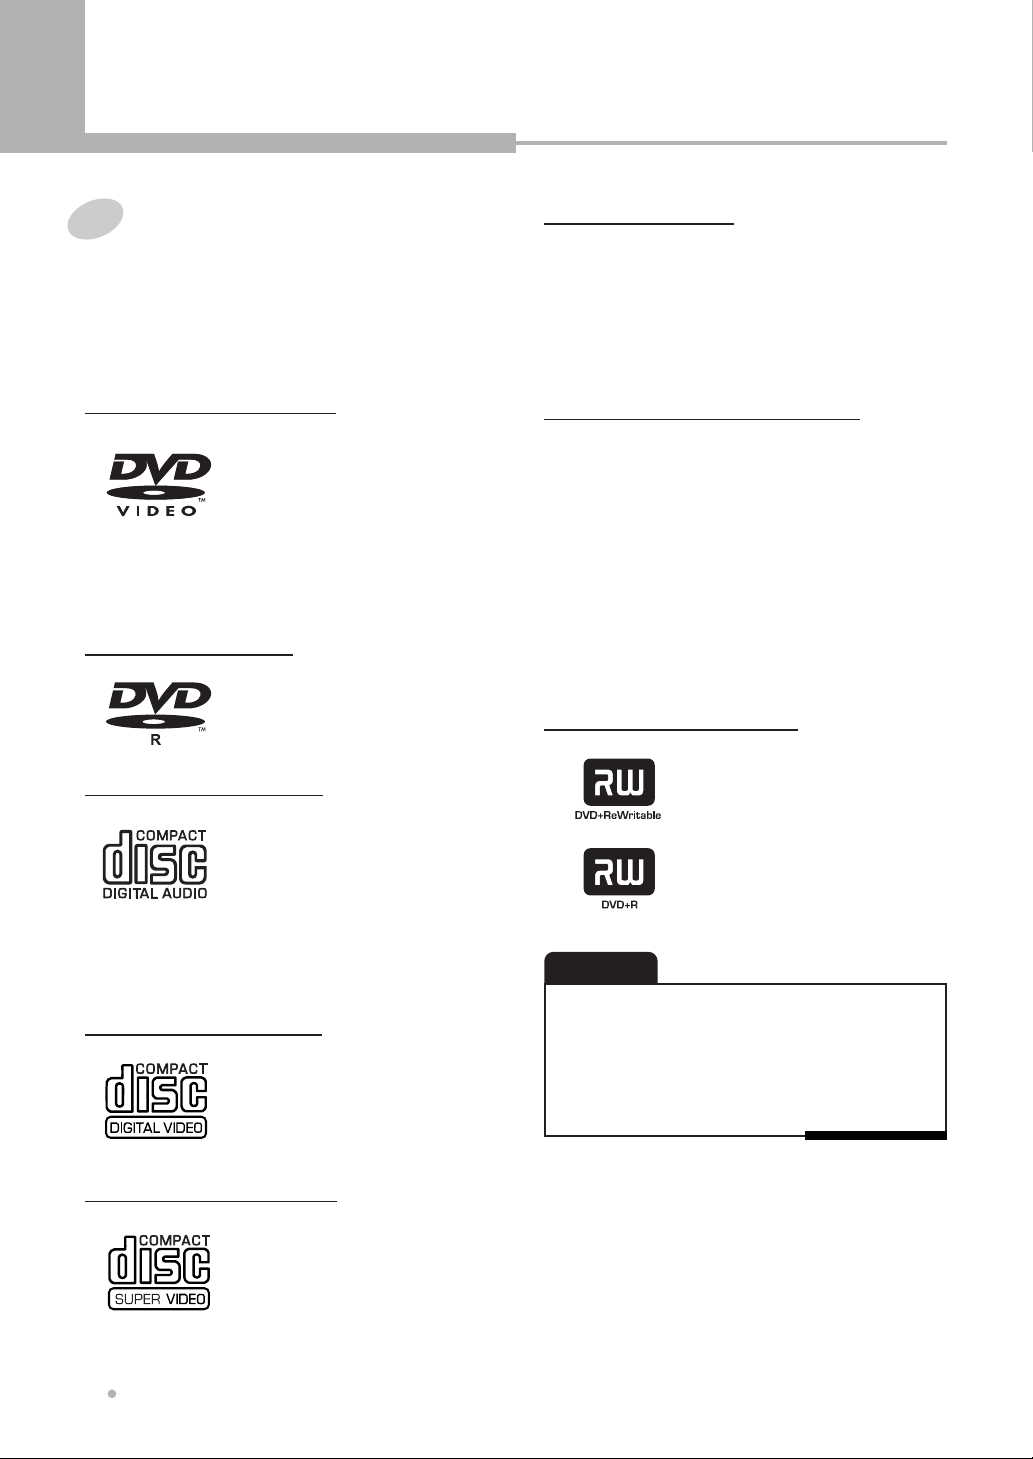
Compatible Discs
Any disc that displays one of the following logos
should play in this system. Other formats, including
DVD-RAM, DVD-ROM, DVD-Audio, SACD and
CD-ROM(except those containing MP3 files) will
not play.
DVD Video compatibility
• Single-sided or double-sided
discs.
• Single layer or dual layer discs.
• Dolby Digital, DTS, MPEG or
Linear PCM digital audio.
• MPEG-2 digital video Discs are generally divided
into one or more titles. Titles may be further
subdivided into chapters.
DVD-R compatibility
• This unit can play DVD-R
discs recorded as DVD video
format.
Audio CD compatibility
• 12cm or 8cm discs
• Linear PCM digital audio
• CD-Audio, CD-R and CD-RW
formatted CDs are divided into
tracks.(This unit can play CD-R
and CD-RW discs recorded in CD Audio or Video
CD format, or with MP3 audio files, or Kodak
picture CD files.)
Video CD compatibility
• 12cm or 8cm discs
• MPEG-1 digital audio
• MPEG-1 digital video
• Video CDs are divided into tracks.
DVD Video regions
All DVD Video discs carry a region mark on the case
somewhere that indicates which region of the world
the disc is compatible with. Your DVD player also has
a region mark, which you can find on the rear panel.
Discs from incompatible regions will not play in this
player. Discs marked ALL will play in any player.
MP3 compatibility information
• The CD-ROM must be ISO 9660 compatible.
• Mono or stereo MPEG-1 Audio Layer 3 format,
32 or 44.1 or 48kHz fixed bit-rate. Incompatible
files will not play.
• Compatible with variable bit-rate (VBR) files.
• This player is compatible with multi-session discs.
• Audio encoded at 128Kbps should sound close to
regular audio CD quality. Although this player will
play 48K to 320K bit-rate.
• MP3 tracks, the sound quality becomes
noticeably worse at lower bitrates.
DVD+R/RW compatibility
• This unit can play DVD+R and
DVD+RW discs recorded as
DVD video format.
• Also this unit can record the
video and audio signal in
DVD+R or DVD+RW disc.
CAUTION
• DVD-R and CD-R/RW discs recorded using a personal
computer may not play if the disc is damaged or dirty, or
if there is dirt or condensation on the player's lens.
• If you record a disc using a personal computer, even if it
is recorded in a compatible format, there are cases in
which it may not play because of the settings of the
application software used to create the disc.
Super VCD compatibility
• 12cm or 8cm discs
• MPEG-1 digital audio
• MPEG-2 digital video
• Super VCDs are divided into
tracks.
Before You Start
6
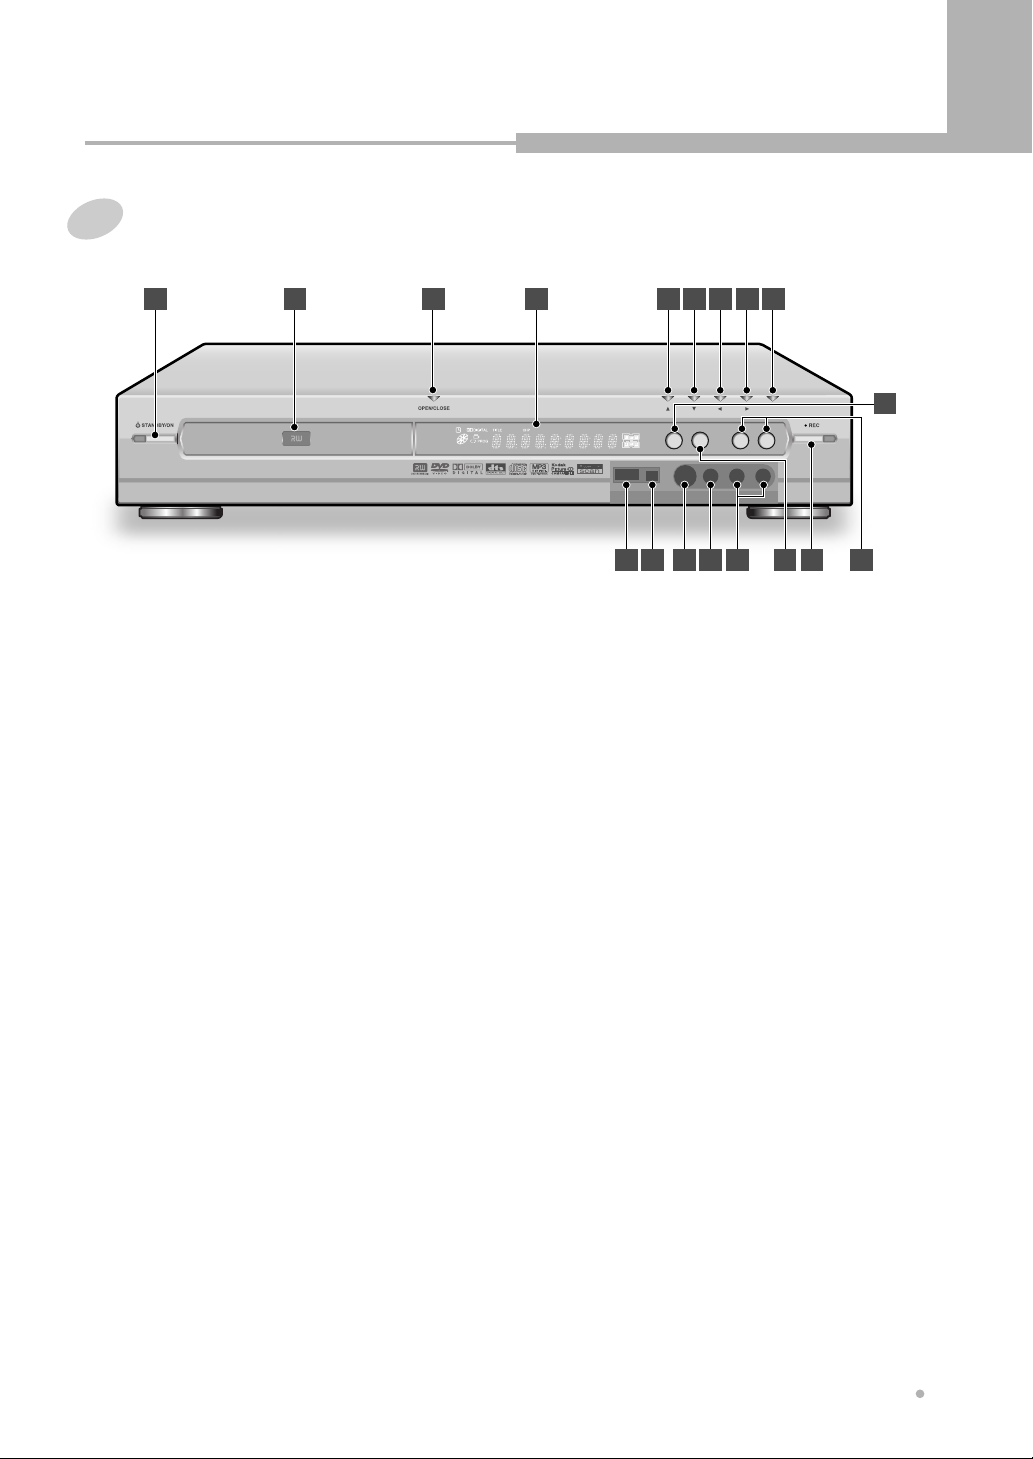
Front Panel
1 2 3 4 5 6 7 8 9
Controls & Display
10
1112131415161718
STANDBY/ON
1
To switch the unit on or into Standby.
DISC TRAY
2
Put a disc to be played on here.
OPEN/CLOSE
3
To open or close the disc tray.
FL DISPLAY
4
Displays operation status.
PLAY/PAUSE
5
Press to start or pause a disc playing.
STOP
6
Press to stop a disc playing.
PREVIOUS (Skip Backward)
7
To skip to the previous chapter or track.
NEXT (Skip Forward)
8
To skip to the next chapter or track.
RECORD MODE
9
To select the record quality.
SELECT
10
Used to select the menu item.
CHANNEL DOWN/UP
11
Used to select the preset TV channels.
RECORD
12
Press to start a disc recording.
SOURCE
13
Used to select an external input.
AUDIO IN
14
Connect to Audio Output of camcorder.
COMPOSITE VIDEO IN
15
Connect to Composite Video Output of
camcorder.
S-VIDEO IN
16
Connect to S-VIDEO Output of camcorder.
DV IN
17
Digital input jack for use with a digital video
camcorder. This jack is for connection to DV
camcorder only. It is not compatible with
other digital equipments.
USB IN
18
Digital input jack for use with a USB memory.
Controls & Display
7
Controls & Display
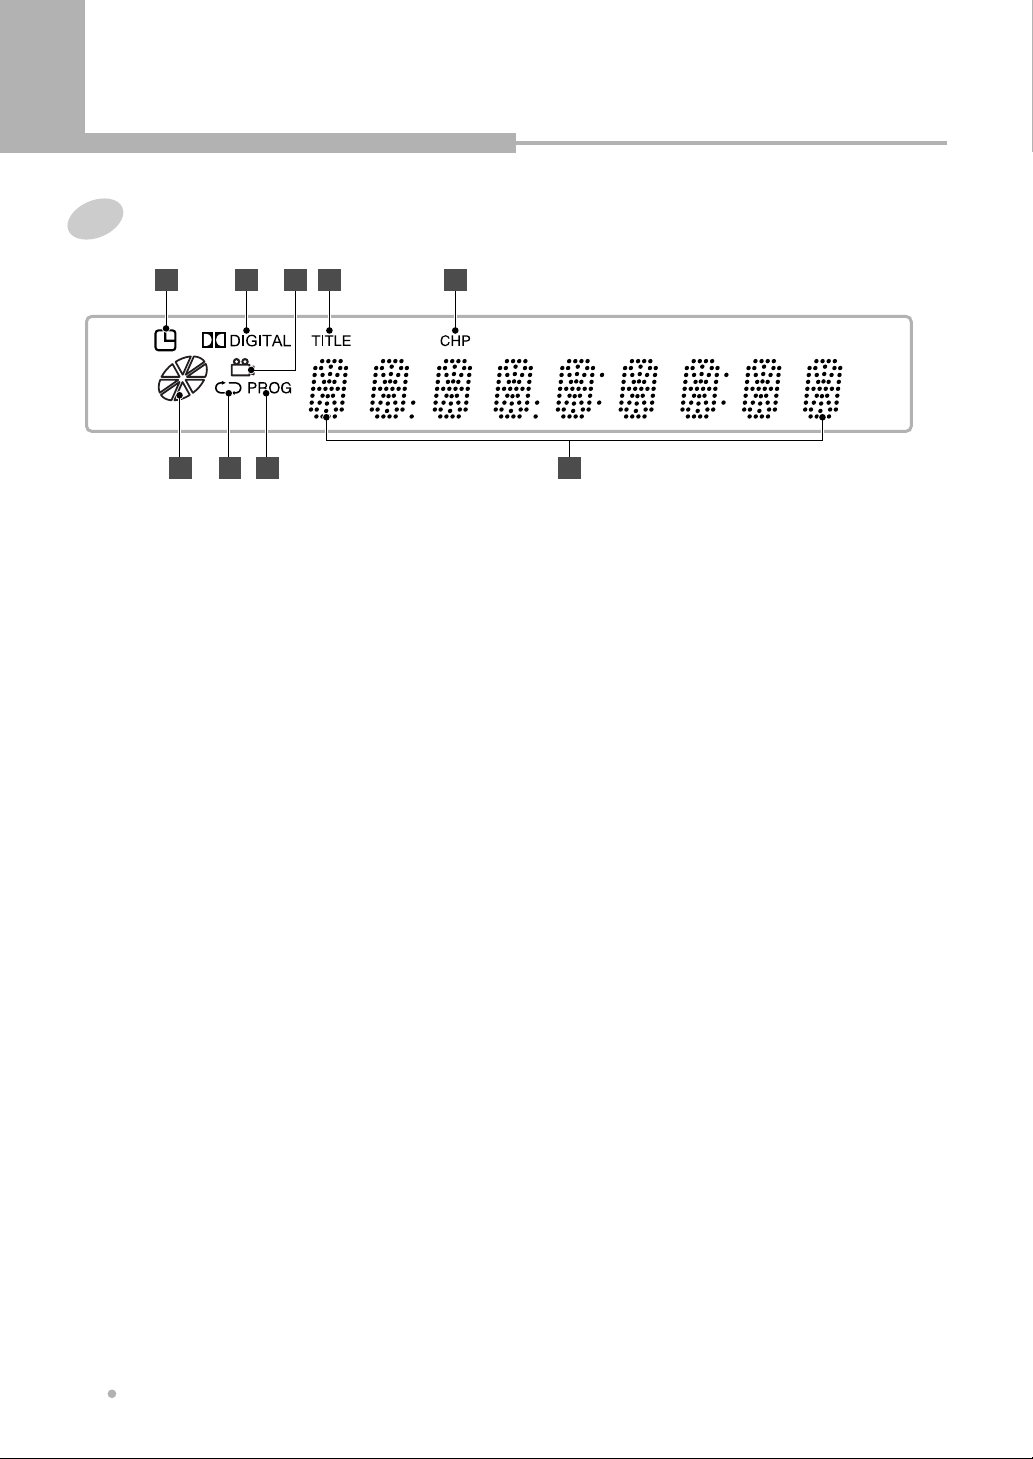
Display
1 2 3 4 5
6 7 8 9
TIMER Recording Indicator
1
Lights when timer recording is on.
DOLBY DIGITAL Indicator
2
Indicates Dolby Digital 5.1CH playback.
ANGLE
3
Indicates the current disc being played is
viewed as multi angle.
This function only works for discs having
scenes recorded at different angles.
TITLE Indicator
4
Title number for DVD playback.
CHAPTER Indicator
5
Chapter number for DVD playback.
ROTATION
6
Rotates when the disc is spinning.
REPEAT Indicator
7
Illuminates when the current play mode is
under repeat title, chapter, track (single), A-B,
disc (all) respectively.
PROGRAM
8
Indicates the program playback.
OPERATING Information
9
Indicates title, Chapter and Track number
and Time, TV channel.
Controls & Display
8
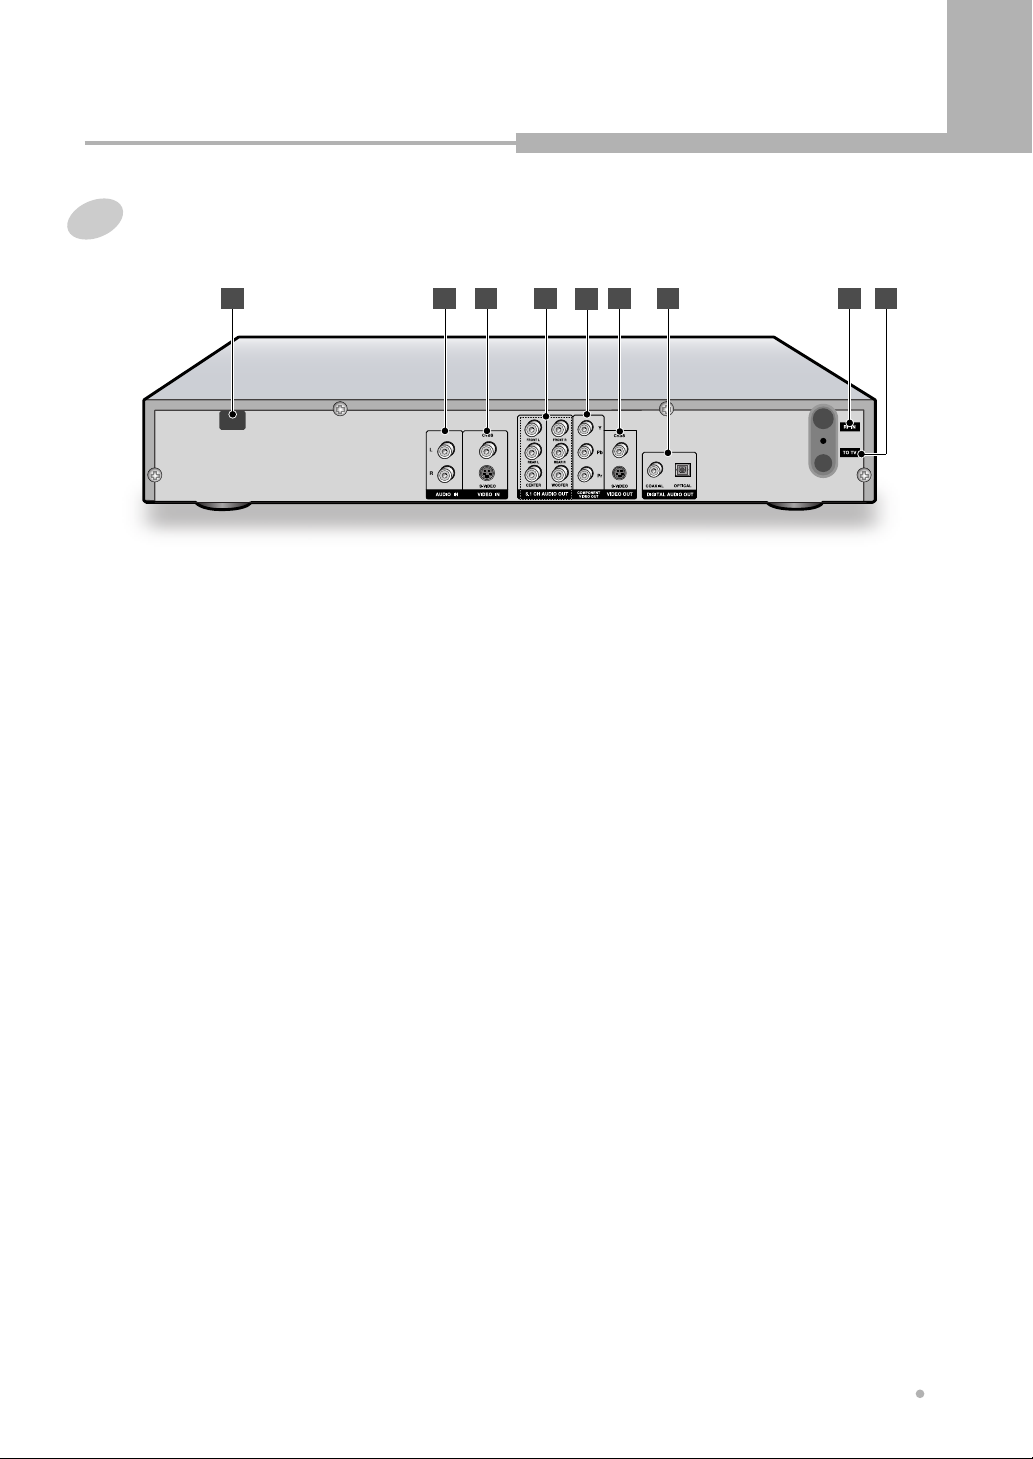
Rear Panel
Controls & Display
1 2 3 4
AC POWER CORD
1
Connect to the wall outlet.
AUDIO IN
2
Connect to Audio Output of VCR or Set Top
Box.
VIDEO IN
3
Connect CVBS to Composite Video Output
of VCR or Set-Top Box.
Or connect S-VIDEO to S-Video Output of
VCR or Set-Top Box.
5.1 CH AUDIO OUT
4
Connect to analog Audio Inputs of Audio
AMP.
If you want to connect to TV, connect FRONT
L and R to Audio Inputs of TV.
COMPONENT VIDEO OUT
5
Connect to Component Video Inputs of TV.
6 7 8 9
5
VIDEO OUT
6
Connect CVBS to Composite Video Input of
TV or monitor.
Or connect S-VIDEO to S-Video Input of TV
or monitor.
S-Video provides better picture quality than
composite video.
DIGITAL AUDIO OUT
7
Connect COAXIAL OUT to Digital Audio
Input (coaxial type) of Audio AMP.
Or connect OPTICAL OUT to Digital Audio
Input (optical type) of Audio AMP.
RF IN
8
Connect to external antenna.
RF OUT
9
Connect to Antenna Input of TV.
Controls & Display
9

Controls & Display
Remote Controller Unit
A
A-B
To repeat a certain section.
ANGLE
To view with a different frame angle.
ARROW ( )
To select an item of menu.
AUDIO
To select the audio language.
AV IN
To select an external audio and video input to use
for recording.
C
CHANNEL DOWN / UP
Used to select the preset TV channels.
CL(CLEAR)
Used when discarding wrong number input.
CM SKIP
For moving to a scene of after 30 seconds. (about
the length of a typical TV commercial)
Controls & Display
10
D
DIMMER
This adjusts the FL display brightness of front
panel.
DISPLAY
To view the Title, Chapter, Track information or
Subtitle Language, Audio Language, Repeat
mode.
DV IN
To select a digital A/V input from a DV camcorder
or USB memory.
Controls & Display
E
EDIT-DISC
To edit a disc : Rename disc, Erase disc, Overwrite
disc.
EDIT-TITLE
To edit a title : Insert chapter, Remove chapter,
Hide chapter.
ENTER
Used to select the menu item.
F
FWD ( )
Press for fast forward scanning during playback.
G
GOTO
To move to a specific time in a track or title.
M
MENU
Used to display the contents menu of the loaded
DVD disc.
MUTE
To turn on/off audio outputs.
N
NEXT ( )
To skip to the next chapter or track.
NUMERIC (0~9)
Used from the menu to select, Title/Chapter search
and direct track number.
P
PAUSE ( )
When you press this button during playback, you
can view the still picture.
Each time you press this button, you can see one
frame at a time.
PLAY ( )
To play the loaded disc.
PREV ( )
To skip to the previous chapter or track.
PROGRAM
To playback in a specific order.
R
REC (Record)
To record the TV programs.
REC MODE
To select the record quality.
REPEAT
To select a repeat mode.
REPLAY
To play back again from the scene of previous 10
seconds.
It is a useful function to learn a foreign language.
RETURN
To move to a previous menu. When using VCD 2.0
and SVCD with PBC function, this button works
RETURN button.
as a
REV ( )
Press for fast reverse scanning during playback.
O
OPEN/CLOSE ( )
Press button to open or close the disc tray. If
pressed under STANDBY, power is automatically
turned on and the tray is opened.
Controls & Display
11

Controls & Display
S
SETUP
To change the initial settings.
STANDBY/ON ( )
Activates the unit POWER ON or into STANDBY.
STOP ( )
To stop a disc playing.
SUBTITLE
To select the subtitle language.
T
TIMER REC
To set a timer recording.
TITLE
To display the title menu of the DVD.
TV/DVD
To switch between “TV mode” in which you get the
picture and sound from the recorder’s tuner,
and “DVD mode” in which you get the picture and
sound from DVD disc.
TV MODE
Set up TV type according to type supported by
user's TV.
Each time you press this button repeatedly, the TV
type will change among NTSC, PAL and
progressive scan.
Z
ZOOM
Enlarges DVD screen image up to 2 times.
Controls & Display
12
 Loading...