


INSTALLATION MANUAL
Single Lever Pull Out
Kitchen Faucet
KPF-1602
www.kraususa.com I toll free: 1.800.755.0703 I © 2013-2014 Kraus USA Inc.

Congratulations on your new Kraus purchase!
We would like to take this opportunity to thank you for your business with Kraus USA.
It is our sincere hope that you are completely satised with your Kraus experience.
We welcome any questions or comments you may have, and look forward to assisting
you in the future.
For more information about Kraus products, please visit our website at:
www.kraususa.com.
In order to allow us to serve you better, we recommend registering your new Kraus
product at: www.kraususa.com/product-registration
Sincerely,
Kraus Customer Service Department
Prior to Installation
Make sure that the cold and hot water lines are turned o
•
• Wrap all threaded connections with Teon tape. Always wrap in a clockwise
direction
• Cover your drain to avoid losing parts
• Do not disassemble the main faucet body, as it has been installed & commissioned
correctly & precisely before delivery from the factory
• To keep the faucet from jamming, ush the water pipe before installation
• Using condition: Working pressure at 0.05-1.0MPa (including cold & hot water
pressure) with applicable water temperature: 4C-90C
• The minimum distance between the faucet hole and the wall/backsplash is 3.5”
• The faucet hole size must be between 1-3/8” and 1-1/2”
• Check to make sure you have all included parts (page 2)
• Do not assemble parts 9 -12 until step 4
15
15
11
12
15
13
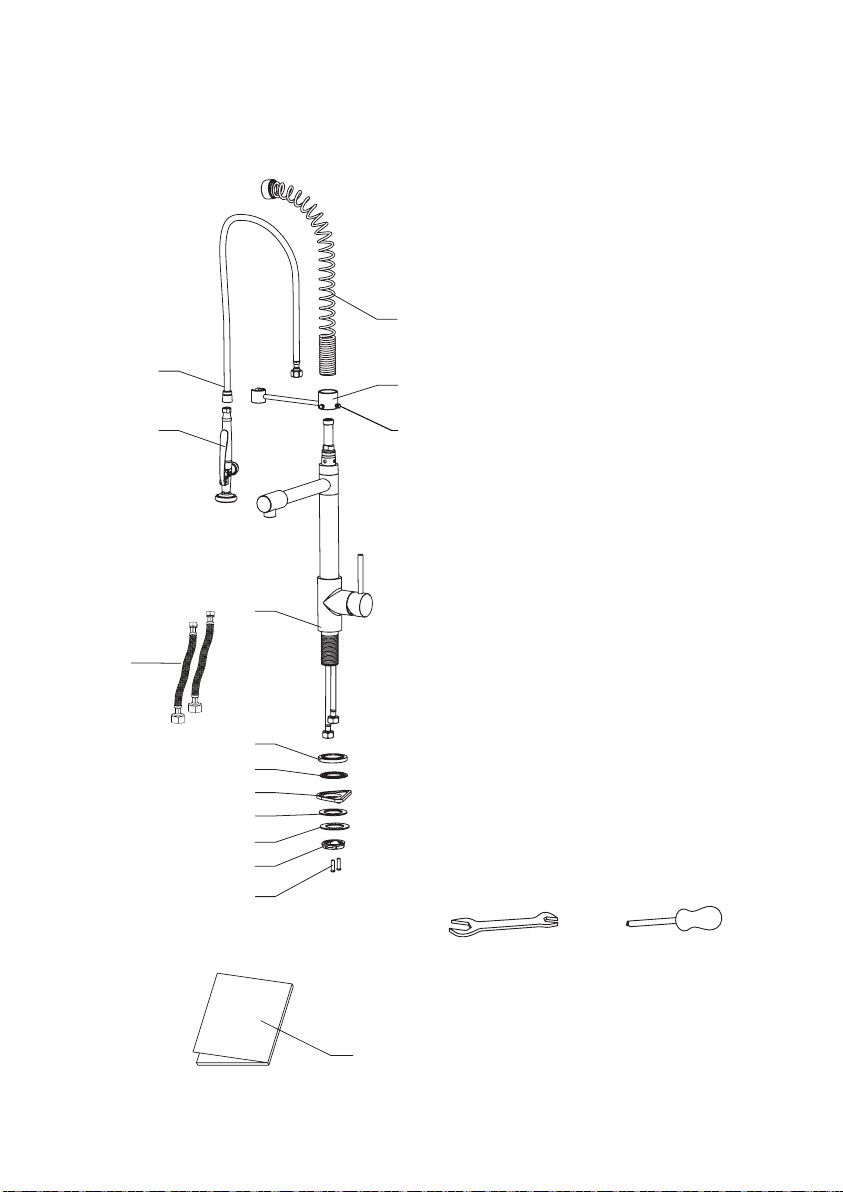
KPF-1602 Diagram and Parts List
Included Parts:
1. Faucet Body
2. Base
3. Base O-Ring
4. Plastic Washer - Optional
(Top Mount Sinks Only)
5. Rubber Washer
6. Metal Washer
7. Mounting Nut
8. Mounting Screws (2)
9. Spray Head
10. Spray Hose
11. Spring
12. Sprayer Holder
13. Thumb Screws (2)
14. Hot and Cold Waterlines
15. Manual
Tools you will need:
14
10
9
1
2
3
4
5
6
7
8
Wrench Phillips Screwdriver
15
32 3/32”
815
194
7 5/8”
Ø1 3/8~Ø1 1/2”
Ø35~Ø38
7
8
Ø35~Ø38
1
2
4
6
8
Ø1 3/8”~
Ø1 1/2”
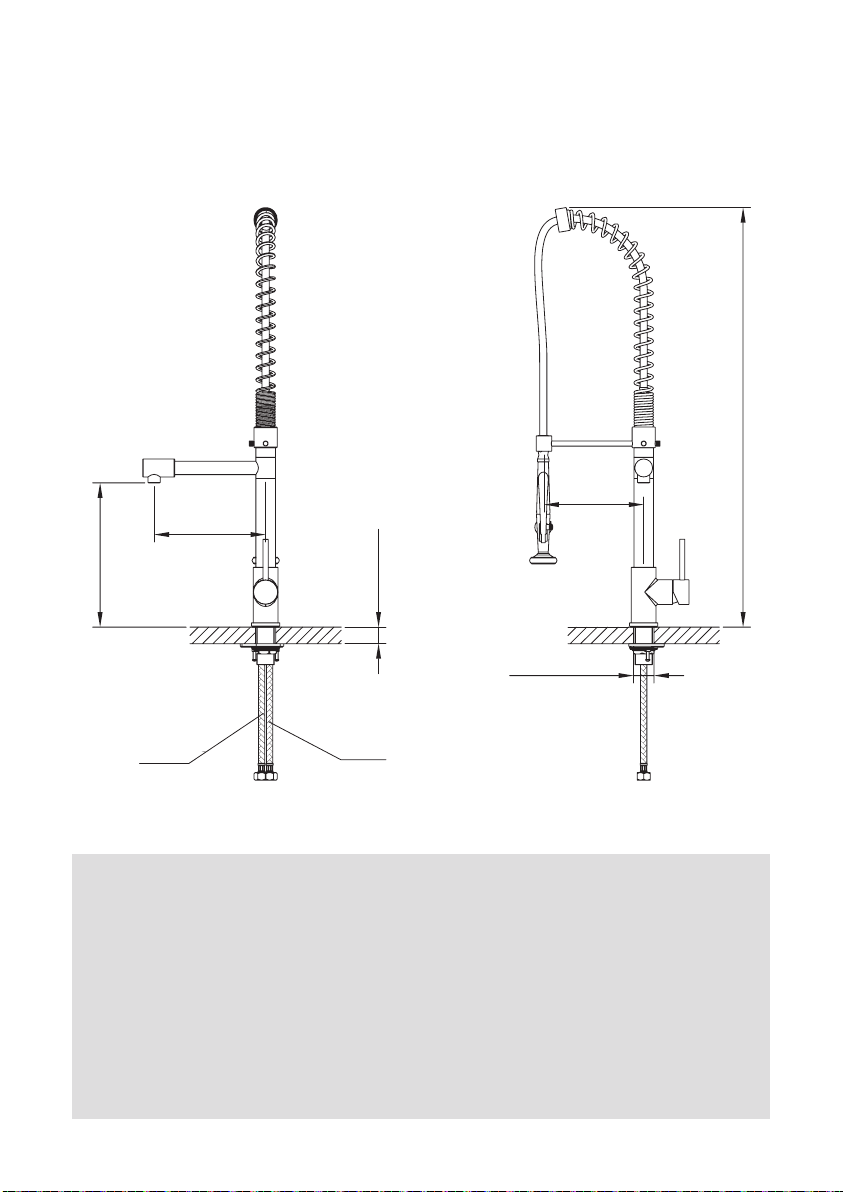
Dimension Drawings
217
279
8 17/32”
10 31/32”
Max35
815
32 3/32”
194
7 5/8”
Max1 3/8”
Ø35~Ø38
Ø1 3/8~Ø1 1/2”
Hot Water
Safety Tips
•
If soldering the water connections when installing the faucet, remove the O-rings,
cartridges, and washers before applying any heat
• Protect your eyes with safety glasses when cutting or soldering
• Do not overtighten xing screws/nuts. Tighten nger-tight, then use a wrench/
screwdriver to tighten the xing screw/nut until snug
Cold Water
 Loading...