

Page 1
Replacement Parts
Keep this manual for ordering replacement parts.
1.
2.
3.
4.
10.
9.
5.
Dear Valued Customer,
Kraus would like to take this opportunity
to thank you for purchasing Kraus
12.
products. It is our sincere hope that you
are completely satisfied with your new
6.
purchase. We welcome any questions or
comments you may have, and look
forward to assisting you in the future.
Sincerely,
11.
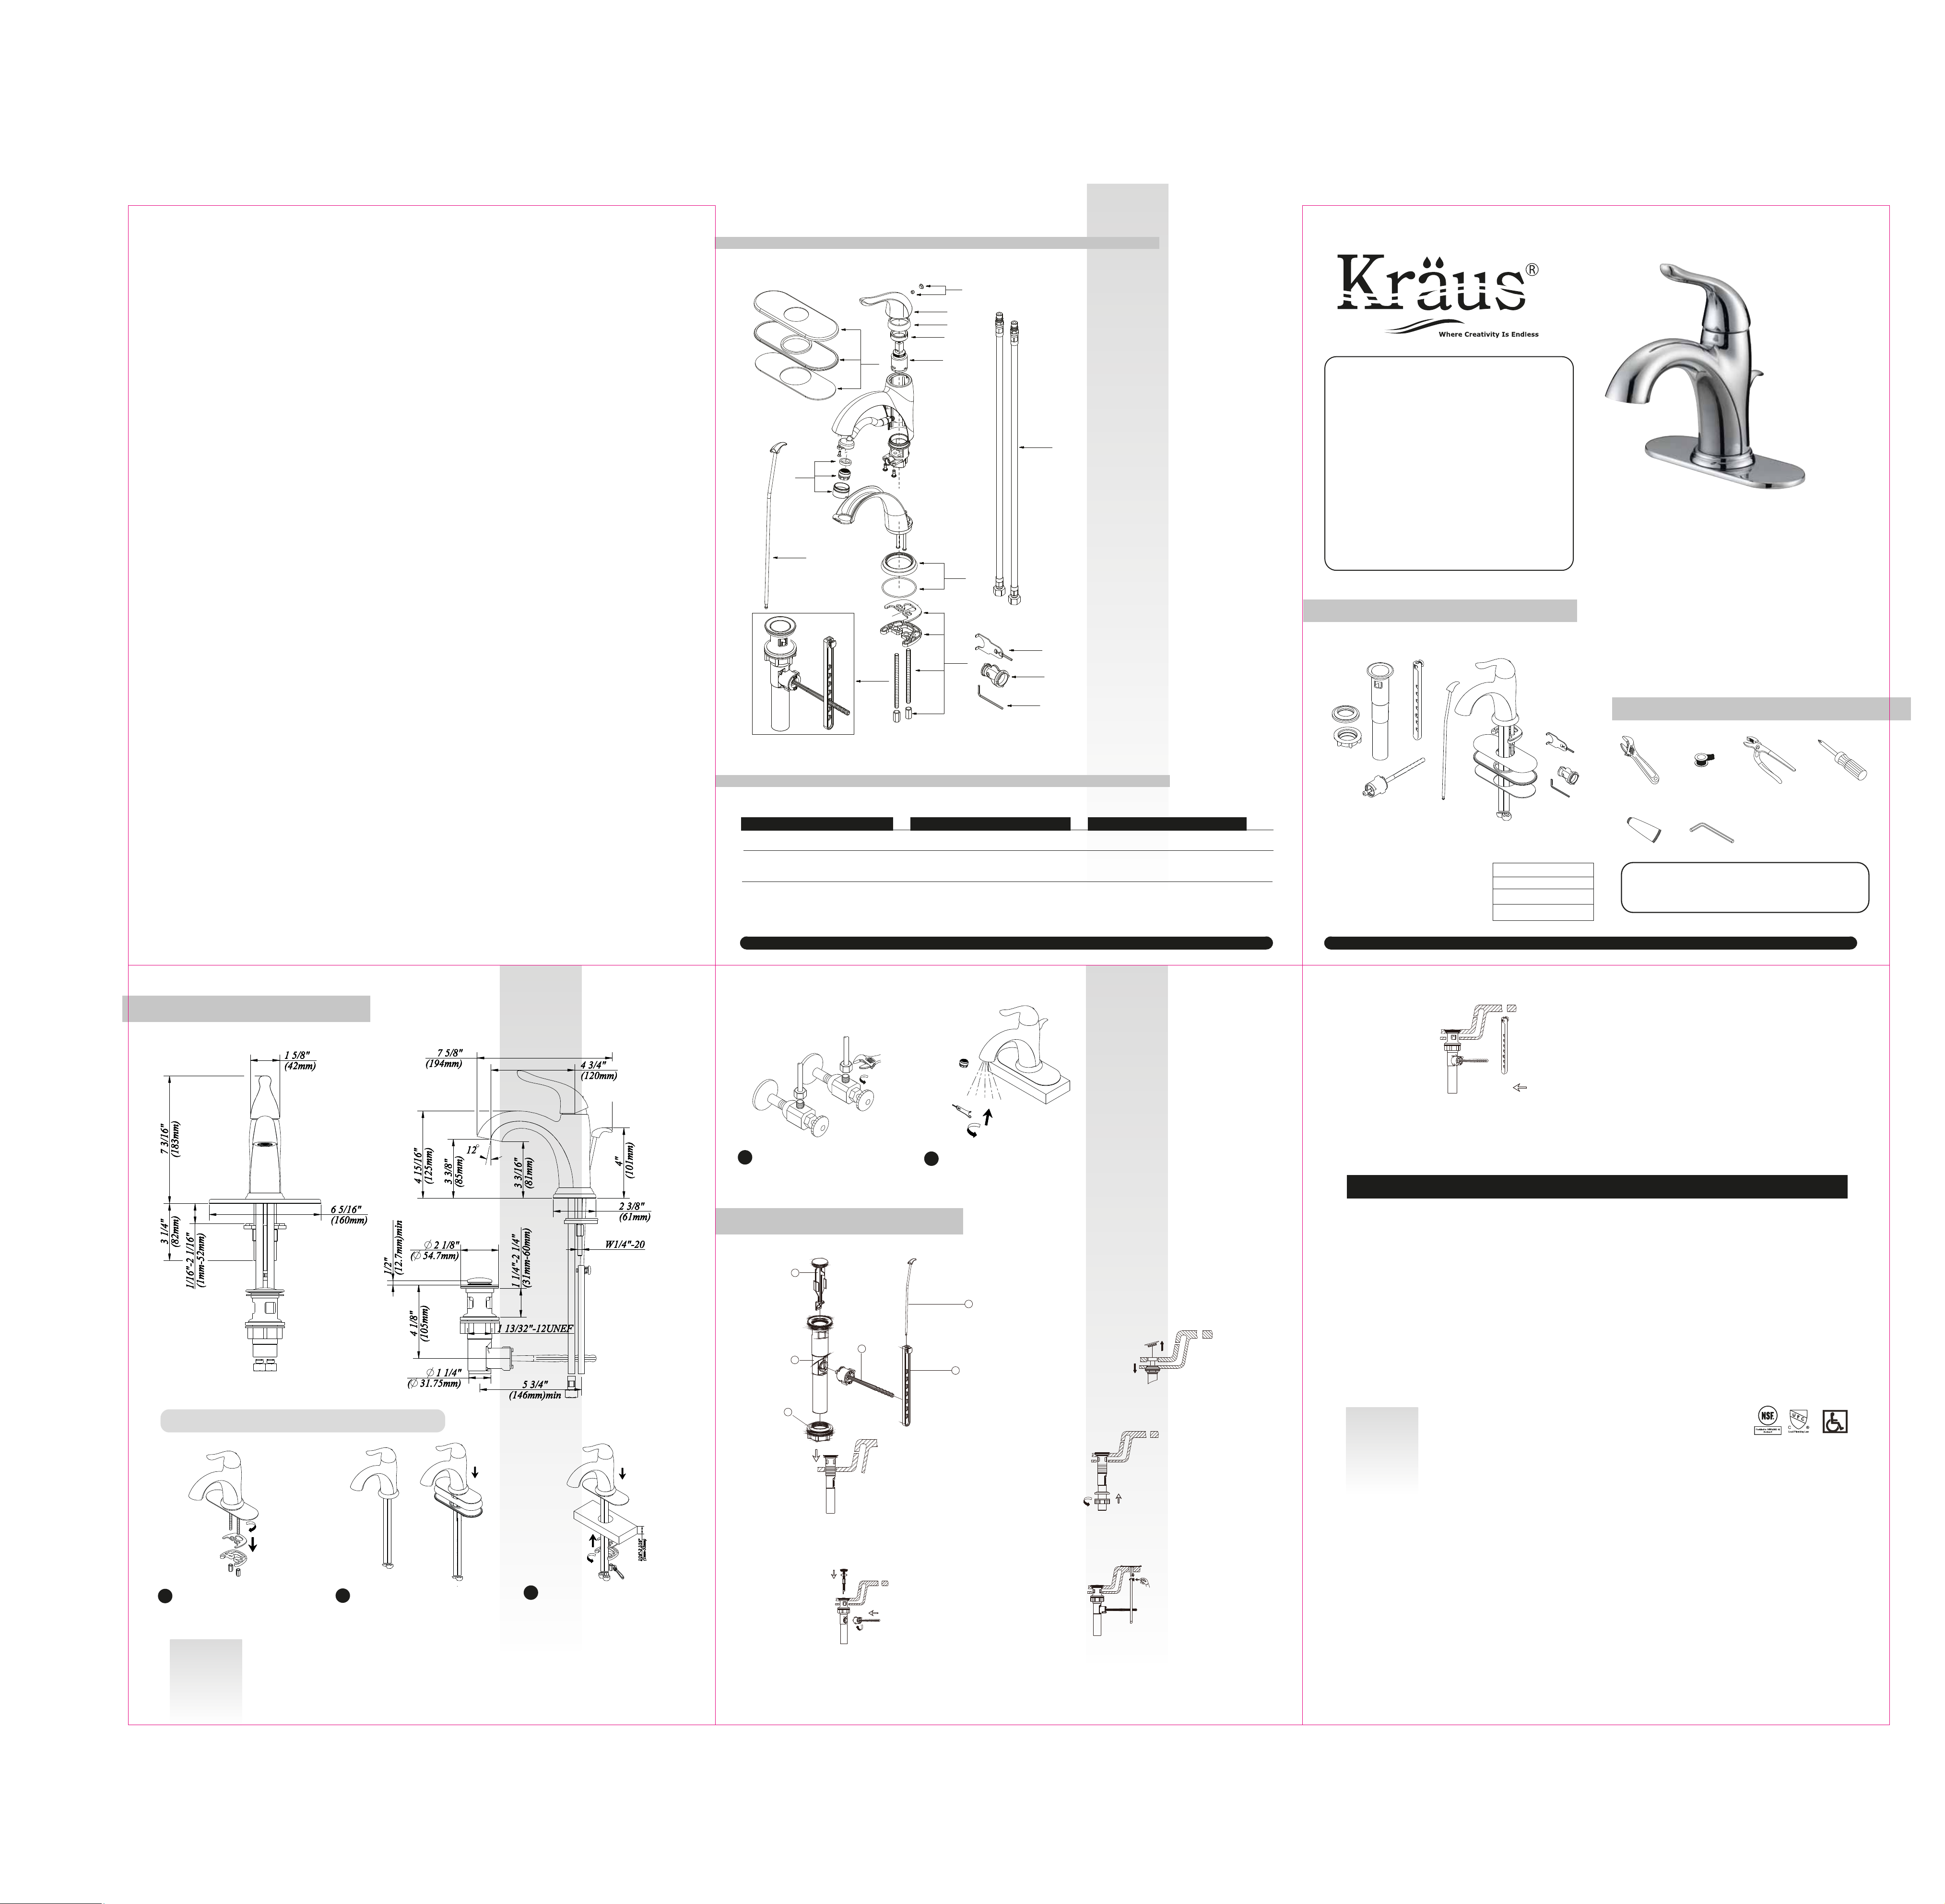
1 Index Button
2 Metal Handle
7.
13.
8.
14.
15.
3 Trim Cap
4 Locking Nut
5 Ceramic Disc Cartridge
6 Aerator
7 Base Trim Ring
8 Mounting Hardware Assembly
9 Cover Plate & Putty Plate
10 Lift Rod
11 Pop-up Assembly
12 Supply Hose
13 Wrench
14 Wrench
15 Wrench (H2.5 * 19 mm L * 53mmL)
Kraus Customer Service Department.
Before Your Installation
Check to make sure you have the following parts indicated below:
Single Handle
Lav Faucet
Tools You Will Need
Faucet Installation Procedure
Shut off main water supply before installation.
Trouble - Shooting
If you've followed the instructions carefully and your faucet still does not work properly, take these corrective steps.
Problem
Leakage under the handle.
Aerator leaks or has an inconsistent
water flow pattern.
Water will not shut off completely.
Contact Us Toll-Free at 1-800-775-0703; or visit our website at www.kraususa.com. © 2008-2009 Kraus USA Inc.
Cause
Adjusting ring or cap has come loose.
Aerator is dirty or misfitted.
Dirty or worn out plastic washer in the
cartridge.
Action
Tighten the adjusting ring or cap.
Unscrew the aerator to check rubber packing
or replace the aerator.
Remove the handle and the cartridge to check if the ceramic
dish is dirty or permanently damaged.
Phillips screwdriver
Model
FUS-1011CH
FUS-1011SN
Adjustable wrench
Silicone Sealant
SAFETY TIPS
• Cover your drain to avoid losing parts
• When installing flexible hose, Please notice: there should be no torsion or deformation ; do not fold into
Shape V or L; do not use if there is any crack or deformation.
Pipe tape
Hex wrench
Groove joint plier
FUS-1011ORB
Contact Us Toll-Free at 1-800-775-0703; or visit our website at www.kraususa.com. © 2008-2009 Kraus USA Inc.
The fittings should be installed by a licensed plumber.
Slip coupling nut onto inlet port.
4
Pop-Up Drain Installation
4
Main plunger
Ball rod
3
5
Drain assembly
6
Lock nut
After installing faucet, remove aerator and
5
turn on water to remove any debris.
Re-assemble aerator.
1
Lift rod
2
Lift rod strap
Note: Please do not use plumbers putty on plastic
components.
1. Remove old pop-up drain assembly.
6.
With the ball rod all the way down, push the tip of the ball rod
through the lift rod strap (2) until it is aligned with the lift rod.
KRAUS” Brand Kitchen Faucets Limited Lifetime Warranty
KRAUS is proud to offer its customers the strongest, most durable
ceramic cartridges in all solid brass Kitchen Faucets it
manufactures. KRAUS guarantees all of our products to be free of
defect in materials and craftsmanship. All KRAUS BRAND Kitchen
Faucets carry a limited lifetime warranty from the original date of
purchase.
If a product fails due to defect in material or craftsmanship during
the warranty period, KRAUS will repair or replace the items at our
sole discretion. Warranty does not apply when the item has been
tampered with, misused, improperly installed, altered, or damaged
due to abuse or accident. Proof of purchase (original sales receipt)
must be provided to KRAUS for all warranty claims. Please contact
one of our representatives if you need any additional details.
MAINTENANCE
Your new faucet is designed for years of trouble-free performance.
Keep it looking new by cleaning it periodically with a soft cloth. Avoid abrasive cleaners, steel wool and harsh chemicals as these
will dull the finish and void your warranty.
All KRAUS products must be installed by a licensed professional
plumber or contractor to avoid any improper use or installation.
IN NO EVENT SHALL KRAUS BE LIABLE FOR ANY INCIDENTAL,
CONSEQUENTIAL OR SPECIAL DAMAGES, INSTALLATION
COST, LABOR, TRAVEL TIME, FREIGHT COSTS INCURRED, LOST
PROFITS, OR CONTINGENT LIABILITIES.
KRAUS USA Inc. makes no representation that its products
comply with any or all local building or plumbing codes. It is the
consumer’s responsibility to determine local code compliance.
This warranty extends to the original purchaser and first
consumer.
AB1953 Compliant
Remove the mounting hardware
1
from the faucet.
The cover plate is optional, you may
2
determine whether you need to install it
or not.
MAINTENANCE
Your new faucet is designed for years of trouble-free performance.
Keep it looking new by cleaning it periodically with a soft cloth. Avoid abrasive cleaners, steel wool and harsh chemicals as these
will dull the finish and void your warranty.
3
Attach rubber washer and metal washer
on supply hose. Screw metal threaded
rods onto faucet body. Tighten the nut
on metal threaded rods.
2.
Place a ring of silicone sealant around drain opening of sink.
Insert threaded drain body down through drain hole.
Insert main plunger into drain with the long side toward
4.
the ball rod opening. Insert ball rod (3) into the hole in
the main plunger. Turn ball rod nut1/4 turn to lock in place.
Thread lock nut from underside of sink until rubber washer sits securely
3.
inside opening of sink. Tighten lock nut.
Place lift rod through the faucet. From below the sink, place the lift rod
5.
strap (2) onto the end of the lift rod by pulling out on the knob and
pushing the rod into place. Release knob.
 Loading...